Yes, it’s true. You can now zero X Y and Z axis all at one time, while using Carbide Motion with the Triquetra Touch Plate. Before now, the only way to accomplish this required the use of a 3rd party g-code sender such as Universal Gcode Sender. Not any more!!
Now you can run Carbide Motion and zero all three axis using the Triquetra Touch Plate. The Triquetra Tool Box (which is included with all touch plate orders) can now generate a Zeroing script that passed the commands to Carbide Motion to zero all three axis, just the Z axis or just the X and Y axis. The script is smart enough to know if your working in inch mode or metric mode and presents you with a bit selection in inches or millimeters accordingly. If the bit selection doesn’t include the bit you are using then you click on the Custom Bit button and input the diameter of your choosing.
I would like to give a big shout out and thank you to Dan Nelson for helping me with this project of expanding the compatibility of the Triquetra zeroing system. I worked with him via email and texting to bring this new capability to the Shapeoko / Carbide Motion users. Today I am going on a road trip to meet with Dan and record some video of zeroing his Shapeoko XXL using the Triquetra Touch Plate. I will post a link to the video here when I get it put together.
Already a Triquetra Touch Plate Owner? Don’t worry, all you need to do is download the update to the Triquetra Tool Box Version 2.0 and you will be able to put this into use immediately. I have also updated the User Guide for the Triquetra on the Triquetra User Page. Be sure to take a look at it for instructions on how to use it with Carbide Motion. This does require a Windows based PC. If you are a Mac user then you will need a Windows Emulator to make this work because it requires the use of AutoHotKey software. That’s included too by the way!
The original version had a hole in it. My thought was so that you could visually see the corner of your material to confirm that it was placed properly. When I realized that placement was never a problem, I stopped adding the hole. It still has a relief on the inside corner on the bottom to make sure that it sits flat against both sides and doesn’t have any wiggle in it.
I have just finished uploading Triquetra Tool Box version 2.0.0.2 . In this update, I added an Expert Mode and Normal Mode option to the Zeroing Script for Carbide Motion.
After running this script a gazillion times, I realized that all the popup boxes quickly become annoying and not necessary. For a new user they are absolutely necessary but once you have got it down you will find yourself clicking through them quickly without even stopping to read them. When you get to that point then you should be able to safely use the Expert Mode. So basically, if you know where to position your bit for all three axis zeroing or for Z axis only zeroing and you know how Carbide Motion needs to be configured then give the Expert Mode a try. Both modes send the exact same codes to your CNC.
In the Normal Mode, all the popup boxes are displayed as applicable. In the Expert Mode, most of them are bypassed. Only use Expert Mode if you have used the Normal Mode enough that you know what you are doing.
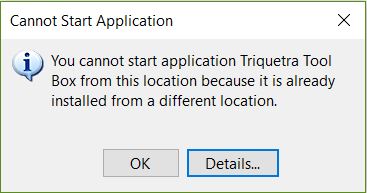
When you download the update and try to install it you may get this box:
If you do it is because the installation files are located in a different folder than the original installation folder. There are two solutions.
Extract the installation files to the same folder used beror and try again.
Uninstall the current version and then run the installer.
Be sure to use the Export Database button on the Main Menu before you uninstall and then use the Import Database button after you have the new version installed. This will save any data you have entered and add it to the new version.
If you can’t find your Triquetra Tool Box Icon after installing it, look in your start menu under Charlindwoodcraft.
It should be. It doesn’t actually control Carbide Motion. Instead what it does is make use of the MDI tab where you can enter gcode commands that are sent directly to your cnc machine. So unless you have a version that doesn’t have a MDI tab then it should work.
This is a really big step. I hope the Carbide Motion creators can recognize this and take it one step further and make a button built into the program to run this without having to run a separate script each time.
@TK-422 If they did it would make it nice. For those of you familiar with Easel, (the Inventables X Carve equivalent to Carbide Motion), I did the same thing I did here. It was much easier though because I own an X Carve so I was able to test the script myself to make sure it worked properly. With the Carbide Motion script, I had to enlist the help of Dan Nelson who owns a Shapeoko and then drive a couple of hours each way to make final tweaks and get some video.
Just a reminder to those Shapoko users who have previously purchased a Triquetra Touch Plate. You do NOT need to buy anything else from me to implement 3 axis zeroing inside Carbide Motion. As a current customer you are entitled to download all updates to the Triquetra Tool Box free of charge.
Also, if you missed it in a previous post, Triquetra Tool Box version 2.0.0.2 is out and it gives you the option to skip most of the popups that show up during zeroing.
So this actually does plug into the shapeoko XXL Controller Board? and does work with it and Carbide Motion? also what if Carbide Motion changes will you be able to make updates to it? you already had to drive 150 miles lol, and I am confused on do i have to buy the software on disk or usb, or is it a download if i select none?
If they change it then I will do my best to adapt. Since it only uses the MDI tab that you would normally use to send gcode commands directly to your machine I doubt they will change anything enough to affect things.
You do not have to purchase the USB or DVD. When you purchase a touch plate you are also creating an account on my website that will grant access to the Triquetra Owners Page. There is no expiration date on that and there is no fee. Just be a Triquetra Owner and your good to go. On that page of my website you will be able to access everything that is on the DVD or USB. Most don’t want to download all of it and purchase the USB instead.
If I have to drive another 150 miles to fix something you can rest assured that I will. I doubt it will come to that though. Now that I have been there and learned what I needed to, all I should have to do to create an revision or update is email the new code to Dan or any other Shapeoko user willing to test it. I have found the members of this forum to be very cooperative and eager to help out and be provided an alternative way to zero all three axis.
Anyone that already has a touch plate from Shapeoko can also use my system. All they need is the Triquetra Tool Box. For now I don’t see the point since they can already zero their machine but future updates will provide more zeroing options such as right corner vs left corner. This is usefull for two sided milling to keep everything lined up from one side to the other without having to drill alignment holes. I will also be adding functionality for zeroing to offsets such as the center of your material or any other offset you want. I have already accomplished this with Easel and Standard G-code senders such as UGS,
There is about to be even more options. I’m putting the finishing touches on options to zero to the right front corner and zeroing to any offset you like. Userful for zeroing to circles or the center of your material.
That’s cool, I am happy to see you keep developing the product.
I still can’t wrap my head around how that would work. Say I have a circular plate I can customize the offset (say measure 10 inch x 10 inch) to find the zero of the circular plate?
Yes you can… as soon as I release the update I worked on last night. I have done this with other machines before so it is a proven concept. I just had to work out the coding to work with the Shapeoko.
A while back I was carving on a piece of round stock that had a 14 inch diameter. I created my carving file with origin in the center of the part.
So I needed to create a method to zero to that point because I was using multiple tool paths with multiple bits. I wanted to be sure that in case I lost my original zero, that I could get it back easily and accurately. The trick is to use a set of bump stops to place your material on. Then with a seperate piece of material that is square (size and thickness doesn’t matter), you create a zeroing file with the offsets of 7 inches (1/2 the diameter) for the X and Y axis. Put the square stock against the inside corner of the bump stops ane run the zeroing code. Then remove the square stock and put in your circle. Place your touch plate upside down and zero your Z axis only. When your done there, just send your machine to X Y Z zero and your bit will be in the center of the circle.
I will try to shoot a short video of it tomorrow if I have time. I have orders to ship which is priority one for sure.
Triquetra Tool Box Version 2.1.0.2 has a glitch in the zeroing script for the Shapeoko. I have fixed the error and it should be good to go now.
There are new zeroing methods included in the last update as promised. If the version you have is self updating then you should be getting the update automatically. If not then you can download it HERE
With version 2.1.0.4 you can now zero to the Front Left corner, Right Front Corner, or Set any Offset you like for your X and Y Zero to be. The offset works great if your design has the origin in the center of your material or if you are carving on a circle. Yep, you can zero to a circle now. I will get a video of how to do that out very soon.
Another enhancement to the Triquetra Tool Box is the way updates are received. You will no longer have to go look to see if there is an update. The tool Box does it on it’s own. If there is one available then it will let you know and it will only take a few seconds for the update to be applied. It will not require you to uninstall and reinstall it any more. Your data will be safe and you will be current.