Every time I switch out my waste board I re-calibrate my machine.
I’m using the instructions from the documentation. I am finding that the adjustments are too large and the only way I could get it calibrated was to half the delta and run multiple iterations.
So for example, lets say I have a 200mm x 200mm square. It comes out to 198mm x 197mm. Using the math from the docs.
200 / 198 = 1.0101 * 40 = 40.4040, then I put $100=40.4040 into the MDI input on Carbide Create.
I’m finding that I need to half the delta so 40.4040 - 40 = .4040 / 2 = 0.202 + 40 = 40.202
I’m finding this number gets me much closer to what I want. A also find that I might need to run this calibration 3-4 times until I’m exactly on point.
So my machine is calibrated correctly, I’m just not doing it according to the docs. Am I doing something wrong?
What I did was take 15x15" peice of MDF and cut a 10"x10" square for calibration. I only cut down (Z) about .1" so I only had to make 1 pass.
I zero-ed the fist cut in the lower-left corner of the MDF. For each additional round of calibration I moved my X,Y about 1/2 an inch towards the center of the stock. This let me generate about 5-6 (overlapping) 10x10 squares on the same piece of MDF. I used a high quality square with 32 marks per inch. I was able to get perfect X and Y after about 4 cuts. The whole process only took about 30 minutes.
Would it be helpful at all to make a video of how I did this? Let me know if you think it could help others.
If you’re measuring the finished dimensions of a cut square, you would get twice the needed adjustment and would need to further adjust as noted at: Shapeoko CNC Router, Rigid, Accurate, Reliable, and Affordable (which arguably is the link I should’ve provided above)
An interesting technique which would also calculate runout would be to, “Mill multiple sizes and graph the results as actual/expected. Linear regression will reveal that there is a constant error (cut size not exactly equal to nominal cutter diameter) and a proportional error…”
That’s why I went with the simpler technique of just drilling holes and measuring from center-to-center, or edge-to-edge.
Thanks. Do you think my method will work if I’m consistently getting perfect 10x10 squares now? Or will I see some variation as my cuts get larger and smaller?
The bit and our ability to accurately measure parts will likely contribute to some of the correction we apply using the “measure the part” method. So if we change bits or cutting methods (like feed rate), we can expect minor variances in our results (I think).
But it would seem belt stretch would be linear over the length of the belt, no? I can’t imagine the stretch varying.
For a good quality belt, yes, stretch should be linear — but sometimes there are flaws, and some belts have been demonstrated to stretch unevenly.
For this particular case, with the measurement of the finished part, since you’re measuring two values (endmill diameter and size or cut part), each with a variable (runout and belt stretch), unless you perfectly deduce both, the solution will only work for one particular dimension, hence the reference to linear regression to solve it (Huh, I guess I did pick up something doing all that typesetting of all those math books which seemed so far above my head).
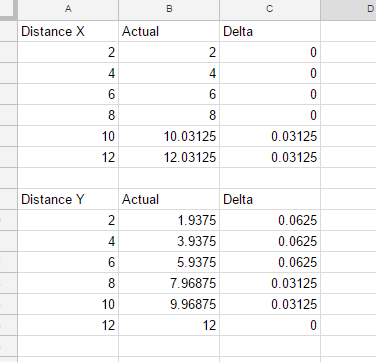
I ran another testing cutting 6 squares, 2x2, 4x4, 6x6 and so on. I have included the results below.
It seems like the X axis is fine until about 10" and then it starts to become larger than desired. The Y axis on the other hand is short until 12" but become more accurate the closer I get to 12"
Is it possible to set one stepping value ($100=, $101=) and have accurate results at all sizes?
One options I thought about doing was running this test out to the max dimensions of my machine (XL @ 16x32) taking the average delta and then adjusting my steps by the amount. This would give me the most accurate results across the widest range?
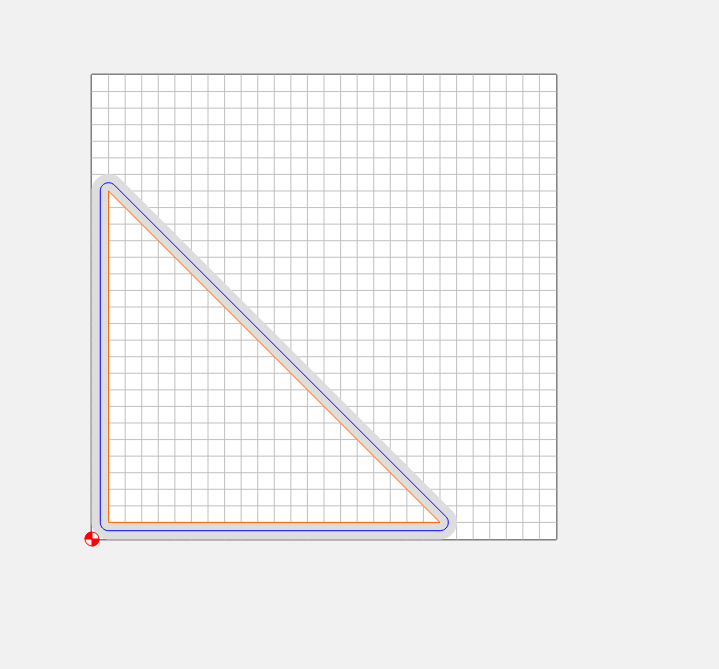
Please start by determining the effective endmill diameter / runout — cut a right triangle, measure the width of the slots and determine a value to use thereby.
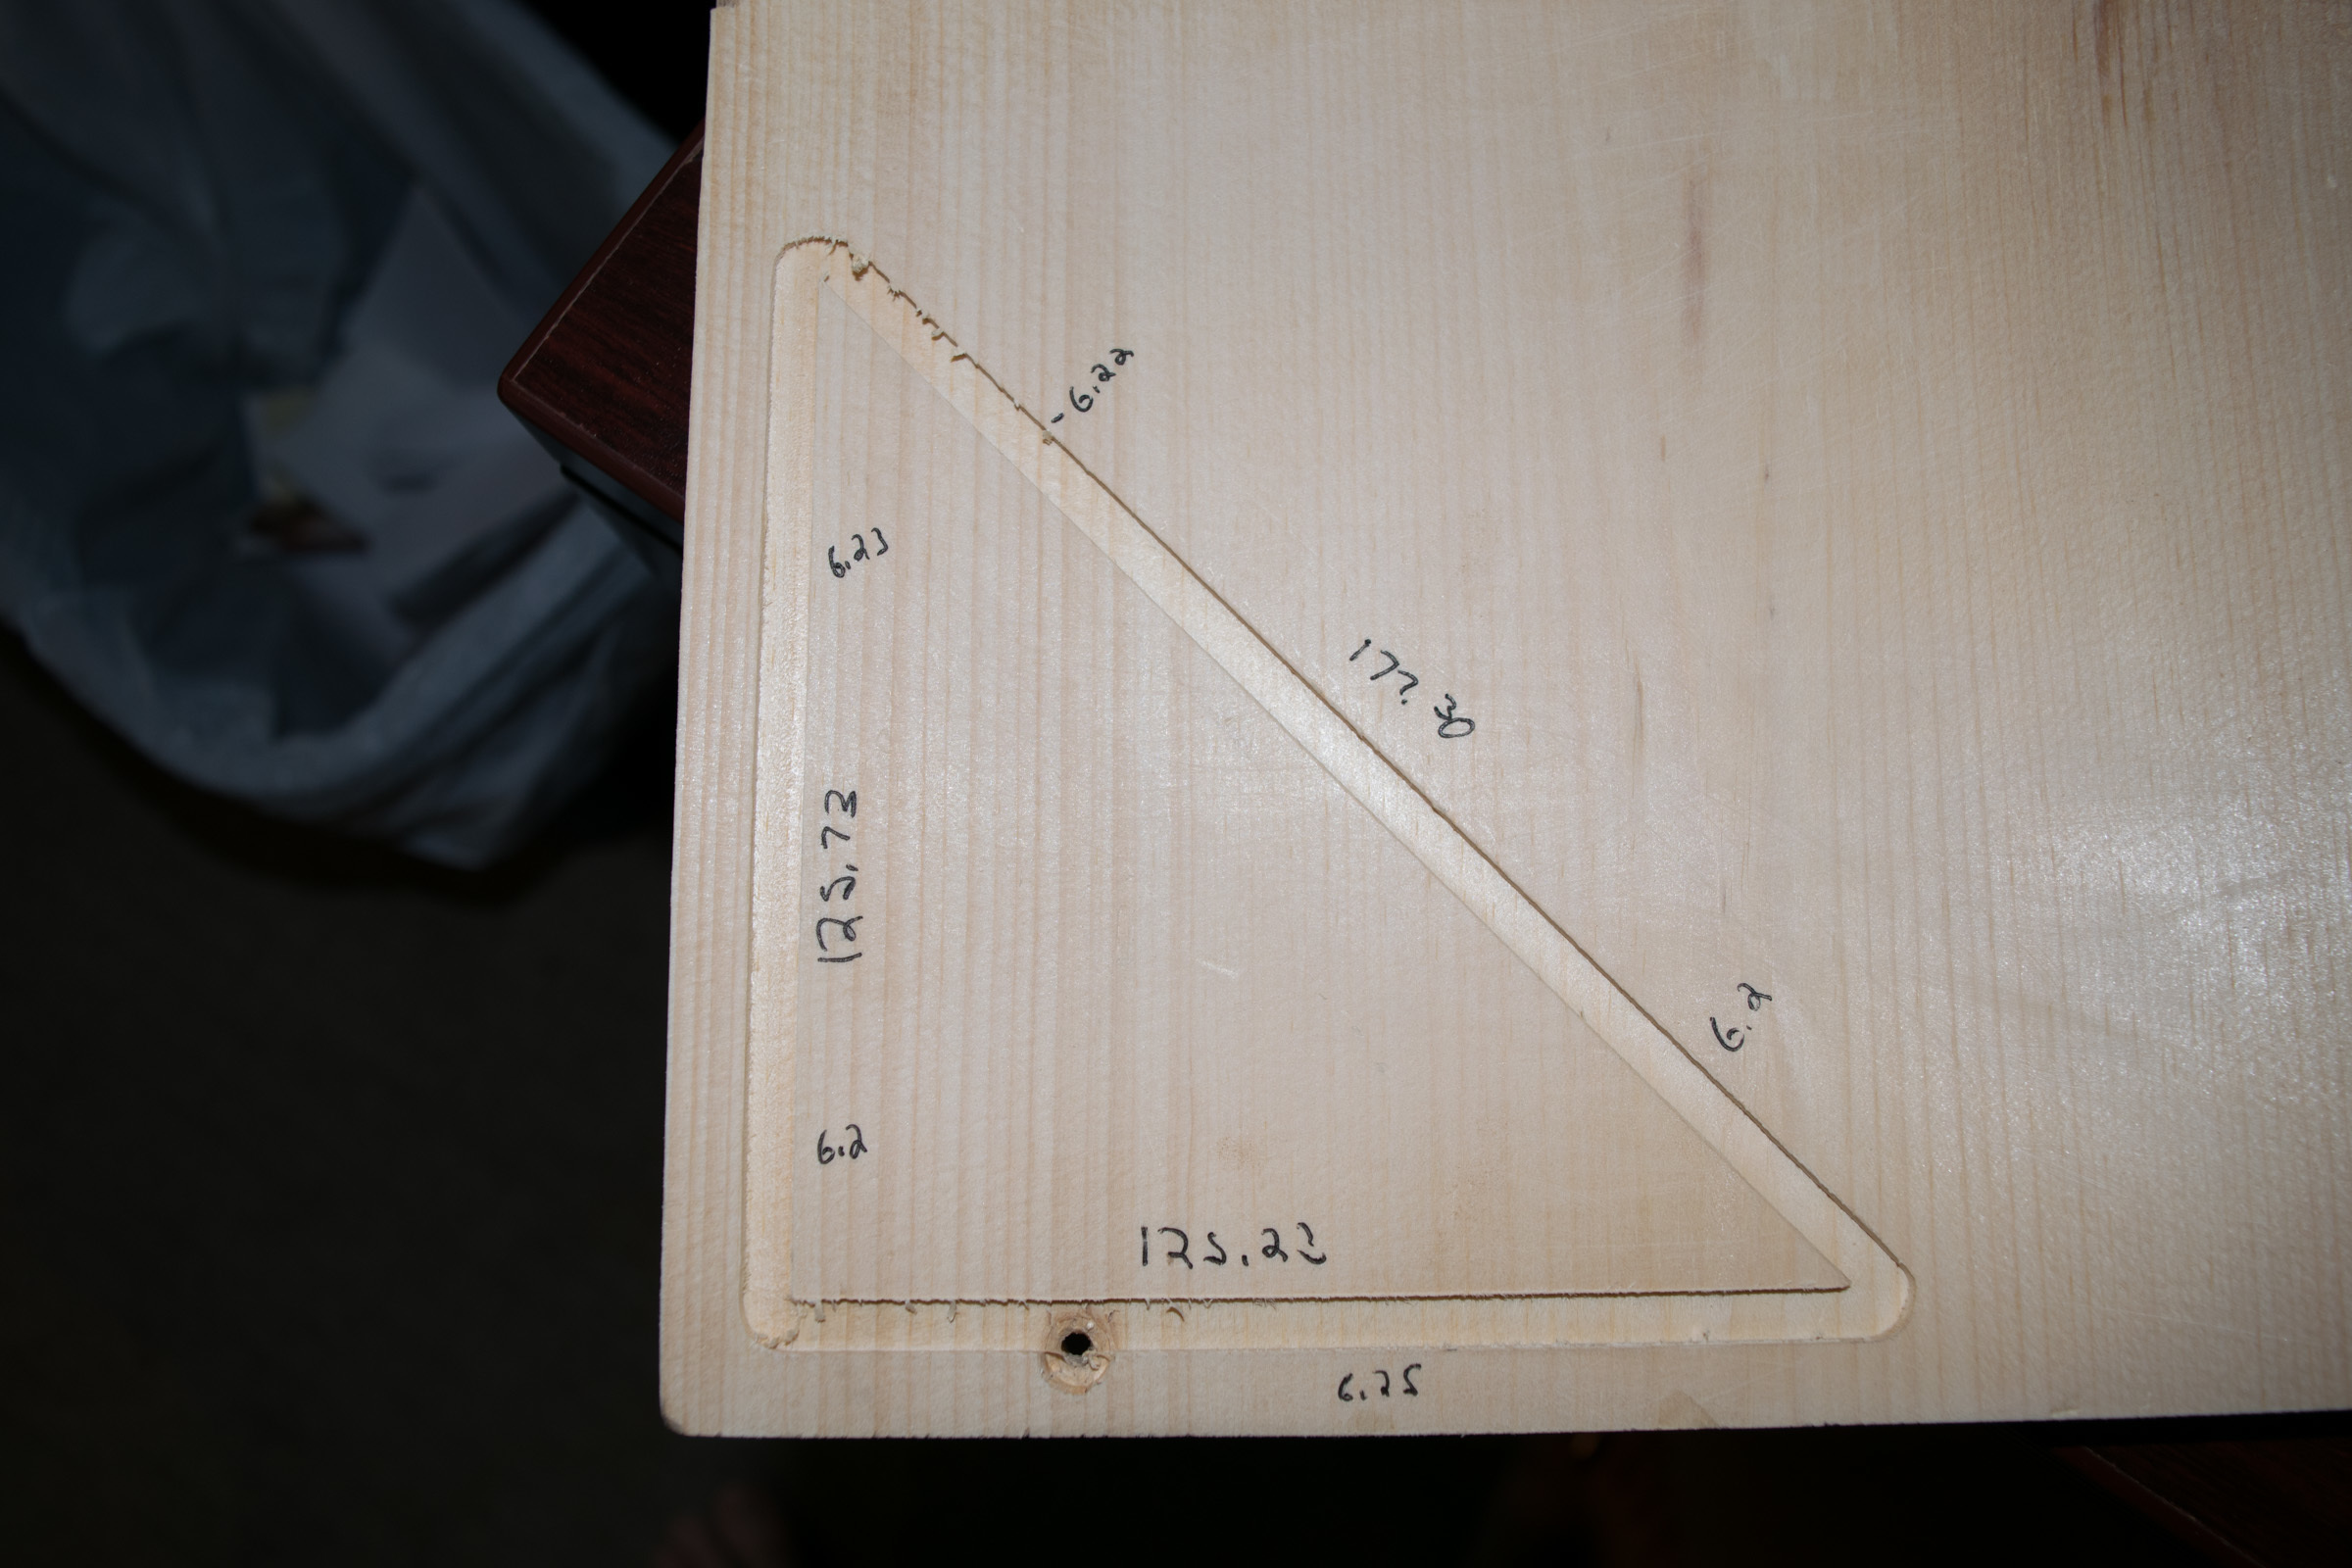
Can I use this piece to measure the run-out? I used some digital calibers and found the width of the slots to be 6.30mm +/- 0.01mm. This was consistent around the entire piece. So with a 1/4 inch endmill should it be 6.35mm?
The length seem fairly accurate. The 5" side are a little under but I attribute that to the soft pine not holding a strong point at the top left and bottom right.
Pine is not a material I’d’ve chosen for this, since it cuts so variably depending on the grain ---- but yeah, for that endmill, for cuts in that variety of pine, ~6.215 would seem a reasonable choice, and you’d want to remember that it’s going to blow out along the endgrain and leave a bit more material there if needed, or accept that it’ll be an easier fit / a bit short.