Well, of course. I think I left mine in my other pants, though.
2 Likes
Oh man, gotta look that up. An optical whozit.
Lowly woodworker here, just muddilin’ through all this tech stuff.
Thanks for the replies everyone! It is very helpful.
I am actually making a touch plate already, the touch probe is something that interest me as well. This is less about what is needed, and more about what am I good enough to make. Self challenge if you will. I’m currently enrolled in an program and have access to big machines so I’m trying to take advantage of this by having projects on standby.
I’m currently designing a touch probe and I have it around 2’’-ish in length, so next step is to 3D print and test.
This is probably 4th on my list, behind a wall of workholding things for the nomad.
2 Likes
I think my QA manager would have a fit if I turned up with my tooling at his office and asked to use his optical comparator. They were not very keen on me rolling my motorcycle in to take some measurements on their FARO arm for some pieces I wanted to make either,…stifling my progress!!!
![]()
Dan
1 Like
Blue tape and CA, walls down ![]()
1 Like
Second that. Unless I am doing some very aggressive roughing with small footprint parts blue tape and CA glue is the only workholding I use now.
In the absence of an optical comparator, a toolmakers or traveling microscope can be used.
In the absence of any of the above, cut a part and measure. From this, you can derive the actual tool size, to a reasonable precision. This, of course, will be influenced by machine factors, but this is often not a problem, as the derived size you get may be a better match for what the machine will do.
2 Likes
Wait, so they inspect your parts using an instrument that you don’t have in the production area? That’s not very smart (or fair). LOL
Incoming parts from vendors, not our final assemblies we assemble from those parts.
Dan
1 Like
I made these for simple surface (auto) leveling/probe. just a tactile button inside the 3D printed one and a tactile under the steel one. Accuracy is of course in the tactile button hands, but it works.
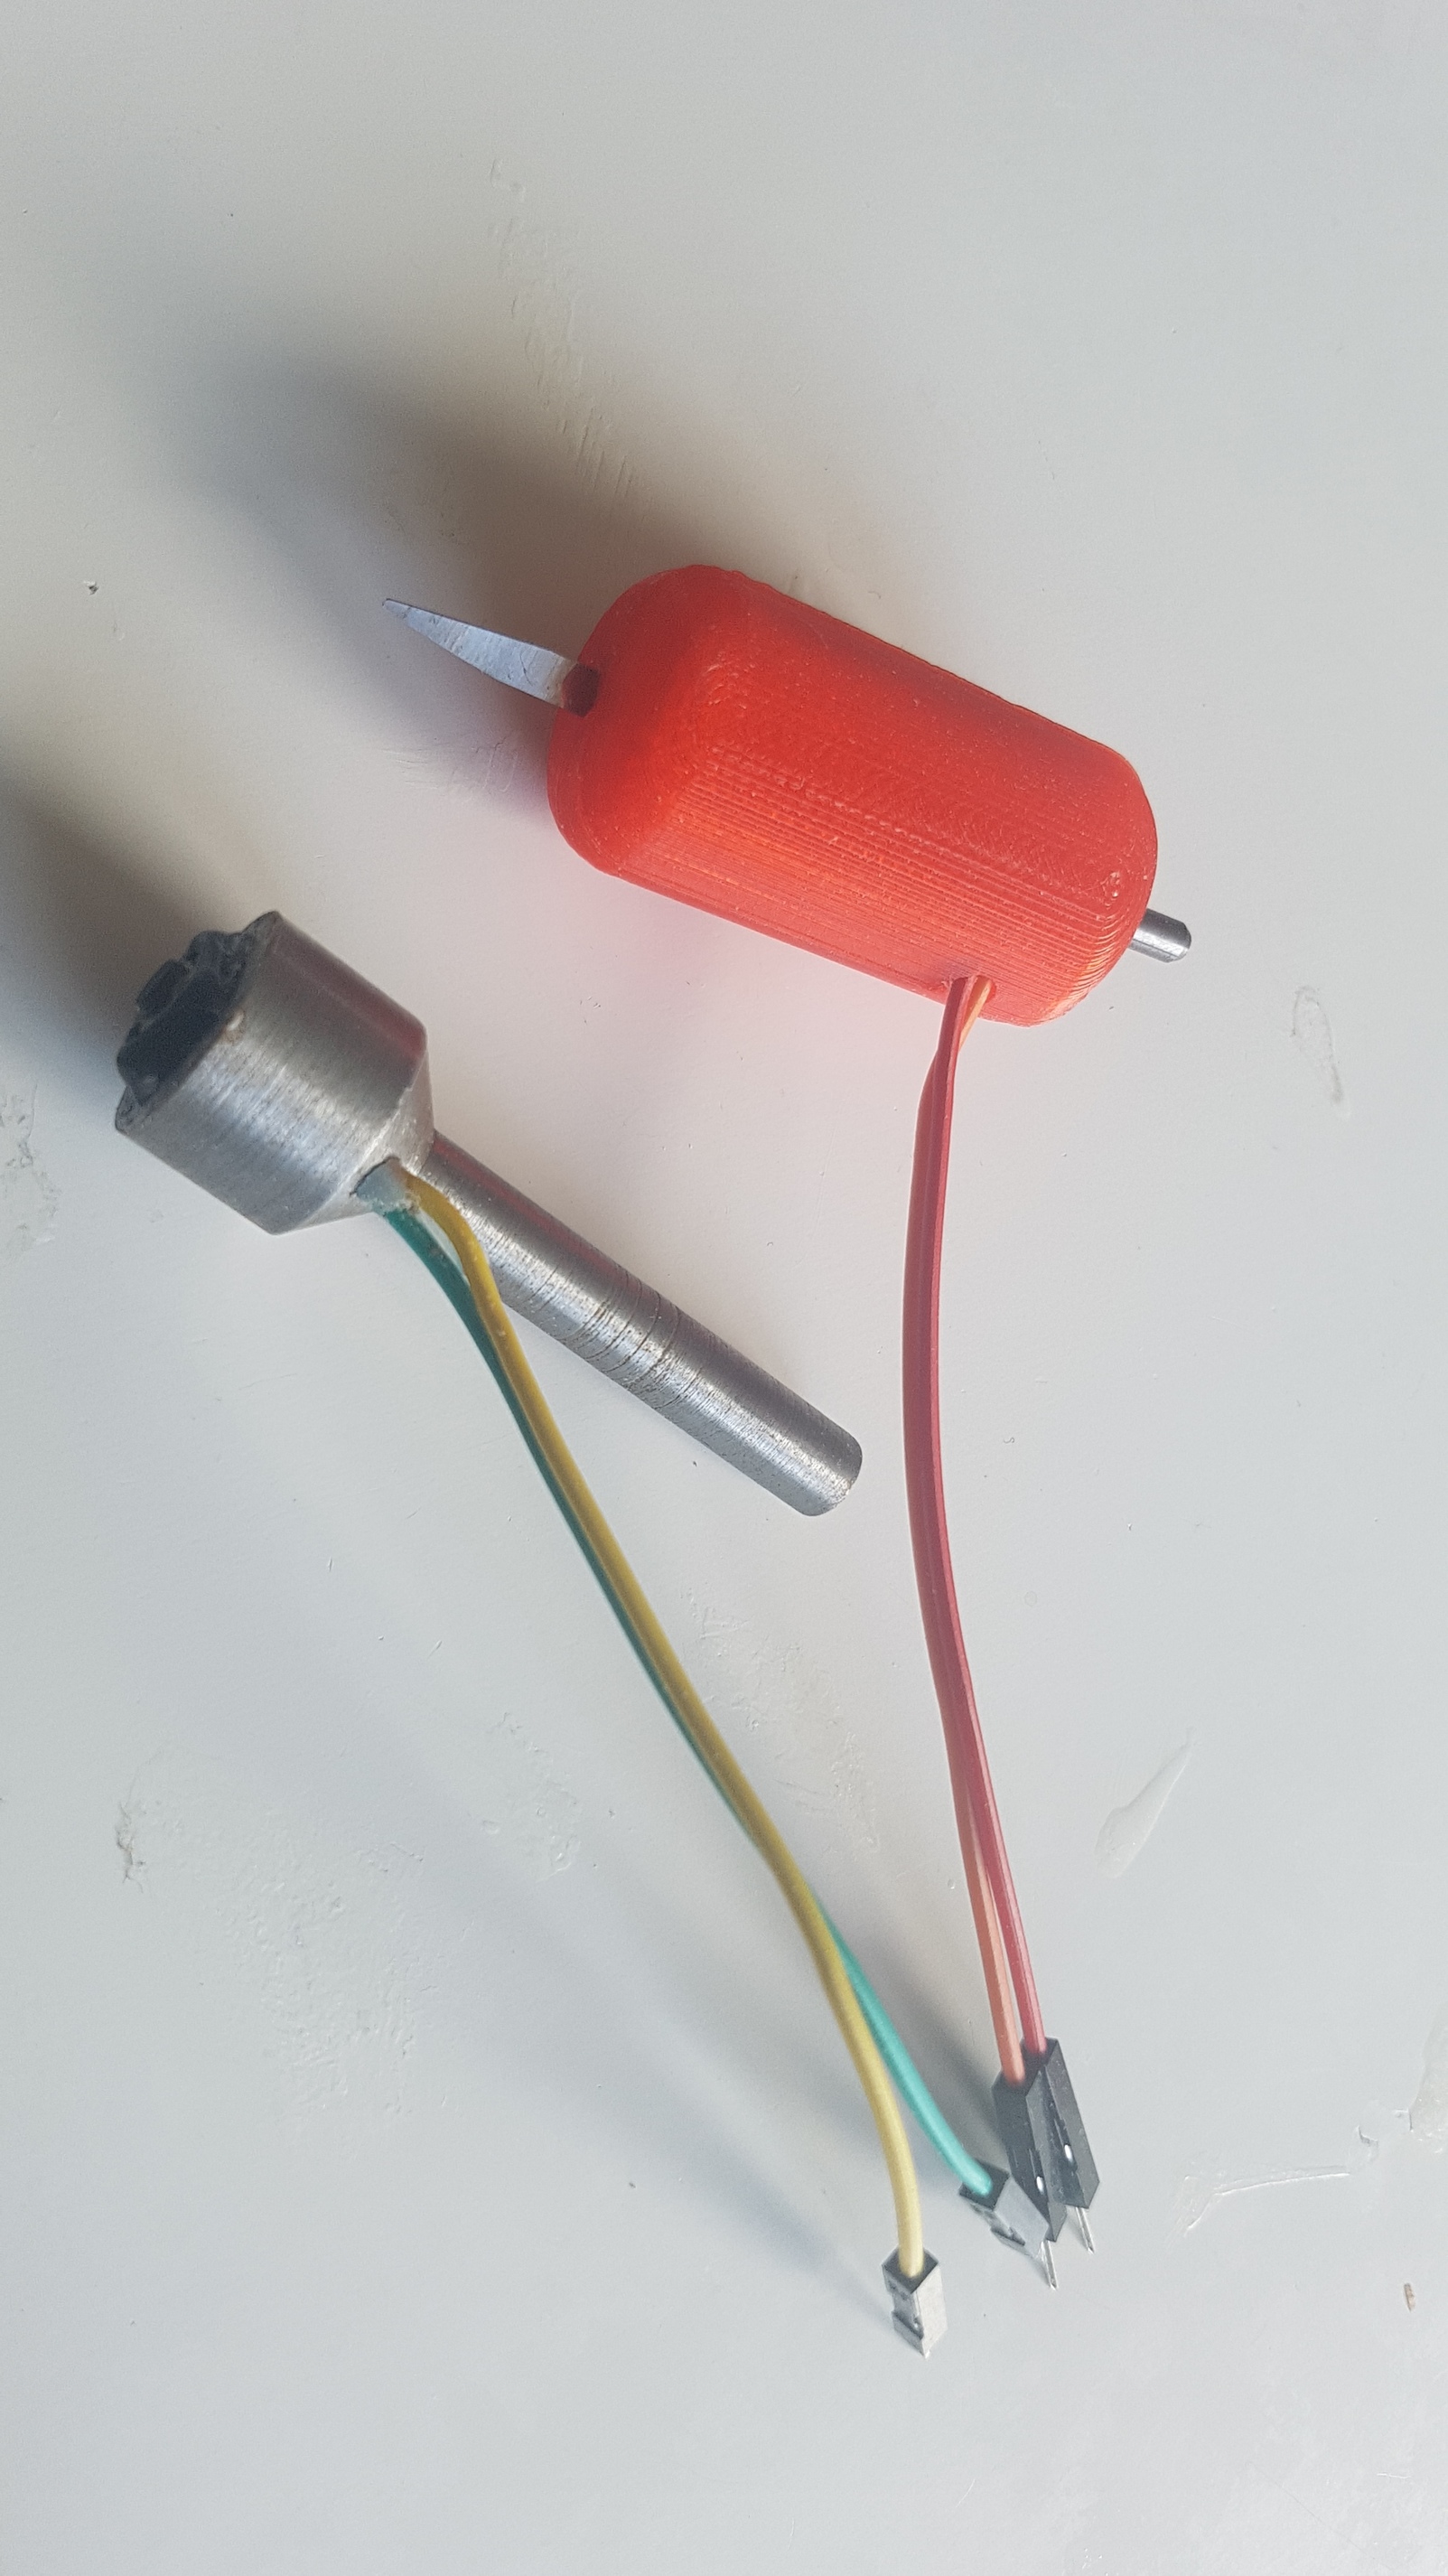
Works on all surfaces
 not just metal
5 Likes
For future reference I found the following very useful re: DIY touch probes:
http://www.homemetalshopclub.org/news/12/presentation_1202.pdf
3 Likes
I made a normally-closed 1/4" shank touch probe a few months ago, designed it up in Design Spark Mechanical - which was the first time I learned a 3D CAD program because drafting it out on notepad paper just wasn’t going to cut it.

I designed it to be cut out in pieces of 1/4" thick acrylic, and works in GRBL just fine. I just had to invert the probing pin using the command:
$6=1
Easy peasy. Works like a charm.
EDIT: Here’s some more images. I have the DXF/STL models of the pieces if you’re interested. I used some rounded cap nuts as ‘contacts’ for the probe tip carriage’s 3 little round pins to form electrical connections with. The probe stylus itself was just a carbide engraving tool (I only needed vertical probing functionality, but you could use a spherical tip to add horizontal probing). Between the black carriage piece and the top of the probe housing I just shoved a small piece of light packing foam I die-cut from a scrapped carriage and the hole I cut in my wasteboard to hold the stylus carriage to cut its underside features for holding the contact pins.
The whole thing is held together using some nuts/bolts through the three holes around the outer edge. The contacts themselves are ‘adjustable’ by just turning the screws that the cap nuts are attached to through the bottom piece of the housing. I didn’t model the screws, wasn’t necessary to get the forms I needed to cut out of acrylic. Also, the shank I used is just a press-fit 1/4" cotter pin that I hammered through the top piece of the housing.
Here’s the DXF files and the DesignSpark Mechanical file: https://www.dropbox.com/s/u4f136c4f5ccj8u/closedtouchprobe.zip?dl=1
2 Likes
Hey @radioteeth. Super interested in your probe. Do you think it will fit in a Nomad?. Would you build one to sell?.
While I like the idea, I’ve already got plenty of projects that are fighting for my time and energy 


1 Like
Also, yes it should fit fine. I went about designing and building my own specifically because I wanted one that was ultra-low profile (from stylus tip to spindle chuck) because my X-carve doesn’t have a whole lot of travel, and I wanted to maximize the size of projects I could use it with. Otherwise I would’ve bought one of the probes you can find on Ebay.
1 Like
Understand completely. Thanks for getting back to me. If conditions change and you are willing to sell one, please let me know.
Looks interesting.
3 Likes
Looks like I have my first project for my PrusaMk3 arriving next week!
1 Like
Here’s something I designed a while ago that seems to work well for probing non-conductive surfaces:
https://www.thingiverse.com/thing:2351060
After reading this thread, I’m thinking about improving the design.
1 Like