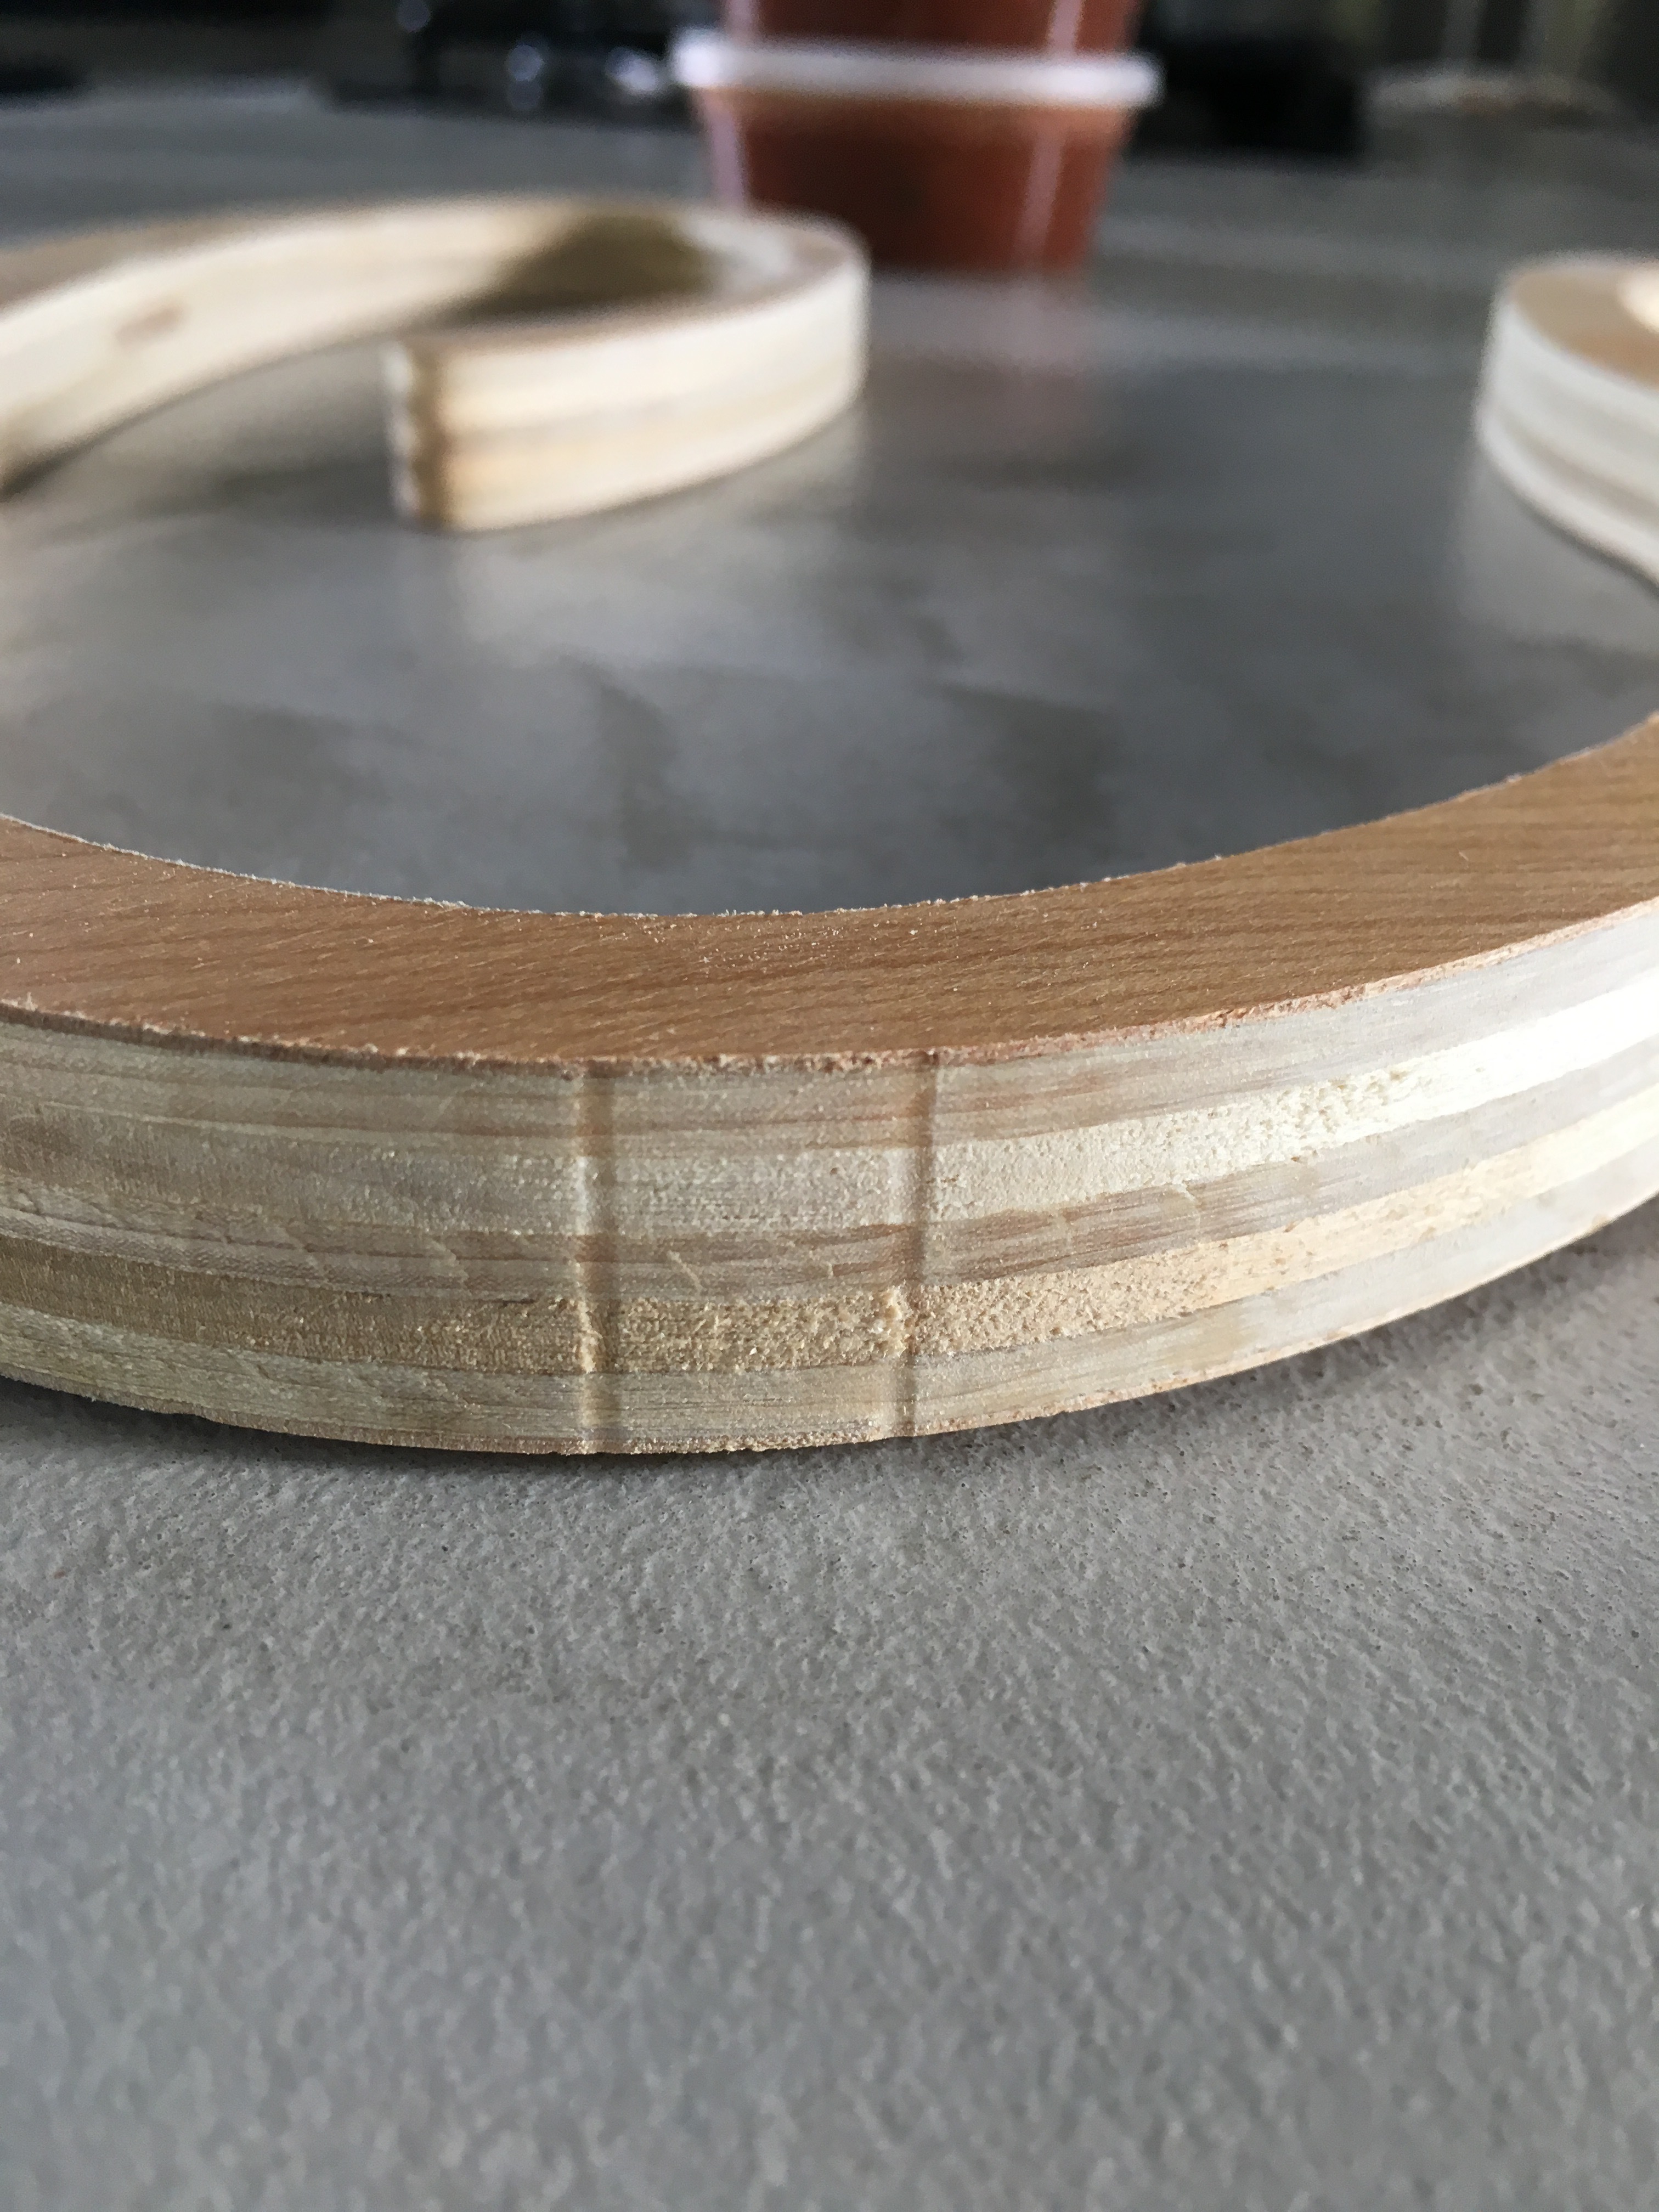
Hi all - I just received my S3 XXL and slowly getting a feel for it. My first challenge/question is why are what look to be plunge marks from the bit showing up around the edge? I noticed it is primarily where there are holding tabs but there are a few others elsewhere along the perimeter too. Any thoughts on what this could be? I am using Fusion 360 and selecting the 1/4 flat end mill. Actually using the stock 1/4 end mill that comes with the machine. Let me know if you need any more info.
Thanks,
Franzi
It’s because of the arcs in the linking tab for Leads & Transitions.
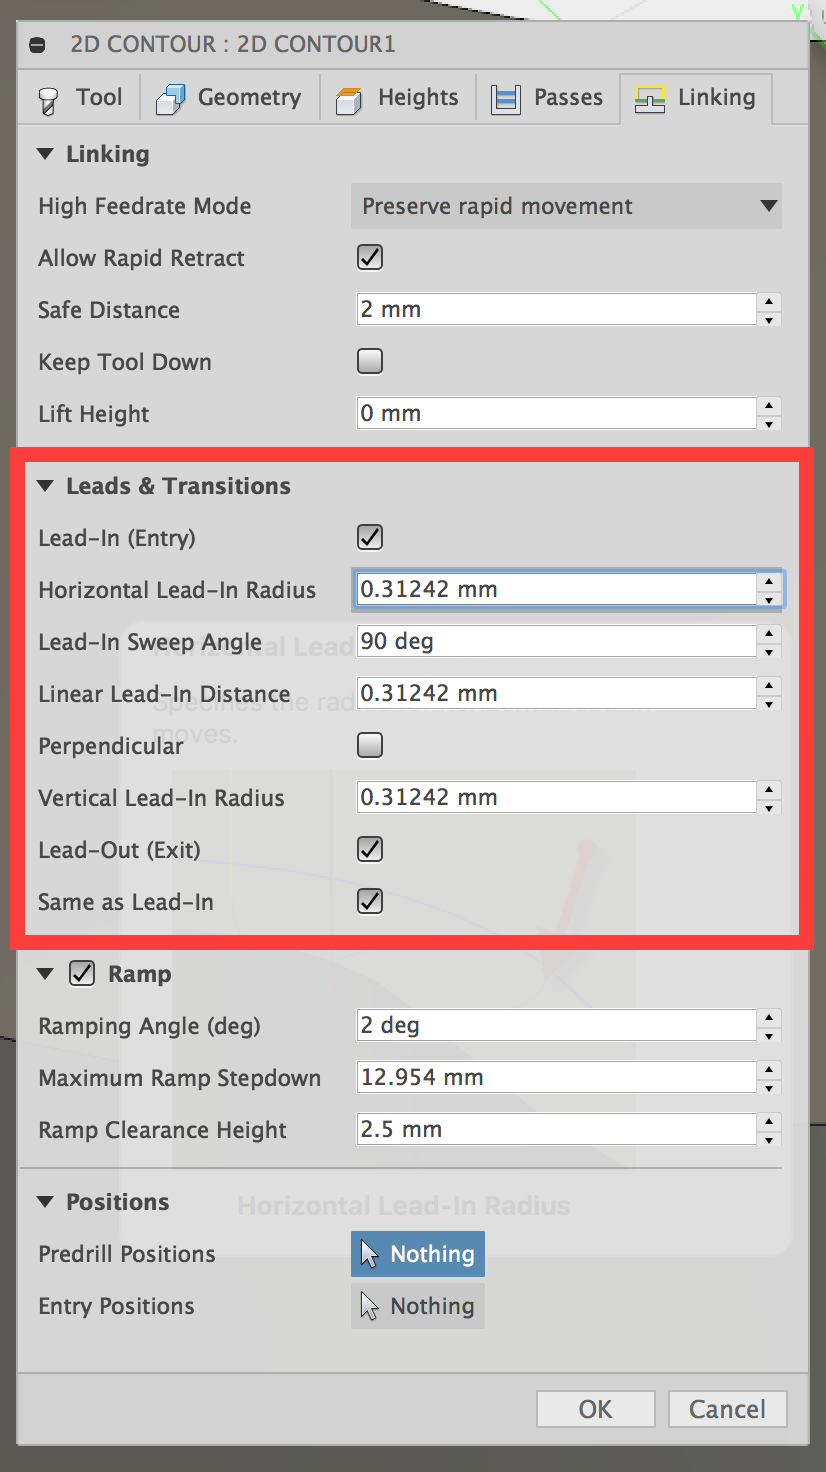
I’ve had the same issue. Look at the simulation closely and you will see where it is happening and where you need to adjust numbers. Make sure that your tools are measured well.
2 Likes
Thanks will need to look into what all that means, as not entirely sure.
Can any one point me to a basic understand of these settings? I can’t seem to find anything that simplifies it for a beginner.
The best you can do is hover over each setting box with your mouse. The help window will pop up automatically for each setting with a brief explanation. If that fails, at least you know the correct terminology at that point to google for. I’m not trying to be sarcastic about it, but I have found that most times with Fusion, I have more problems using the right words as search terms, than I do finding good information.
2 Likes
@Franzi, did you find any settings adjustments that helped with this? I’ve tried a lot of different leads & transitions settings here, including no lead-in/out, and still get the same little marks around tabs as you. I am fairly certain at this point that leads & transitions settings are not related to these marks.
1 Like
I also had no luck trying a number of different settings. What did end up helping for me was using triangular tabs in F360 vs the normal rectangle ones. While that helped a ton there were still a few minor marks along the contour which I believe are due to tool deflection. When I slow my feed and speeds, those also no longer showed up. Hope that helps.
2 Likes
@Franzi - I have the same issue. I often use the same plywood as you. The photo below shows an example with grooves cut in the side of the piece.
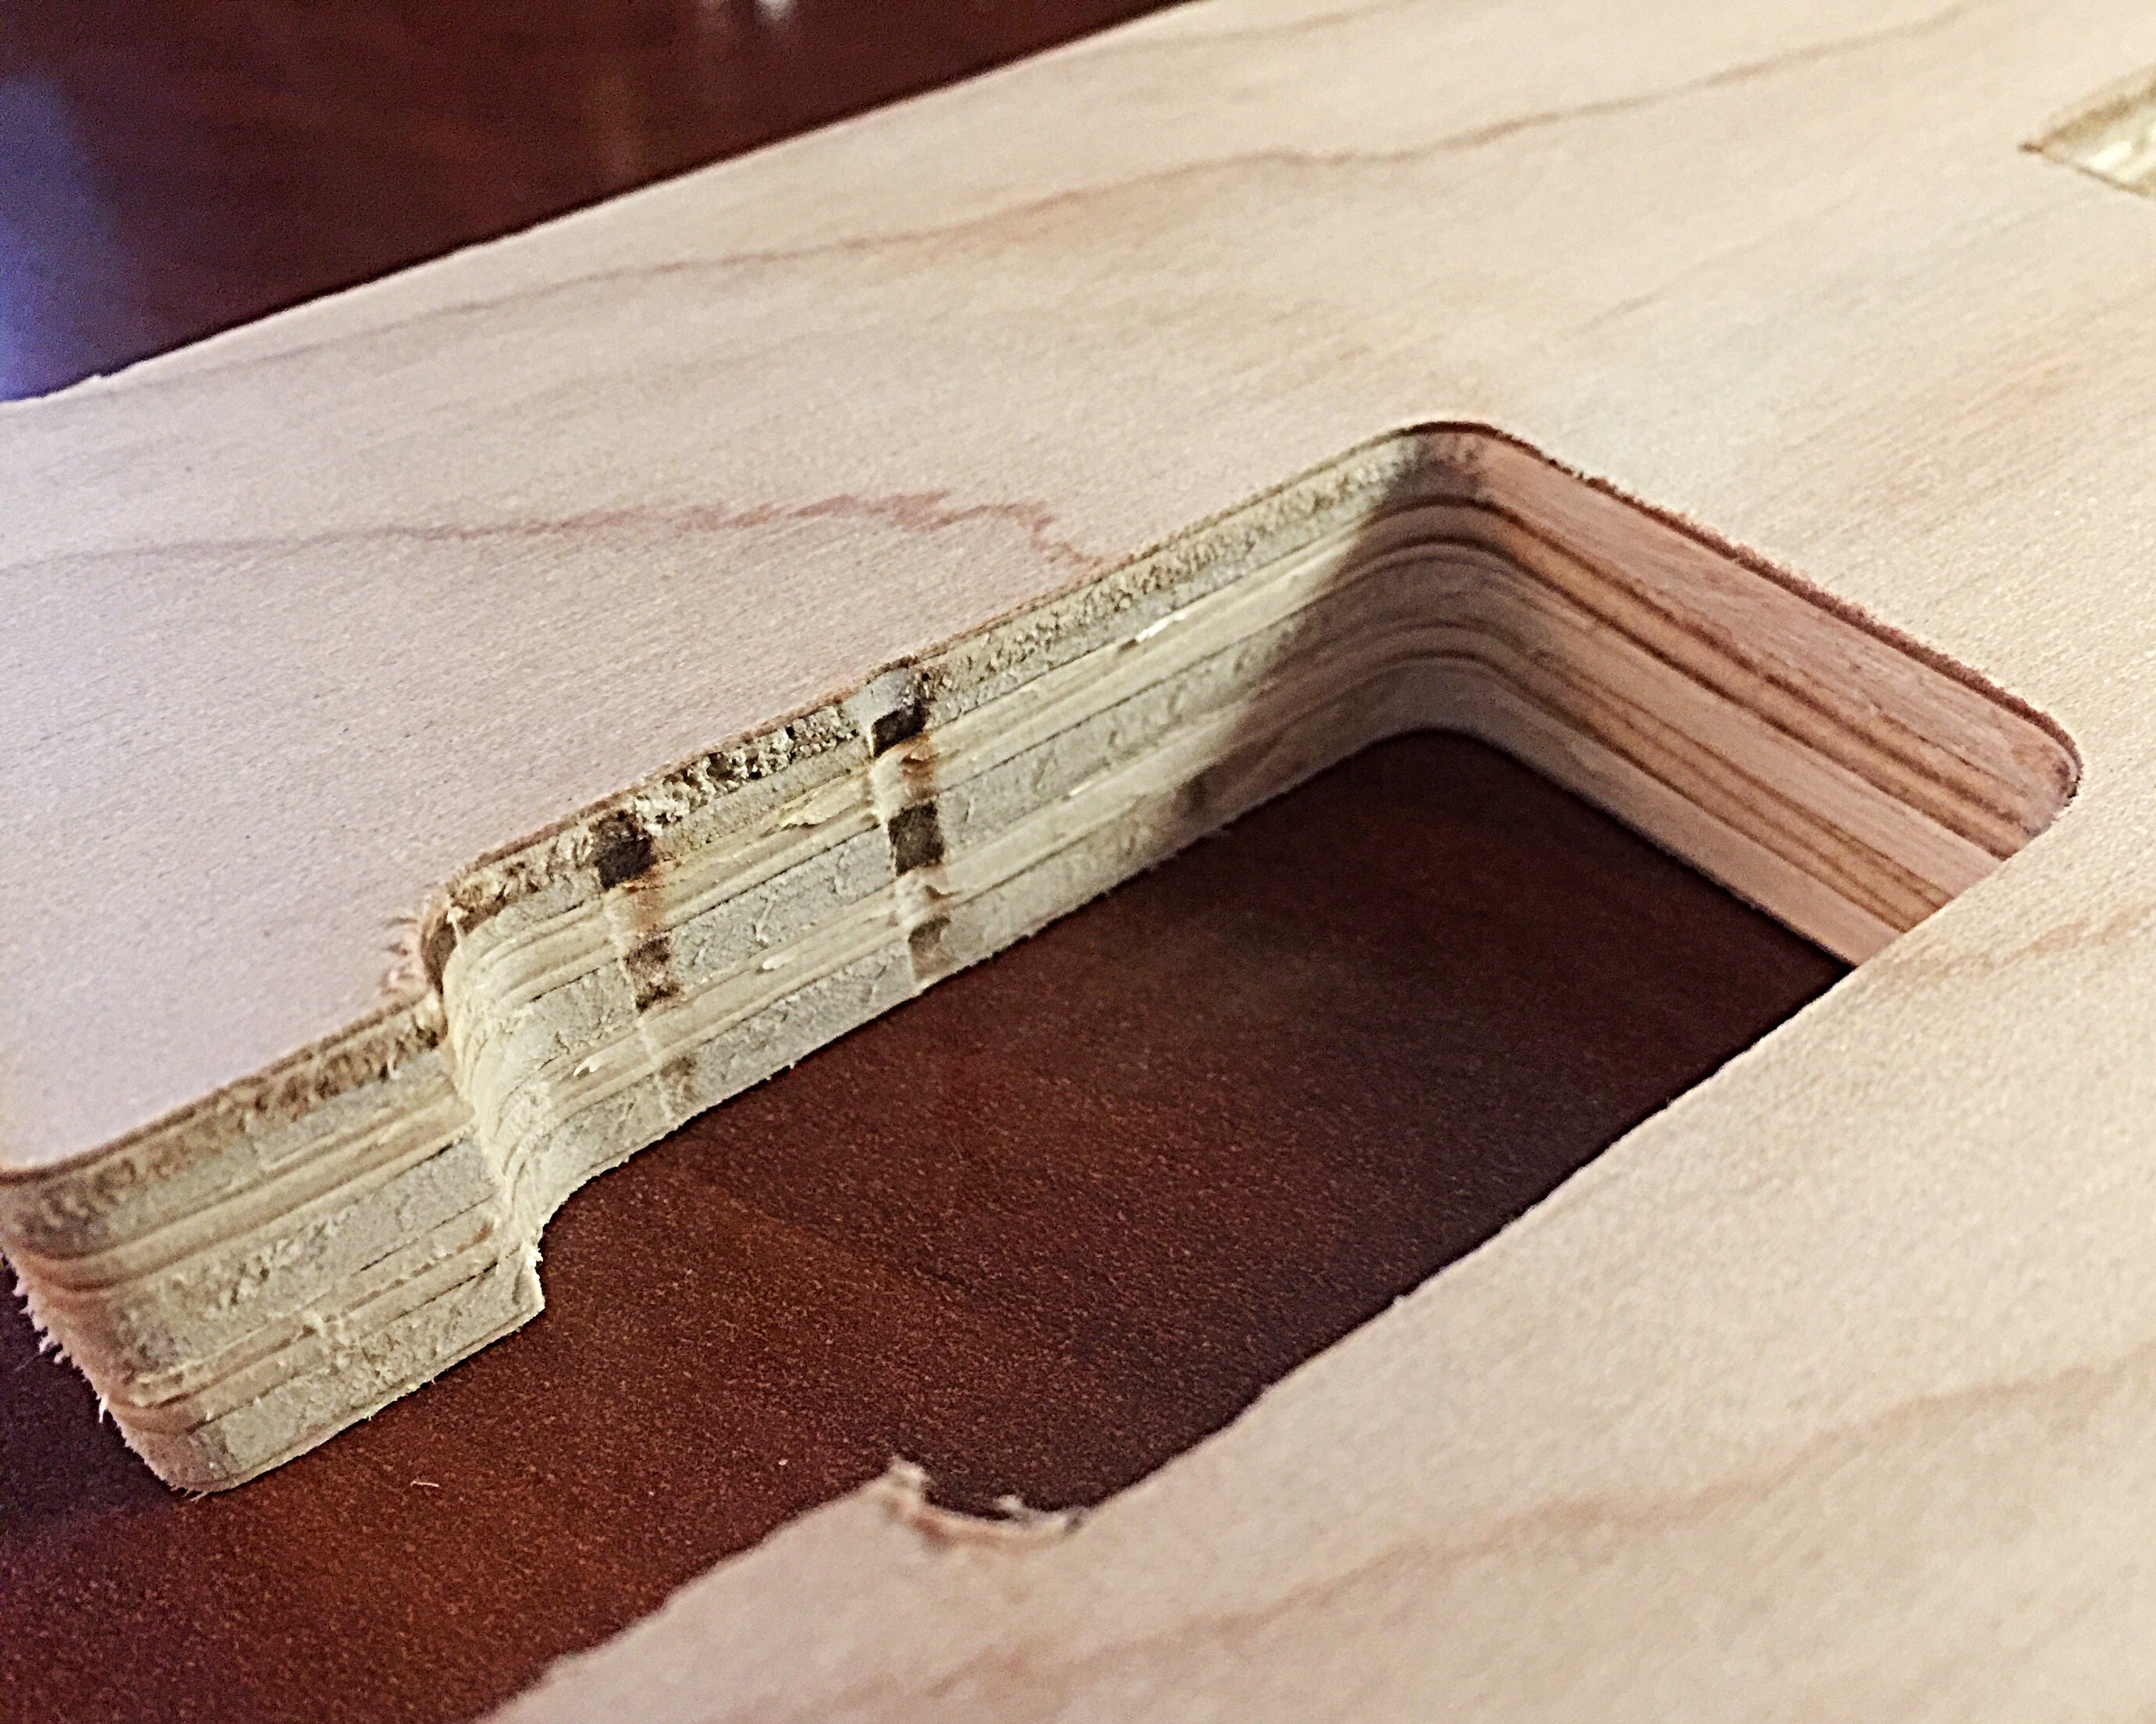
I get these grooves on each side of my holding tabs. My tabs are shorter than my stock height. The bit stops the last 2-3 passes to cut out these tabs (and make these ugly grooves). Mine even burn the wood slightly at times.
Check your wasteboard surface to make sure it is flat and level. My overall setup (possibly wasteboard) is actually sloped slightly from heavy use recently. Has many cuts in places where the bit went fully through my stock. The slanted waste surfaces causes my grooves to be wider at the top on one side because the bit is meeting the wood and a slight angle. Replacing my wasteboard will help, but not resolve the grooves. But every bit helps.
I don’t use Fusion360 so I cannot speak to that part. I set all my tool paths in Vectric software. Run the cuts with Carbide Motion. In Vectric (and other software I am sure) you can make the bit slow down at certain points, like tabs, and ease into those sections. Would cause less jerking around and so on. Less potential for grooves.
But a bit moving in a straight line, stopping, lifting up and over a tab height and back down should not cause sideways grooves. There’s no reason the bit should move left or right in that process. So either the settings for my (our) tabs need tweaking or belts aren’t tight enough or something else is going on that I cannot yet identify.
I am going to research it now that I have some time because fixing this problem will save me time and money. I’ll reply again on here once I find a solution. In the mean time, if anyone else has ideas please share.
Brian
3 Likes
I had similar issues the first time I tried to use tabs in a Vectric job in brass — need to revisit that — thinking using the tabs at the roughing stage makes the most sense.