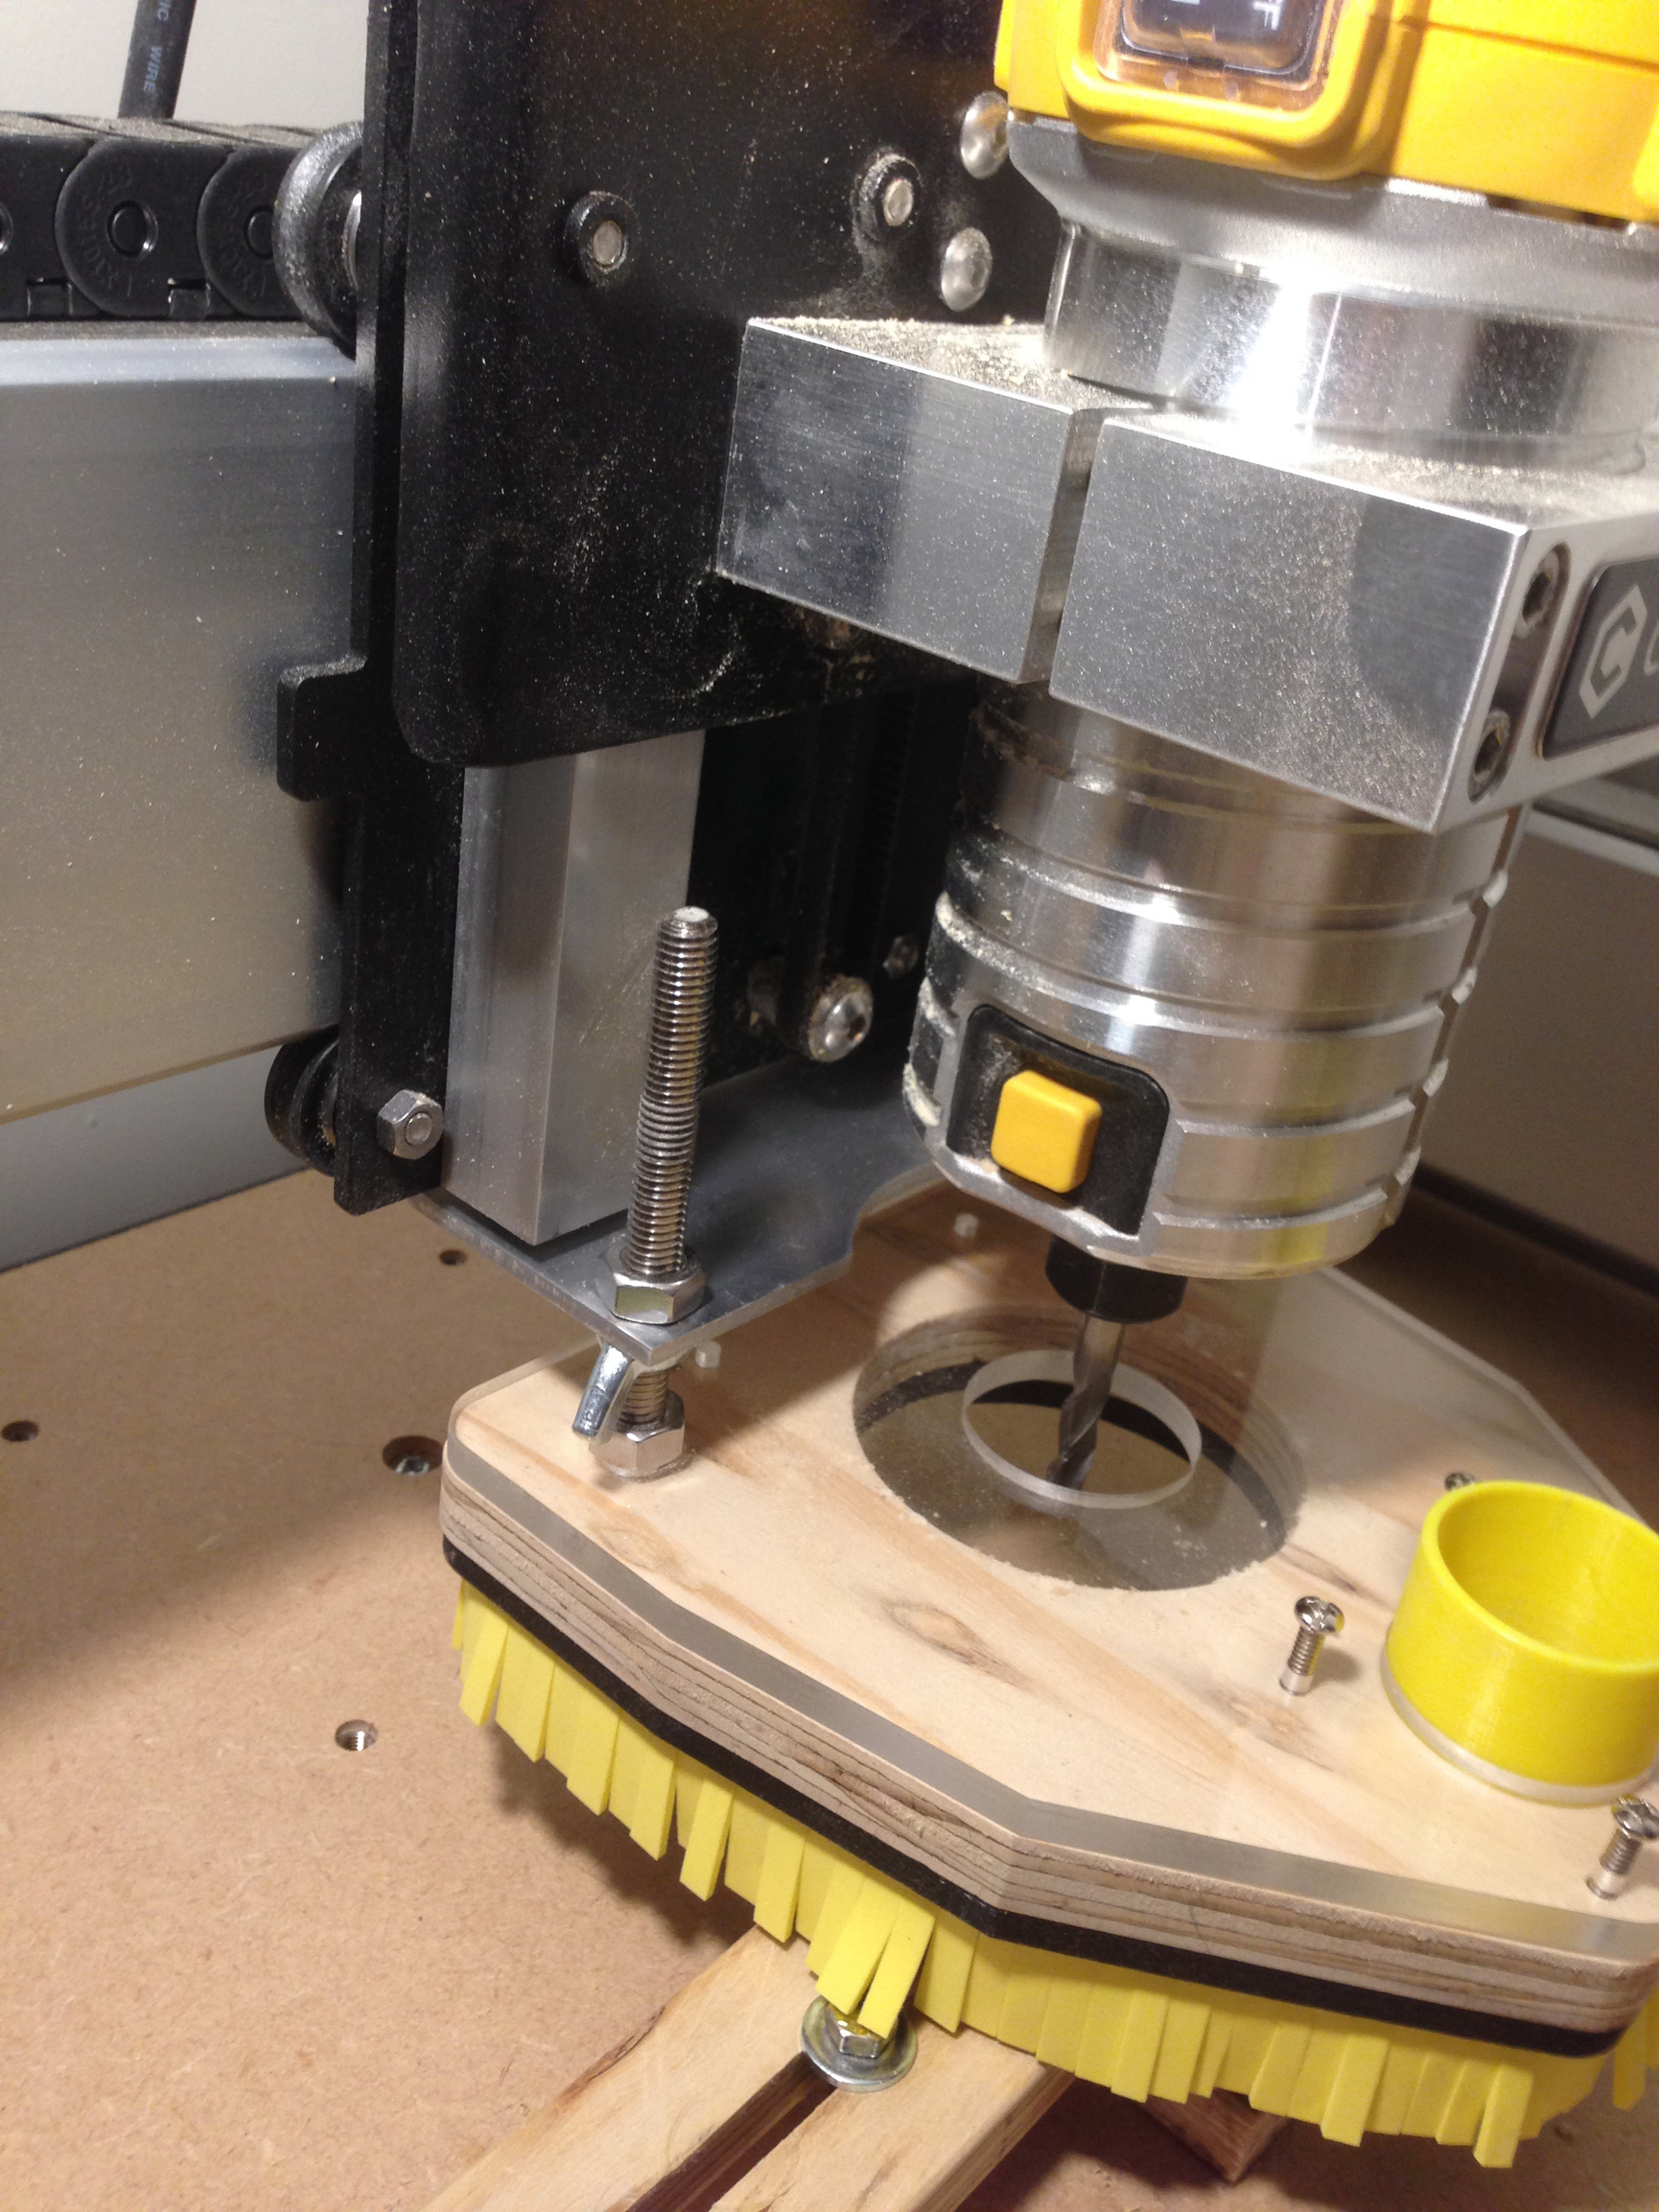
Been busy fleshing out a homemade z axis independent dust shoe. I have the prototype all up and running. Just added the brushing today haven’t run it with the latest addition just yet. And as we speak I am 3d printing a hose attachment bracket to be mounted where the bolts are sticking out of.
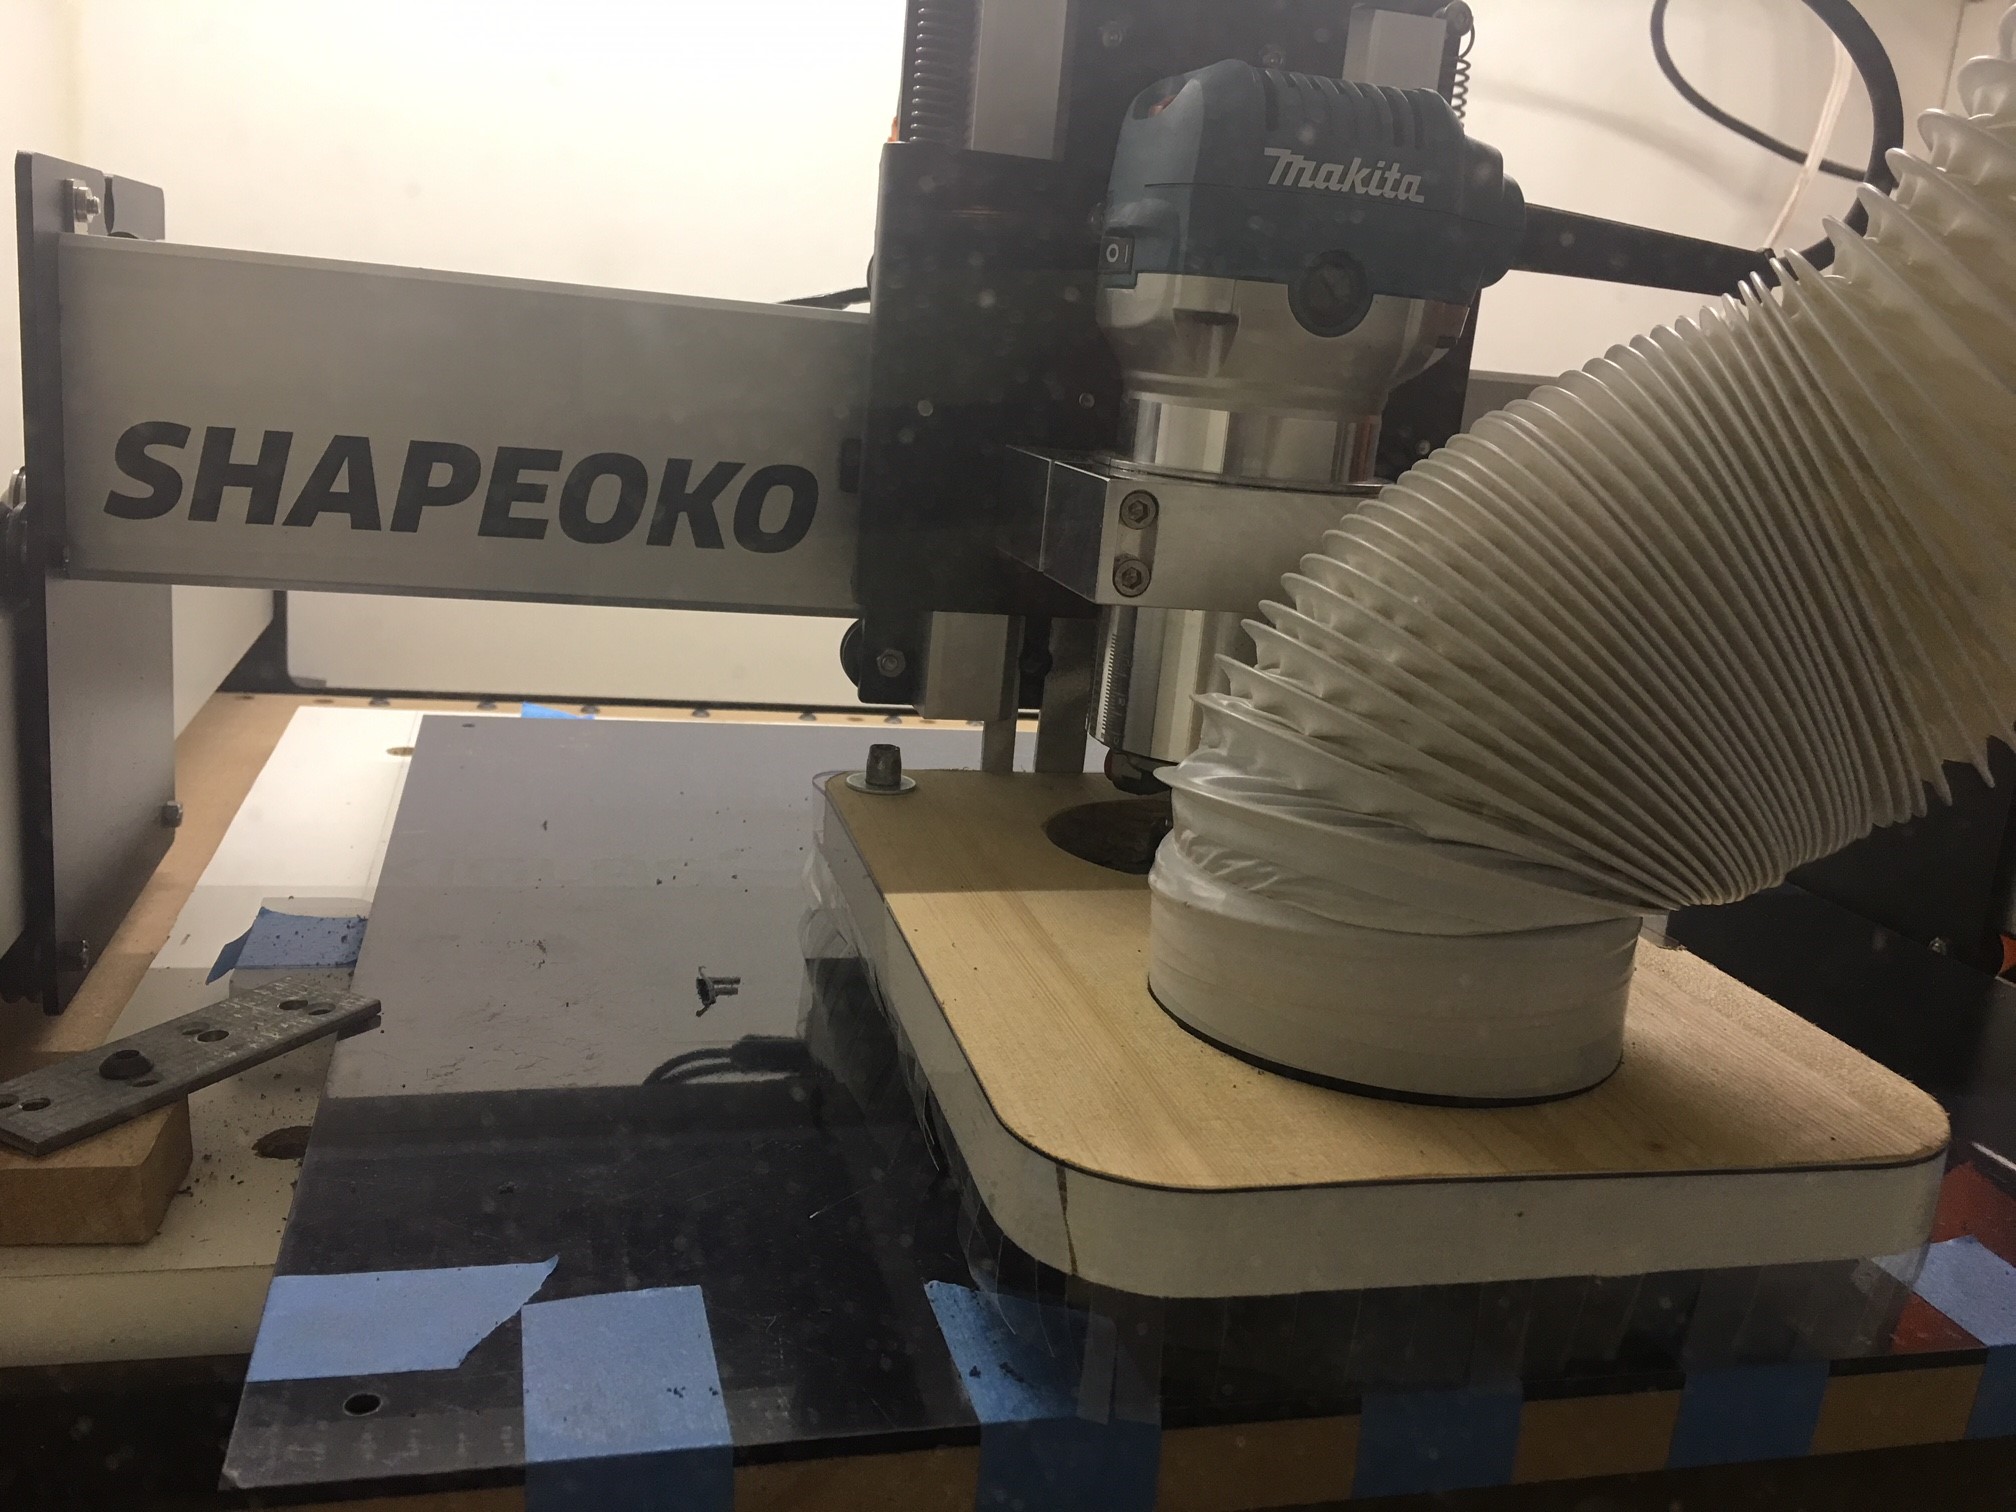
I will redesign something in the future as I would like to get my vac hose on the rear of the gantry so to not hinder visibility. I also wonder how much more I can get out of my Z height.
Most of my projects are thinner in nature but I want to work on some larger pieces in future.
Very nice Csaba , our bracket designs are so similar its quite funny.
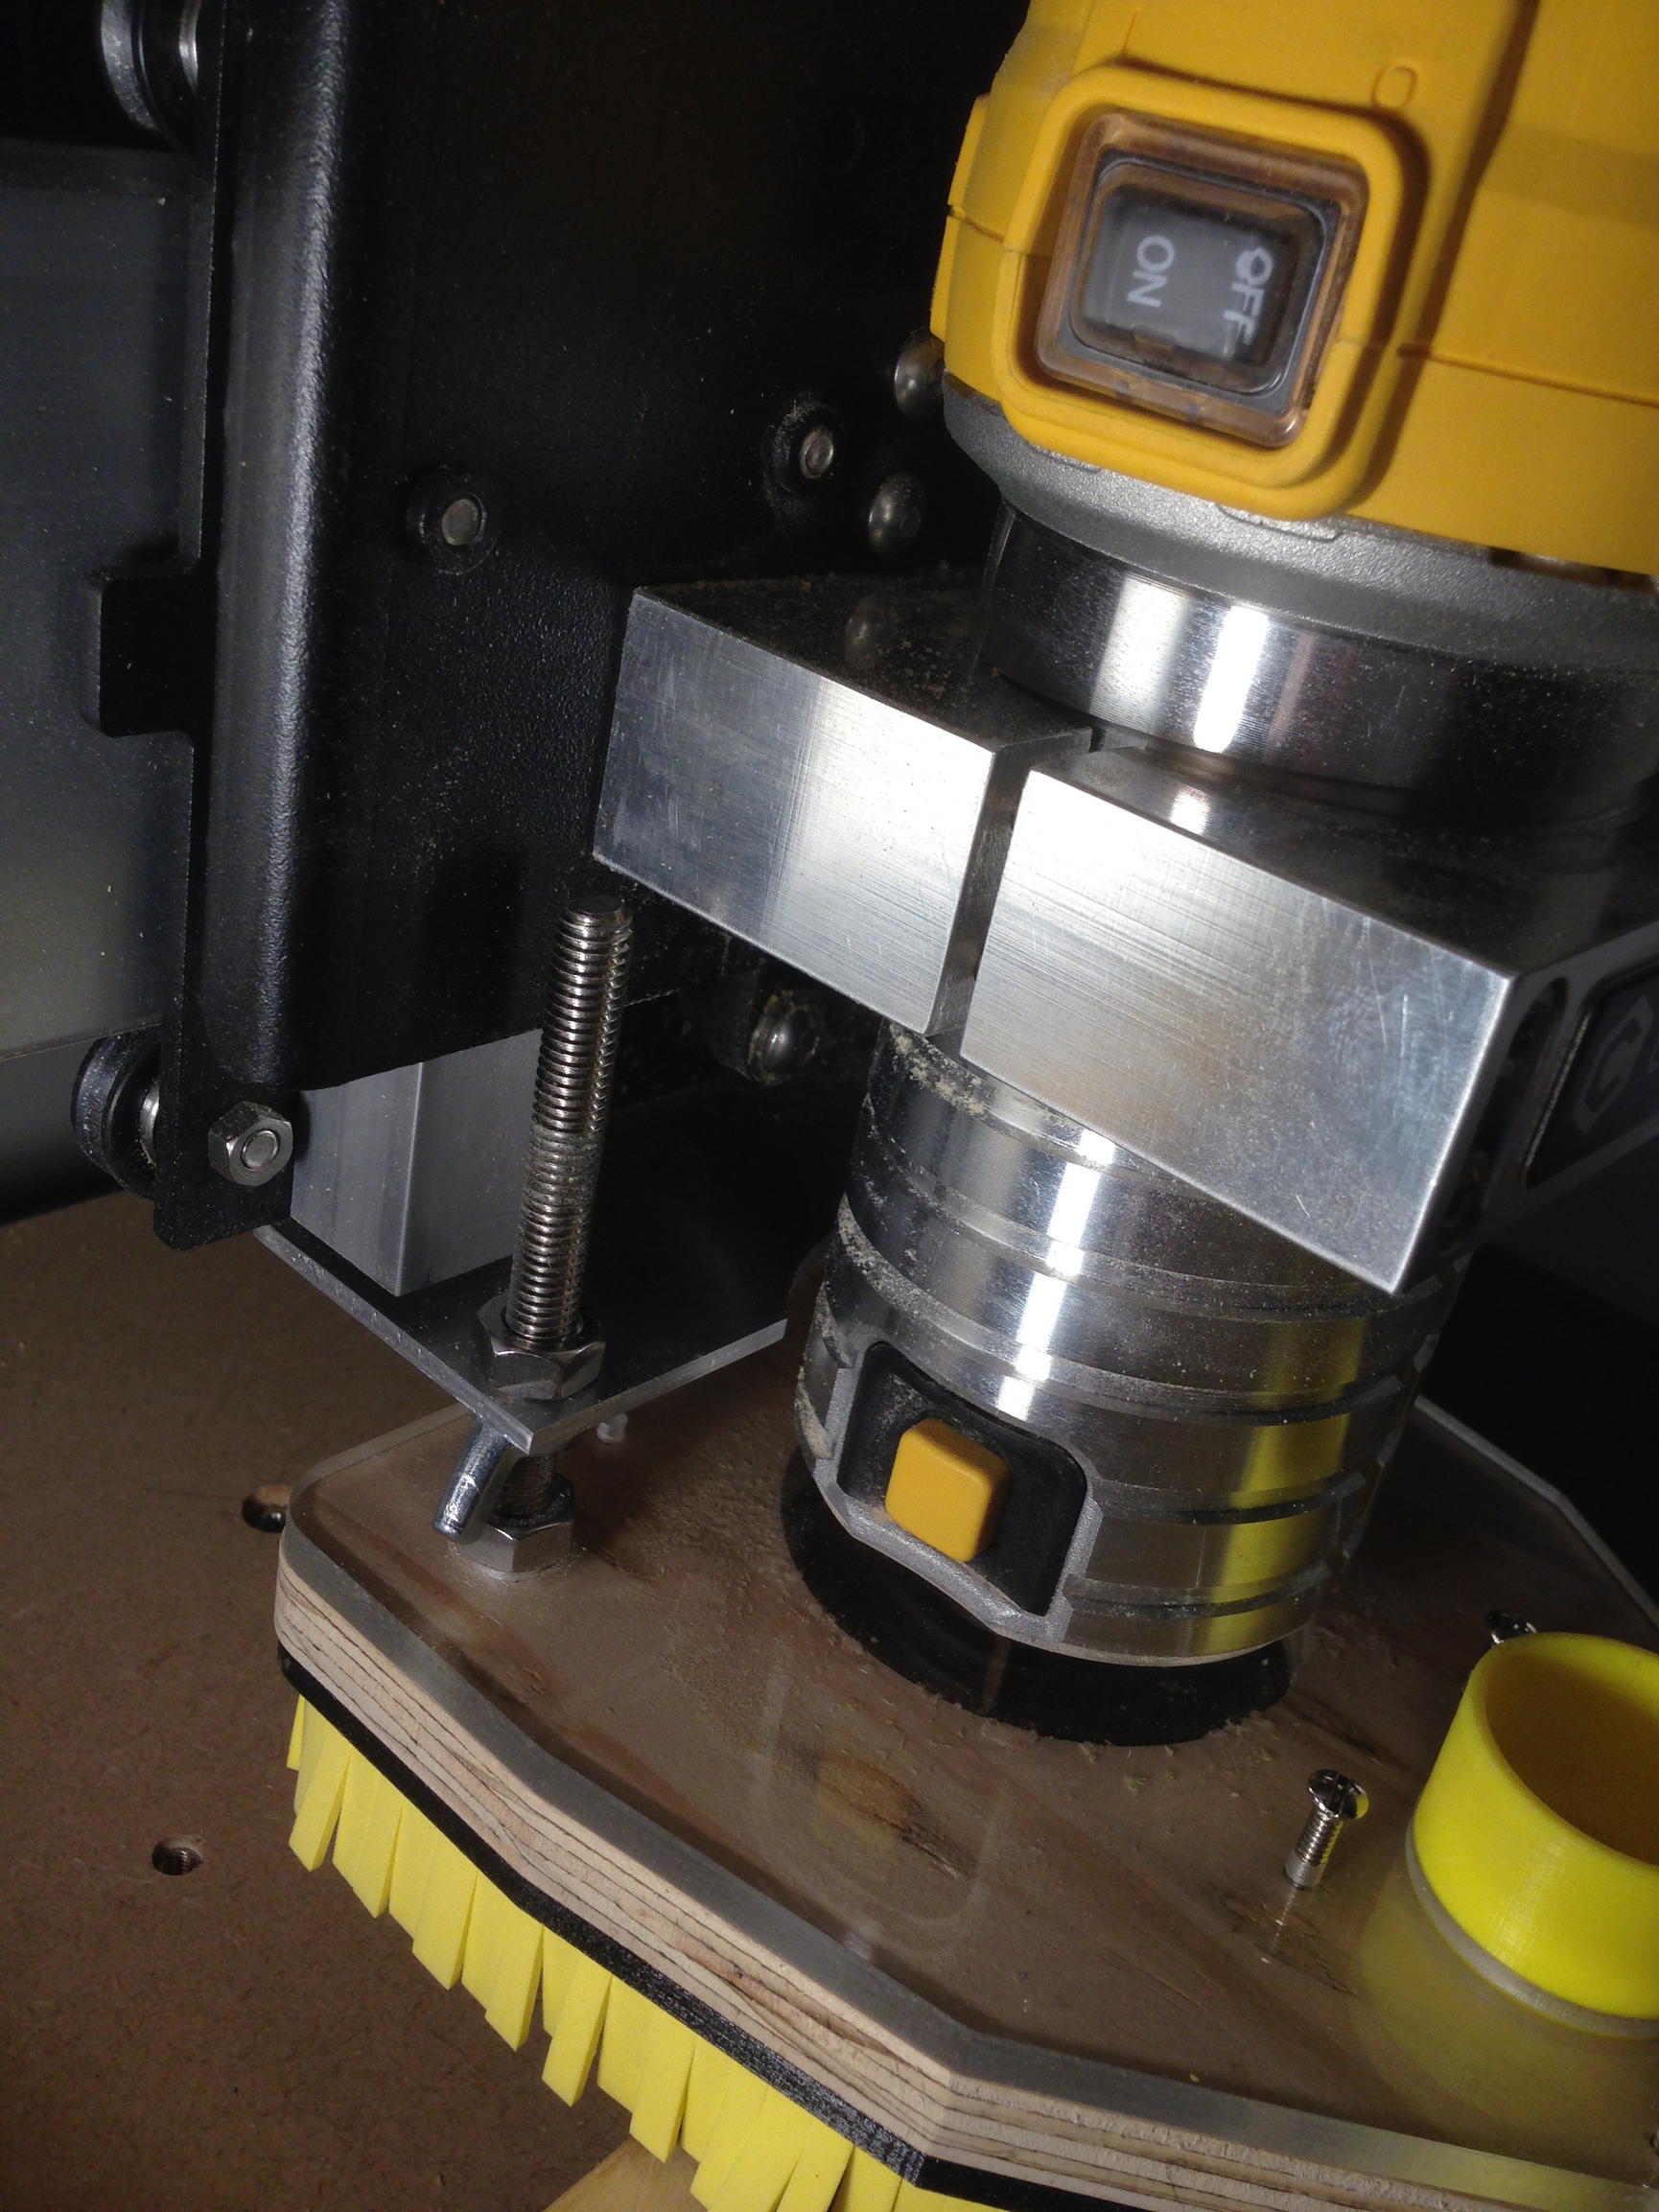
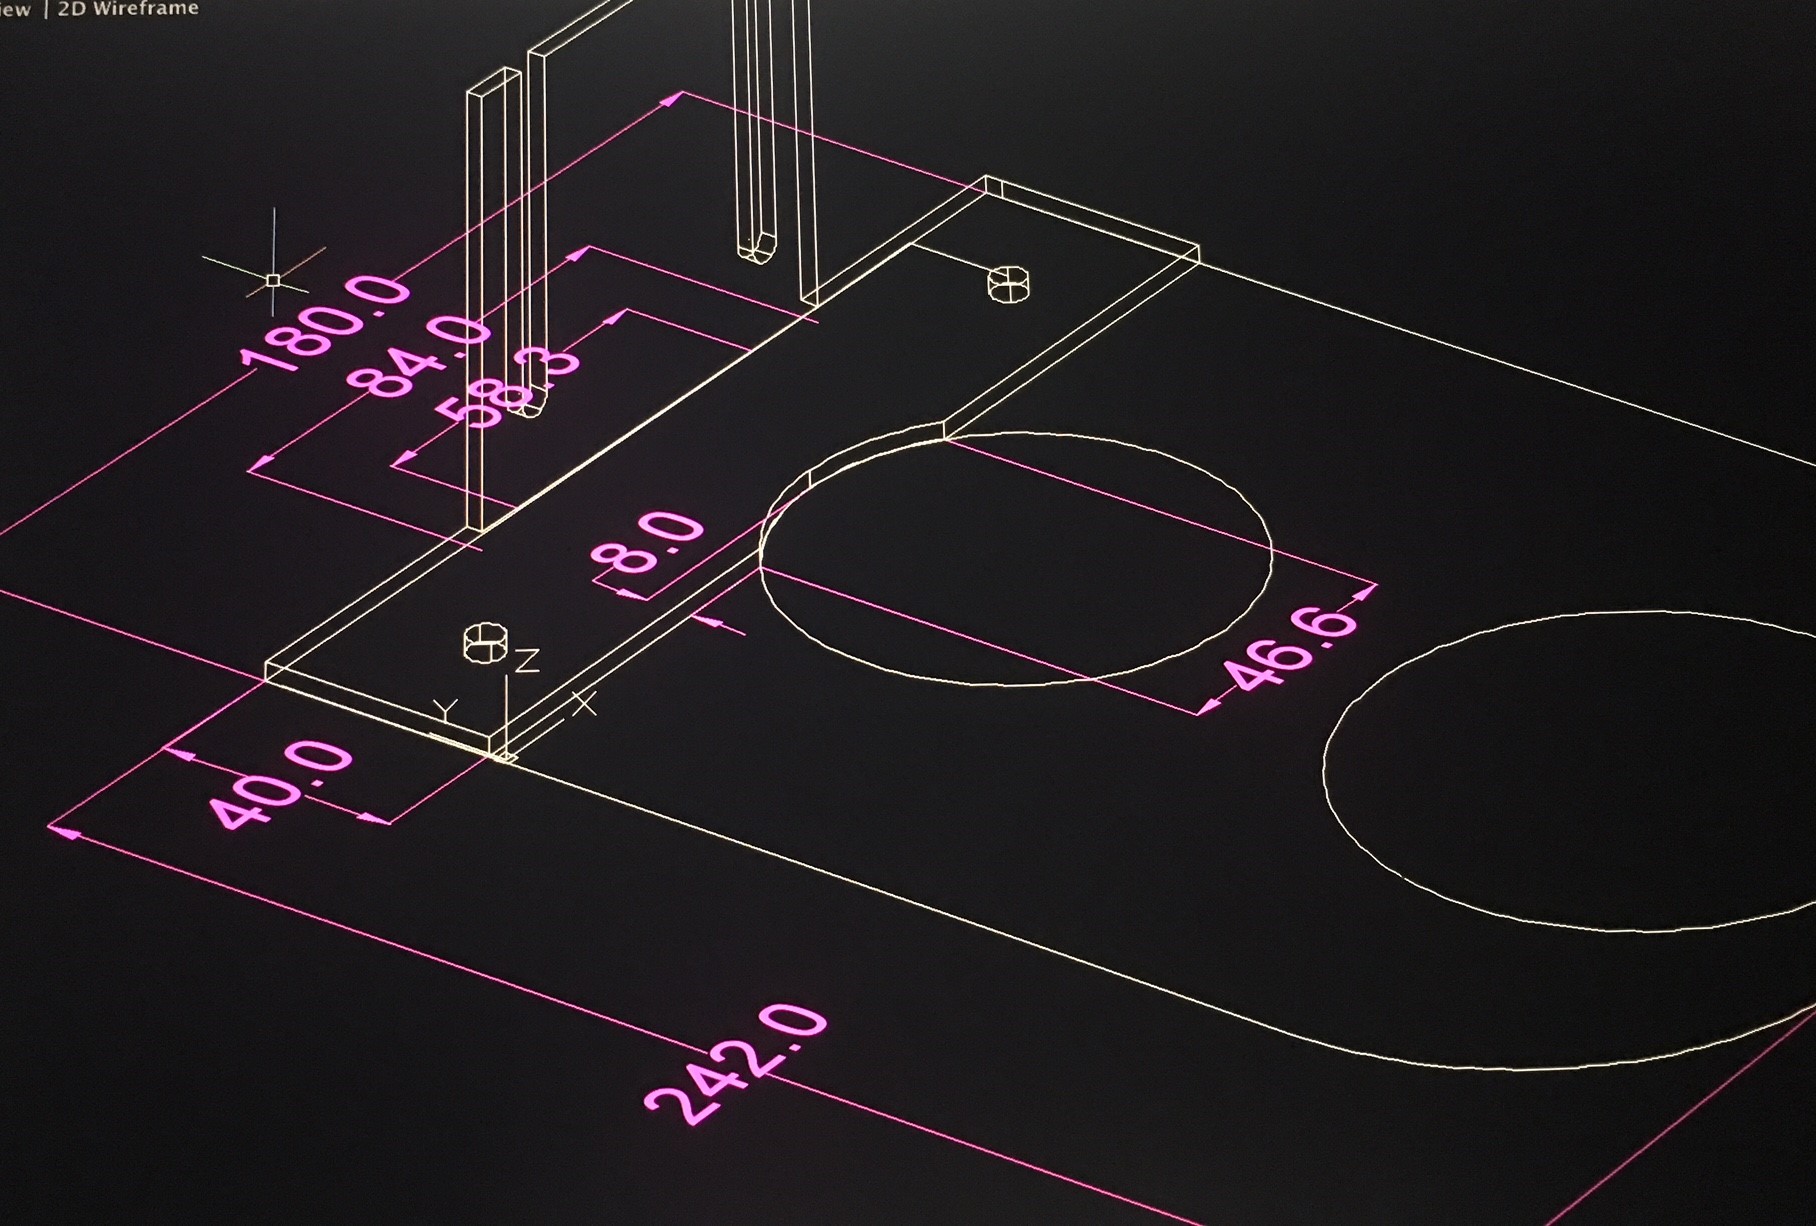
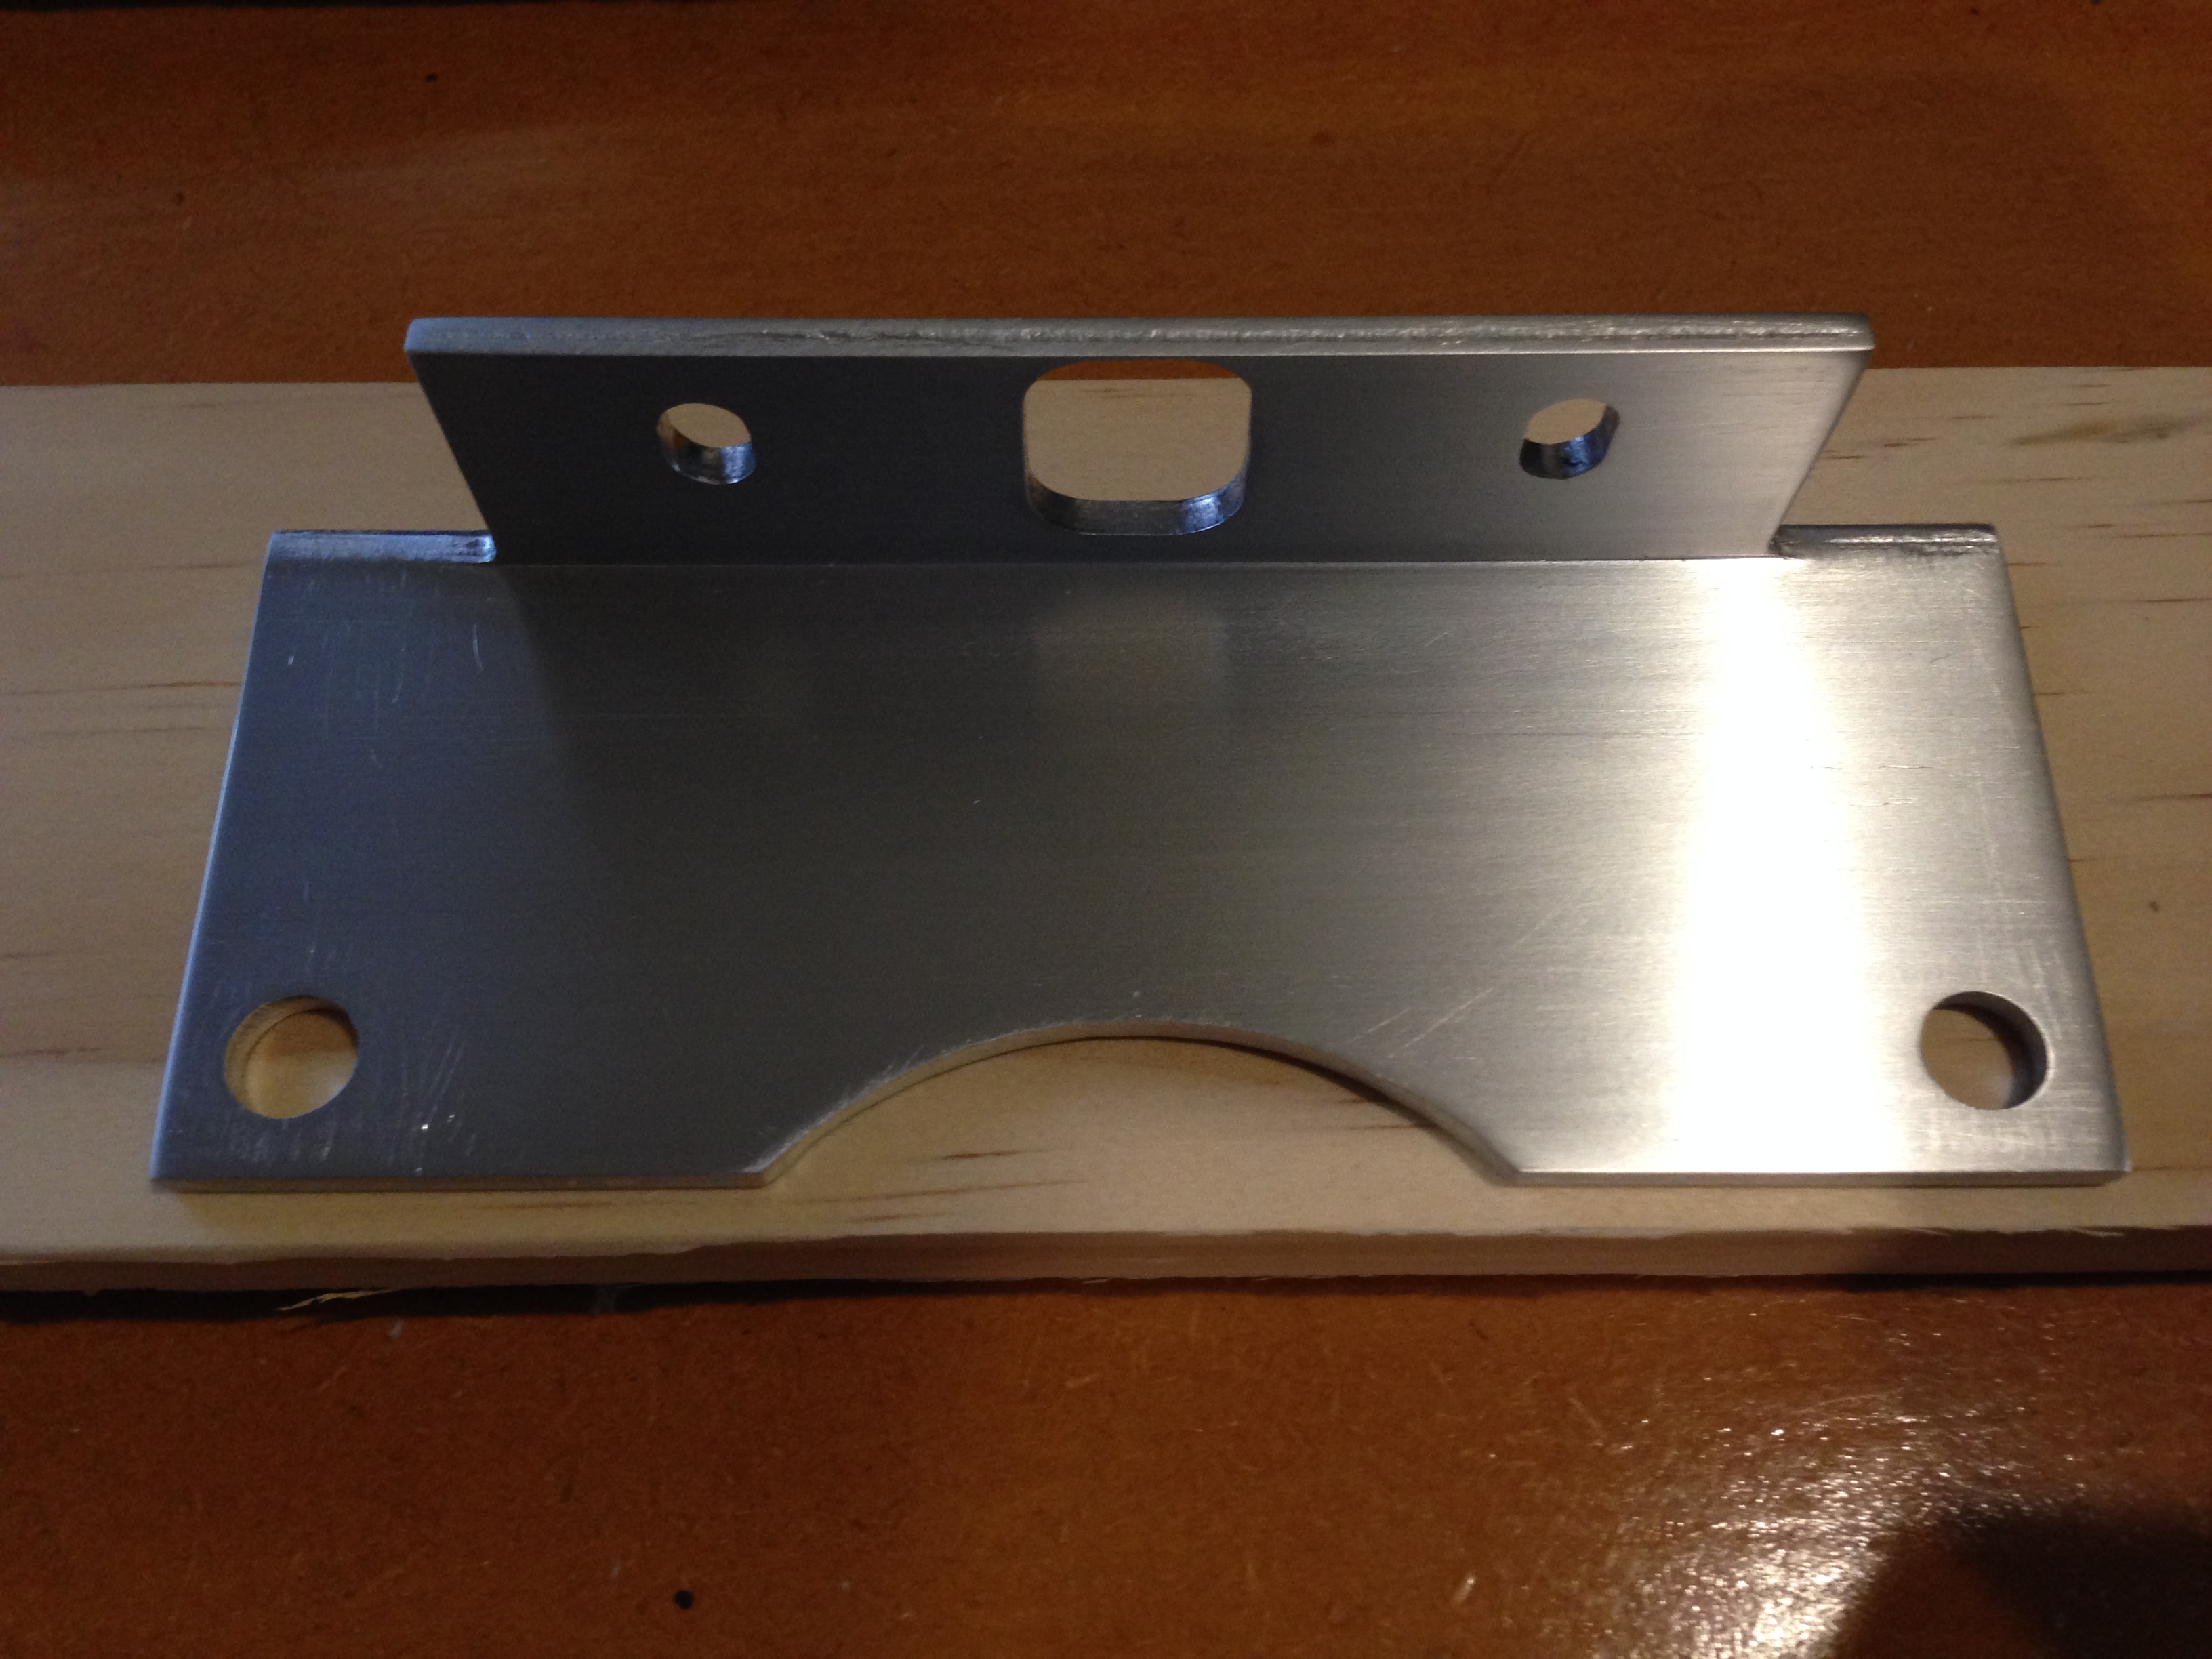
I made an aluminium bracket out of 50mm x 50mm aluminium angle. I went a bit overkill and used 3mm thick but sure does the job. Clearances are tight at the back of the z plate but allow about 1mm gap before scraping the aluminium extrusion.
Here is a pic of the cutout on the alu bracket, was my first go at milling aluminium so a bit rough. Had not learned proper techniques yet.
Yeah, just sneaks in on the rear plate of the gantry, just have that cutout in the middle to compensate for the rear of the bottom belt tensioner of the z axis.
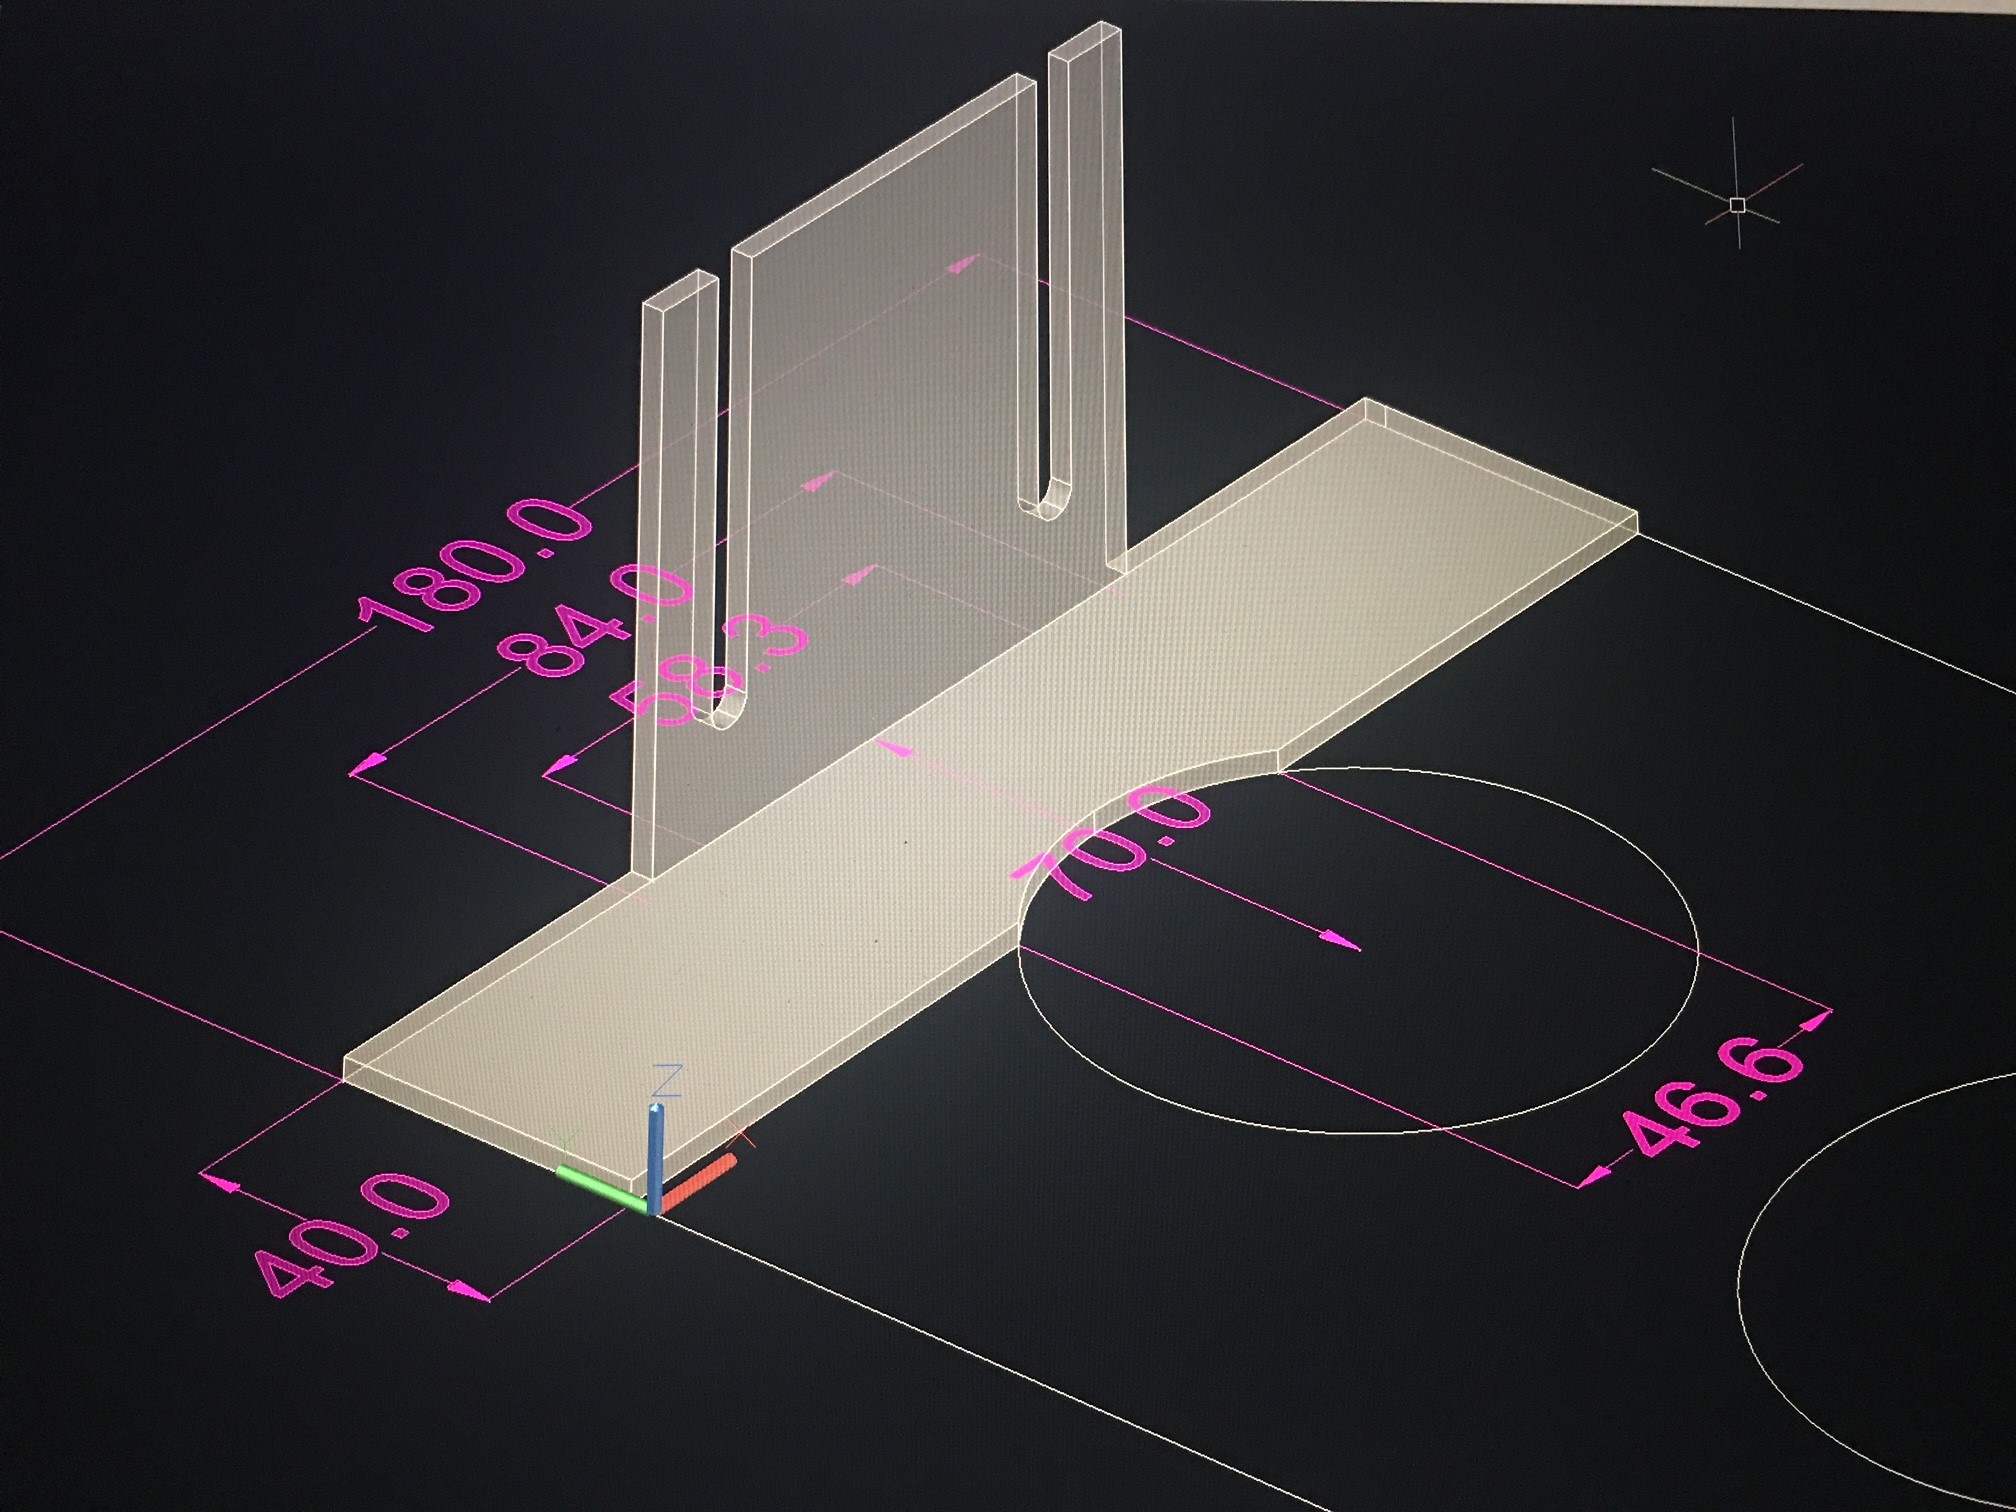
It is funny and somehow satisfying when someone else comes up with a similar idea and a solution. Yours look way much better than mine! I started with a 40x80x40/3 “U” aluminium extrusion and got rid of the parts that were unnecessary. I don’t think that 3mm of material is an overkill. I tried thinner aluminium angle previously and the forces generated by the vacuum actually bent it. Well, my S3 was occupied at the time I made mine so I had to use a saw and a file. I made those vertical cutouts to adjust the dust shoe height but I’ll try your threaded rod type solution also on the my next version. Why does the edges of the shoe converges towards the hose attachment on your design? I was experimenting similar shapes but found that reducing the surface area of the shoe and having the edges close to the vacuum attachment causes a lot of loss in suction.
I have some ZrN aluminium bits on their way so will probably mill another one soon, but I think I will do some tweaking so I can get the hosing on the rear.
I think both our designs look great and have their own merits.
I drafted the sides in at the front as I have a 3D printed directional vein underneath so I try direct the suction. At some point I will switch from shop vac over to a dust extractor. The noise is just too much.
I have just installed the vac attachment which I messed up the design of, forgot to shape the front to match the dustshoe frame, but it looks okay, only a prototype at this stage. Just gotta get that dust down in the garage as its a shared space.
I hope you will share your updated version also. I was also thinking to fix the hose somehow behind the gantry but couldn’t come up with a satisfying solution so far. I am more focused on changing the MDF to aluminium at the moment and than I will probably just use coolant to suppress the dust and chips whenever it is possible.
When I originally conceived of my bracket design, I decided to use the single center hole for the pulley for attachment. I didn’t want to bother the left/right extrusions when attaching and removing it, and end up needing to readjust anything.
If you pull the bracket tight to the bottom of the z-axis plate and tighten the pulley screw/nut, the bracket doesn’t budge. I’ve been using mine for some time now (since about April I guess).
I like a shoe with a bit slot, it makes removing/replacing easier.
I also have added very short (1/4" high) skirting right around the edge of my shoe’s bottom hole, and I can adjust height so it just hovers above the top of the material. Nothing escapes.
Someone should crank-out these brackets and sell them.
OH AND I NOW see your holes for the threaded rods coming from the shoe aren’t slots. If you make those slots, your shoe will go on and come off much more easily.
Underneath the plywood section is a 3D printed bracket with a groove. In the groove I glues in some 1.5mm craft foam as a solid piece and then after glue dried I cut it at regular sections to allow movement over clamps.
I have been working on some different flexible 3D printed materials including flexible PLA (too hard), TPU ( almost right), and I am about to trial ninjaflex which should hit the spot, I will report back on this later.
I was originally going to either butcher up and old brush but its very time consuming or find some door/window draft gap brushes ( some 9-12mm ones are available on places like aliexpress for next to nothing)
Yeah I think I would add that to my design in future when I manage to get hose at rear sorted.
With all this input I think the final revision is going to be pretty near perfect.