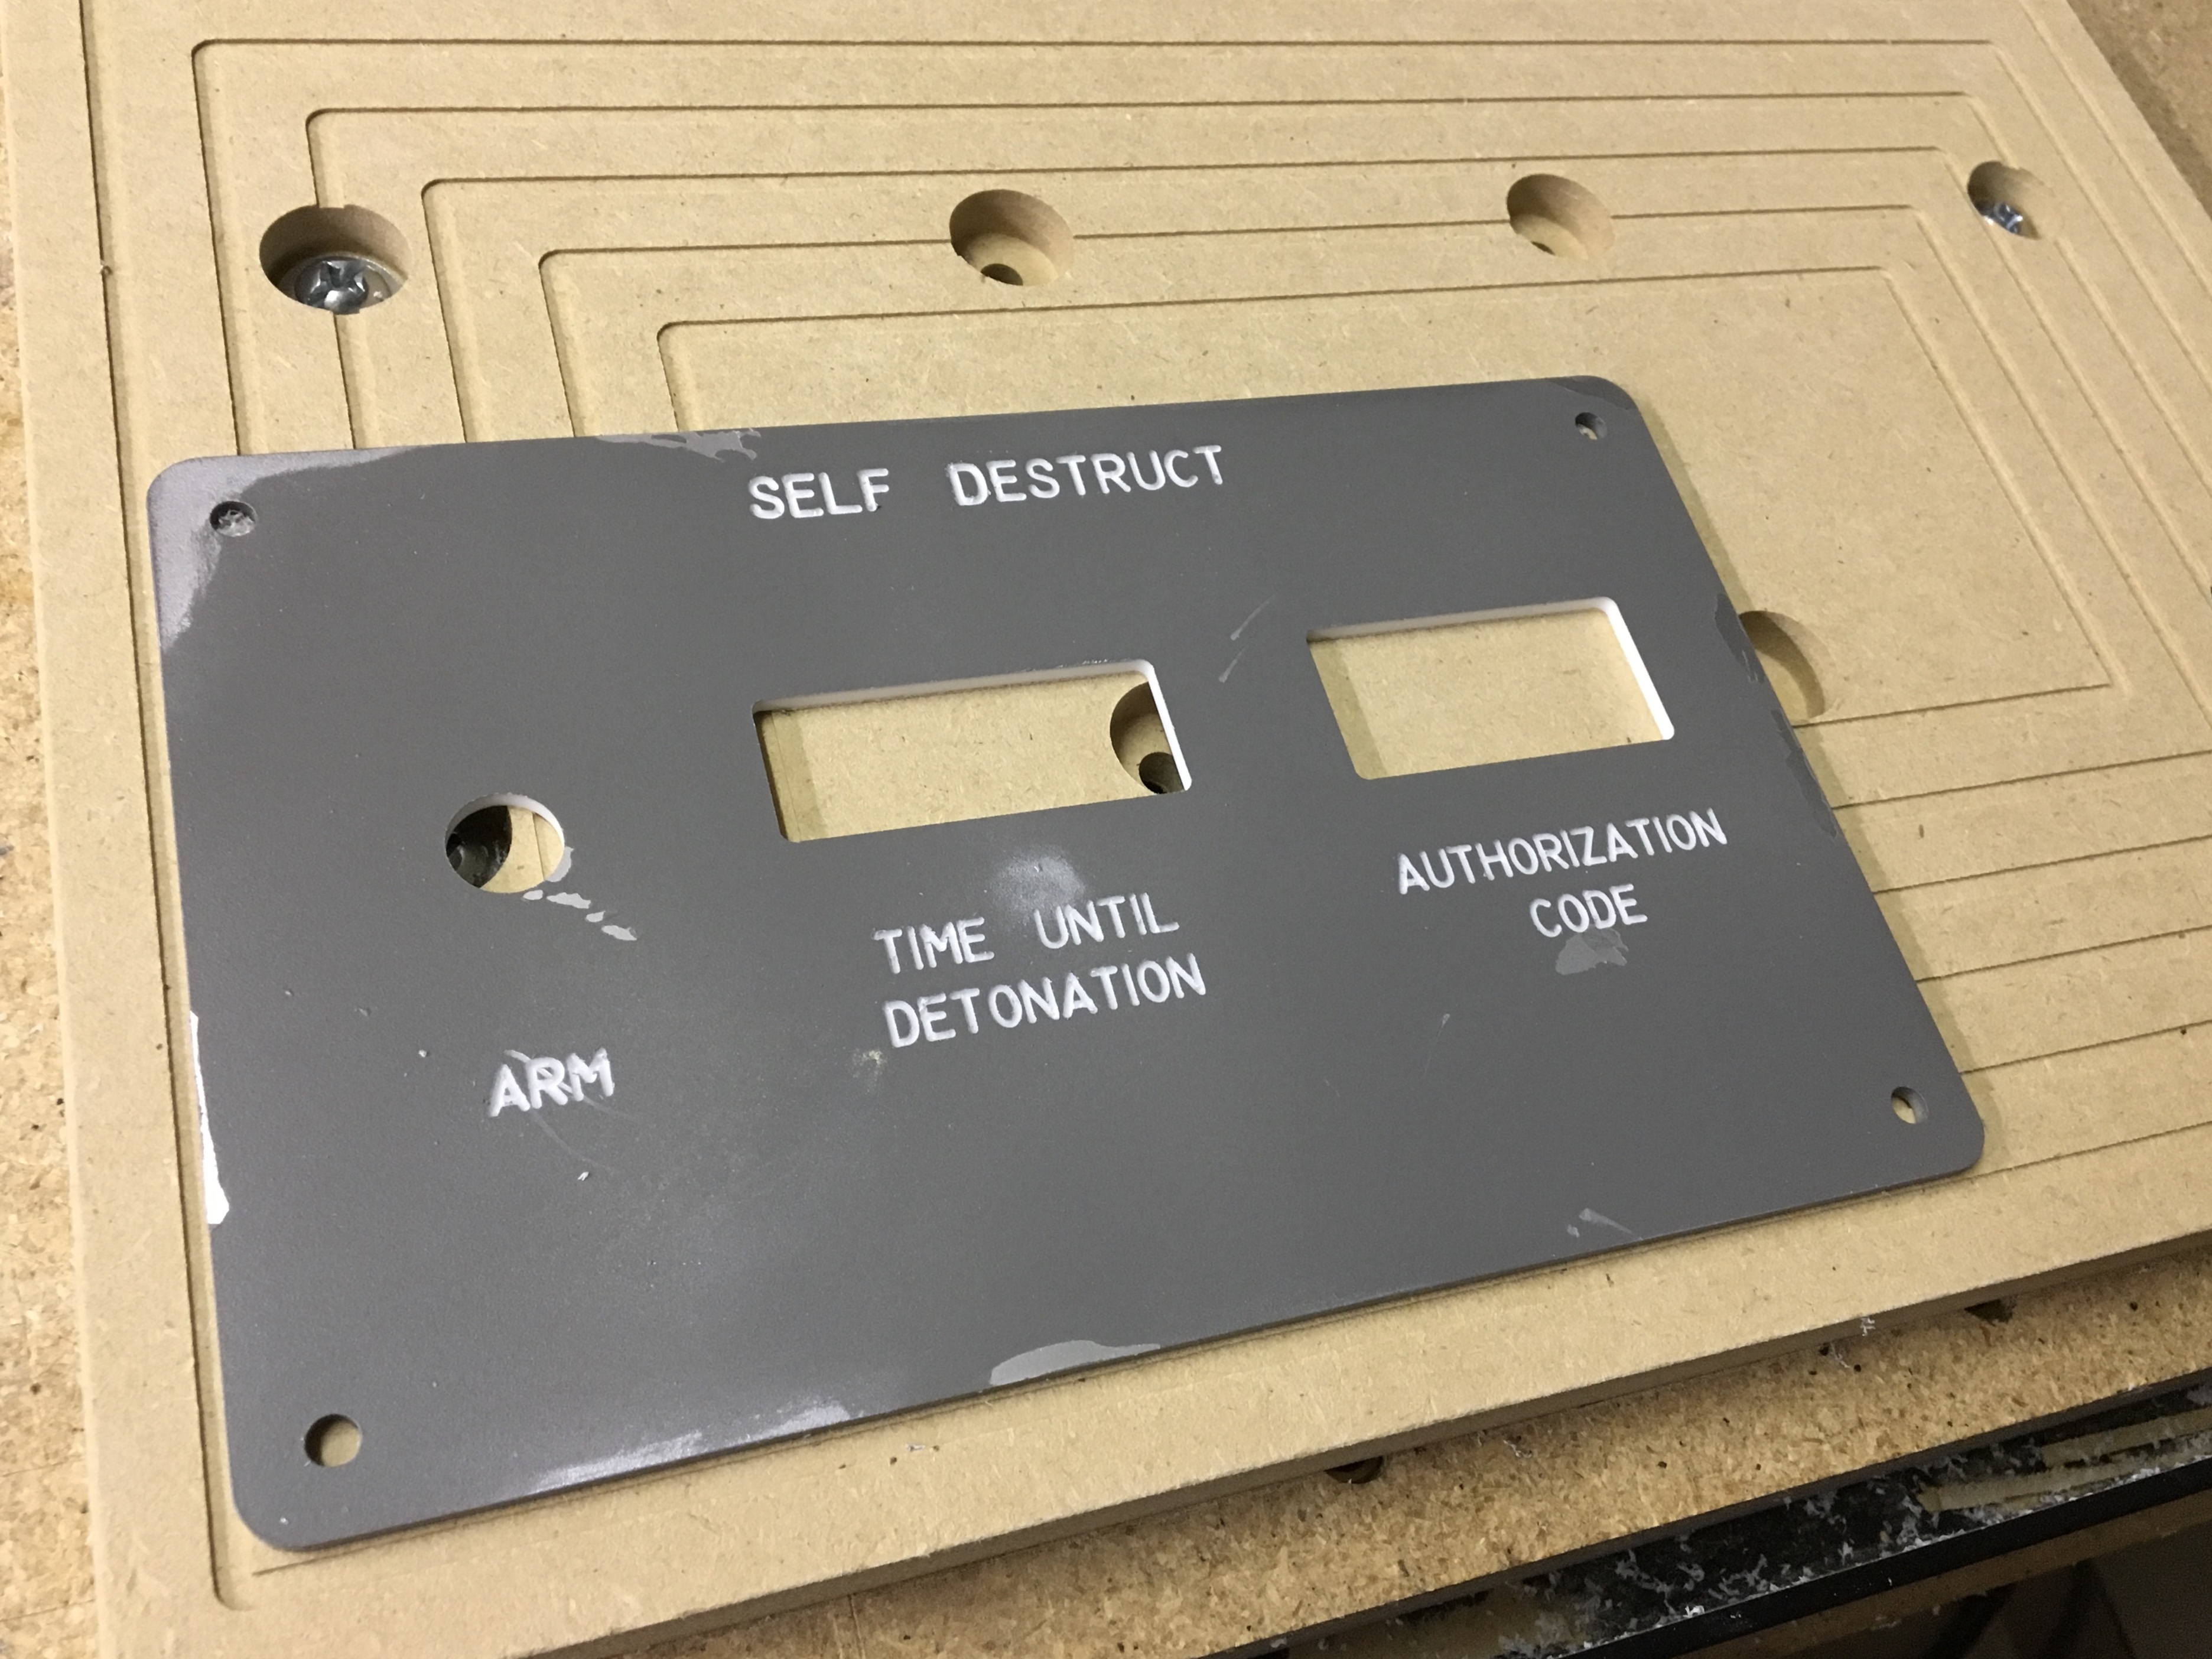
I’ve been doing a lot of cutting and engraving of acrylic for a large project I’m working on. I”m engraving text with a V bit, so it’s critical that the acrylic be completely flat. Even a tiny 0.01” difference across the surface of the workpiece can make the text noticeably different - faint on one end and bold on the other.
Today, I finally got fed up with the tedious process I used before and I decided to make a fixture to ensure a dead flat surface and also to help in making the workpiece orthogonal and to make zeroing the machine less tedious. Here is the result:
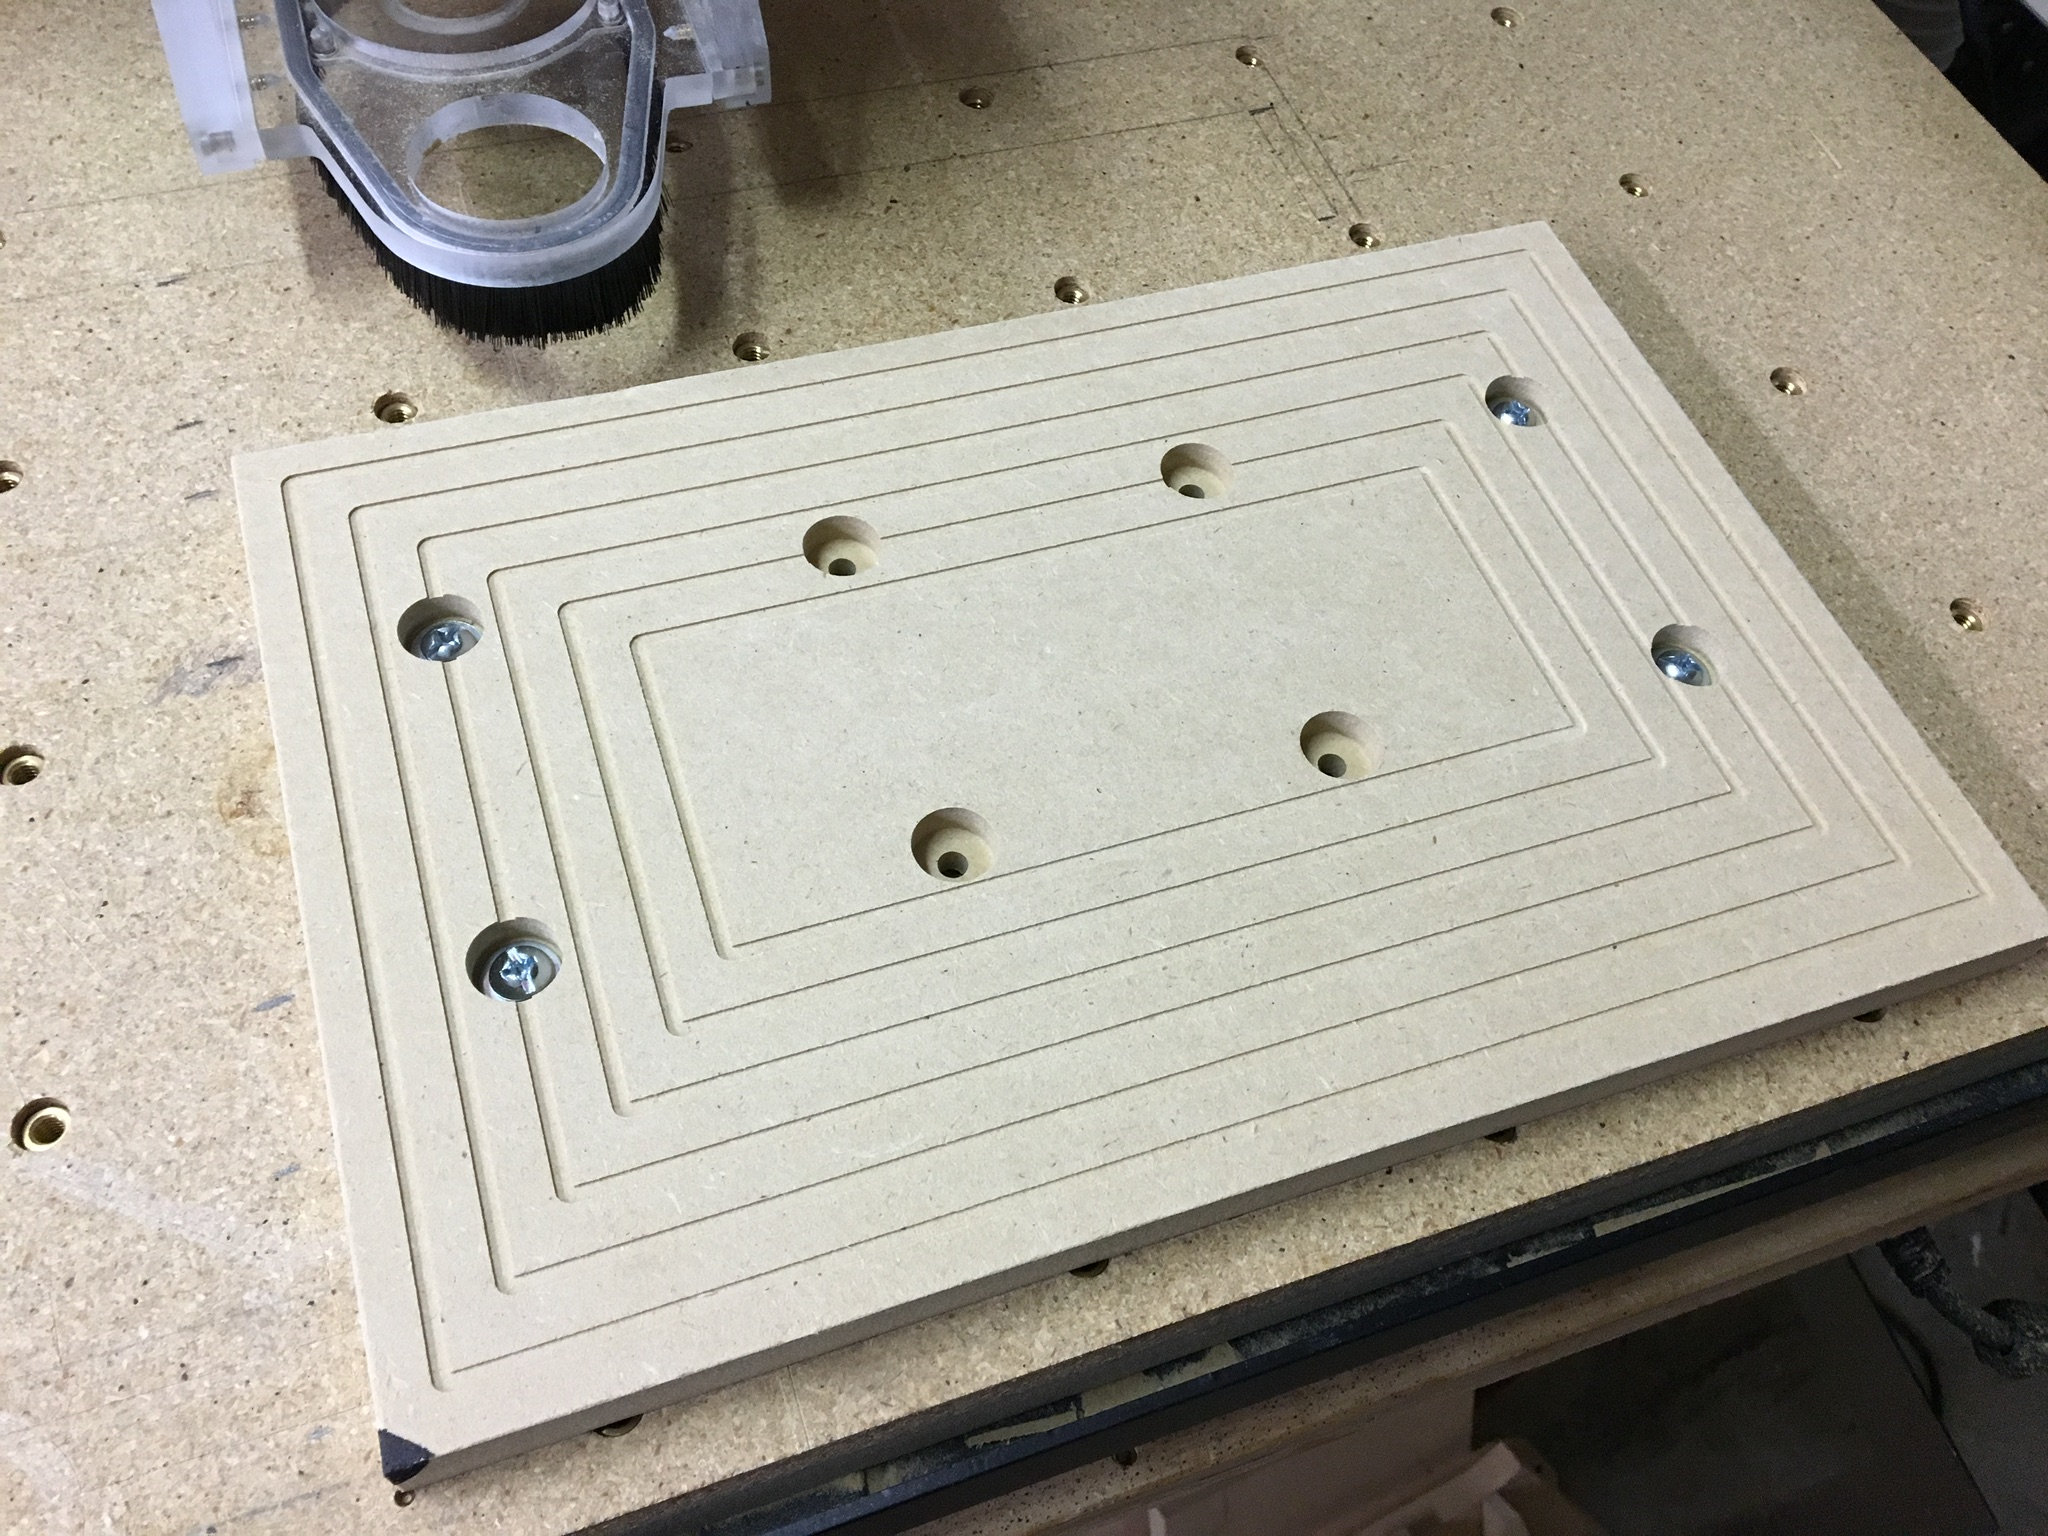
First, I cut a hole pattern to match the hole pattern of the threaded inserts in my waste board. Then I fastened it securely to the waste board leaving the bolt heads recessed well below the surface. I cut out the outline and faced off the surface to flatten the fixture with respect to the spindle. I also engraved concentric rectangles to act as guides when I fasten my workpiece. From the zero position in the lower left hand corner, the rectangles form guidelines every 1/2” both vertically and horizontally. This matches the offsets I usually use in Carbide Create, so I can eliminate measuring. Now I can just eyeball the placement of the workpiece and always get it well within the tolerances I need for this project.
I borrowed a neat trick that I remember @WillAdams mentioning a month or two ago. He said he designed all of his fixtures to use one of the default rapid position points as the X&Y zero position. I did that with this fixture, setting the zero point at the middle rapid position point closest to the operator. This really works well, essentially eliminating XY zeroing completely. This may be a common practice among the folks in this forum, but it was a revelation to me.
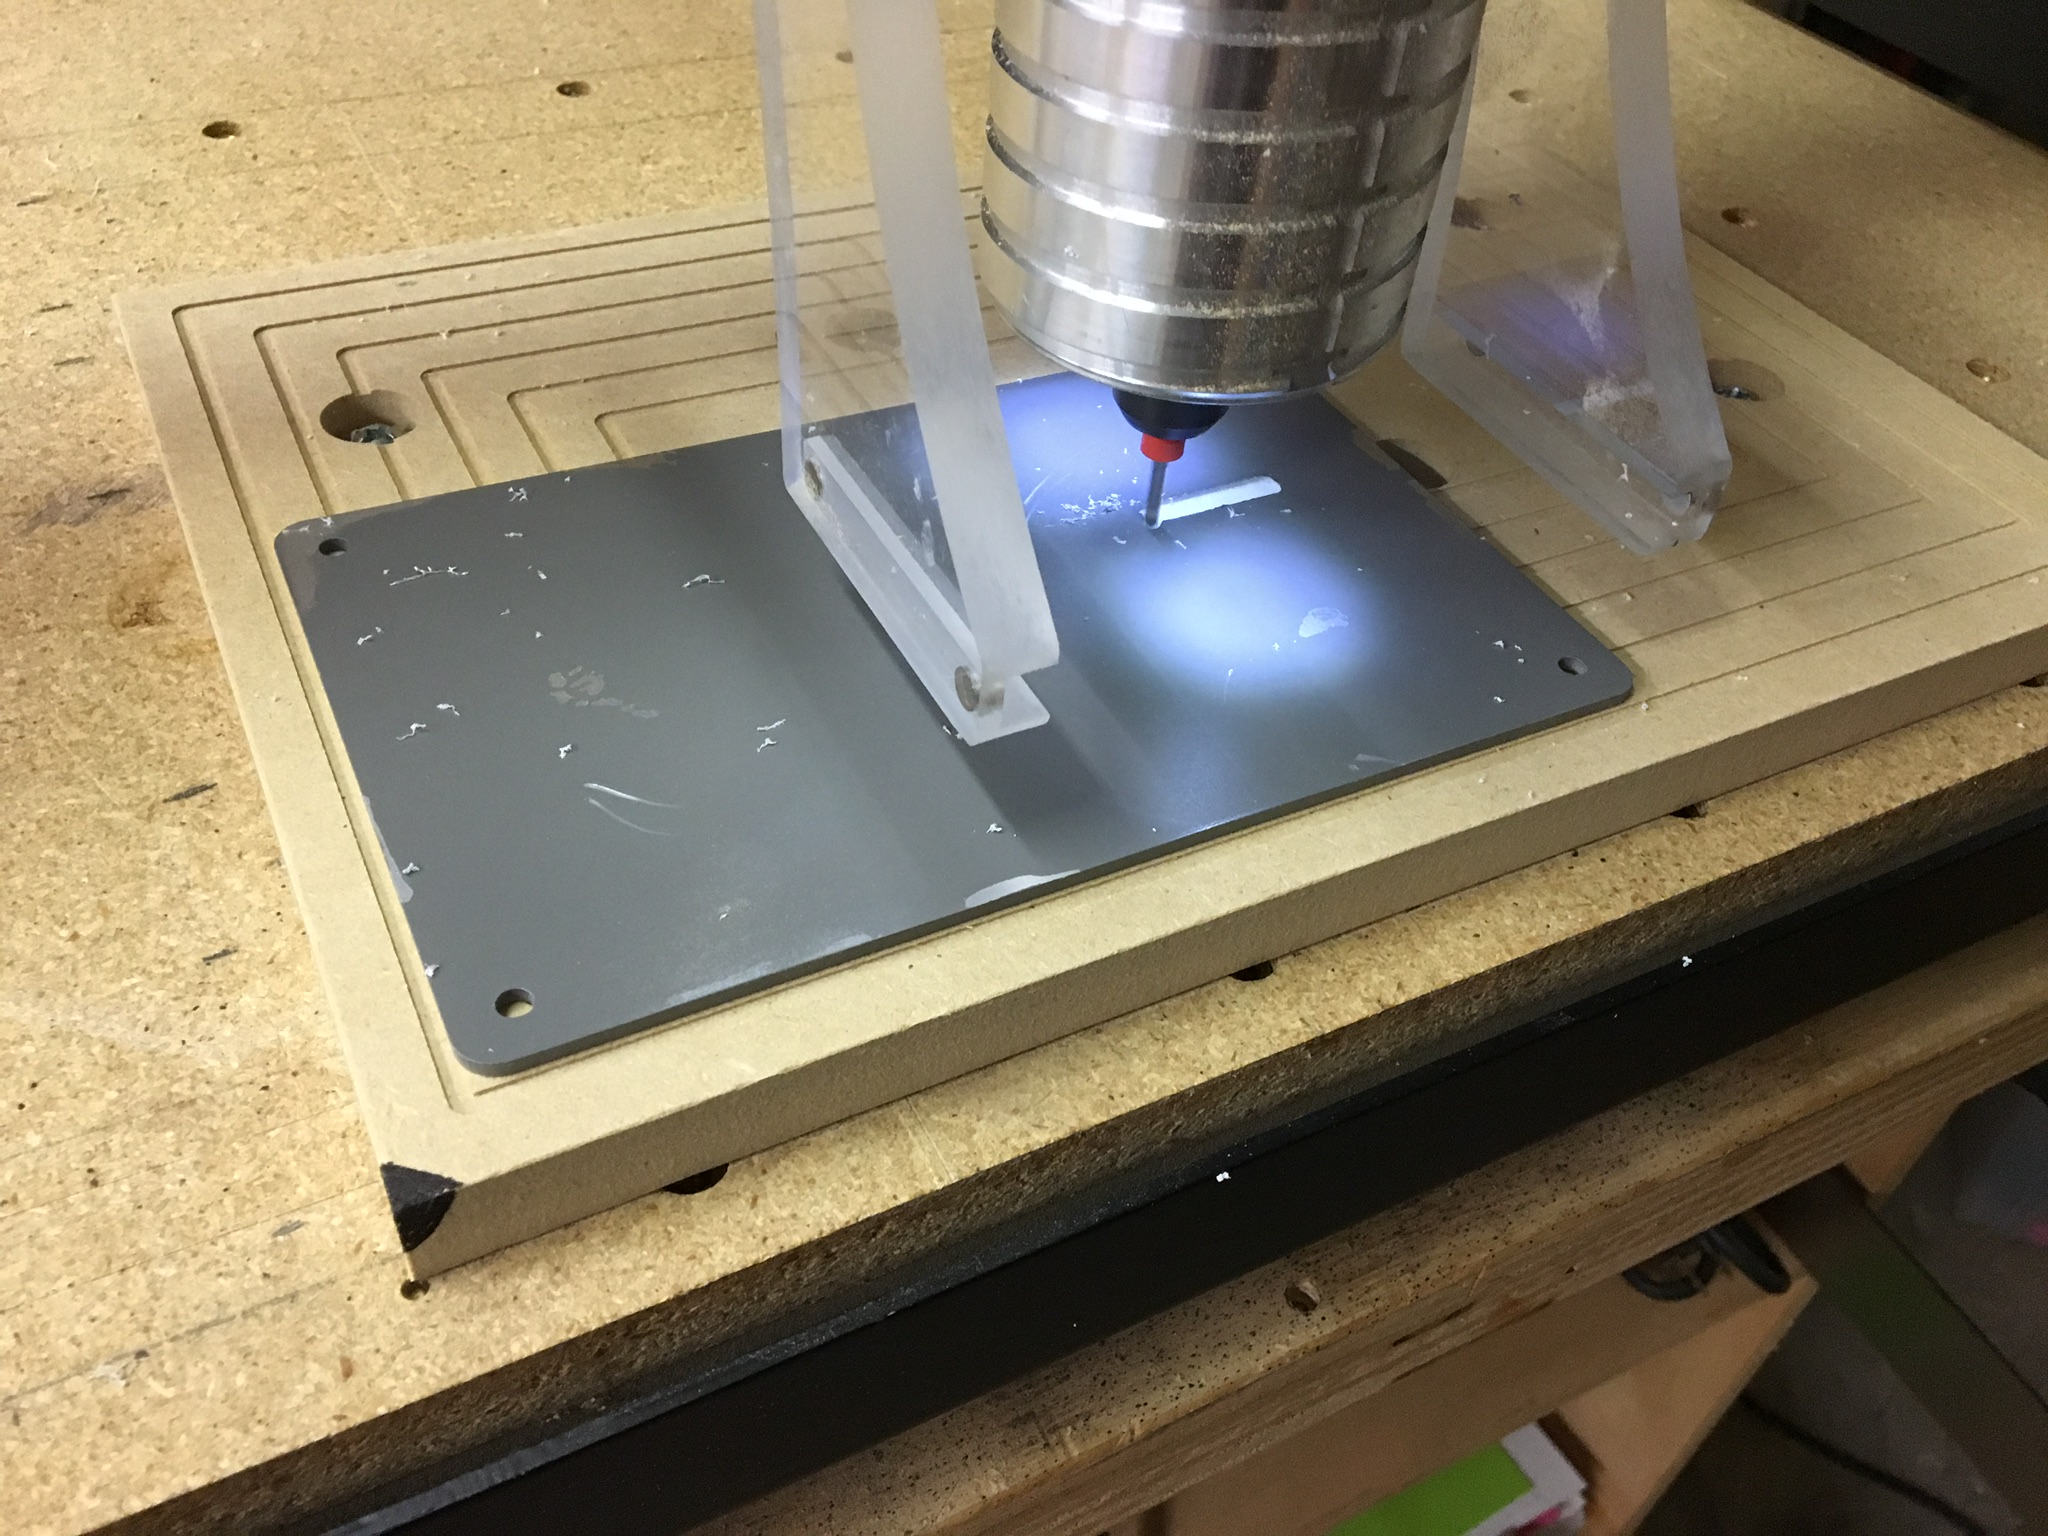
Here are a few more photos showing how I used the fixture to make a control panel for a spaceship cockpit I’m making for my kids. I use Nitto tape to secure the acrylic panel to the fixture. I have a total of 14 control panels to make for the spaceship cockpit, so I think this fixture will save me a huge amount of time and produce better results.
This is really cool!!! I love making fixtures to do repeat projects.
For engraving acrylic have you tried a spring loaded drag bit? I don’t know the scope of your project, but I bought a drag bit several months ago and I’ve been thrilled with the results. Cool thing about a spring loaded bit is your surface doesn’t have to be exactly flat, really close to flat, but the spring will soak up some minor errors in flatness, and since it’s a drag bit your spindle is off, your vacuum is off, and all you hear is the stepper motors.
Very nice work! Must go now and shower, time till detonation is near!
Thanks Dan. I’ve never used a drag bit, but the stuff I’ve seen posted in the forum makes me want to try it. I’m cutting through several layers of paint to the white acrylic beneath. The exposed white lines need to be fairly wide for the letters to be clearly legible. Could a drag bit do this? In any case, I’m kind of set on my path now, but I’d definitely like to try a drag bit on another project.
Yeap, I wasn’t suggesting changing your path now, your project looks great!!!
As far as the width of the drag bit, it’s very fine, but using the quick engrave tool paths in VCarve (you can do the same in Carbide Motion with a little trickery) it will go over the same areas and fill in the blank areas. Basically you treat it as a very fine end mill. As to how deep it will cut, I have no idea, I’ve only ran it on clear acrylic. Through multiple layers of paint it would probably cut through too, but you might have to pause the run and blow the junk off every so often.
Thanks @tito and @jimidi. I’ll try to post more progress updates here, especially if it’s related to CNC. I’ve recently started a blog, partly to document this project. It’s sawdustandsolder.net in case you want to check it out. So far, I’ve just covered the chassis construction, but I’ll be getting to the good stuff pretty soon.
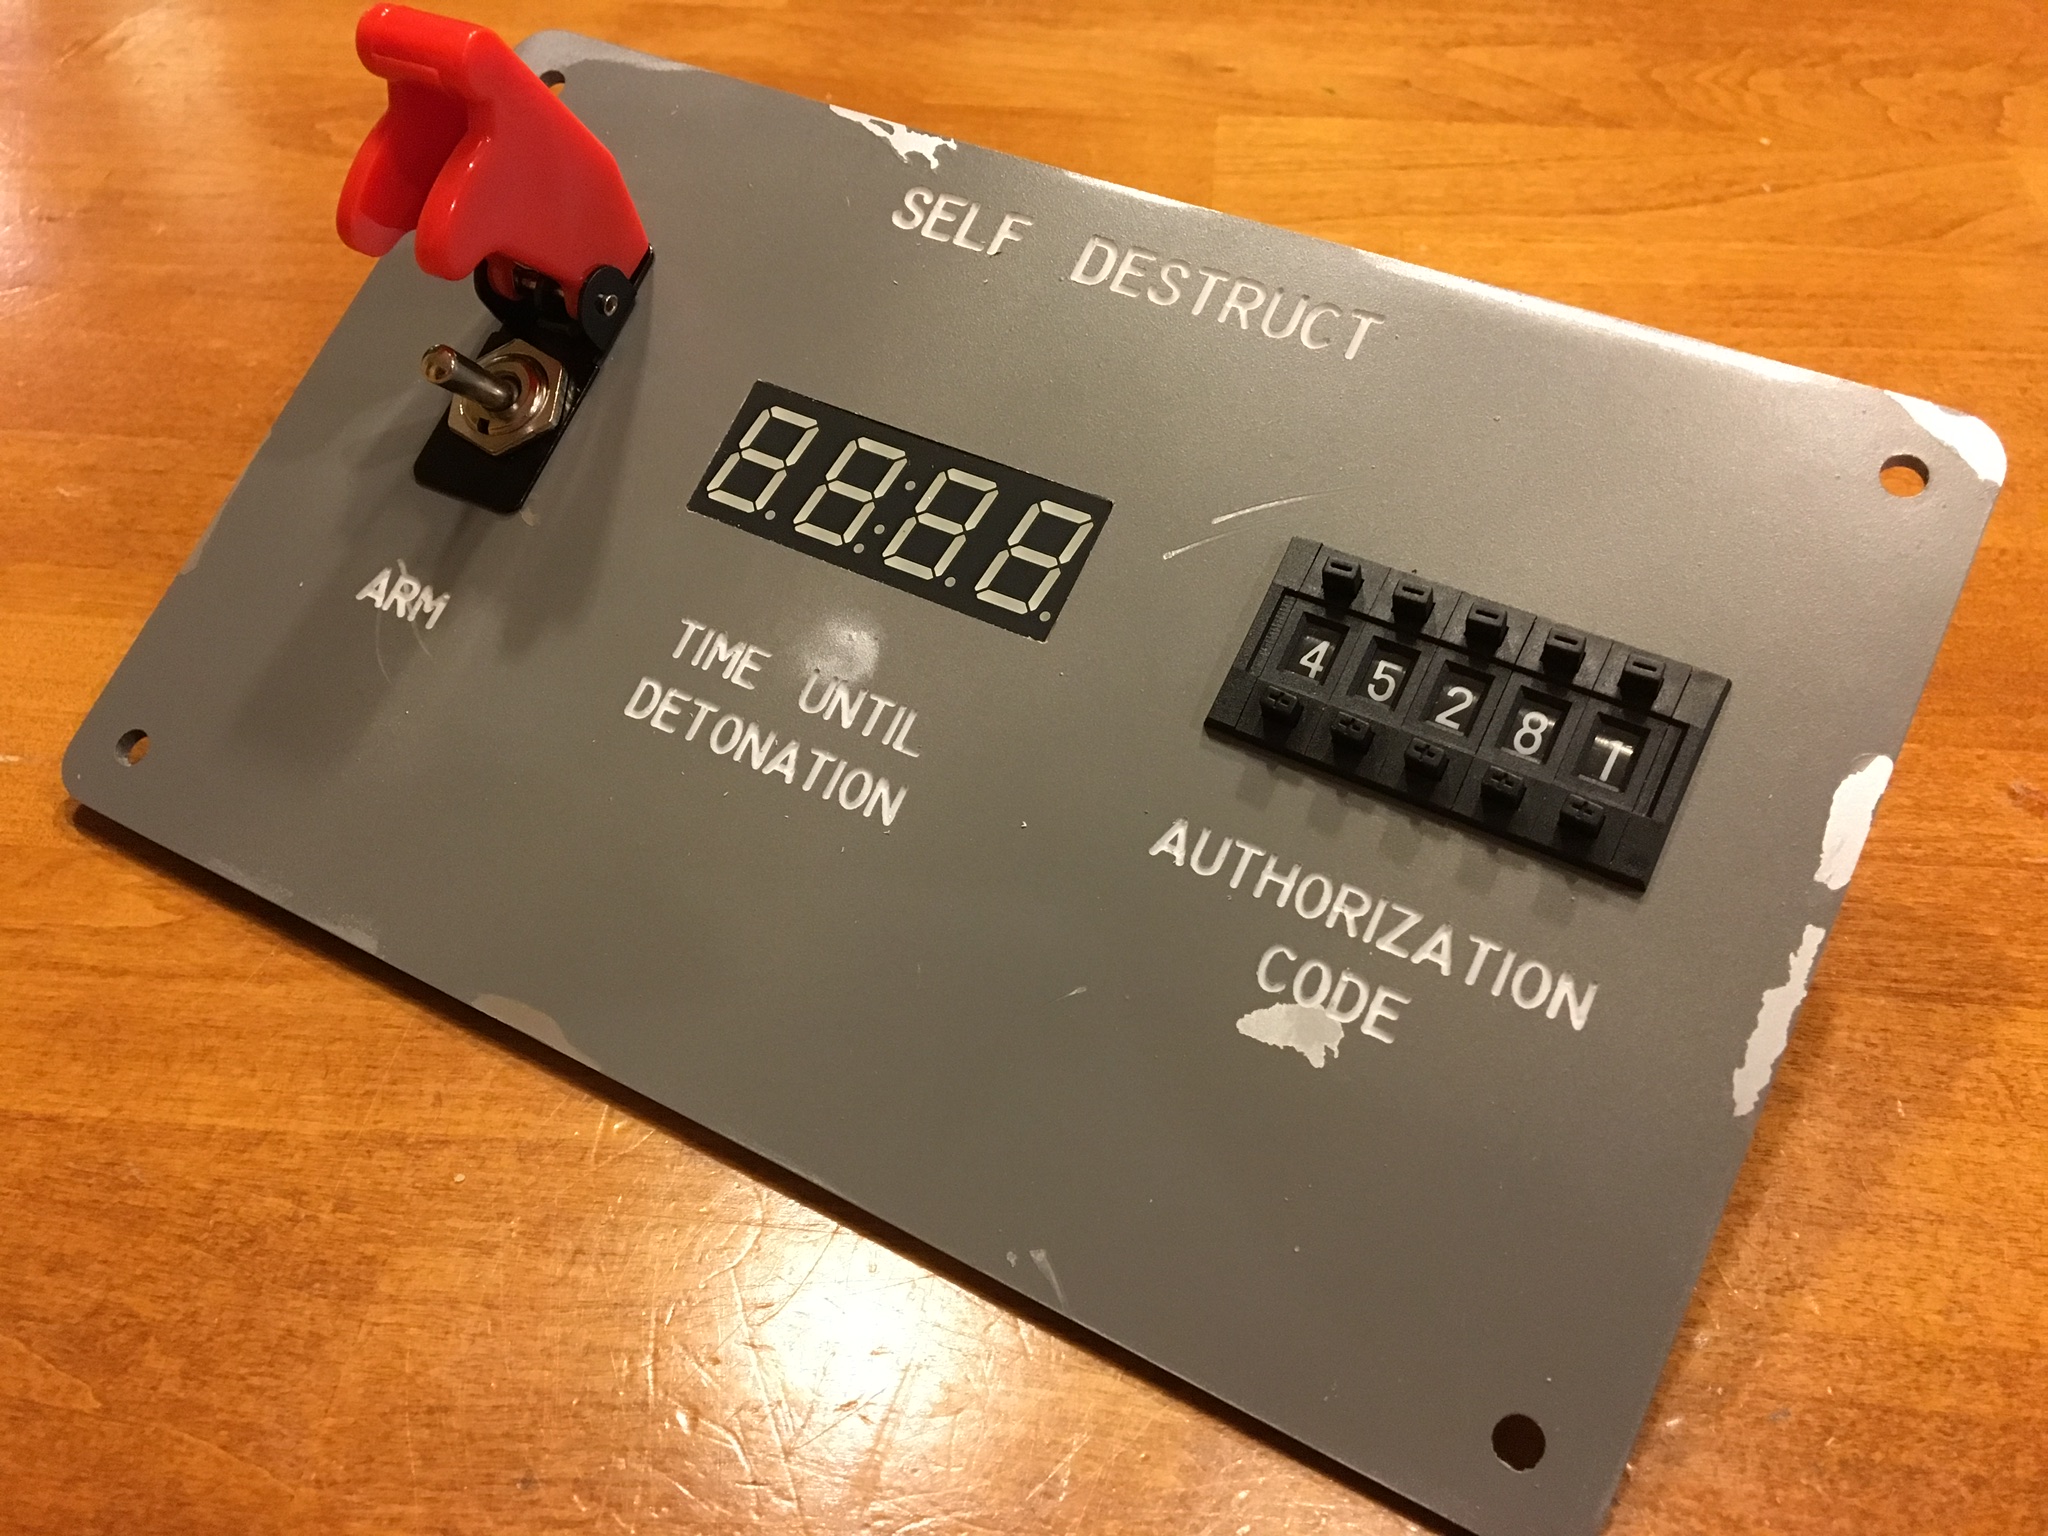
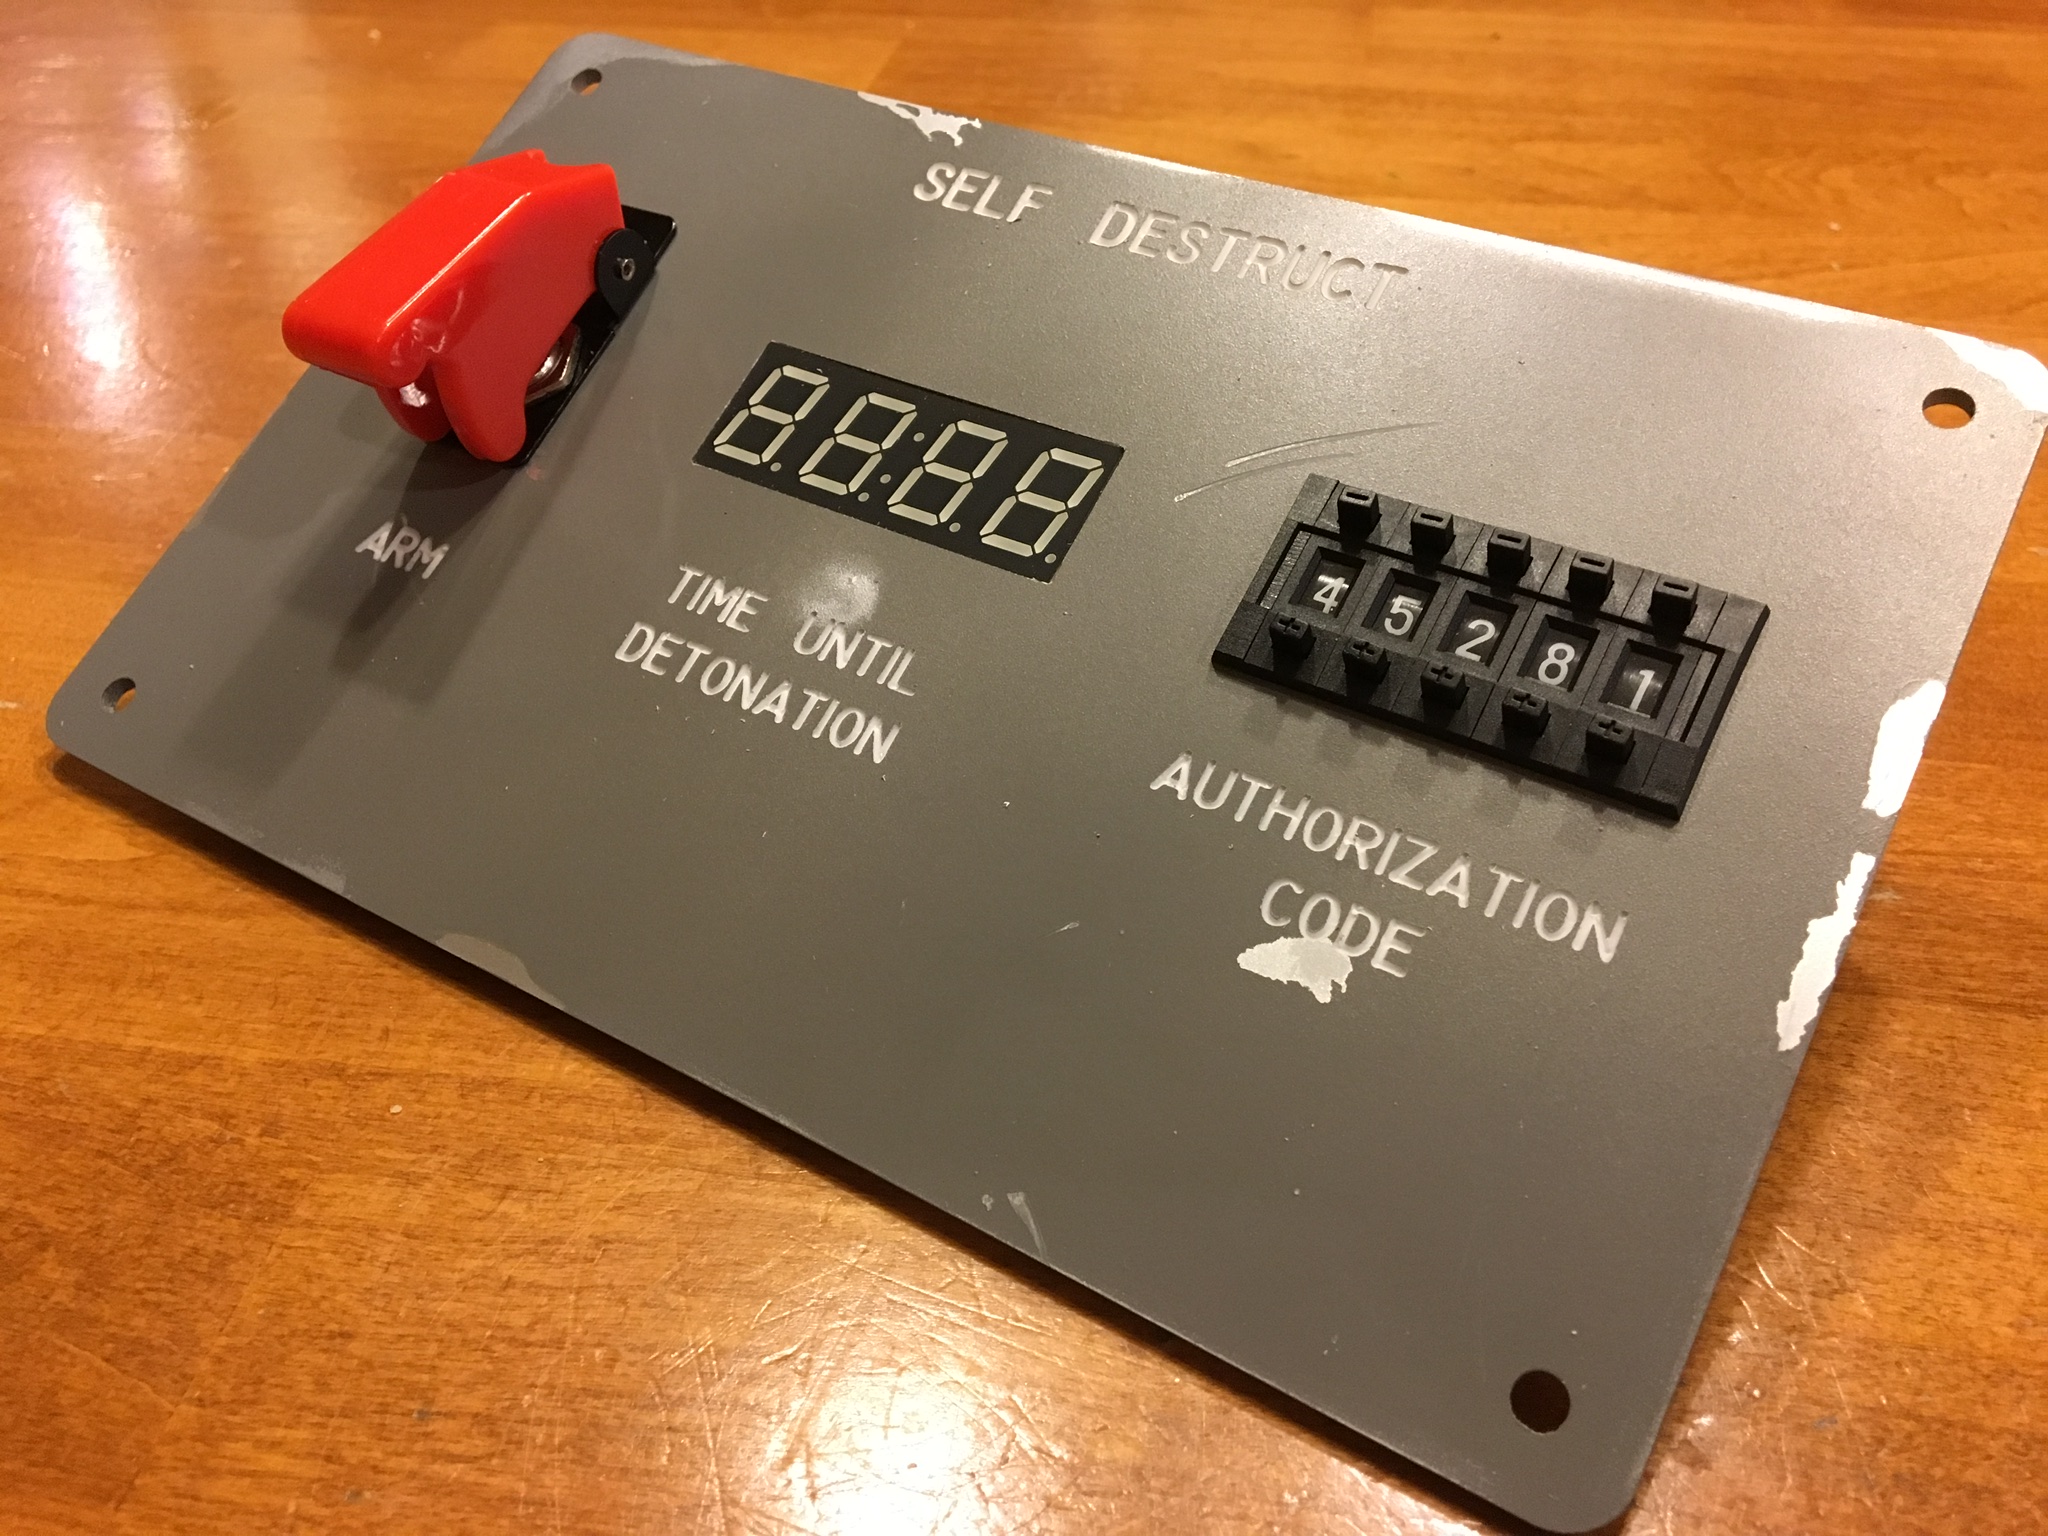
To answer your question @jimidi, yes, there are backend electronics. For example, this self destruct panel will have a microcontroller which will check for the correct authorization code when the “arm” switch is flipped. If the code is correct it will start a 10 minute countdown timer. It will also trigger an audio board to sound a klaxon and announce an evacuation. Some of the other panels are more sophisticated while some of them are really simple - just LEDs responding to a switch.
Just checked your blog–very nice! What an extremely cool project–so different from anything else I’ve seen. I was always trying to make something like this for myself when I was a kid, but never had the tools or knowhow. But cardboard boxes with grey spraypaint, and wax paper over cut openings above twinkling Christmas lights (and a few light switches as well) were fun enough. Oh, and the electrically ignited smoke bomb in the panel–that was cool too (had my parents known…). Your kids are super lucky, though they may be used to awesomness coming out of your shop.
Wanted to be the first poster to your blog but couldn’t figure out an anonymous login, but I think you’re onto something here. (Maybe it also helps that I’m reading a book about Elon Musk now–unless he dies prematurely, I’m pretty convinced we’ll be getting to Mars soonish.)