Thank you so much for your help, I really appreciate
it. I am going through all the links you provided, and will then do some more experiments based on your recommendations. There is a lot of interesting stuff to learn, and that is part of the fun. I will let you know when I have made some more progress.
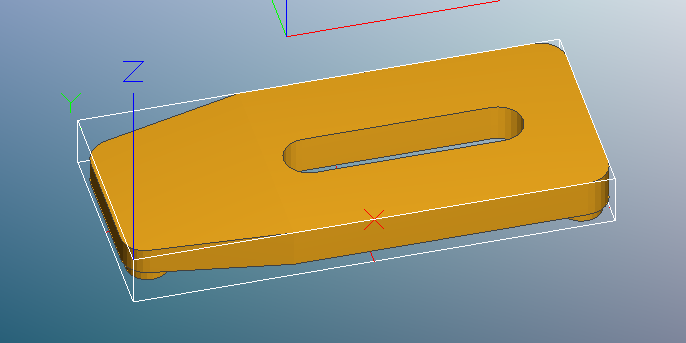
I changed the feeds and speeds for pine based on your suggestions, and the information I read in the links
you provided. The values used are shown in the attached screen shot.
When I used roughing, the cuts came out as expected. When I tried a cut without roughing, the cutter left
the expected path about half way through the process and went right through the design where it was not supposed to cut. The design is a 2.5D rectangle with a pocket cut in the middle. I thought I should be able to do this without roughing, but it caused the cutter to jump off the path. Why would this happen?
In the finishing section should I use the same value for ‘step Down’ in the Waterline function that I use for ‘step over’ in the first ‘cut along X’ finish pass?
I found some carpet tape at home depot called, ‘Roberts Double-sided carpet seam tape’ and it seems to work much better than the tape included with the Nomad. It seems to work about as well at the hot melt glue, but is easier to clean up and remove.
I am now experimenting with cutting some Acrylic. If that works you may here cheering coming from the northwest
Roughing is very important—it’s probably better explained as “bulk material removal” because that’s the process by which you’re going to get rid of 95% of what you want to cut. If you don’t have those passes clearing the way, then you’re engaging the cutter a LOT more when you go to do the finish pass, likely more than the .5x to 1x diameter-to-depth ratio I mentioned. The point of the finish pass is to remove just the last few bits remaining with minimal forces on the tool and work-piece so neither deflect under loading.
If you’re trying to just cut out a profile, then you will want to use “Waterline” finishing but with an appropriate step-down and feed-rate (it uses the same value from the parallel pass section of finishing options) so that you’re not biting off more than the machine can chew. You’re definitely not being aggressive with the 0.428mm step-down, so I’m not sure without seeing the tool paths what it was trying to do, but it may be because of your angle limits or something that it went straight for a pencil clean-up and dove right in…
Glad to hear the double-sided tape is working better, I"ll have to see if I can’t track some of that down here where I live
After reading about feed speed based on the info from @UnionNine, I reduced the feed rate to 35in, and set the stopover and depth per pass to half the cutter diameter. This yielded better results and allowed me to complete the lighted sign project I had been waiting to do since ordering the Nomad. The photos below show the sign both on and off. The name is cut to a depth of 3mm in 6mm thick plexiglass. The base is pine, and of course needs some stain.
I initially used the speeds recommended by the ‘Carbide Auto Toolpath’ in the tools dropdown menu. That caused problems, and after significantly reducing the speeds things started working better. I wonder if the AutoToolpath Wizzard needs to be revisited with different numbers. It seems like new guys would try that first so they should have know good parameters…
I still see problems with the the parallel finish pass. What I am seeing is that in some parts the roughing and waterline do not cut in a particular area, so when the parallel path starts it is taking a bite which is the full thickness of the wood and that is too much for the Nomad so it stalls then takes off in the wrong direction. If I do not do the parallel cut things work, but I am left with material I wanted removed. Anyone see this sort of issue or have ideas on what to check?
It seems like roughing and waterline should take away material so the parallel finish is just removing a small amount. For some reason this is not happening with some parts and the parallel cut tries to remove way too much material at once.
The sign in the photos below was the practice piece, now I can try something more interesting. The light comes from LEDs in the base that shine up through the acrylic.
Hi Steve, it’s hard to say why it’s leaving material behind without seeing the settings and the toolpaths. Can you post those for us to scrutinize? Also, did you import an STL or generate one from a 2D file?
After watching the machine cut, and looking closely at the simulations in Meshcam Pro, I found that the problem was that the part had an angled surface sloping downward in the z-axis and the roughing pass was not using ‘3D roughing’. The surface angling down into the z-azis was not roughed, and when it was time for the parallel path it tried to take the entire depth of the angle in one bite, which was too much and caused the machine to stall and jump. Now it seems obvious why it is called 3D roughing. I finished the design of a knife and it is being cut now. I will post the results in another thread. Lots to learn…
The formulas don’t take into consideration the spindle power and the machine stiffness and axis-motor power available, so hypothetically, yes those calculations might work out for optimal cut characteristics… but aren’t what this machine can do.
The nice thing about CNC Cookbook’s feeds & speeds calculator is that you can include the spindle power (wattage), and you can ‘de-rate’ the values to reflect what the machine can do.
For longevity of the useful life of your tooling, you’ll want to try to keep to the optimal chip load for the cutter and material combination in as deep of a cut as the machine can push, because you want to minimize tool burnishing (rubbing) against the material, in particular because the heat from rubbing is the number one enemy for the tooling.
@davidgjohnson I have been meaning to get to some aluminum projects soon (making a set of church keys with the company logo on them) so when I do dial in my feeds & speeds in aluminum I’ll post them for you here
@davidgjohnson@UnionNine Mark has given me these numbers for Aluminum with a 1/8’’ 2 flute endmill:
10K RPM, 15-20 IPM, 0.02-0.03 DOC. Plunge at 6 IPM.
This is roughing speed. Finish is much slows for a fine finish - 6 IPM, 0.01 DOC.
I have tried 10K, 16IPM, 0.02 DOC for contouring on 6061. It works fine for me. Finishing wasn’t great, I didn’t add a finishing operation and also maybe because I didn’t clear out the swarf well - going to try the air nozzle solution from the other post. Mark also suggested a DOC of 0.03.
I stalled the spindle trying to cut a hole of about 0.150, didn’t have enough space for chip remove I guess. I switched back to my old feedrate of 8K, 12IPM and 0.01 DOC which worked fine for the tight space.
I have the Lakeshore Carbide 2 flutes ZrN coated corner radius endmill. I forgot what flute angle it was, but I think our cutters are similar and it shouldn’t be the problem. I have been using WD-40 for lubricant, and your cutting fluid should work better. If there isn’t anything special about the programs you are running (I do a lot of slotting, which is pretty demanding), I don’t see much difference between our setups.
Mine is a Pro, but in the end it shouldn’t make that much difference. Any chance it’s a problem with your machine?
yep mine is a pro as well.
I got in contact with support and we are going to try a new driver board and possibly motor is out of spec.
do you have an aluminum or brass pulley?
I’ve had a lot more success plunging with a ballnose cutter than a flat endmill. Maybe it’s because the surface contact area is applied more gradually? The flat cutter works well if you can perform your z-axis moves off of the work piece and come in from the side. Aluminum 3D Contouring
I am not sure and I am unable to check, but I think mine is aluminum. I have never seen any brass parts on mine. The plunge rate seems really slow. I plunge at 5-6 ipm. Probably contacting Carbide3D is the best to do.
@Remmy I’ve read that it’s always good to gradually start the cut, so it would make sense ballnose cutters do better while plunging. Thanks for letting us know!
@Remmy that makes sense, looking at your tps from the other thread, id say you are pretty close to what I was trying, the main difference was im using a flat endmill for roughing and often on the plunge the spindle stalls… probably due to 100% tool engagement. only way I found to keep it spinning is by using a painfully slow plunge like .5 ipm even then sometimes it can catch when clearing a corner.


 I finished the design of a knife and it is being cut now. I will post the results in another thread. Lots to learn…