I’m using a shapeoko 3, I currently use duct tape haha, looking for something more secure, I’ve seen people using clamps but don’t see anywhere to clamp to on the stock shapeoko 3. Any interesting methods out there? any you guys think are the best?
I use a combination of different style clamps if I can clamp to the edge of the material. If that is not possible, I use blue painters tape on the spoil board and on the part. I then put super glue on one of the pieces of duct tape and glue the two pieces together. You can easily separate the tape off the part or spoil board and throw the two glued pieces away.
1 Like
@spasmfingers
Creating your own threaded grid with inserts is probably the easiest solution as shown in @WillAdams link:
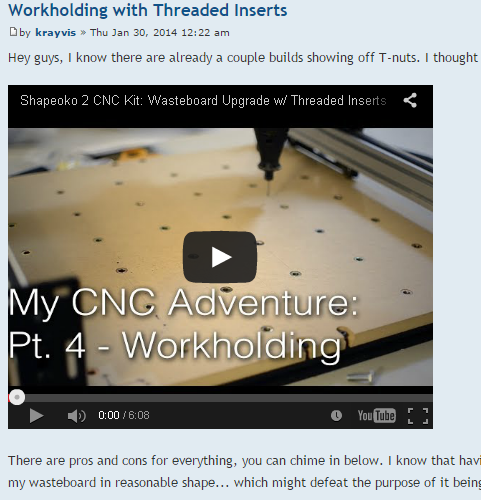
The easiest solution is the threaded table we make:
MDF Wasteboards will swell with temperature change, So I use a HDPE bed saver ontop of the S3 threaded table.
5 Likes
So far I’ve only been working with larger (12in X 24in) flat non-porous sheets of composites and plastics. I use 3M outdoor double sided tape and have yet to have an issue. I found it in the paint department of your favorite home improvement store. It also has the advantage of holding the material a few thousands up off the spoilboard which helps keep you from cutting into it. Just be sure to be a little careful where you put the tape, If you cut into it, it will gum up your cutter.
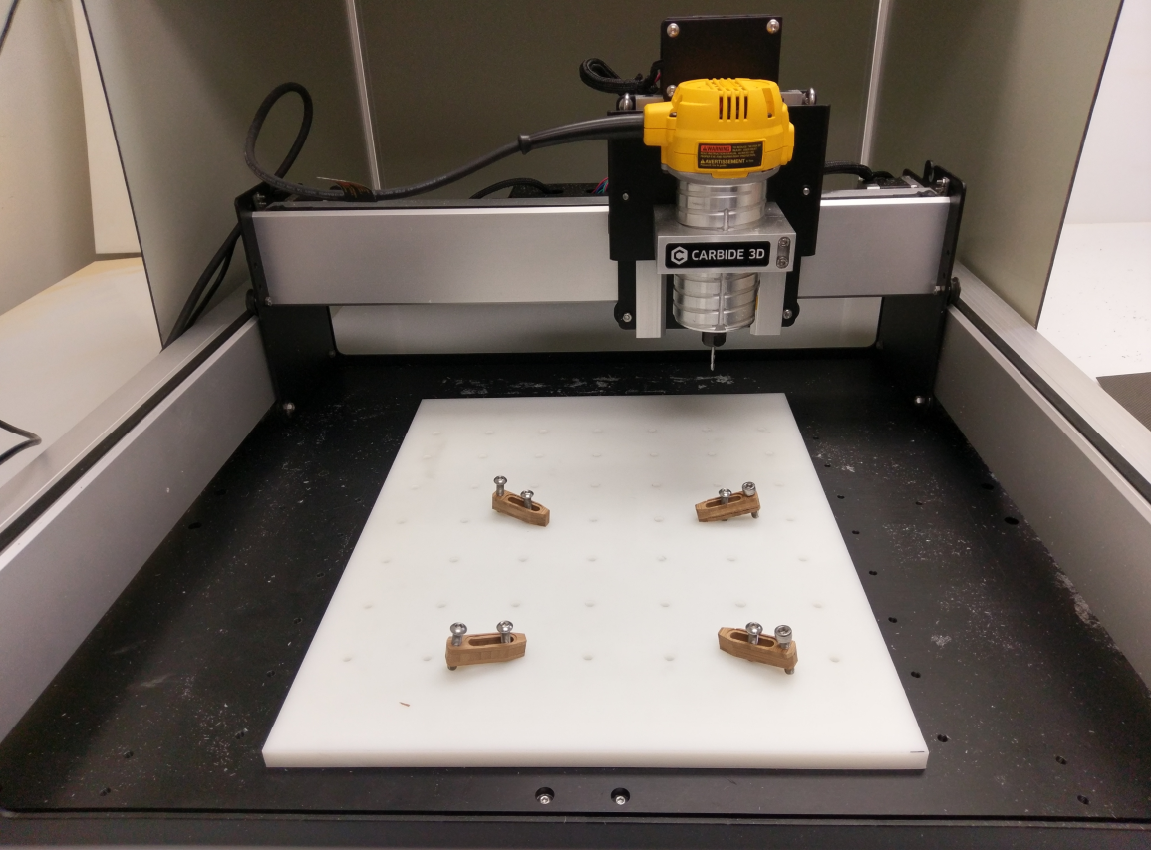
Why don’t I see more folks using aluminum T-Track in the MDF spoilboard? I have noticed several that create elaborate boards with holes and threaded inserts, seems like T-Track would be so much simpler. In some cases I can see this being more flexible too since you just slide the clamp or bolt along the track and don’t have to rely on a particular hole spacing. Of course, you’d have to noodle on this a while to figure out a good T-Track arrangement to use for your given situation. Perhaps I am not seeing the whole picture yet.
1 Like
I have both in mine. I find I use the threaded inserts more, as the t-track clamps I have stick up farther and I have to worry about hitting them. With the threaded inserts I use a bolt and a large washer, so the clamping is not sticking up as far. Since I have limited Z height I have found the threaded inserts work better for me, but I still do use the t-tracks on occasion. I probably just need to find some lower profile clamps.
2 Likes
I would love HDPE for my XXL…
Currently I use threaded inserts on a single sheet of MDF instead of the two piece is came with.
1 Like
On my SO3, I replaced my entire base board with a single 3/4" HDPE sheet, and then installed t-nuts into it.
1 Like
I’ve found that on my Nomad I most often use the vice, so I am working on a cam clamp / t-track setup for my XXL, a kind of put-it-anywhere any size vice. I found these cam clamps that are quite low profile (unlike typical clamps for t-track) on Amazon, and have used them a little on my current custom wasteboard (MDF with t-tracks routed right into the MDF).
Shop Fox D3347 Cam Clamp https://www.amazon.com/dp/B00012XE0A/ref=cm_sw_r_cp_api_HevMxbSPGZXCV
Next rev will be aluminum tracks in the MDF. I’ve got the aluminum track already but there is still life in the current setup for a bit, even though my “MDF tracks” are not as sturdy and consistent as I’d like.
I’ve been doing a lot of 2D parts on my Nomad. After having more than a few parts that were secured with tape get yanked off the table, I now typically put a screw in each of the corners that pass through the matching holes on the waste board and screw it right to the table.
I then often split my job into two parts. First I cut all the inner features, then I do the outline for the part in a second job. As long as you don’t cycle the power between jobs, then you don’t have to reset your zeros and you can just run the second job right after the first.
Under the parts that I cut out, I do still use the double sided tape, but it’s still hit or miss. If the part comes free prematurely, then the edge can still get a bit scuffed up. Does anyone have any suggestions that minimize the inner part getting pulled loose?
I’ve found the best things to do are:
- make a fixture and include holes for holding interior parts down (use screws (nylon/aluminum) which can be cut away)
- get Z-axis dialed in and leave a paper thin layer of material — usually it will catch some places and vanish, while others will remain and hold things in place, easily removed w/ a knife.
I did both of these w/ my locking register caliper project: http://www.shapeoko.com/projects/project.php?id=154
To leave a thin layer of material, do you zero relative to your table or the top of your material?
I zero off the bottom of the fixture using a slip of paper — the assumption is the zero will be at the top of the paper which will (more-or-less) leave a paper thin thickness of material.