How can I define a roundover bit for edge finishing in Carbide Create

I don’t have create installed, I use v carve but generally these programs are looking for a right side profile of your bit.
If I understand what you’re describing correctly, I believe that is described in:
Or see:
Do not use endmills w/ bearings.
That’s what routers and router tables are for.
Yes, but with the bearings removed, Is this possible?
Don
With the bearing removed you’d need to work up an appropriate offset toolpath and feeds and speeds, prob. through testing — way easier to make and use a router table.
1 Like
OK… I have 50 2.5" x 10" name panels to make.
I was trying to figure a way around using the table router but you’re right, it would likely take longer by the time I messed with all the settings and tool changes.
Thanks as always for the good advice!
Do
I’ve been struggling with this same topic (bringing back an old discussion). The following is me attempting to explain my two ideas, curious to know how others have tackled this problem.
I see two potential ways to define a roundover bit in Carbide Create. Neither is perfect, but it seems either would work. Maybe even use both methods depending on your needs.
For this (long) example I am going to be working with three roundover bits.
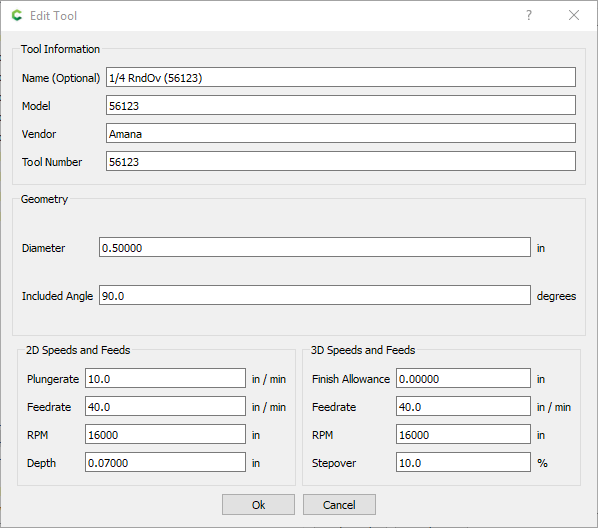
(a) 56144 1/2 inch roundover
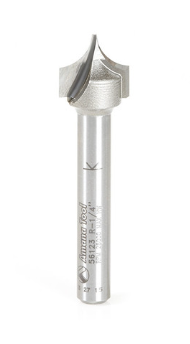
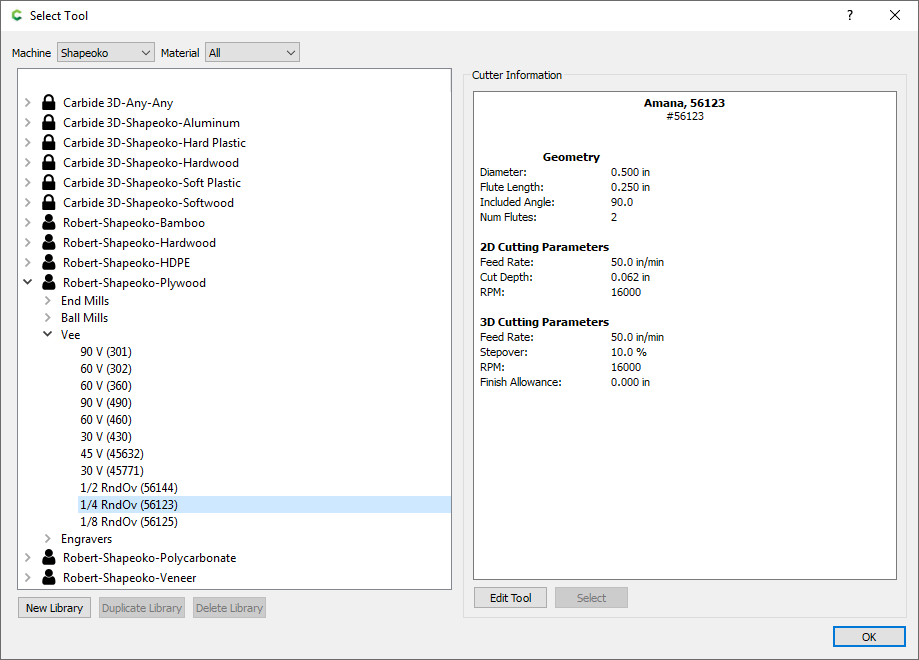
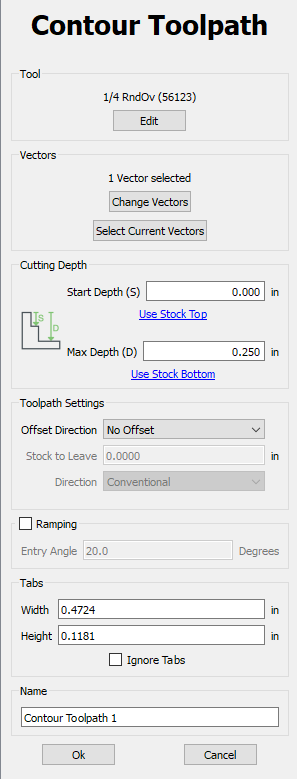
(b) 56123 1/4 inch roundover
(c) 56125 1/8 inch roundover
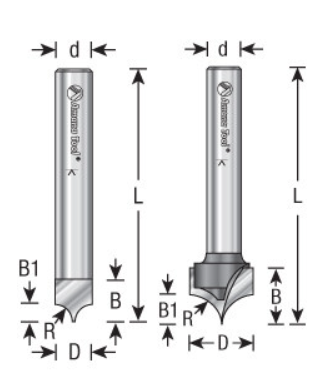
The shaft diameter “d” is the same for all three, 1/4 inch
The length “L” is the same for all three, 2 inches
The radius “R” matches the tool description (1/2, 1/4, 1/8)
The cutting height “B1” matches the tool description (1/2, 1/4, 1/8)
The cutting diameter “D” is double the tool description (1.0, 1/2, 1/4)
METHOD 1
Define these roundover bits as V-bits in Carbide Create. If you looked at a 1/4 inch round over next to a 90 degree V bit you’ll understand this first method.
The have nearly the same profile, the obvious difference being the round vs straight edge.
So if you used this V bit method, your round over bit would look like this in Carbide Create.
And you would actually get to visually see “something” in the Carbide Create simulation.
I created a single circle, and used that same circle for a pocket toolpath, then a no offset contour toolpath with the roundover (impersonating a vbit).
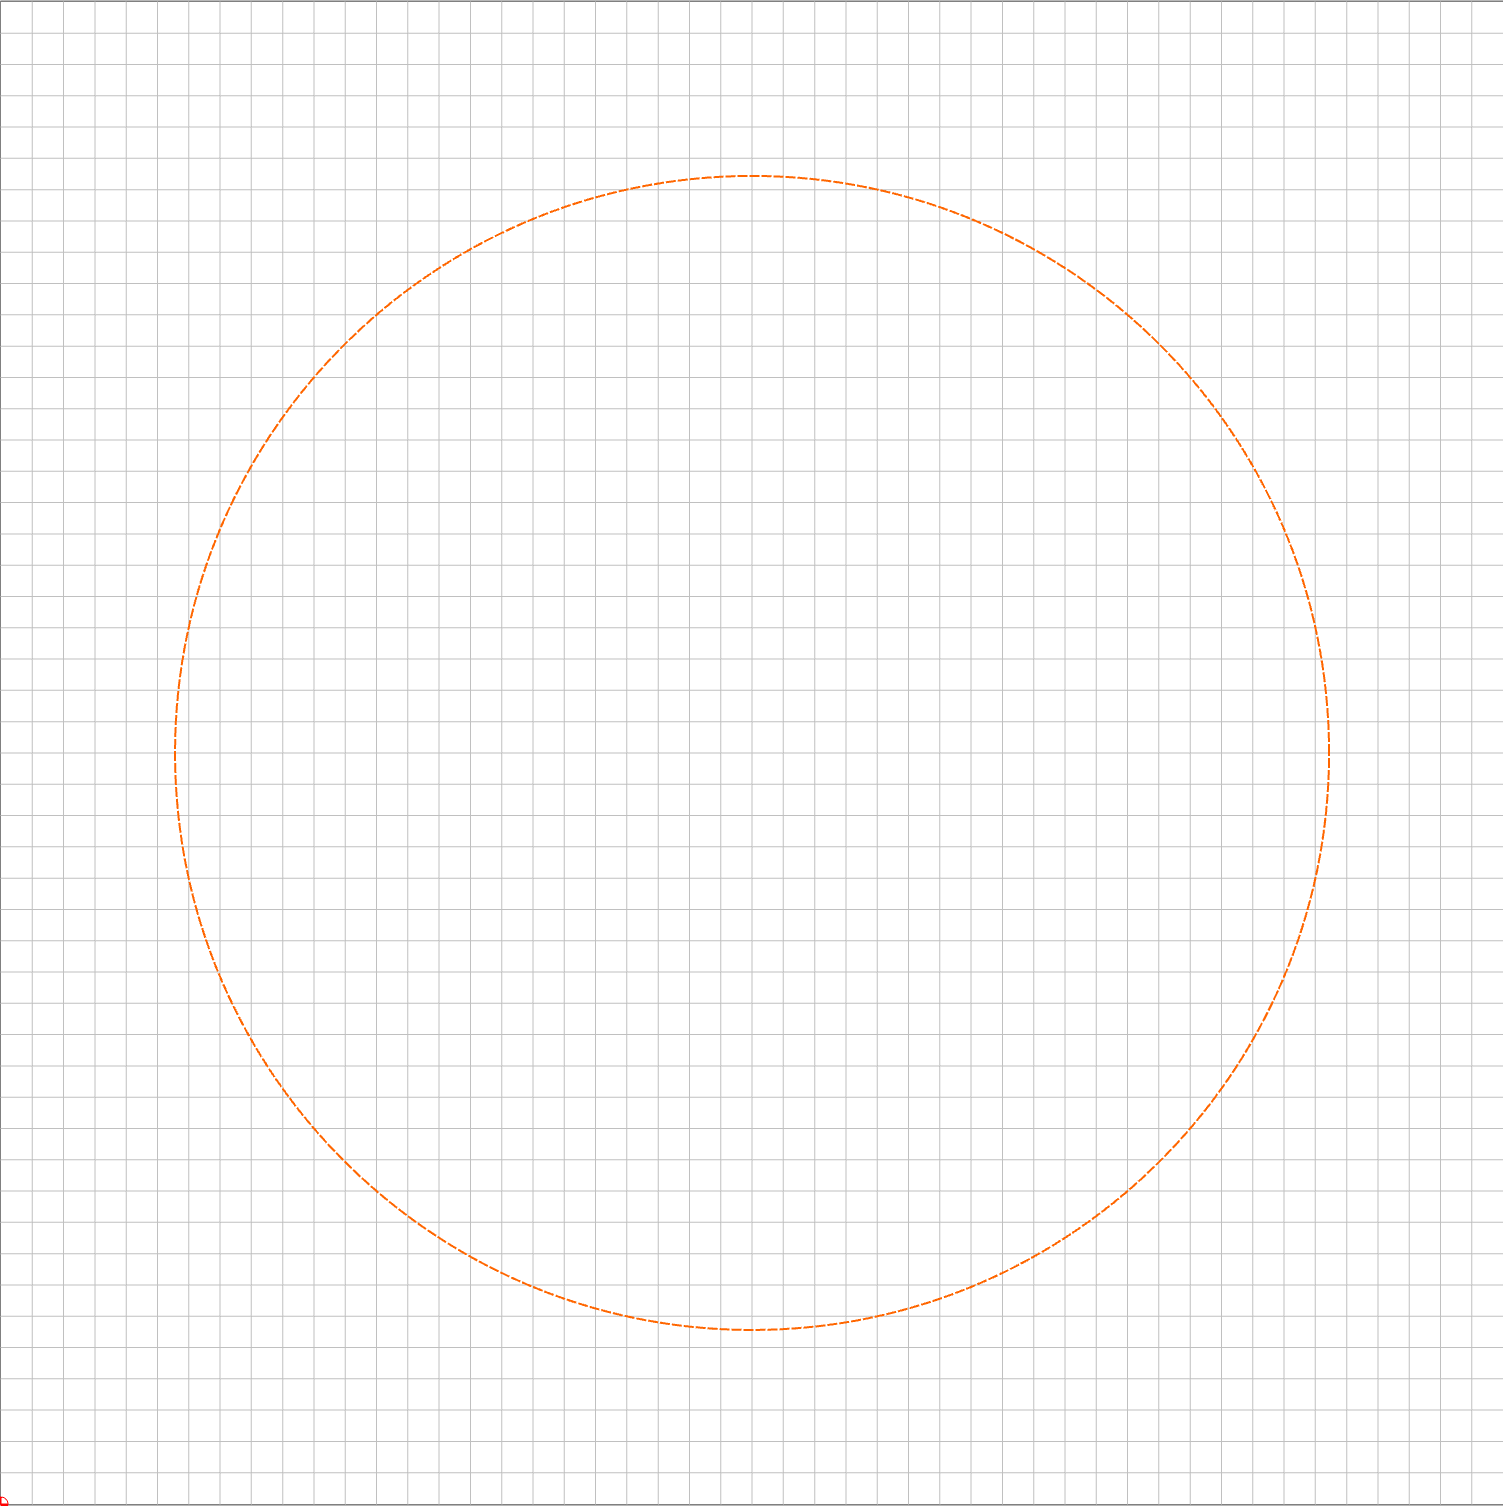
Here’s the simulated result. Okay the edge isn’t rounded over, but at least you get to see something.

Now come the downsides to this method.
The round over bit (lets focus on the 1/4 version) is designed to cut 1/4 deep (see “B1” back on the previous chart). So you have to have the discipline to remember to always cut 0.25 inches deep with your 1/4 roundover bit.
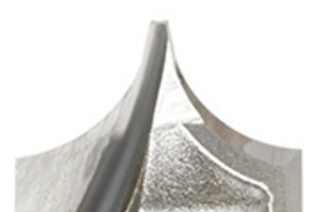
The other downside is that the 1/2 and 1/4 roundover bits don’t actually have a point on them like the vbits do. My calipers are telling me the 1/4 roundover has a 1/16 flat tip, and oddly my 1/2 roundover has a smaller 1/32 flat tip. The 1/8 roundover has a pointy enough tip that it gets a pass on this discussion.
To account for this, now I’ve got to get the bit to offset half of those measurements so the flat tip does not come in contact with the material. So if I want to use the 1/4 roundover which has a 1/16 flat tip, I have to create an offset circle 1/32 inside.
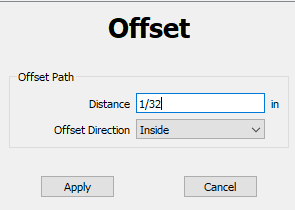
And change my roundover toolpath to that smaller circle, but its still a “No Offset” contour toolpath.
Visually you won’t see much of a difference in the simulation. But it will be better when you actually cut.
So in summary, the vbit method has the advantage of letting you see something, its a 45 degree flat edge instead of a rounded edge but close enough. The downside is you have to remember to make the right sized offset for your tool, and you have to remember the right depth to use.
METHOD 2
Define the roundover bits as (straight) endmils. Basically you are just defining the flat-tip to Carbide Create. This makes using the 1/2 and 1/4 inch easier because you don’t have to remember to create the right size offsets in the designer. Carbide Create will think tool it is a tiny 1/16 (1/4 roundover) or 1/32 endmill (1/2 roundover).
You still have to remember (ugh) to always set the contour toolpath to the correct depth, but now it’s a more common Inside or Outside offset direction. This method lets Carbide Create figure out how far to offset the tool based on the (false) tool diameter you defined in your tool library. Instead of you having to remember the right sized offset to create, and use a no offset toolpath.
The downside to this method is that you will not see the roundover in the simulation. Carbide Create thinks it is cutting the same air your previous pocketing toolpath cut.
METHOD X
Or… save your money and use (real) vbits with no offset toolpaths to “Chamfer” your edges, and claim you like that look more than the roundover look.
4 Likes
Garrett Fromme posted a video using his IDC Woodcraft bits and Vcarve Desktop. The bits are supported there but he has a strategy for setting the DOC to get the proper roundover while doing a profile on the line.

I have used it a couple of times with the 1/8” bit and it worked well. Not sure if his video will help you figure out which method works best for CC.
I took the first method (roundover defined as vbit) to my Shapeoko 3 today.
After running through some tests here are the settings that I am going to start with.

For the Amana 56144 1/2 Roundover
The stepover is setup so it takes 5 passes to cut down 0.5 inch, but not in equal 0.1 increments. With these roundover bits it’s the last pass that removes the most material. So I ended up using a 0.115 depth, so after 4 passes there is only 0.04 left to cut for the 5th pass.

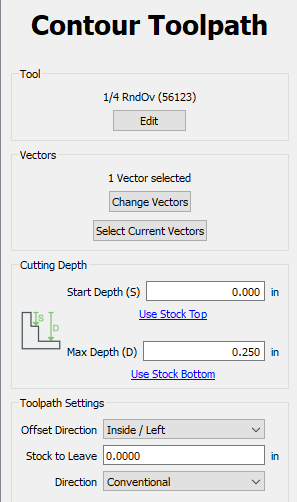
For the Amana 56123 1/4 Roundover
The stepover is setup so it takes 4 passes to cut down 0.25 inch, but not in equal 0.0625 increments. I’m going to use 0.07 depth, so after 3 passes there is only 0.04 left to cut for the 4th pass.
For the Amana 56125 1/8 Roundover
My opinion is that you should save your money and skip this bit. The tip on this broke off using a 1/32 depth of cut. Maybe I just wasn’t lucky, but I’ll be using a 90 degree vbit and chamfer the edge if I want to do something like a 1/8 roundover.
4 Likes
The IDC Woodcraft roundover bits appear to be different. They are actually pointed where the Amana bits have flat tips. The (big) advantage of the IDC bits would be that you don’t have to calculate your own offsets to account for that flat tip. The (small) advantage of the Amana bits is that the depth to cut is more straight forward.
If I had seen that video before I purchased the Amana bits I would have purchased the IDC bits instead.
3 Likes