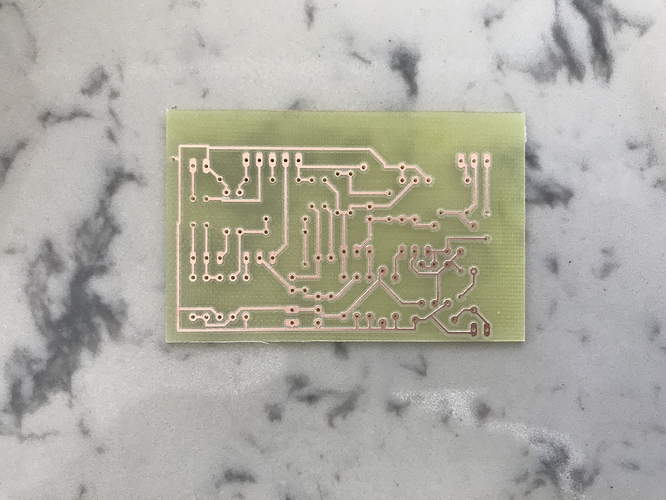
Today I milled my first PCB on my nomad using carbide copper. I’m happy to report that it worked perfectly on the first try! In the past I have had PCB’s manufactured by professional board houses, and etched them with chemicals at home. I’ve always read that CNC milling for PCB’s is more trouble than it’s worth, as it takes a long time, and that its difficult to get good results. My experience far exceeded my expectations! The entire milling process, tool changes and all, only took around 30 min. The traces all look very clean, and the cutting itself was surprisingly quiet. Overall I would say that this process is far superior to etching as you don’t have to deal with all of the chemicals, and is a great way to prototype before having boards manufactured. Carbide copper may not be the most feature rich program in the world, but it certainly got the job done, and I couldn’t be happier with the results. I do believe that my success is due in a very large part to using a nomad as opposed to other machines. Almost everyone I’ve seen attempting to mill PCB’s online has been using the X-Carve. Perhaps that machine just isn’t rigid enough to achieve accuracy on such a small scale. Anyways, thanks to the Carbide 3D team for developing such an easy to use free tool. Keep up the good work. Hope everyone has a nice day!
I wonder, why remove all the extra copper? I’d think once you created an island of unused copper, you could just leave it there, and that the process would go much faster.
It looks like a chemically etched board to me.
And the drilling doesn’t show the precision of a Nomad.
Really? Look at the waterlining (tool tracing) around the remaining copper. As far as the drilling, it is in the range of what I would expect.
Without knowing the purpose of he board, I can’t guess why the remaining material was cleared. There are times it needs to go (control capacitance, clearance for mounting parts with metal cases, etc) but I generally don’t unless I need to, as expanded ground plane can be really useful and it reduces machining time and tool wear.
Yeah you’re right, totally unnecessary to remove all of the extra copper. This was my first time using Carbide Copper, and I wanted to test out all of the features it has, including the area rubout. I probably won’t repeat this step in the future to save myself some time and save my cutters some wear. Thanks for checking it out!
Hey thanks for checking it out! Like I said in a previous reply, I just wanted to check out all of the features of Carbide Copper, the area rubout being one of them. Have a great night!
I like seeing something different. Not many Copper-produced things in the Gallery yet. Please post back with the finished board, what it does, etc. Probably lots of folks like me who dabble in micro electronics as well would be interested.
Thanks! I appreciate it!
Not at all Curtis. I simply thought you had posted the wrong photo. I speak from experience and apologise for any misunderstanding.
This topic was automatically closed 10 days after the last reply. New replies are no longer allowed.
