Griff
(Well crap, my hypometric precursor device is blown…)
1
Some may remember that I built Mr Beavers HDZ from the plans he provided.
I’m now at the beginning of a mod to my router mount as I want to lower it and further stiffen it. I’ve designed a double ring mount sized for a Makita. Plus a new mounting plate and a “tram mount”.
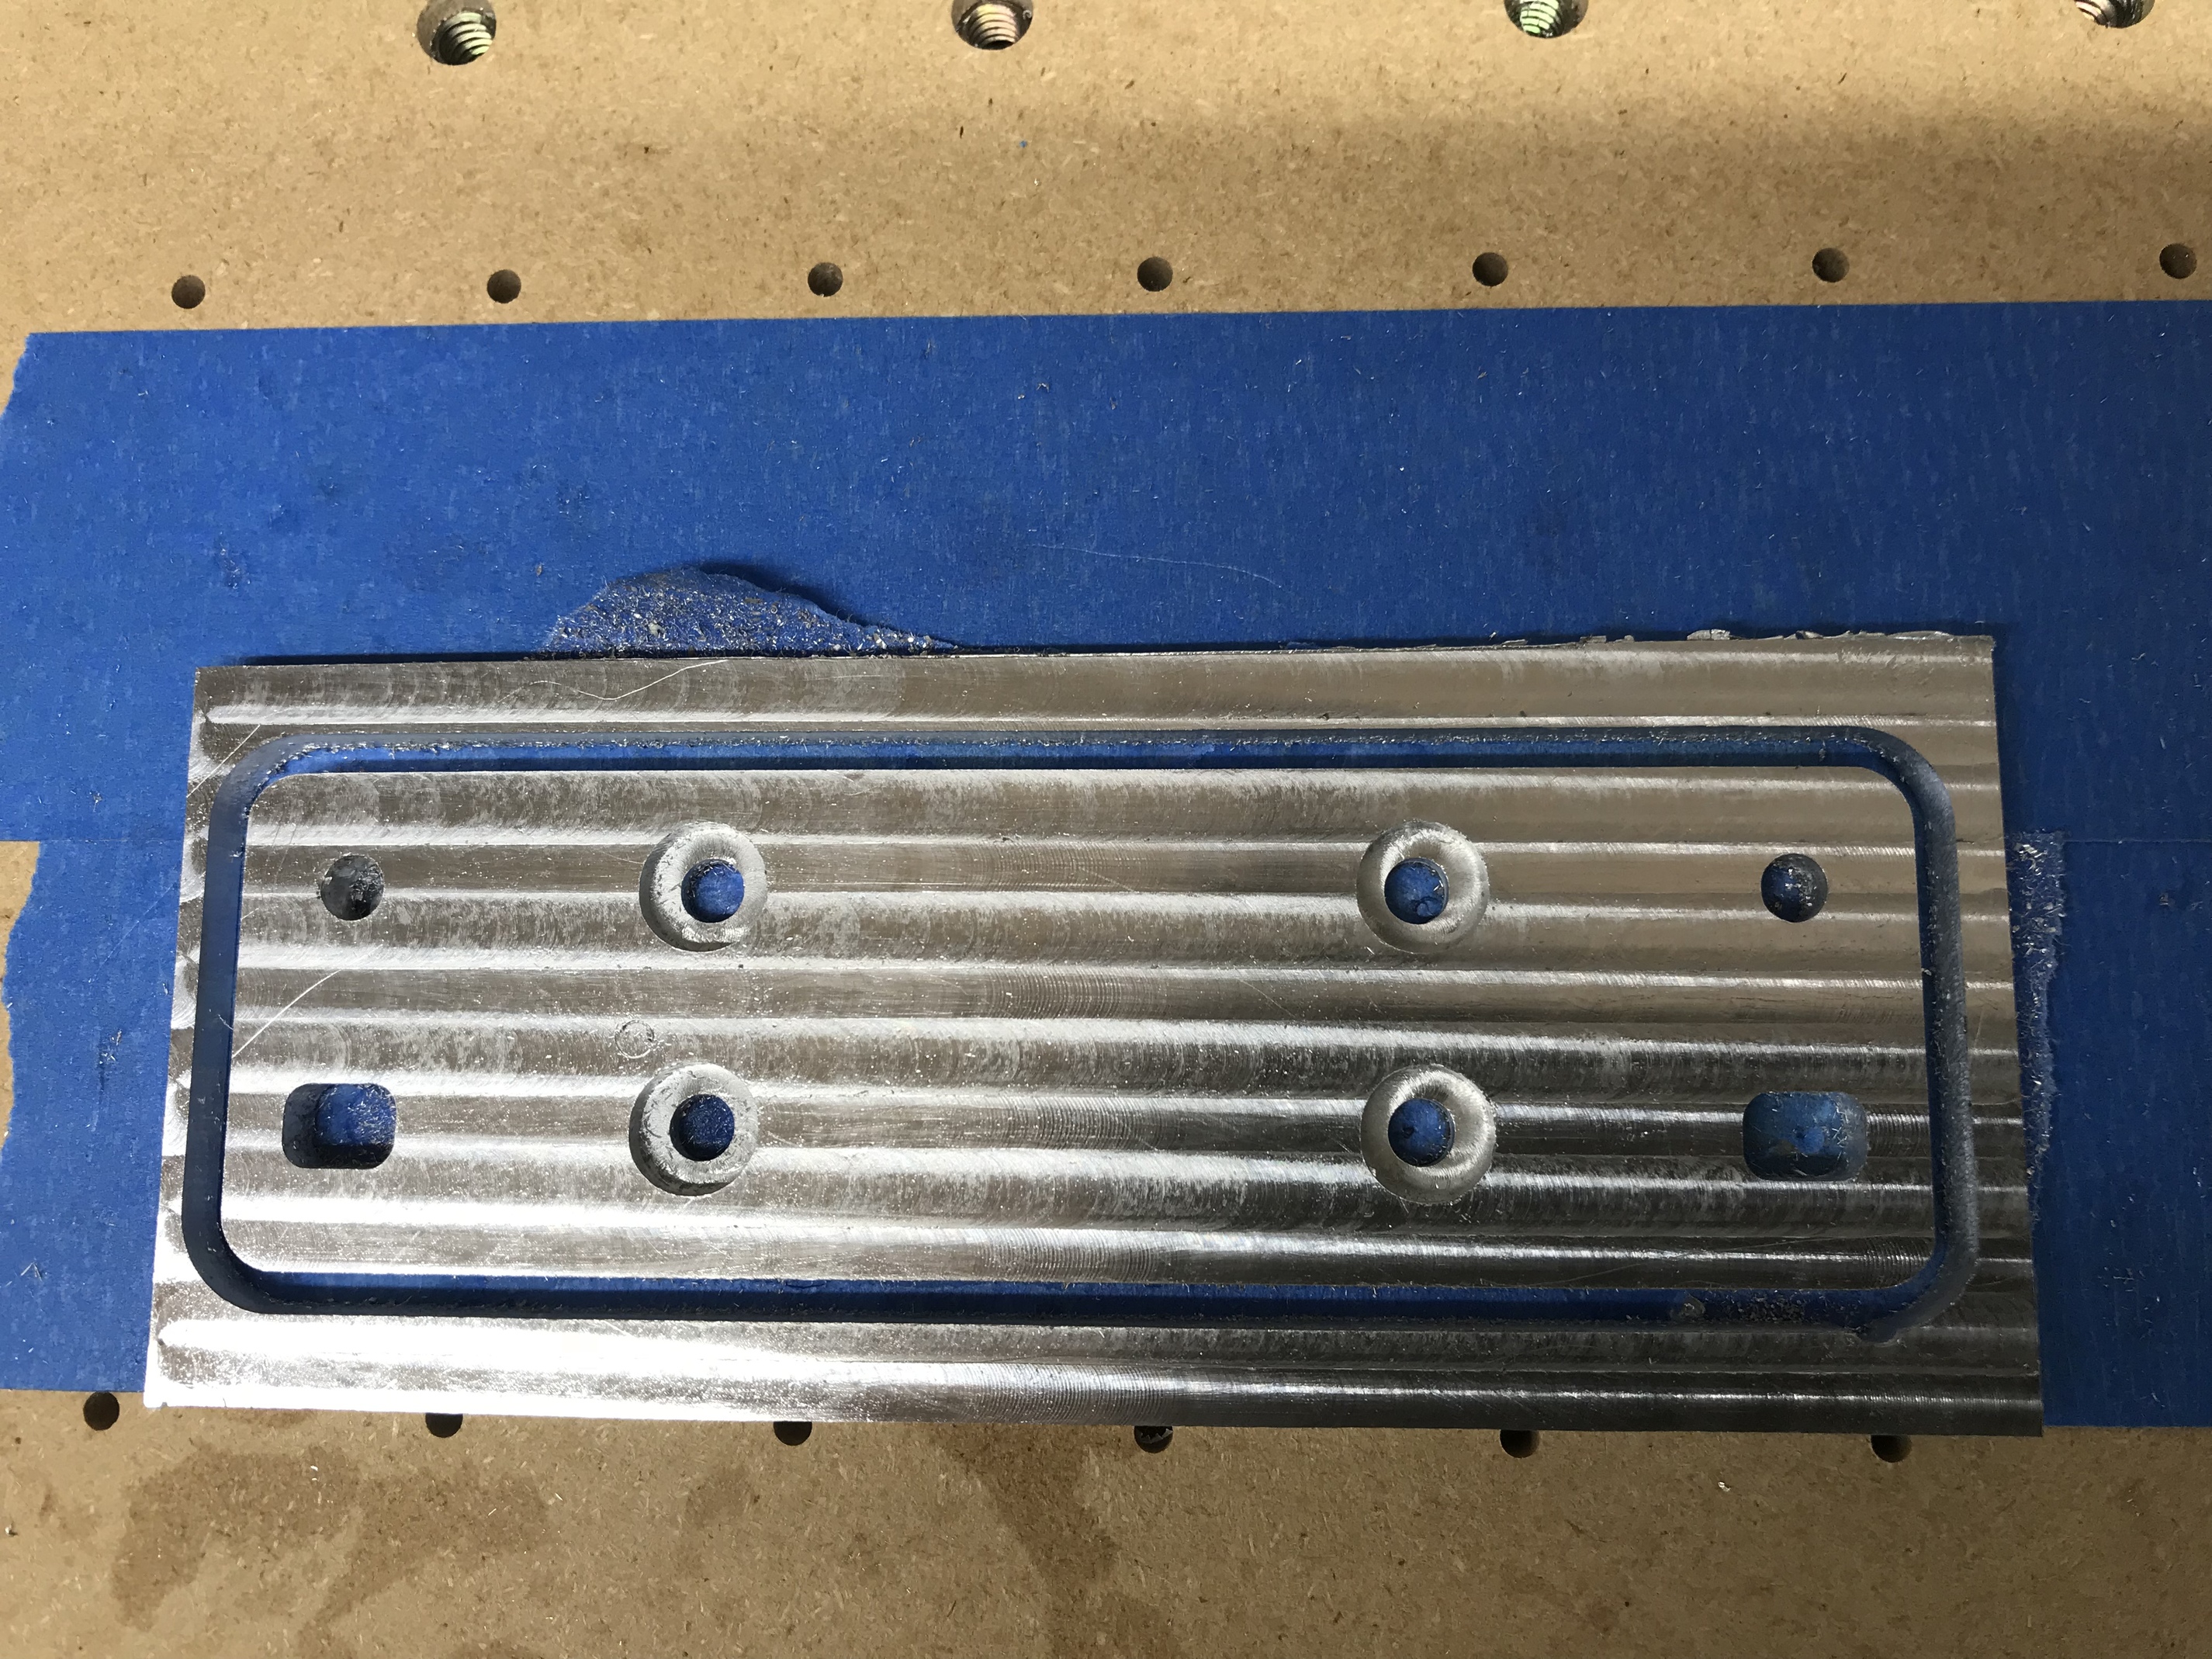
I cut the “tram mount” and am very pleased with the outcome.
Surfaced to precisely 6mm, all bores spot on and no intrusions into the blue tape across the entire part. Cool Nothing special about feeds and speeds, on the conservative side.
Griff
(Well crap, my hypometric precursor device is blown…)
4
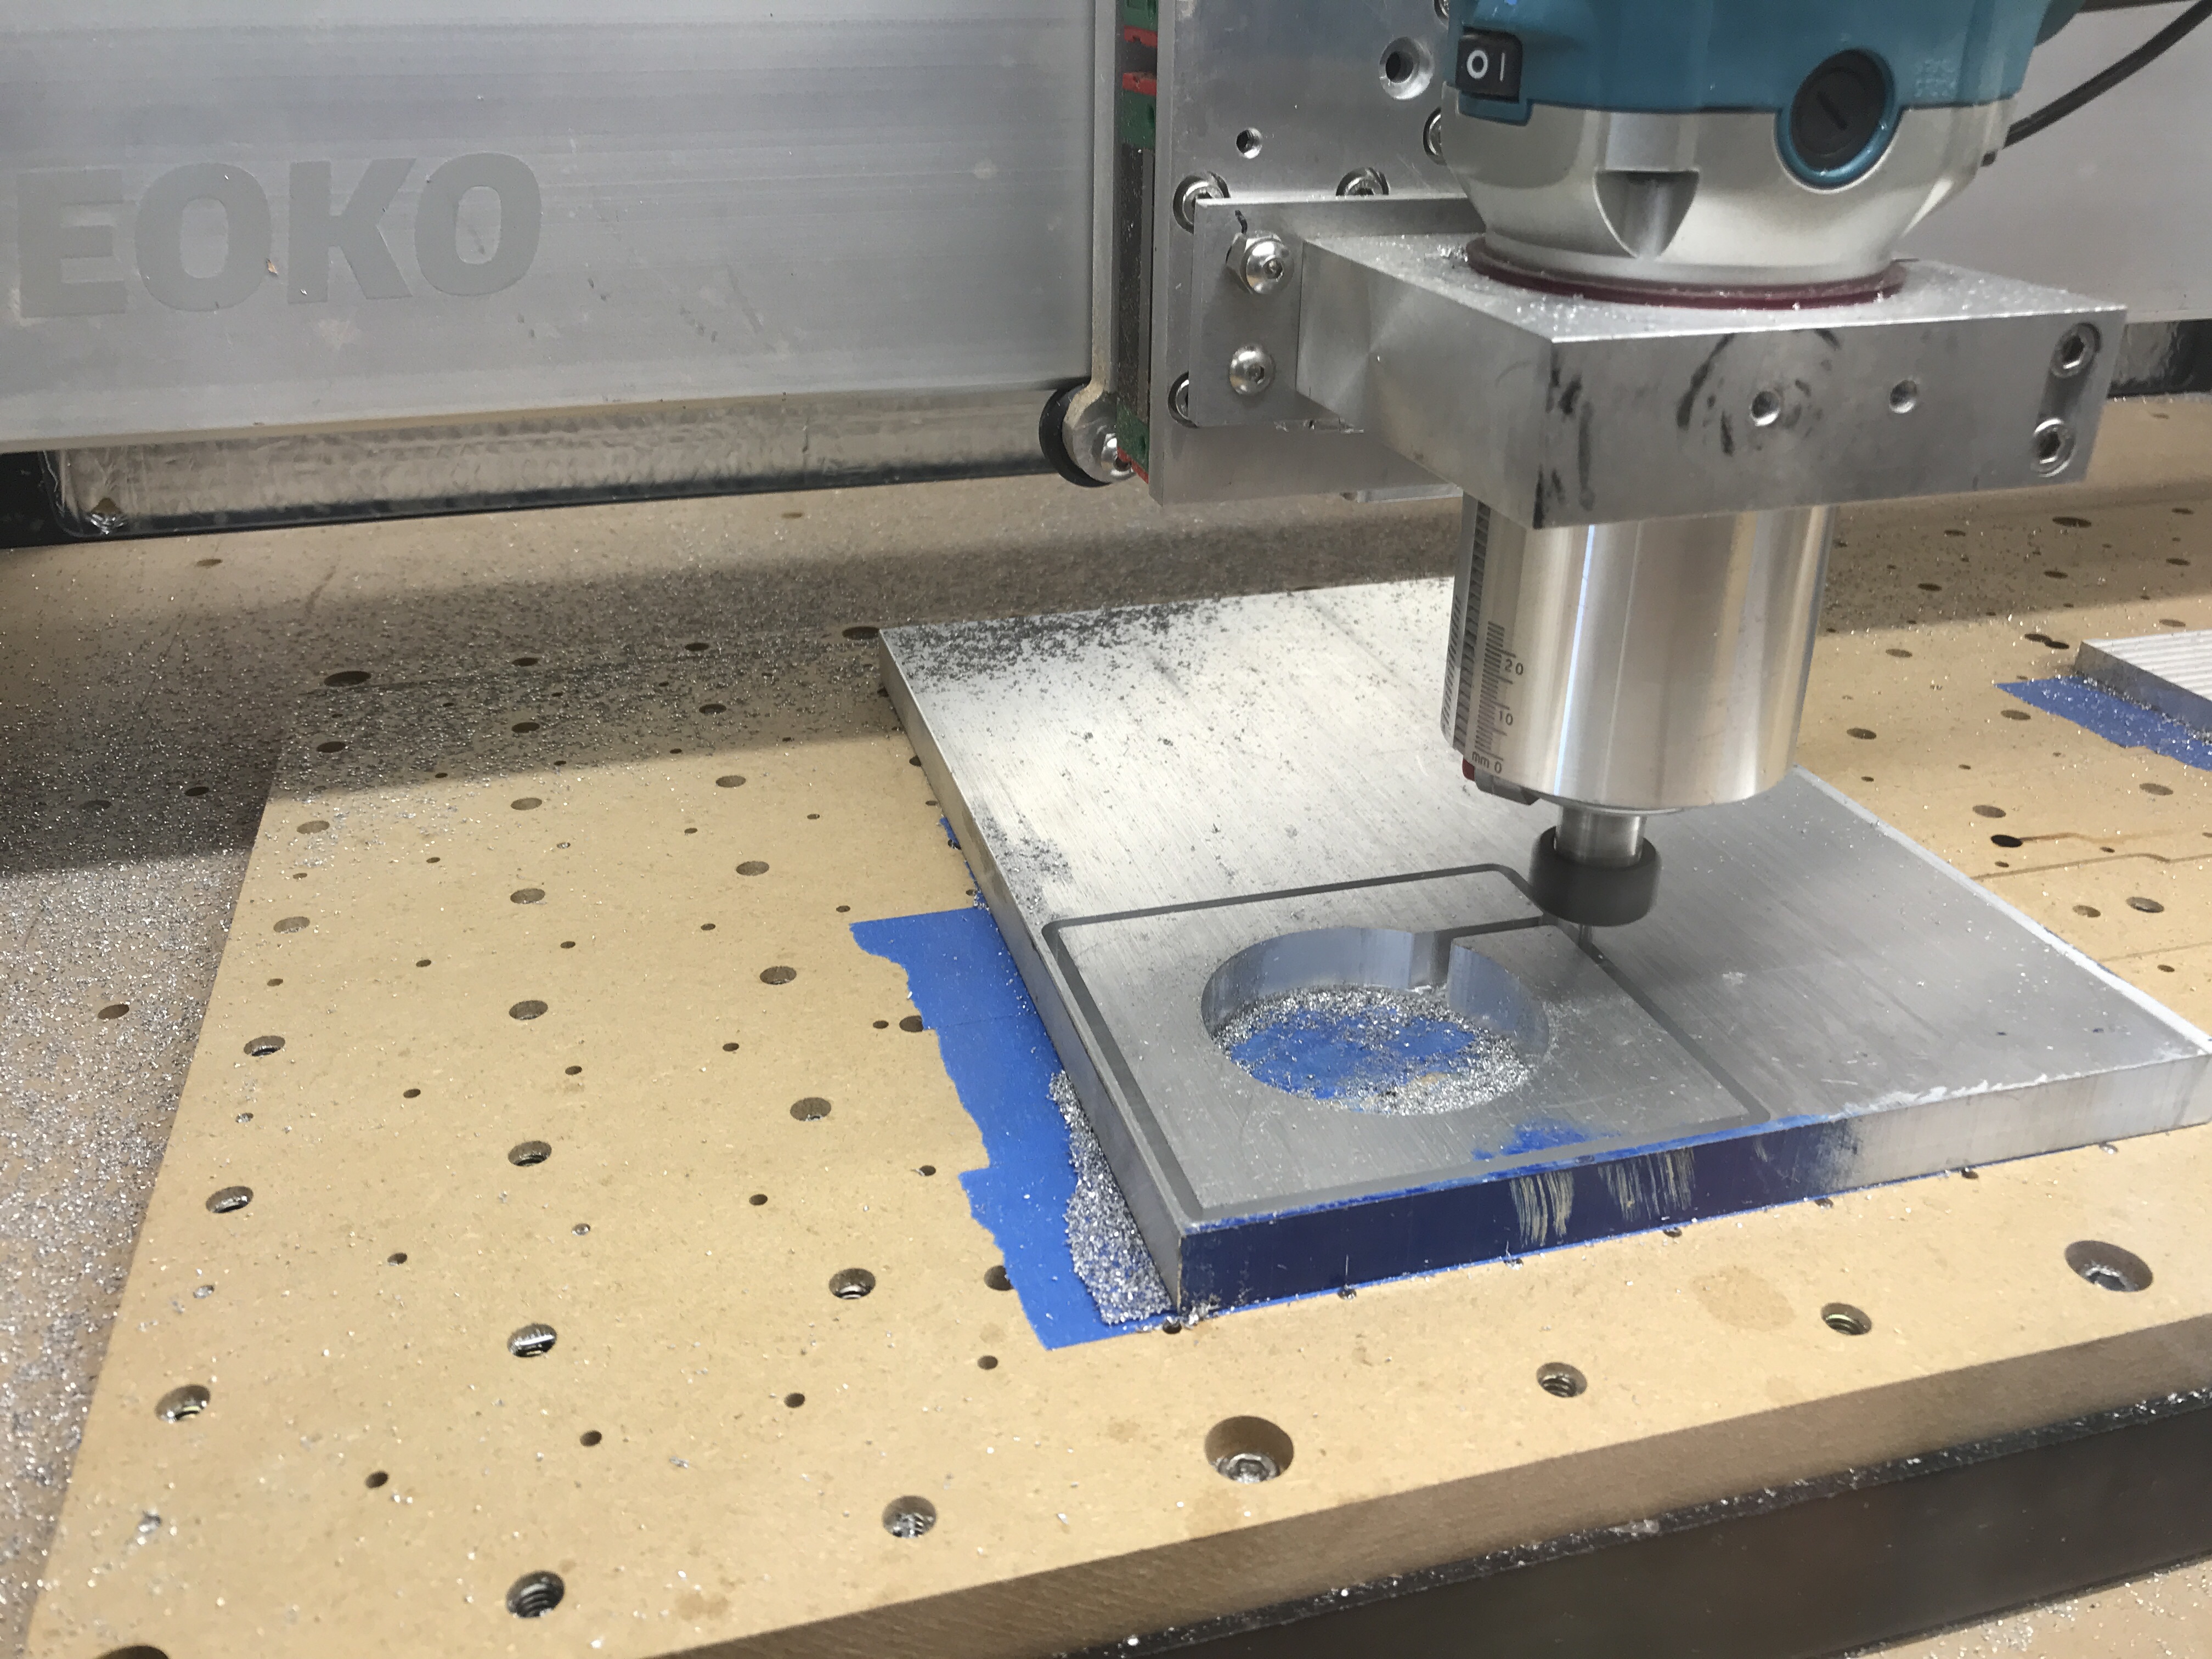
Ha, that was dumb. Spending all that time hogging out the center.
Plan B in effect. Plus I get a nice disc to use for something else instead of a pile of chips. Just have to keep the chips clear as the slot deepens.
Griff
(Well crap, my hypometric precursor device is blown…)
6
Yes indeed.
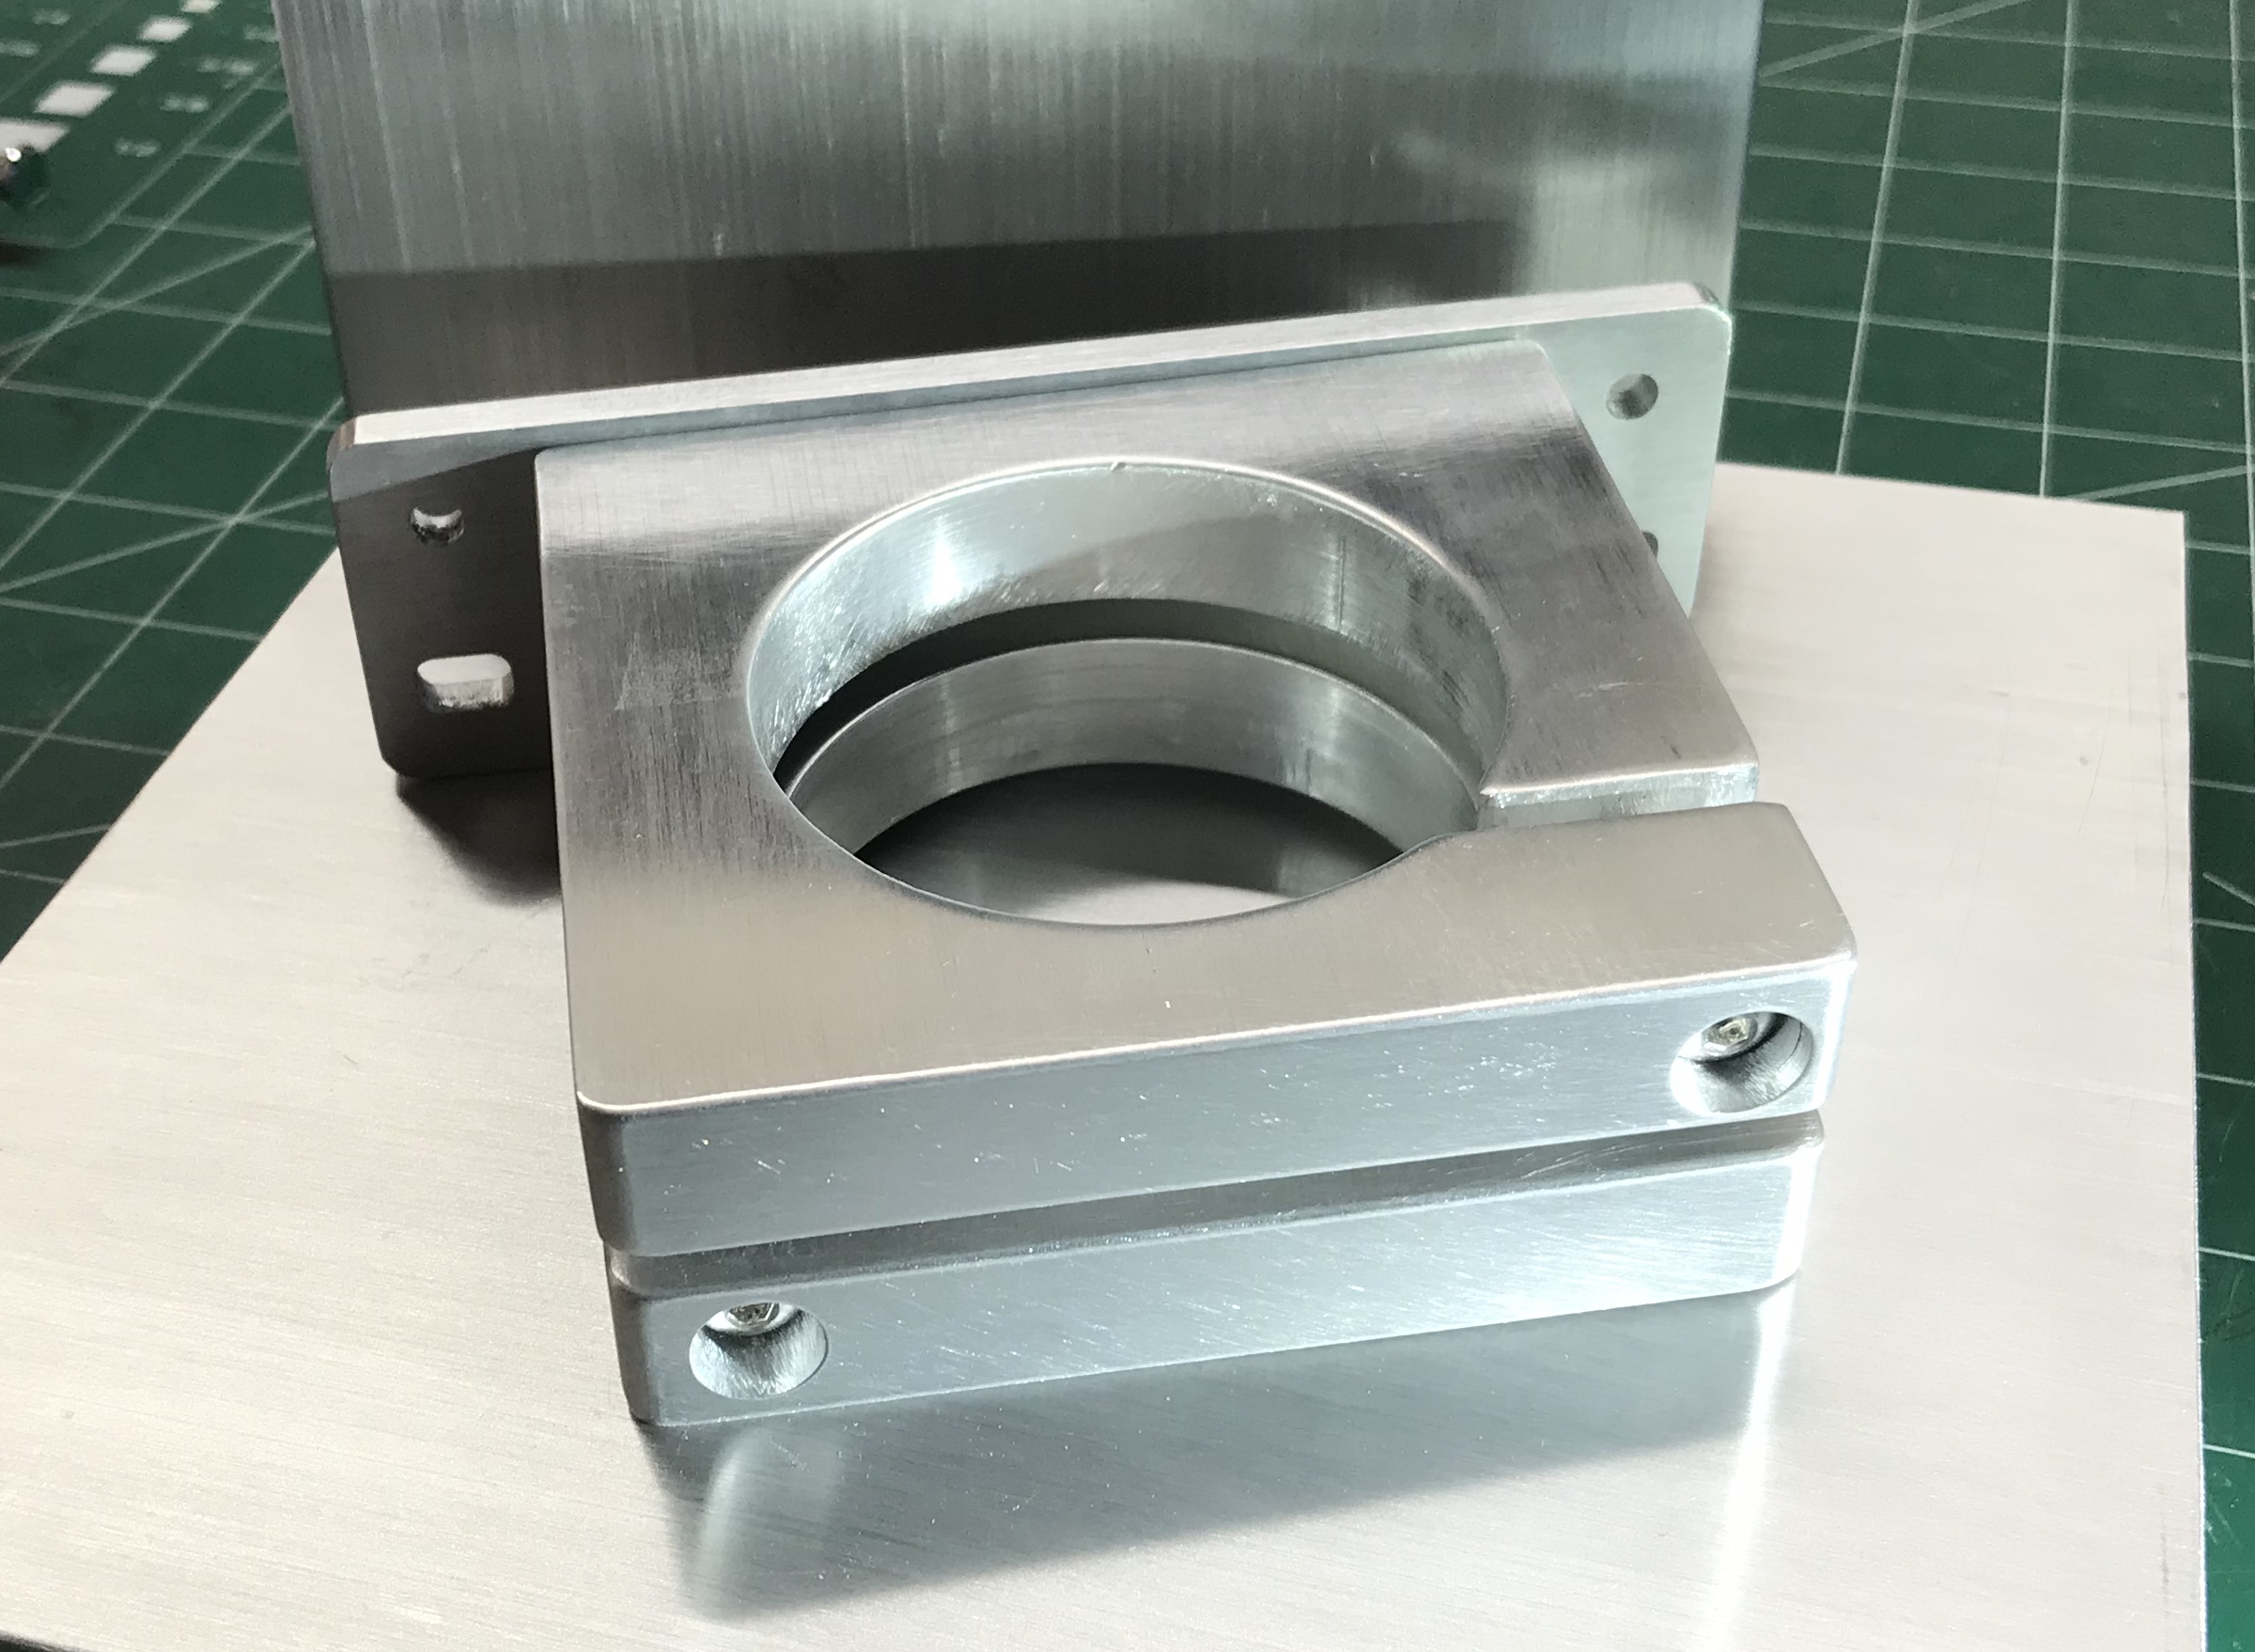
Originally I printed a sleeve adapter from ABS to fit the Makita to the stock SO3 mount. I’ve decided I would prefer metal to metal contact to ensure rigidity. Of course, I’m no engineer but it just feels right.
And, since I need to move the mount all the way to the bottom of the front slider plate I’m going to make another of those as well.
Awesome looking parts Griff! Metal is a blast on this machine!
Check out picking up a 3m convolute bench grinding wheel to really finish the surface easily. Makes a super professional surface finish.
Griff
(Well crap, my hypometric precursor device is blown…)
11
You mean there’s better finishing methods then 120 grit flapper on my portable drill? Thanks for the tip, appreciate it.
I was not too happy with the inner faces but didn’t have a tool small enough to finish them nicely. Not to mention, I’ll never see ‘em again as they’ll be covered up by the Makita. Another story if I was marketing them.
Griff
(Well crap, my hypometric precursor device is blown…)
13
They do indeed. If I had seen the link you posted and used it I would certainly have acknowledged it, no problem.
There are only so many ways to make parts like this. I did not include design files but happy to share.
My design attaches each bracket to MrBeavers designed easy tram as per the original Carbide3D screw dimensions and sizing. The file you link references thru screws, wouldn’t have worked for me as tramming that design would be…difficult.
Hey Griff, that looks awesome! what kind of feedrate, end mill size and router speed were you running? I have struggled cutting aluminum in the past and haven’t tried it again since. Were you using any kind of lubricate on the end mill? Thanks, I would appreciate it!
Rob
Griff
(Well crap, my hypometric precursor device is blown…)
16
Hey @remooney, thanks! Happy to share but, I’m still a beginner at cutting aluminum so, not the best to learn from probably.
Design/CAM done in Fusion360.
Cut is a simple contour with multiple depths, doc 0.6mm. Keep in mind, it is a narrow/deep slot so chip clearing is a must after the first 6 mm or so. I just chased the router with my shopvac every few minutes.
Endmil was 1/8" flat carbide turning at about 12K. Feedrate about 400mm/min. No lubricant used, particularly for narrow slots - it just gunks up the chips and guarantees failure.
Learning to cut aluminum is not no hard, lots of experts in this forum.
For me the key’s were to 1. slow things down and 2. reduce initial plunge speed into the piece 3. reduce doc to less than a mm.
I cut my entire copy of Mr. Beavers 1st HDZ on a stock SO3 XL.