Griff
(Well crap, my hypometric precursor device is blown…)
61
Thanks TommyG, for the explanation and F360 lesson!
Really? Are they suggesting you start a new topic? It would certainly be my preference to keep everything about Luke’s design and your refinements to his design in the same thread. I may go for a hybrid of the two so I can stick with the direct drive ballscrew.
I felt 6mm was more than suitable. Over a 30cm span there is no flex. It’s got supported rails on it and a ball screw. The only reason I went to 6mm was because I used a 3mm counter sunk holes. If I didn’t I’d have gone down to 5,
I used the superglue and tape method to mill it which make it quite easy.
Getting there slowly but… well just slowly really.
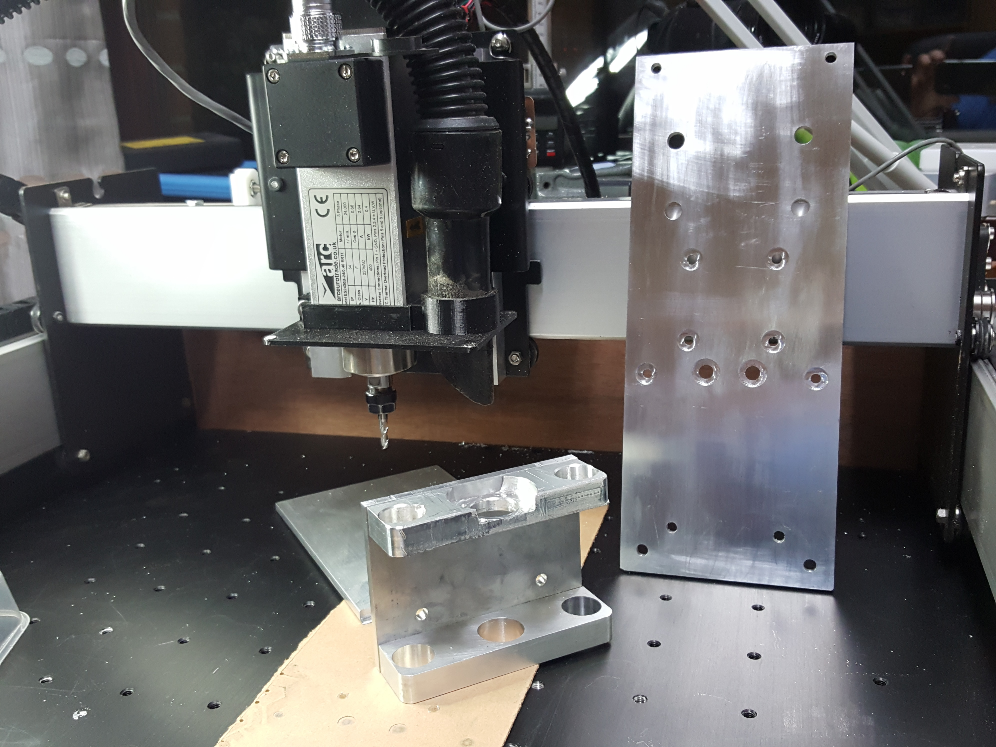
Had a nightmare with the carriage top due to multiple issues including over-optimism regarding the powers of the superglue & masking tape method (I know, I was warned) and the evergreen classic “this is going to take two hours, surely I can speed that up… two days later…”. Hence the awful finish on the front of it. Oddly it was the second piece I cut, the bottom mount went like a dream.
I’m a suckered for ramping up the speeds but patience is a virtue. Usually if you keep them low and the aluminium stays cool the marking tape method is great…
I’m not having a lot of luck with the tape method, even the 6mm base plate came off just as I was getting to last few passes on the cutout but I was able to file it off.
In that case though, I had only had a few mm sliver on the bottom of the part and it was that which pulled loose and snagged the bit. Just experience I guess.
I’m sticking down to MDF, possibly not the best surface?
Griff
(Well crap, my hypometric precursor device is blown…)
67
EDIT. Sorry, my bad, this should be addressed to Luke, I’m cutting his file. DOH!
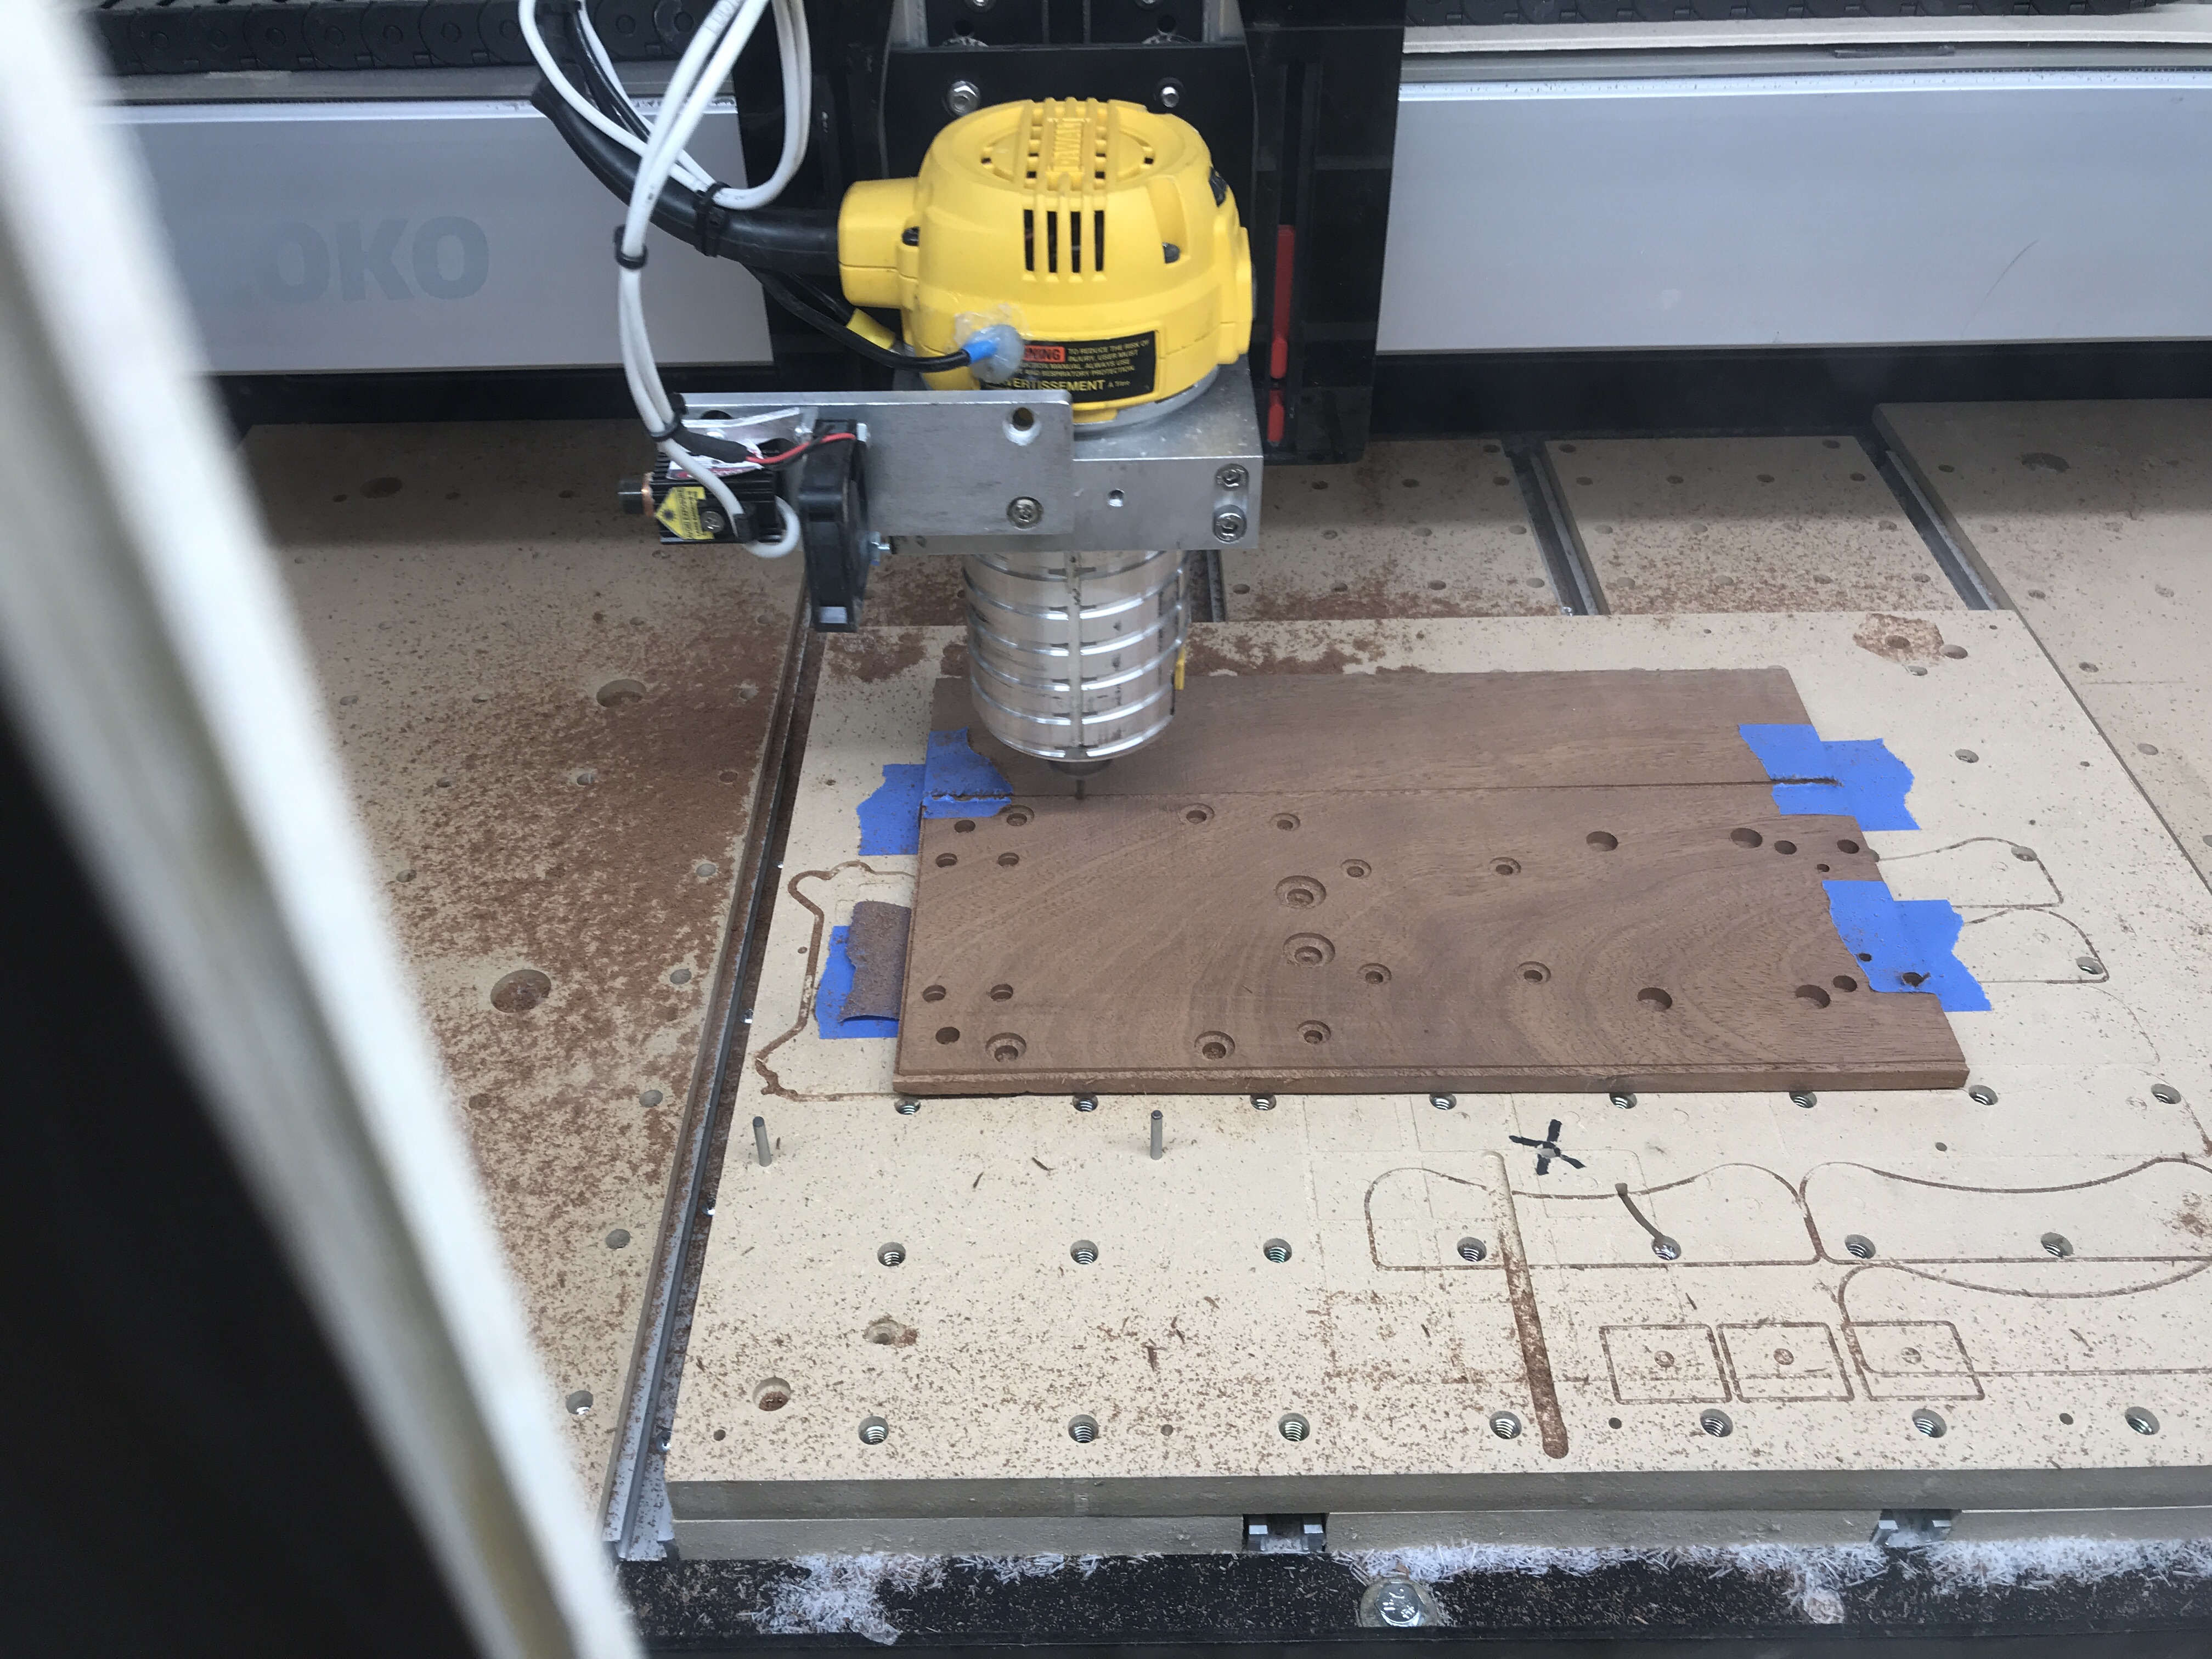
Tommy, I’m test cutting the largest plate now in wood.
I see several Setups in CAM. For this first test I am using setup 2, I’ve left all the parameters the way you set them up. I’m curious why, on some of the bores in the second step plunge so fast? I know that would break a cutter if I was doing aluminum. I’ll probably add a step that cuts those as pockets instead of bores.
There is still much more that I don’t know about CAM as what I do
I’ll jump in just to “vary” the input for the forum’s sake. Nothing to add just another voice chanting “keep this topic alive”. Tommy and Luke are sharing mind blowing workable concepts and we fellow Shapeoko’ers (at least me) need their enlightenment and encouragement. They have not tried to profit from these concepts and deserve (for their prolific sharings) room to “muse”. Keep talking guys, Evan and Griff are adding tremendously also. Keep it up guys and THANK you all for sharing. Jude
A quick tip for anyone playing along at home. If you’ve ordered a ball screw and if it has arrived and if you know bugger all about how ball screws work… DO NOT take the ball nut off the screw.
The screw is what’s keeping the ball bearings in the nut and if you take the screw out they all scream “We’re FREE!!!” and jump out all over your desk. You then have to learn how to re-stuff a ball screw and discover some new uses for Vaseline that aren’t anyway nearly as much fun as other uses you may already have for Vaseline.
This is simply a public service announcement and not in ANY way based on personal experience
It will be quite a while before I’m done with the house and back up and running, so I’m keeping up w/ this thread and learning. Hopefully, you guys will have this process trouble shot and someone will compile a step by step … hint hint… I doubt I will be able to glean the correct instructions from the 3 topics already in motion. So all the hope of the CNC free world is riding on your shoulders, but no pressure, no worries, you have my support and good wishes… I for one do not have the machinist ability to sort this out. Thanks for all the input and effort all of you are providing. The ball screw Z axis initiative shall succeed and the conquering heroes shall be acknowledged. Go forth young men and conquer. Jude