I recently came across this link on @ApolloCrowe 's Instagram page:
https://instagram.com/p/sIdd1ErSuH/
I’d like to try to make a few of these. Apollo, can you tell us what material you’ve used to create this lithophane and perhaps provide a basic outline of the software you used to prep the image for machining?
@Remmy, I’m not Apollo, but there is a short, older discussion on lithophanes on the MeshCAM forum at http://grzforum.com/viewtopic.php?f=4&t=446&p=957
Thanks for sending this link over @Randy. I see that you’ve used Acrylic and possibly Corian to create these lithophanes, can you comment on which materials that you’ve had the best luck with?
Corian is the most common choice. One can produce very nice lithophanes with it.
I discovered this place:
http://candlestonegifts.com/candlestone-store
and I can tell you that the quality of a lithophane using this material IS MARKEDLY BETTER than Corian. I love working with it for lithophanes.
No, I don’t work for them. I checked them out and discovered that their claims are true.
1 Like
@Remmy, I only made two lithophanes from acrylic, then got distracted by being laid off and job searching and moving halfway across the continent (the usual stuff) so I didn’t get around to trying the Corian I have. In general acrylic doesn’t work as well becuase it is dyed rather than pigmented with powder, so its contrast isn’t as great as with Corian or other materials. I have a slab of 1/4" Corian that I dug out after posting the above, so in a few days I’ll be in a position to report back on that. A great advantage of Corian is that offcut trimmings are often available from countertop fab shops–1/4" is a common thickness for backsplashes. The “local” shop just gave me an offcut since it was too narrow to be useful for anything for them. I’ll need to check out the Candlestone that mbellon mentioned.
There are plenty of good batches of Corian (and Candlestone) on eBay. Just do a search.
Randy is - as usual - quite correct about checking with local counter top shops. They have a lot of Corian pieces lying around and will often sell them at a great price.
Just bought a batch of ‘seconds’ from Candlestone to play with. My family might have some unique Christmas gifts this year.
1 Like
The trick with Lithophanes is to work from the bottom up-

Basicly, the white parts of the image are the thinnest parts and need to be under a millimeter thick; 0.8mm is what worked here. The darkest parts are 2.75 mm thick.
Starting with an image that has a good range of contrast will appear most like a photograph, like this image of Mike Conley.
After downloading the picture, I did adjust it by increasing the contrast, so that the lightest parts where actually white, and the dark parts; pants and hair for example, where actually dark.
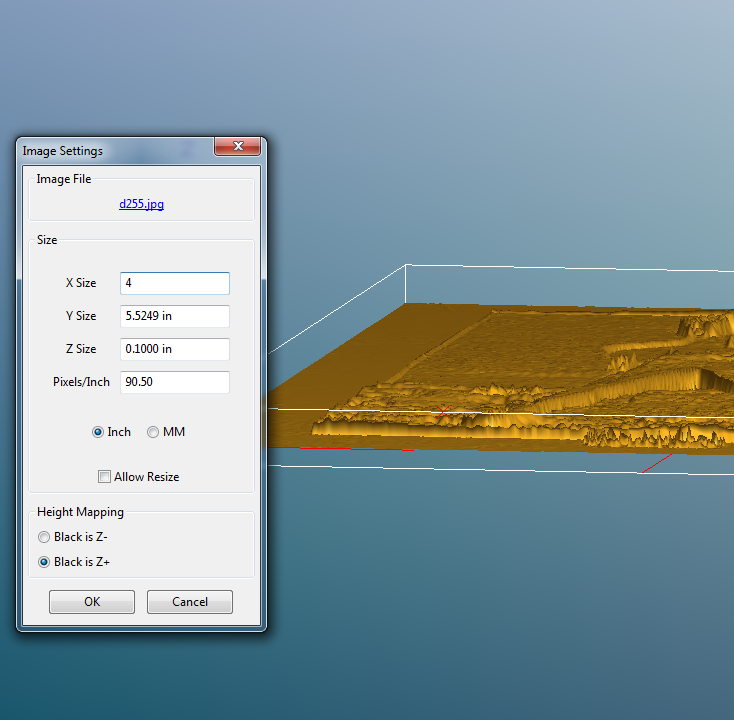
I used MeshCAM PRO to generate the height map, setting “black” to Z+ and leaving the Z height dimension at .1" which is roughly 2.75mm
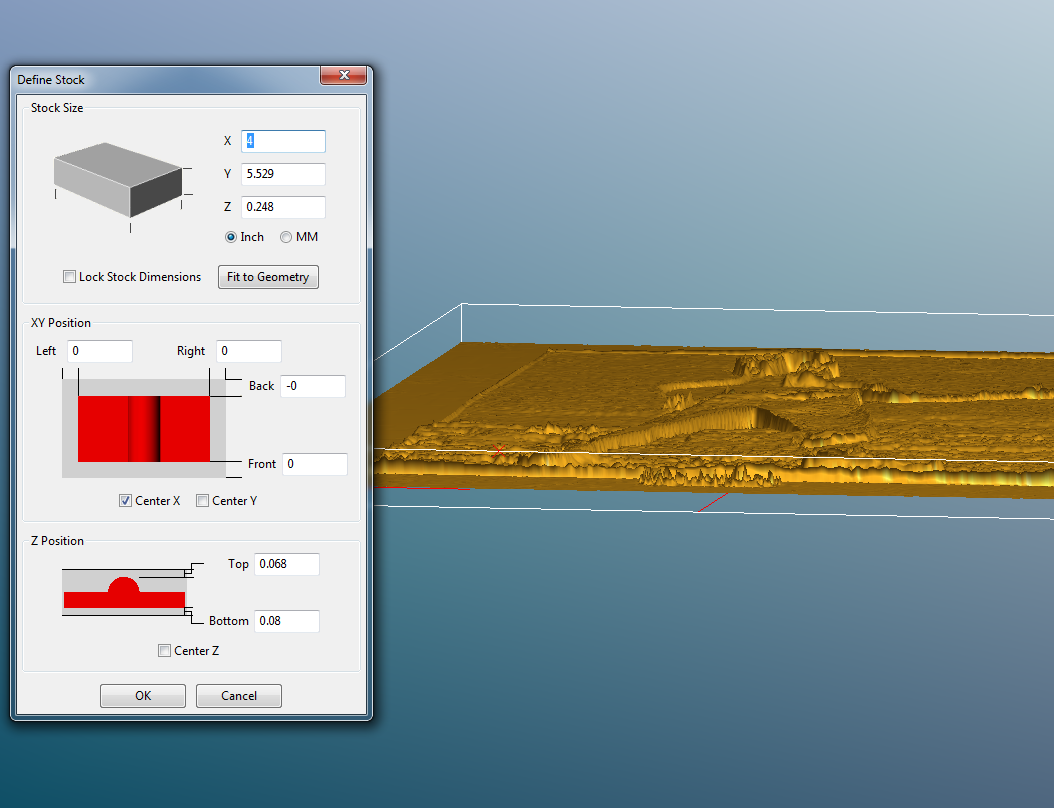
The corian stock i had on hand was 6mm thick, so I defined my stock accordingly and since I knew the white part of my image was at the bottom, I added .8mm to the bottom of my stock.
I roughed with a 1/8th ball, and finished with a 1/16 ball with a 25% step over.
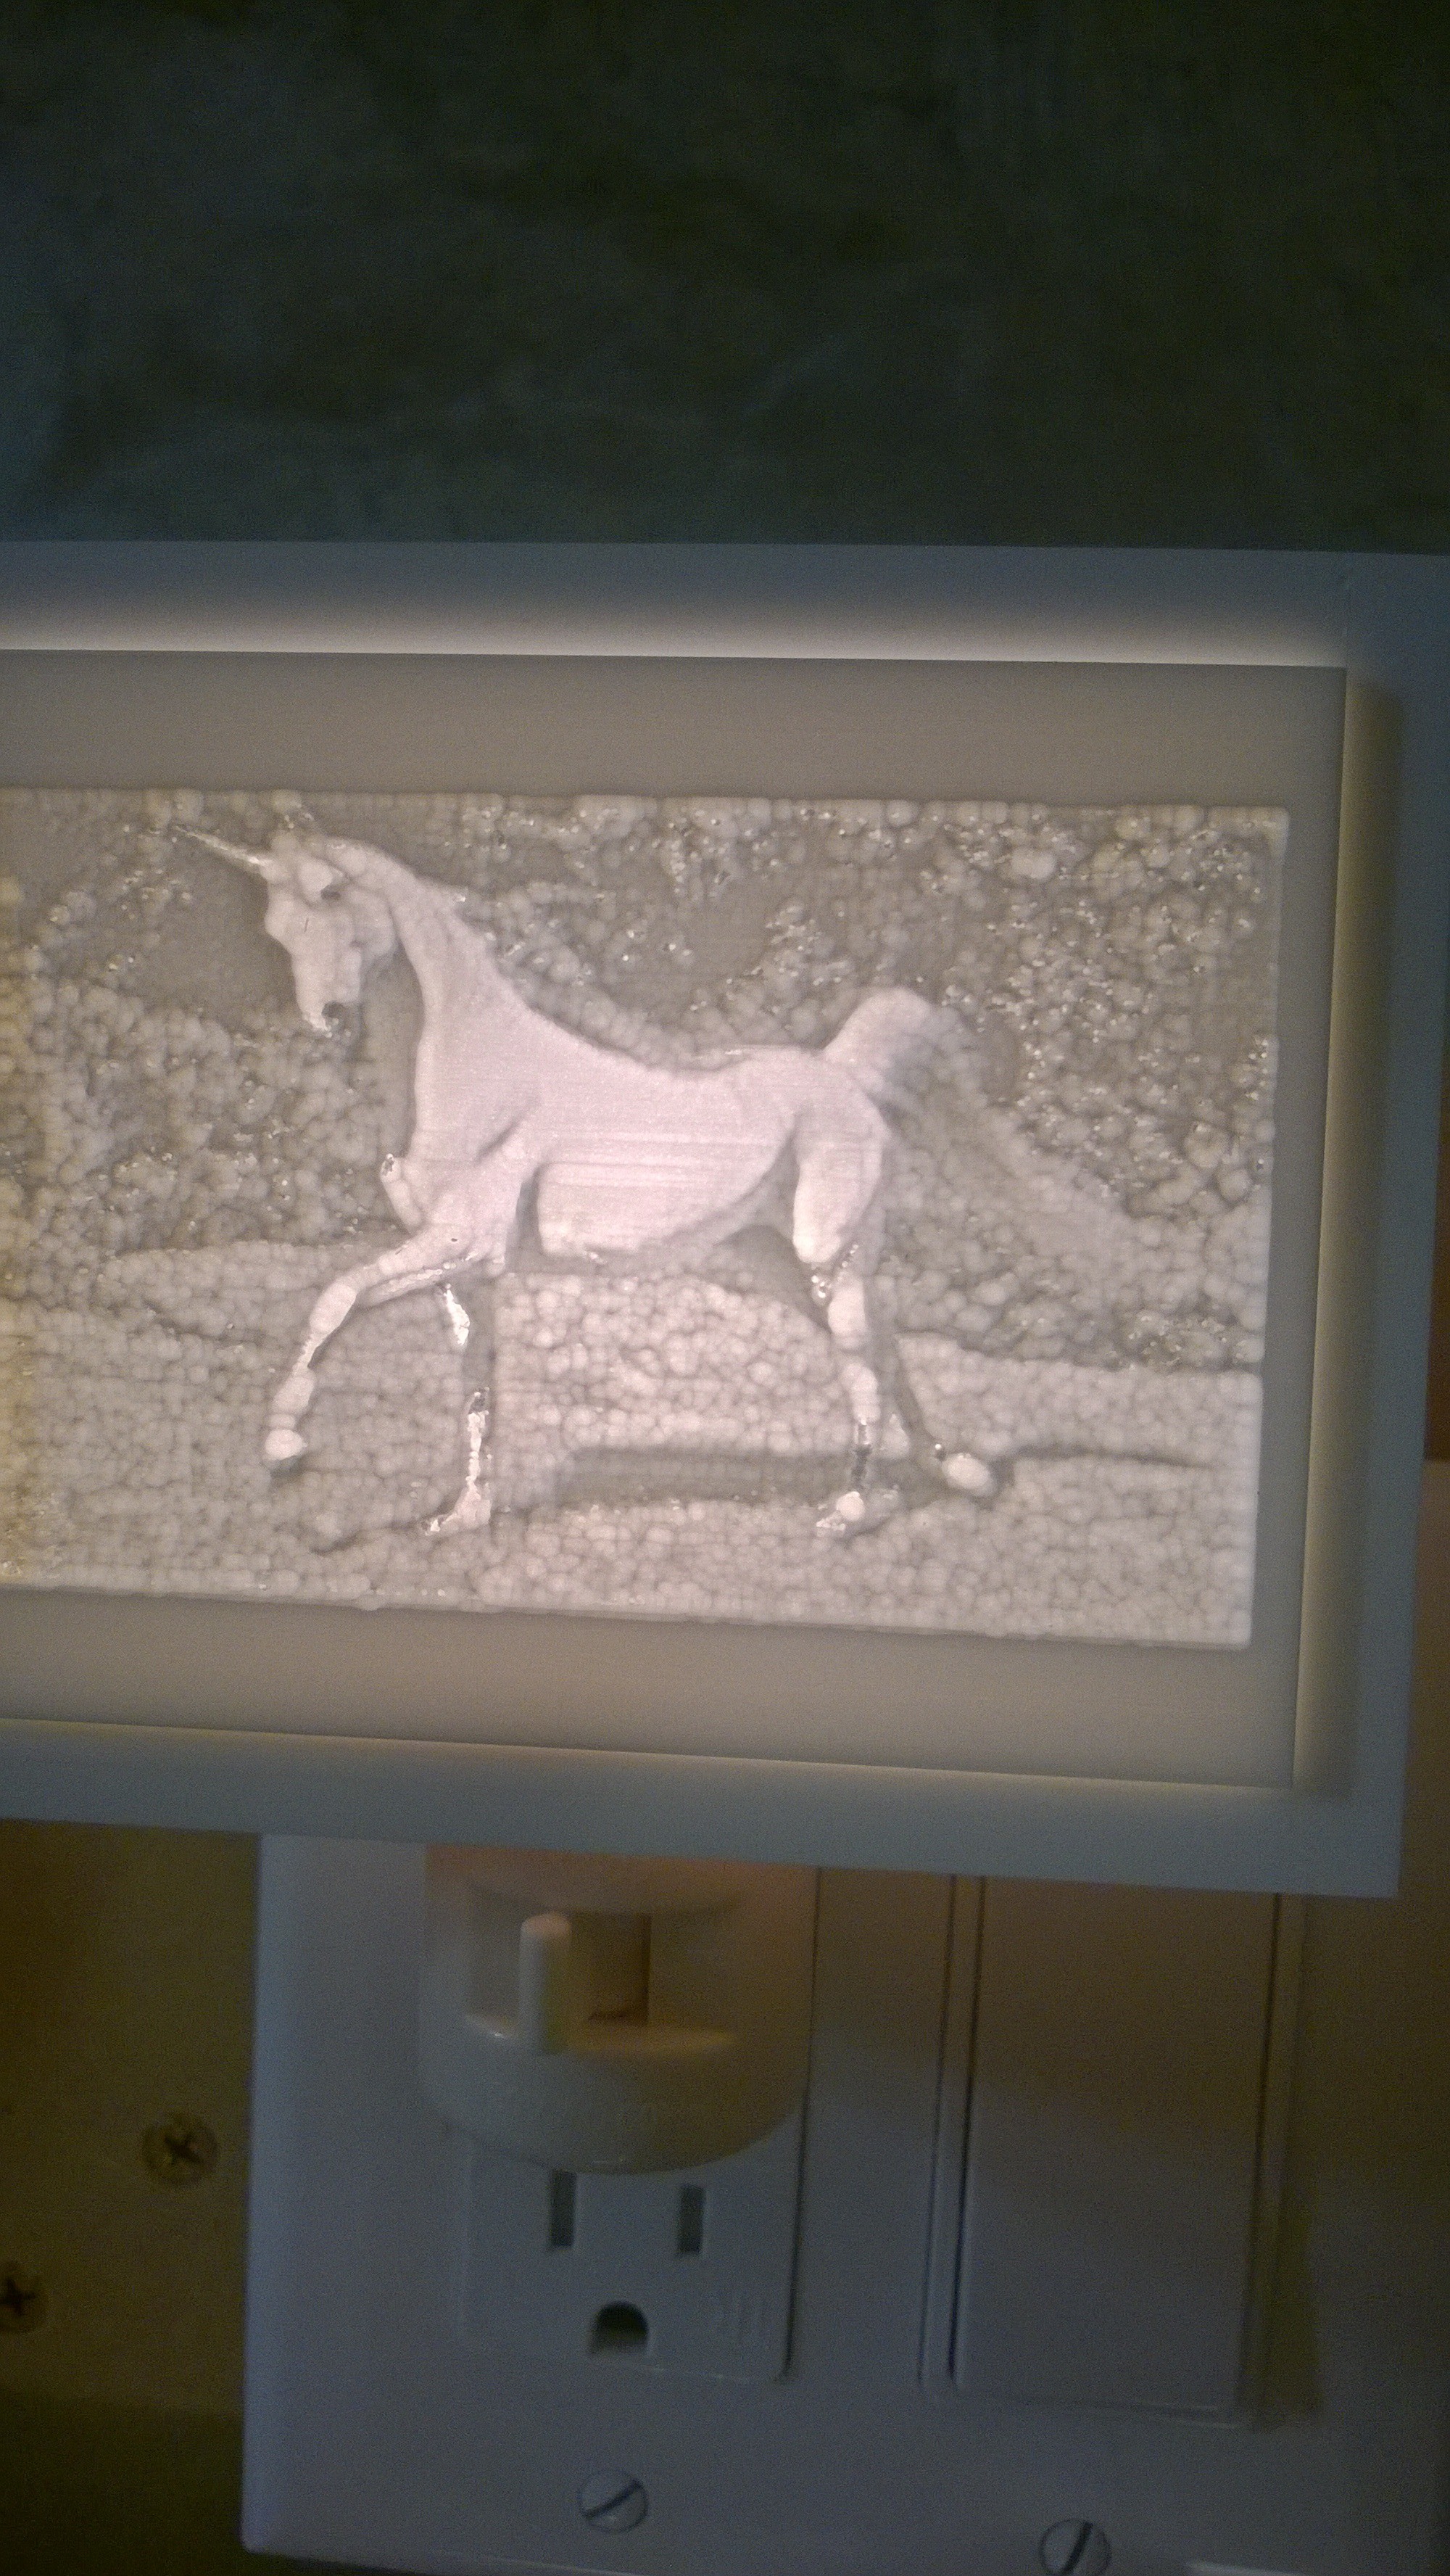
Here is my first, using the CandleStone.
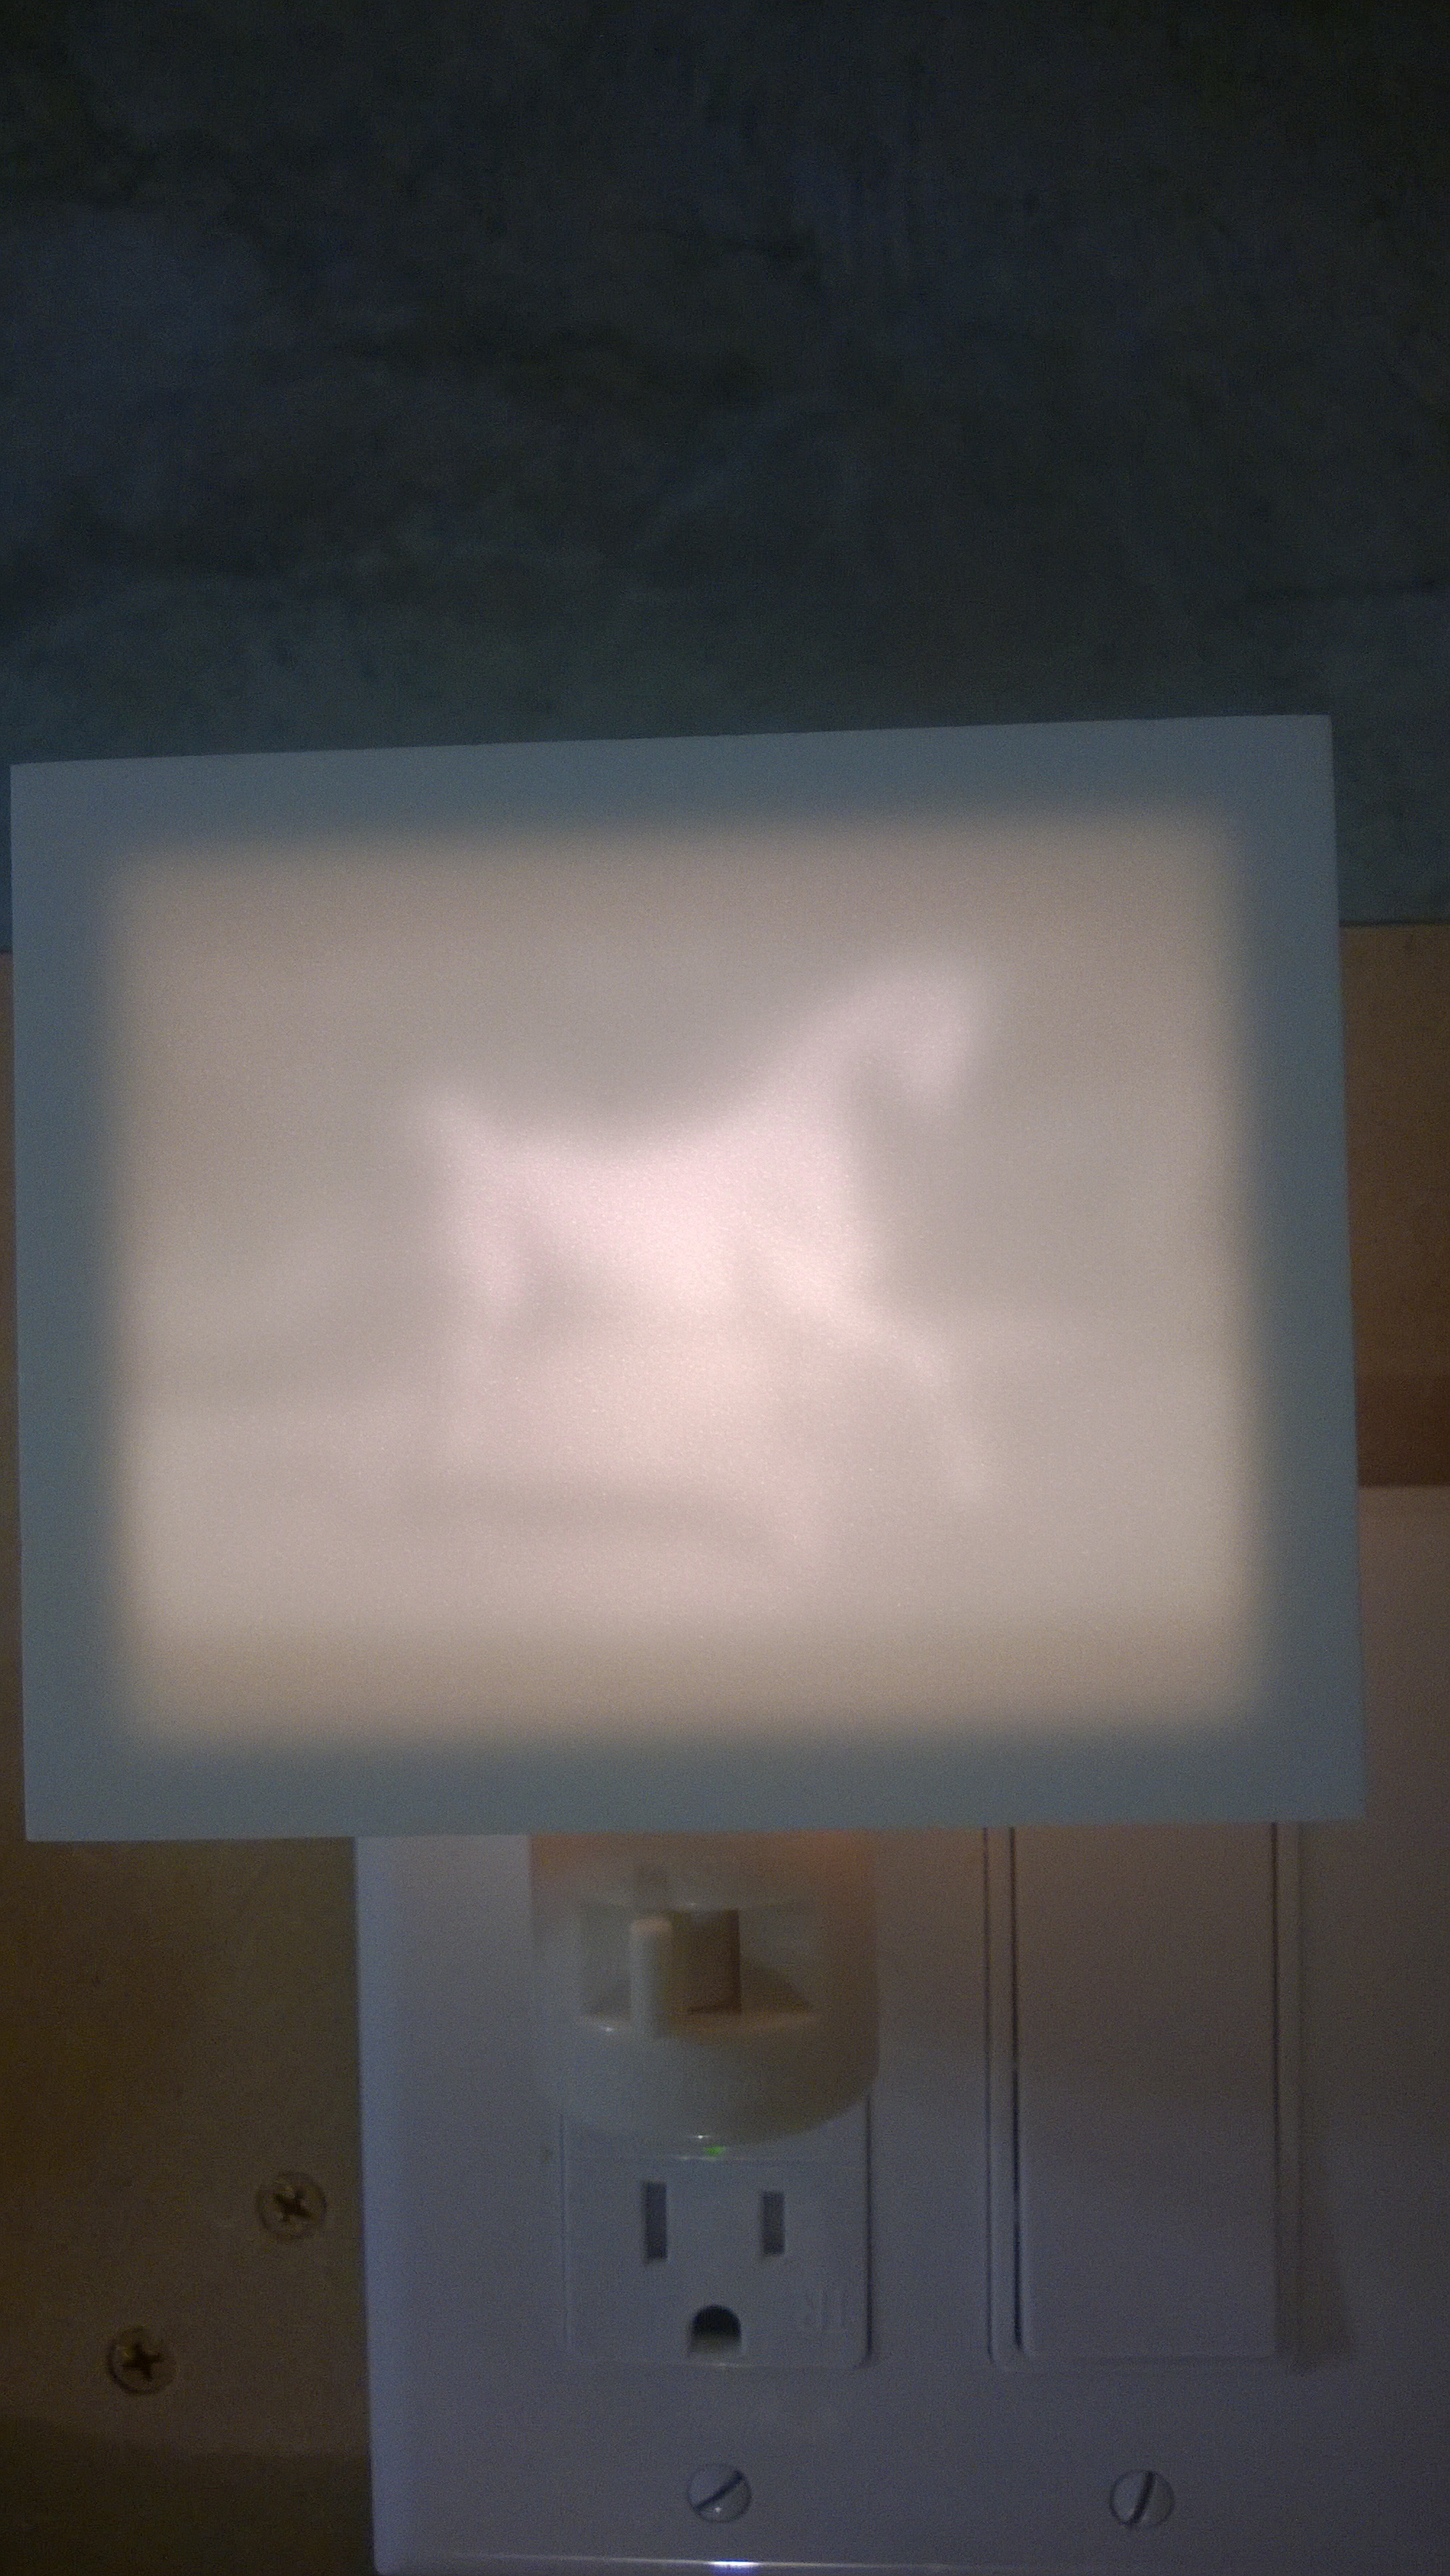
I tried a reverse cut in the bottom, but the image just doesn’t show the detail the same as when the cut side is towards your eye.
Adding front side photo for comparison.
2 Likes
Nice work!
It makes sense that there is some loss of detail coming from the back - the sharpness of an “edge” is defused by the material in front of it.
1 Like
That is very impressive for a first attempt. Great job!
Awesome Unicorn.
How thin is the brightest whit part? you may be able to go thinner.
A brighter light bulb or a boxed enclosure may help.
Possibly the dark areas are too dark, in image editing, try lightening the dark area.
Last cut was at .1" depth on a .18" CandleStone blank.
Currently cutting #2 - need more machine or more resource utilization in MeshCAM?
I need more time for this, this has been crunching for over 3 hours…
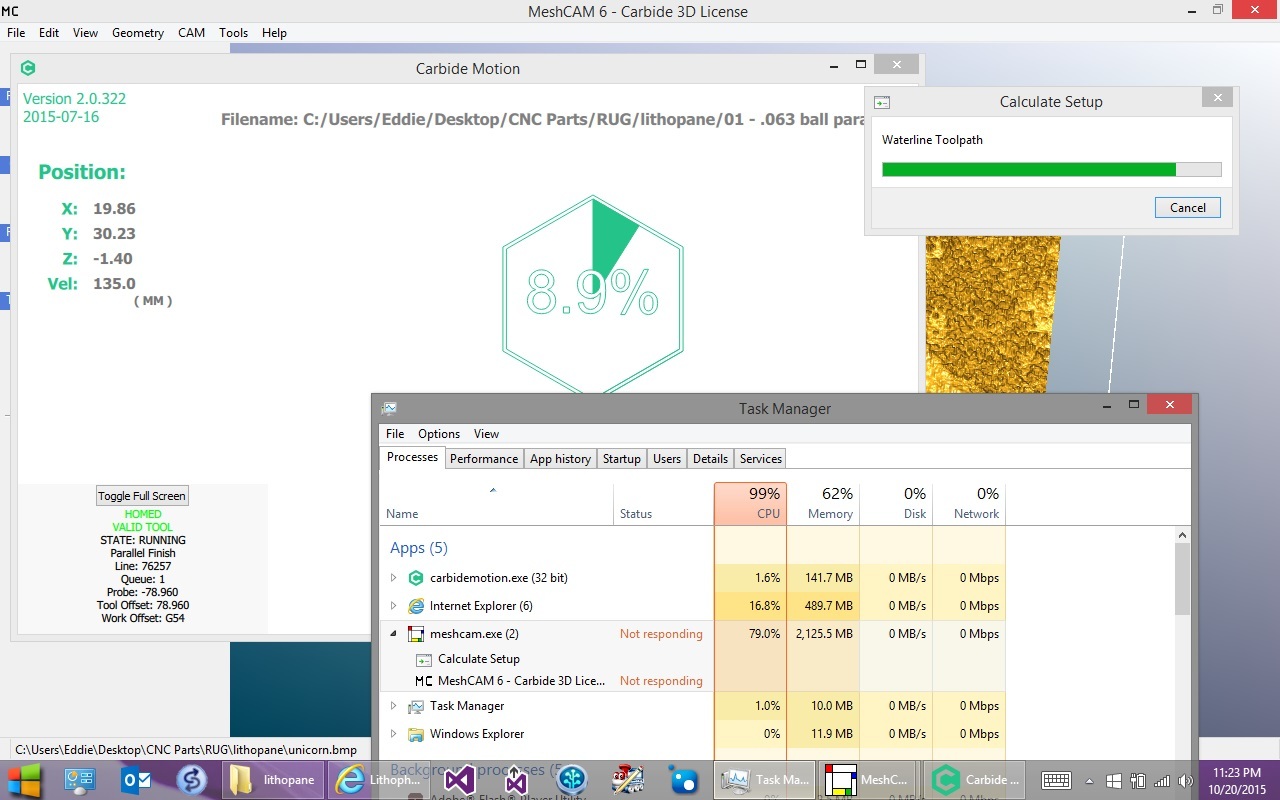
Machine is i7 2.66GHz - 8GB ram - Win 8.1 x64
Stacking windows is almost an art.
1 Like
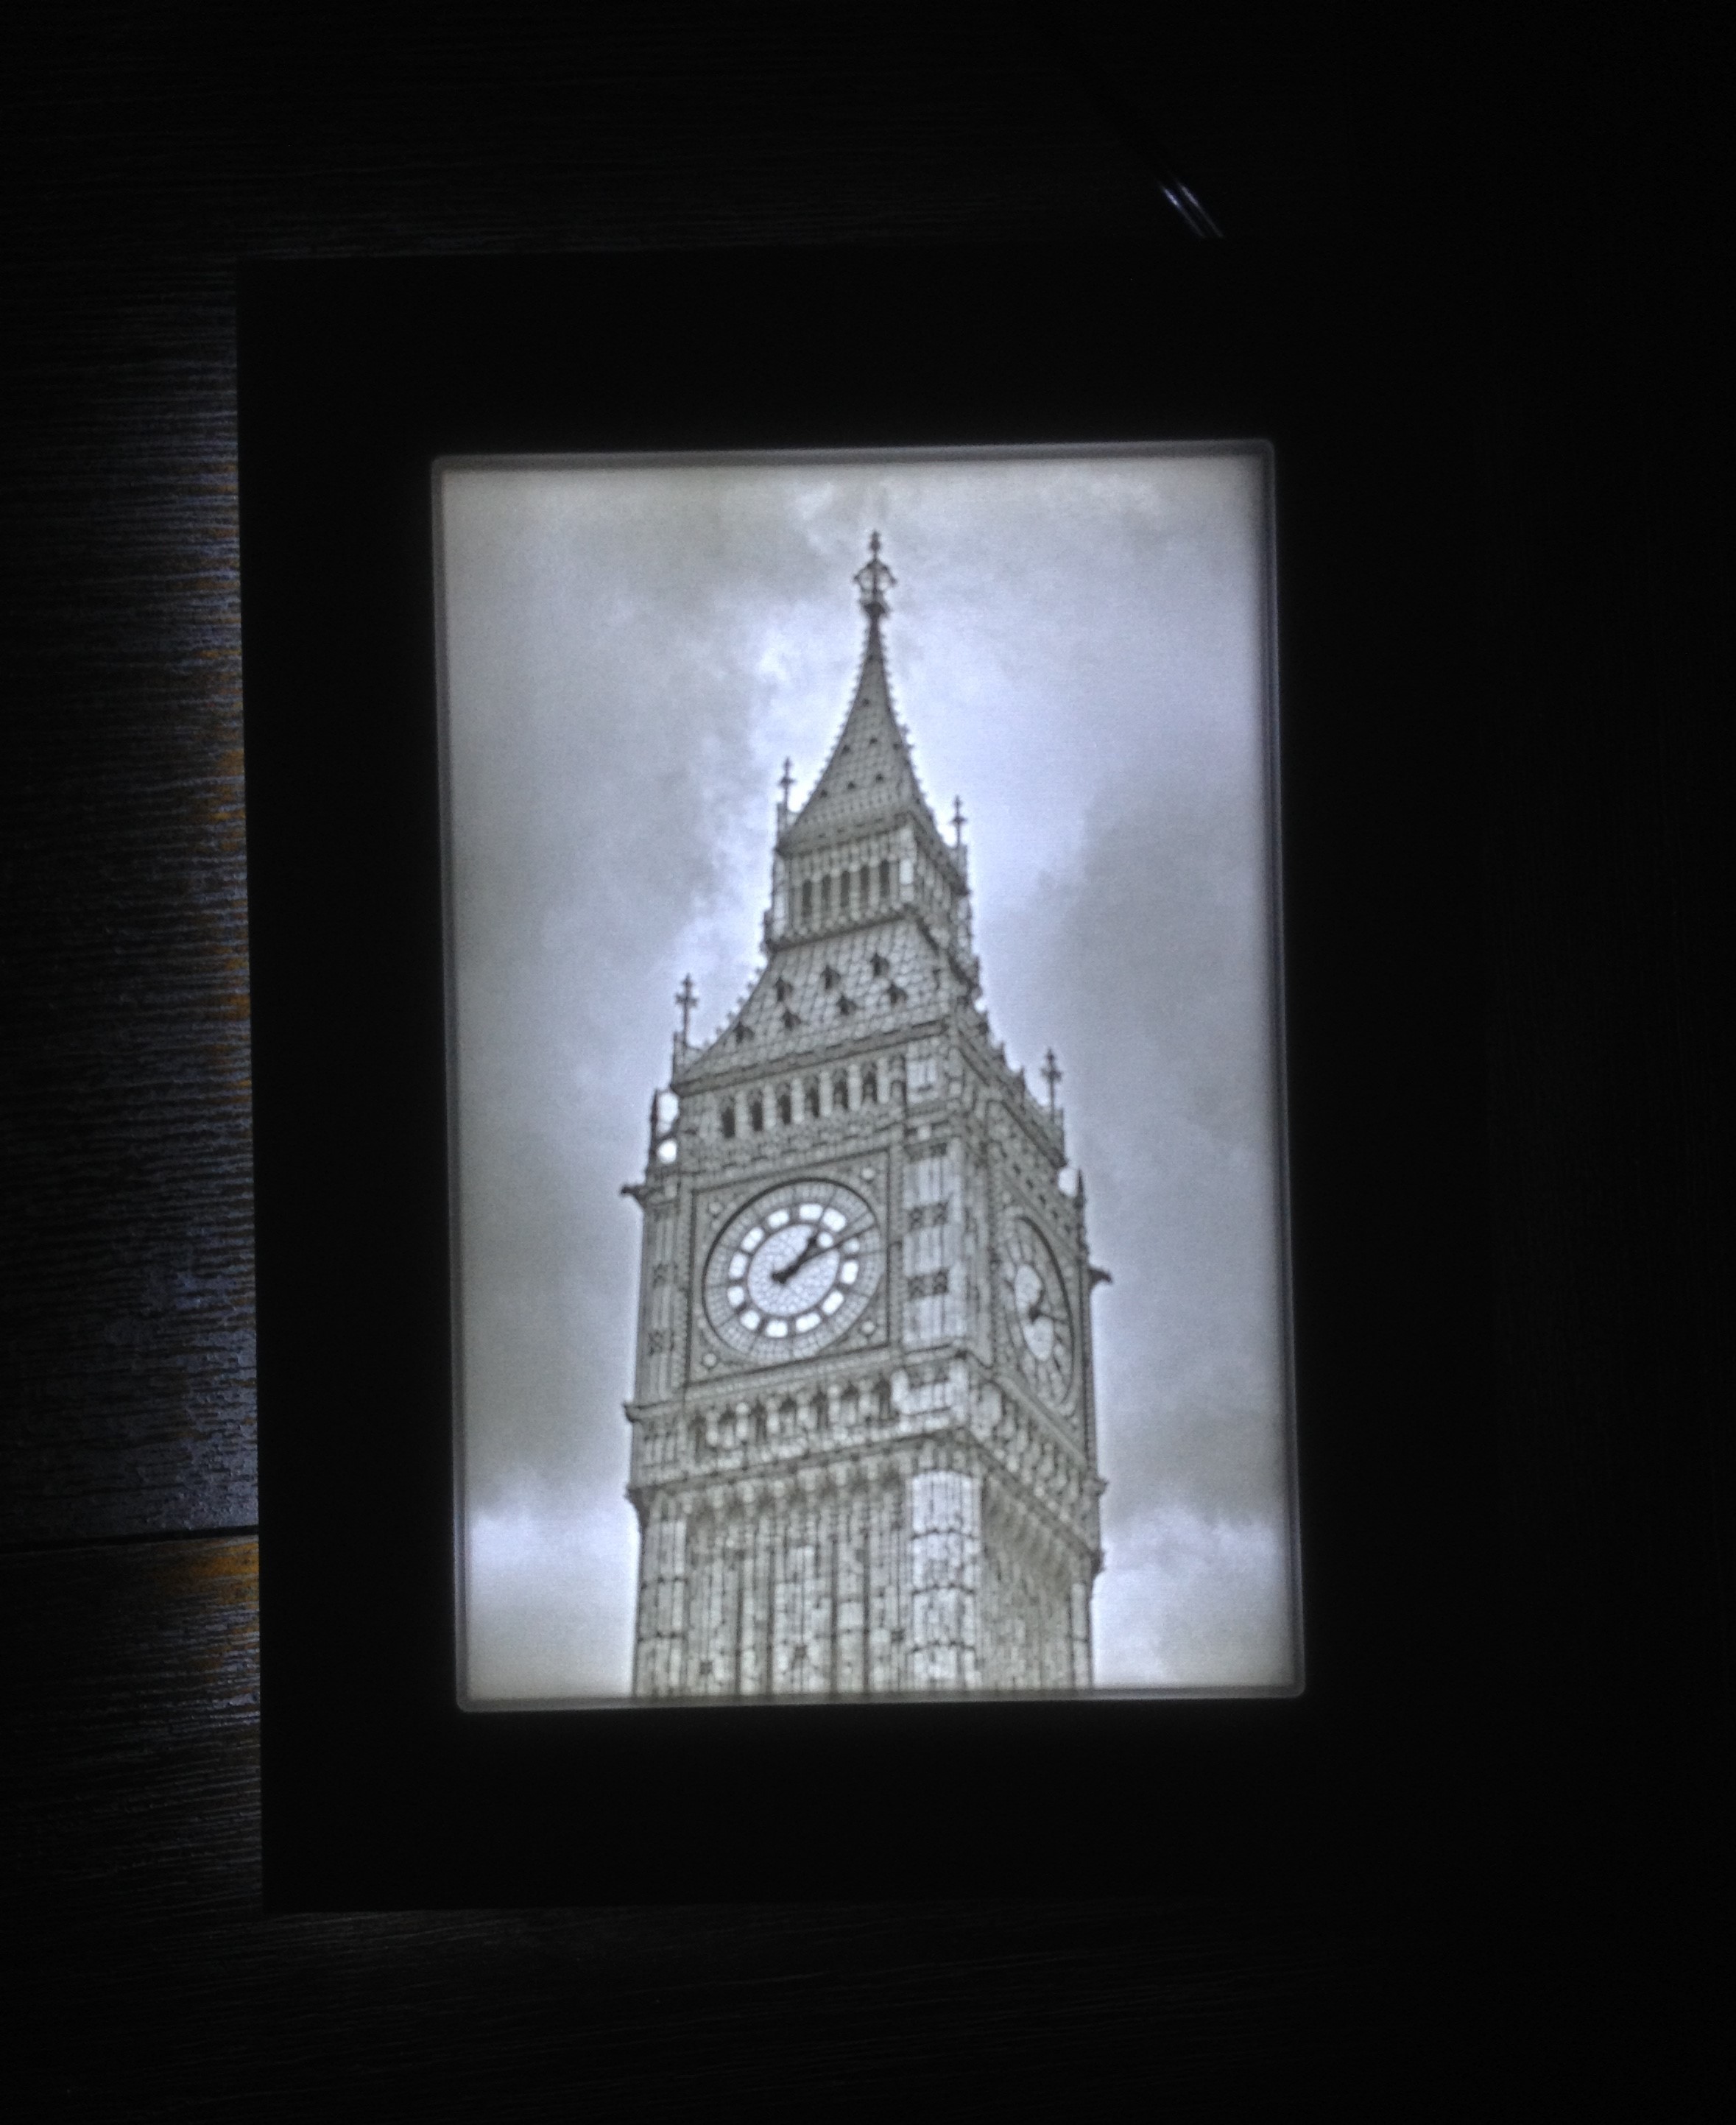
Cut #2 complete, to .13" in .18" candlestone. Zoomed and cropped the photo, no other changes. 3 passes, .063 ball rough, .063 ball parallel, and finally 30°v parallel.

2 Likes
Look at the detail! The muscles are visible!
NICE!
mark
Taking my first stab at some Candlestone right now. I went with the default bi-directional roughing. From what I’m seeing, this material seems to work much better for Climb cuting than conventional. The Conventional passes are building up piles of “thread” chip that cling at the end of the cuts. But my alternate Climb cuts are whistle-clean.
For reference, I’m running a .25" 2-flute carbide cutter for the roughing pass, 0.06" stepover, 0.010" step down, 7500RPM, 55ipm. From how smooth it’s going, I could probably be more substantially more aggressive without much risk.
I’ve finished my first Lithophane and have a couple of tips to help others who may want to make one in the future. As far as picture selection goes, choosing a shot with one or two large objects in focus seemed to work best when using a 1/16th ball nose cutter. Landscapes were more difficult because of the small, fine detail but could probably be created using a smaller mill and long machining times. I also noticed that high contrast works well, but details tend to show up better when they fall in the lighter regions of the image.
I used a .13" z-depth for this project and the total machining time was about 3 hours, 1 for roughing and 2 for finishing. I was able to decrease the machining time by about 25% after applying just 1 or 2 percent of smoothing when importing the image into Meshcam. This allows the tool to move more smoothly across the image during finishing and allows for faster machining. Finally, I had to find a couple of strategies for restarting the job after Carbide Motion crashes. One effective method was to use the polyline tool when setting the machining region to restart the job at the point of the crash instead of restarting the entire job. I’m going to open a new topic dedicated to managing CM because I think there is a lot more to say on the topic.
My toolpath setting for this project are below.
Lithophane 3D 125b 063b.tps (2.1 KB)
1 Like
VERY NICE!
What material did you use? Candlestone? Corian?
mark
Thanks! I used candlestone and it worked very well. According to their website, candlestone is a high grade of white acrylic so I started with the carbide toolpath settings for acrylic and tweaked them a bit to get the resolution that I was looking for while decreasing the machining time.
Thanks!
Very, very nice work!
I used Candlestone
YES! I’ve been recommending it here on the forums for quite some time.
and it worked very well.
I’ve been very impressed with the quality of lithophanes produced with Candlestone.
Candlestone is a high grade of white acrylic so I started with the carbide toolpath settings for acrylic and tweaked them a bit to get the resolution that I was looking for while decreasing the machining time.
Knowledgeable, careful experimentation is the only way to arrive at a truly safe and effective feed and speed.
Well done!
mark
Big Ben, eh? Very nice.
So far, I’ve blown every attempt at making lithophanes with Candlestone – not the material’s fault, I just wasn’t holding it right (the low-profile vise just causes the stock to bow once you remove enough thickness in the middle). Now that I have my sea-of-holes bed, I need to get around to trying this again.
One thing I’m still unsure of: just how much Candlestone do I need t leave? That is, my stock blocks are .25" thick, but I haven’t been able to find a good set of numbers for how much thickness equates to what shade of grayscale. That is, what the thickness of Candlestone is scaling from “White” to “Black.”