So after all my kvetching about different cam applications, I did finally get around to downloading meshcam, and getting to play around with it a bit.
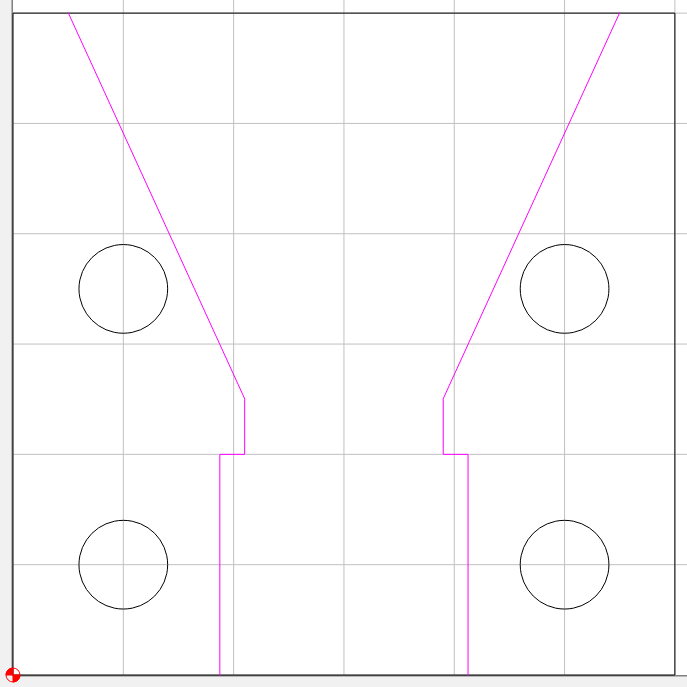
Carbide Create really does not like overlapping geometry, and highlights it in pink and then pretty much just refuses to allow me to do anything toolpath related with it.
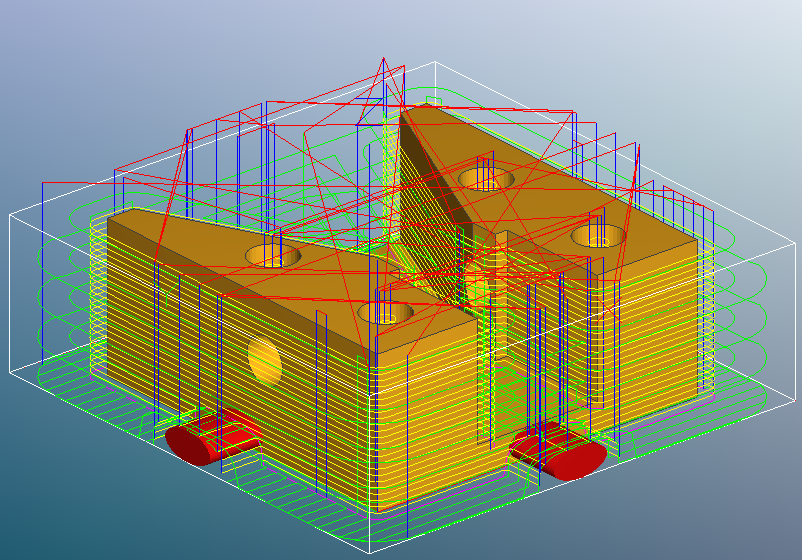
Now, here’s the problem, Meshcam seems to do a great job of setting up the toolpaths using a 1/4 (#201) to do the roughing, and then doing a finish path with a #102. The problem is, carbide motion pauses, allows me to insert the #102 mill, but it gives me no access to set the depth. I think another user complained about this earlier. Further, in CC, I could set a different set of toolpaths (roughing pass) followed by a finish pass, namely, since the holes are #7 holes (.201") the 1/4" end mill obviously will not drill these in any useful way.
So I’m kinda stuck between a rock and a hard place here.
As a workaround, you can save the roughing pass and the finish pass as different gcode files. Then you can take whatever steps you like in between.
The way you do this, is the save gcode button saves whichever paths are checked in the preview. So you check rough and clear finish and hit save then flip the checkboxes and save again.
In the mean time, I went to finish some other components, one of them was the control panel, which all the holes were routed, and well I’ll be damned if the plastic didn’t melt to the bit and make a mess of my holes. I remember someone mentioning that, was just going to look it up.
The major issue wasn’t as much with carbide create as it was with Meshcam, in that it wouldn’t break the toolpaths into two so I could use carbide-create in this manner.
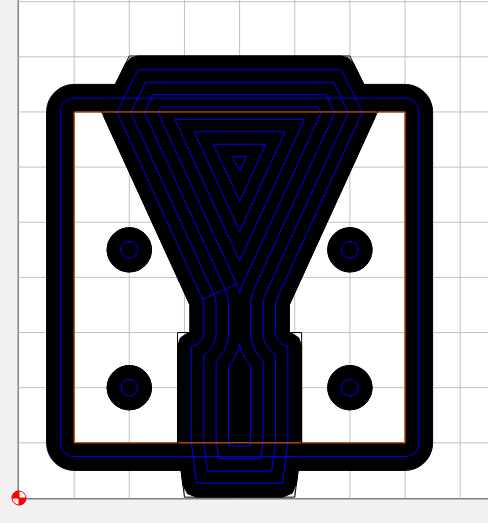
Anyways, after a bit of experimenting, I was able to add geometry, and there’s another obtuse function called “join” that I didn’t previously notice, this allowed me to create another “entity” to borrow DXF parlance, that I was able to set as a pocket.
One thing, I’ll definitely say, Carbide Create really REALLY REALLY needs a PAN function. Yea, I know you can zoom in/out that gets old, also kinda’ve annoying to do on a laptop with no wheel mouse, when you’re trying to find where the discontinuity between two lines is.
So while I haven’t solved my Acrylic problem, I’m using some material of unknown makeup, I don’t know what it is, I think it may be foamed ABS, or foamed PVC, it has no odor when cutting, and it’s making a bunch of fine “snow”.