I share the same concerns. The new assembly is actually closer to 2" thick when you add the plate that connects the spindle mount. It is about 1.25" thick at the bottom. So it is adding some cantilevered weight out front. And it weighs 4 pounds. I did not weight the old, but I doubt everything I removed adds up to 4 pounds. So I will be watching it pretty closely. I already ordered some eccentric spacers. I’m going to give those a go with a socket cap bolt and a lock nut to see if that makes adjusting the v-wheels easier/better. Since the SO3 extrusions only have a lip on the bottom front side, I guess if you added a rear plate it would only be able to roll along the flat of the extrusion. But that would still provide a little support for the weight by transferring some weight to the rear. You are correct in that this could be the start of a slippery slope. I’m already thinking of lifting the Y extrusions to gain more clearance and space under the gantry. But luckily this machine is a hobby in and of itself for me. I sell a few pieces here and there, so the machine has paid for itself, but I don’t rely on it for steady income. So if I manage to break something I am just down until I fix it.
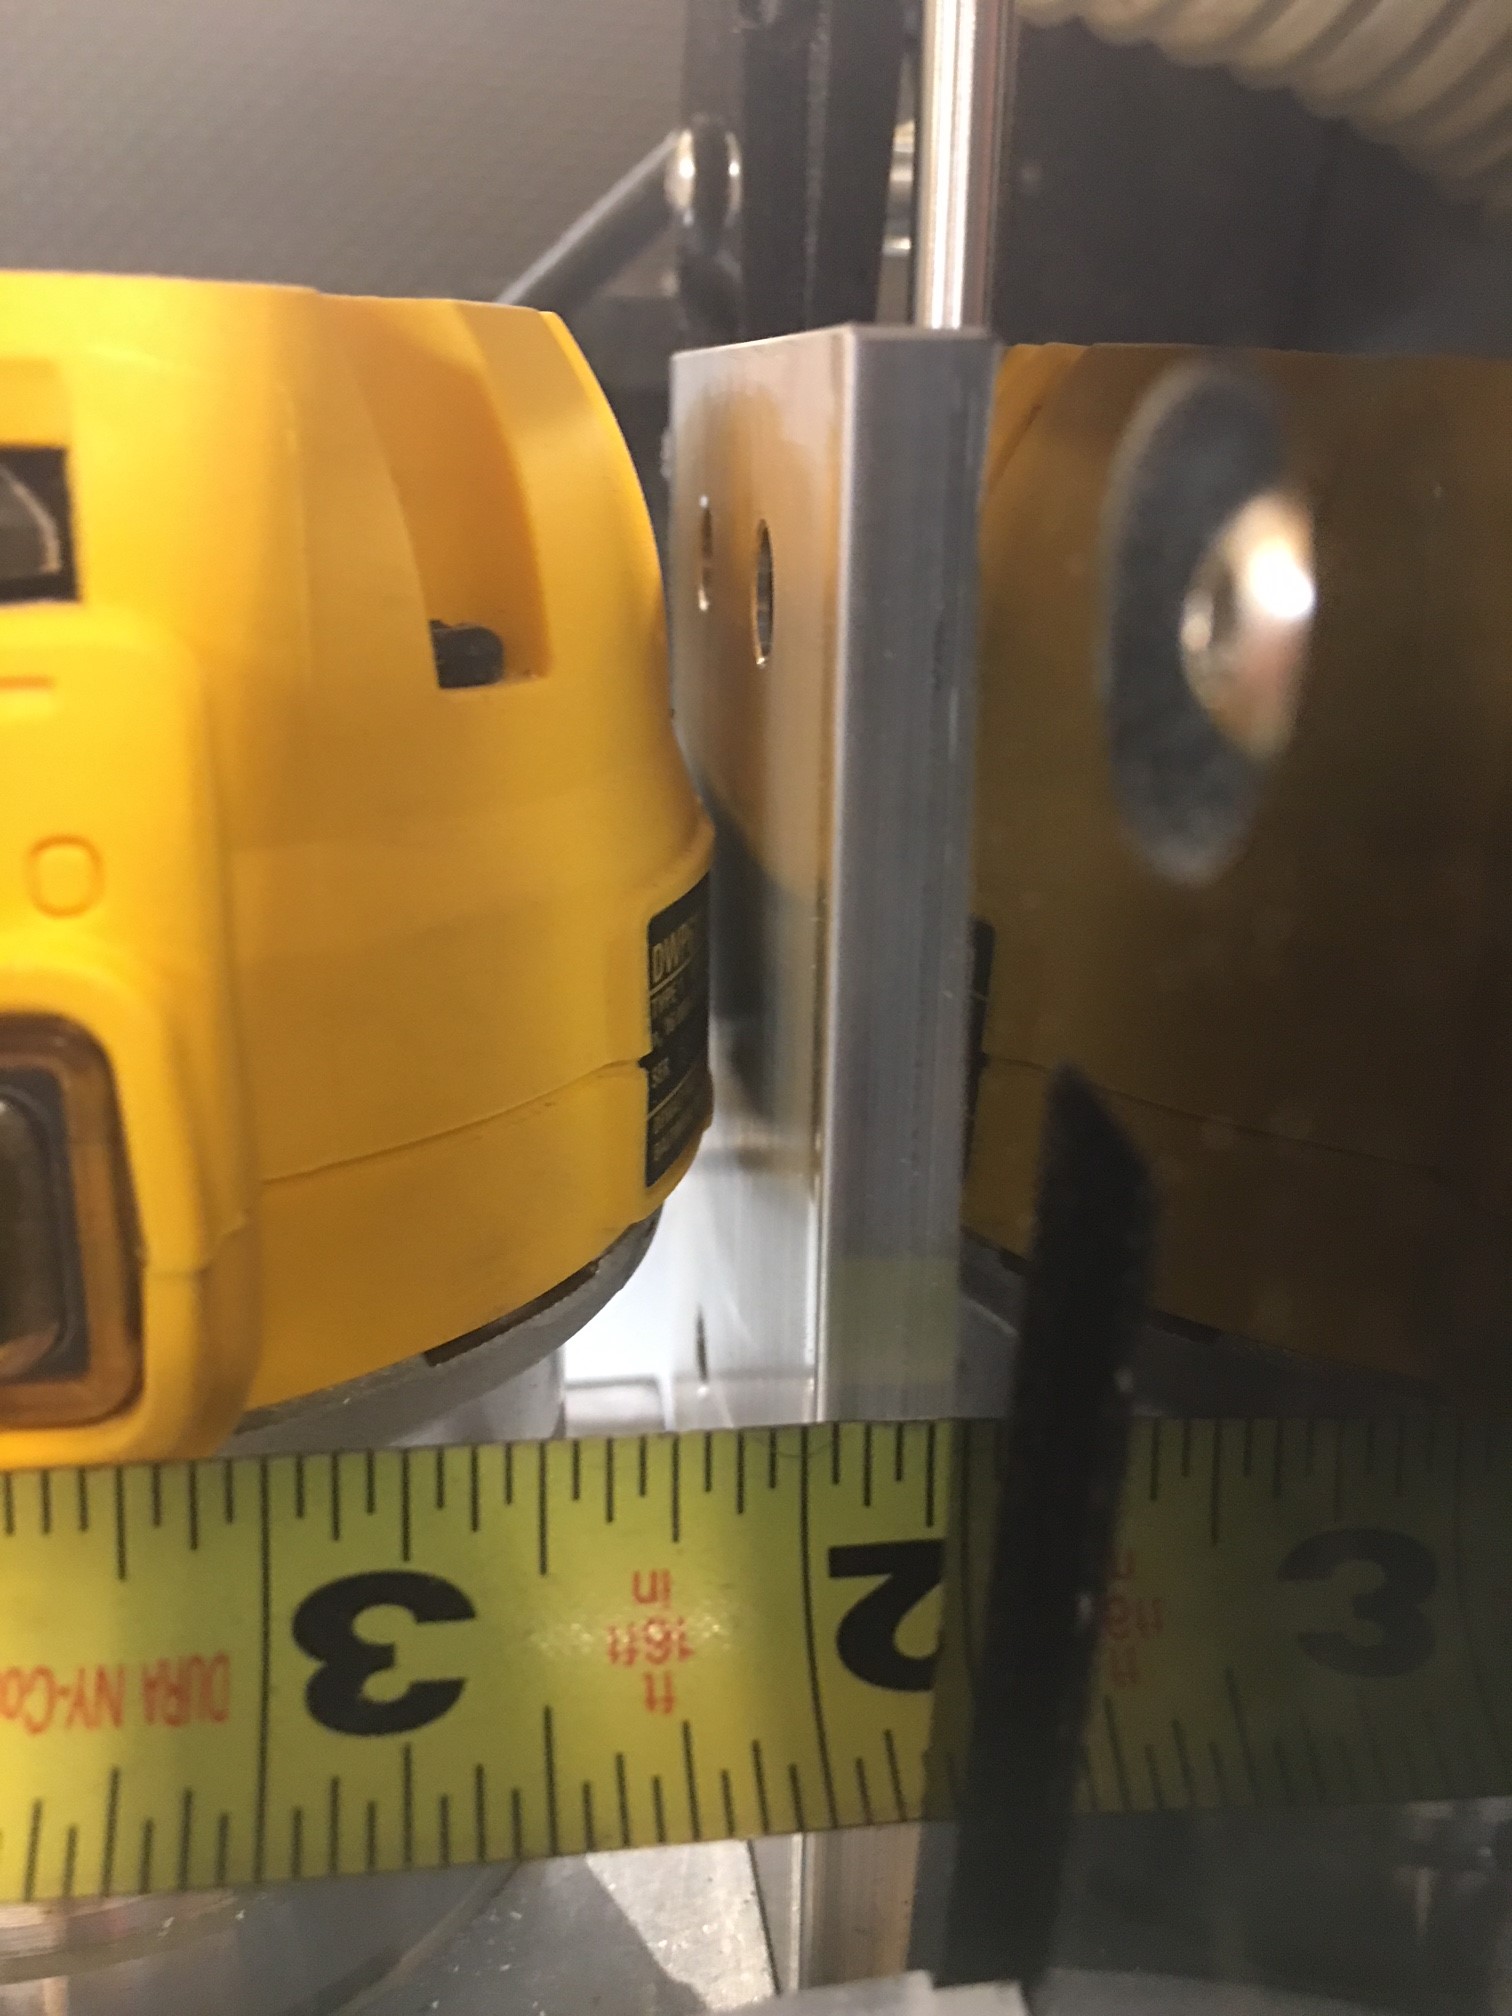
The top pic show the measurement from the original X plate to the edge of the new spindle plate. Just under 2".
It’s partially the weight, but also all of the forces generated by the router itself when cutting. Everyone gets the idea if you can’t break a bolt loose you add a cheater bar for more leverage, with this mod you’ve essentially doubled your wrench length prying against the V wheels. I have no idea what kind of loads they’ve been designed to handle, so it may not matter in the end? I really hope I’m wrong as I’m really interested in making this change, more so because I’d like to increase Z a little.
Valid point. Another upgrade I want to try is making pillow block bearings for the X&Y rails out of Teflon blocks. There are some linear rail systems which use this design.
Yep, there’s a bunch of ways to go at it. I think the Y rails are pretty sound though as they have double the wheels between left and right and there’s nothing big twisting at them like the X…it’s like the difference between standing on two feet versus balancing on one foot while holding a heavy box out in front of you. Technically you could double and double and double even more, but at some point you could have doubled into a more robust machine. Currently my XXL is performing really well, so I’m not in a huge hurry to change stuff around, the only thing I’m really after is more Z travel. I’ve doubled up on waste board, and my latest project was 2 1/2" thick, which I two sided machined, but I had my hand on the kill switch nearly the whole time because everything was so tight. I’d like to do some even thicker stuff, and I could remove some waste board to do that, but I’d rather not have to. I’ve also been pining over the idea of putting a lift kit on this thing to raise the Y rails up an inch or so…you can always add more waste board, but with the low Z you can only remove so much waste board before you’ve dug a whole to China, haha!!!
There are a lot of items that are tall and narrow that could be machined with the added Z. Meaning not every part needs to pass under the rails to be machined.
Example: Facing, drilling and threading the end of a 2"x2"x5" long piece of stock.
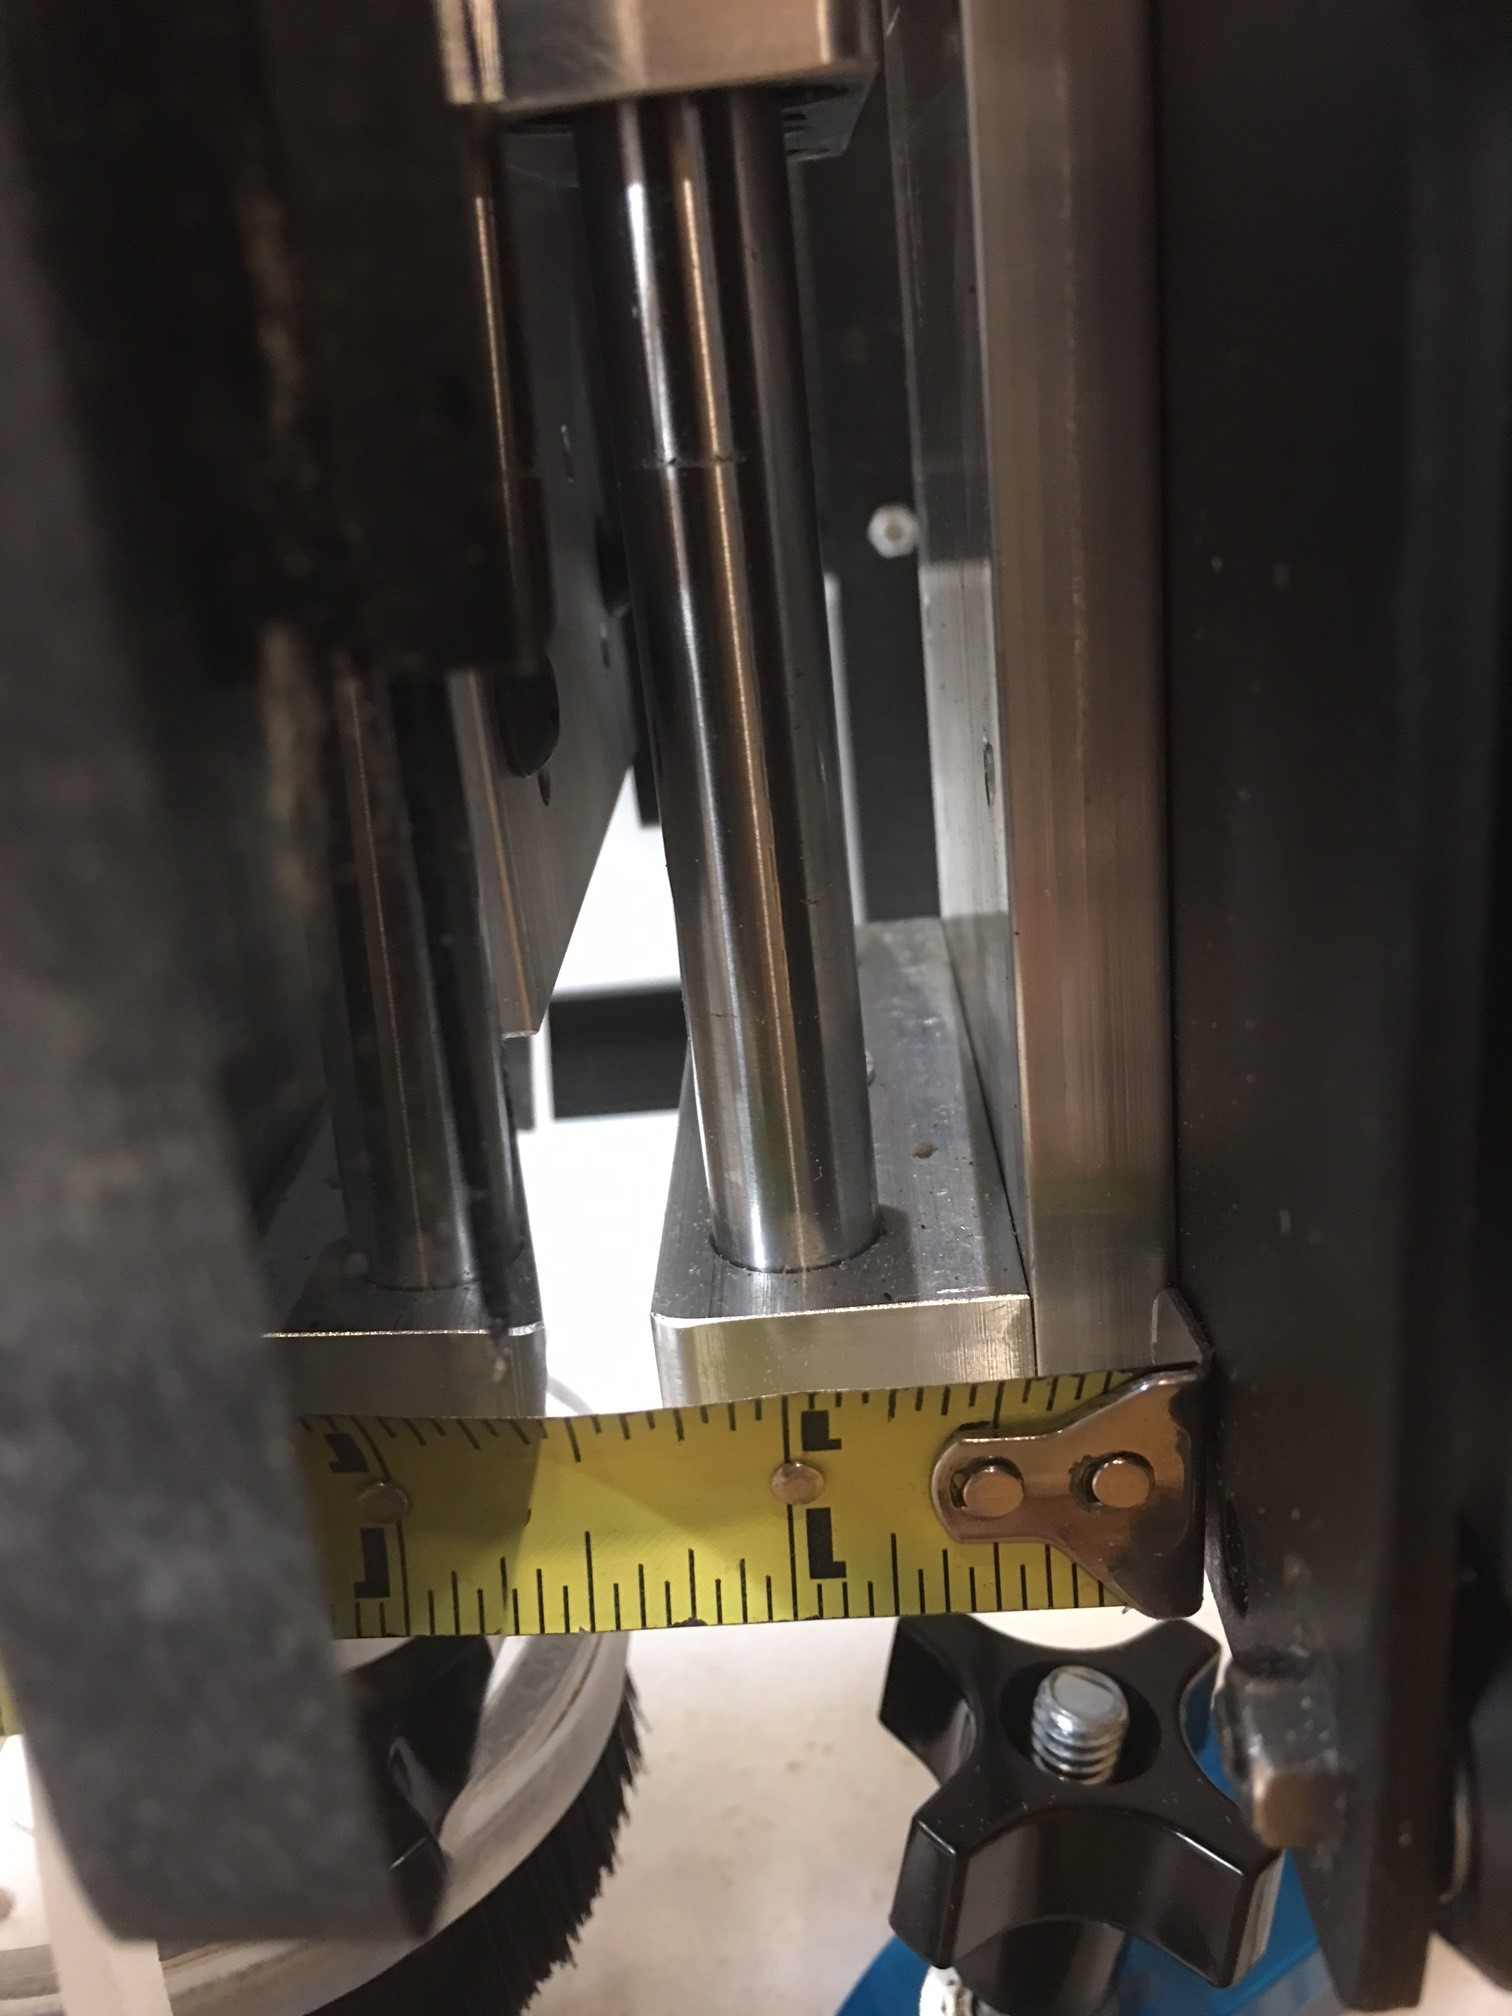
Correct, no more room under the carriage after the Z upgrade. That will involve a lift kit of some sort. I’m kicking around some ideas in my head about how to go about this, how much to raise the X, etc. Also to consider - do you lift it by making taller X plates or do you make taller Y brackets? Taller Y brackets would raise the X and give you more room under the Y rails if you like to tile and need stock to stick through there.
For me it isn’t about the height under the bottom of the carriage, it’s being able to retract a long end mill far enough to clear my work without constantly shifting my router in the mount. I just ordered one, we shall see
Yes!!! I planed on retro fitting one of these onto my s3 but now that know he can make them setup for it I’m going to buy one for my standard and my xxl !!