Roger, looks great. Below are some suggestions, keep in mind I have no experience with your software and absolutely 0 comprehension what is involved to write this in a program or make changes to what you have compiled.
I would suggest making some of the settings input and buttons larger, it looks there is a lot of blank screen real estate , usually I am in a hurry to get the job running and am looking at the screen from 3-5 feet away while jogging with a remote keypad and my long arms. bCNC has smaller inputs compared to Chilipeppr, I use Chilipeppr most of the time. The larger input areas and larger buttons make manipulation much easier for me. I may also be 8-12 feet away working on other items while the job is running, so Large Text is important to me. I like the Mach 3 displays for this reason, looks old but you can see it from a good distance.
For the Z touch plate to set Z '0", i would allow the user to set the touch plate settings and store them, and have the Z pull off of the touch plate a user defined distance, Chilipepper pulls off the plate 2mm, I would like to be able to set it to pull off say 20mm for example so I can put my dust boot on after I remove the alligator clip. if the software could keep track of the Z position in relation to the homing switch position after setting Z ‘0’ to prevent crashes, that would be great. Allowing the user to automate functions to their comfort level would be a great customization feature.
The Find Center is a great feature. This could be partially automated using WCS ‘0’ and jogging to the opening of an edge finder for the opposite corner from '0" and running a macro to find the precise opposite corner.
Looking forward for your future updates and feature videos. Keep up the great work!
The probe section I JUST started attempting since yesterday when my limit switches arrived. I figured when they got here I would have to take the cover off anyways so I installed my probe wires at that time. It’s hard to see in the program, I think because of the format my phone records on. But currently it allows you to set a defined Z Max distance, also a speed in MM/MIN and an offset when you zero it. which allows for the thickness of the plate.I think you are right on the pull off, I may add some code to support just that. I plan to add the probe X and Y as well to that same panel.
The center finder I am still working on actually (Another new feature added yesterday). Currently it supports 2 points and splits the difference. I plan to add a 3 point touch option for a circle, so you could touch 3 points on the edge of a circle and it would find the center based on those points.
Ad far as looks and larger goes these are good points, and I am noticing this myself so I do plan to make it look larger and nicer.
For the number pad control I currently support all movement options plus I added a “SET” option and 3 definable point options. I made 1, 7 and 0 definable but I made it so you have to tap them 2 times in half a second to go there, that way you don’t accidentally bump them and send the machine going where you don’t want to.
Yes all the settings eventually will save to disk and re-load. Currently I have macros and tools and a log saving but the rest will need to save before I release the first version.
Simpler is better unless you want to try to market this to experienced CNC users. However, that won’t be the Shapeoko crowd for the most part.
I’m an engineer and there’s a saying… “shoot the engineer and ship it!” I think it applies to programmers too. Its common for programmers to spend 6-12 months developing a program that they know everyone will love only to find out that some key concept was overlooked and the software doesn’t appeal to the market. There’s an excellent book called “The Lean Startup” that talks about common issues and how to avoid them.
Its fun to tinker but you really won’t have any idea what people like until you get it out as a beta for users to test and get real world feedback. IMO, the game changer for the entry level CNC crowd will be something that
Doesn’t require any math in your head
Has very few buttons or adjustments on the main screens
Is simple enough for a first timer to intuitively understand within 30 minutes or so
Works for a wide variety of machines
Allows you to quickly and easily make common shapes without a separate program.
The Carbide Motion program is pretty close to that except for a few major functionality issues that force users to seek alternatives. It also doesn’t allow creating simple shapes within the program.
I’d like to see a paired down version of what you show in your video with much simpler UI front page. Put the details and special functions on separate pages. Trying to do too much with your beta can kill a project in more ways than one.
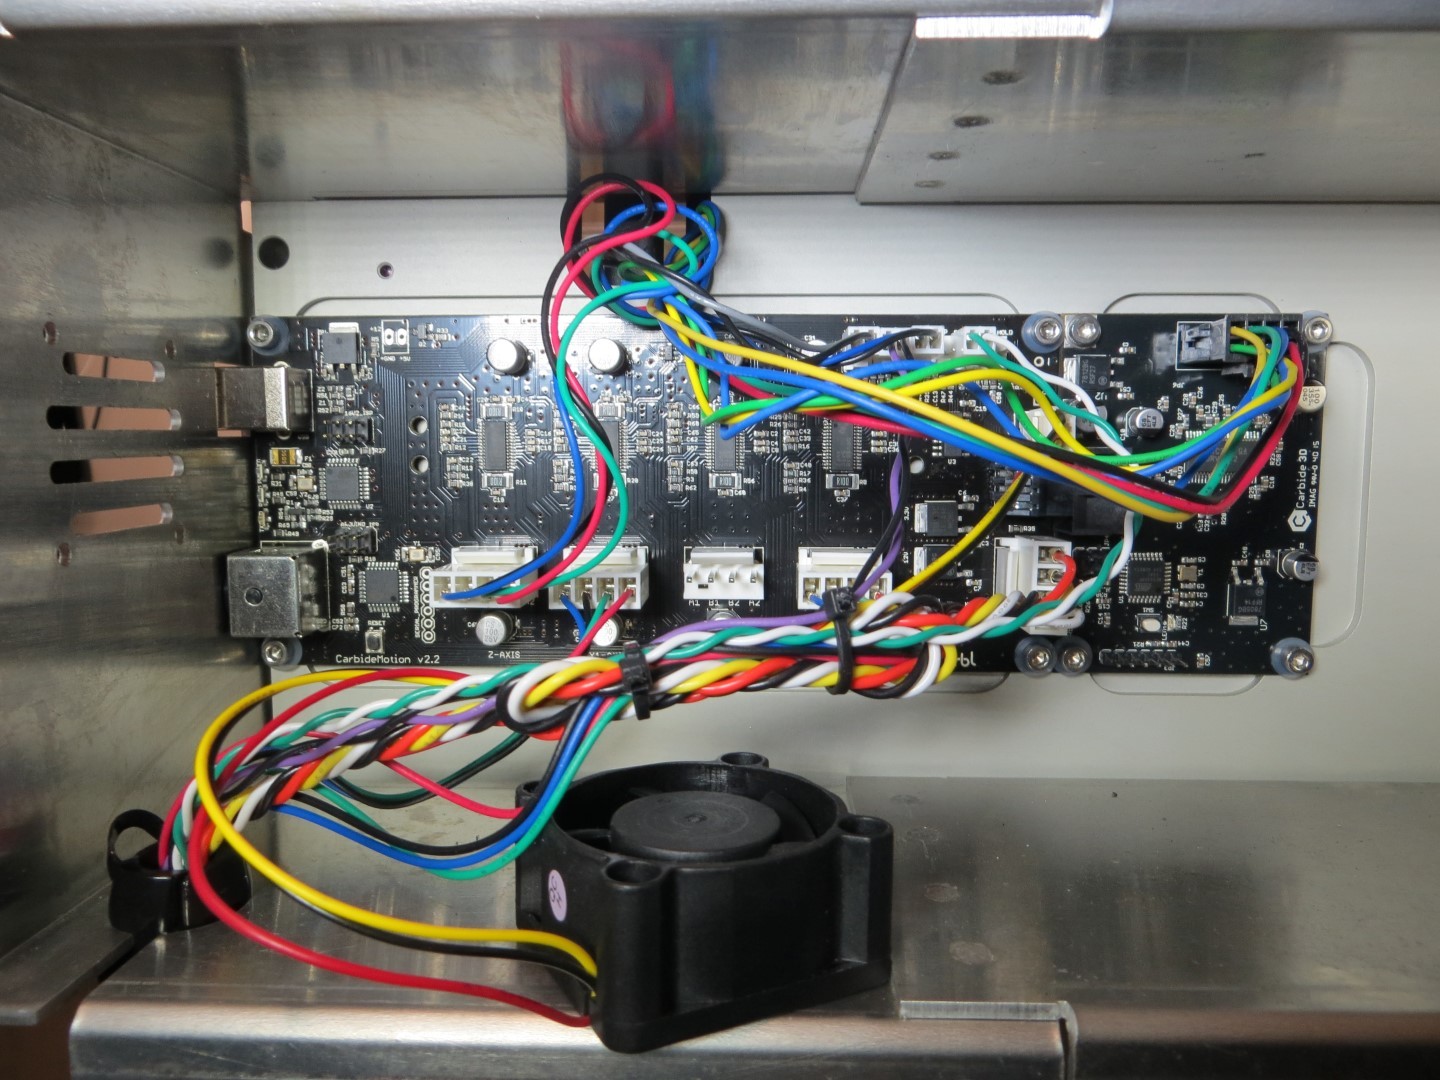
The probing function looks great! Exactly what I want on my Nomad 883. How do you connect the electronics to the computer? Through a separate USB device or is there something I don’t know about the Shapeoko?
I agree with Tony, it will be nice if you can release a beta version and see how users think. But I do think having advanced functions are great (maybe in separate tabs/versions - like Tony said in a previous post).
Will you have machine specific functions? It would be awesome to have something like pressing a button to face the spoiler board on the Nomad, only needing to zero, select what tool to use and set how much the user want to trim.
The Shapeoko has pins for a probe so you just have to get your own plug/wire and plug it in. As of right now, it only speaks GRBL dialect of Gcode so to speak. As for the function like you say, it would currently require you set point A at the bottom left, and then point B at the far right back point and it will bring the surface to any depth you want it to. As a side note, point B doesn’t need to have a Z depth it assumes everything is at point A depth and goes down from there. So as fast as you can jog the machine front to back and side to side, it will generate the G-Code for that box. You just need to tell it the bit diameter and how much of an overlap you want it to be.
I think this is a step in the correct direction for software.
Thanks for the explanation. Does the Nomad have the pins too? I saw the “box” tab on your last post and I know you can do it that way, just thought it might be even easier if it is built-in. Now I think about it, I only need to do it once and I can reuse the g-code after.
I took a pic of my Nomad board when I got the machine but I can’t tell much from this pic. I bet @WillAdams has a Wiki link that shows what all the board pins do.
Another nice to have feature would be a go to touchplate zero location. The user could set the X & Y offset from “0” coordinates in WCS and the machine would move there before zeroing Z. I typicality go 70-100MM in on X and Y to do my touch plate and have to jog each time. It would be handy when batching out dozens of like parts.
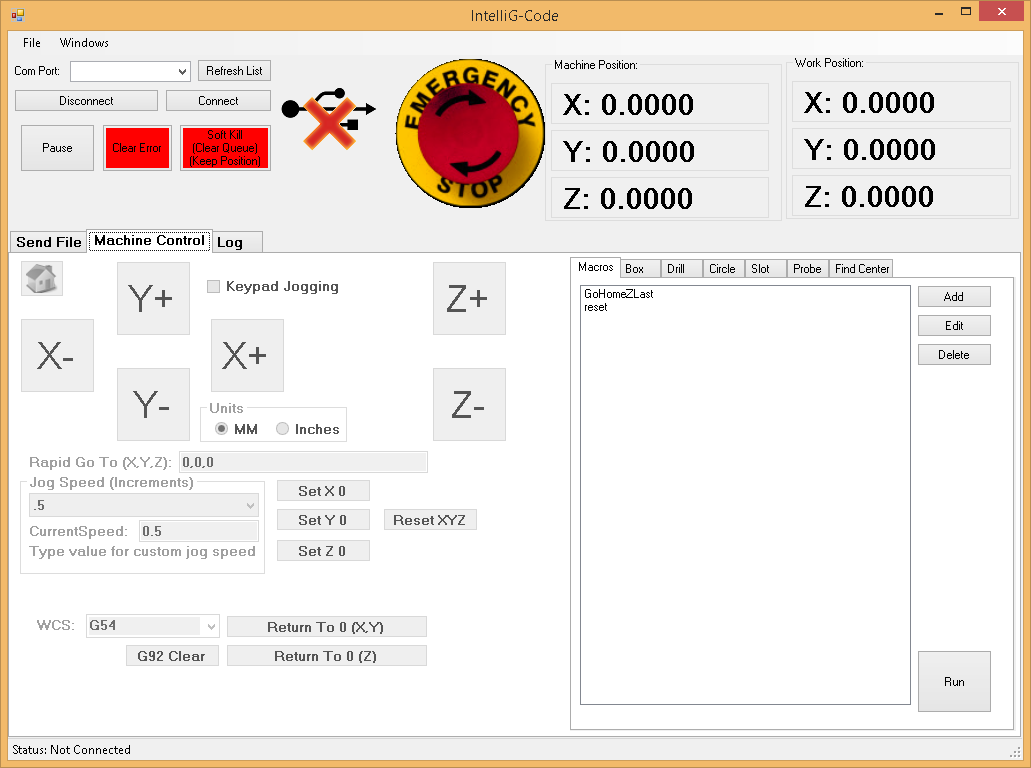
Well with the software currently allowing 3 “Software” set points, this would not be an issue. You could set one point for that, another one for say a tool change position, and another for an “Out of the way” position so you can remove or fasten the part quite easily. At least those are the set points I made. Also I made a 4th point that is not a point but rather a Z safety height, so you can hit that button and then it raises to set height before moving anywhere else.
All of these are set as Machine (Absolute positions) based on homing, OR WCS depending on what you prefer. Those with Homing will likely use Machine positions because they will not change when zeroing a part.
Been stress testing the software, have run millions of lines of code through it so far. I updated the GUI a bit based on recommendations that I agree with (particularly, the the need for larger fonts so you can read at a distance). I have been doing everything with a keypad so far and I added support for toolchange commands as well.
Added support for all workplanes. G54 etc and G92.
Still working on a few bugs, nothing major but just GUI related when things are out of order etc. Then I will focus on adding more controller options like joysticks, midi devices, etc.
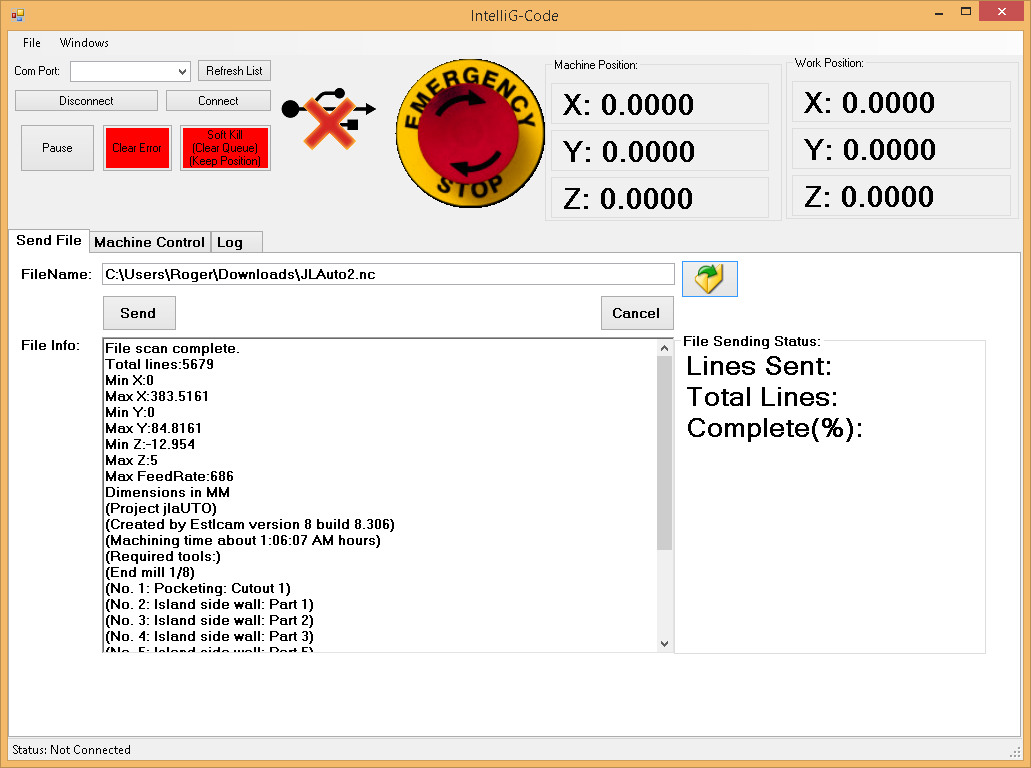
It’s going well though, I use it exclusively as my g-code sender because I can program in Machine locations with hot keys which allows me to move the machine anywhere after homing very quickly!!! Plus it sends the files no problem and even testing it with laser files no issues yet.
You my notice the Icon next to the stop button, this serves as a status. Currently it shows not connected. But it has working, alarm, connecting, and connected symbols so you can see whats happening very quickly.
YES I fully anticipate sharing!!! I am however going to ask a tiny fee. Hey I’m a one man band here, and it is time I should probably get paid something for no?
Not much I promise. There are many free ones out there. But I am dedicated to taking many aspects out of the silly workflow for many things. I think to be a good sending program you should be able to define “Software” points for tool changes and finished job changes etc. I think one should not need to dray in cad to surface a material or carve a box or circle. And things like probing and center finding should be the norm. I still have a ways to go before I start beta testing so to speak, I’m less then alpha testing at the moment. But I promise, very soon I think we can find some way to start large scale testing.
For those whom say they take over a minute to home their machine, I say to them get real software and do some real things in sequence! For those whom say that their machine does strange things, I say it’s because the software is not sending the commands well half the time.
My SO3 XL is doing everything my software tells it to do! And I have seen that it does strange things with the Carbide Motion which is 80% of why I took it upon myself to develop a better solution. I honestly was not considering writing software until I started jogging my machine and it started going wherever it wanted to. That is when I said “Something is wrong here”
I think I will be releasing a “Alpha” for users right after I fix about 10 issues I see and get the drill and arrays working. At that point I will need feedback as everyone will probably need some workflow adjustments. That being said, I am busy with my actual job so I can go on a vacation so it will probably be mid to end of July before I can honestly give out a sample to the public.
But if all goes well I hope I can get something worth investing a tiny amount into. No set target price yet but it will be under $50 for sure!!! I think it has huge potential, I am adding G-Code fixing options as well to update and fix bad or poorly implemented gcode software. Removing redundant S and F calls which cause GRBL to pause to catch up etc. I really see a whole new breed of software soon. I hope to be on the edge of it now that I have found it.
I think the current offerings have enough issues that many of us will pay for something that works and that has some time savers. However, it will need to have a free trial period, be relatively bug free and include decent support before most will be willing to plunk down anywhere near $50.
I don’t know if you’ve done this before but if you roll out a program that has all the bells and whistles, you will likely crash and burn. There are so many variables outside of the functionality of the program itself that will be difficult to anticipate. If you roll out the minimum viable product and get it rock solid quickly, then add features based on user feedback then you will grow a following.