I did a few of these last year on my XXL out of Candlestone. I used an 1/8" ball to rough and a 1/16" ball to finish. Took about 2 hours plus a little for some 4x6" pieces. Lots of ways to skin a cat (I’m not condoning cat skinning).
Great job Dalton, and thanks for sharing your settings.
It is purely subjective, but I would flip the image when carving a lithopane so that the final effect is revealed on the flat side of the Corian. Haven’t made one myself, so if anyone can tell me a reason not to do it that way, please do.
The best image is always produced when the cut side is left towards the viewer and the flat side is left towards the light source. It takes some practice to get depth flattening correct, and to learn how much of the material to leave in the uncut layer.
This photo doesn’t do this piece justice IMO, but you would never get the strands of hair if they were cut on the back side of the piece, or any detail of that level.
A piece of clear acrylic goes in front of the art in the wide groove, and the LEDs get glued to a piece of plywood in the back. I have since stopped making them with the buttons and plugs on the side and now put all of the electronics directly on the back plate.
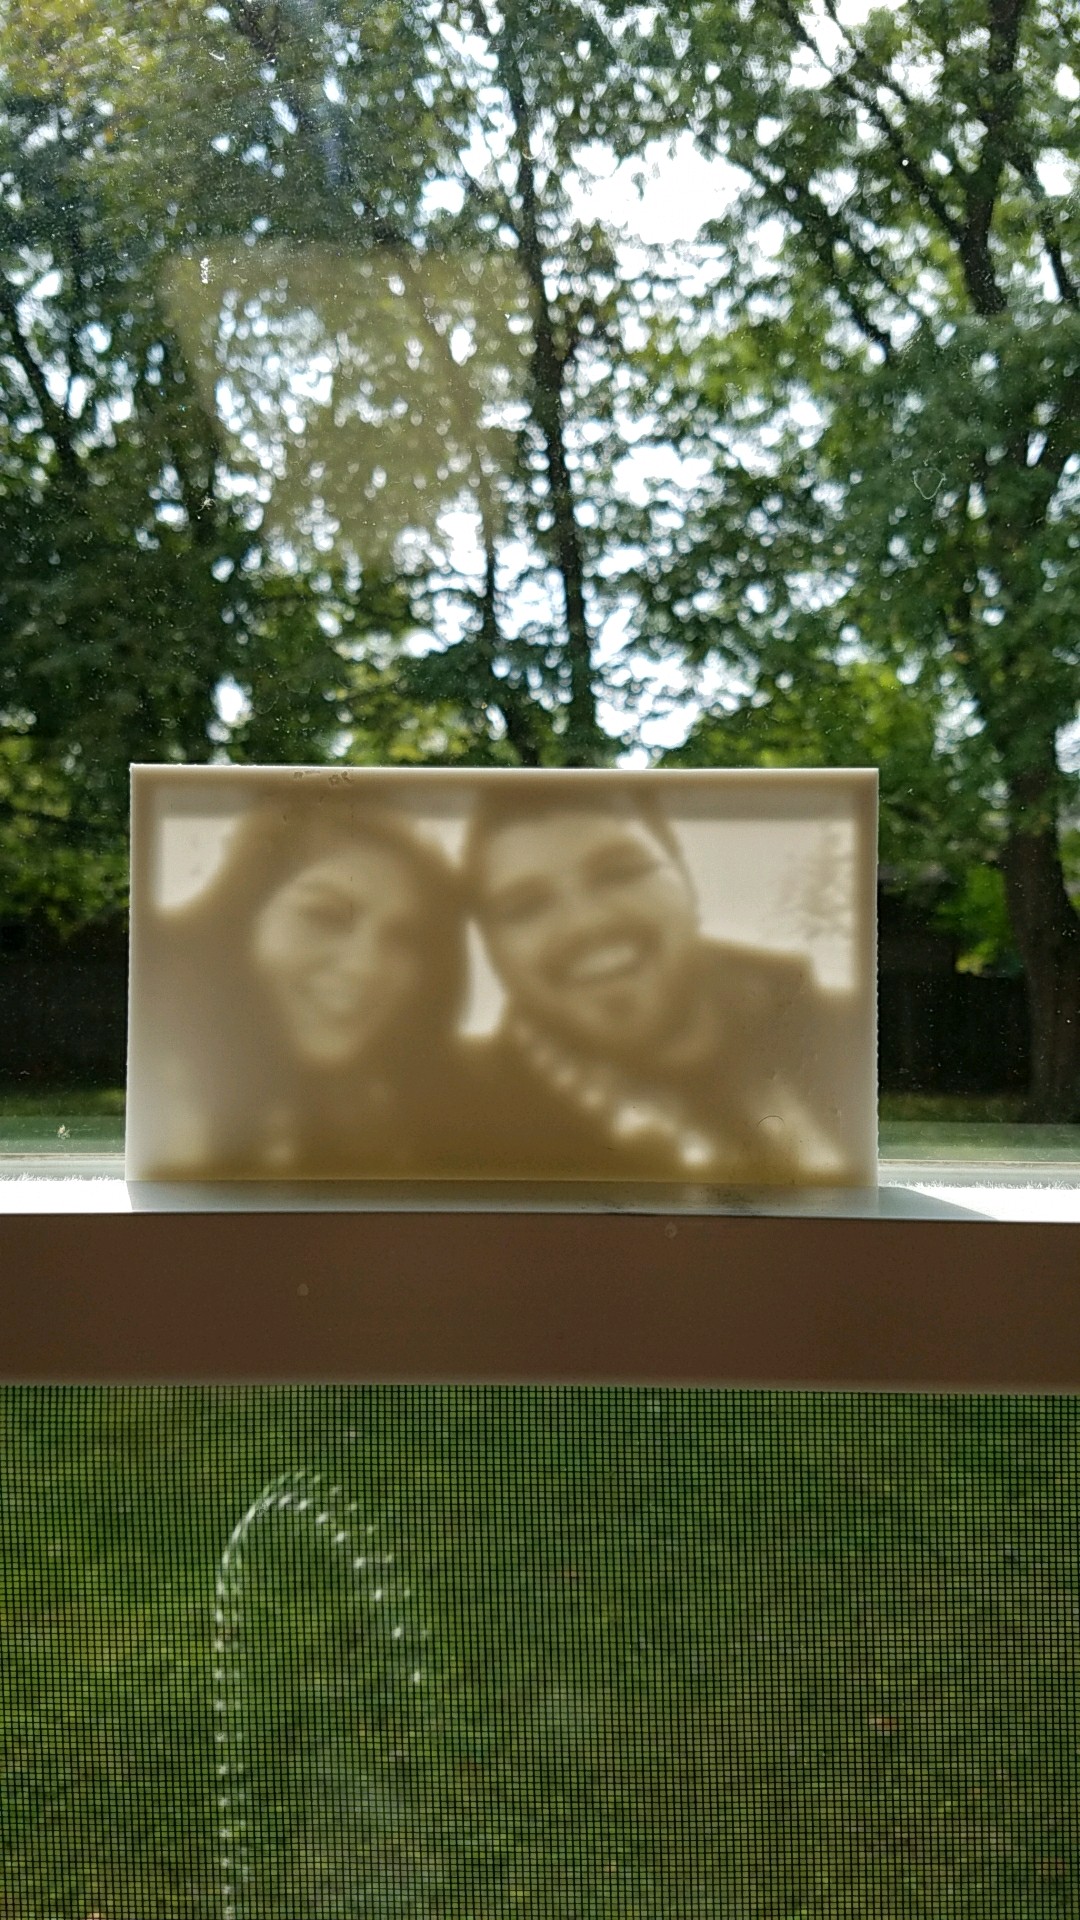
Thank you all for the feedback. As mentioned by someone else above, the flat side if the Corian produces an image that is less sharp. This is because Corian is very good at conducting light. When the light enters the sharp cut edges and hits flat non cut material the light scatters and diffuses yielding an image that appears out of focus. The thinner the material the better, but when the light passes through the flat side it diffuses the light that then gets conducted to the sharp points and edges yielding much sharper images. Here is an image of the flat side to demonstrate what I am trying to explain.
I used the following website to generate an STL file from an image file. Specify the size on the Model Settings page. I used a minimum layer thickness of 0.6mm. Also ensure you choose positive image on the Image Settings page. Another tip is to lower the vectors per pixel to three to reduce the number of polygons in the STL. With the default vectors per pixel setting at four, the STL file is massive and it takes forever to generate footpaths.
I think it is a “cnc finger joint”. Trick is that the fingers need to have a fillet so that they’ll fit in slots that must have fillet due to the cutter having a diameter.
This is like a blind finger joint, but I designed it by hand. They are not hard to do at all. It was more about getting the decorative end banding, but it is cut completely from the top with one ball mill in one program.
@dmckee55 - Looking to try one of these and finalize my workflow - so you took the STL output from a lithopane generator and pulled that into… what to make the toolpaths? vCarve? MeshCAM?
Thanks a ton for posting all the feeds and speeds, super helpful. Any other tips you can pass on to help me waste less corian?
I used Meshcam v6. WARNING: use a decent computer and expect it to take quite some time while generating tool paths. Dust evacuation is also pretty important.
I am going to be finishing my frame / box sometime in the next few days. I included an led panel to backlight the lithophane. More pictures soon to come.
When I do lithophanes I use Candlestone and three passes to get the best possible detail - 0.25", 0.125", 0.046". A 5x7 takes about 3 hours, including the tool changes.
I use BobCAD-CAM plus Art so I’m using industrial embossing CAM. I use a adaptive, High Speed Machining (HSM) rough then an adaptive finish pass and finish up with REST milling finish.
I’ve also used MeshCAM and the results are quite good.
It took around four hours to cut if I remember correctly. I got tired of waiting on MeshCAM to generate tool paths so I let it run overnight and started the job in the morning.