Nomad and SO3: Custom Enclosures (the enclosure zoo)

Thought I would make a thread for people to show off their custom enclosures :slight_smile:

I know Mark @mbellon has a pretty sweet setup, especially for his PocketCNC!

Anyway here is my work in progress, It has thick walls filled with polystyrene foam for noise dampening and then a thin mdf ‘veneer’ to make it easier to clean. I am waiting for some aluminium square tube to extend the front to maximise usable work area of the shapeoko 3. They will also add as the frame for some polycarb doors I am building and the support for an extended wasteboard, lots of work to be done!

8 Likes

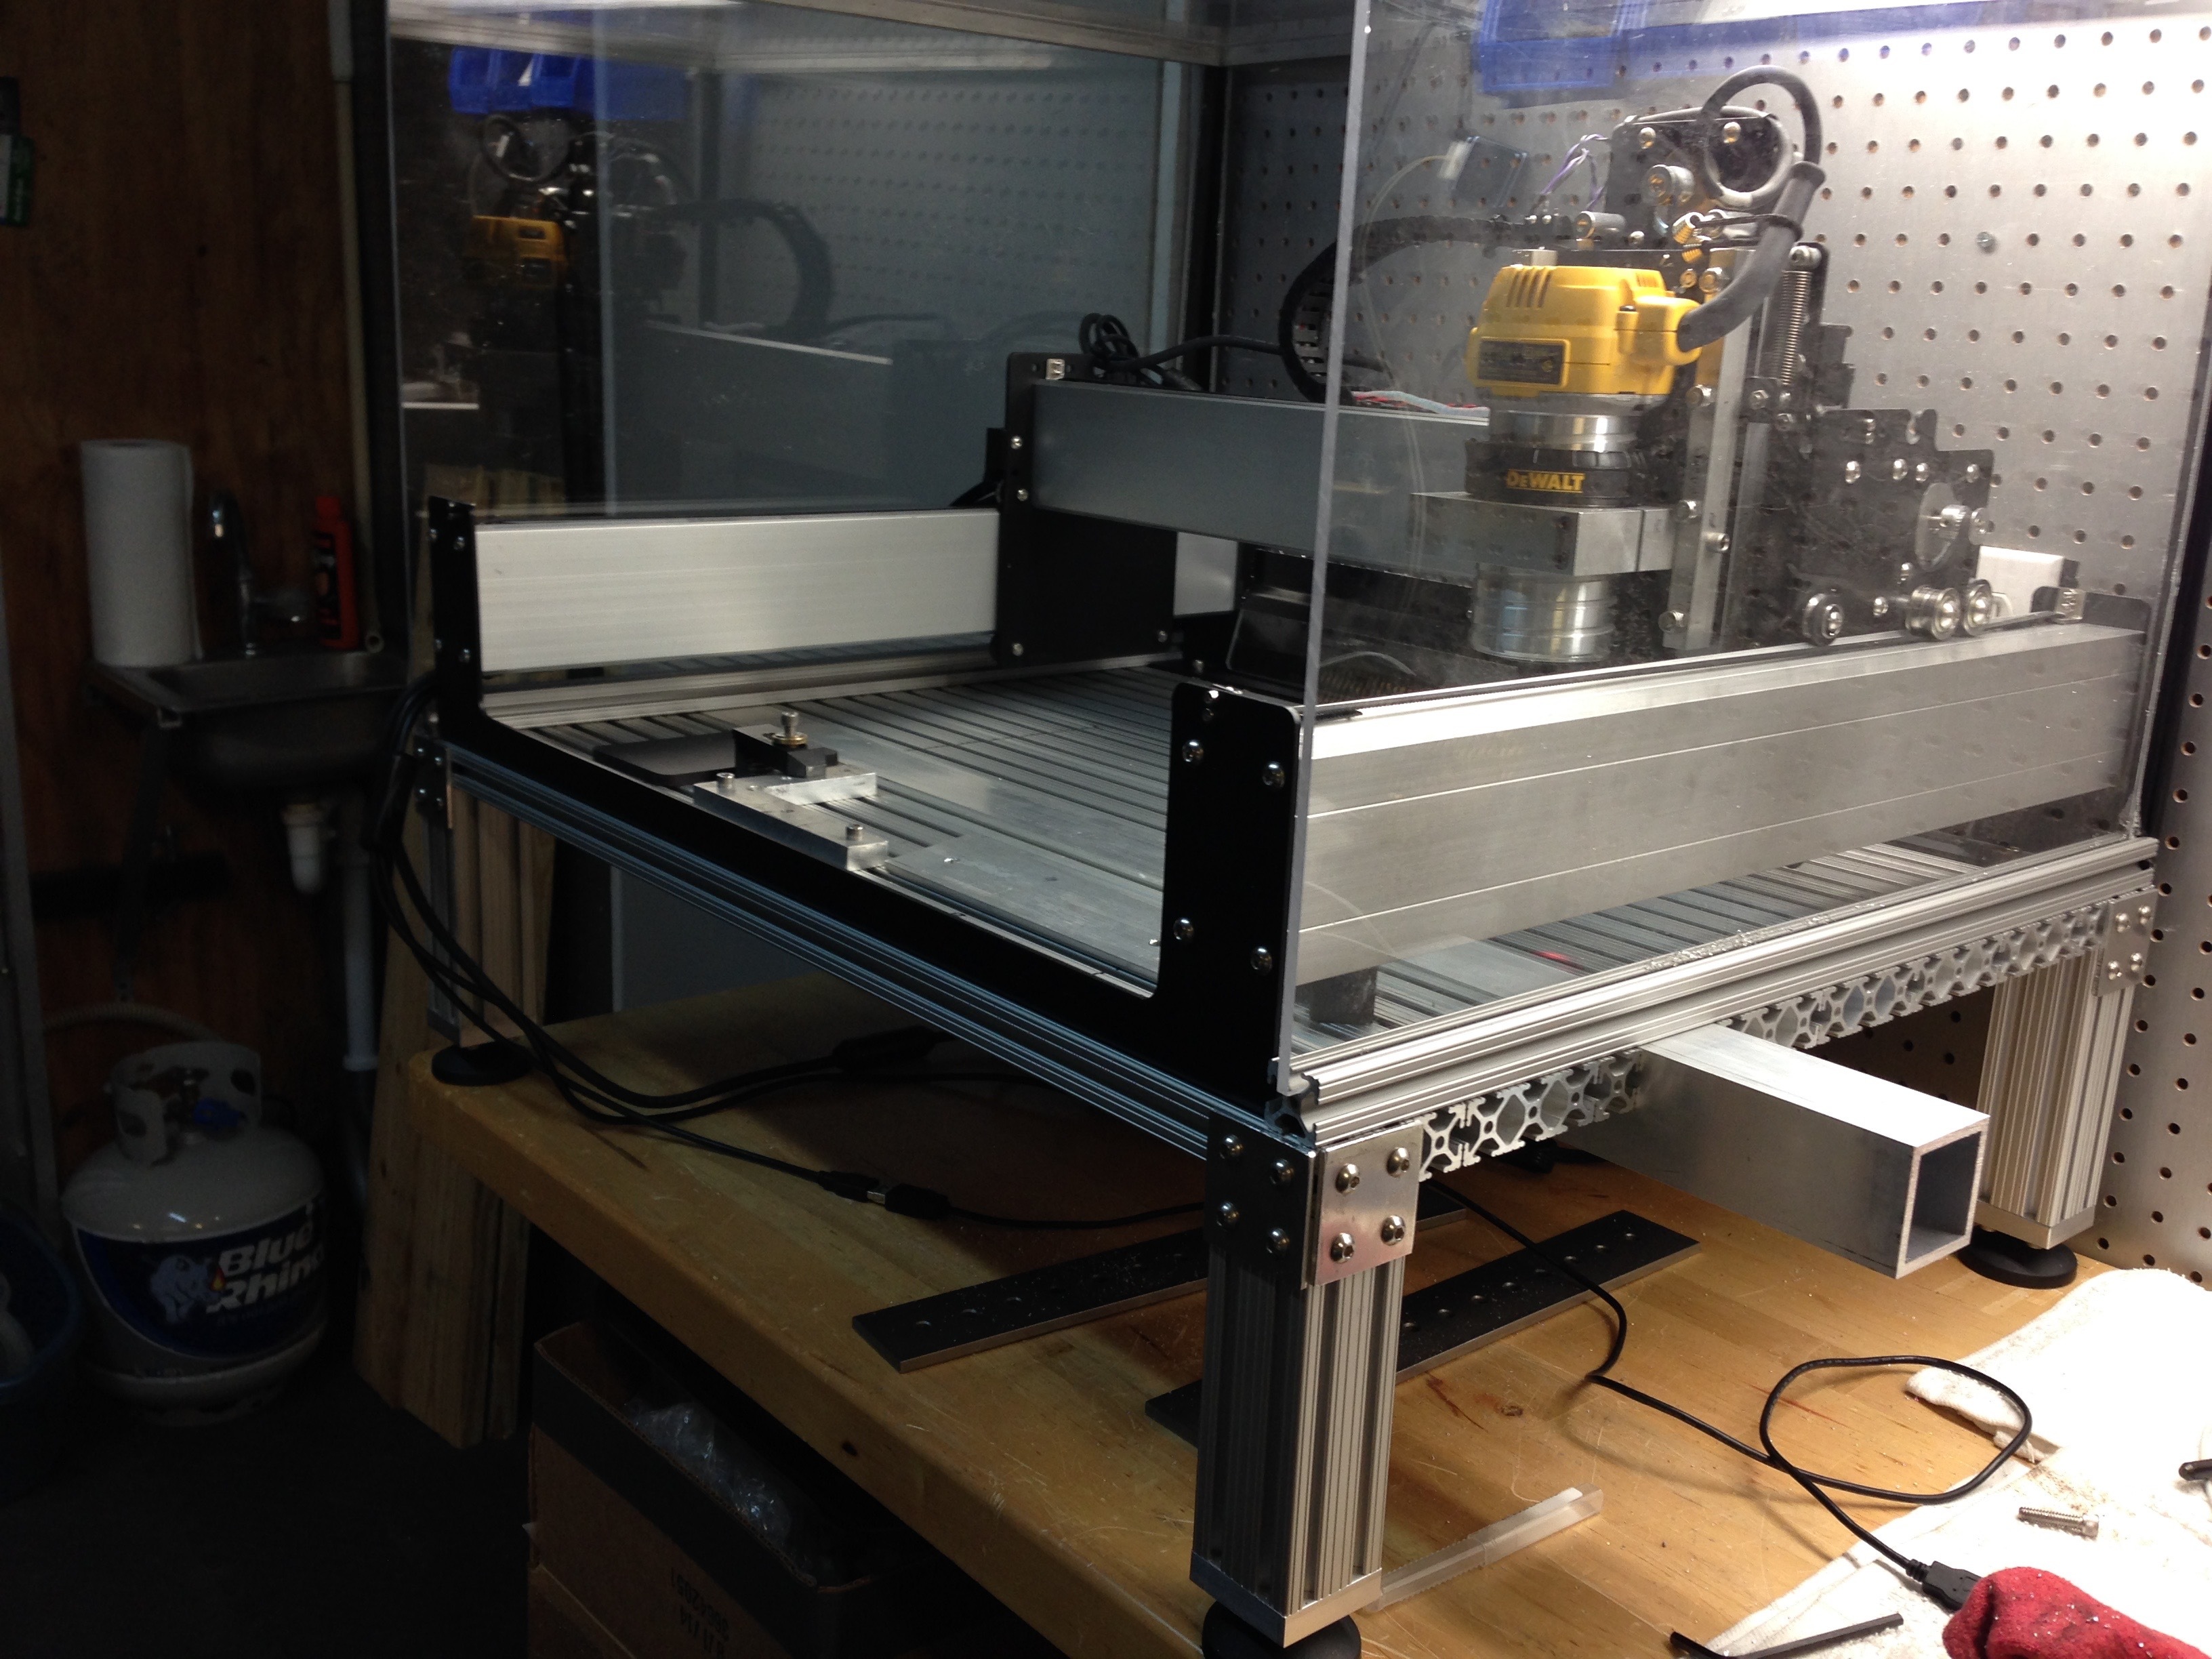
Here is what I’ve been working on the last 10 days or so.

I tried, I really did, at using the Nomad 883 Pro enclosure. I just could not fit the LED lighting and a dust head that uses tubing large enough to reach the safety levels that I’ve come to expect.

My wife of “ok” with the sound but eventually asked if I can could “lower the volume”.

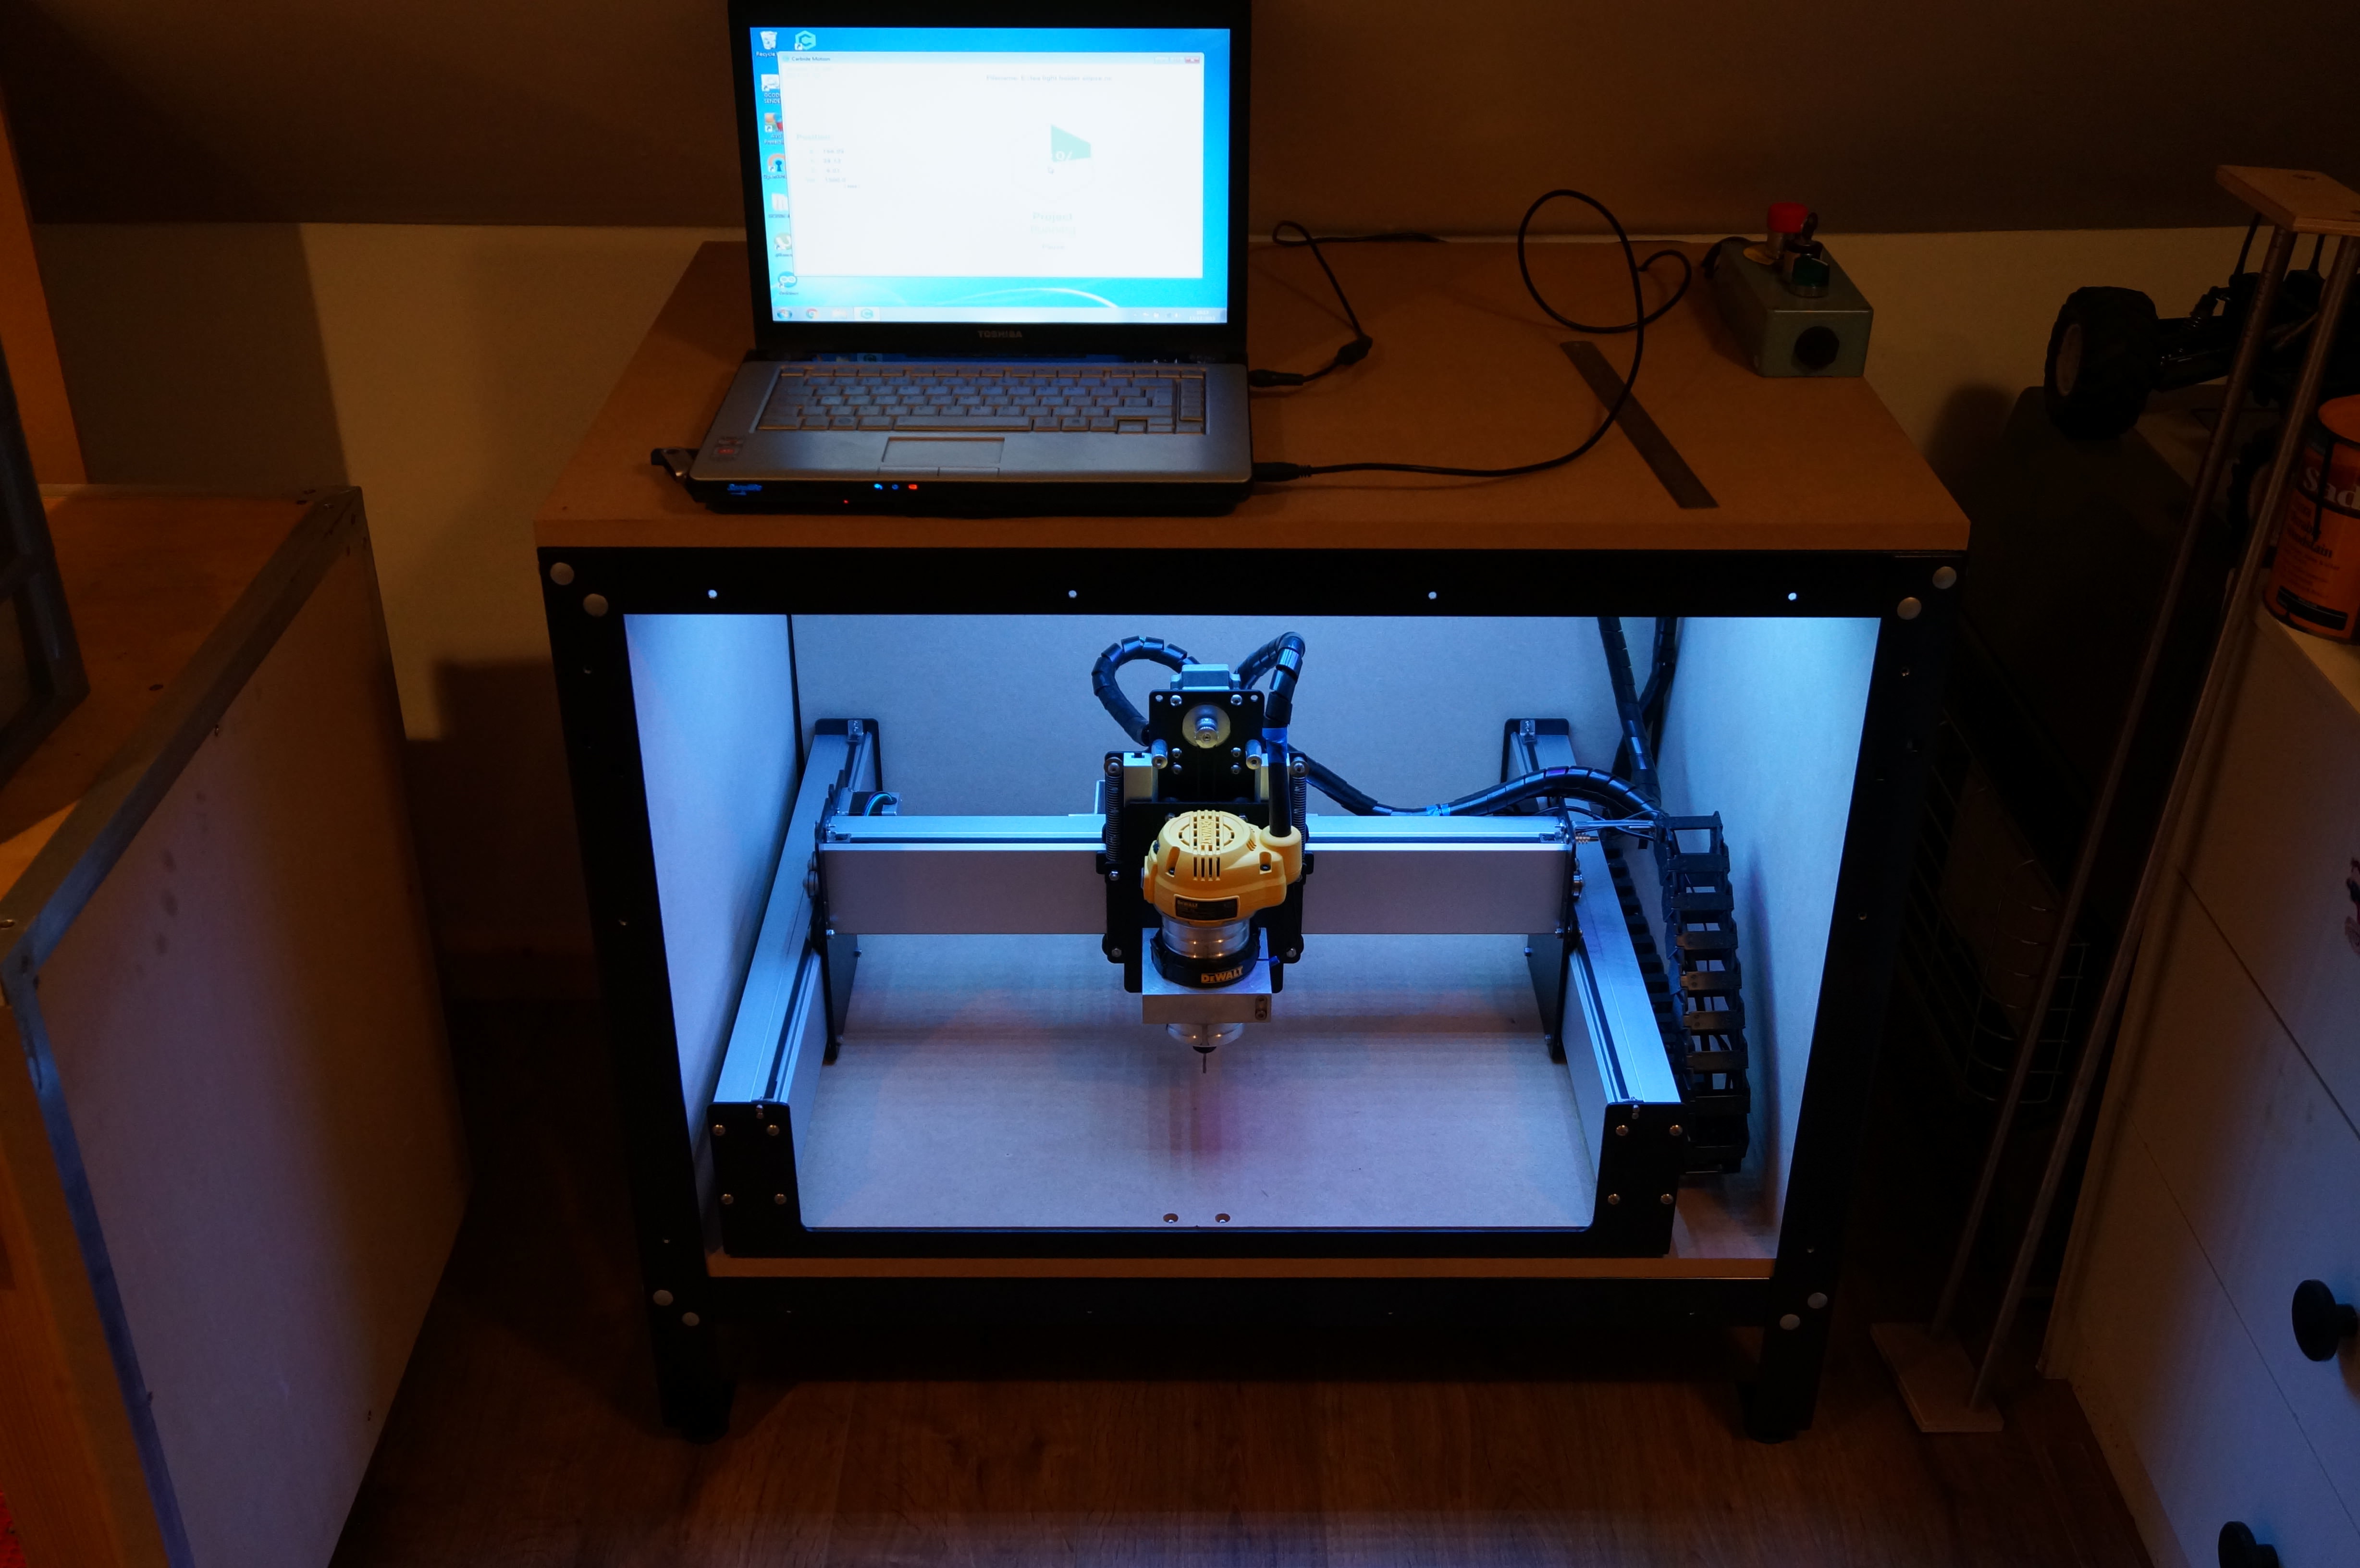
Any CNC machines I’ve owned have lived in the garage. Now I have two inside (Nomad 883 Pro and PocketNC).

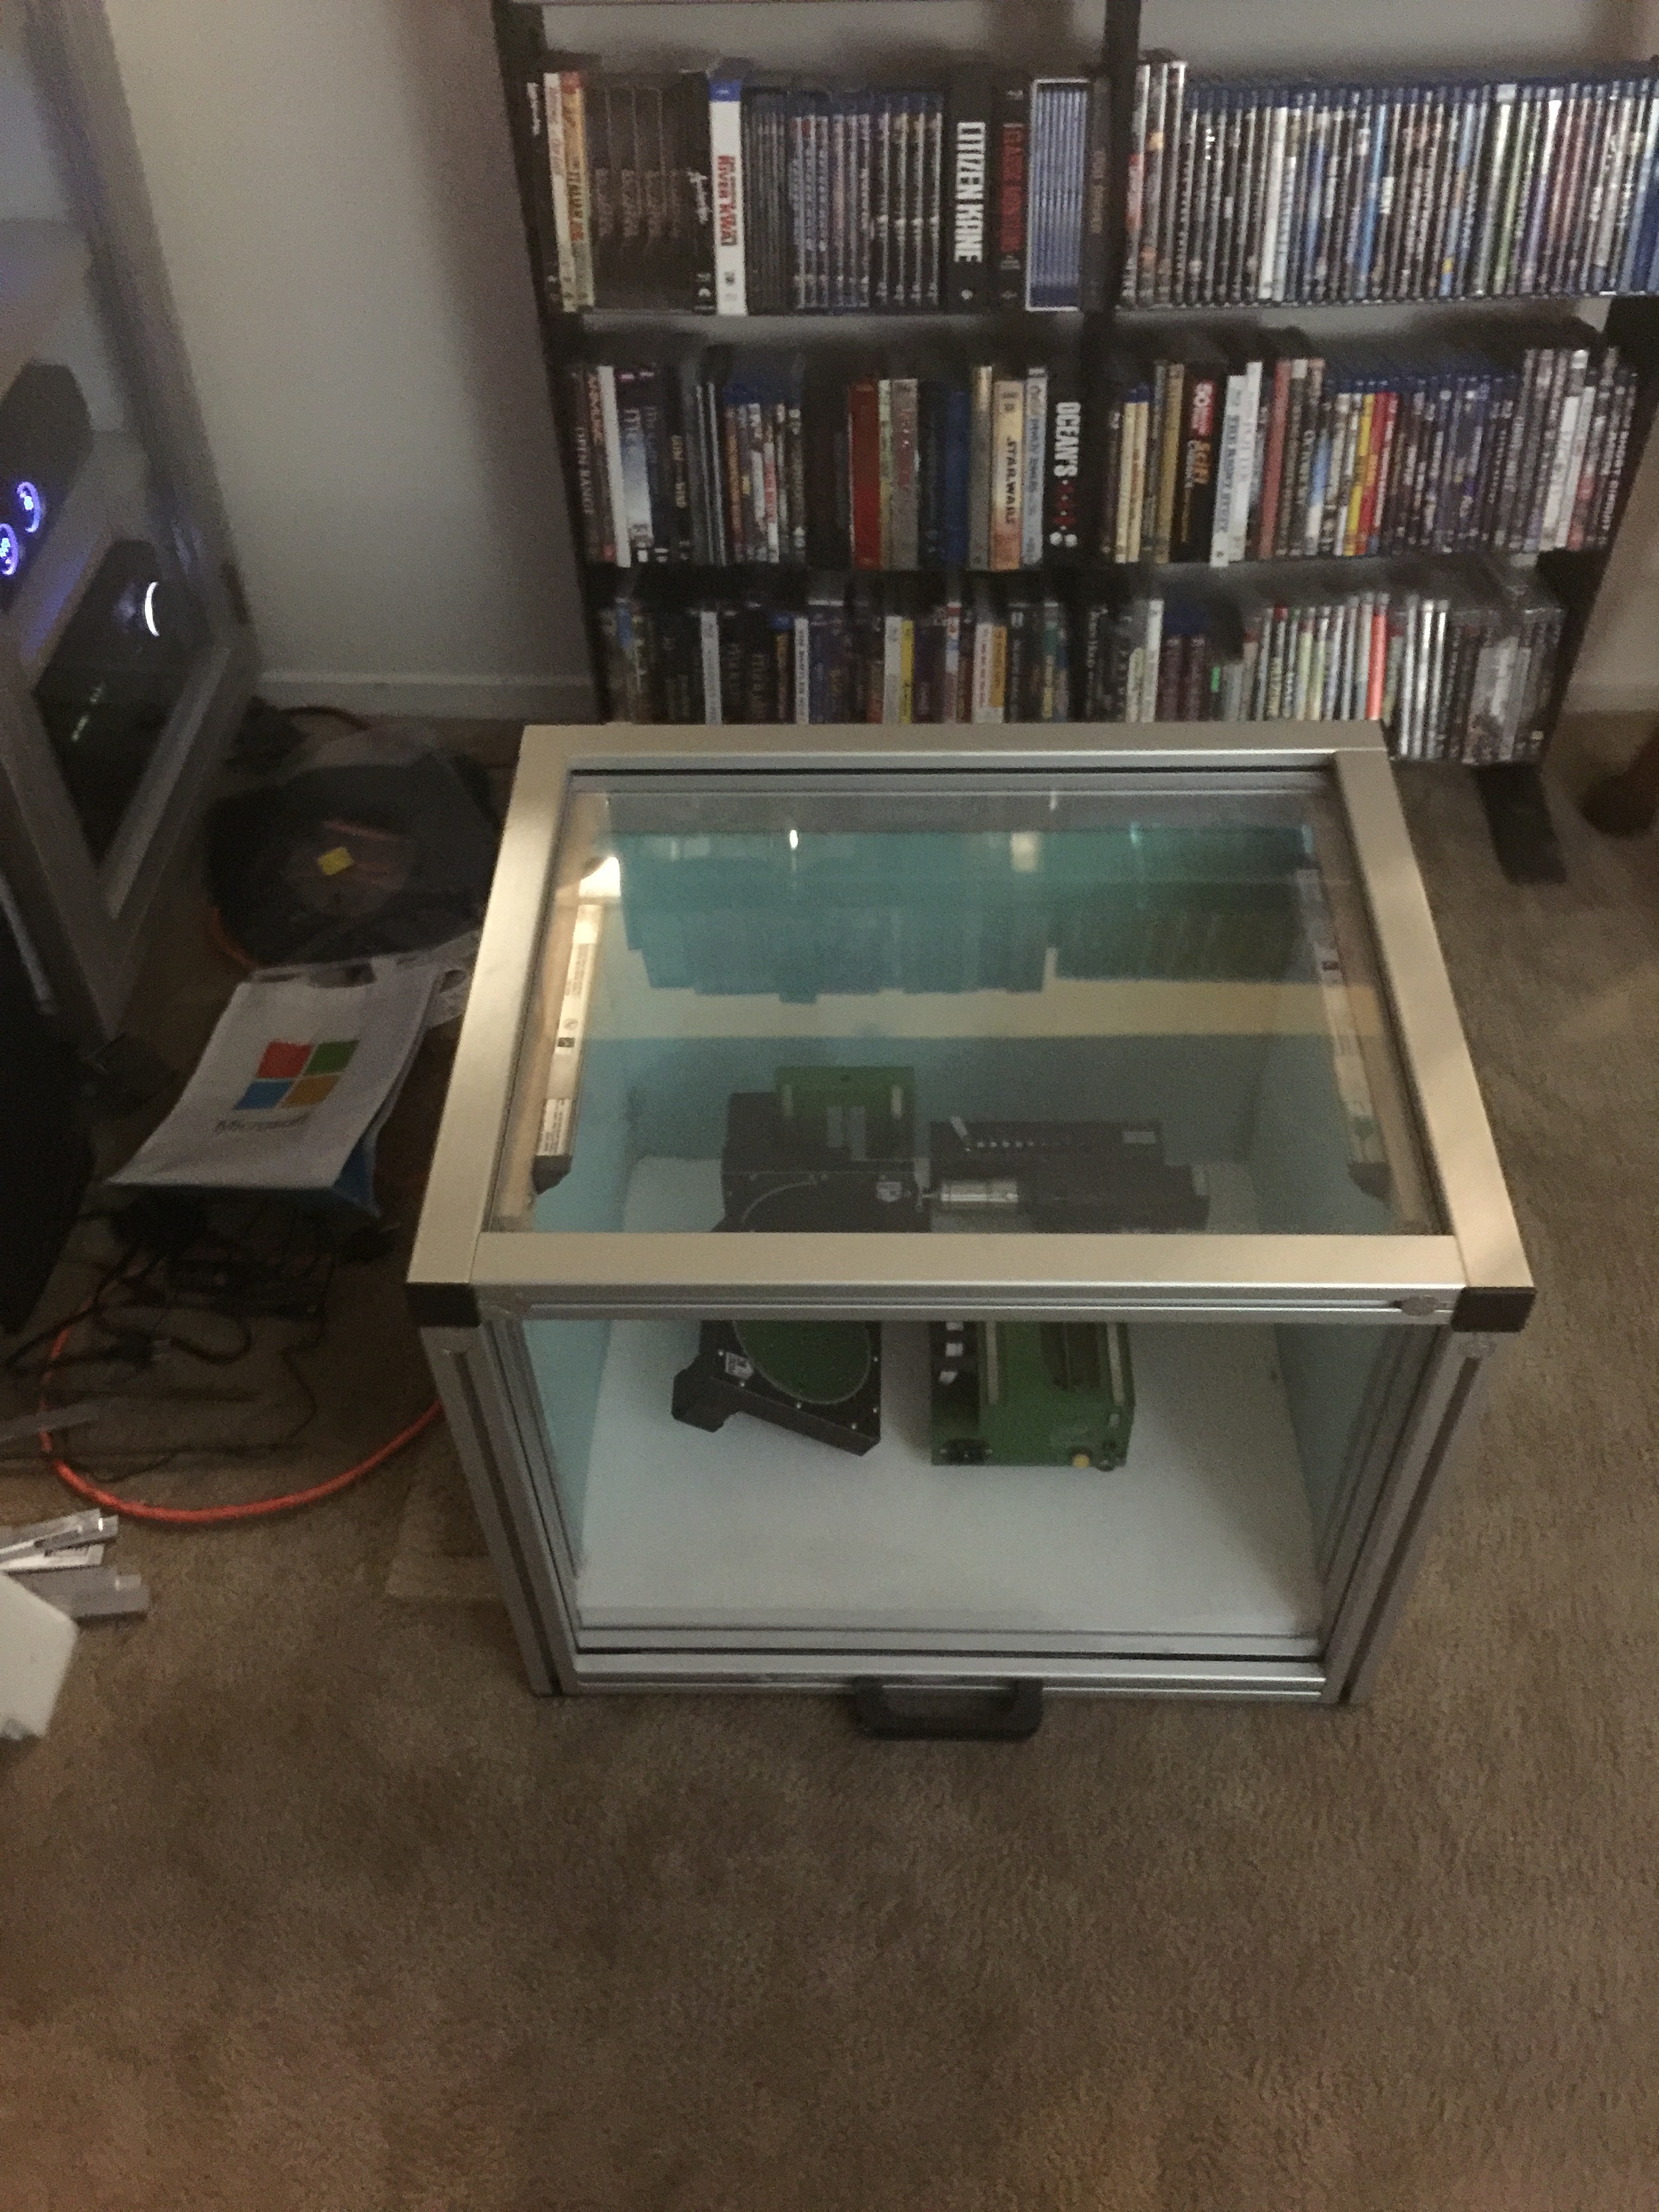
Since I design enclosures for CNC machines for people and I had most of the materials lying around I… I… kinda went nuts.

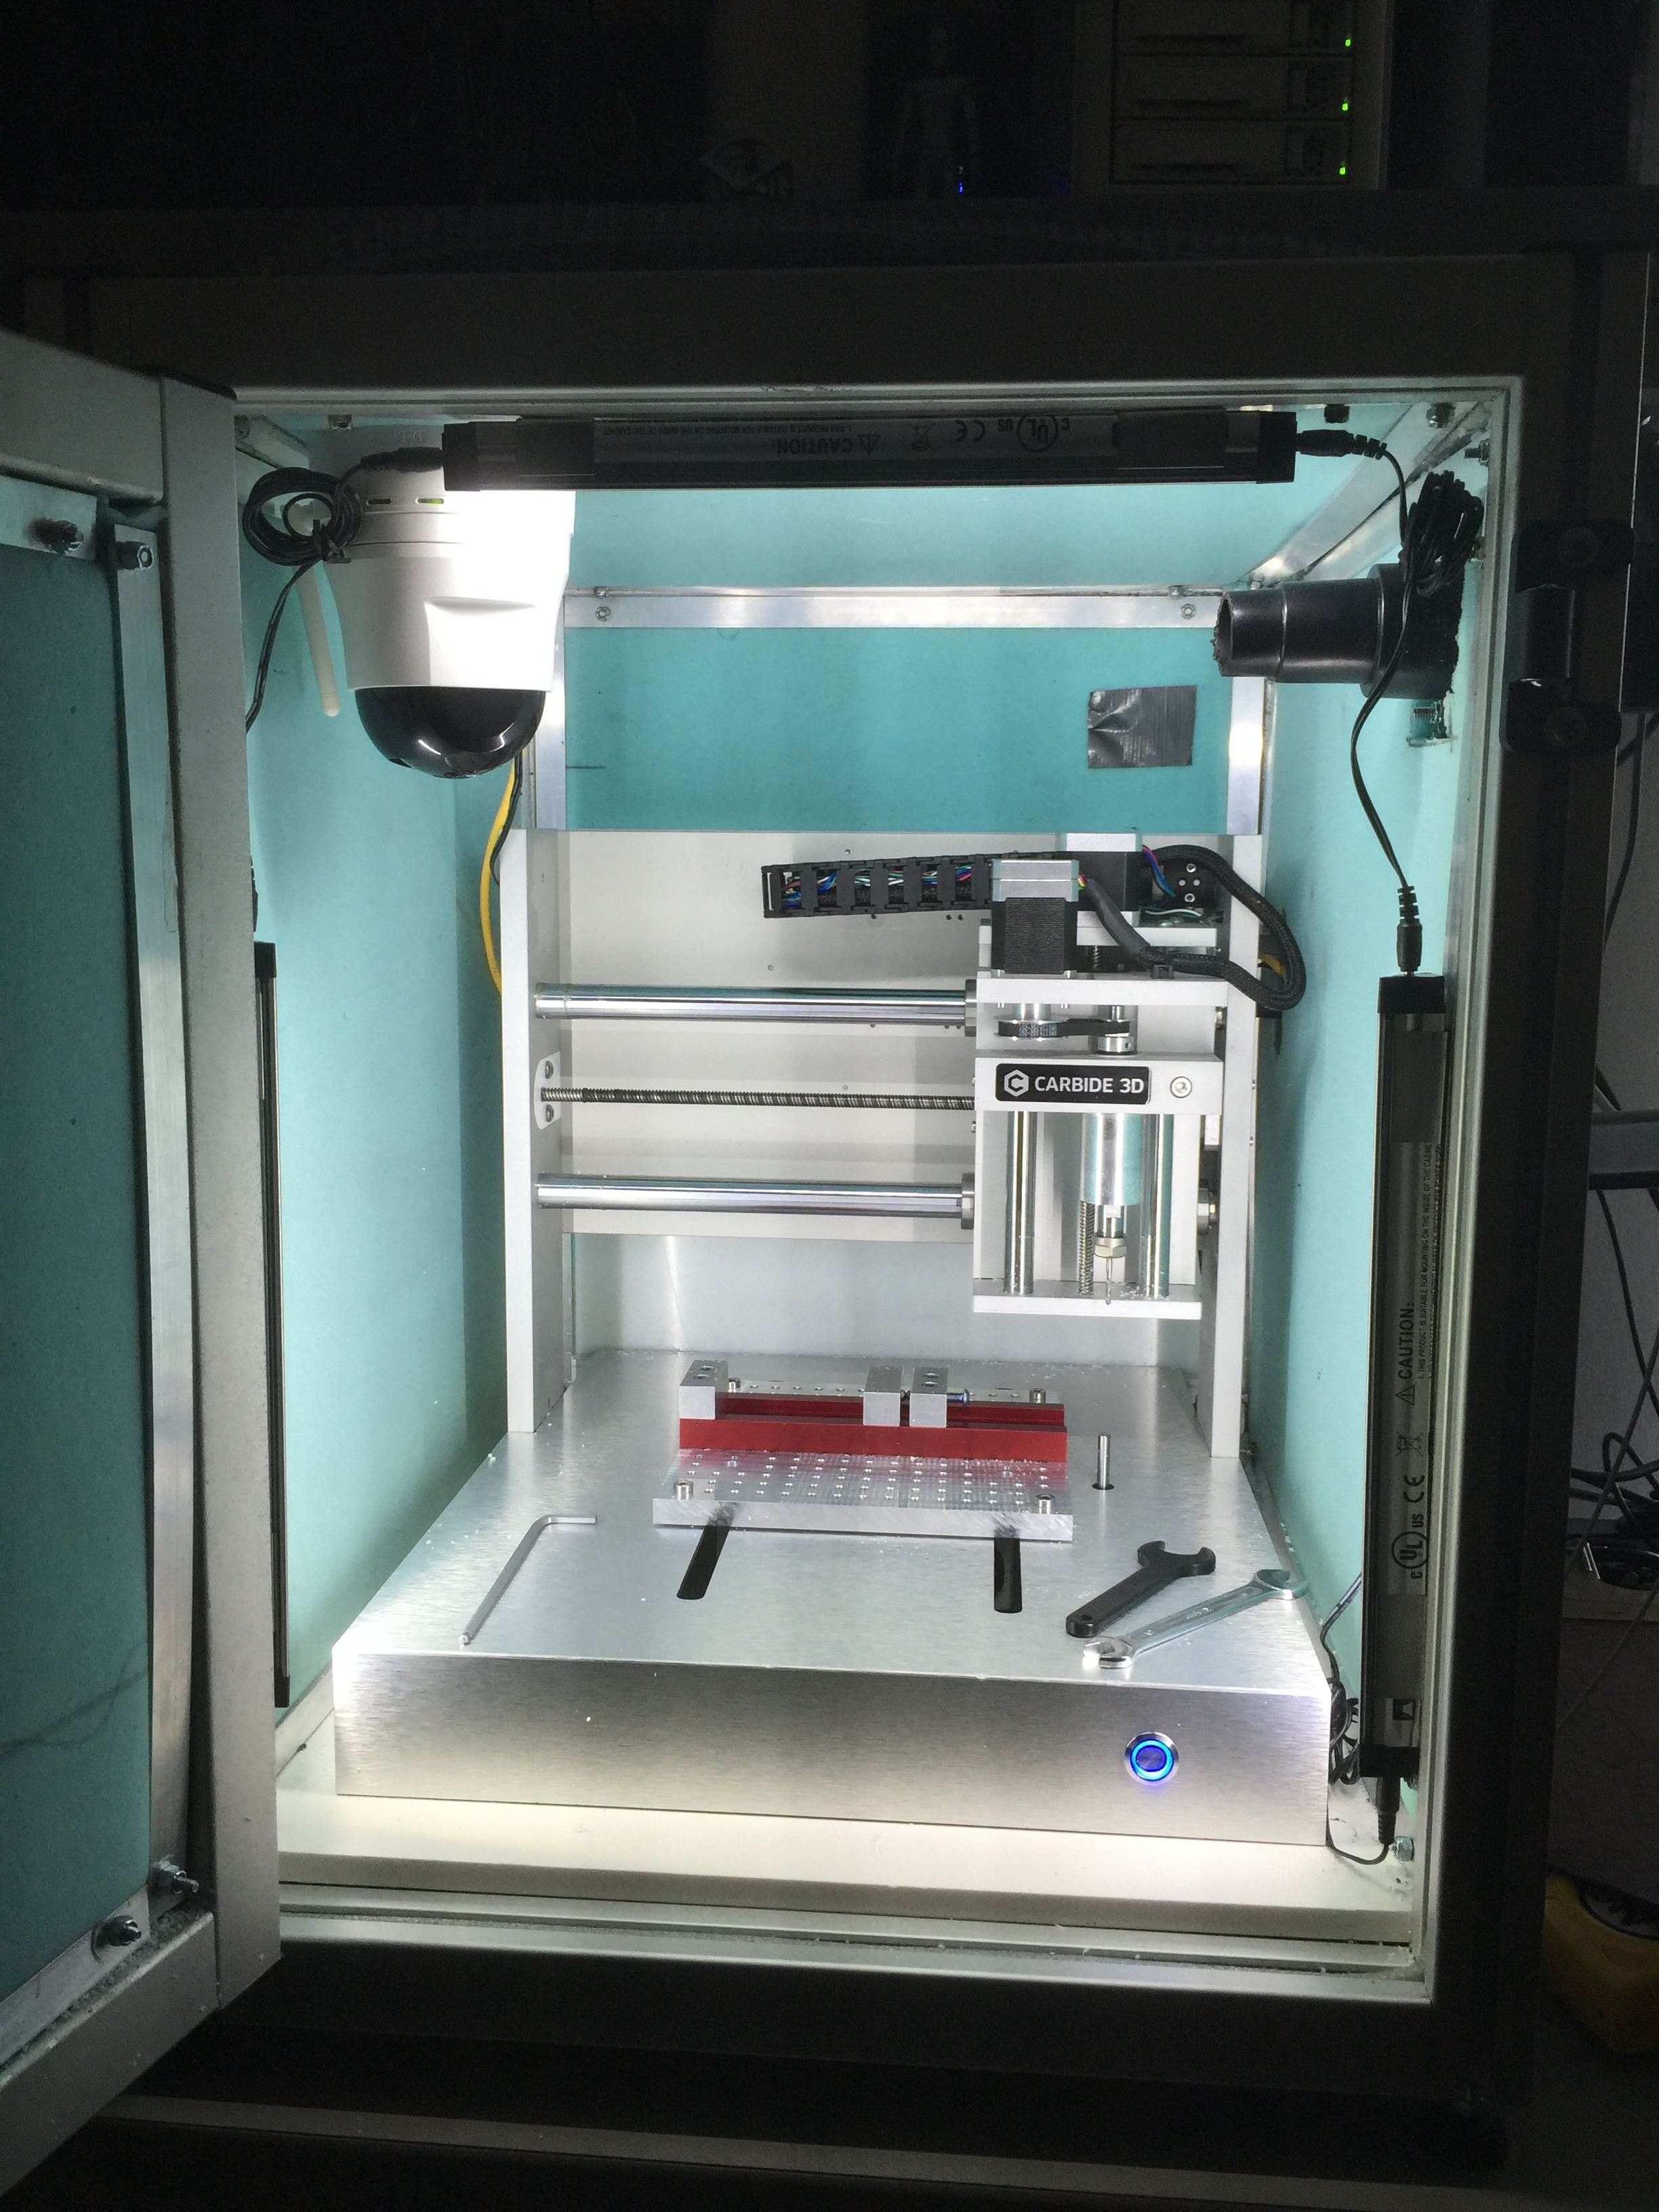
I lost the sides, top and front of the Nomad. Yes, I moved the serial number tag to the back.

You can see the power button on the lower right. That is why I want to know about the wires. I plan to replace the button with an LED and run the switch wires to the power button.

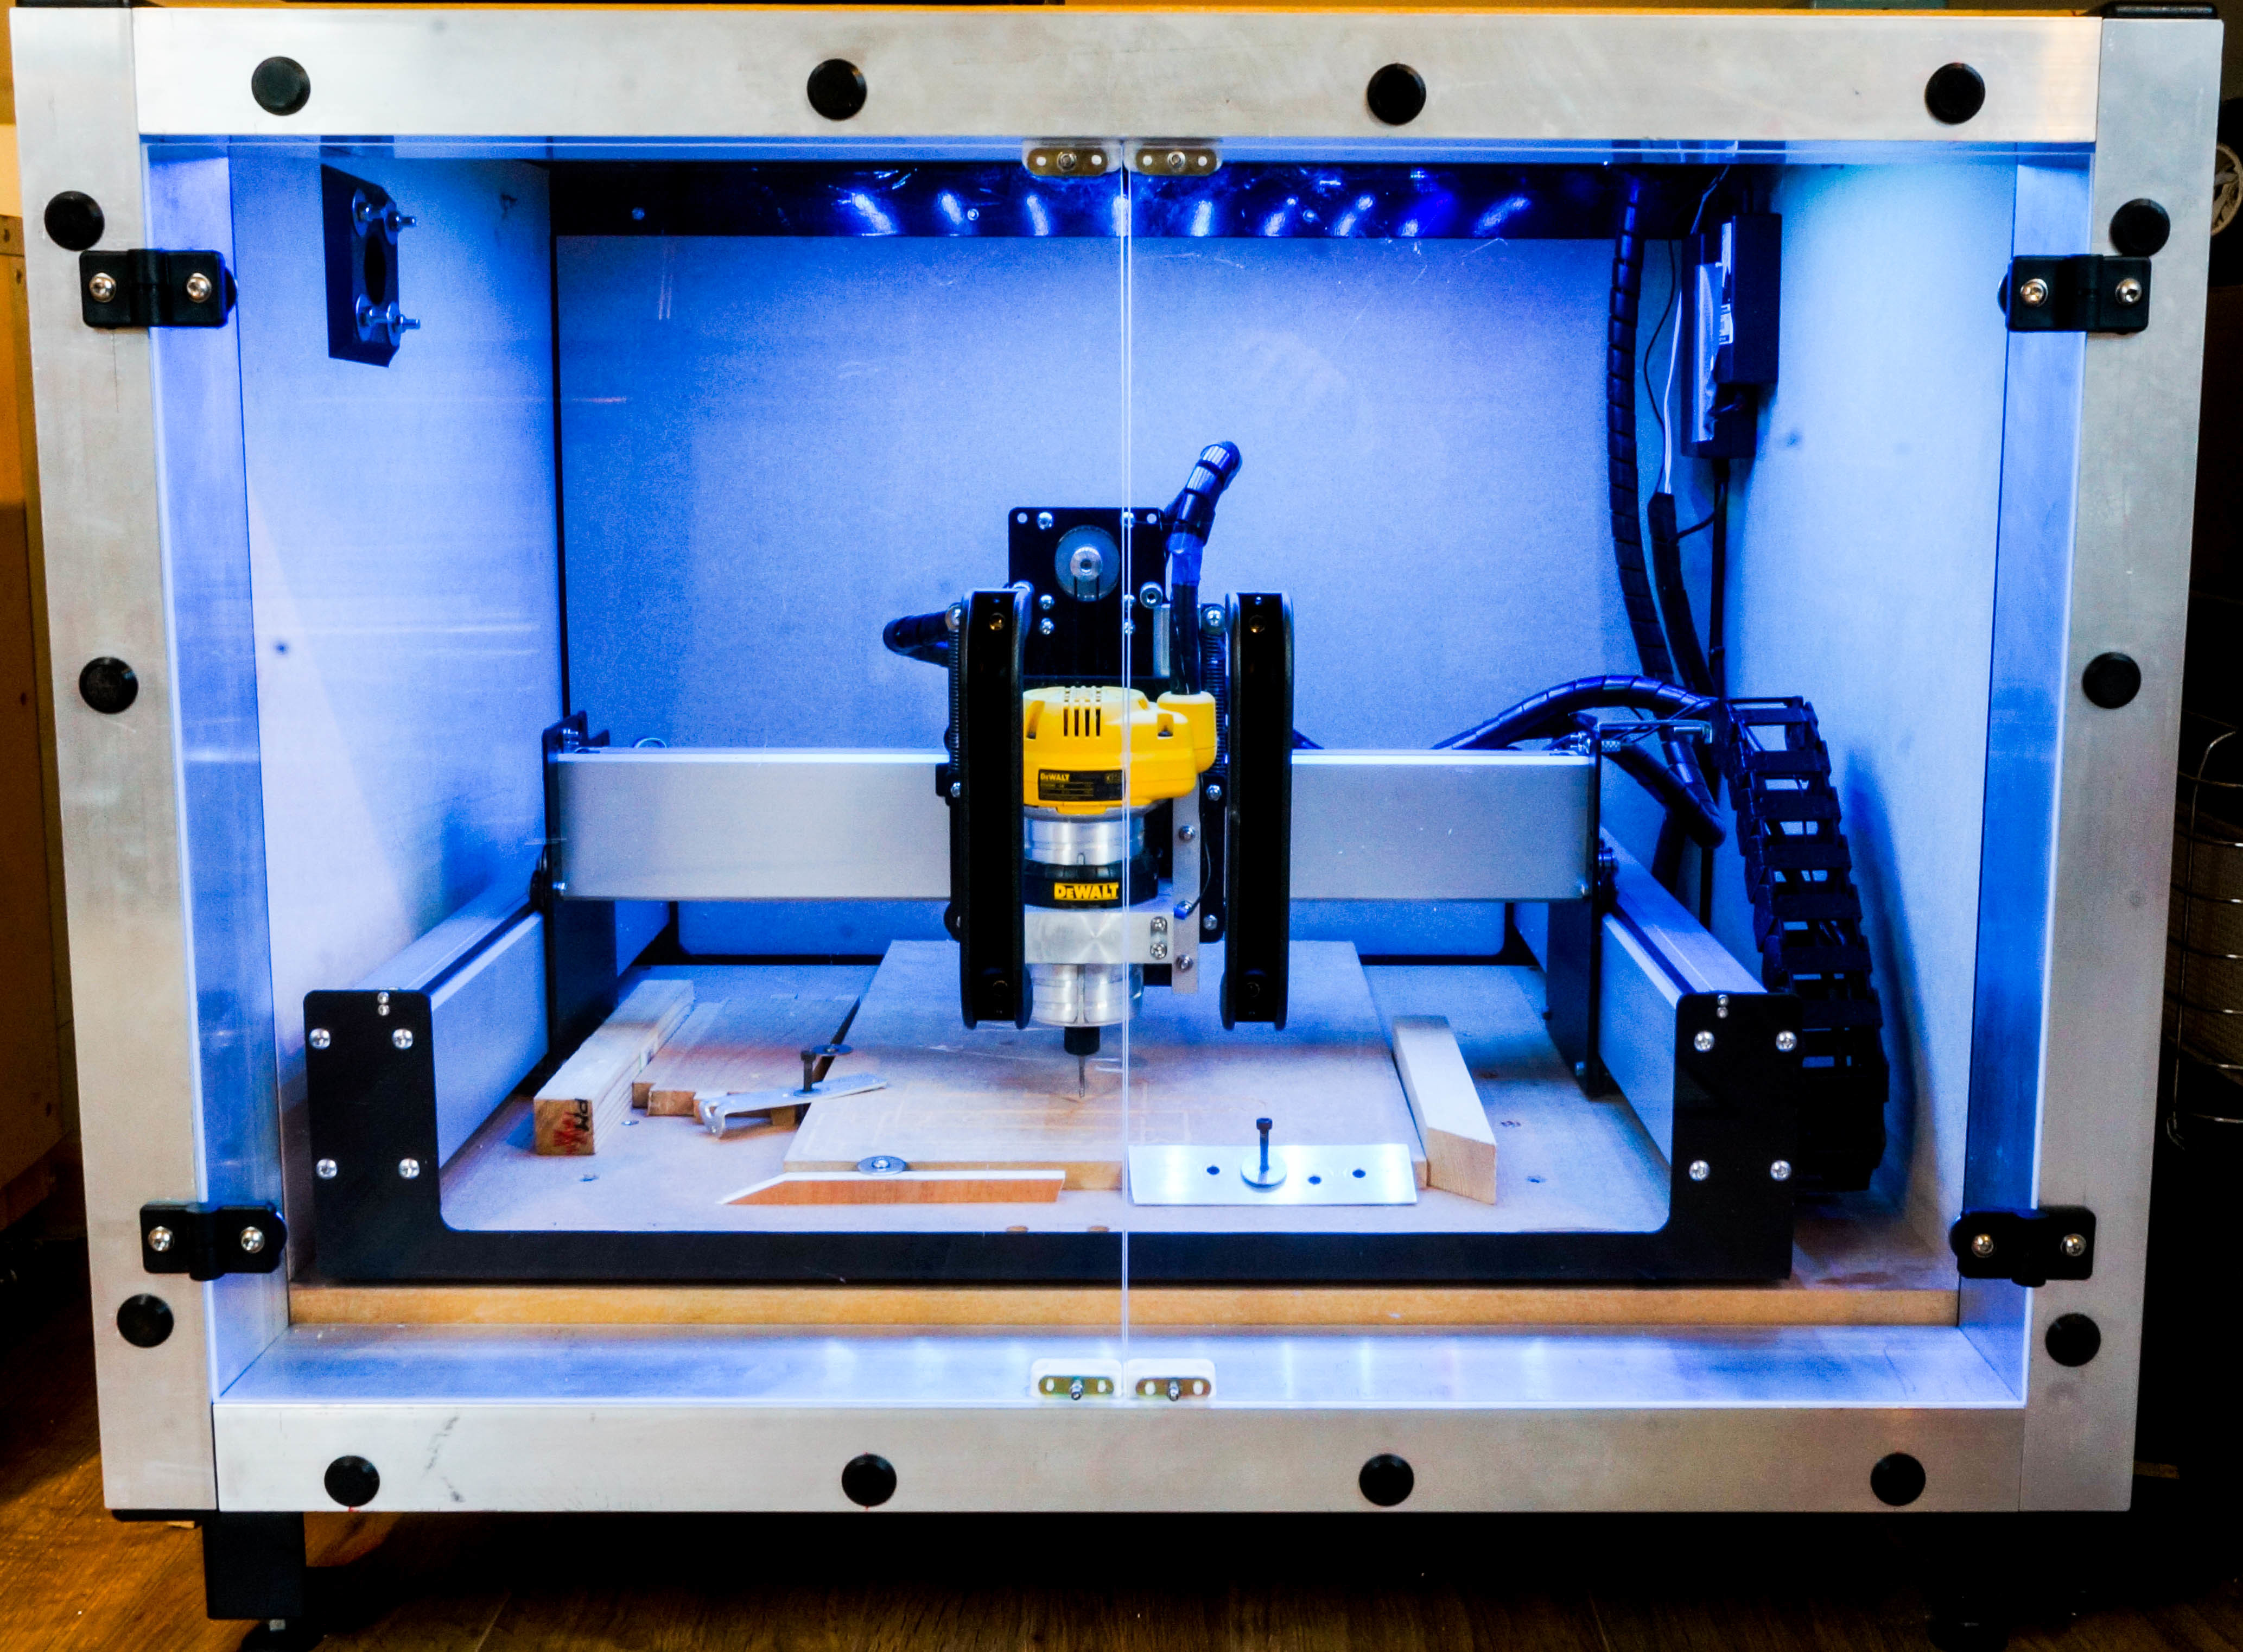
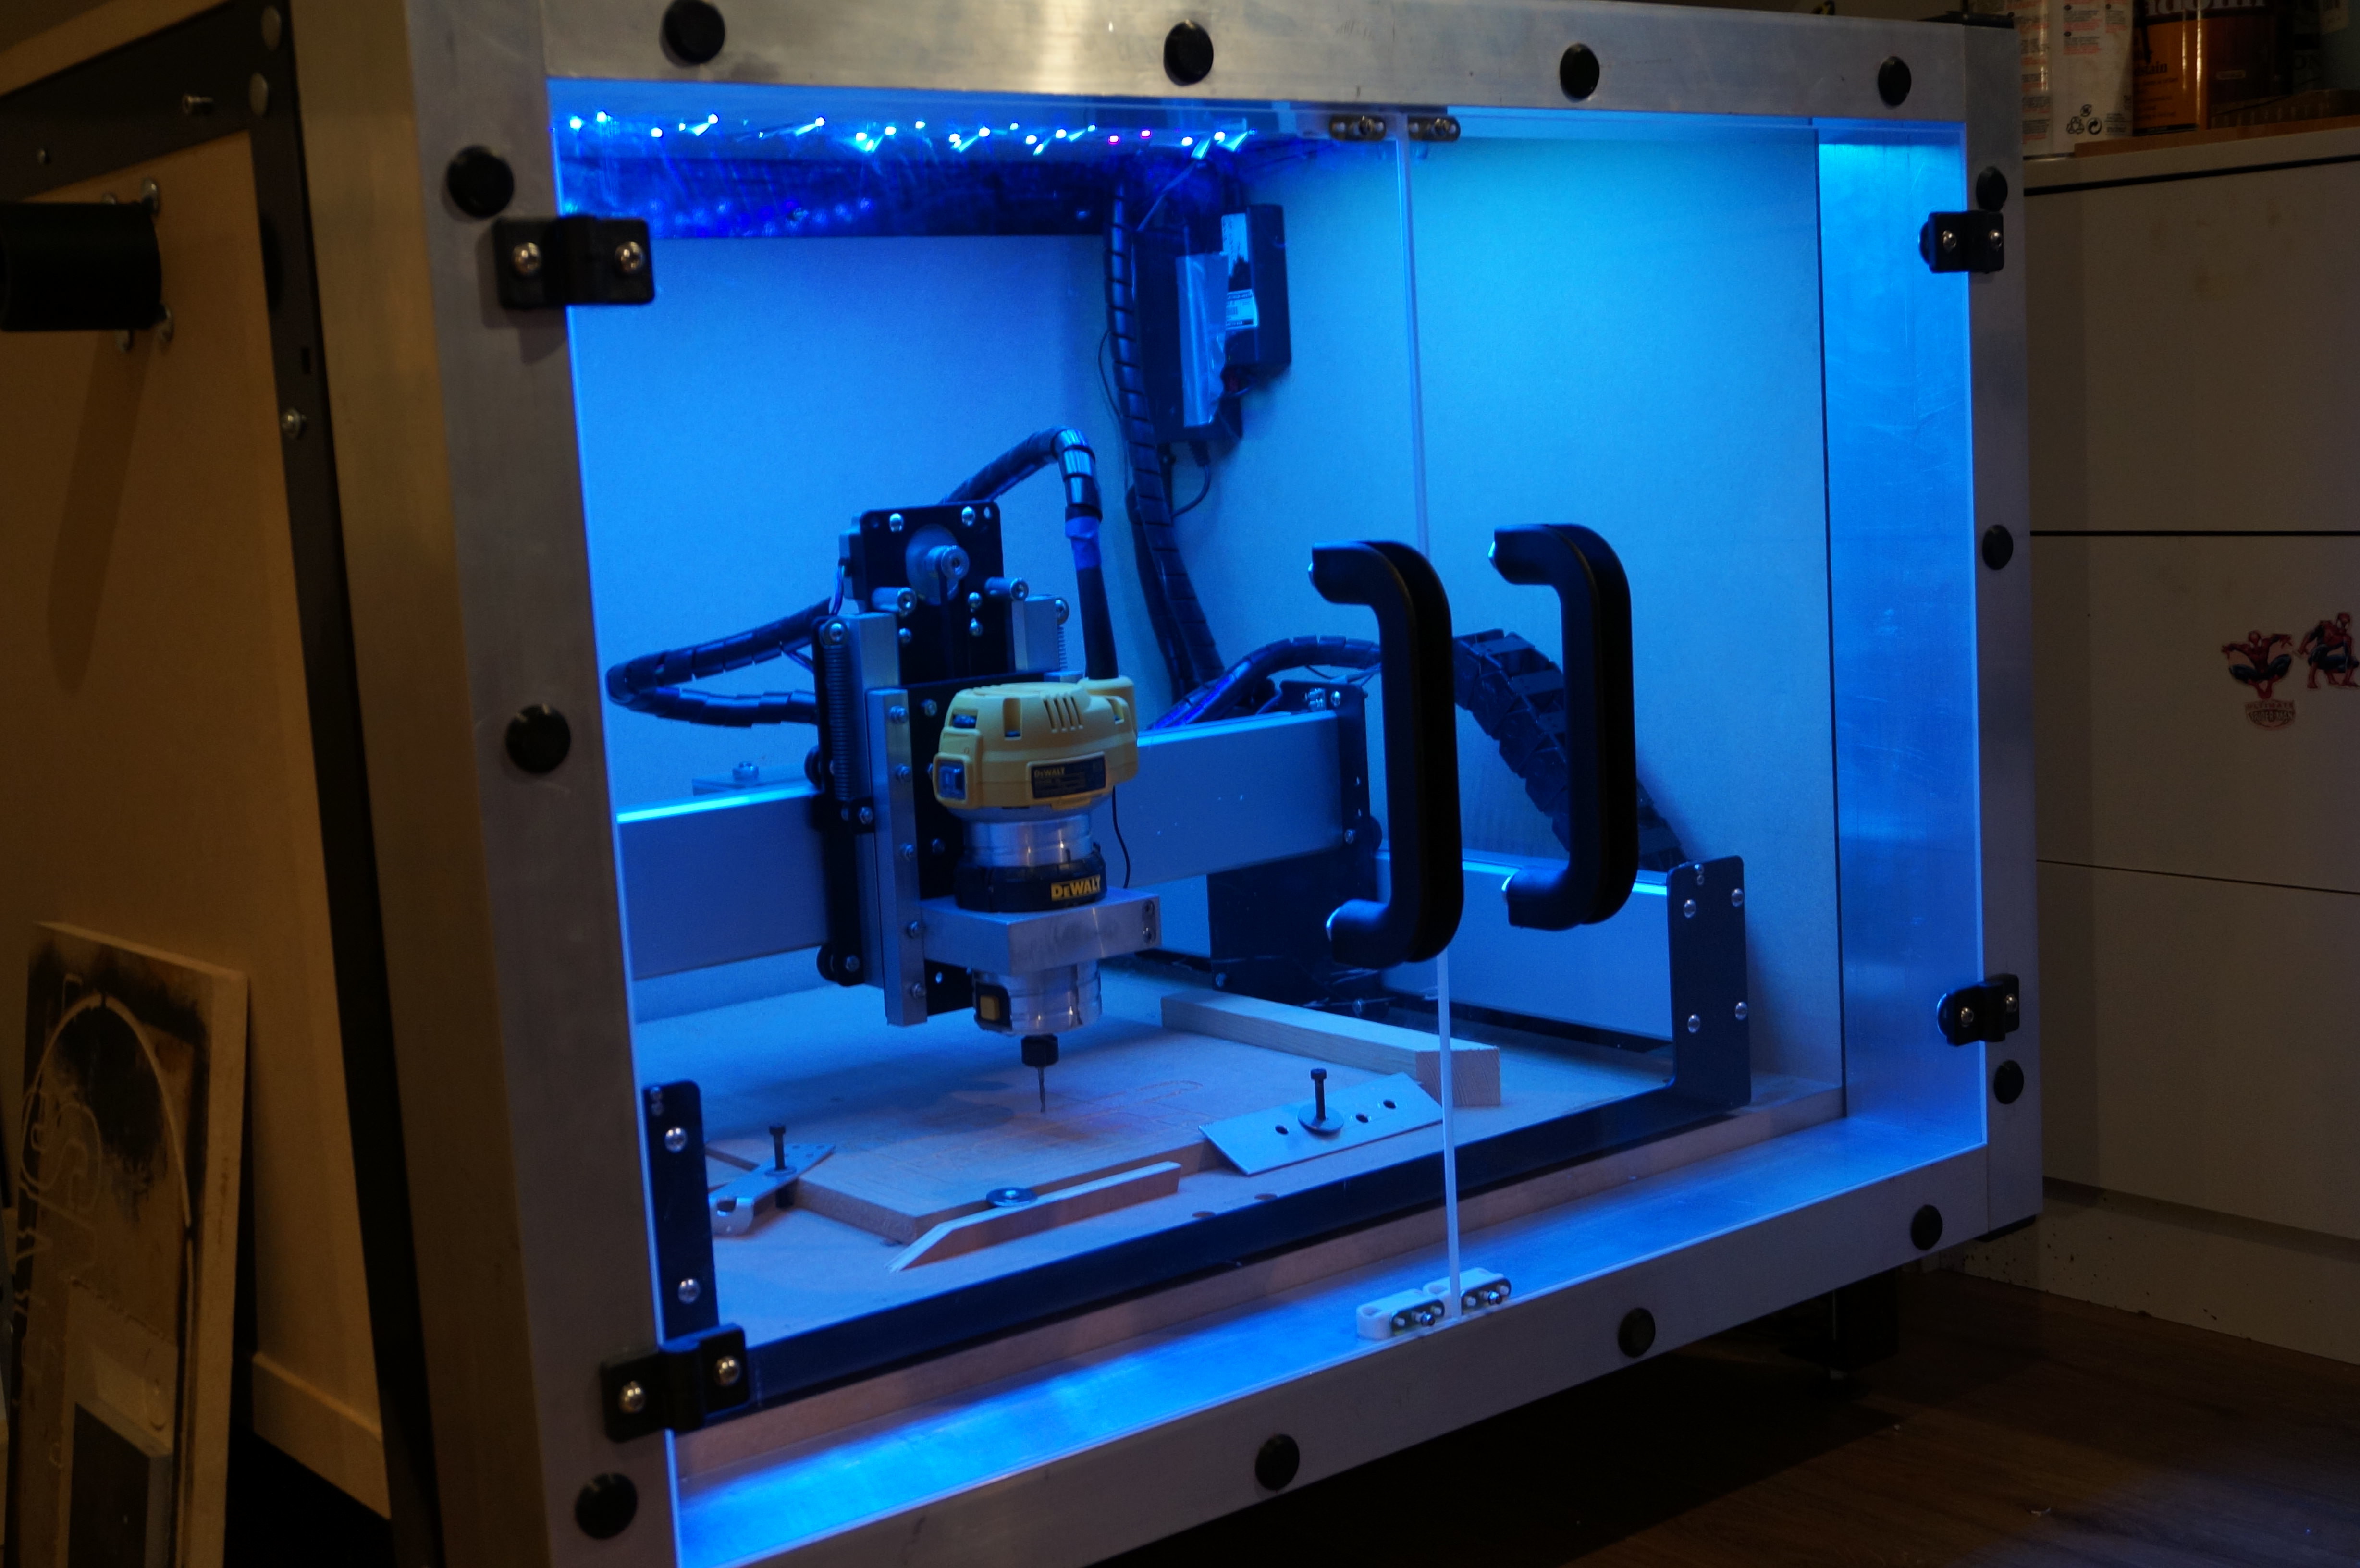
Three LED bars… and a dimmer. You can see the vacuum inlet on the upper right; tubing on top.

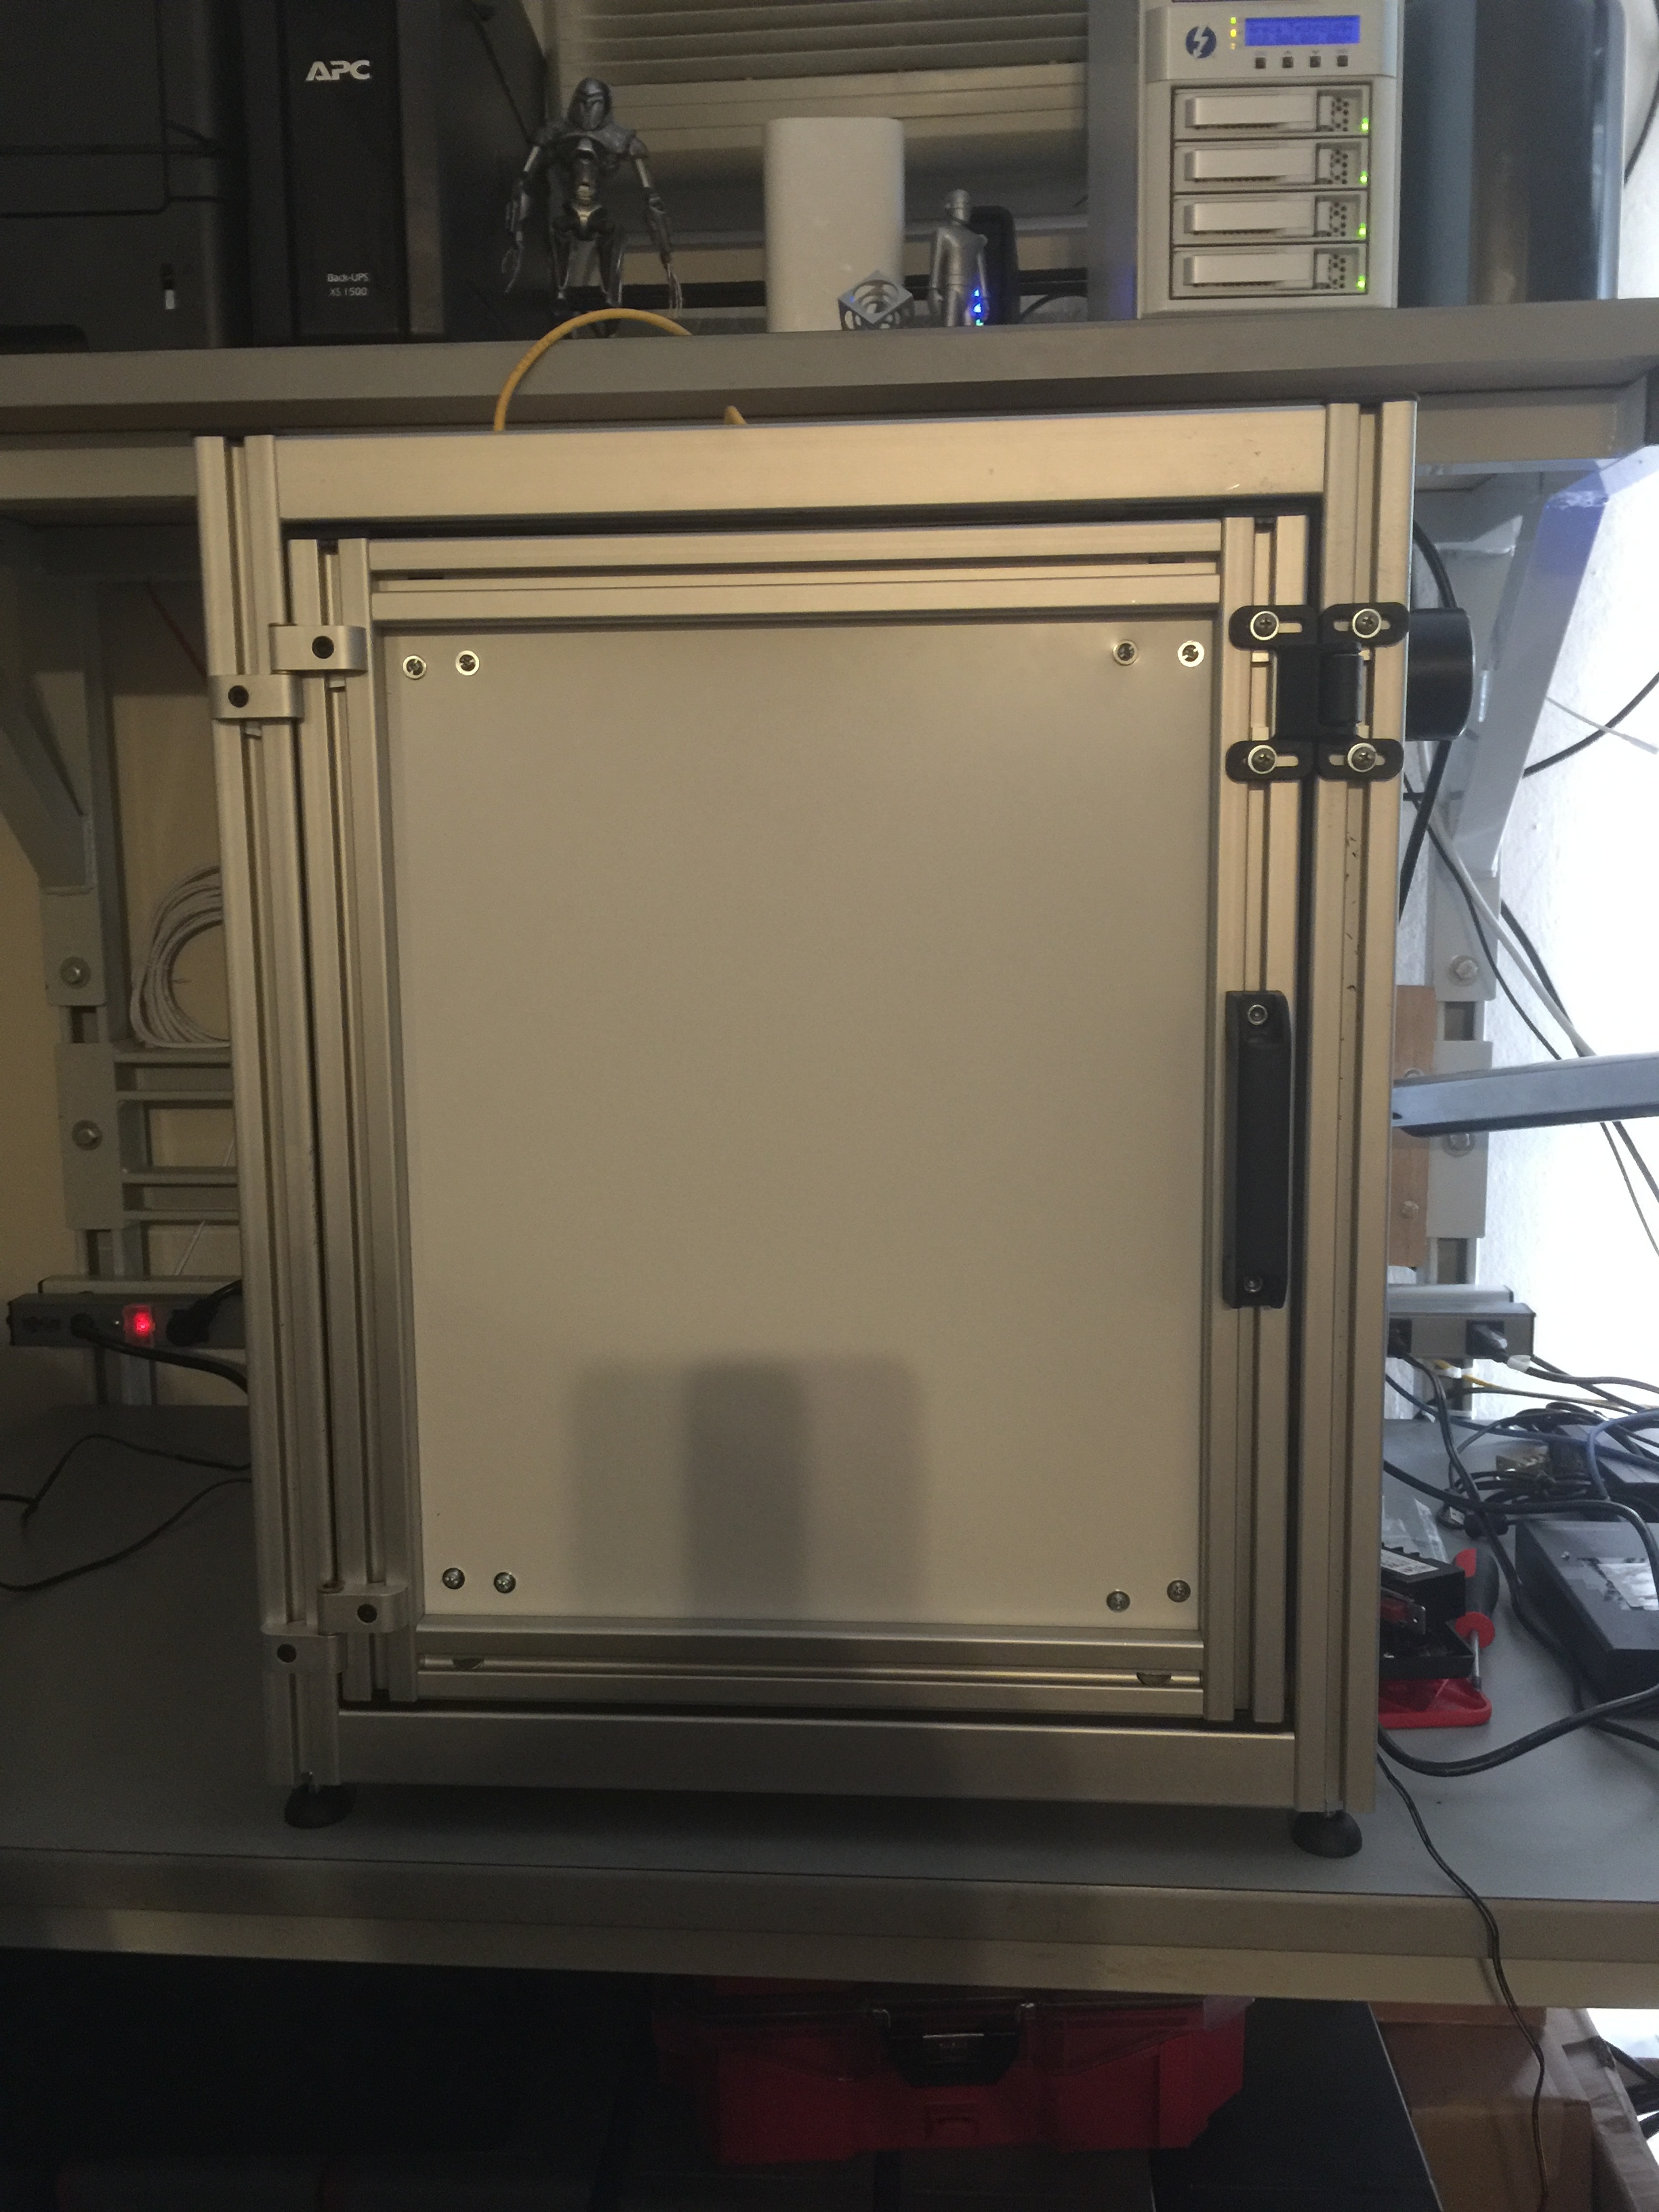
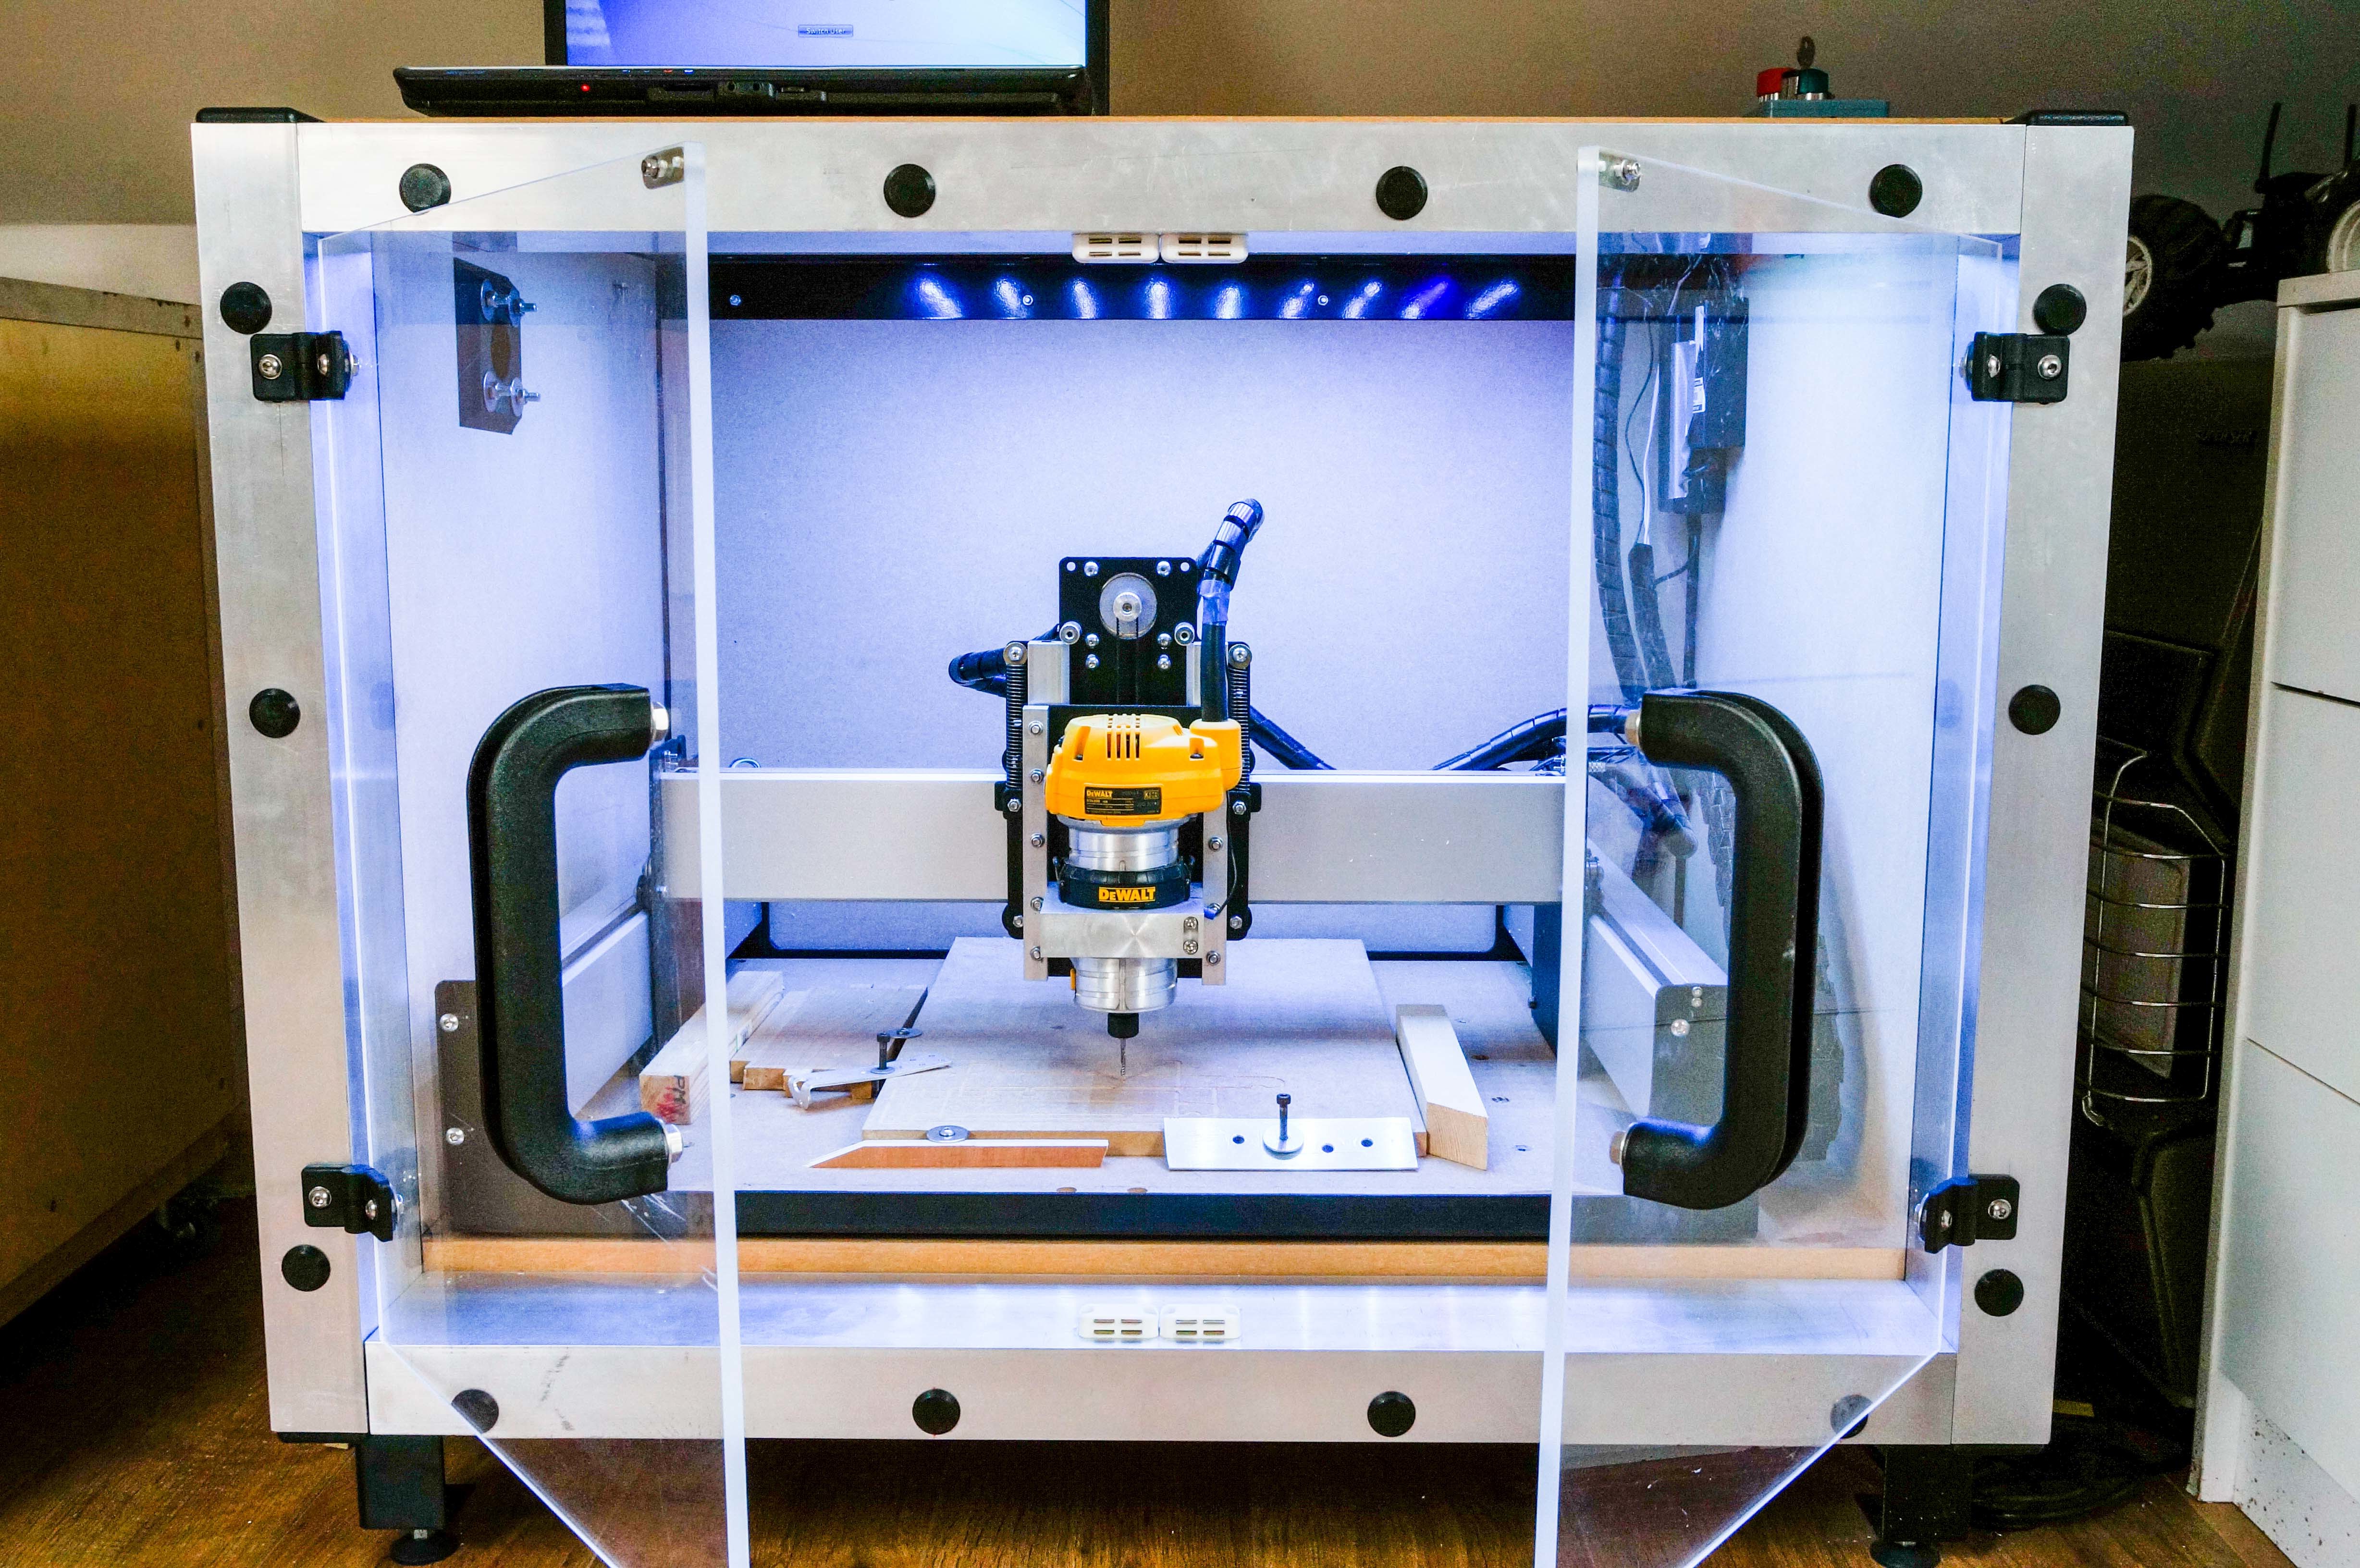
On top left is the WEB CAM so I can watch and hear what’s going on. No window in the enclosure. First time I’m trying this. I want the very best sound suppression.

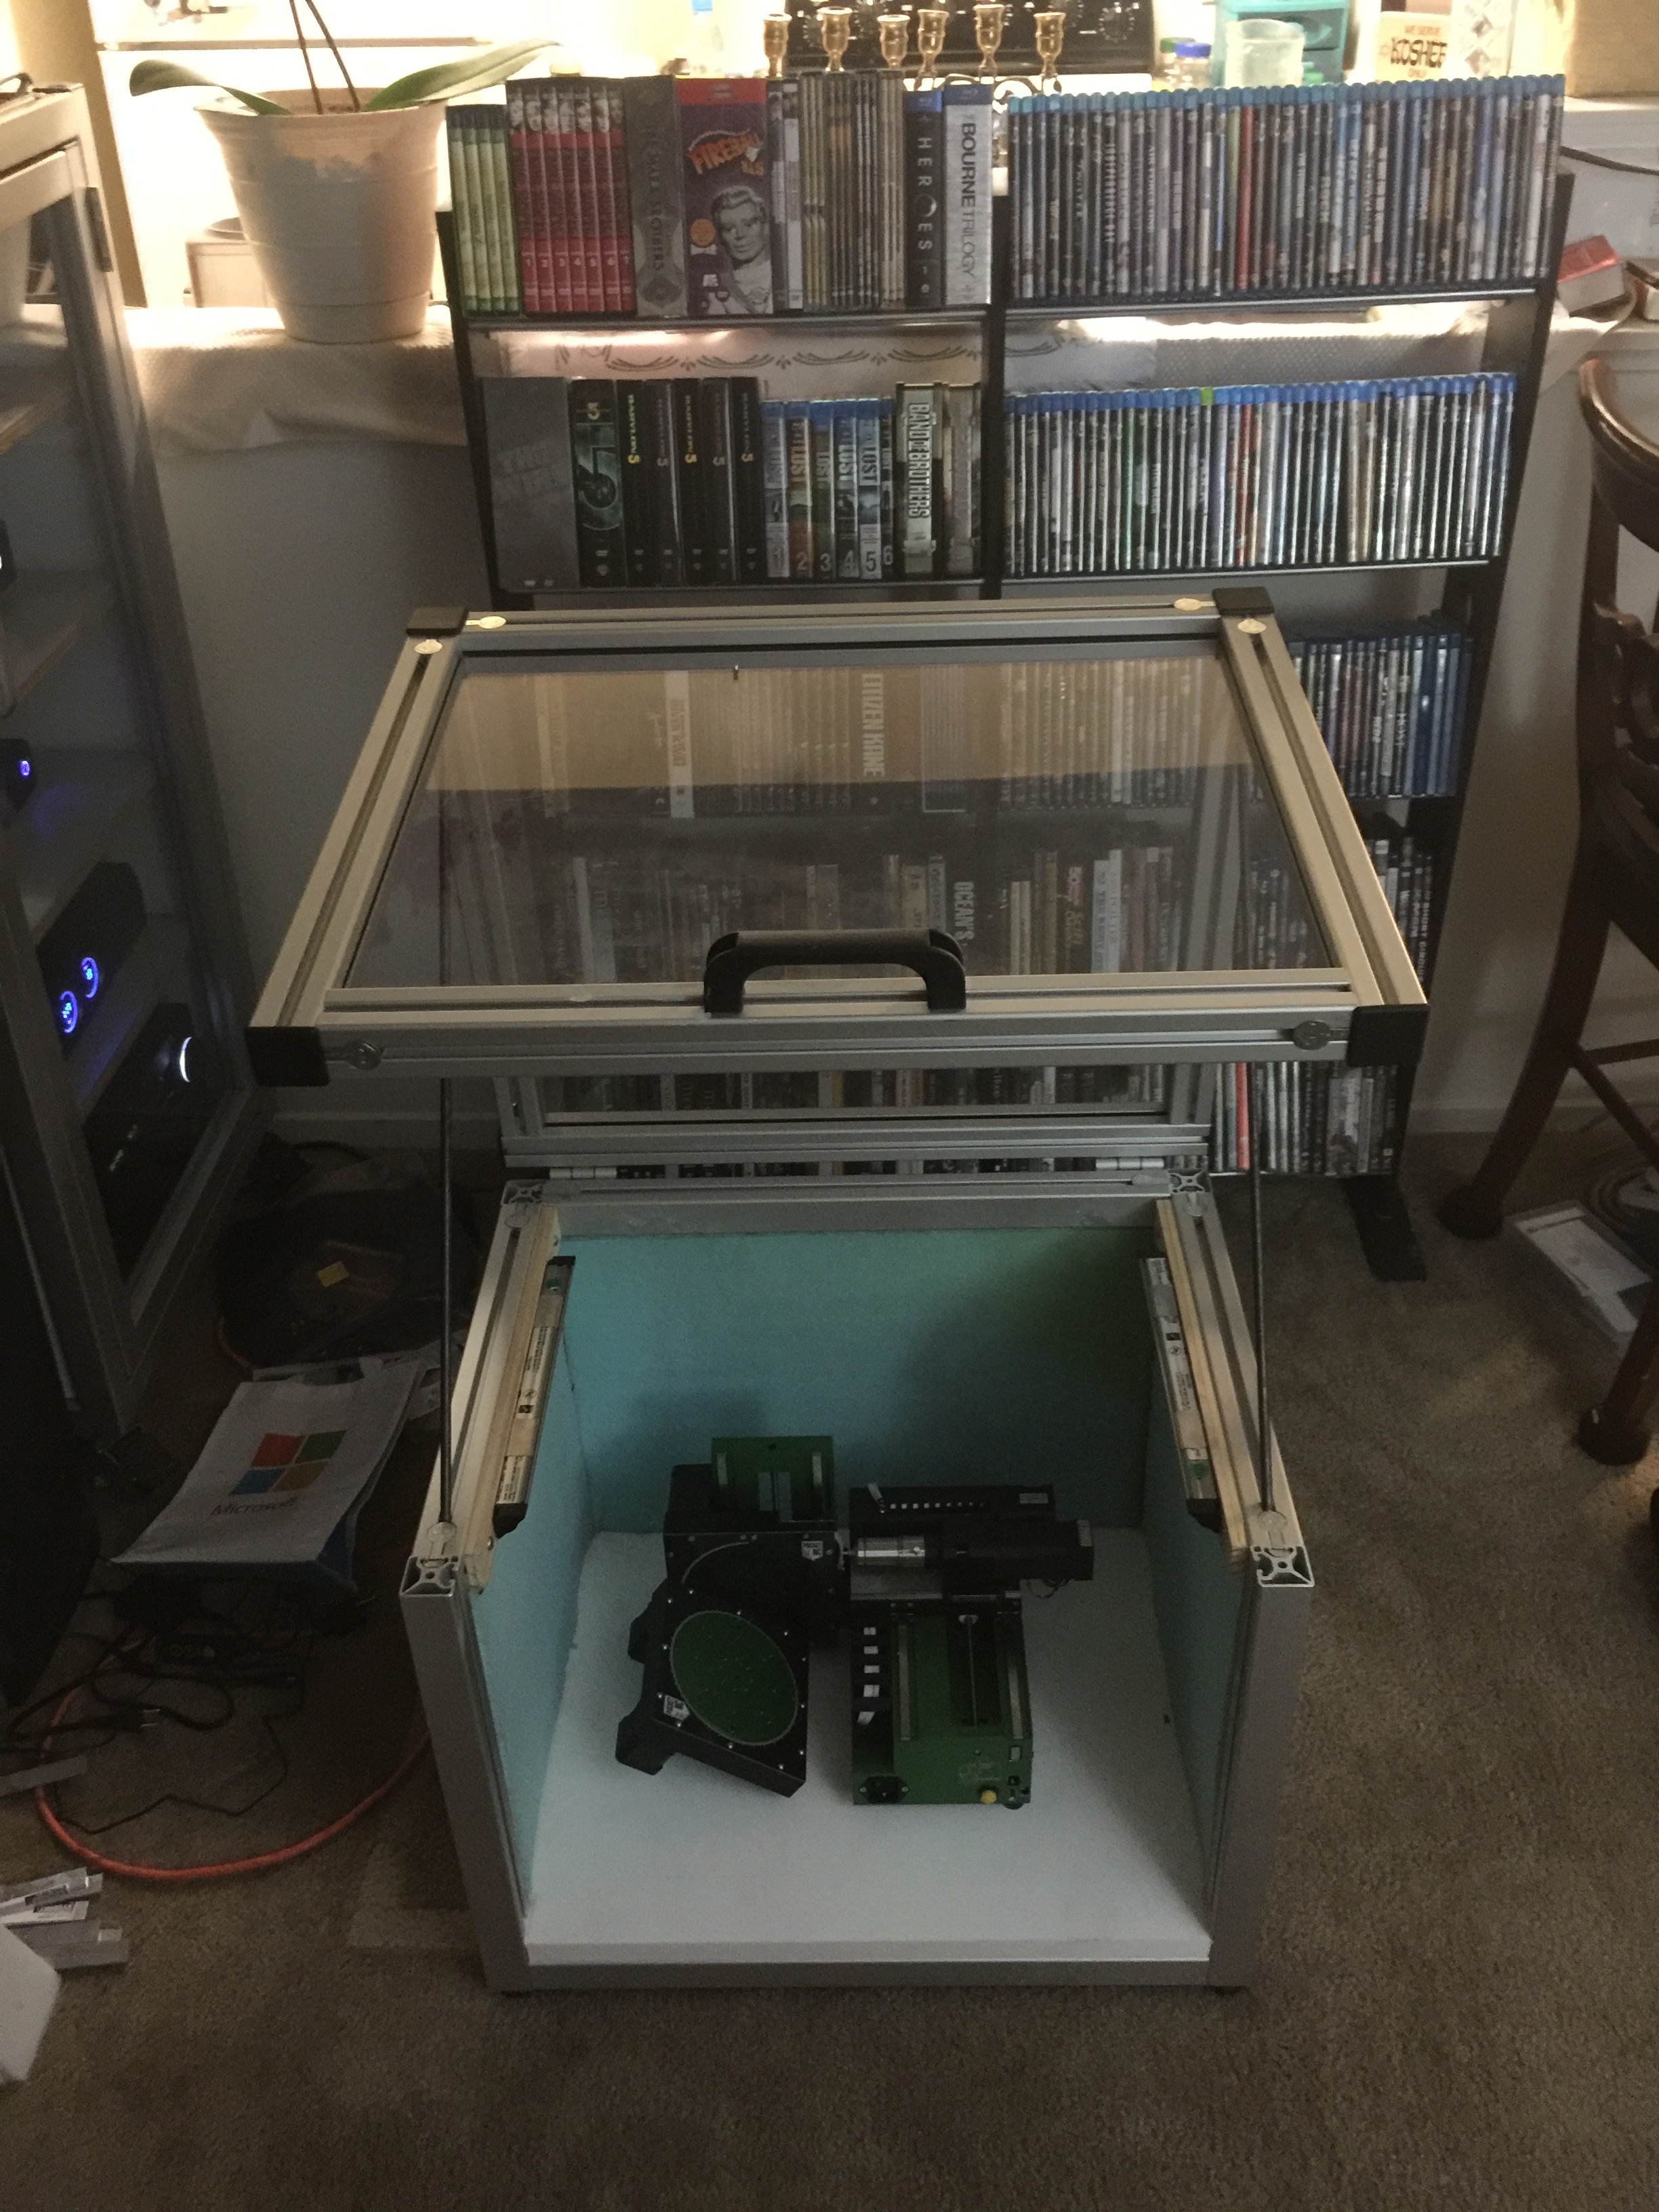
The front door is on lift off hinges.

The enclosure is made of 1.5" T-Slot; the walls Alumalite ( a “high tech” composite material).

The foam is Whispermat, a professional, two level, sound suppression foam. It’s laminated onto the Alumalite via 3M Super 77 industrial adhesive and then pinned around the periphery via aluminum flats. The foam is left exposed to maximize the diffraction and sound suppression; it kills the wall reflectivity across many frequencies.

The bottom is 0.500" HDPE with 0.125" of Neoprene (a shock absorber) on top. The feet have shock absorbers but I plan on added better ones.

The whole thing is sitting on a welded steel frame desk I design some years ago. Unistrut where appropriate. The top is 0.750" heavy duty industrial material. Heavy.

The vacuum goes to a Festool with a Oneida cyclone; all on wheels.

I still have to fix up the cable runs out the back and tweak the flats a bit.

The cables enter on the rear right side, in line with the Nomad power and USB connectors. The hole also serves as the air inlet port for the vacuum connection (which is on the top right).

4 Likes

Here is the PocketNC enclosure - opened and closed.

I’m up to the eyeballs building both enclosures at the same time…

I started on the PocketNC but had to switch to the Nomad. I’m wrapping up the Nomad enclosure and will go back to the PocketNC enclosure. The PocketNC enclosure is less about noise suppression and more about allowing people to see it do its work. Watching 5 axis continuous machining is a sight to behold!

I’ll be getting back to finalizing the PocketNC enclosure shortly.

I’m also working on post processors for a few CAM (and CAD/CAM) packages so additional options will be available.

mark

6 Likes

@mbellon incredible work! I love the camera setup in the nomad enclosure. Aluminium extrusion does give such a clean and professional look!

Indeed, 5 axis is something that you really have to watch live to appreciate.
Have you done any parts on the pocket yet?

Watching 5 axis continuous machining is a revelation. Everything one understands about 3 axis machining is now taking steroids.

I’ve yet to run a 5 axis job on the PocketNC. I’m finishing up the Nomad enclosure and two post processors for the Nomad - BobCAD-CAM and SharpCAM. I wanted to finish the post processors I said I would.

I do 5 axis work with BobCAD-CAM so I didn’t want to jump into a 5 axis continuous post processor right away. Starting with a 3 axis post processor seemed appropriate, especially since the Nomad is relatively simple.

This week I hope to finishing the enclosure, sign off on the post processors and make them publicly available and start the Nomad machining parts for the dust head I want for it. While the machining is going on I’ll be finishing up the PocketNC enclosure and starting on bringing it up.

mark

Thanks Nick for opening this thread. Some really good ideas are out there and hopefully folk will rally to post some photos also (a picture tells a thousand words) highlighting their achievements.

I haven’t worked with wood yet, only aluminum (larger T6-6061 blocks), but found it immediately necessary to a) change the bed to accommodate the stock and b) build an enclosure in order to limit the mess (also add some form of shielding for the onboard electronics).

So far so good, with the low cost additions.

• Added the 80/20 bed and legs (to increase z-axis range) - $180 plus $50 nuts and bolts, made the Leg Plates from scrap lying around

• Added Pillar blocks and Clamps (to hold the work down) - $150

• Added the Perspex cover - $150 plus duct tape, scrap aluminum angle etc

• Added energy chain and limit switched (currently not used) - $25 est (3D printed ends and mounts for the micro switches)

• Added Electronics and Fan cover - $6 for the screen plus 3D printed cover and perimeter

I’ve attached some photos of the larger completed jobs (stock slide 1” x 6” x 14”) and am about to embark on a 2” x 2” x 30” latticework stock next month once I get the overlap working.

Hope you thread sparks even more interest, bringing innovative ideas to the table (pardon the pun)?

16 Likes

VERY NICE @sliso!

Your T-Slot bed is very nice. I especially like the well adaptation for tall parts and how easily you can open and close the well. I’ve seen this before but this is one of the nicest executions I’ve seen.

The raising legs are a nice touch! For large scale machines I try to get the bed at waist height as this seems to make loading stock easiest. Looks like you’ve got it in just the right place for you.

Your see-through enclosure is delightfully minimalistic - maximum visibility.

mark

1 Like

@sliso wow… That is a mighty fine set-up you have there!

I definitely need to do something about covering the driver board of my machine, especially when I start working with more aluminium.

Do you have a grill or shield underneath the driver board to stop any chips being flung up from underneath?

I really need a 3d printer to make little mods like this, so useful!

Yes Nick, it is essential to cover the bottom of the driver board also. Both the upper and lower covers are identical.

No reason why they can’t be cut/milled (using your SO3) from perspex/plastic/wood etc, if you don’t have access to a 3D printer? I used the printer only because i needed to some contribution from it to justify its existence now that its built and its initial task is complete…

Good point, I think I will try both and compare! I woke up after a new years party and discovered I had ordered a Prusa the night before… so I guess now I have one haha

She’s done! full build log to come soon on my blog and on instructables


8 Likes

Really Nice Work here, Thanks for Sharing!
I really like seeing the different material choices and solutions.

WOW! AWESOME SAUCE!

Really nice work! I love the doors and handles!

I see a vacuum inlet. Vacuum pulling out means air has to come in somewhere. Where?

Is there going to a dust head? Anything special?

Do the LEDs change color?

mark

Thanks! I’m very please with how it turned out! Yes so the vacuum connector is to create negative pressure inside the enclosure so any airborn dust trying to escape through any gaps.
There is a thin gap between the top of the doors and the frame to aid this process so there is air flowing into the enclosure keeping the dust in.
Seems to work so far!

And yes the LEDs do change colour but I have them set at a slight bluey shade of white, I think it makes it look cool haha

1 Like

Thanks! I’m very please with how it turned out!

You should be! Very nice work!

Yes, so the vacuum connector is to create negative pressure inside the enclosure so any airborn dust trying to escape through any gaps.

Gotcha. With a HEPA filter on the vacuum you’ll be plenty safe. With a cyclone added, your HEPA filters will last much longer.

Any plans to modify the vacuum port on the inside and use tubing to go to a dust head? If so, the cyclone becomes almost a necessity (the volume of particles goes way up and they include the big/visible ones)

See here:

Another has come up with a Dewalt top plate for a dust head.

There is a thin gap between the top of the doors and the frame to aid this process so there is air flowing into the enclosure keeping the dust in. Seems to work so far!

Ah! It wasn’t obvious from the pictures where the inlet ports were. No whistle or uncomfortable noise then?

And yes the LEDs do change colour but I have them set at a slight bluey shade of white, I think it makes it look cool haha

… and they accuse me of being over the top! :joy:

WAY COOL! A design suitable for all moods and peoples! :joy:

mark

1 Like

Well done Nick, it looks fantastic, also looks like you have some very good noise dampening attributes through your choice of materials.

Thanks! Here is the main write up of the build process: http://www.makealittlemore.co.uk/2016/02/10/diy-cnc-router-enclosure/

1 Like

AWESOME WRITE UP!

mark

1 Like

http://www.makealittlemore.co.uk/2016/02/19/shapeoko-3-enclosure-sound-isolation-test/

The sound test! It didn’t go perfectly but you can get an idea of how much difference it makes!

EXCELLENT!

My enclosure keeps my Nomad to ~52 dBa when cutting. If I try to hog (really aggressive roughing) it goes up to around 54 dBa.

mark