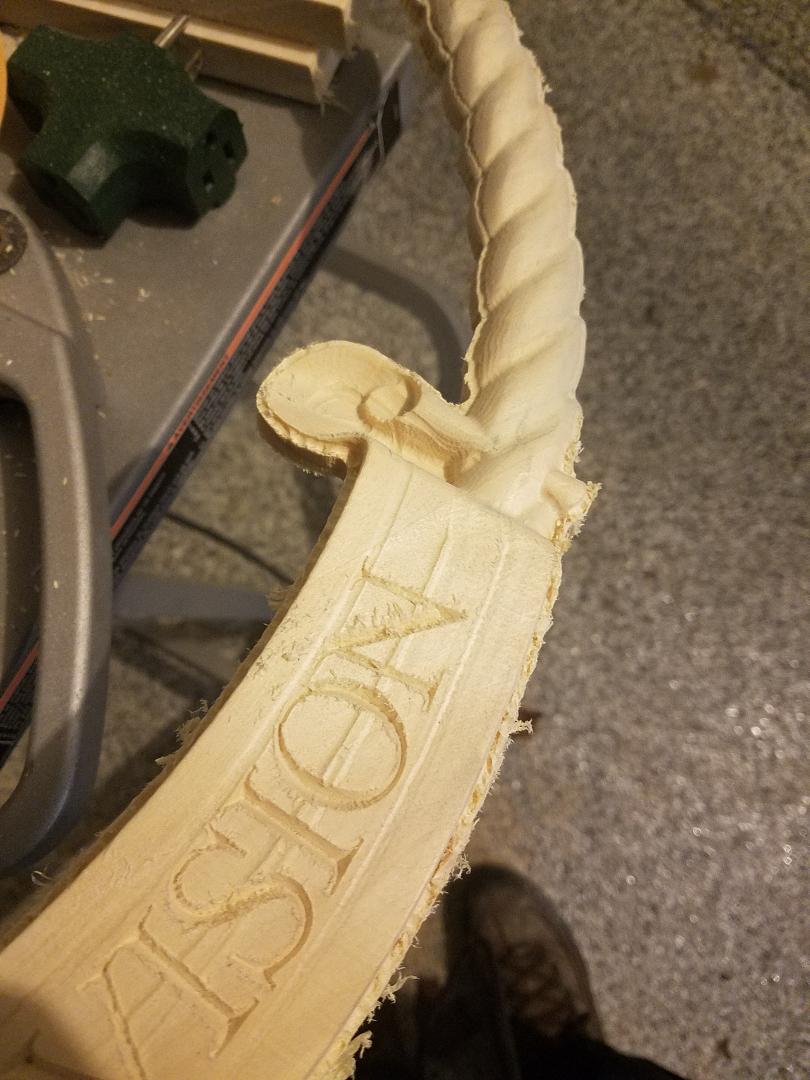
Hey guys. So I’ve been noticing irregularities with my z-axis depth on projects. I cut this 3D rope border, yesterday with scroll. Let me attach an image to show you what I’m seeing :
2 hours of sanding later here I am to try and get this fixed.
As you can see there are lines running through the project in several spots. I notice height irregularities in all my 3d projects. I did do a 3d clearing pass with .25 EM, so theres a chance I set the clearing bit too low (doing it with piece of paper, set to .02" machining allowance), but im pretty (very) confident some of these showed up from the 1/8" ballnose bit I was using. This tells me that my z-axis is not right. After reading other posts I know the z-axis belt needs to be guitar string tight. So its pretty tight but I’m going to tighten it more anyway not knowing if its where it needs to be.
I jog my machine all the way forward. Drop the gantry near all the way down. I can see the set screw when I look down. It is loose when I contact it. I’m assuming this is a problem? Im on the way to hardware store to get an Allen to reach it, as well as a 1/16 Allen to reach my pulley set screw. Is this my best bet to tighten this? Or do I gotta pull the router dustboot and motor off?
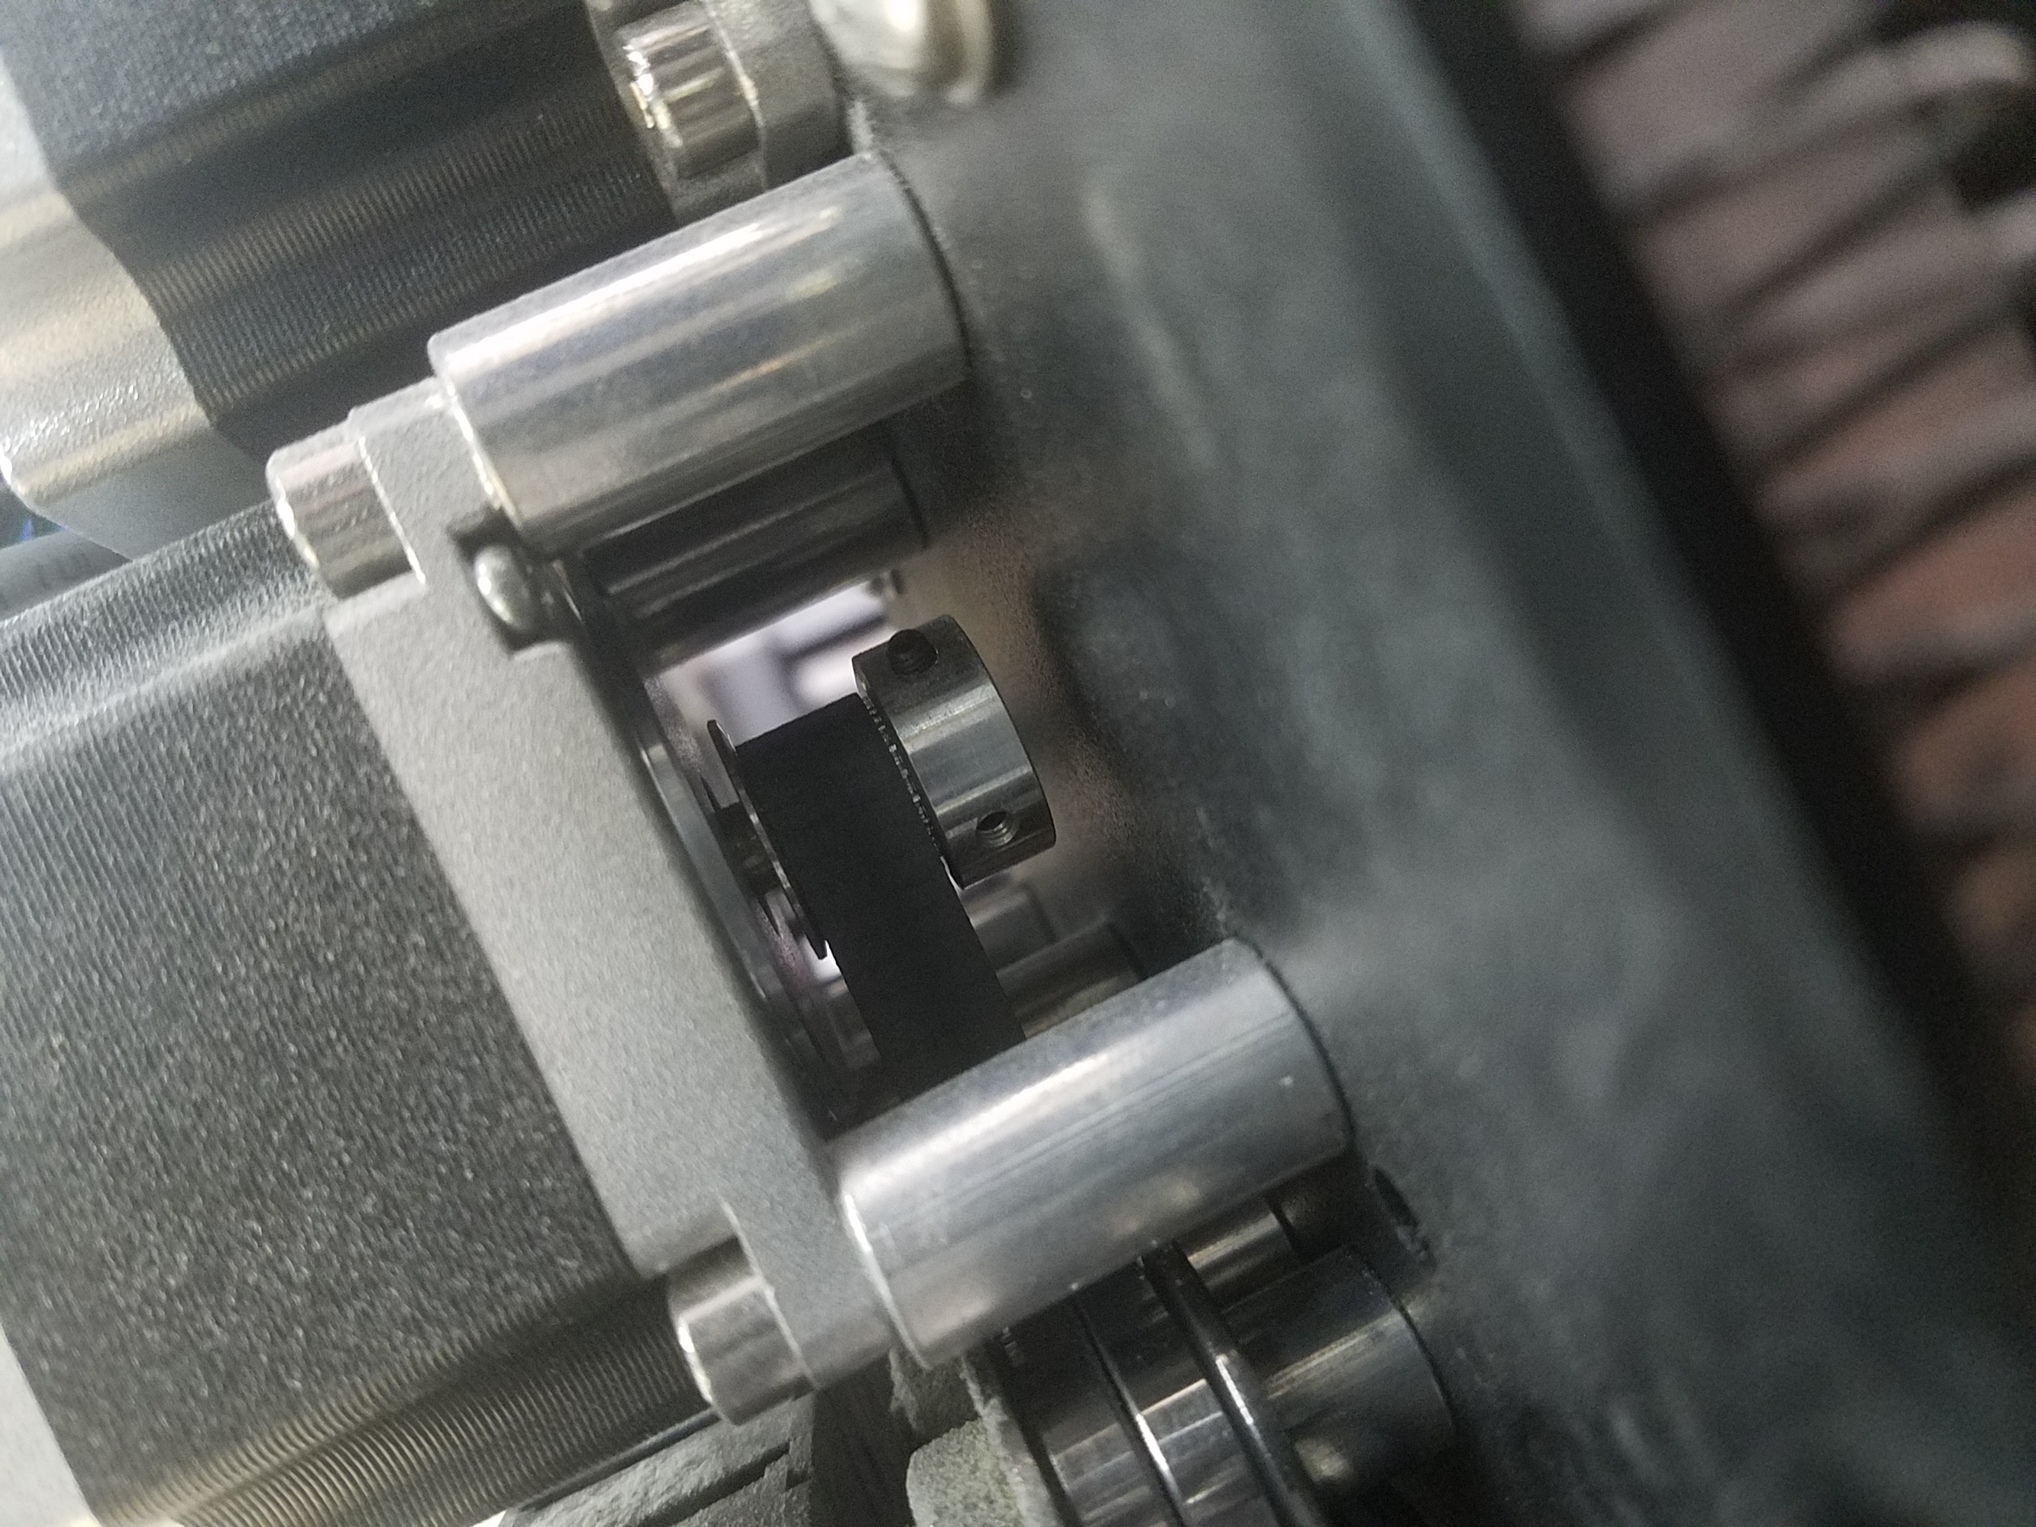
Finally when inspecting my z axis pulley set screw I’m seeing one of these partially sticking out, and it appears to be on an angle or crossthreaded. Heres the pic of it:
Hey Michael, nice project. While you are at the hardware store pick up some small screw loctite. It comes in a small tube. I think it is a blue liquid. Put a tiny amount on the screw and it will stay. I would pull the servo motor out and confirm the location of the pulley. The set screw should bight into the shaft a tiny dent. With the loctite it will stay for good but still be removable if you need to in the future.
I use loctite 242/243 blue on those set screws. Other folks have replaced those screws with cap head screws which gives you better grip with a larger Allen wrench.
Ok let me first say I’m a moron. The picture was of the X-axis pulley. I’m going to take a closer look at things and I’ll update soon. Any ideas on tightening the z-pulley without removing router/dustboot/motor? Can i just tighten that screw from the topside?
I think you can get at every pulley without disassembly, except maybe the dust boot (I have no idea what your dust boot looks like). It’s been awhile since I messed with mine, but you should be able to position the machine in such a way that the set screws are clocked in a direction where you can access them.
Just re-read your post, not sure about Z belt tension without removing the router. From memory (not in front of my machine) I think not.
So I had 3 set screws in the two holes in my x axis( two seated correctly and one partially threaded in, in a hole where I already had one… just couldn’t see it. which explains why it wouldn’t advance further lol)… The z axis had only 1 screw in 2 holes (one hole empty). I vaguely remember a screw falling out at one point in the past and I must’ve thought it belonged in the x axis. I’m new at this, clearly a mistake. Also in regards to tightening my z pulley it looks like I need to loosen the bottom bolt that is directly behind the router, then tighten the adjustment screw, then retighten that bolt. I am excited to see improvements in accuracy once I make these changes
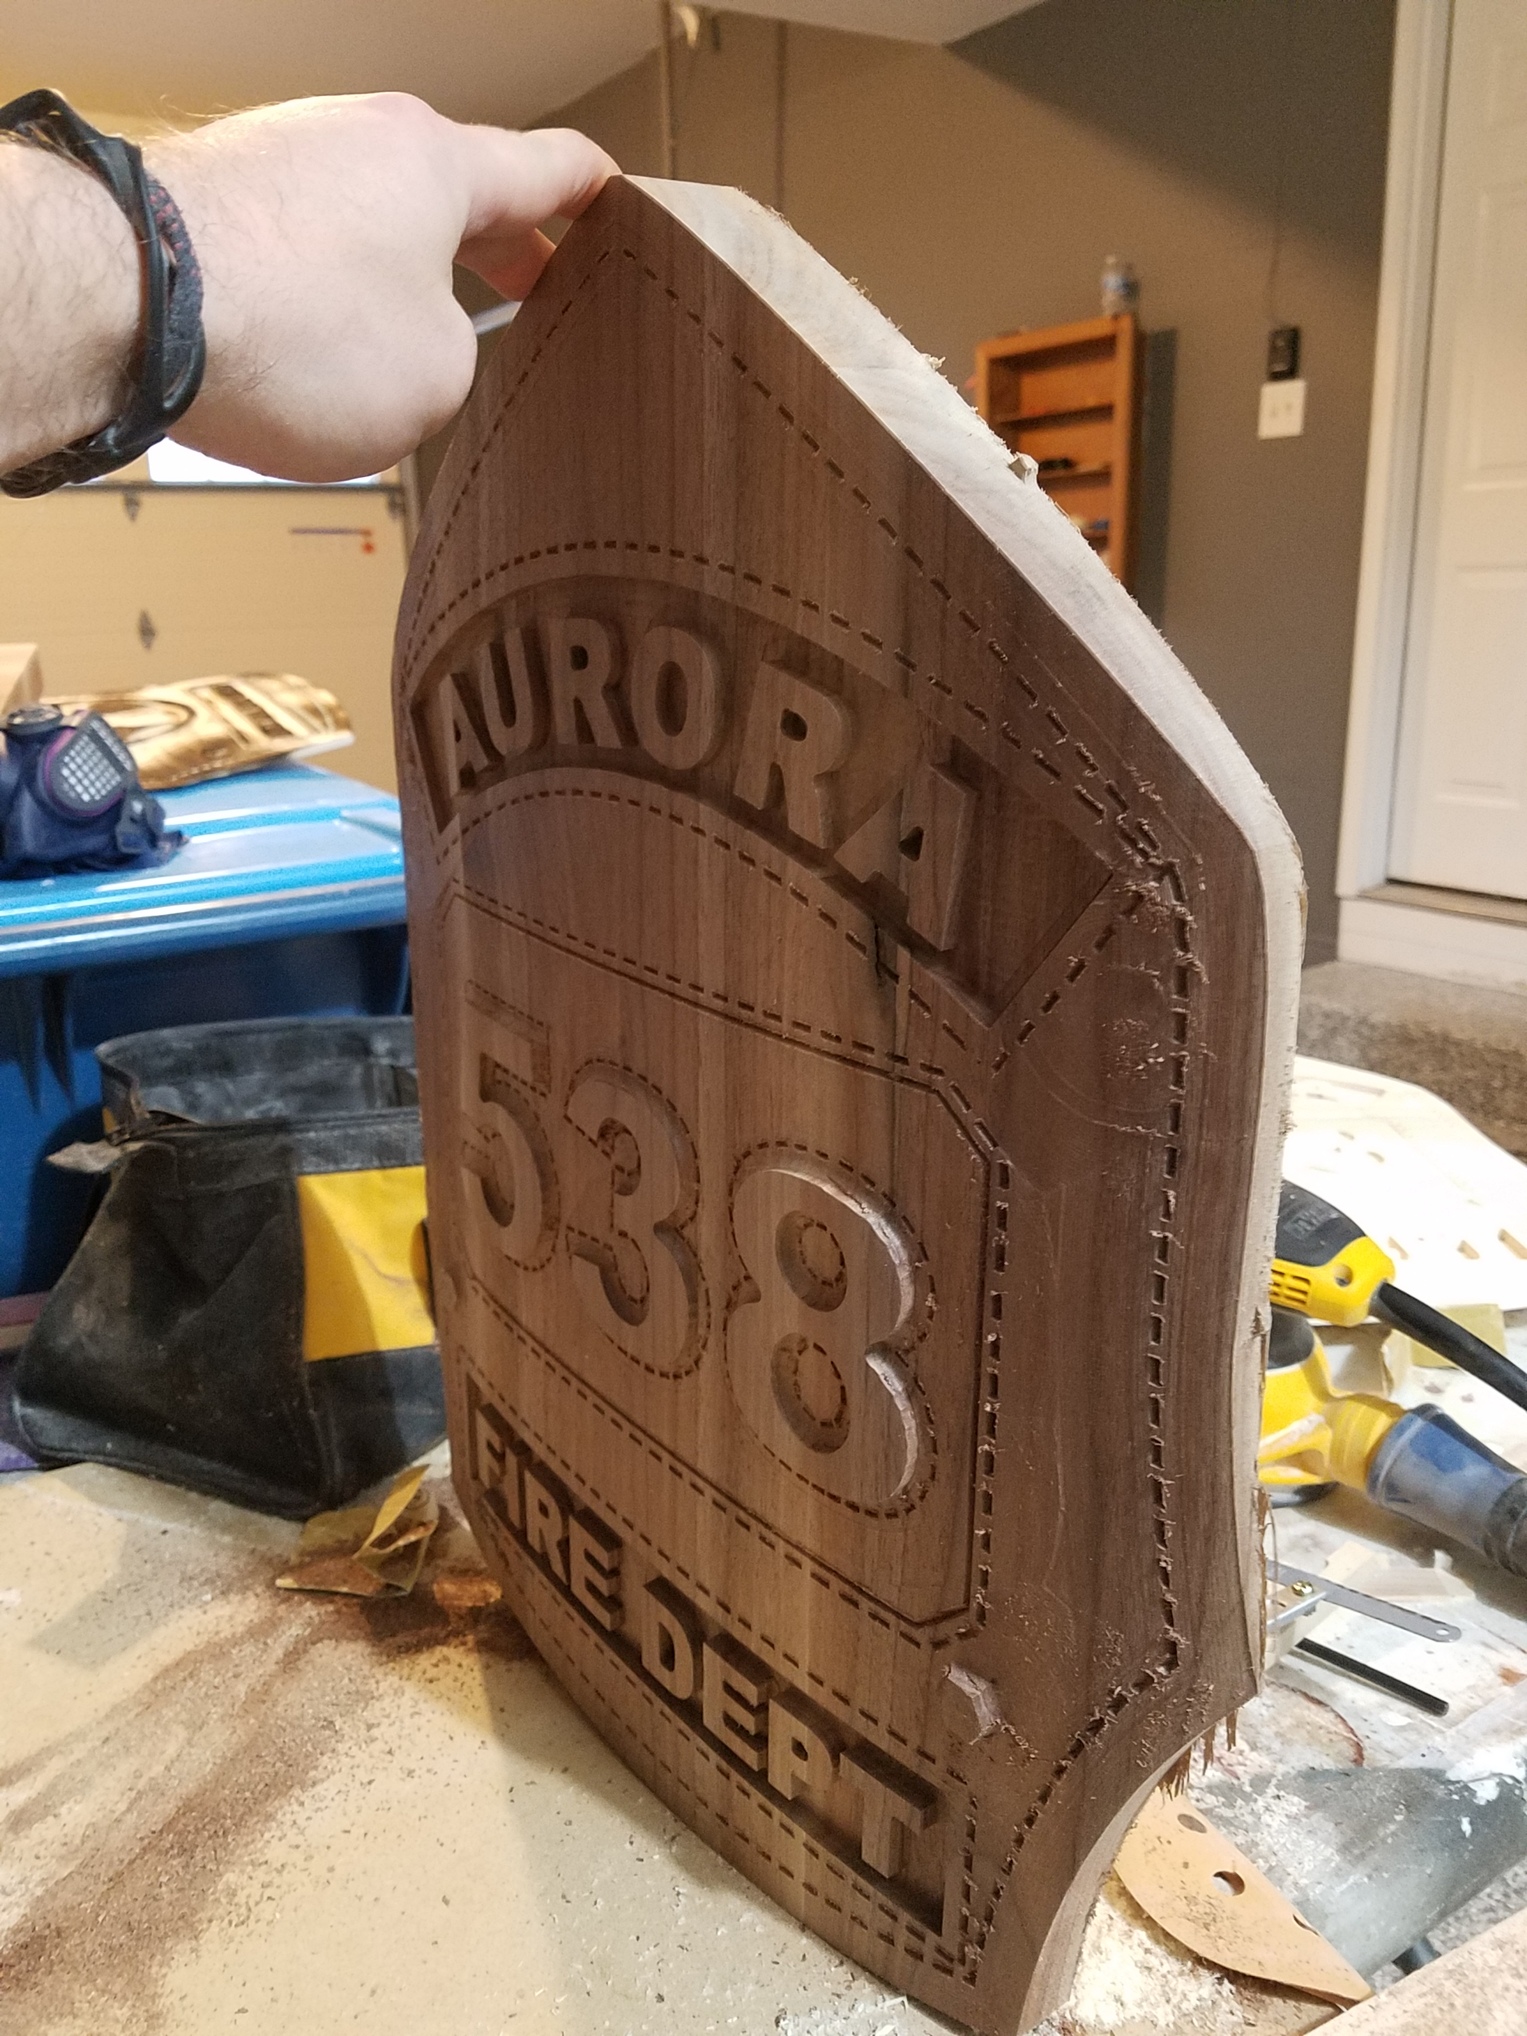
There are subtle inaccuracies in my z direction on 3d carvings prior. I figured these were standard and acceptable. Beyond scallops. Heres a pic showing. Should be a smooth surface.
the pulley needs to hold position on the shaft as it moves the belt — check the set screws
the belt needs to move the pulley along as it rotates — check the belt tension
the plate / carriage / gantry needs to move along the V-rails, check the eccentric nuts / V wheels
the endmill rotates and cuts against the material — this will vary based on feeds and speeds and the direction of movement — the concept in question is climb vs. conventional milling. Another concern is that the endmill will compress the material slightly as it cuts and depending on how long it takes for the endmill to revisit and how thick the material left is — sometimes you can create the effect of a finishing pass by matching the depth per pass to the thickness of the pocket (e.g., it’s an 0.5 inch deep pocket — an 0.125 depth per pass will make 4 passes, but if you choke up on it, 0.12 it’ll make 5 passes and the last will be 0.02 inches