I’ve got the Elaire 1/8" collet which seemed highly recommented. I also have an actual spindle square, I know across the X axis it’s off .002-.003" across the width of the spindle which is 3-4". Is there a good target number? At some point I need to take the Xaxis off so I can file off the anodizing on the left side of the gantry which should bring it closer but seems pretty close, I’m not sure I’d even notice it off that little with a homemade jig.
Alright so I bumped it up to a .15" ‘roughing’ diameter, leaving .0125" material for the finishing pass. MUCH BETTER.
The lines are barely perceptible so this technique will definitely ‘cover’ the machine issue for now. I’m going to try upping it just a bit more and just doing a really slow 8ipm finishing pass.
Now this whole thing has introduced one new issue around the tabs. At each location that it moved vertically to avoid the tabs it also ate into the wood on each side of the tab. This is movement along the Y axis and it’s on both sides. May try making the tabs a mm narrower on the finishing pass. I did intentionally orient them on the face grain so it’d be easier to sand after removing the tabs but, still kinda annoying after getting this close.
Well at least it’s not just me then I don’t like gumming up my bits with double stick table but I may resort to that. First lunch! Then going to try a .015" finishing pass depth to see if that gives me a good enough result that I can crank out some boxes.
I’ve sold enough of these boxes that I’m about 1/3rd of the way to paying off my shapeoko purchase (not including bits, router, etc, etc … etc) so while it’s been a journey would be cool to reach that milestone.
But next project is gonna be hella rustic pine with nice sturdy 1/4" bits.
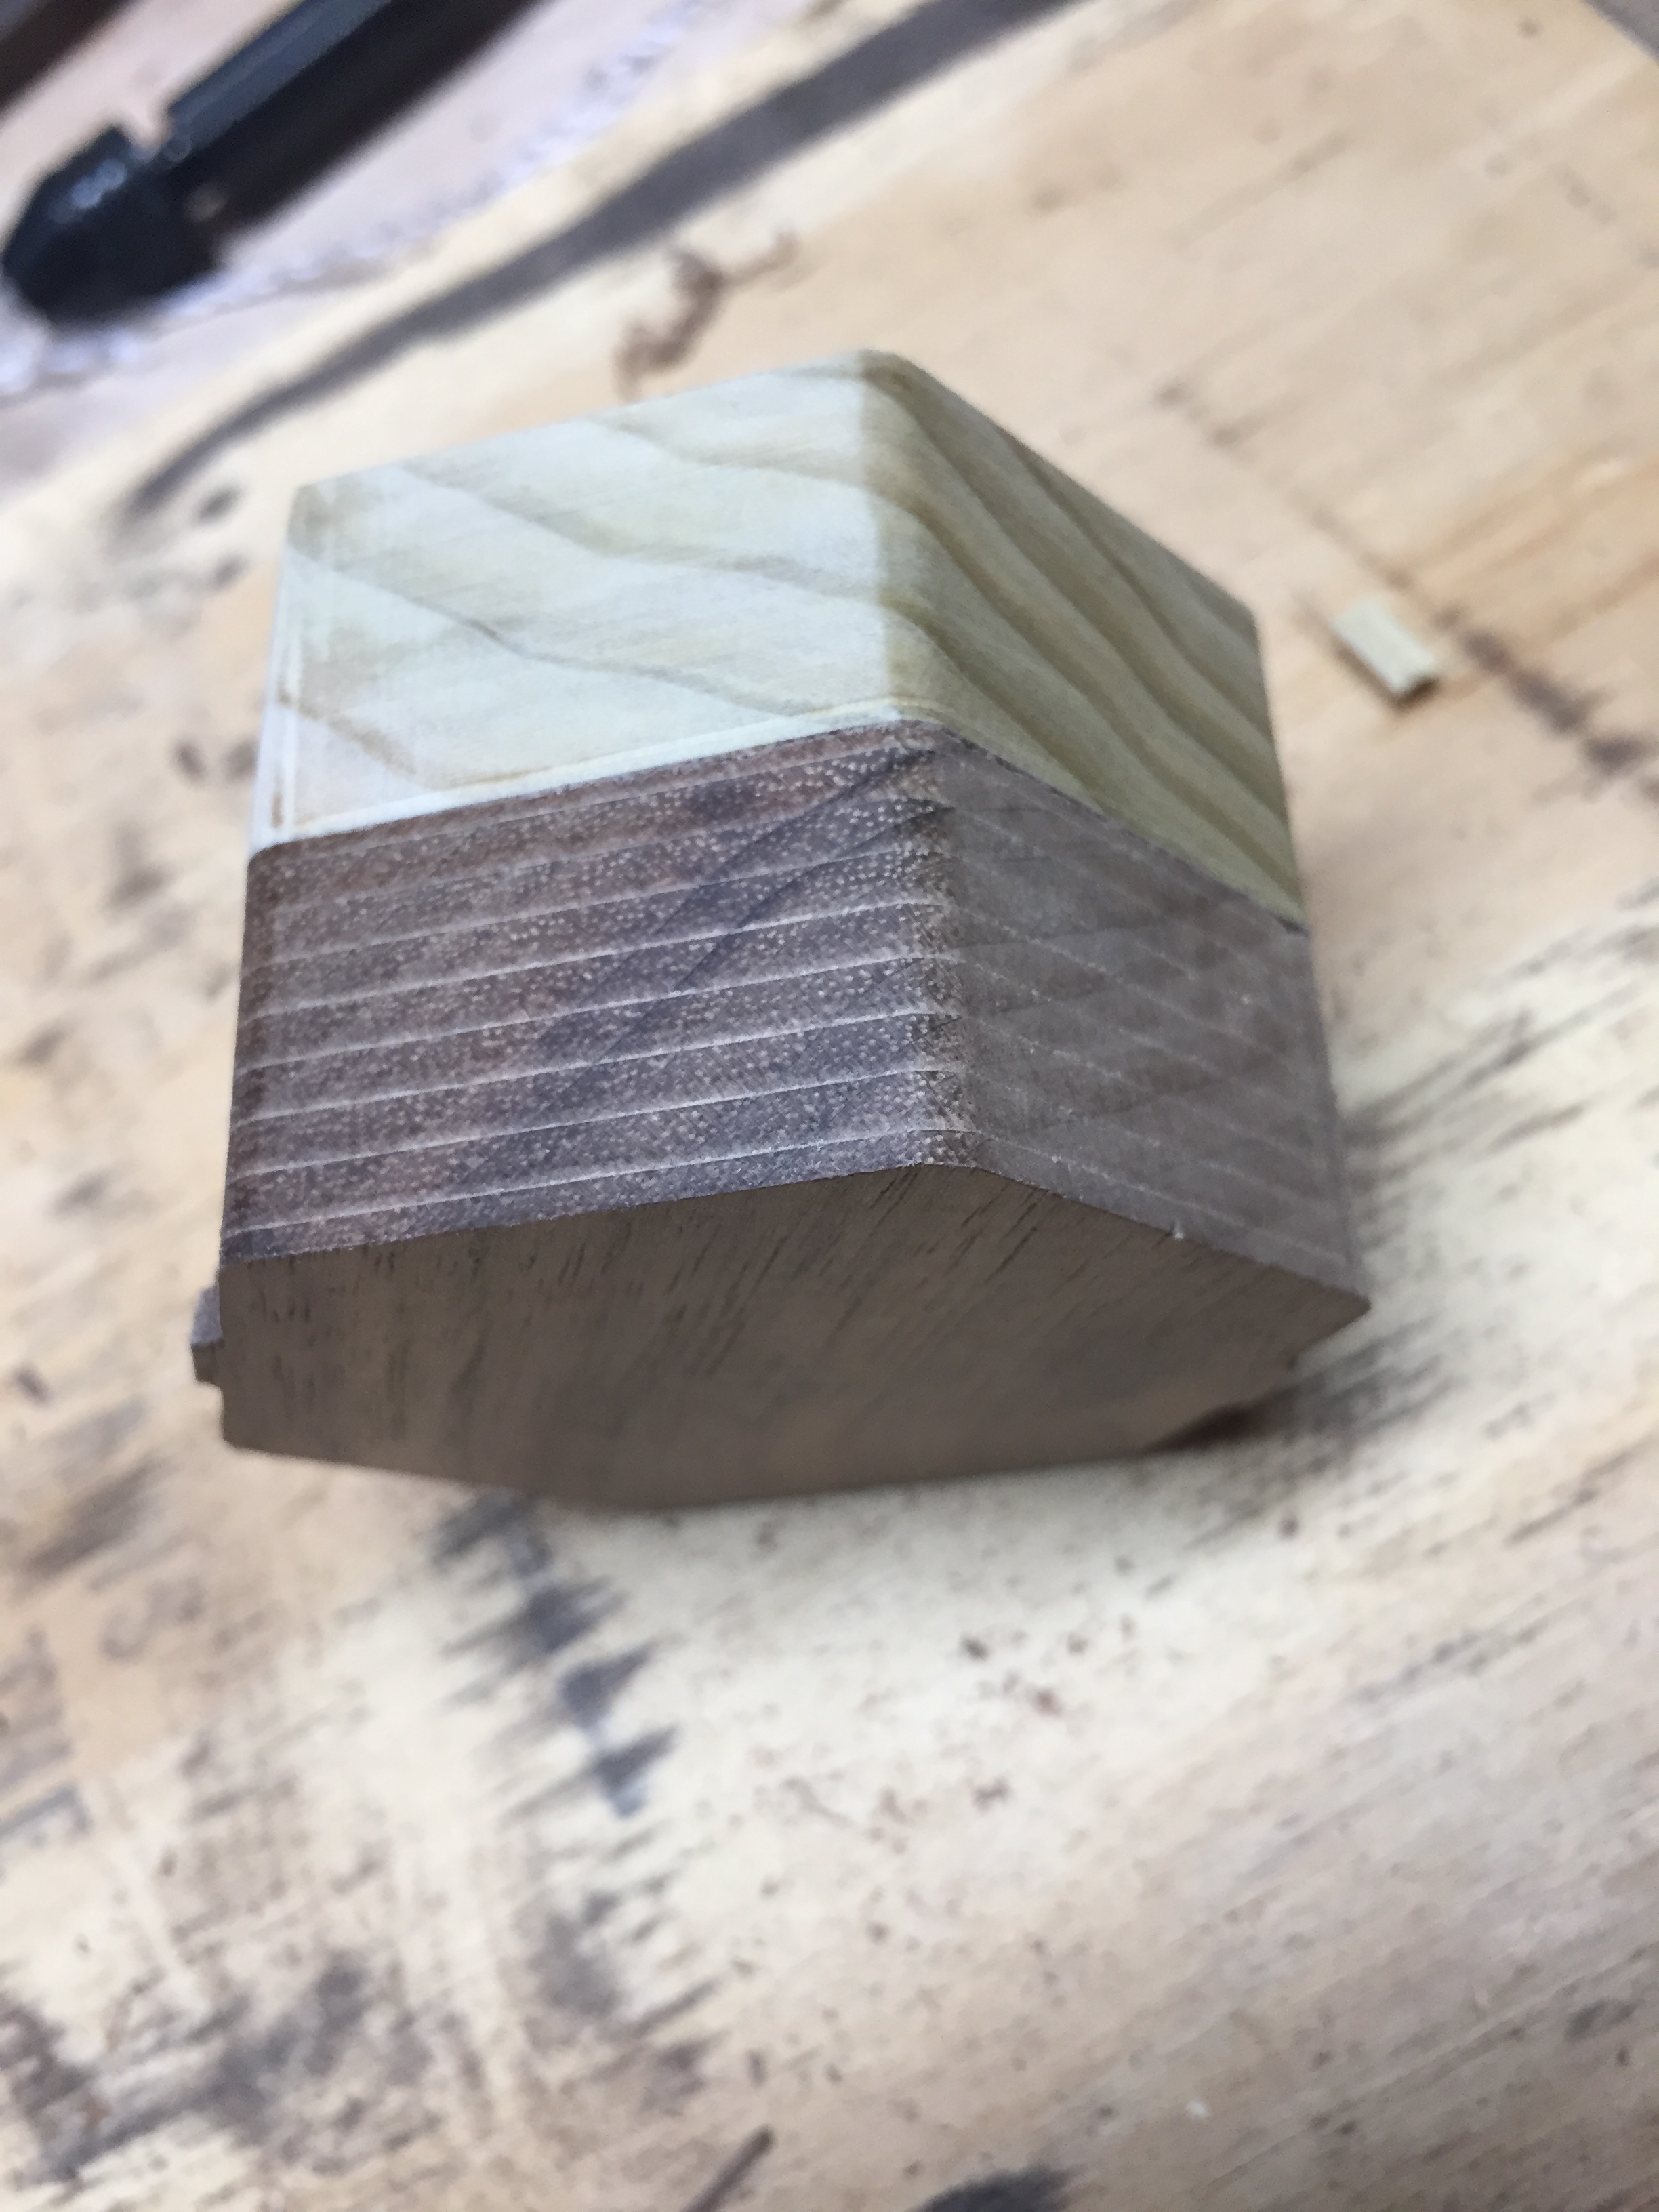
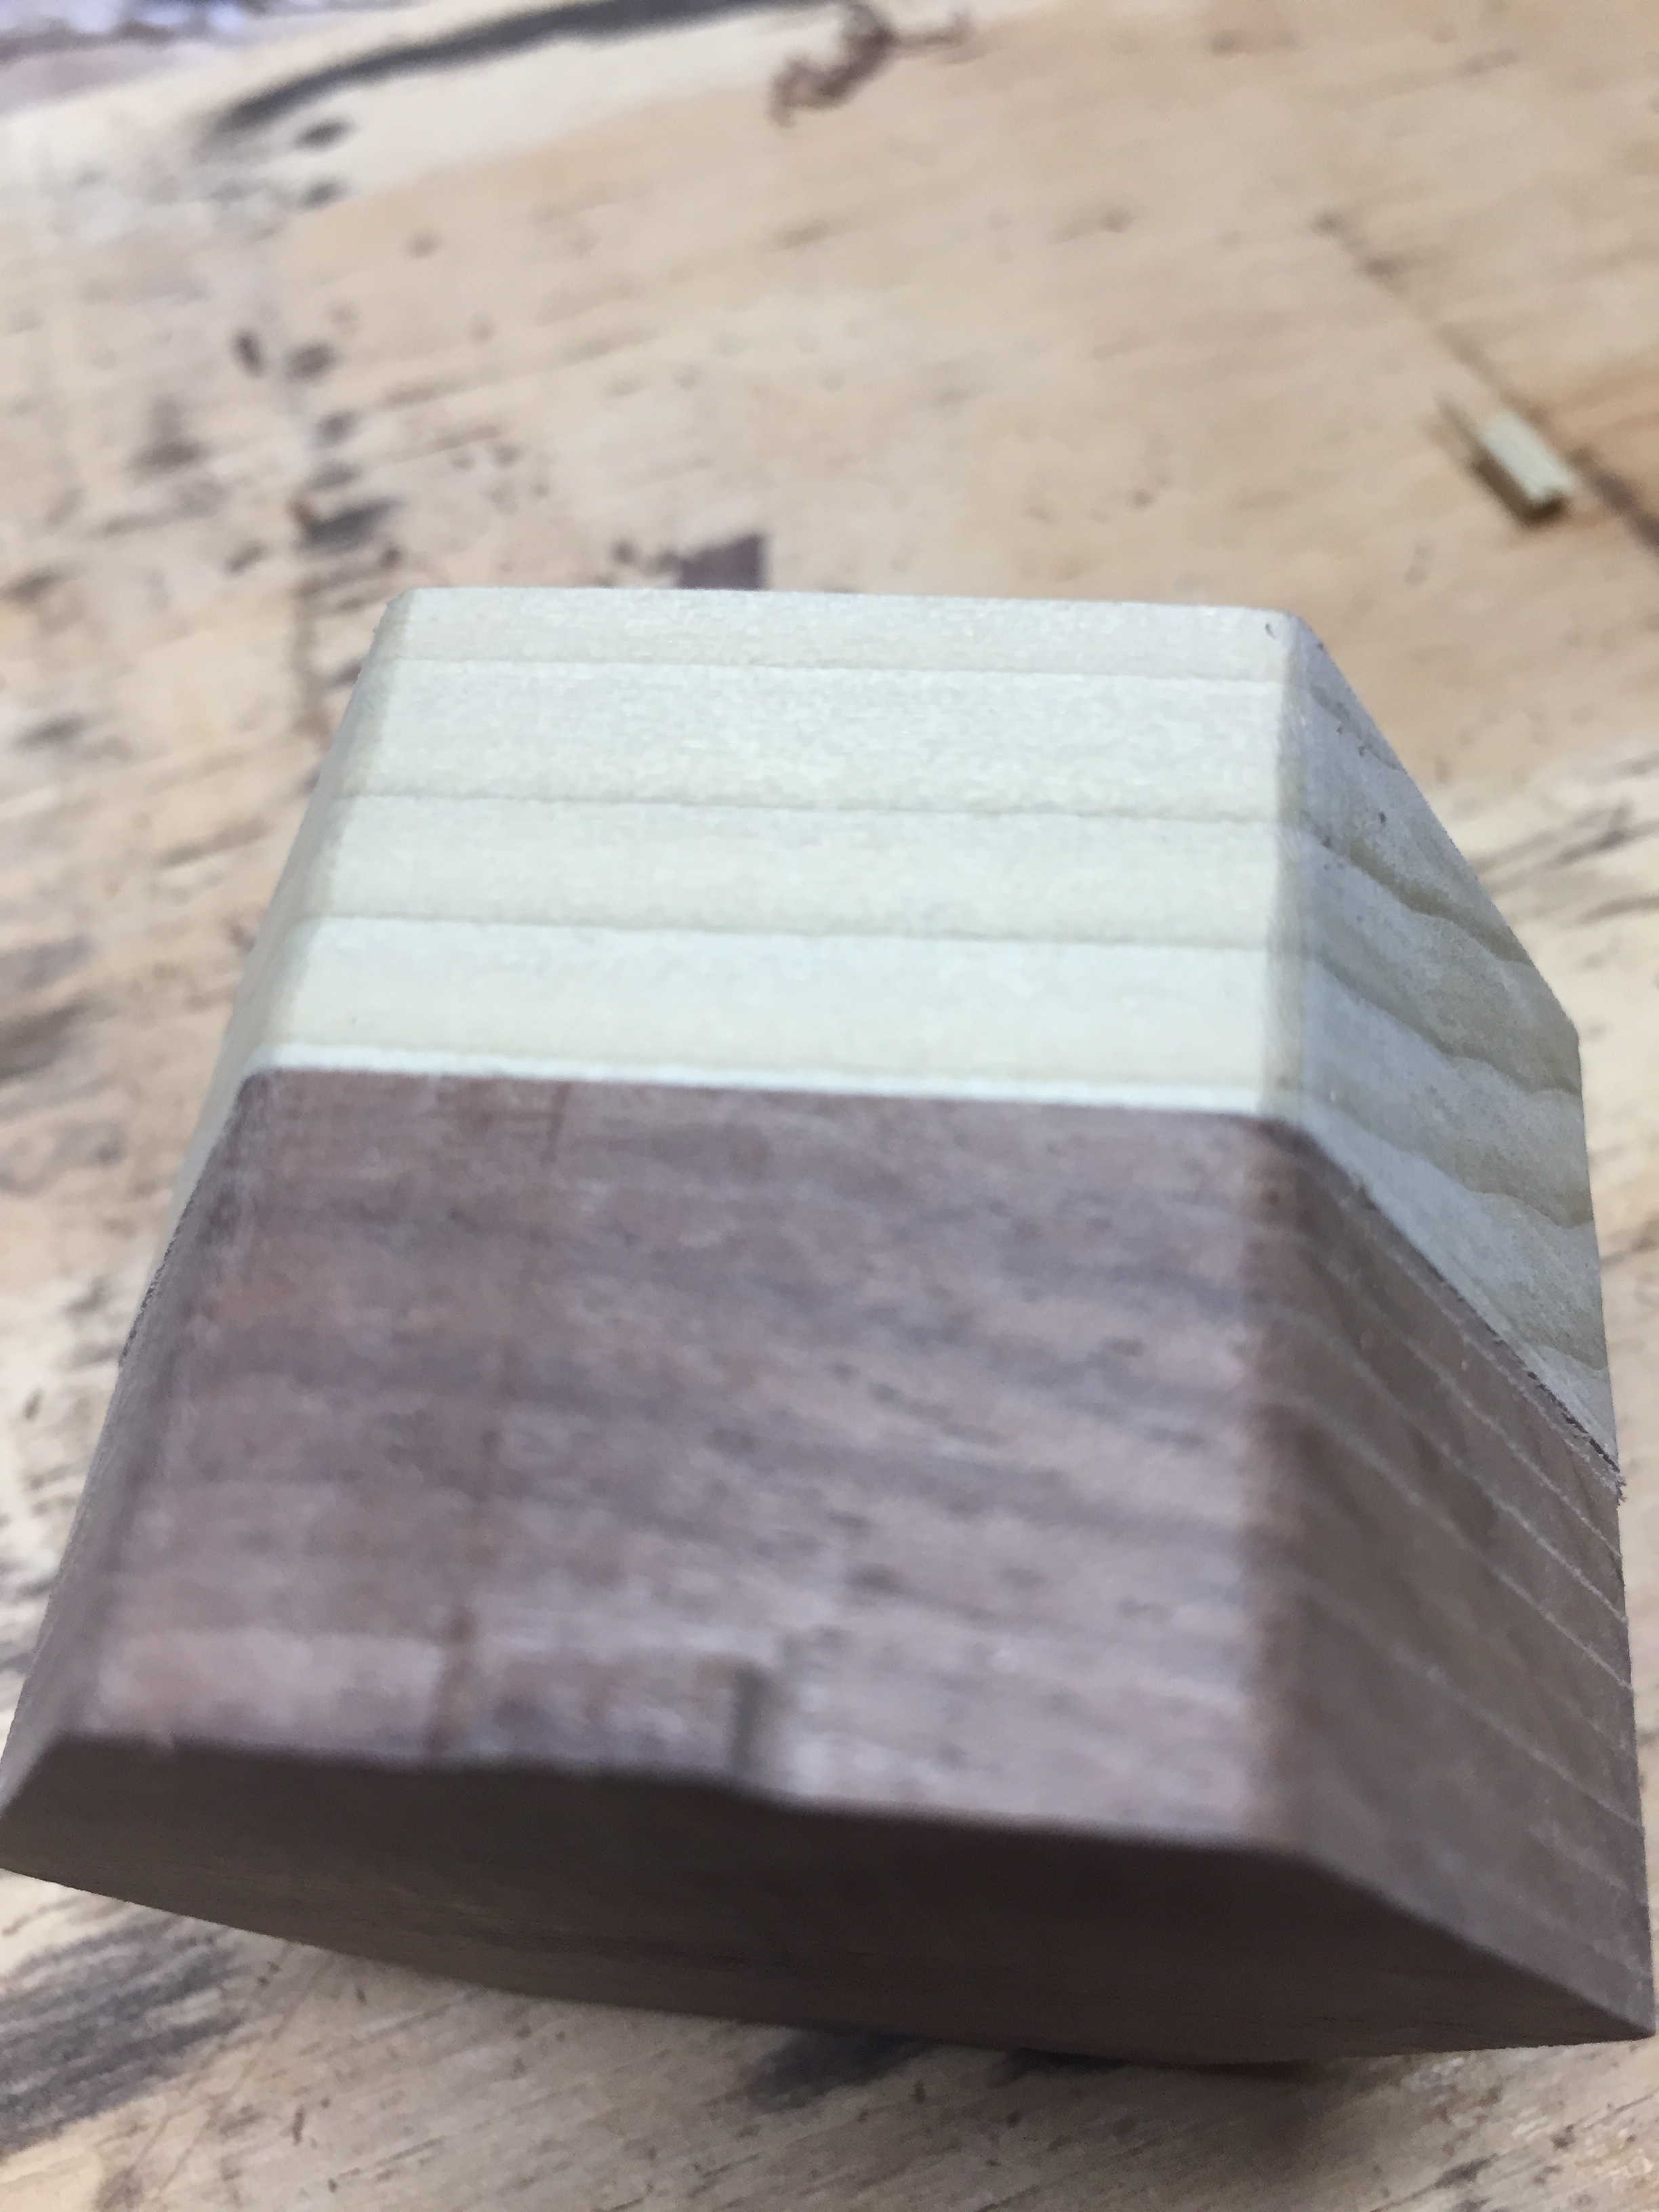
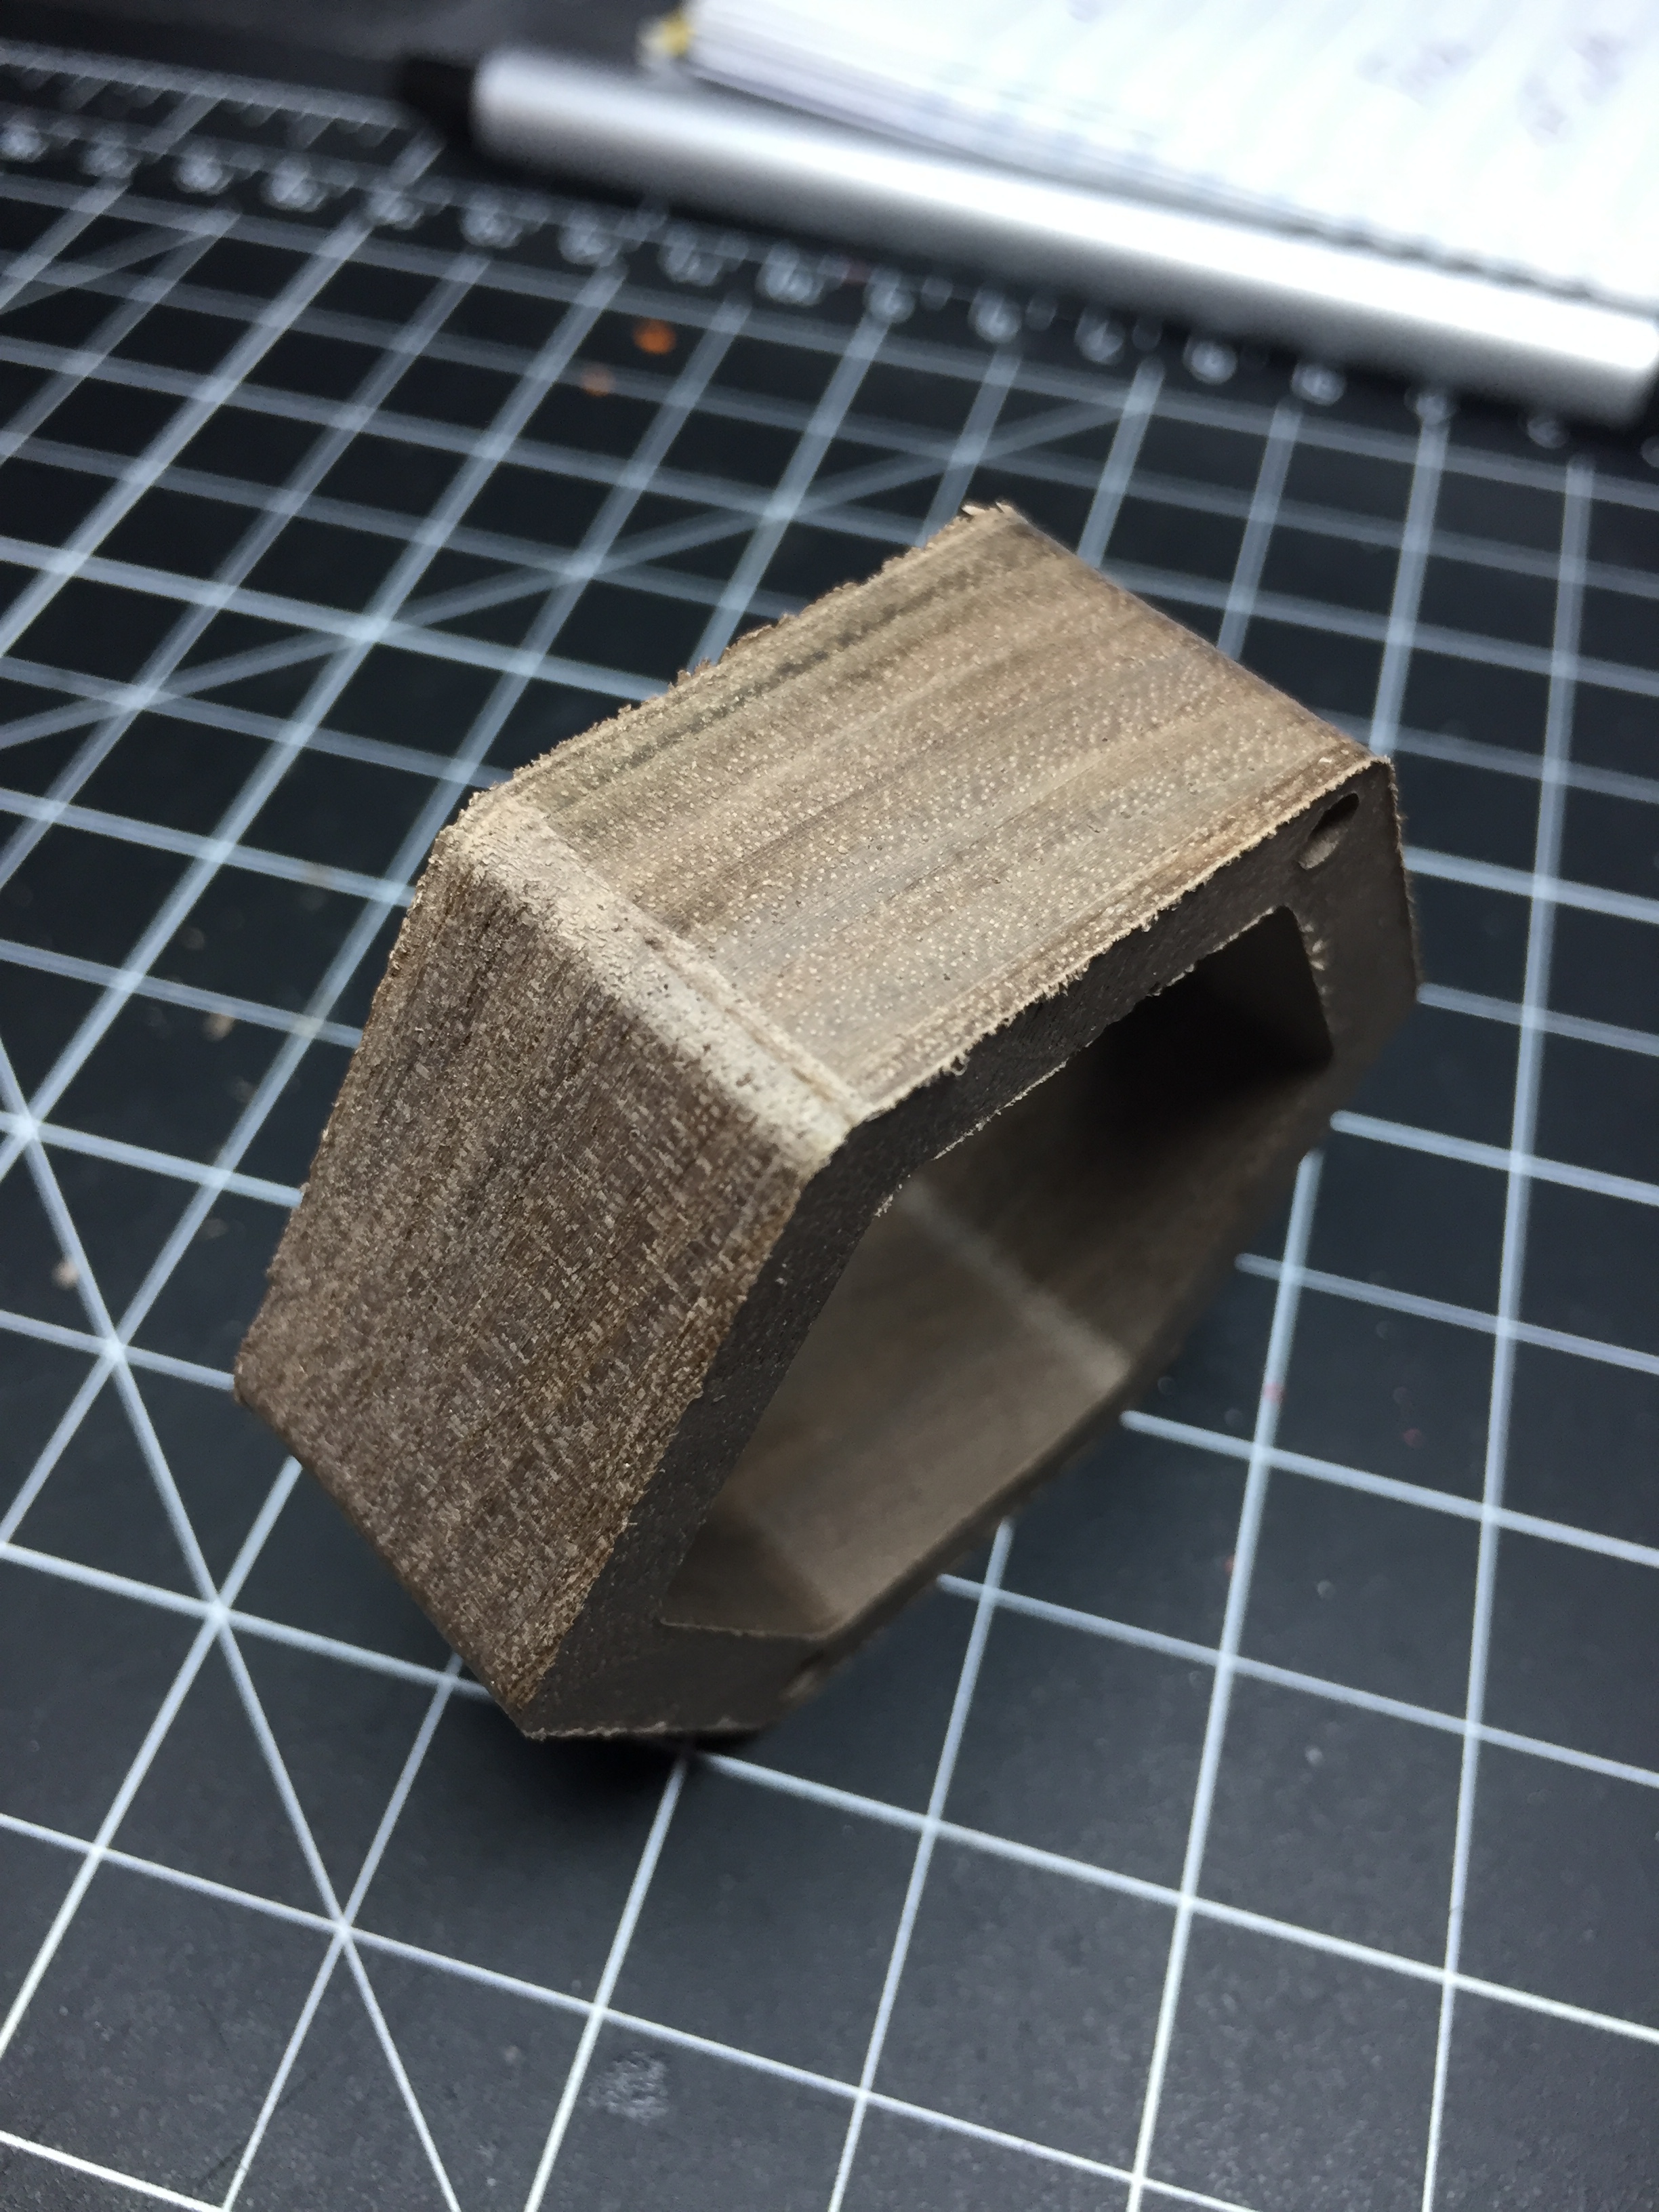
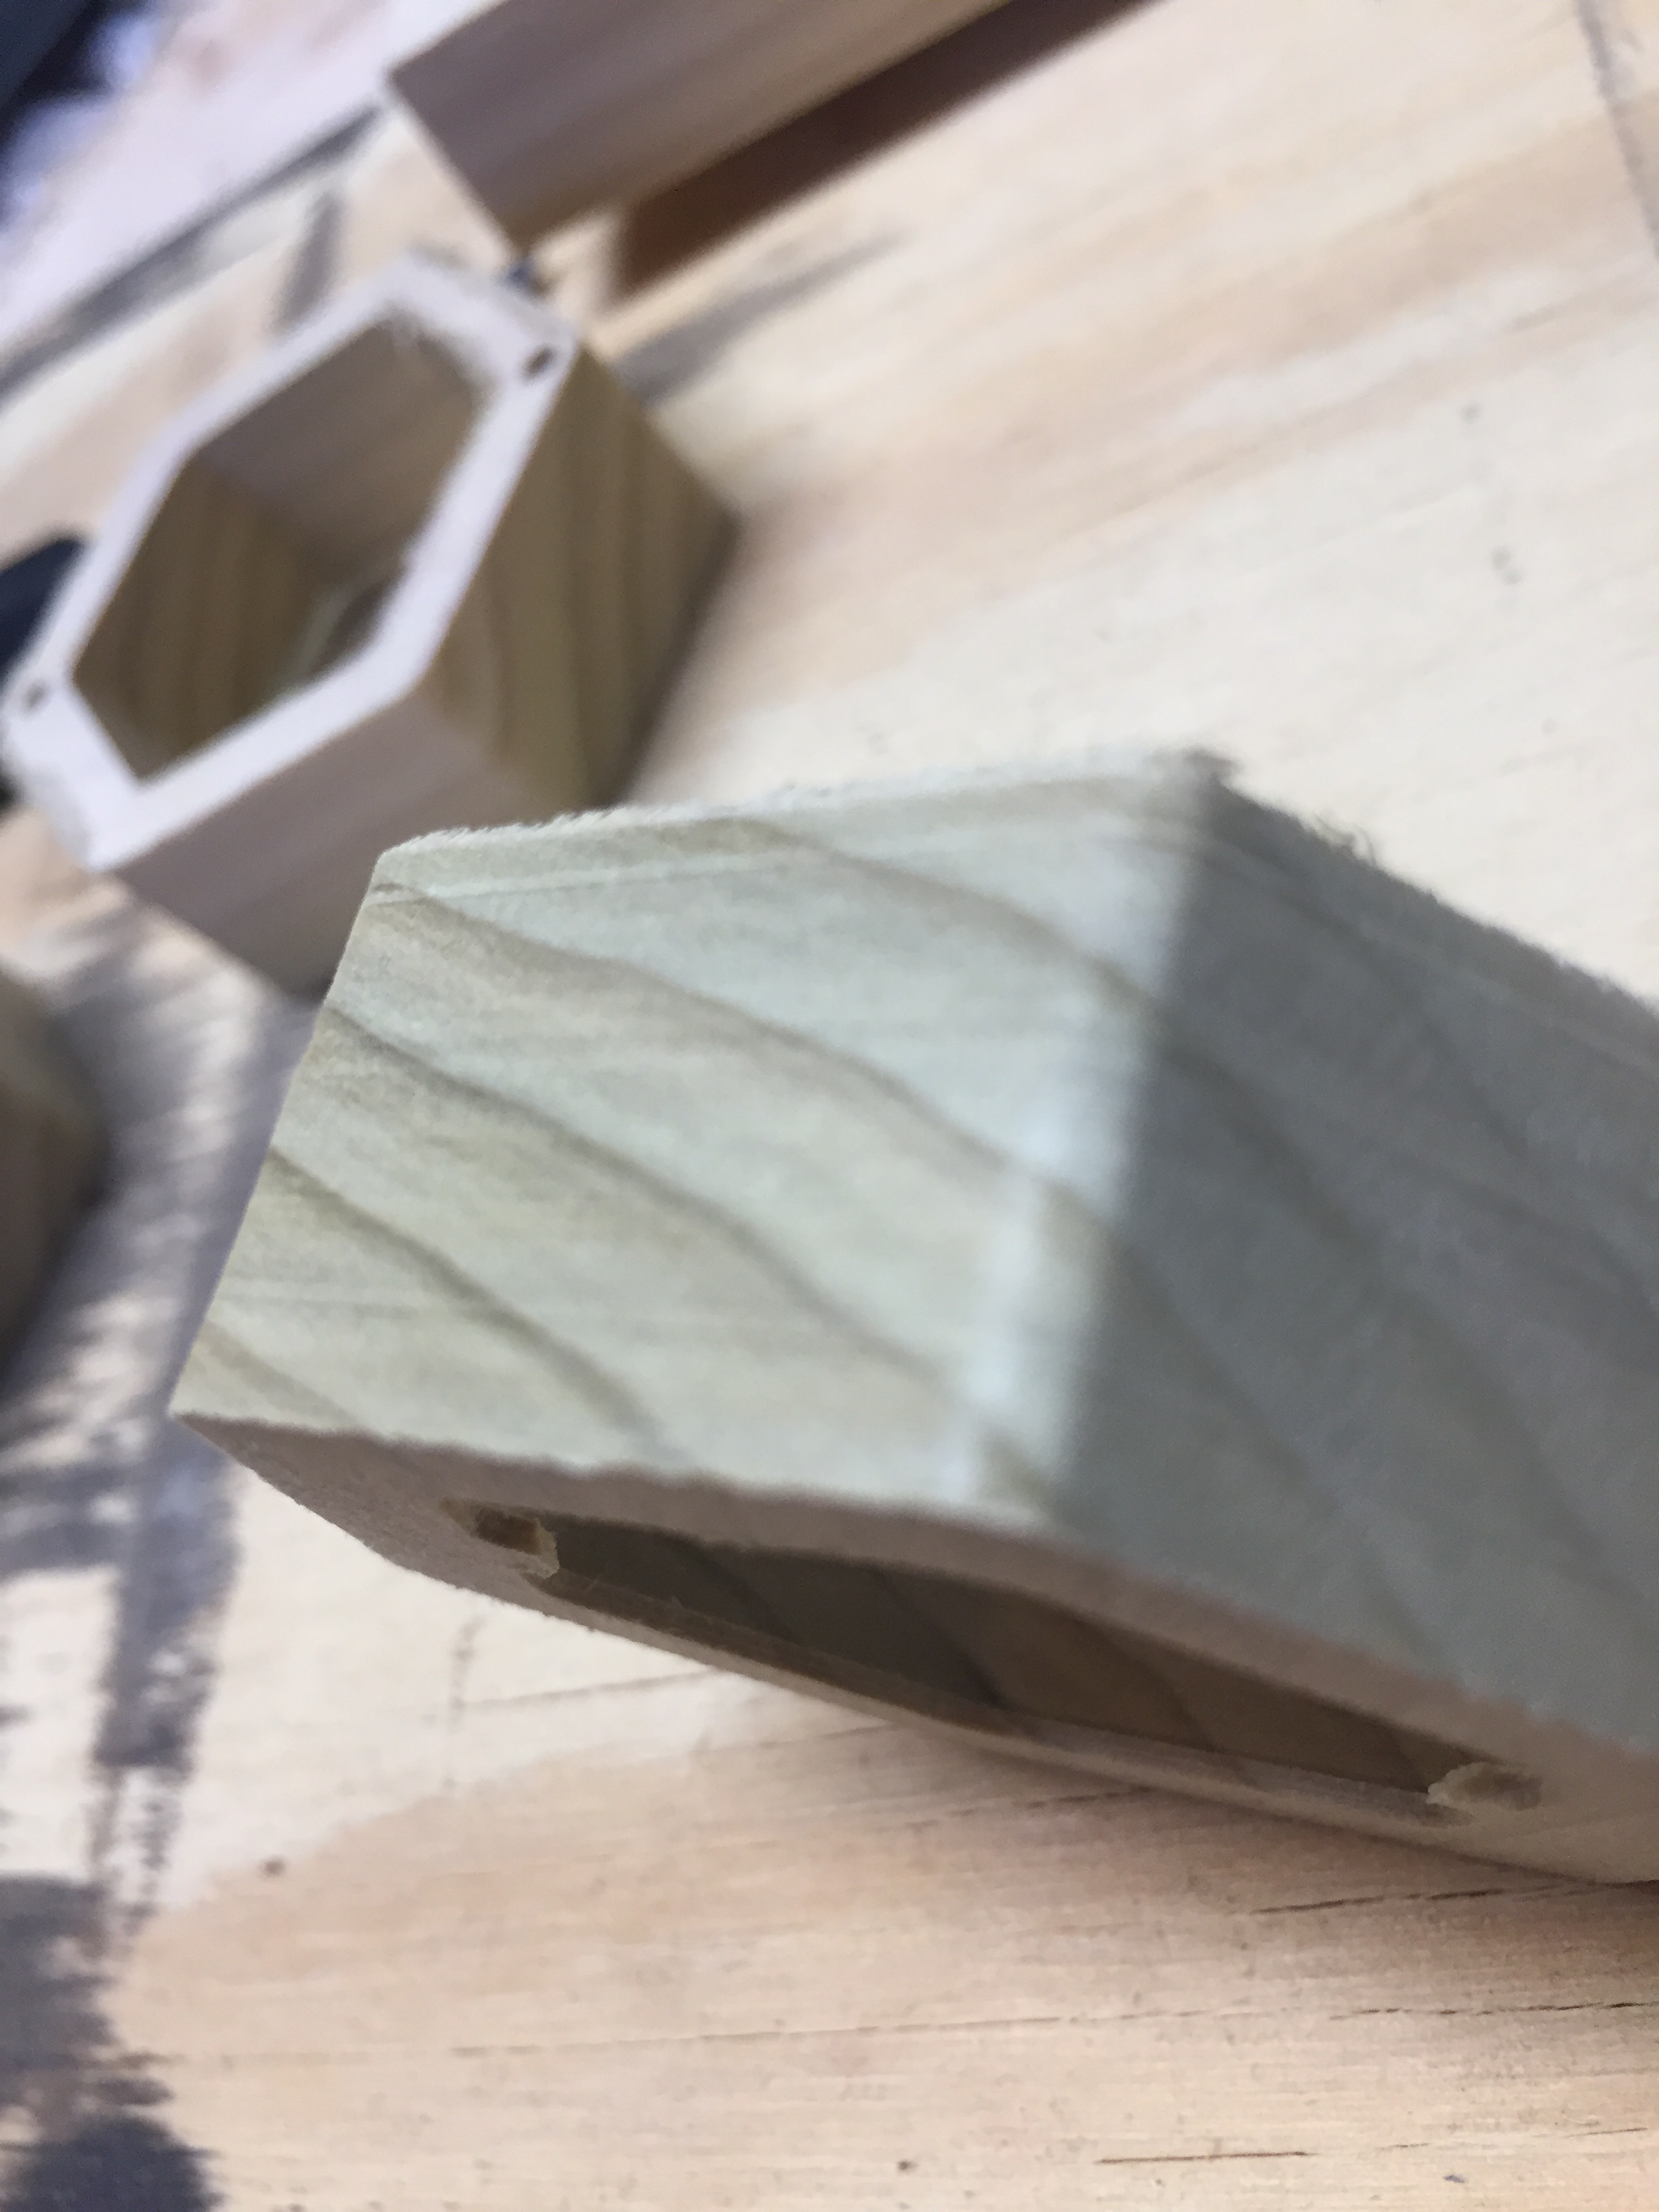
Last night in walnut, latest in poplar. I need to speed up the outside finishing pass, smelt a little burny, though I didn’t see any marks, will just go up an ipm or two, but other than that lines seem good. Second picture shows those vertical lines where the tab was, not hard to sand down to them since I put them on the long grain. Also found on the long grain I could use my 3d printer tool to pop prints off the table to break the tab.
May be done for the day but, just need to copy the settings and techniques over to the bottom half and should be good. Just a little shaping/sanding by hand after cutting.
I’m sure a new problem will crop up again in a few months.
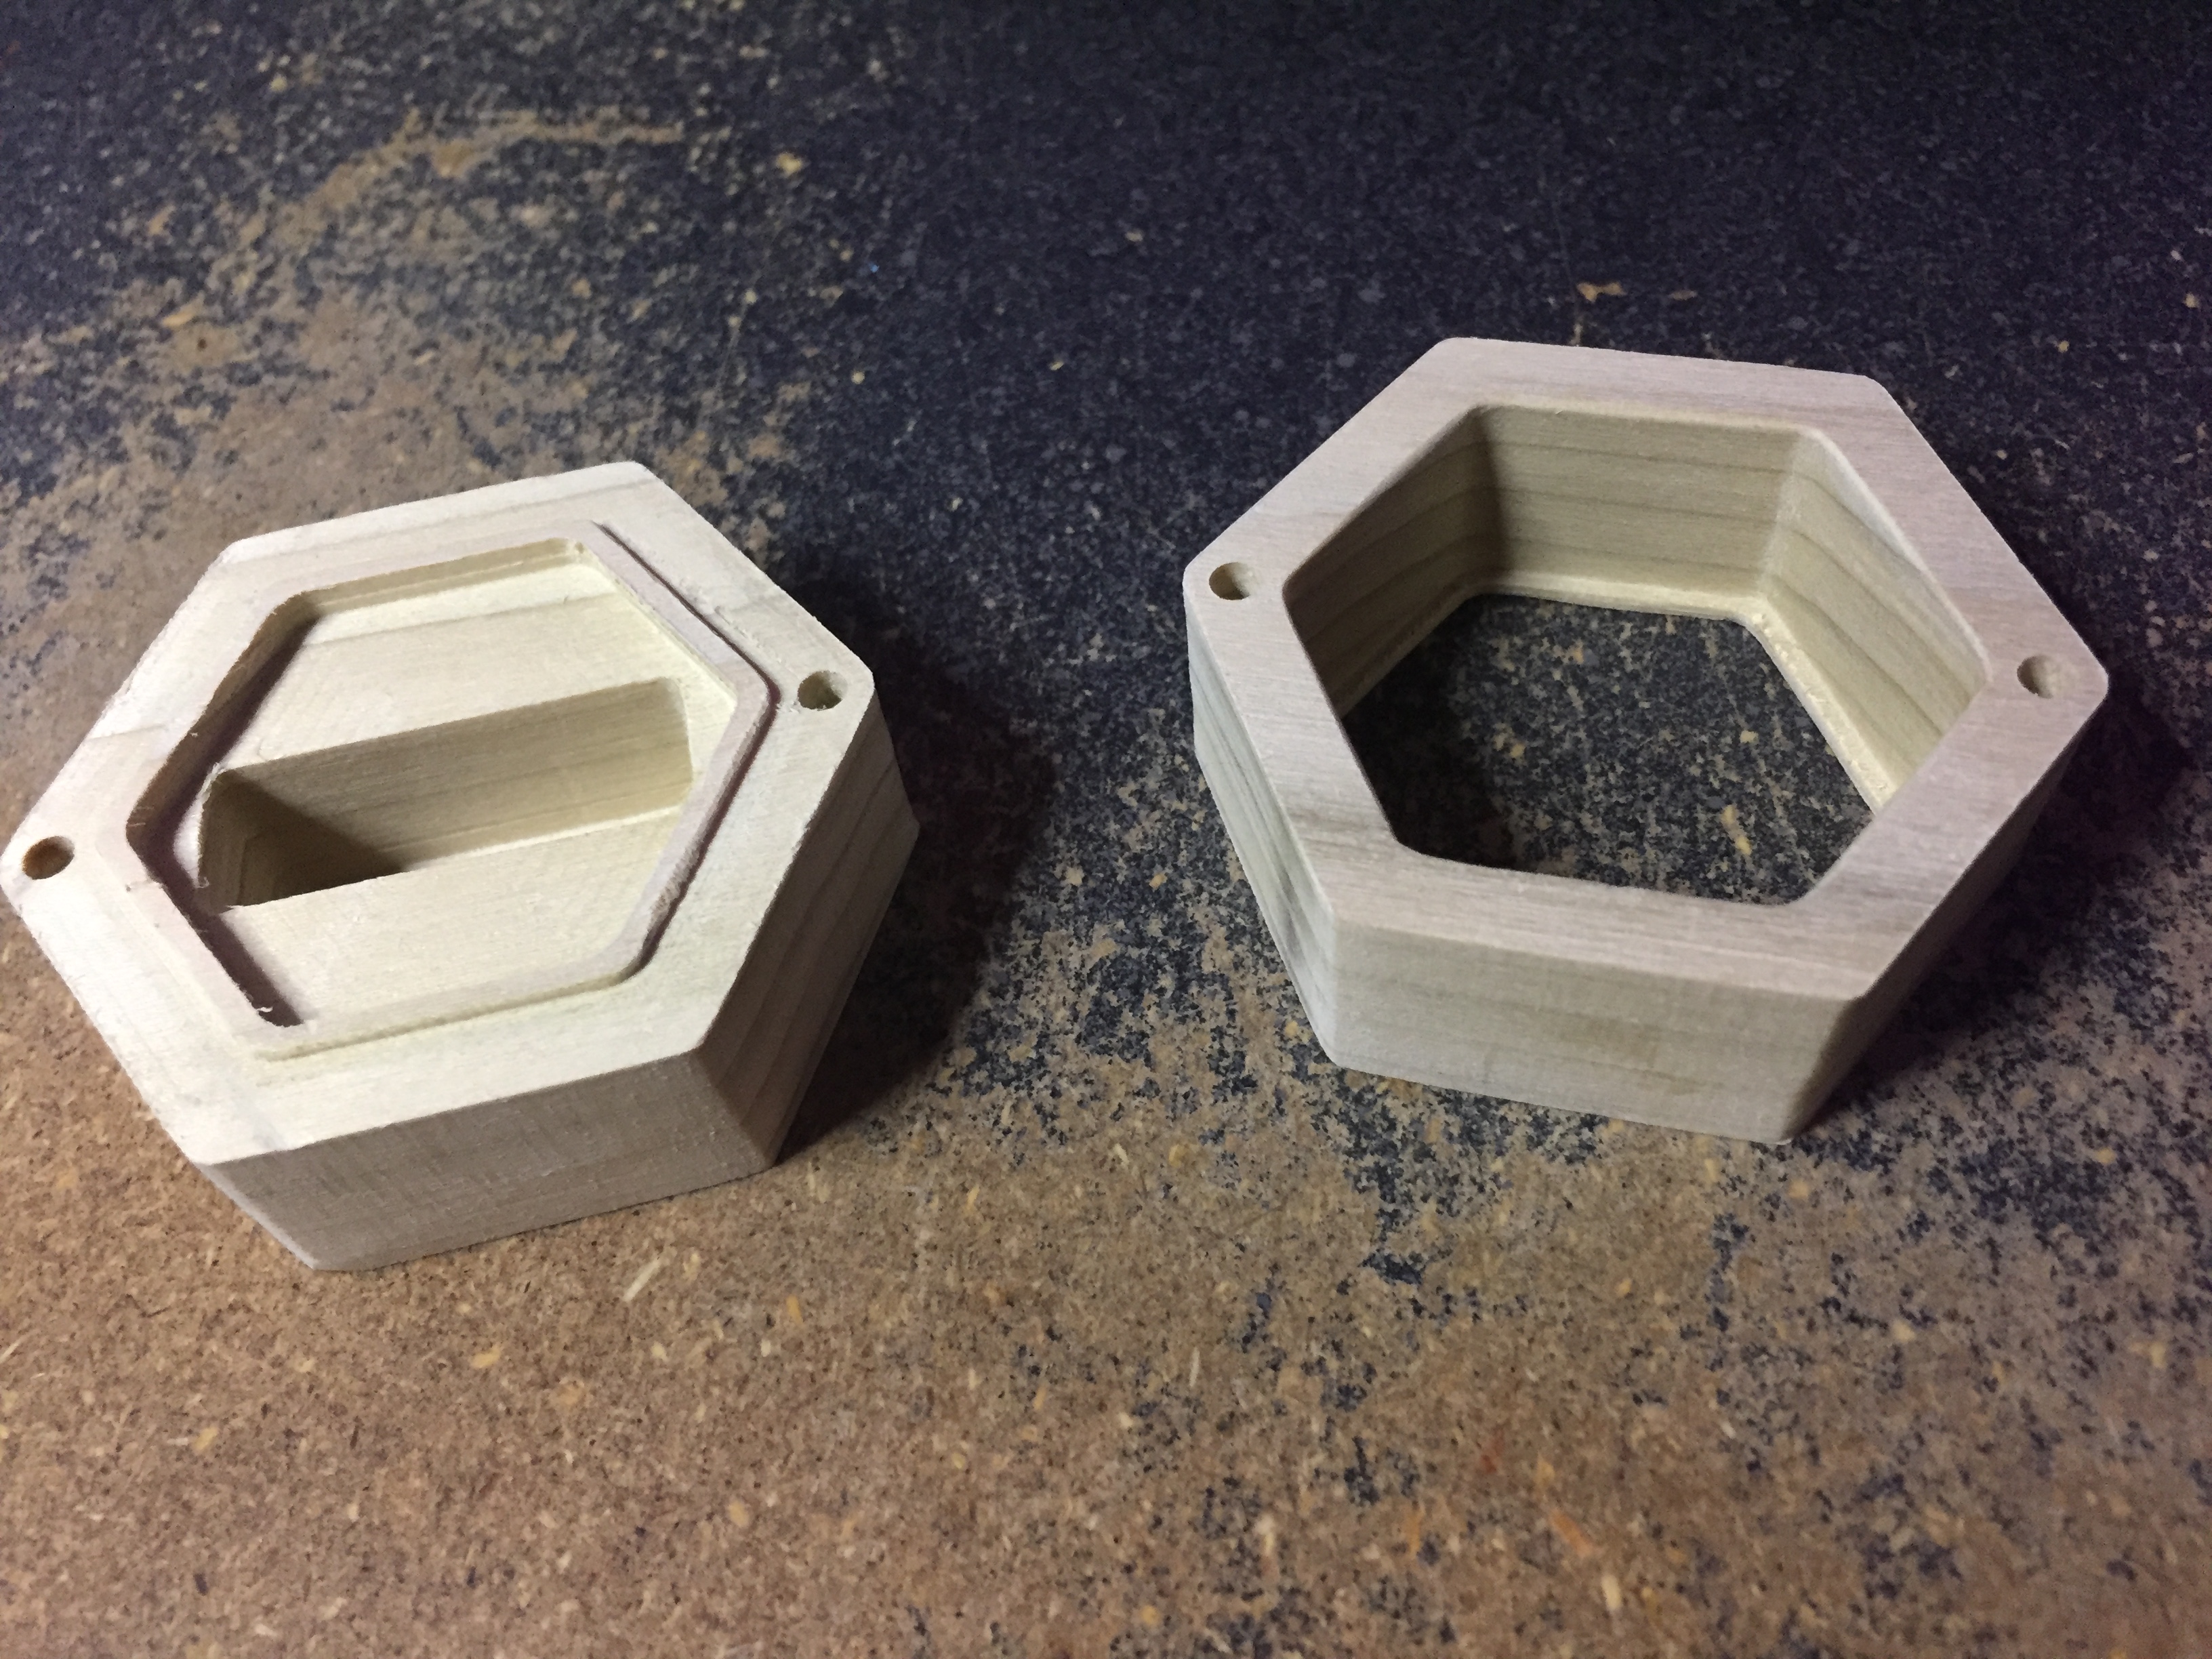
From the machine, chisel off the tabs, light sanding to clean up the fuzzies and the vertical line near the tabs, soften the edges and corners a bit, pretty damn clean. The tolerance between the top and bottom is a bit tight, used to take just a bit of knocking back with sand paper and it’d ‘snap’ shut, takes a bit more now. Might see about shaving a tiny tiny bit off but honestly it’s fixable with a bit more light sanding and putting a slight chamfer on the bottom part where it mates helps align it a bit so, yeah. Did it.
Good to know, I have something similar from 3d sold as a finishing pad, but I usually just swipe my finger over them to lift them up then run it over sandpaper glued down to a board I keep in my shop. Works for now, though the paper needs replacing.
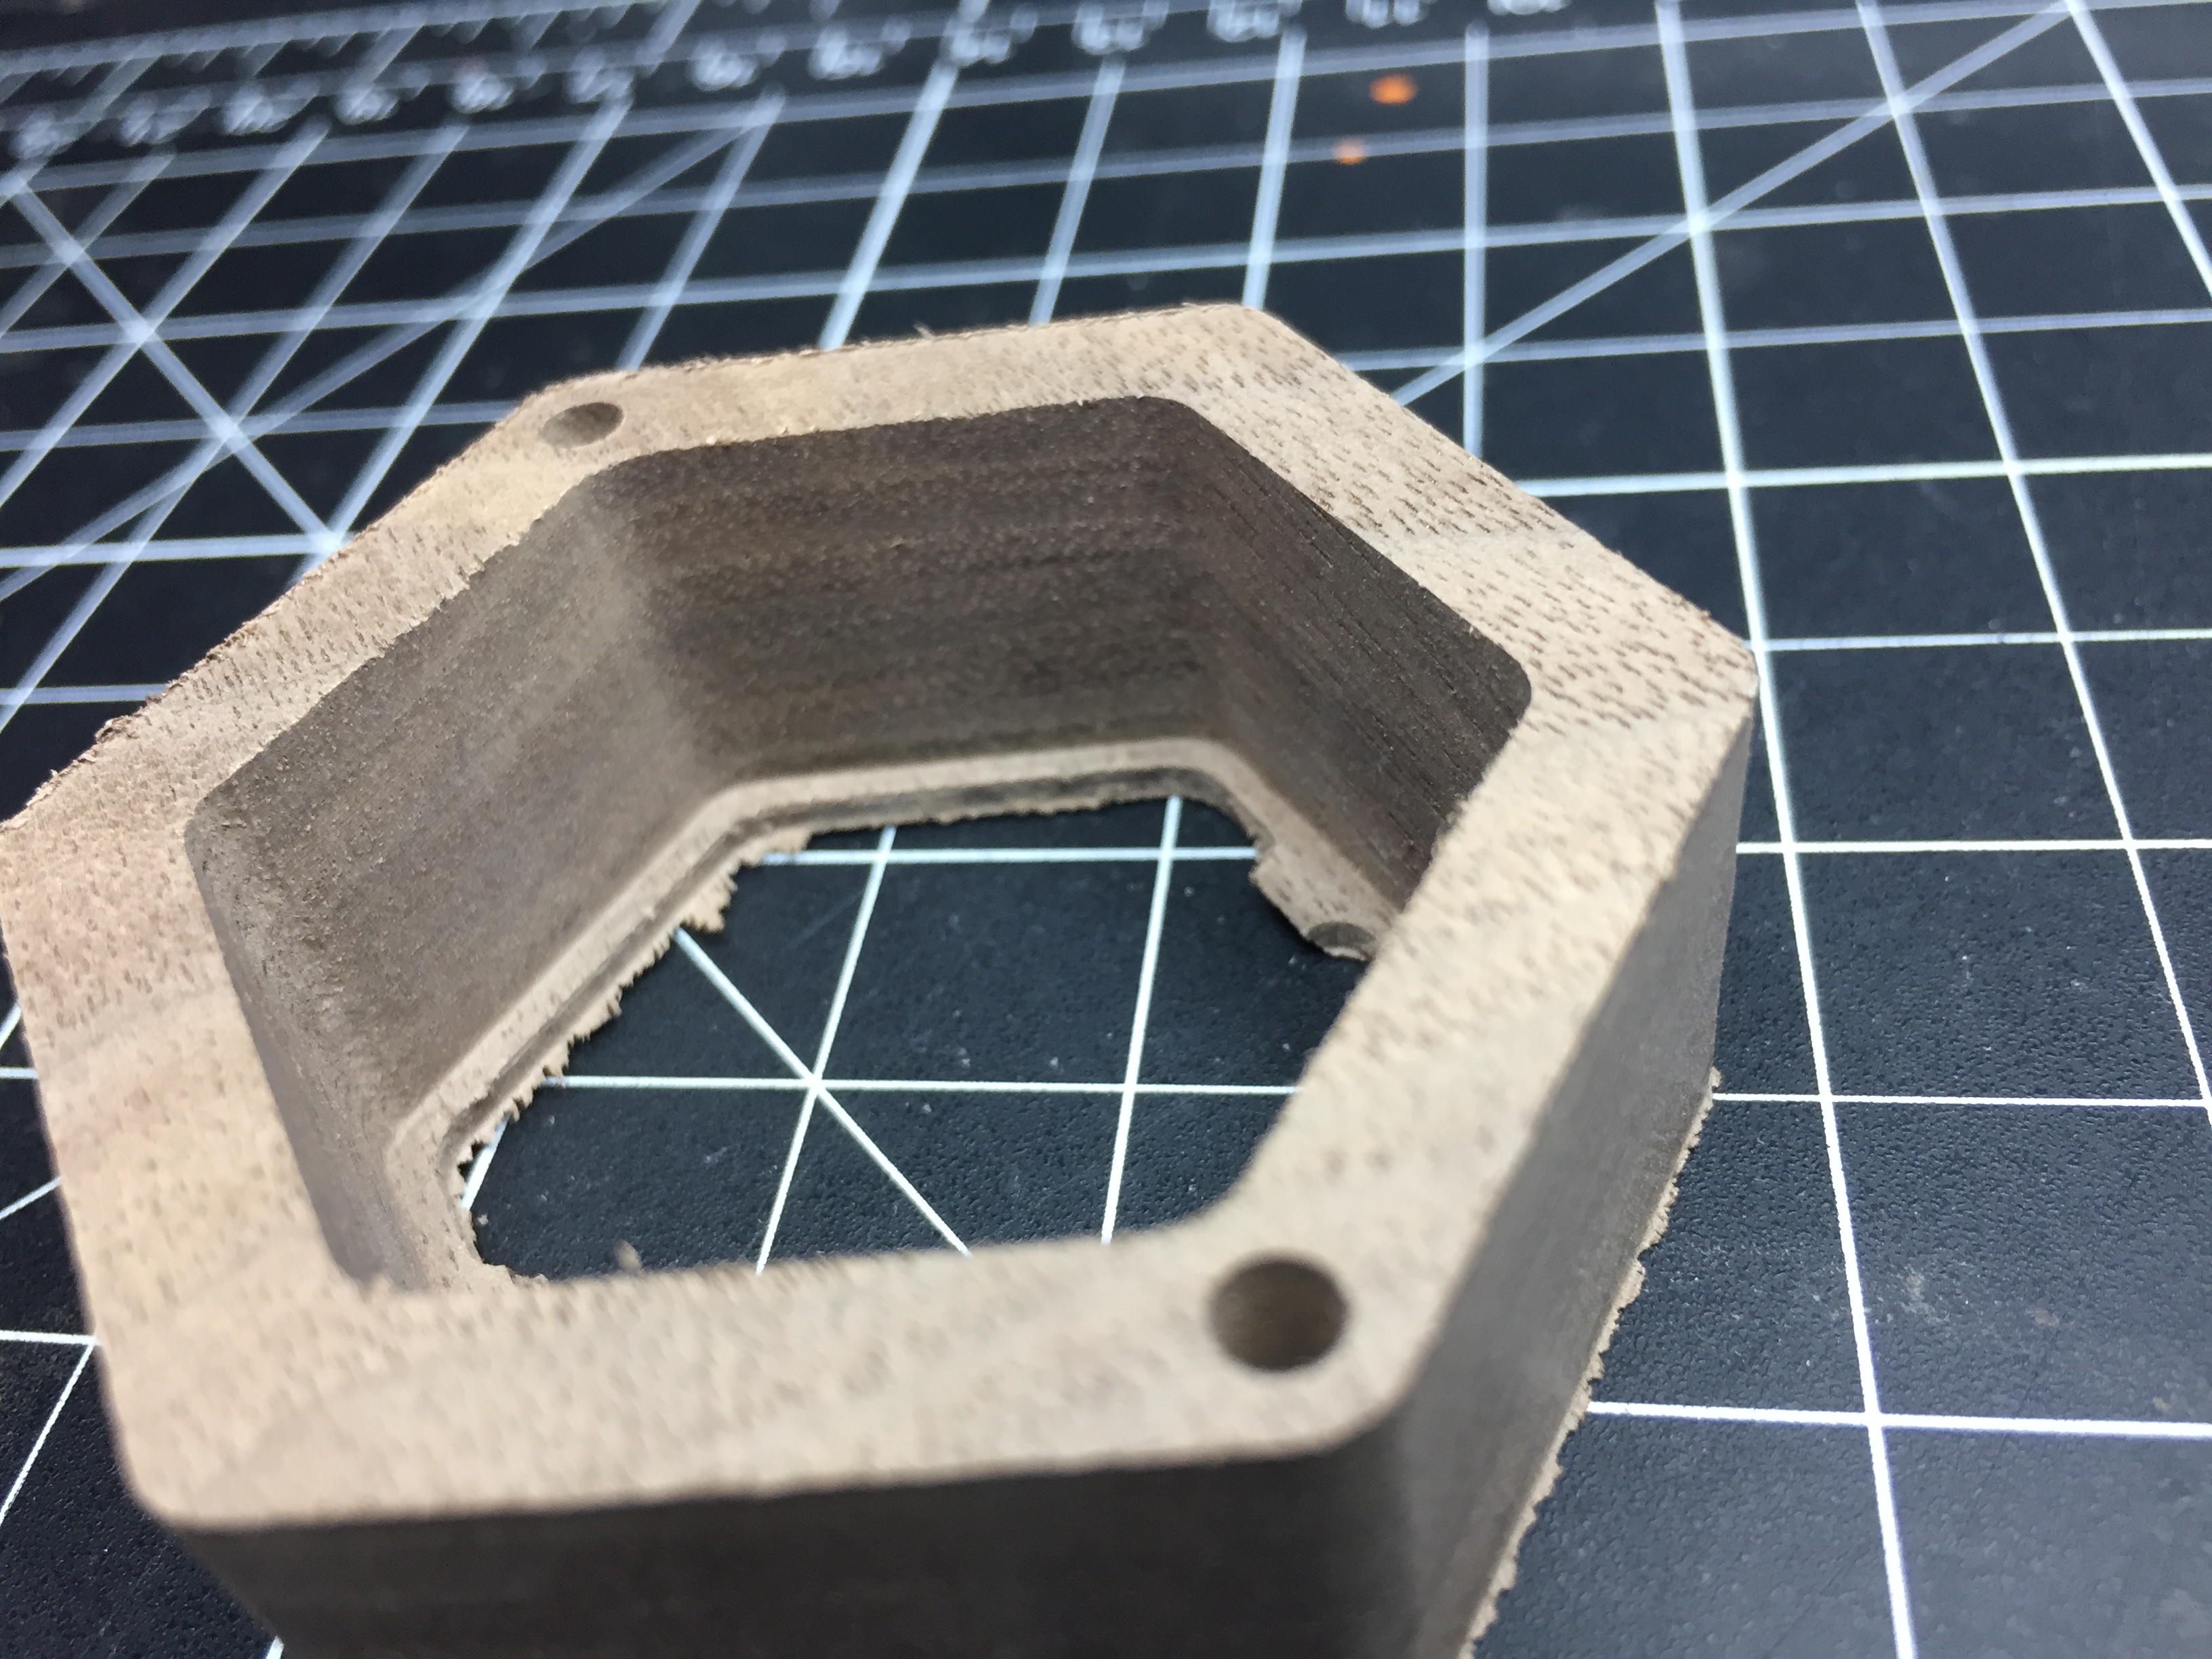
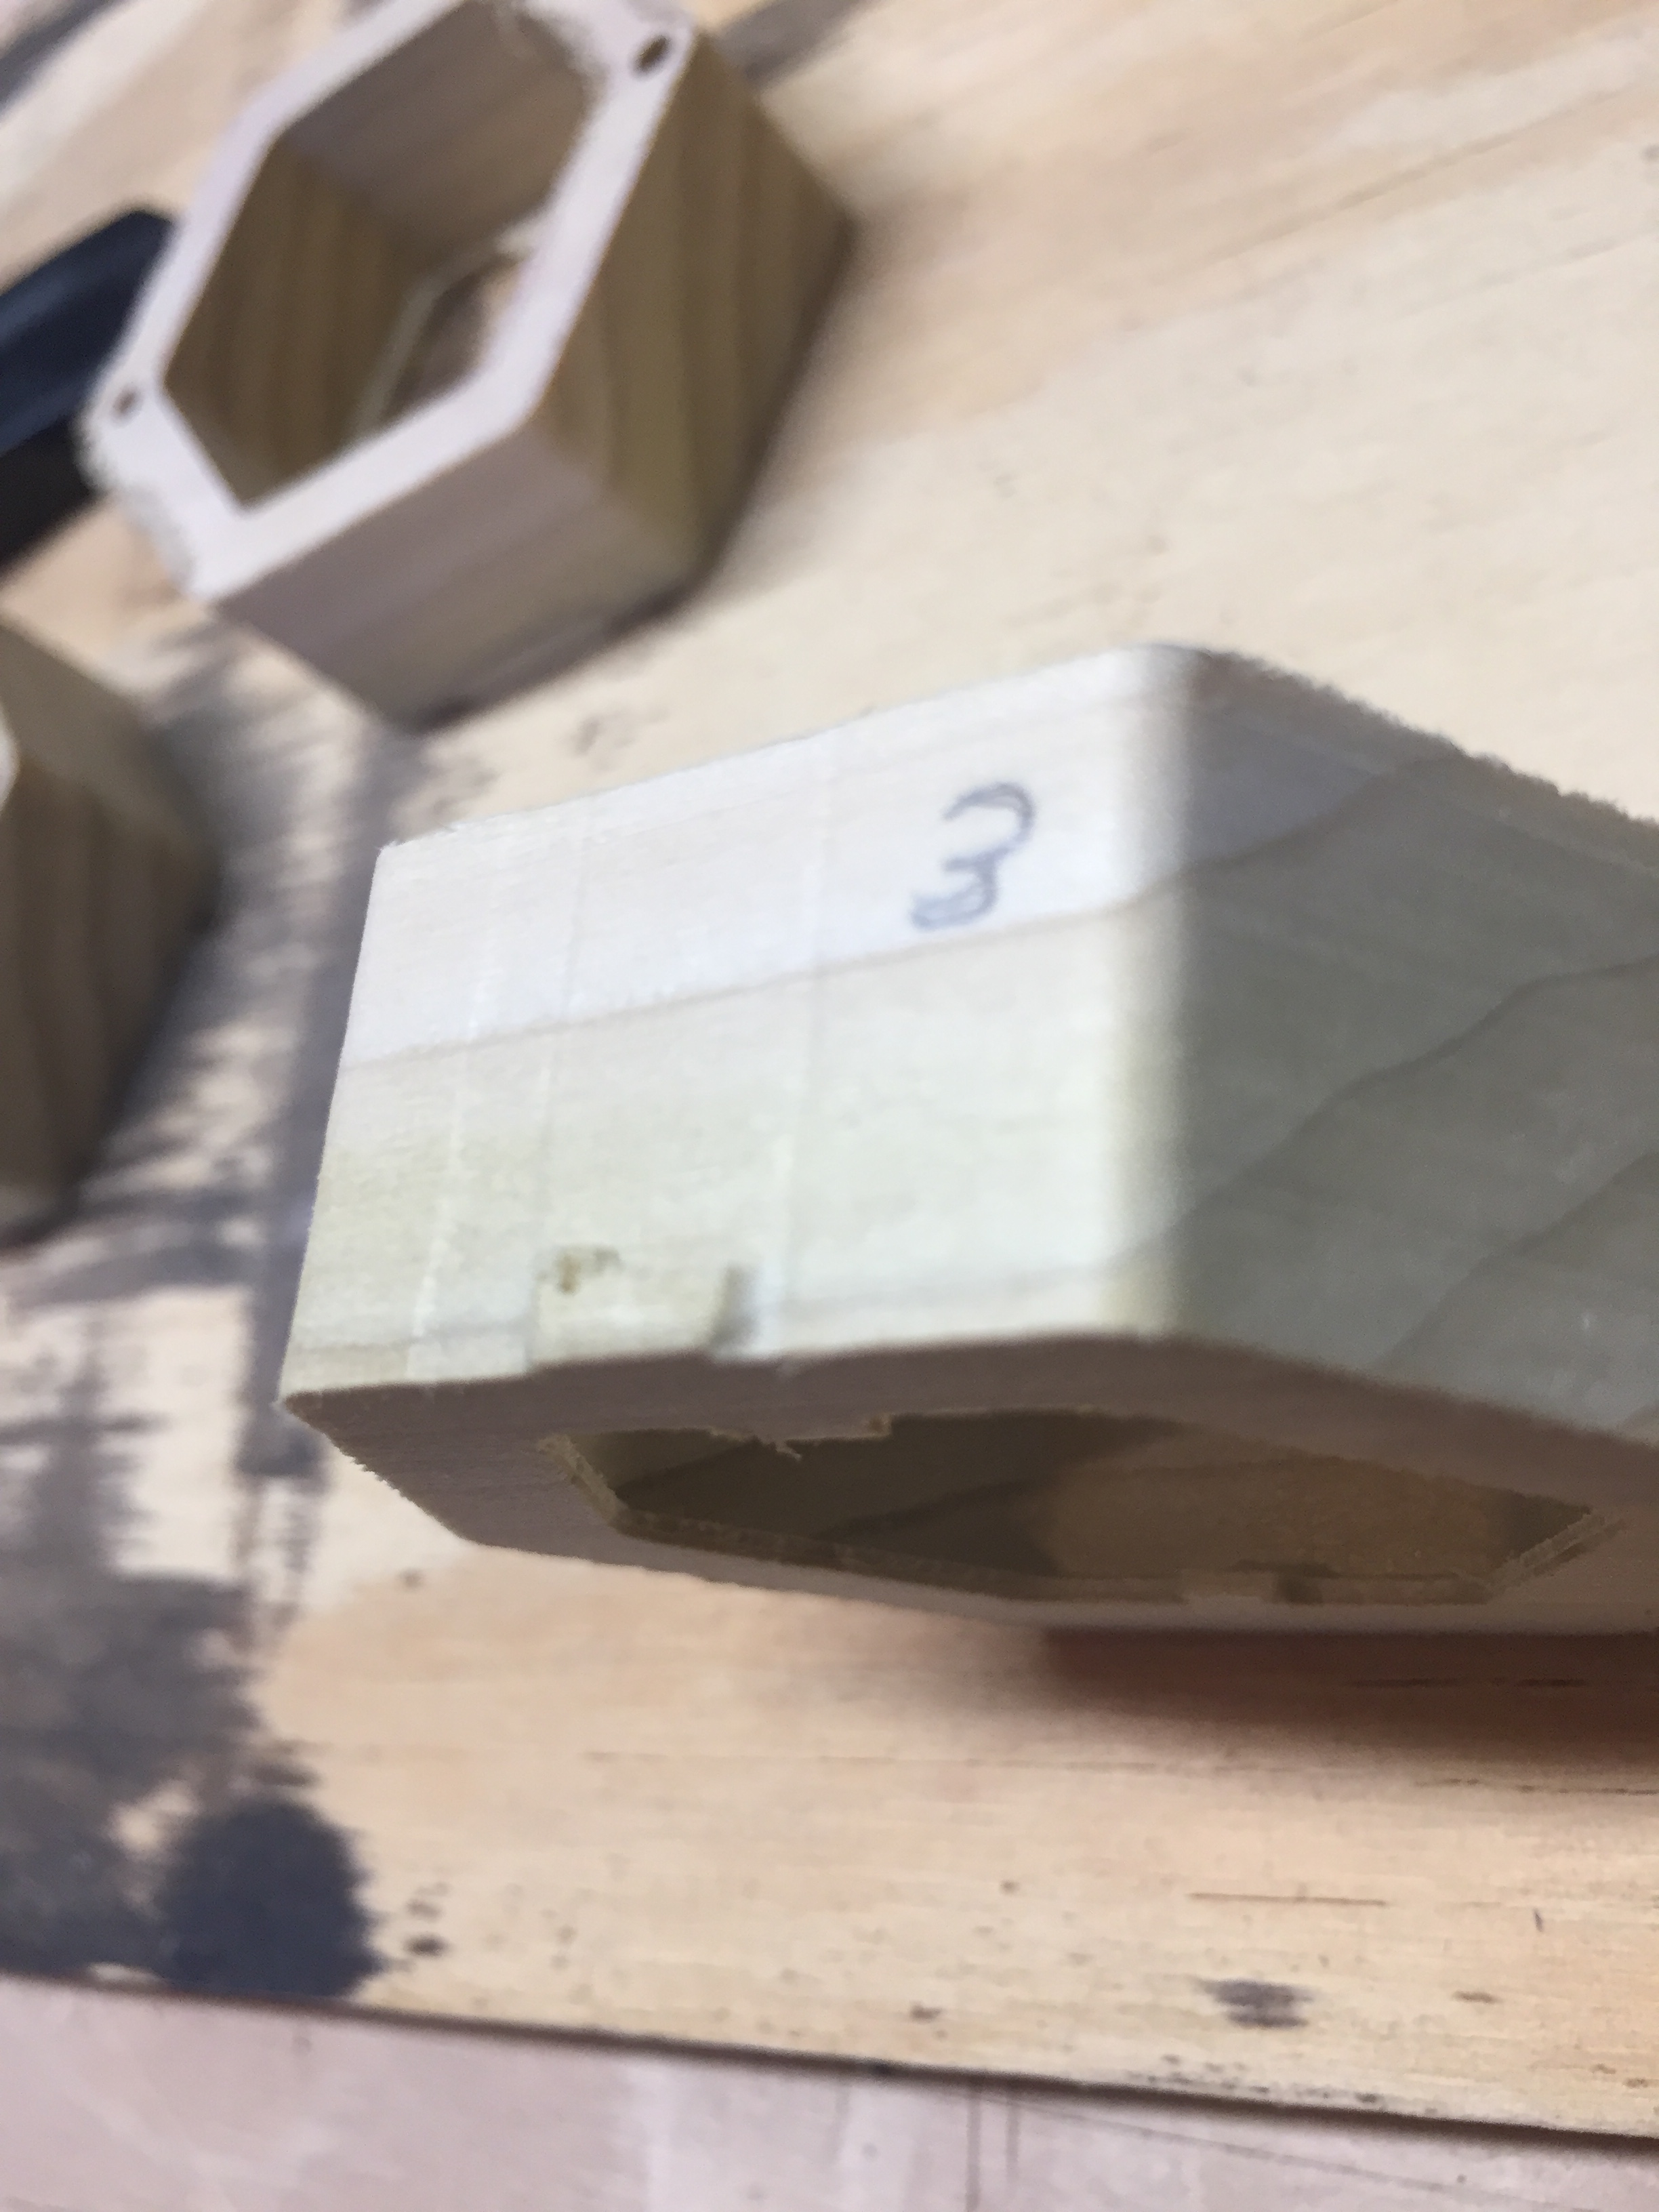
Straight off the machine, no ridges or lines. Only remaining issue is the outside finishing pass, when the bit plunges (4ipm) it leaves the line in the last picture, it’s not hard to sand off and it’s near a corner so it kind of blends in a bit.
Since runout was suggested for the issue overall I did order a new 1/8" collet from c3d, my existing one is in theory high quality but there can be a bad item in any batch so, we’ll see if that affects anything. I may explore fusion 360 as I know it has more advanced toolpath generation, though this issue I wish I could just fix by having the bit come down a tiny bit outside the cut line during the plunge and then only move in after.
I’m losing track here. I thought the problem was fixed once, then it seems it returned. Now it seems gone again but you think runout could be the issue so you have a new collet on order. But how could it be the collet if the last piece has no ridges?
That is, why are you still searching for solutions if the last piece looks so good? Did you have to compromise your cutting speeds more than you’d like or something?
Ha yeah I should probably call the thread done and post new specific issues elsewhere. It did seem fixed, then I didn’t do any cutting at all for a few months and it showed up again. The reason I get no ridges right now is doing a full depth finishing pass, so the last pass takes off a small amount of material but at full depth, so no ridges. It leaves them while doing rough cutting, and I suspect that’s part of why I get the vertical line there, the tip of the bit may be slightly ‘out’ so when it runs vertically slowly along the length like that it leaves a groove.
Just did the math, I’ve sold 15 of these boxes are $79/ea. That’s $1,185. My Shapeoko3 as configured and shipped was $1,136.96. My Shapeoko has paid for itself
Oh I’ve spent the last 2 weeks working out the difference between my existing side gig (web dev, strictly service) and a manufacturing side gig, much different and more complex. If anyone is venturing into the world of making stuff for money I’d highly recommend Craftybase for accounting purposes.
Upside is by filing as a schedule C business I can claim a loss, hobbyists can only claim up to the amount they made, and even then only if they itemize their taxes. So silly and complicated.
 I don’t like gumming up my bits with double stick table but I may resort to that. First lunch! Then going to try a .015" finishing pass depth to see if that gives me a good enough result that I can crank out some boxes.