thanks everyone for the feedback!
I will try my cut again with a lot of adjustments and see the results.
thanks everyone for the feedback!
I will try my cut again with a lot of adjustments and see the results.
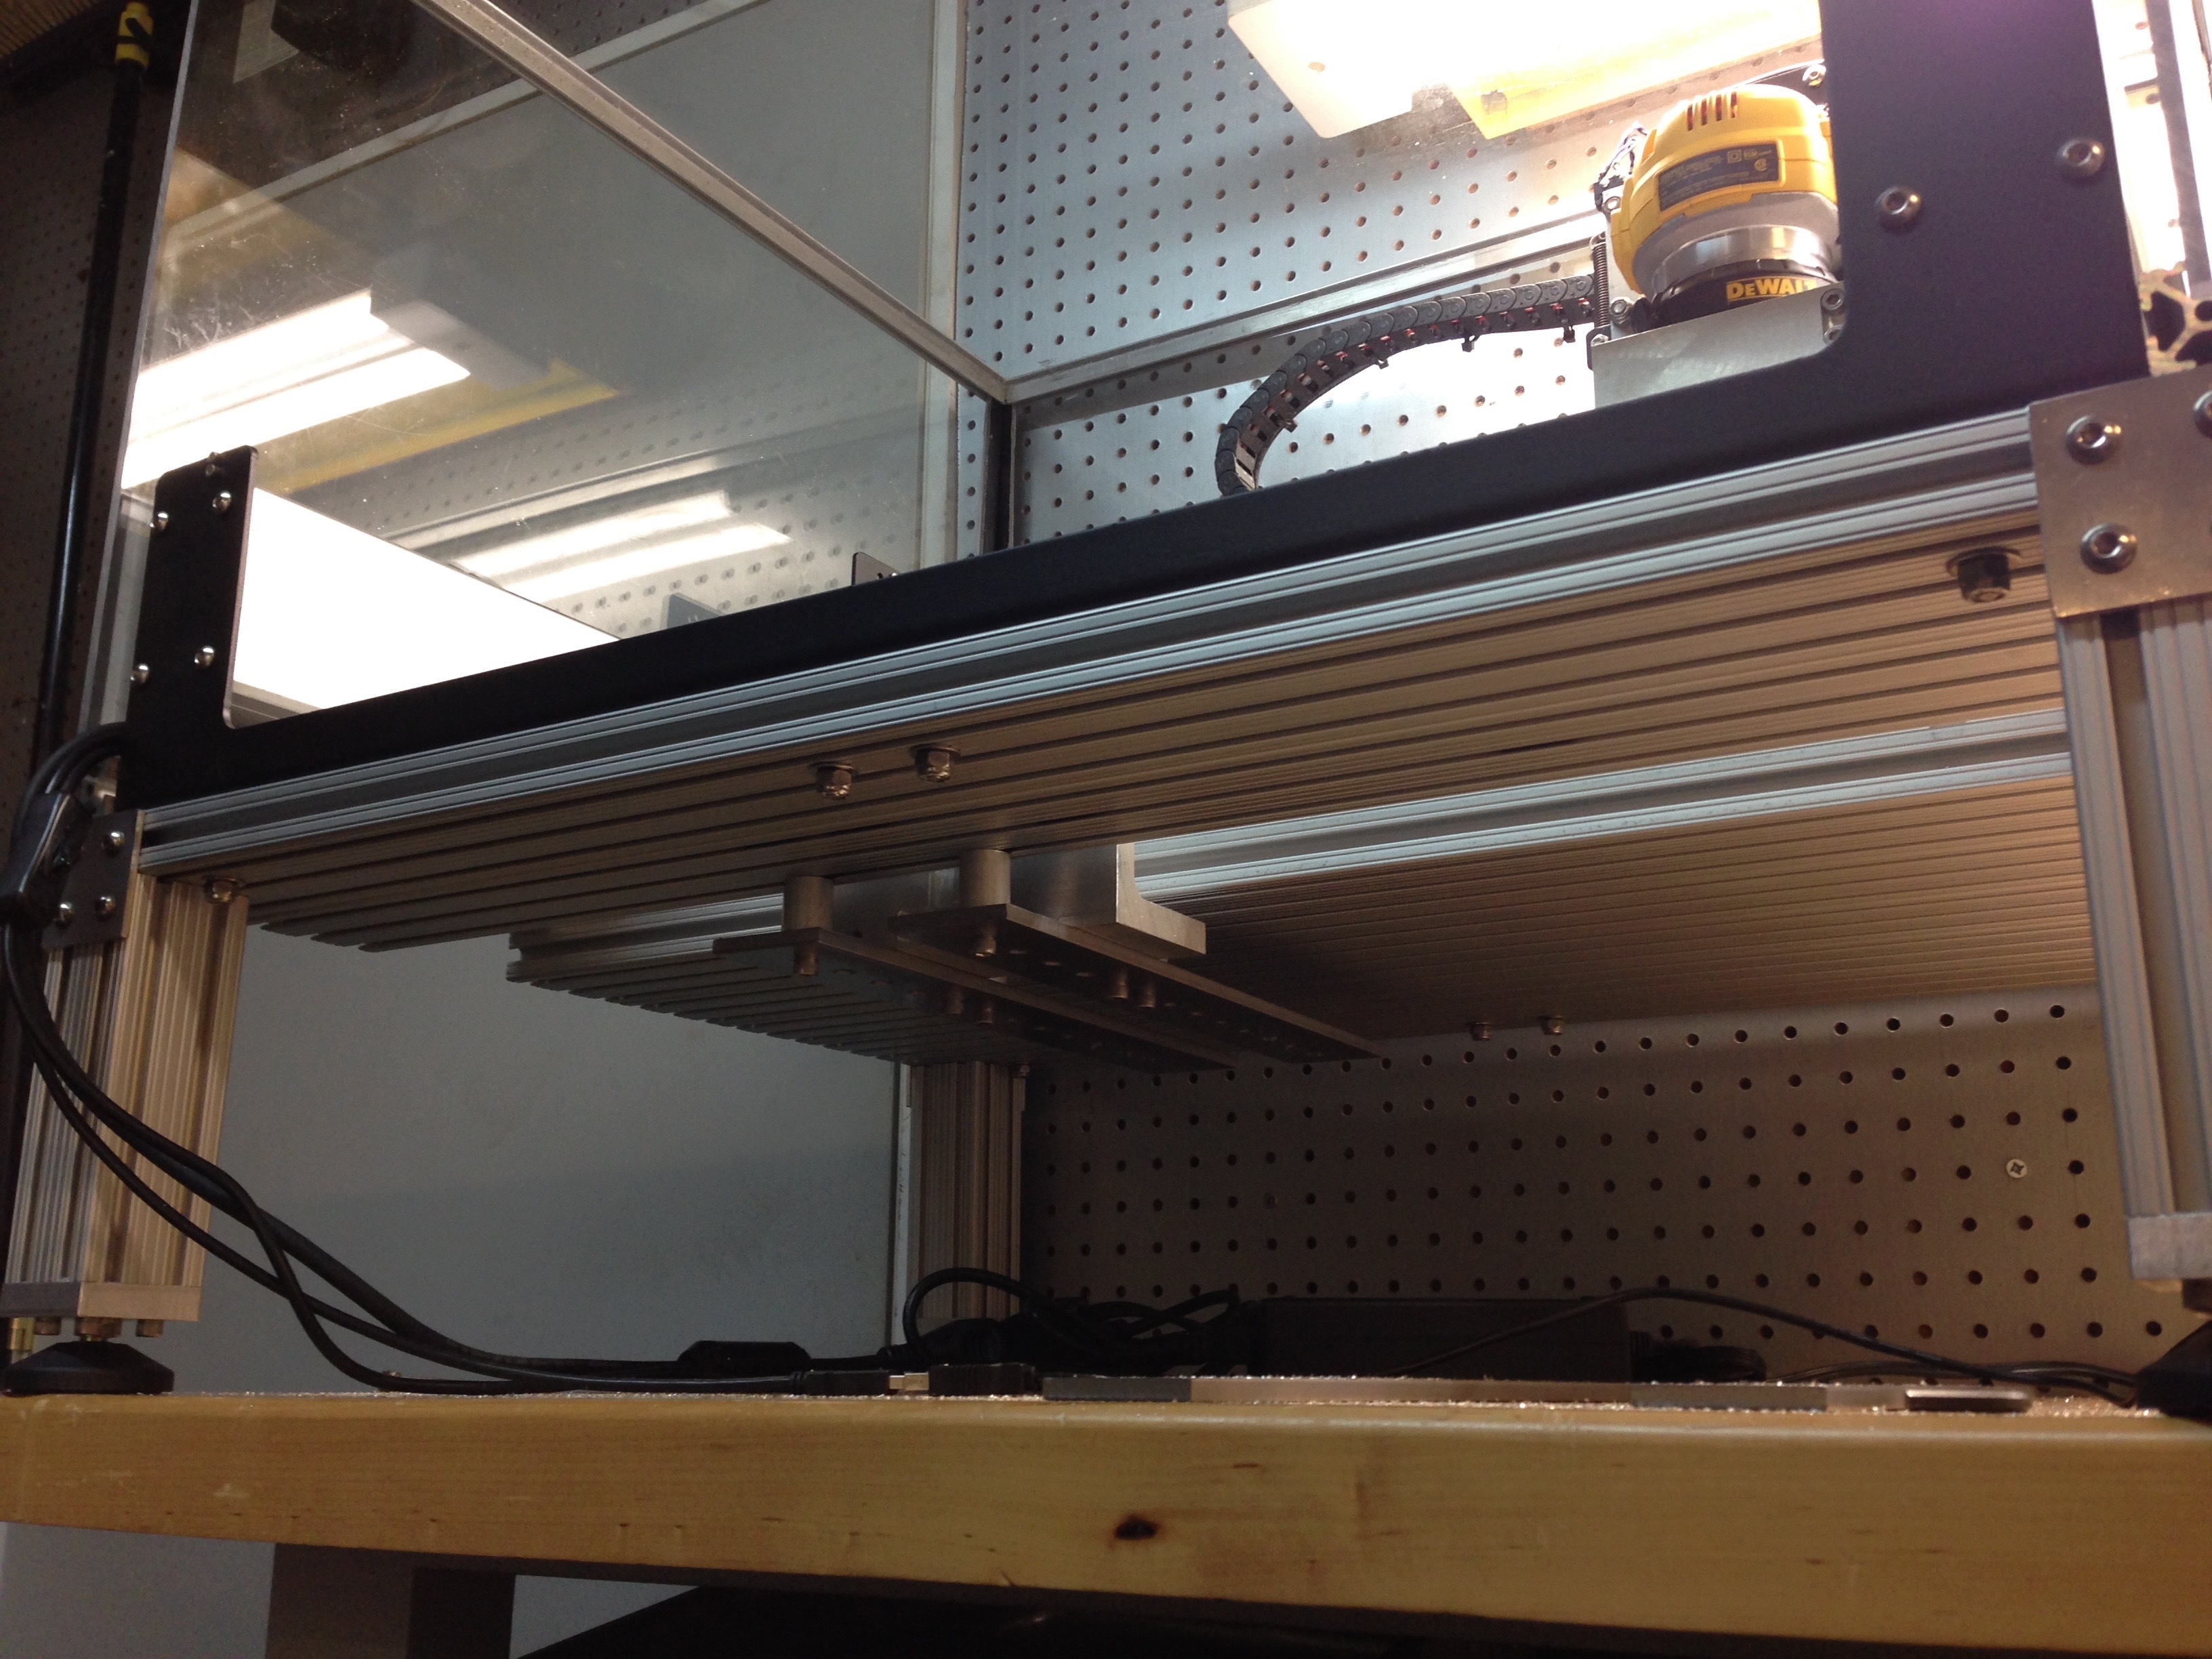
@UnionNine, to answer you questions an perhaps you may be considering similar modifications for similar reasons, I was considering the following;
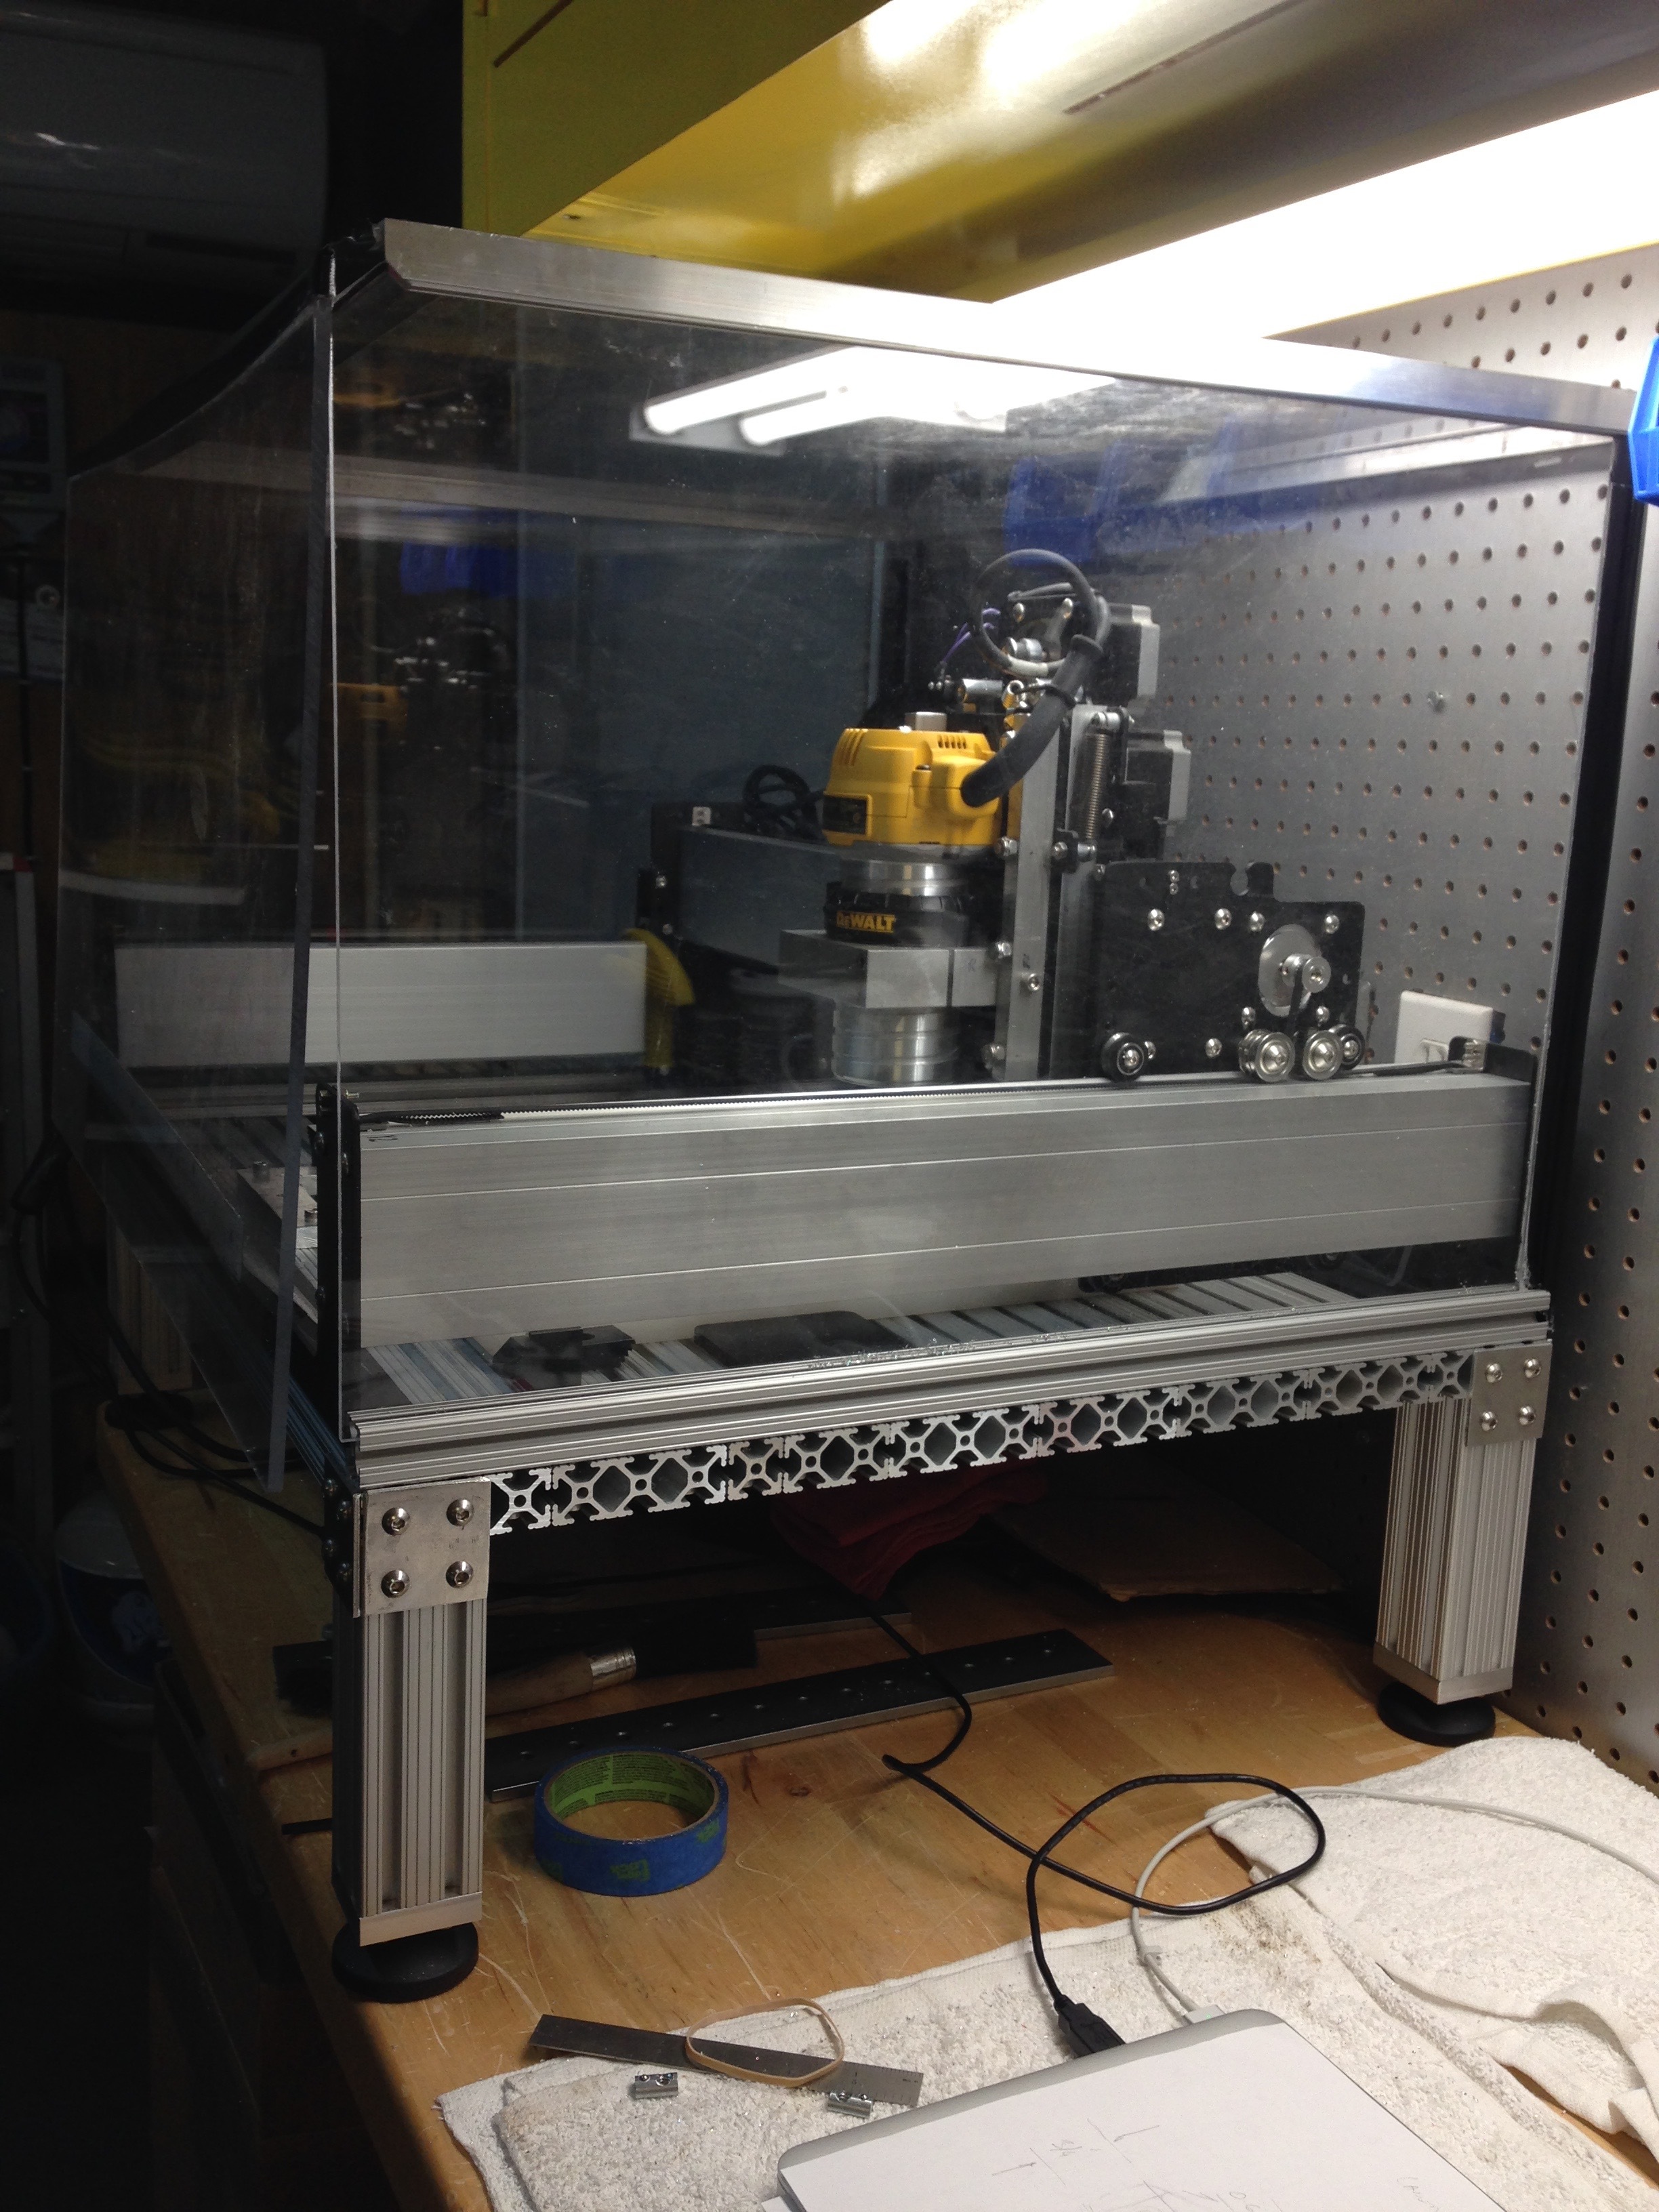
Approx - $180 plus $50 nuts and bolts, made the plates from scrap lying around
Approx - $30 plus $5 nuts and bolts
Approx - $6 plus $2 nuts and bolts
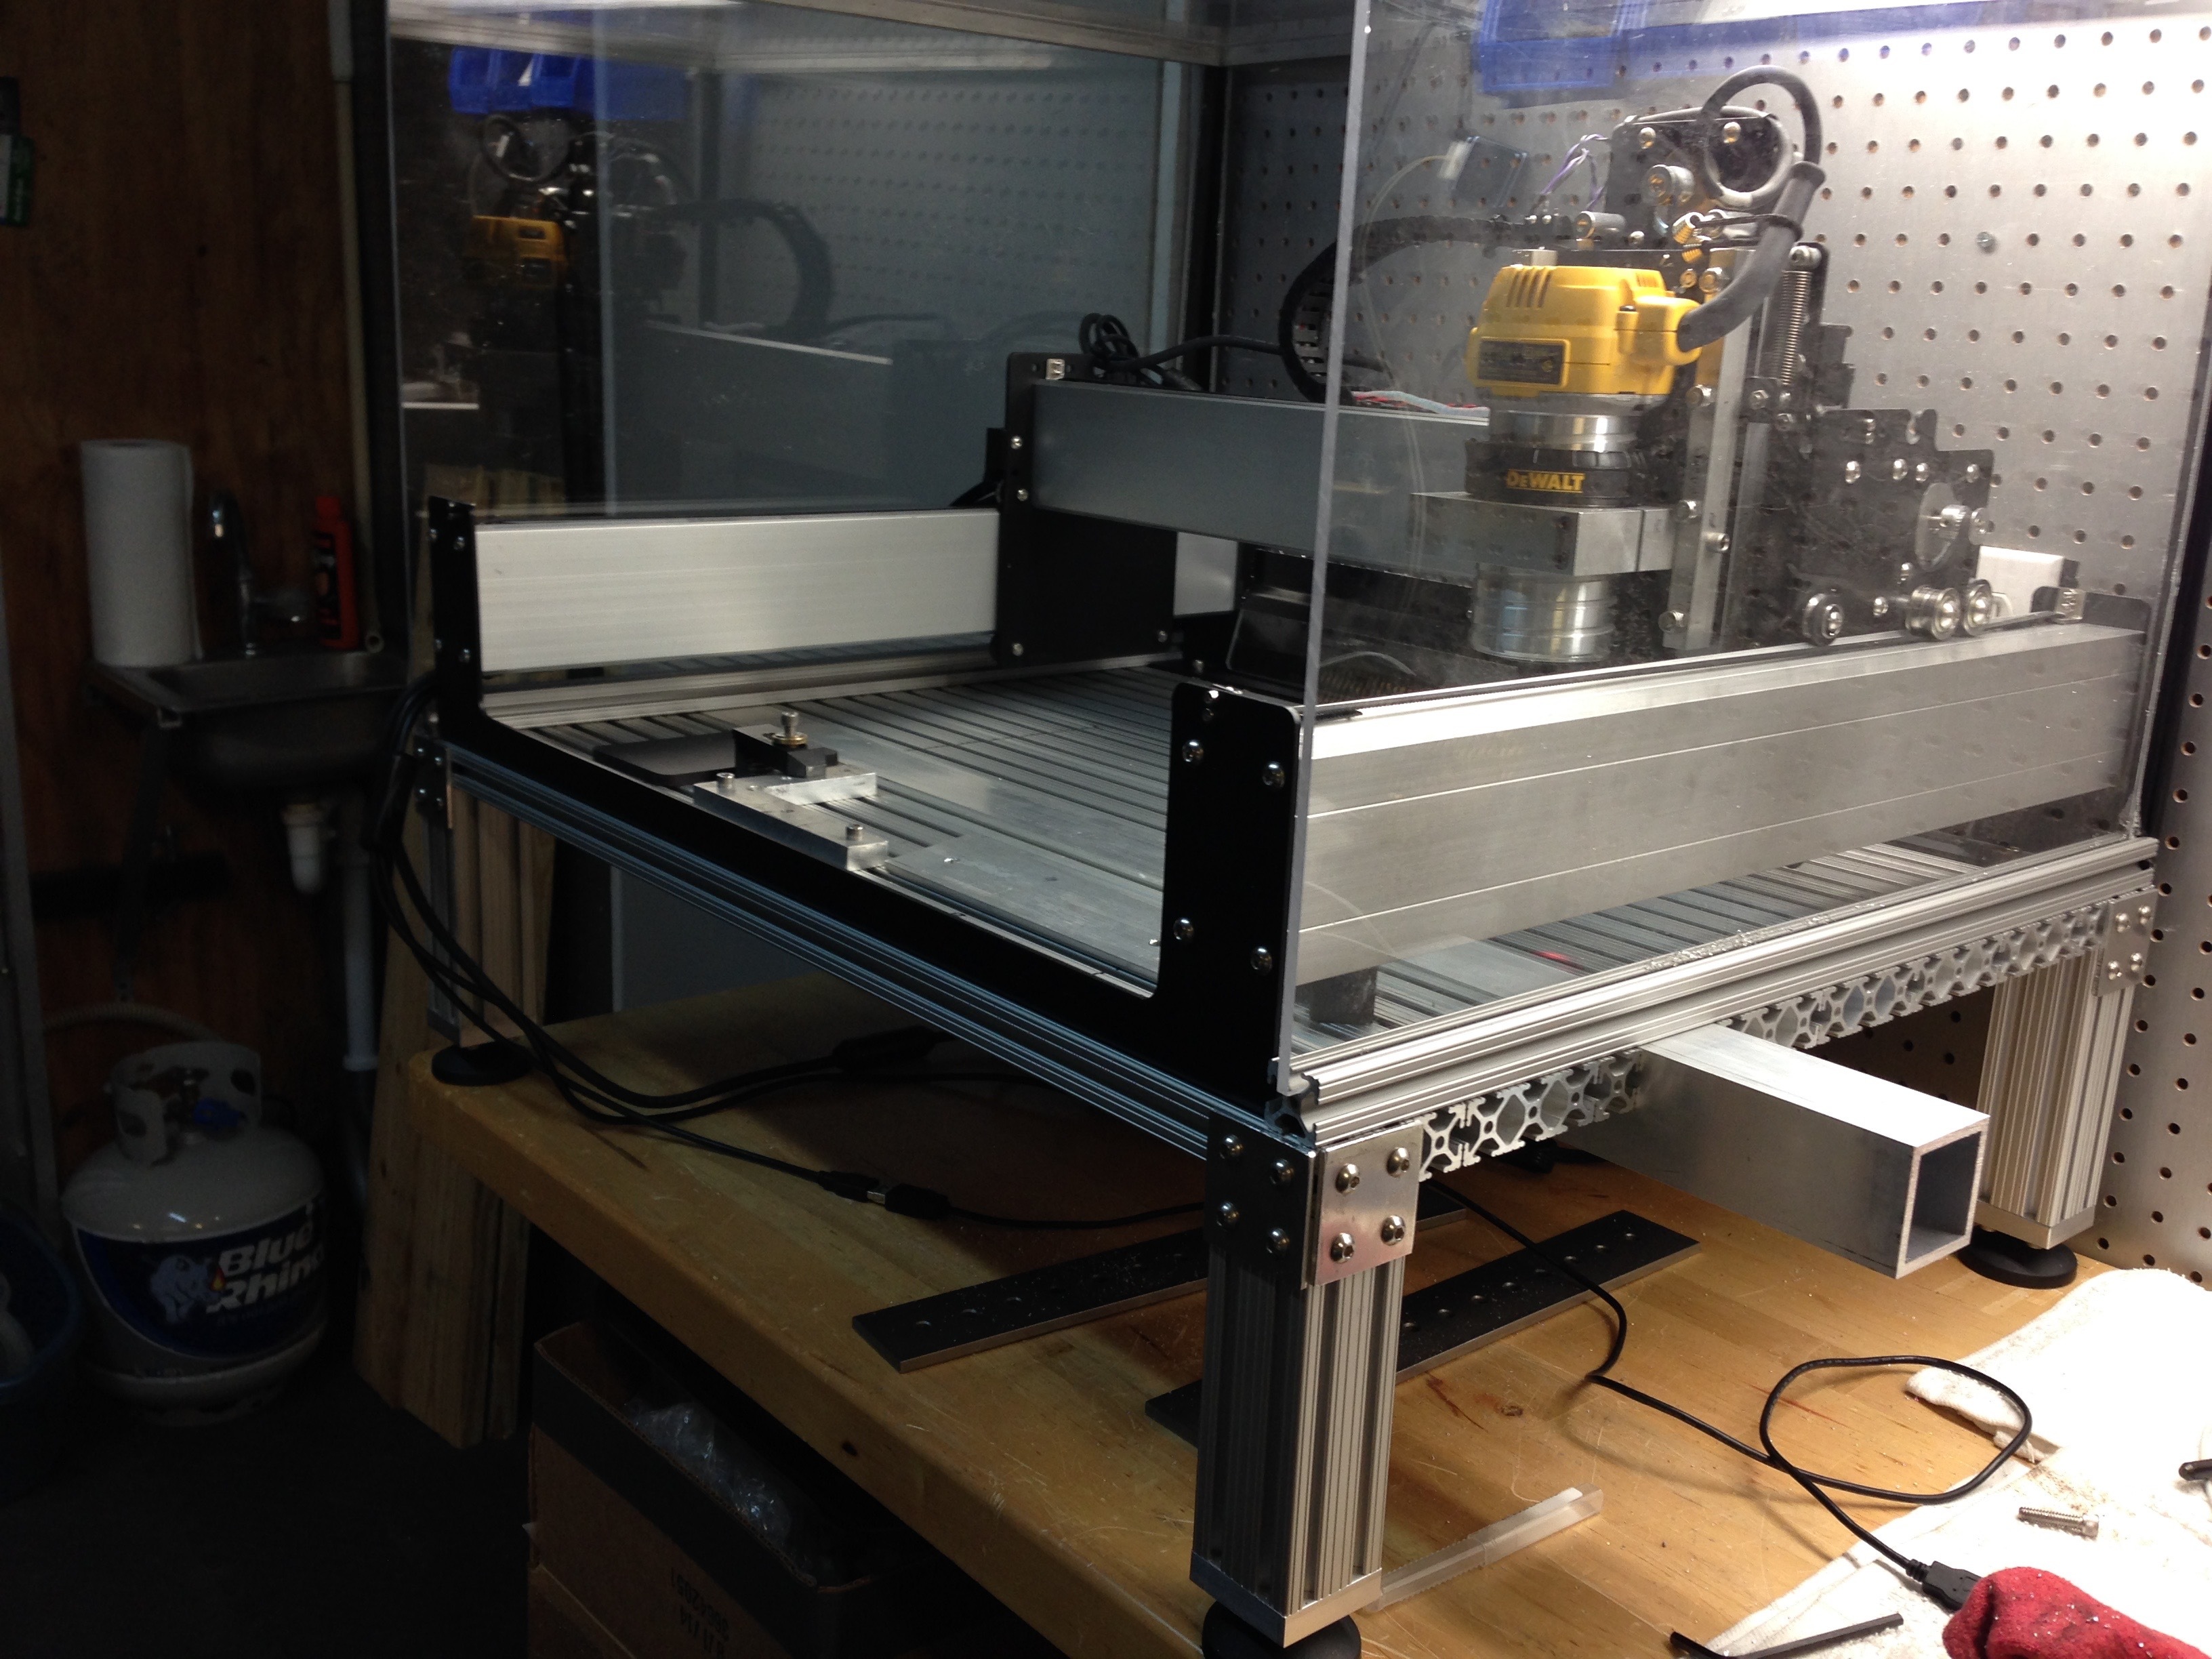
All in all, the machine is now doing what I wanted, repeatability is good for this machine, so I’m very happy with the system and the mods to extend the range.
I use T-slots myself - 80/20 equivalent - and over the years I’ve pretty much given up using the 10 series stuff. Unless there is a space restriction that requires it, I use the 15 series stuff.
One of my CNC machines had a bed made from 15 series T slots. Used the CNC machine to flatten the top.
mark
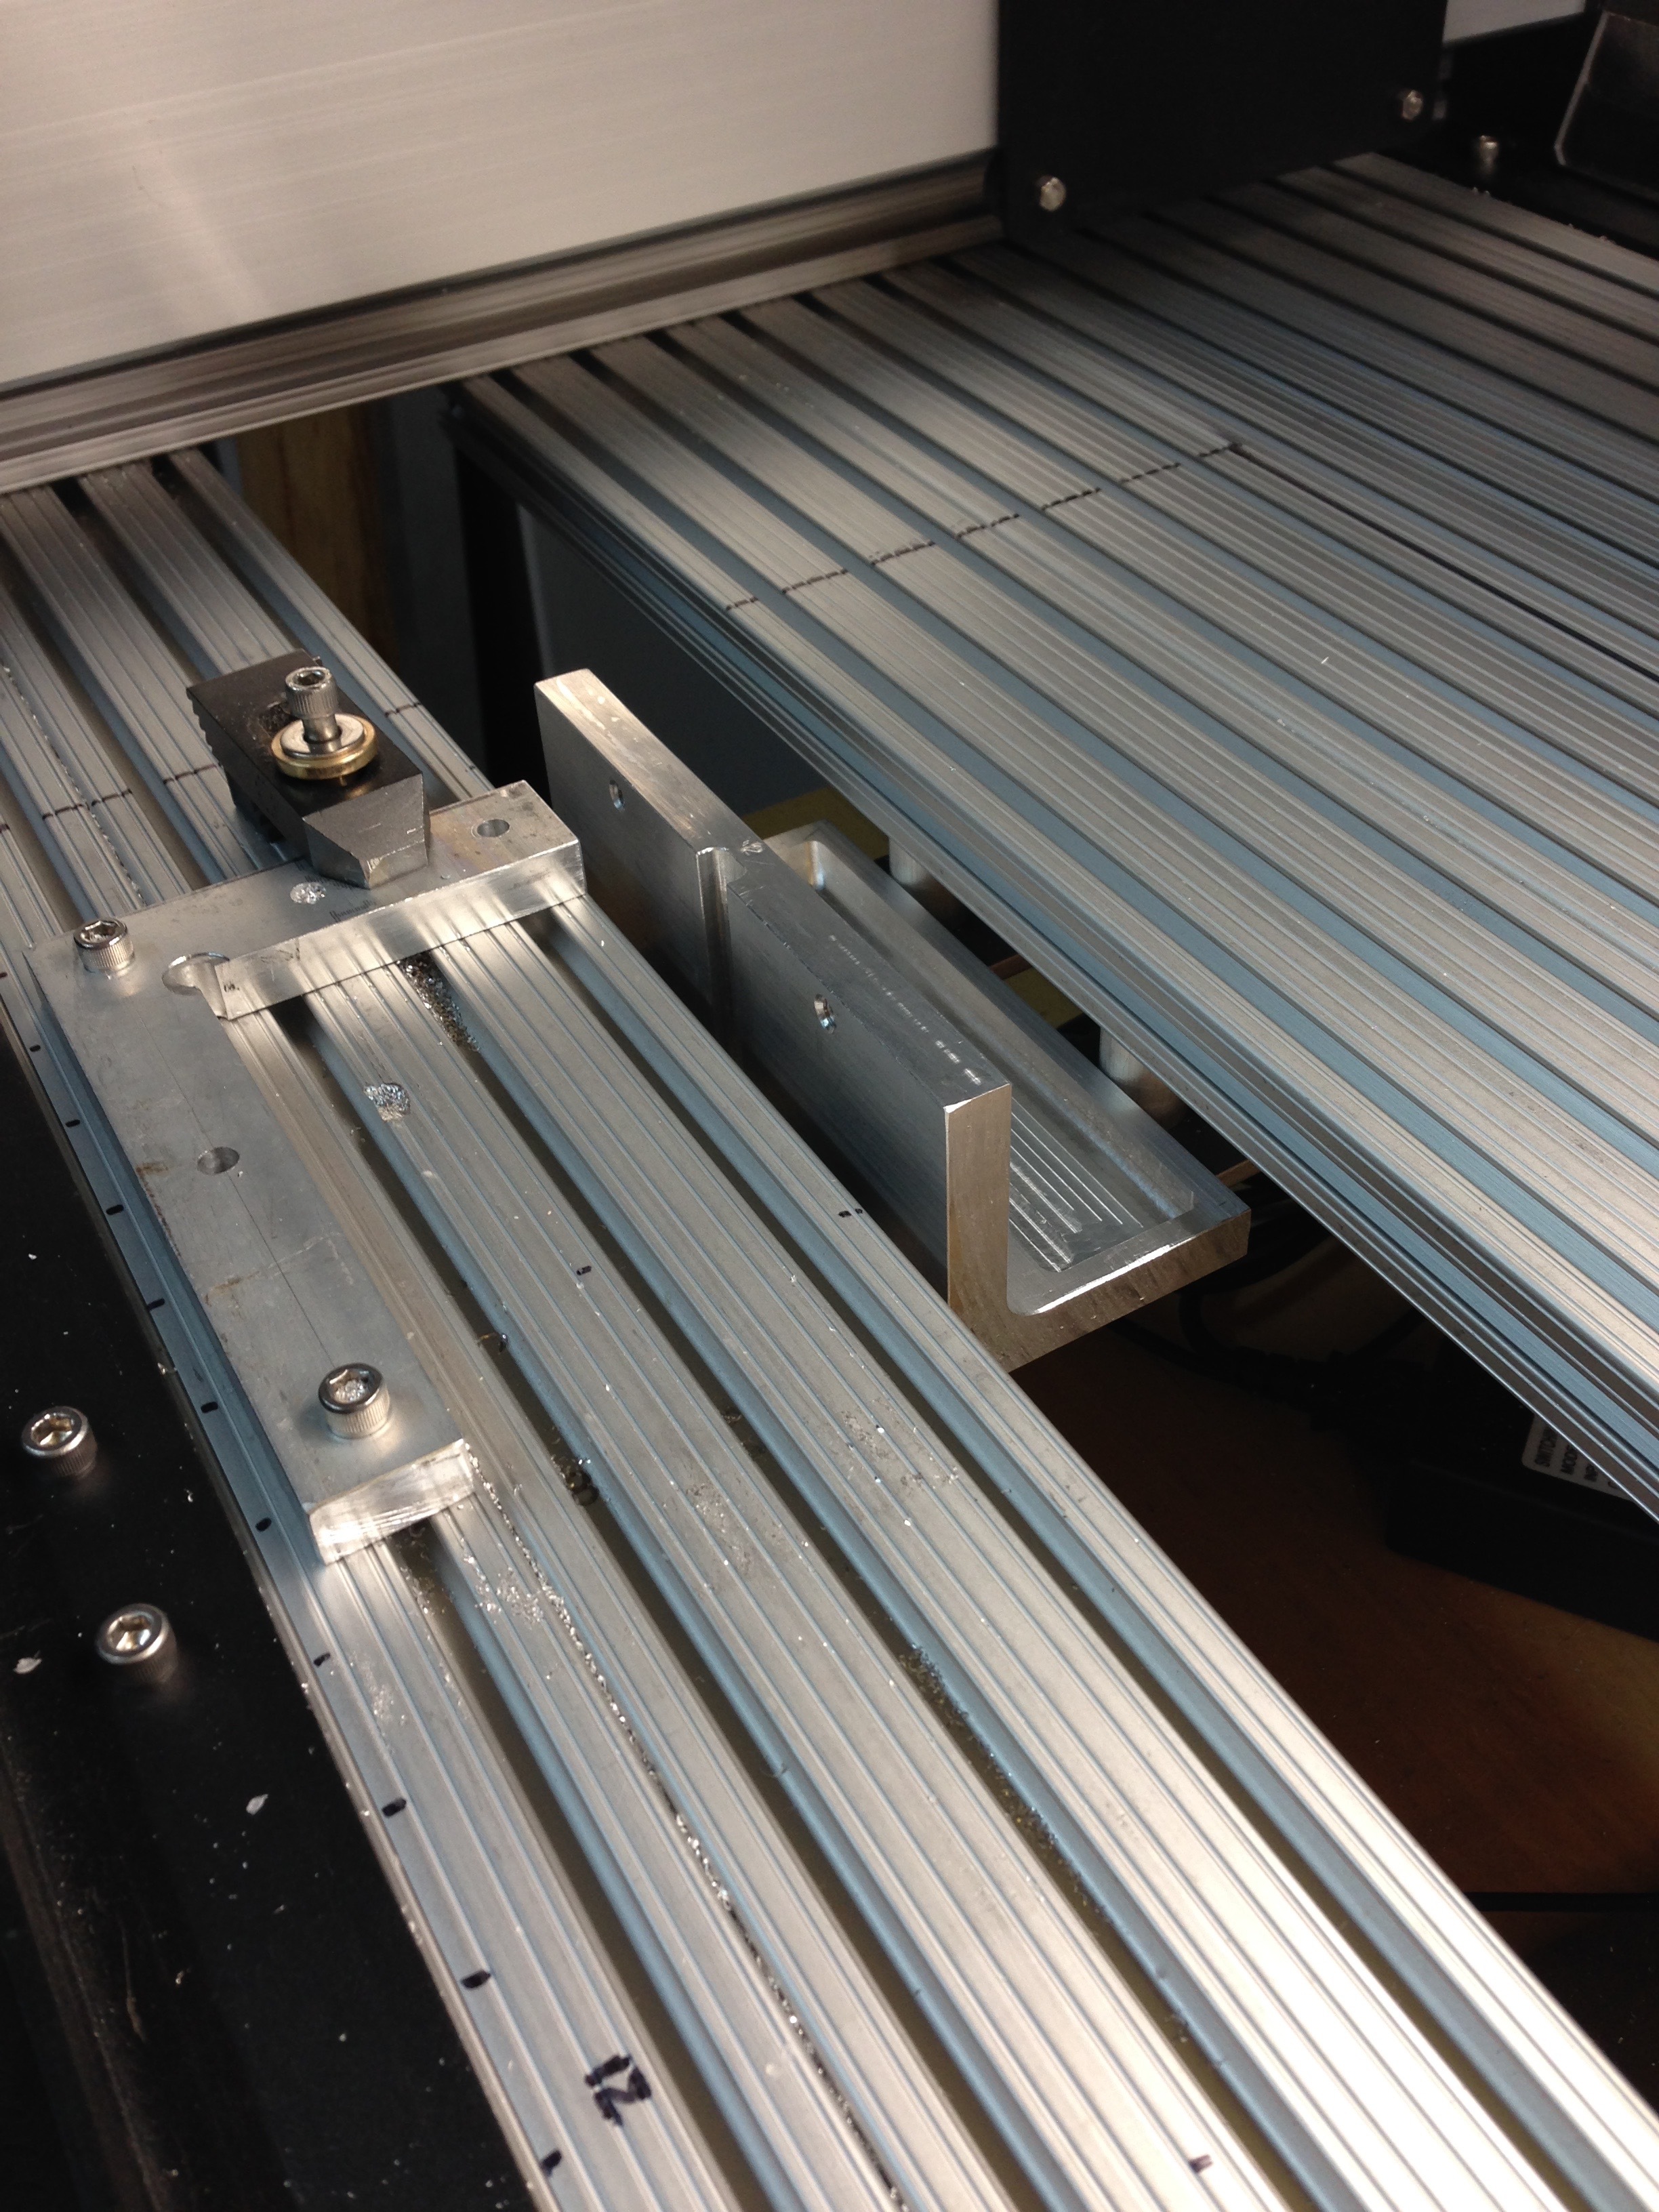
wow that is an awesome setup. I noticed u have a bar on the dewalt plate. Mine doesn’t have that.
@designxtek, all my work is focusing aluminum, they are an add-on’s to try to stiffen the z-axis plate during plunging operations into aluminum jobs only, otherwise, i don’t think that they would be necessary. If you have access to steel angle e.g. 5/8" x 1" x 1/8", it will help stiffen the Dewalt mounting plate somewhat.
As a newbie, I’m finding the S3, to be a magnificent machine for light milling style operations. I will be targeting plastics and non-ferrous (aluminum, brass, etc) materials/stock, not sure if i want to work with anything harder? The learning curve has been wonderful, thanks to your questions and replies in this forum.
Hope you find as much fun in you efforts as i have?
Yes… I bet you were! Doesn’t it basically get red hot when you machine it? Like peeling lava off a metal block? I have never seen it in person but I imagine it is crazy hard to work with. So you have a machine that can cut an alloy like Hastelloy and a Nomad over in the corner somewhere? That is quite an eclectic range of machines! Sounds like a fun shop!
Like peeling lava off a metal block?
Inconel and Hastelloy aren’t THAT bad! We’ve been machining them, quite efficiently, since the early 50s, seriously since the early 60s. The X-15 (1959) was skinned with this stuff and many parts were made of this.
By-the-by, the X-15-2, the one that set the speed record (Mach 5.5), MELTED (Inconel) pylons off due to atmospheric friction! It was never flown again.
Yes, this is stuff that is a twitchy as it gets. Yes, the tooling has to be top notch… and you’re going to go through multiple tools even with top notch ones. Yes, the surface speed has to be tightly controlled. Yes, it is often machined by hand, rather than CNC. Yes, it gets hot… but you really want to avoid that since that causes much of the twitchiness.
IMHO, the reason these are often machined by hand, with constant adjustments, is due to the “magic formula” approach to feeds and speeds that most shops take. It is so twitchy, so unforgiving, and so far outside the experience level of most shops that mysticism is used. A human baby sitter constantly adjusts the machining.
With a solid understanding of the CNC equipment, tool selection, feeds and speeds and lubrication this is just another machining challenge. It is incredibly hard and machining is to some extent unbelievably slow… but it can be done and done well. Even with a CNC machine.
mark
P.S.
No, I’ve never machined it myself, but I have been around it and those who have machined it. Learning to machine it was the hard part. Once the lessons were learned, it was just another job… albeit expensive due to chewing up tools and the time it took.
P.P.S.
You want a creepy materials to machine?
Plutonium
It has 5 solid phases! The first two, as it heats up, expand. The third phase CONTRACTS! The next phases expand.
Many of the nasty accidents with it came from accidentally getting into the third phase and the resultant geometry took things from simple machining to a serious physics problem (Prompt Critical - not quite there but lots of neutrons and gamma rays).
Beryllium
The chips and dust are highly toxic. Nasty to the lungs. About 10% of the population will die, very quickly, from very small doses.
If you’re ever machining copper, please, please, please, make sure it is not an alloy containing Beryllium. You will not like the outcome.
By-the-by, the first one or two Mercury space capsule heat shields were solid Beryllium. They later switched to the composite stuff that ablates.
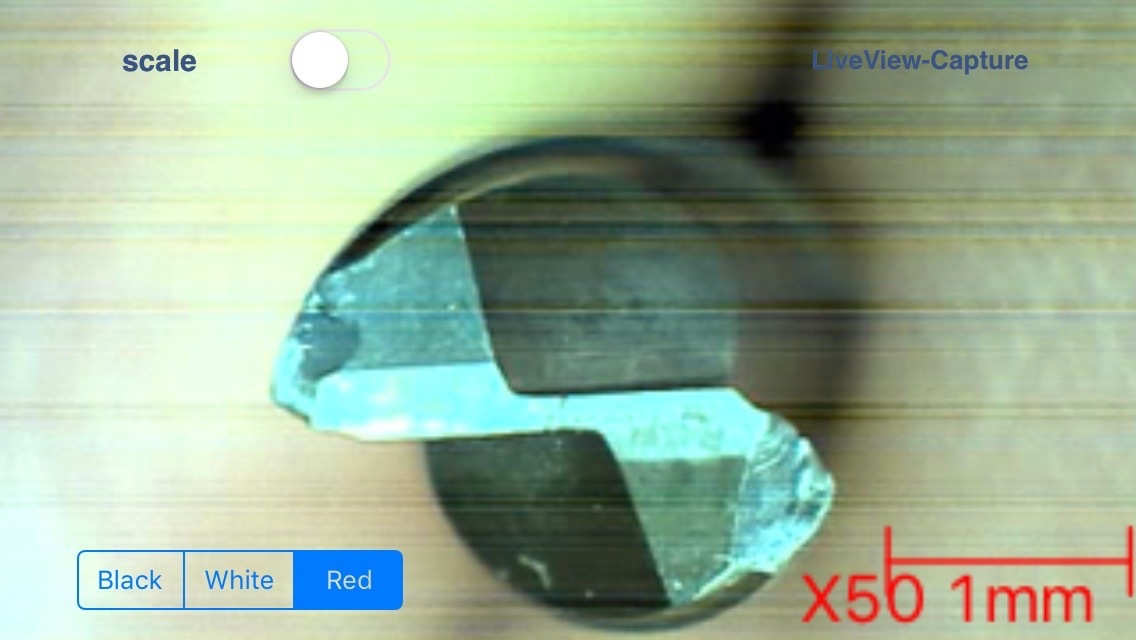
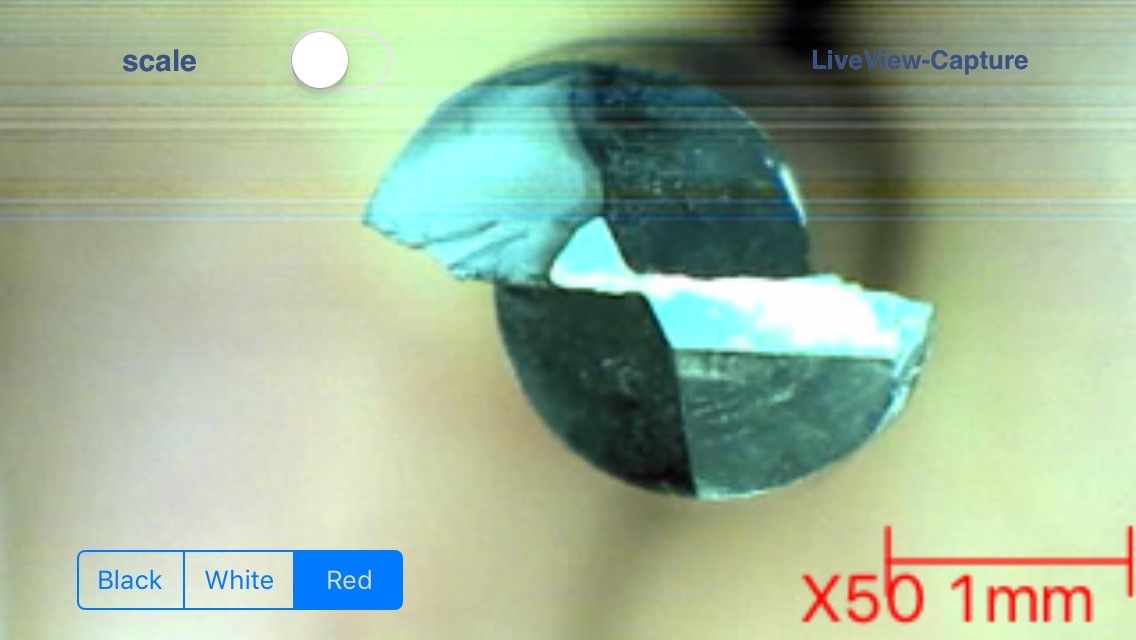
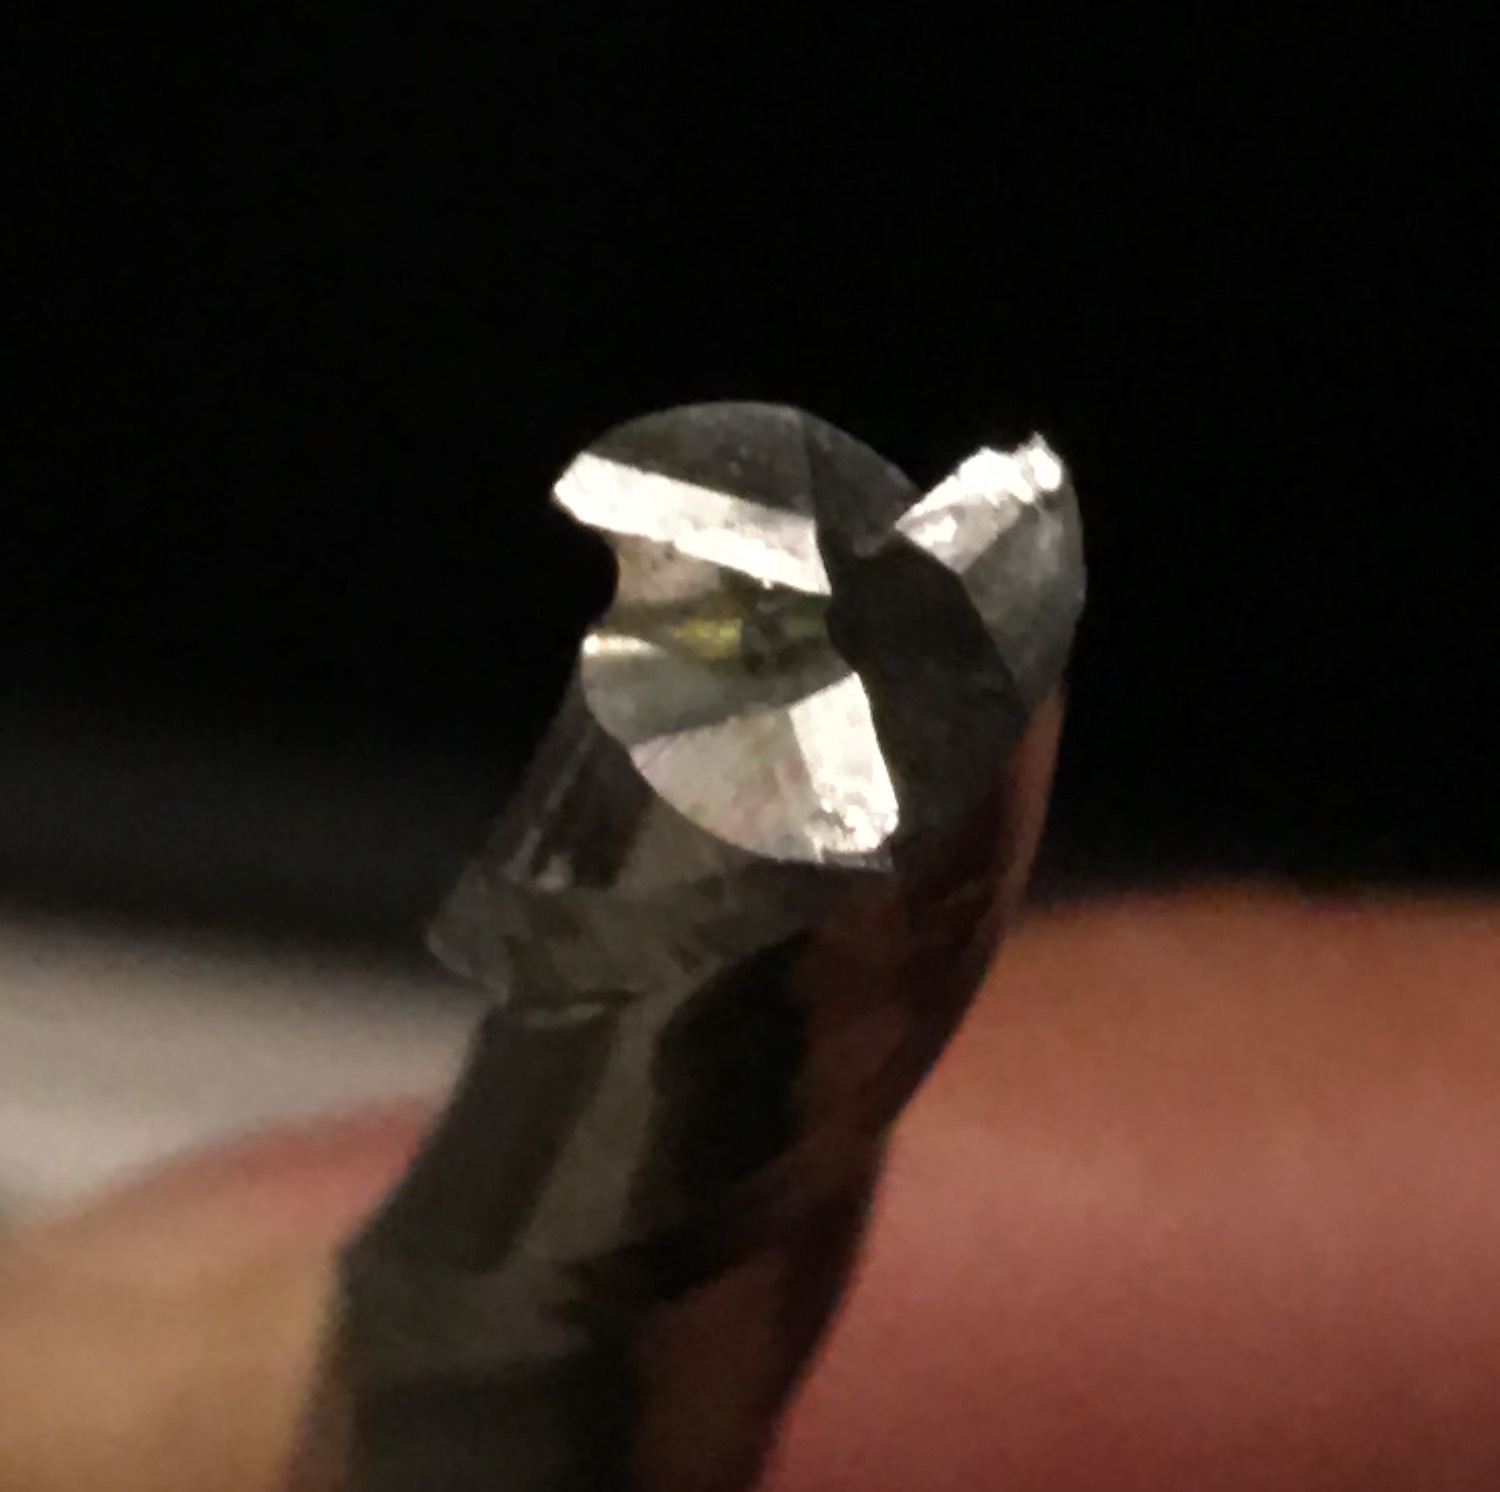
i took a closer look at my endmill and it has a tiny chip at the corner. I think that is preventing the plunge to go deep. It ended up doing shallow cuts and taking less chip load = more heating up.
Do consider a coating - TiB2 or ZrN - as this will reduce the heat.
mark
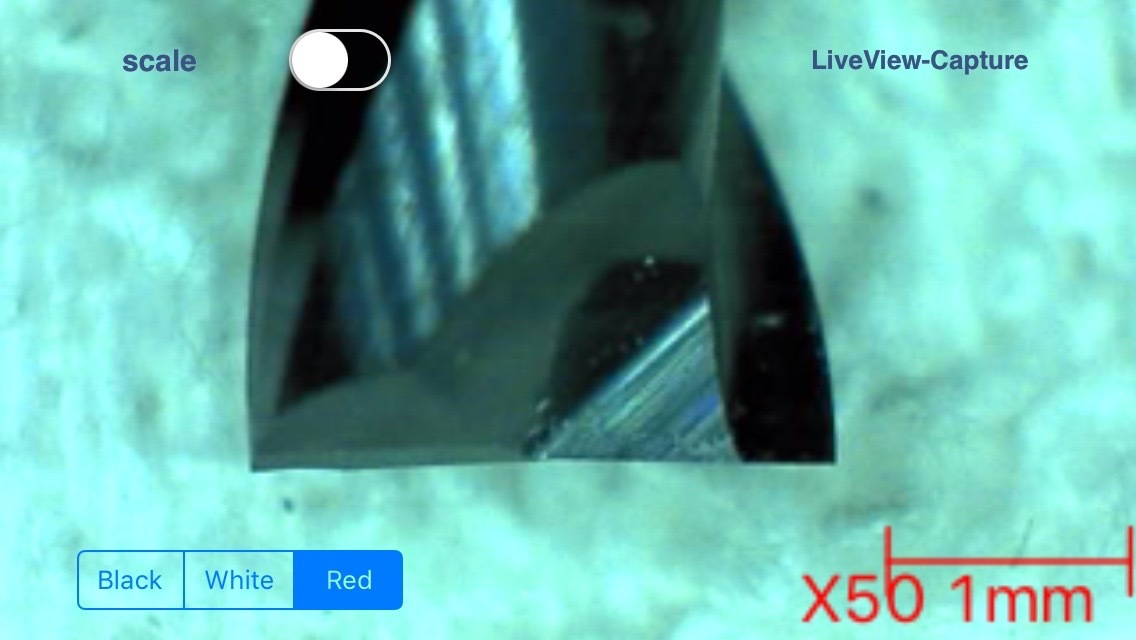
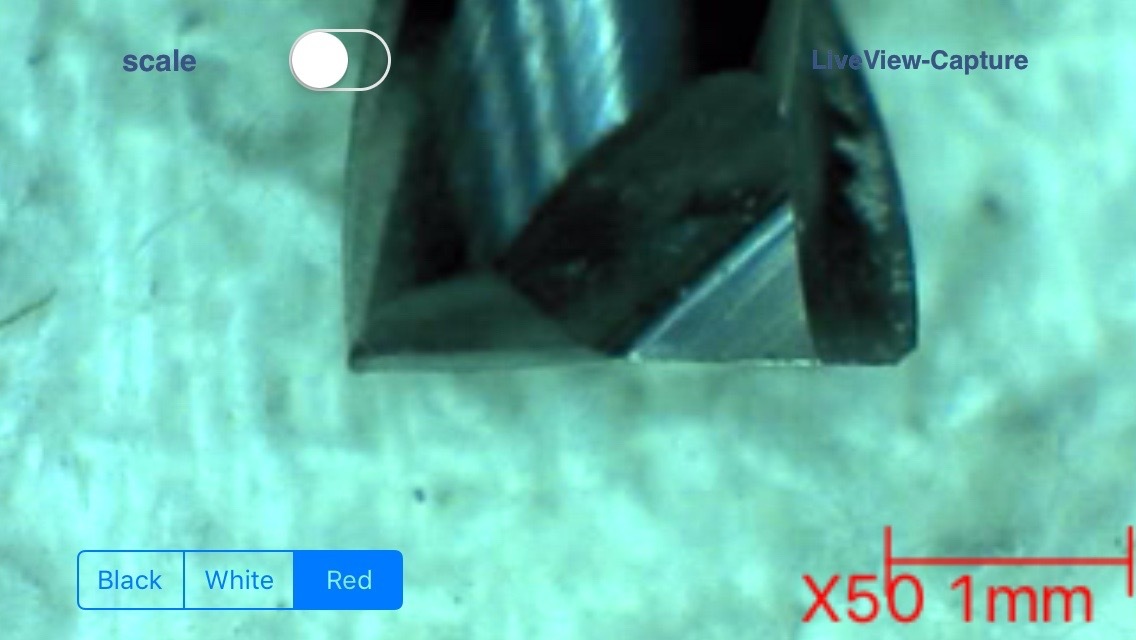
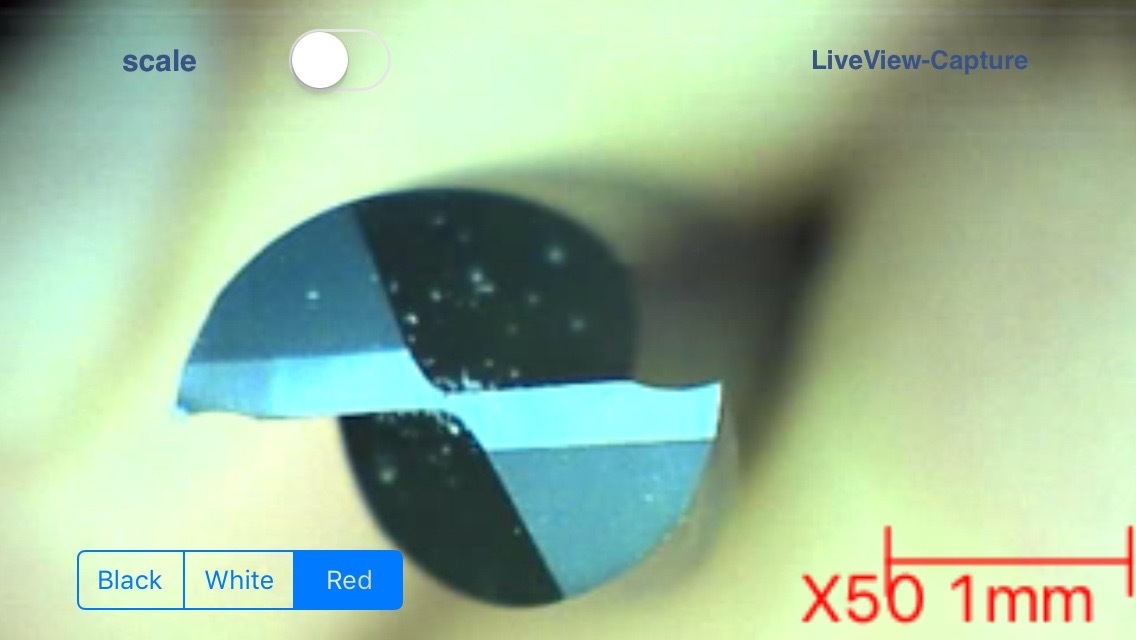
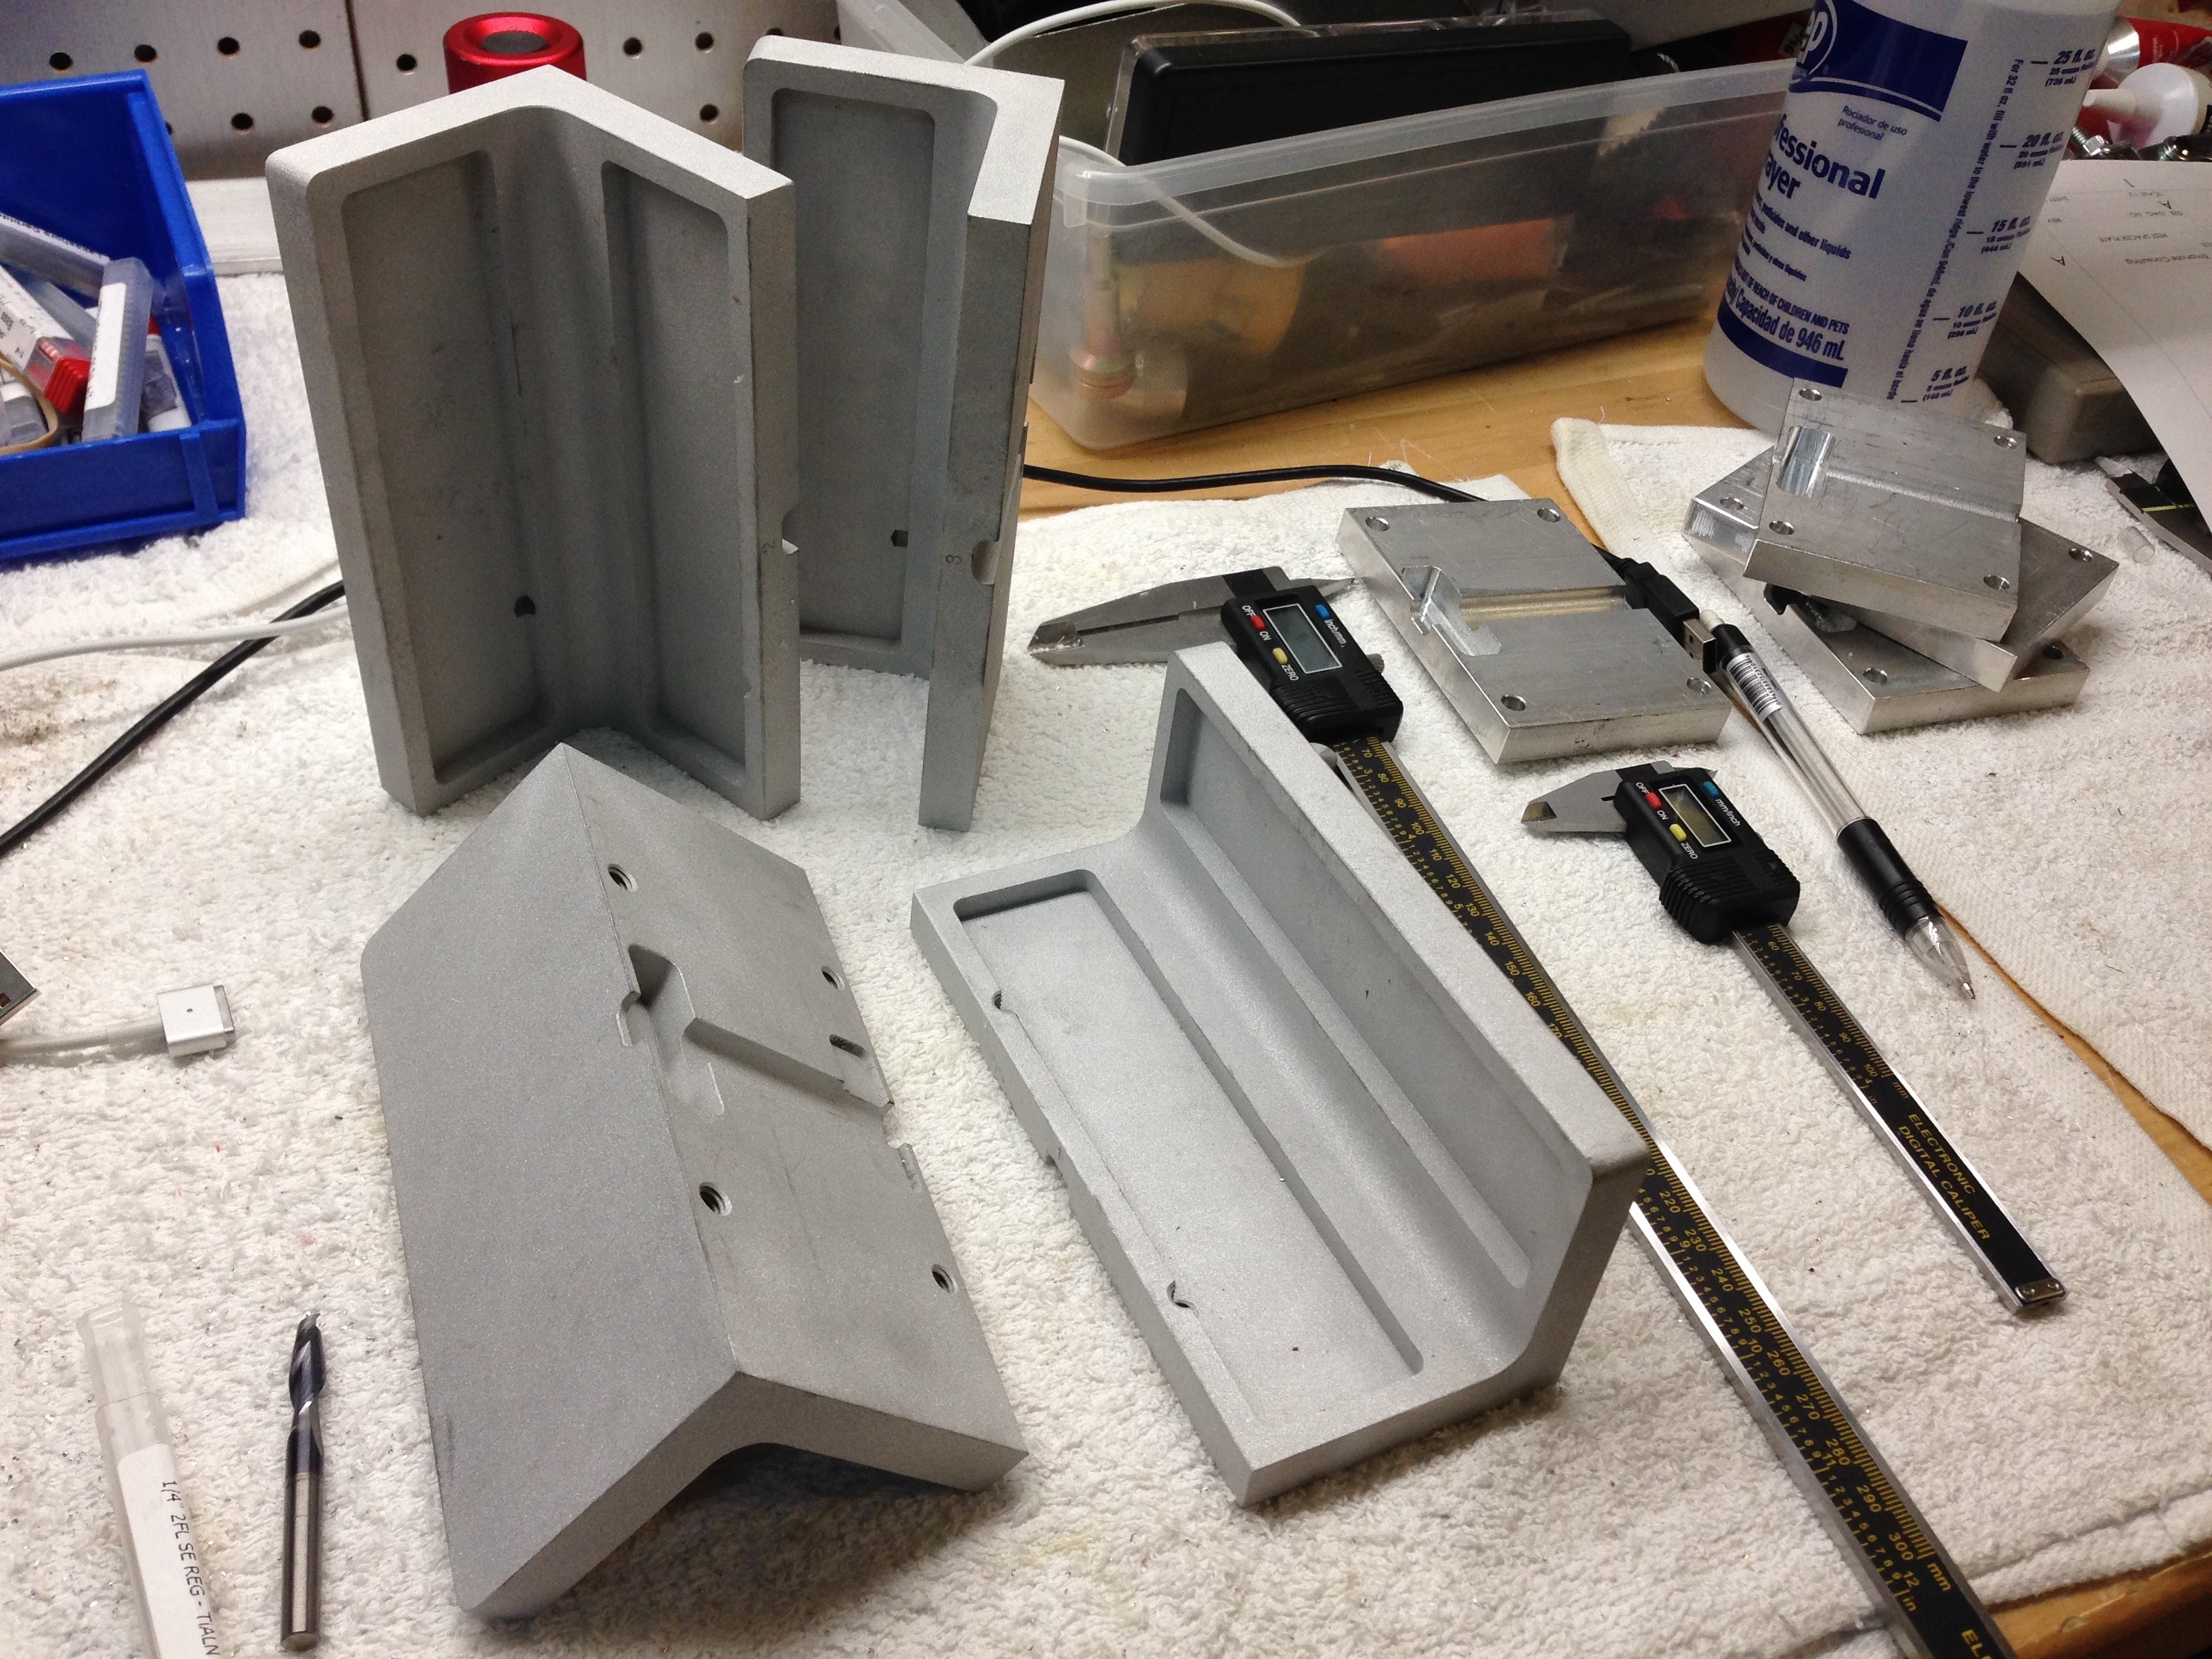
@designxtek, if its any help I have attached some photos of what has worked for me with respect to Mill tips.
Photo 1 new tip – sharp edges (as a comparison only).
Photo 2 & 3 – sharp edges, right corner missing on photo 2 after clipping a SS hold down screw – still functional completed pocketing on remaining 2 angles with no measurable differenced.
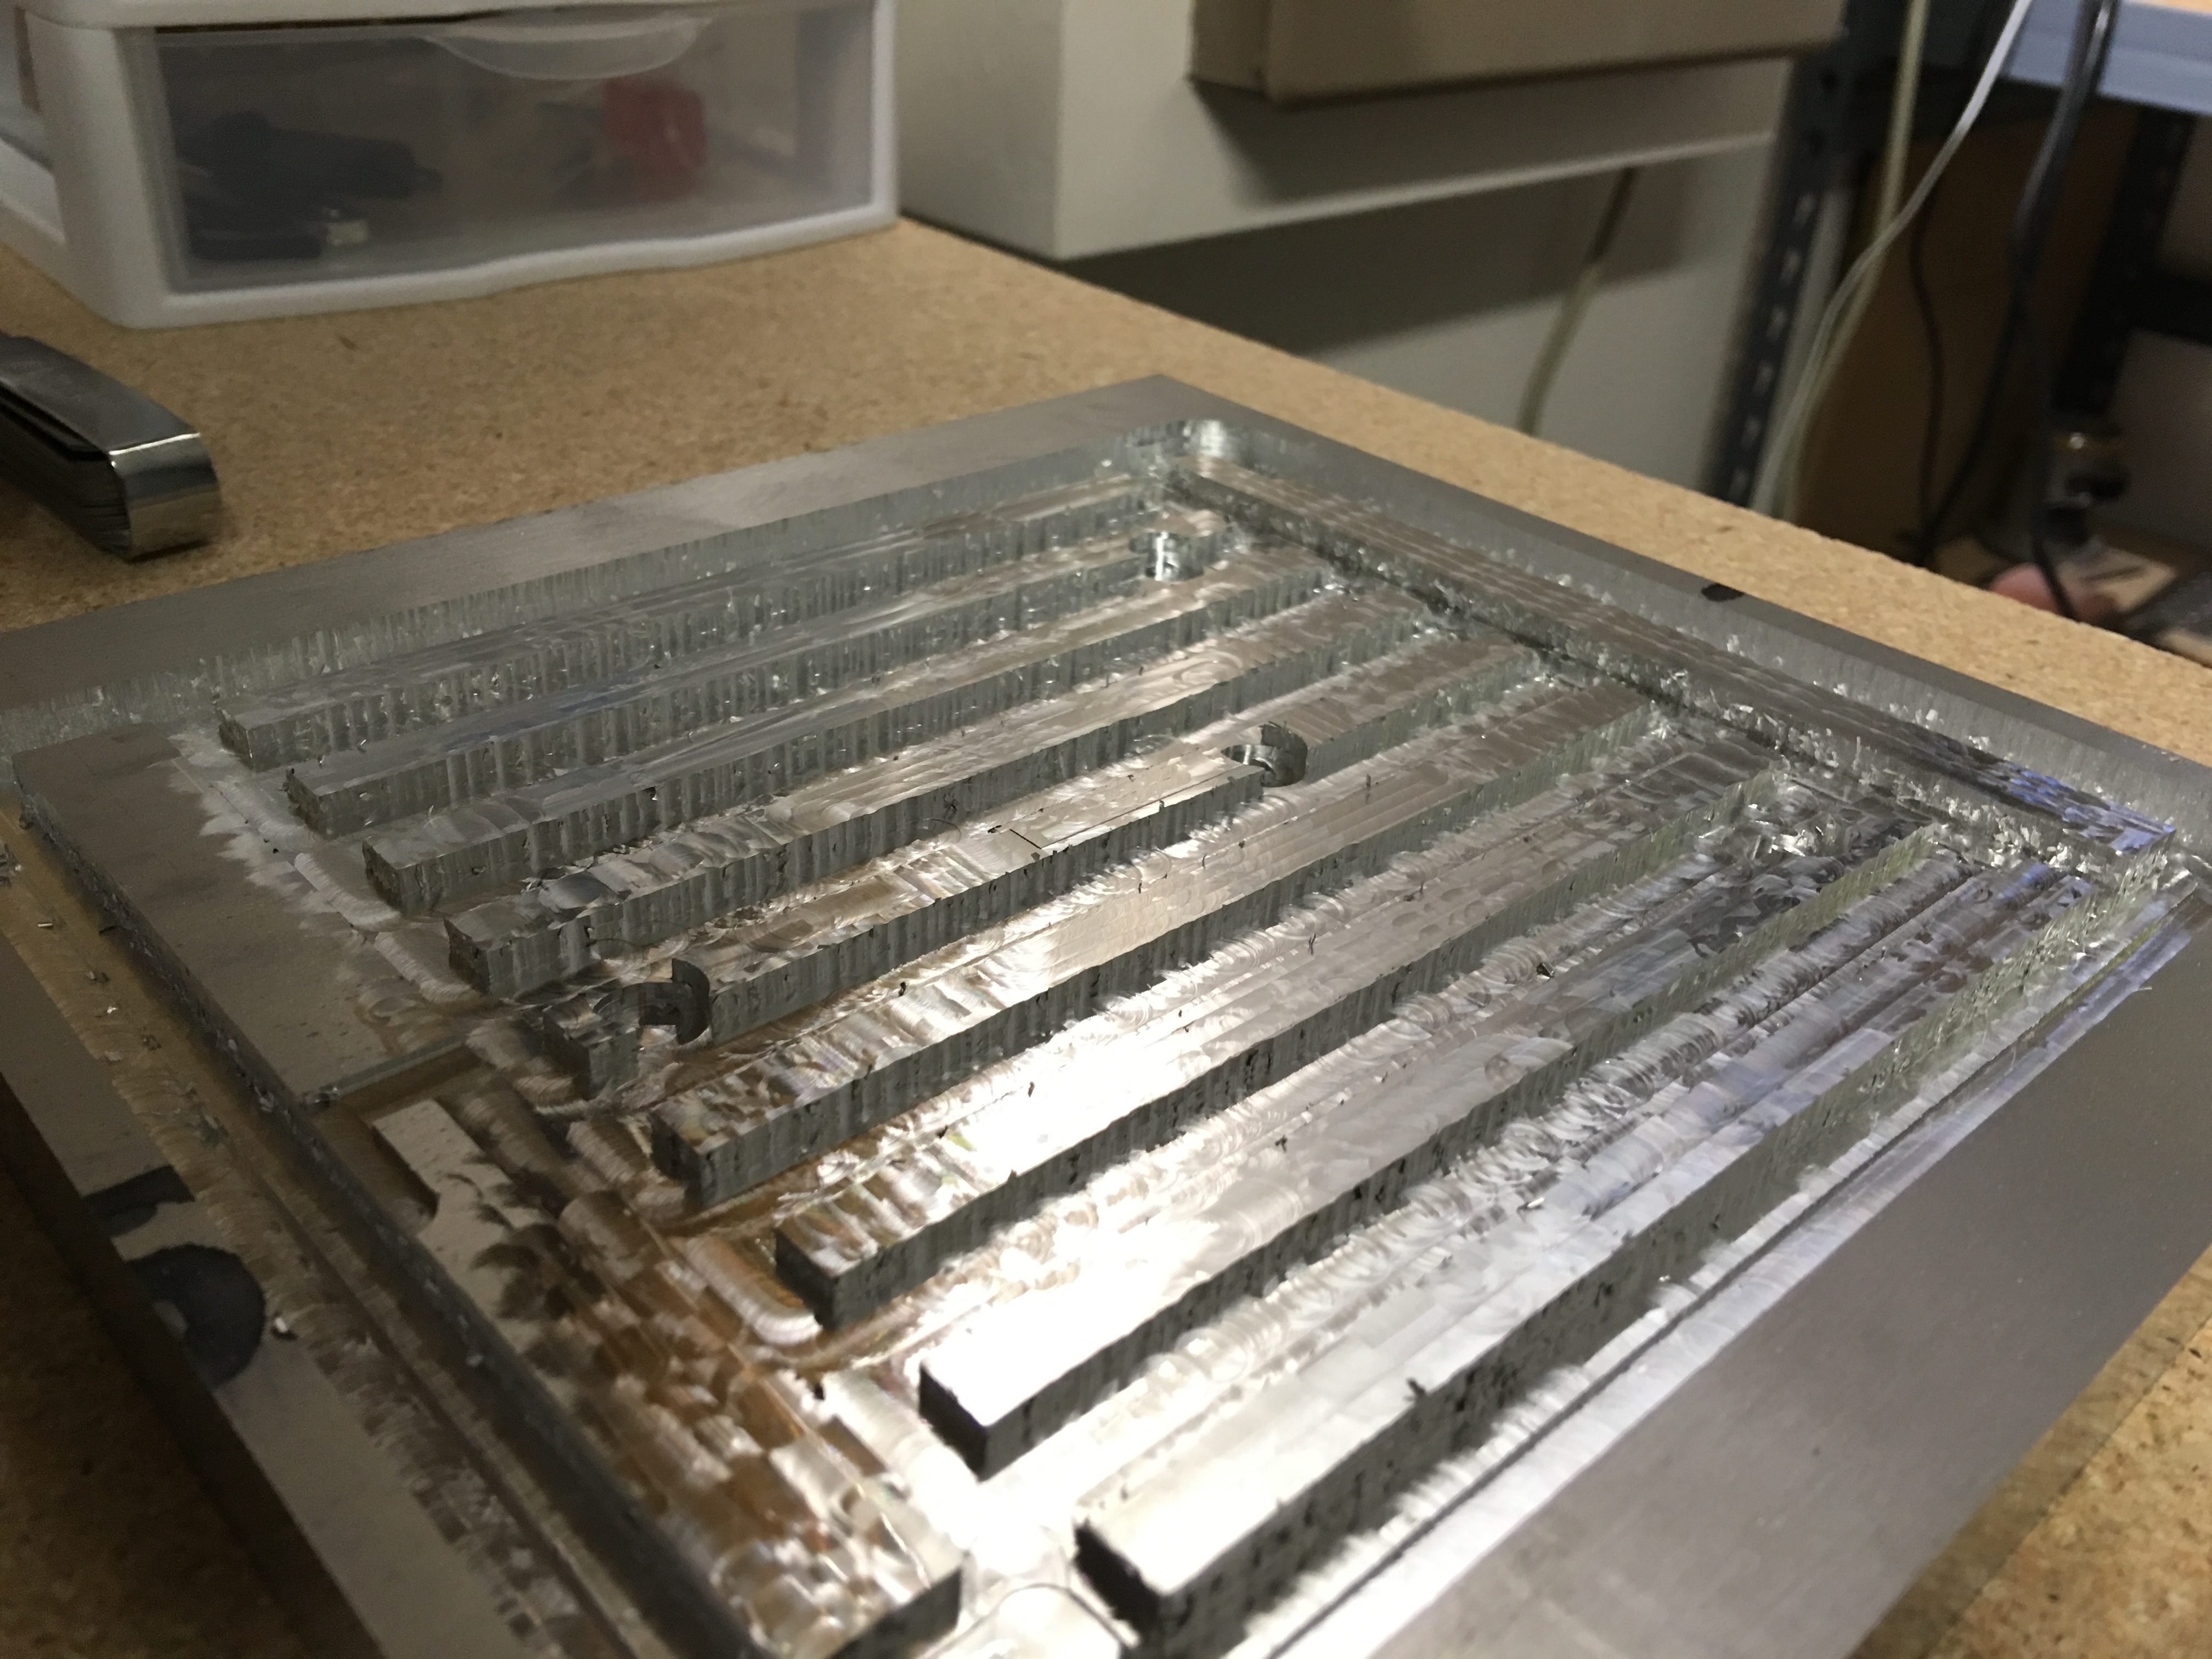
Photo 4 – machined angles (T6-6061 3” x 3” x ½”, 6” long) after sand blasting.
Photo 5 – damaged tip after hitting steel hold down clamps earlier (lost control of the S3 while testing) – tool scrapped.
Photo 6 – damaged tip after hitting steel hold down clamp erlier (lost control of the S3 while resetting the job and jogging to re-enter the pocket) – tool scrapped
Material T6-6061
Mill Bit 2FL SE REG SQ - TiALN
Plunge rate 3 in/min
Depth per pass at 0.020 (I was being cautious here because of the long reach required to clear the geometry and tool chatter – nice snall chips btw)
Feed rate a little to 36 in/min
Speed set to 5.5 on the Dewalt, guess, could be 26,000 rpm
Observations:
Ambient temperature was 70 deg F
Time on the table was approx. 30 min per pocket
The T6 material warmed up. Not hot, but noticeably warm to hold after the operation (no empirical measurements were taken – was too excited).
The Dewalt 611 was noticeably warmer than the material, but not unbearable to touch (again, no empirical measurements were taken).
The Mill Bit tip was surprisingly cooler than both the material and Dewalt 611 straight after the operation and switching off - cool to the touch, same as ambient.
It’s all an experiment for me at this stage, but good enough for a first job? Hope that this can help in some way?
Please ignore the duplicated photo after #3, also the scale in red is not real!
Steve
Excellent!
Just out of curiousity — how are people recycling their carbide bits? I know Carbide Processors runs a recycling program, but it’s going to take me years to accumulate their minimum weight.
William
@sliso wow! You ran a more conservative cut than I was.
This was my s3 setting and it got gummy. I had it on a 3 dial on the dewalt. I think my plunge was too fast for the cutter to get the correct depth per pass? My tool is also chipped at the corner so I’m assuming that added to the factor.
Thanks @designxtek, a good share. Perhaps the software and default settings were established/designed for heavier/more rigid machines, we may need to tweak from the conservative side, moving towards getting the optimum for our particular setup/machines - its all a learning curve?
Thanks again, Steve
Yes, for all of us. Some have had more experience, some less, but these are all things that you’ll look back on eventually and probably laugh. Just keep at it.
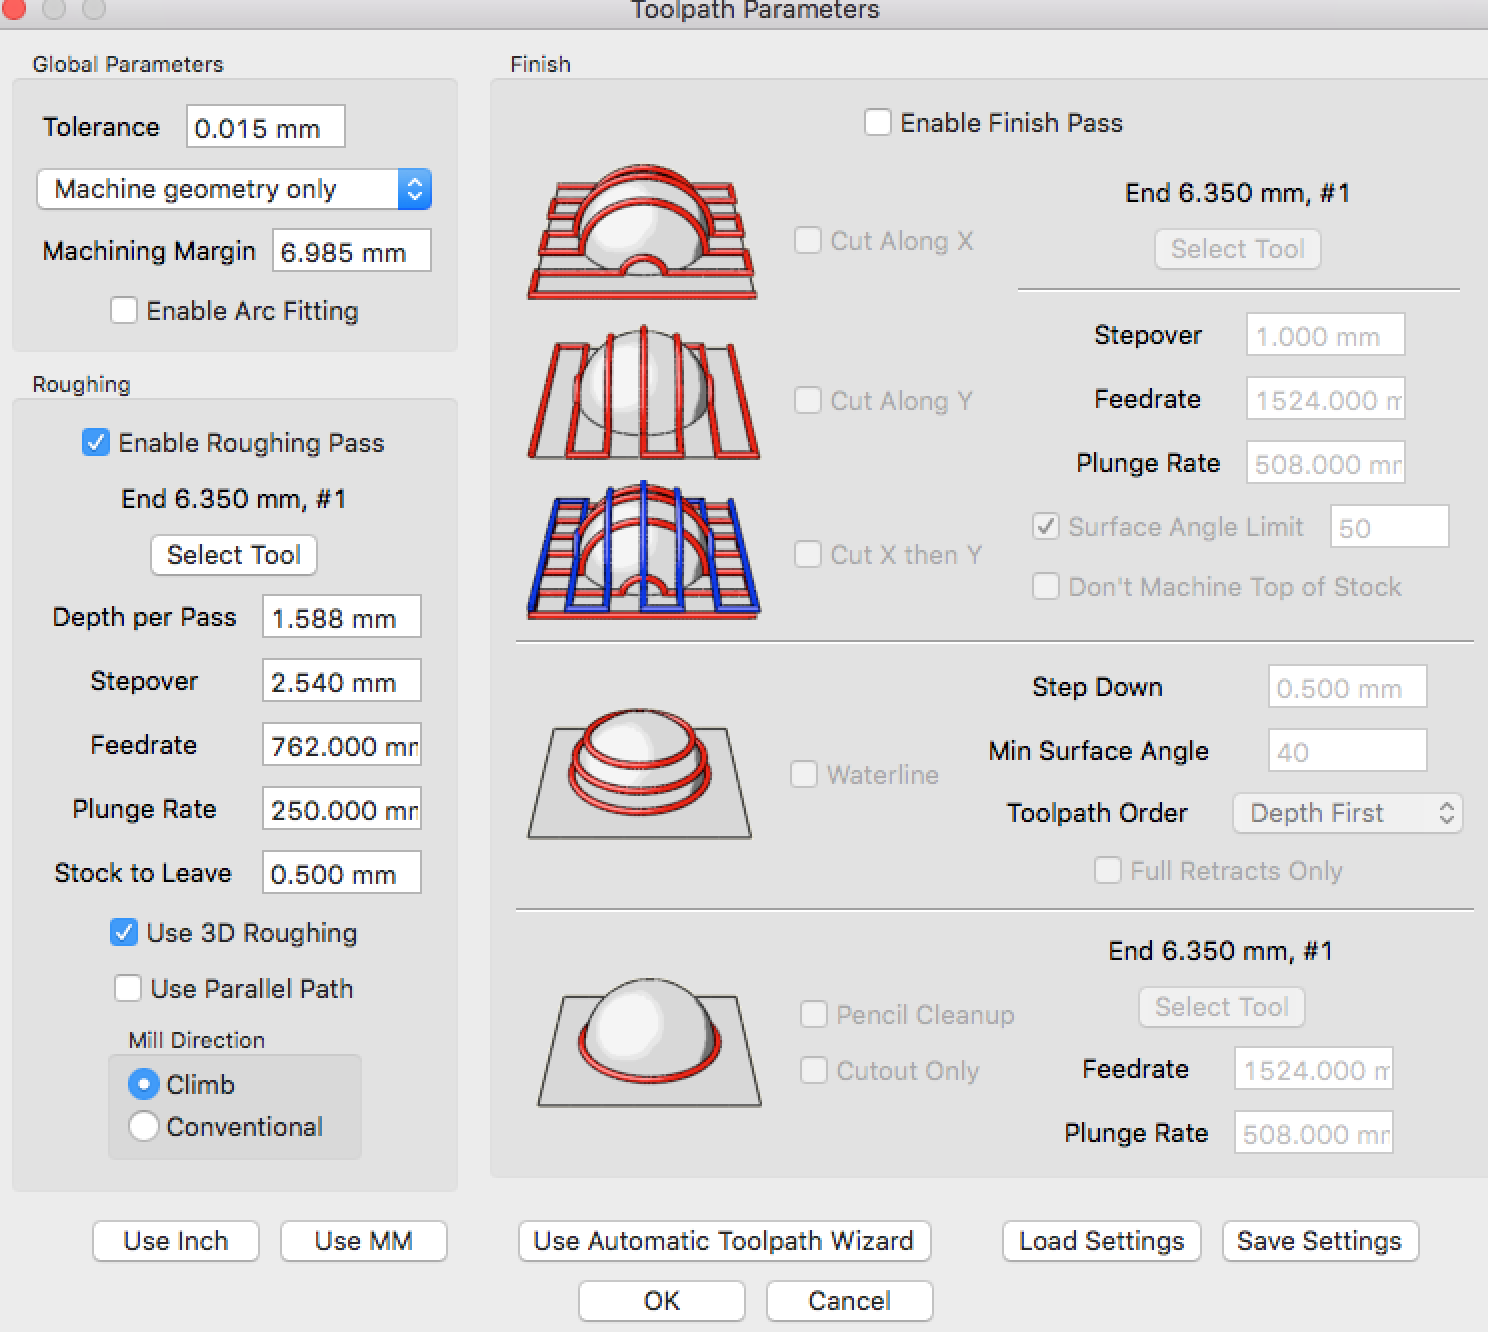
When cutting aluminium climb cut is recommended!
Also avoid the parallel path option for aluminium it puts a lot of stress on the tool especially in non (Completely) rigid machines.
yeah! finally got a rough pass I wanted!
I had to move the trim router mount up to the highest threaded holes. This way it is closer to the middle of the Z plate. It reduces the chatter on some parts of the cut and prevents my S3 from skipping.
I also used a 2F end mill. This prevents aluminum from gumming up. Ran it at 12ipm with 5 speed on the dial.
Looks like things are starting to working out - gumming up hurdle is well past you now, thank you for sharing the photos, they tell a thousand words, please keep us posted?
Do check into coated end mills - ZrN or TiB2 - to improve your Al machining.
mark