SO3: Are things on track for the XL and XXL shipments to begin?

Thanks for your response. Perhaps my post was not clear I always intended to build my own base with Rockler trac system. All parts can be purchased separately, which I already have. I use Melamine covered MDF (comes in 4’ X 8’ sheets @ HD) since it is easier to work with than Formica. no need to cover the MDF it is factory applied. However it only comes in slightly less than 3/4" thickness, so I’m hoping its not a problem. I am surprised that they are using two pieces on the frame. I share your skepticism about rigidity. I have a panel saw so cutting should be pretty precise. I’m just worrying about the placement of the rail system on Melamine. It needs to be exactly true and the same as the “factory” placement. Cross that bridge when I come to it. I guess.

Check around with hardwood dealers or cabinet/closet shops if your HD can’t get it. . Melamine comes in many thicknesses from 1/8" to 1 1/4". the BORGs may not carry on the shelf, but may be able to order in for you.

I have a feeling I must be profoundly failing to understand something, since I am wondering why you wouldn’t just use the machine itself to make the cuts for the track. Oh well, never mind my (not that unusual) confusion, I’m sure you’ll sort it all out. :grin:

I’ll just be happy to get hands on with my XXL when it arrives.

1 Like

Using the machine to bootstrap its own wasteboard creates challenges an limitations, esp. if it’s a single piece, in particular, the machine can only access w/in its cutting area, not easy to make cuts so as to put workholding and fixturing and fastening points outside that.

I worked up and documented a technique for this on the SO3: http://www.shapeoko.com/forum/viewtopic.php?f=35&t=6045&p=48138

1 Like

William,

I have had to speculate, since I have never even seen an SO3, let alone had the chance to make any detailed assessments, but I assumed (perhaps wrongly) that the margins outside the work area were relatively small, and that since the vast bulk of the work could be done with the machine, thus firmly establishing track locations, any follow up at the periphery could be readily handled by common methods.

Perhaps in the next few weeks when I receive my machine I will have a better understanding of the issues at hand. :relaxed:

Thanks for the input.

Another Update for today!


It sounds like everyone is pretty interested (and pleasantly surprised) that the machines comes pre-sub-assembled.

We had a few emails over the weekend asking, out of curiosity more than anything, why. Figured this is as good a place as any to explain the decision, and talk about what it means for your kit.

It became clear to us over the last 12 months of shipping the standard machine that assembly was the most difficult part of getting up to speed with the machine.

As we worked through the design, looking at ways to make it easier to assemble, we kept making small modification, most of which involved preventing one from having to handle a nut and a screw at the same time. By the time we finished, almost every static hole had been filled with a PEM nut, and all of the M5 hex nuts had been removed from the design.

We changed the way the z-axis is tensioned, by slotting the bottom bearing, instead of the motor mount. This provides enough space for one to pull down on the belt assembly with the proper amount of weight (about 20lbs) to tension the belt perfectly.

Speaking of belts, we also changed the belt clip to be more like our original (unreleased design) that used a single M5 PEM nut instead of the 2x M3x16mm BHCS. The single screw design has proven to be SIGNIFICANTLY easier to manage than the old design - and we’re really happy we made the change - if you had to tension your belts the old way, you will be too!

By the time we finished with the revisions, we thought the carriages were so easy to assemble that we might as well assemble them before shipping. This way we could go the full distance and ensure that everything has been installed correctly, and no parts (fasteners) are missing from your kit. I

So what does this all mean?

Basically, your machine is getting delivered to you 90% assembled. You’re going to save your time and energy assembling, and instead get to apply it directly to using the machine.

We are really excited about the changes, and we can’t wait to hear from everyone about their experience putting the new designs together.

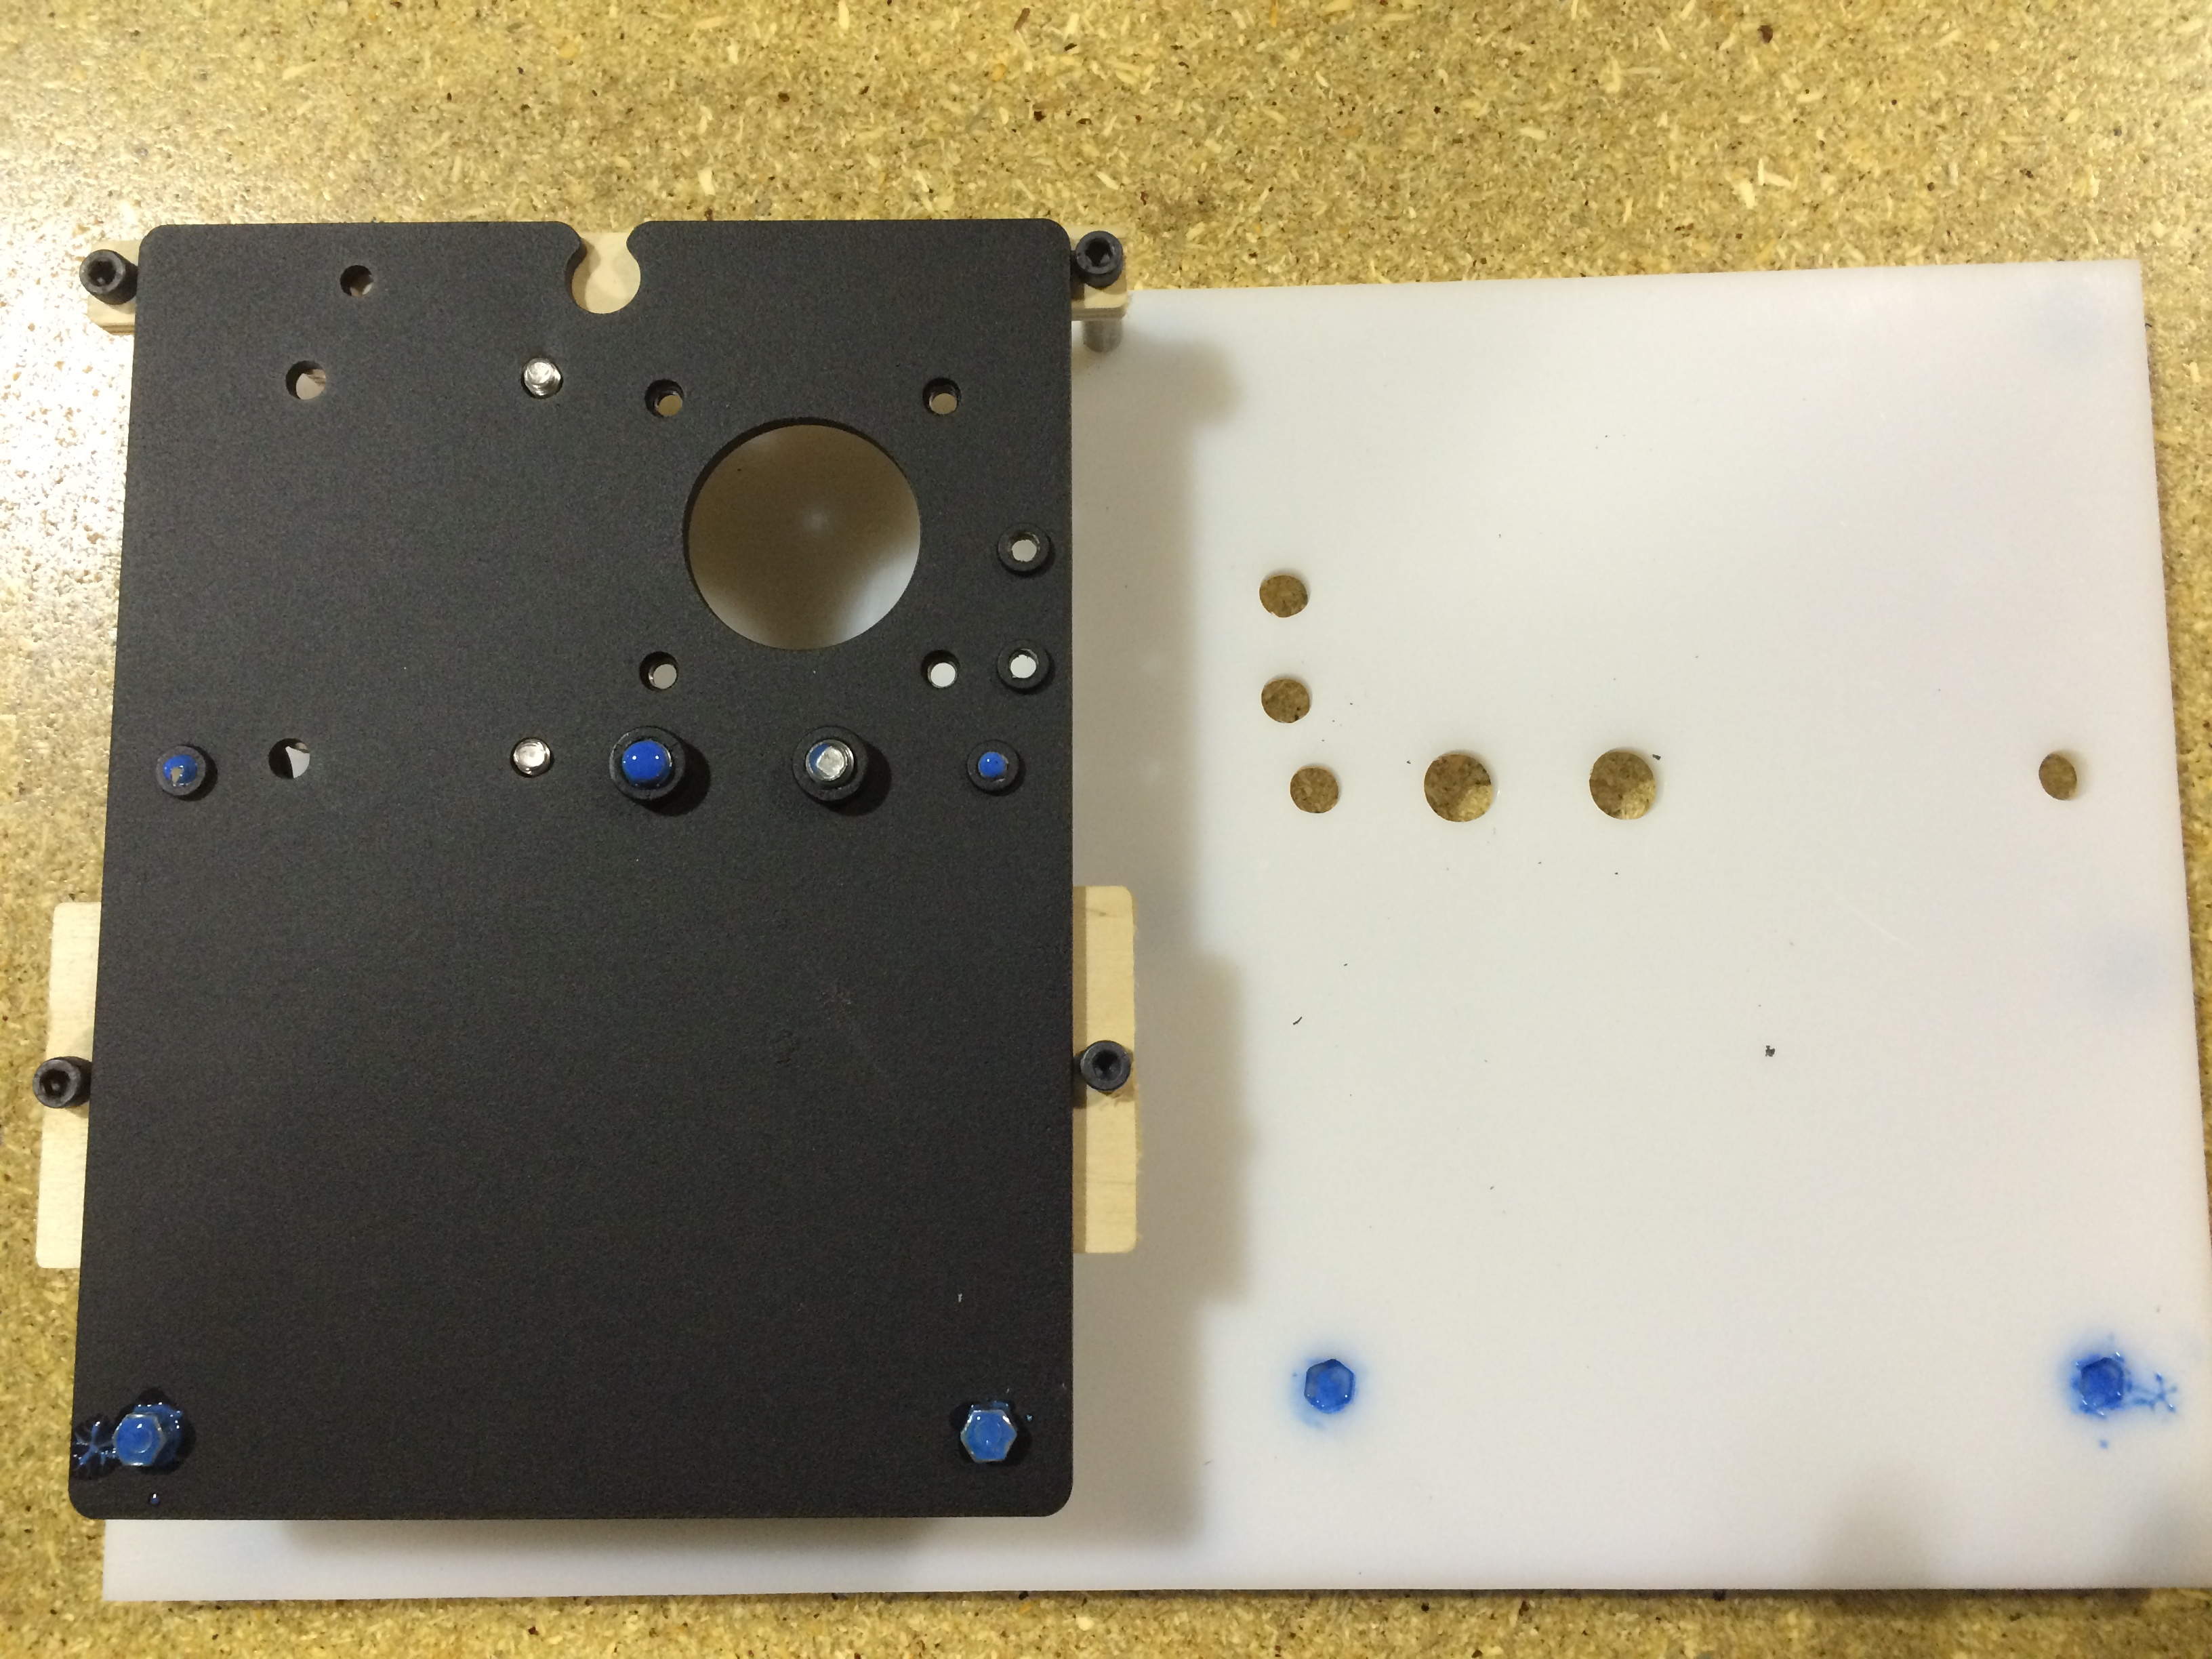
Here are a few more pictures of the pre-assembled plates, in their various stages of production:

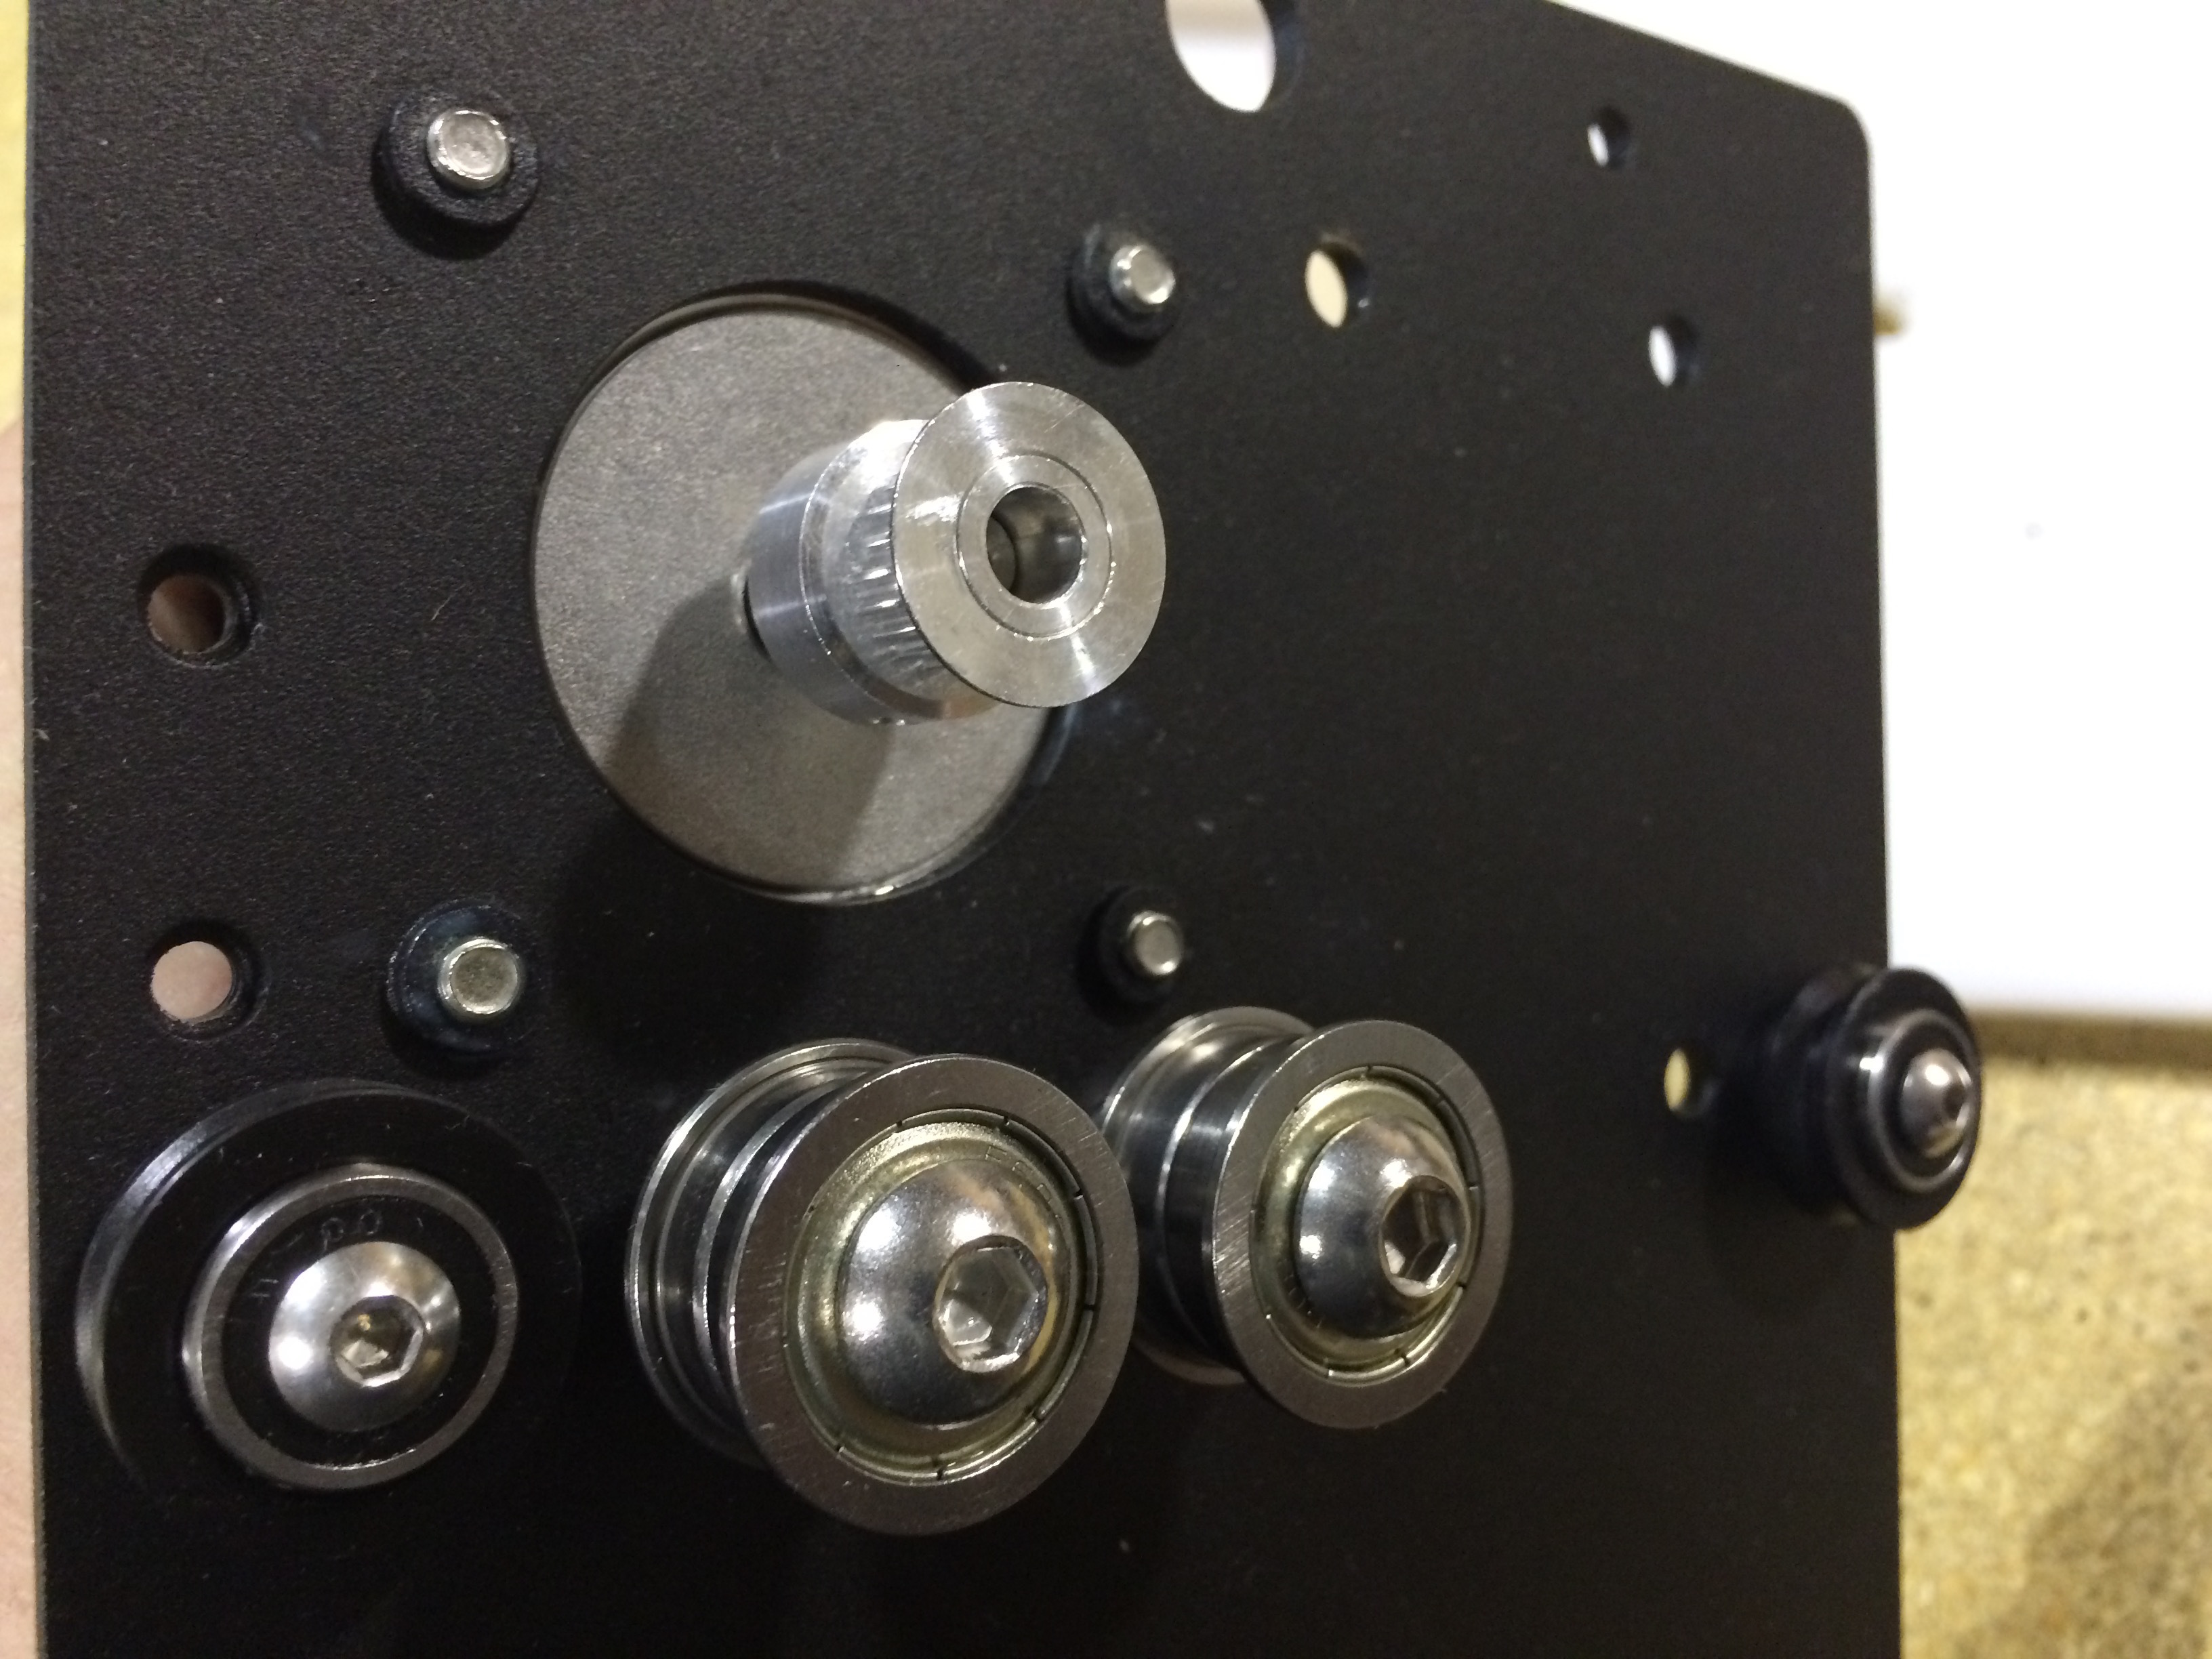
(we install the pulley at exactly the right spacing to ensure its aligned with your pulleys)

(all of the hardware is threadlocked to prevent vibration from winning)

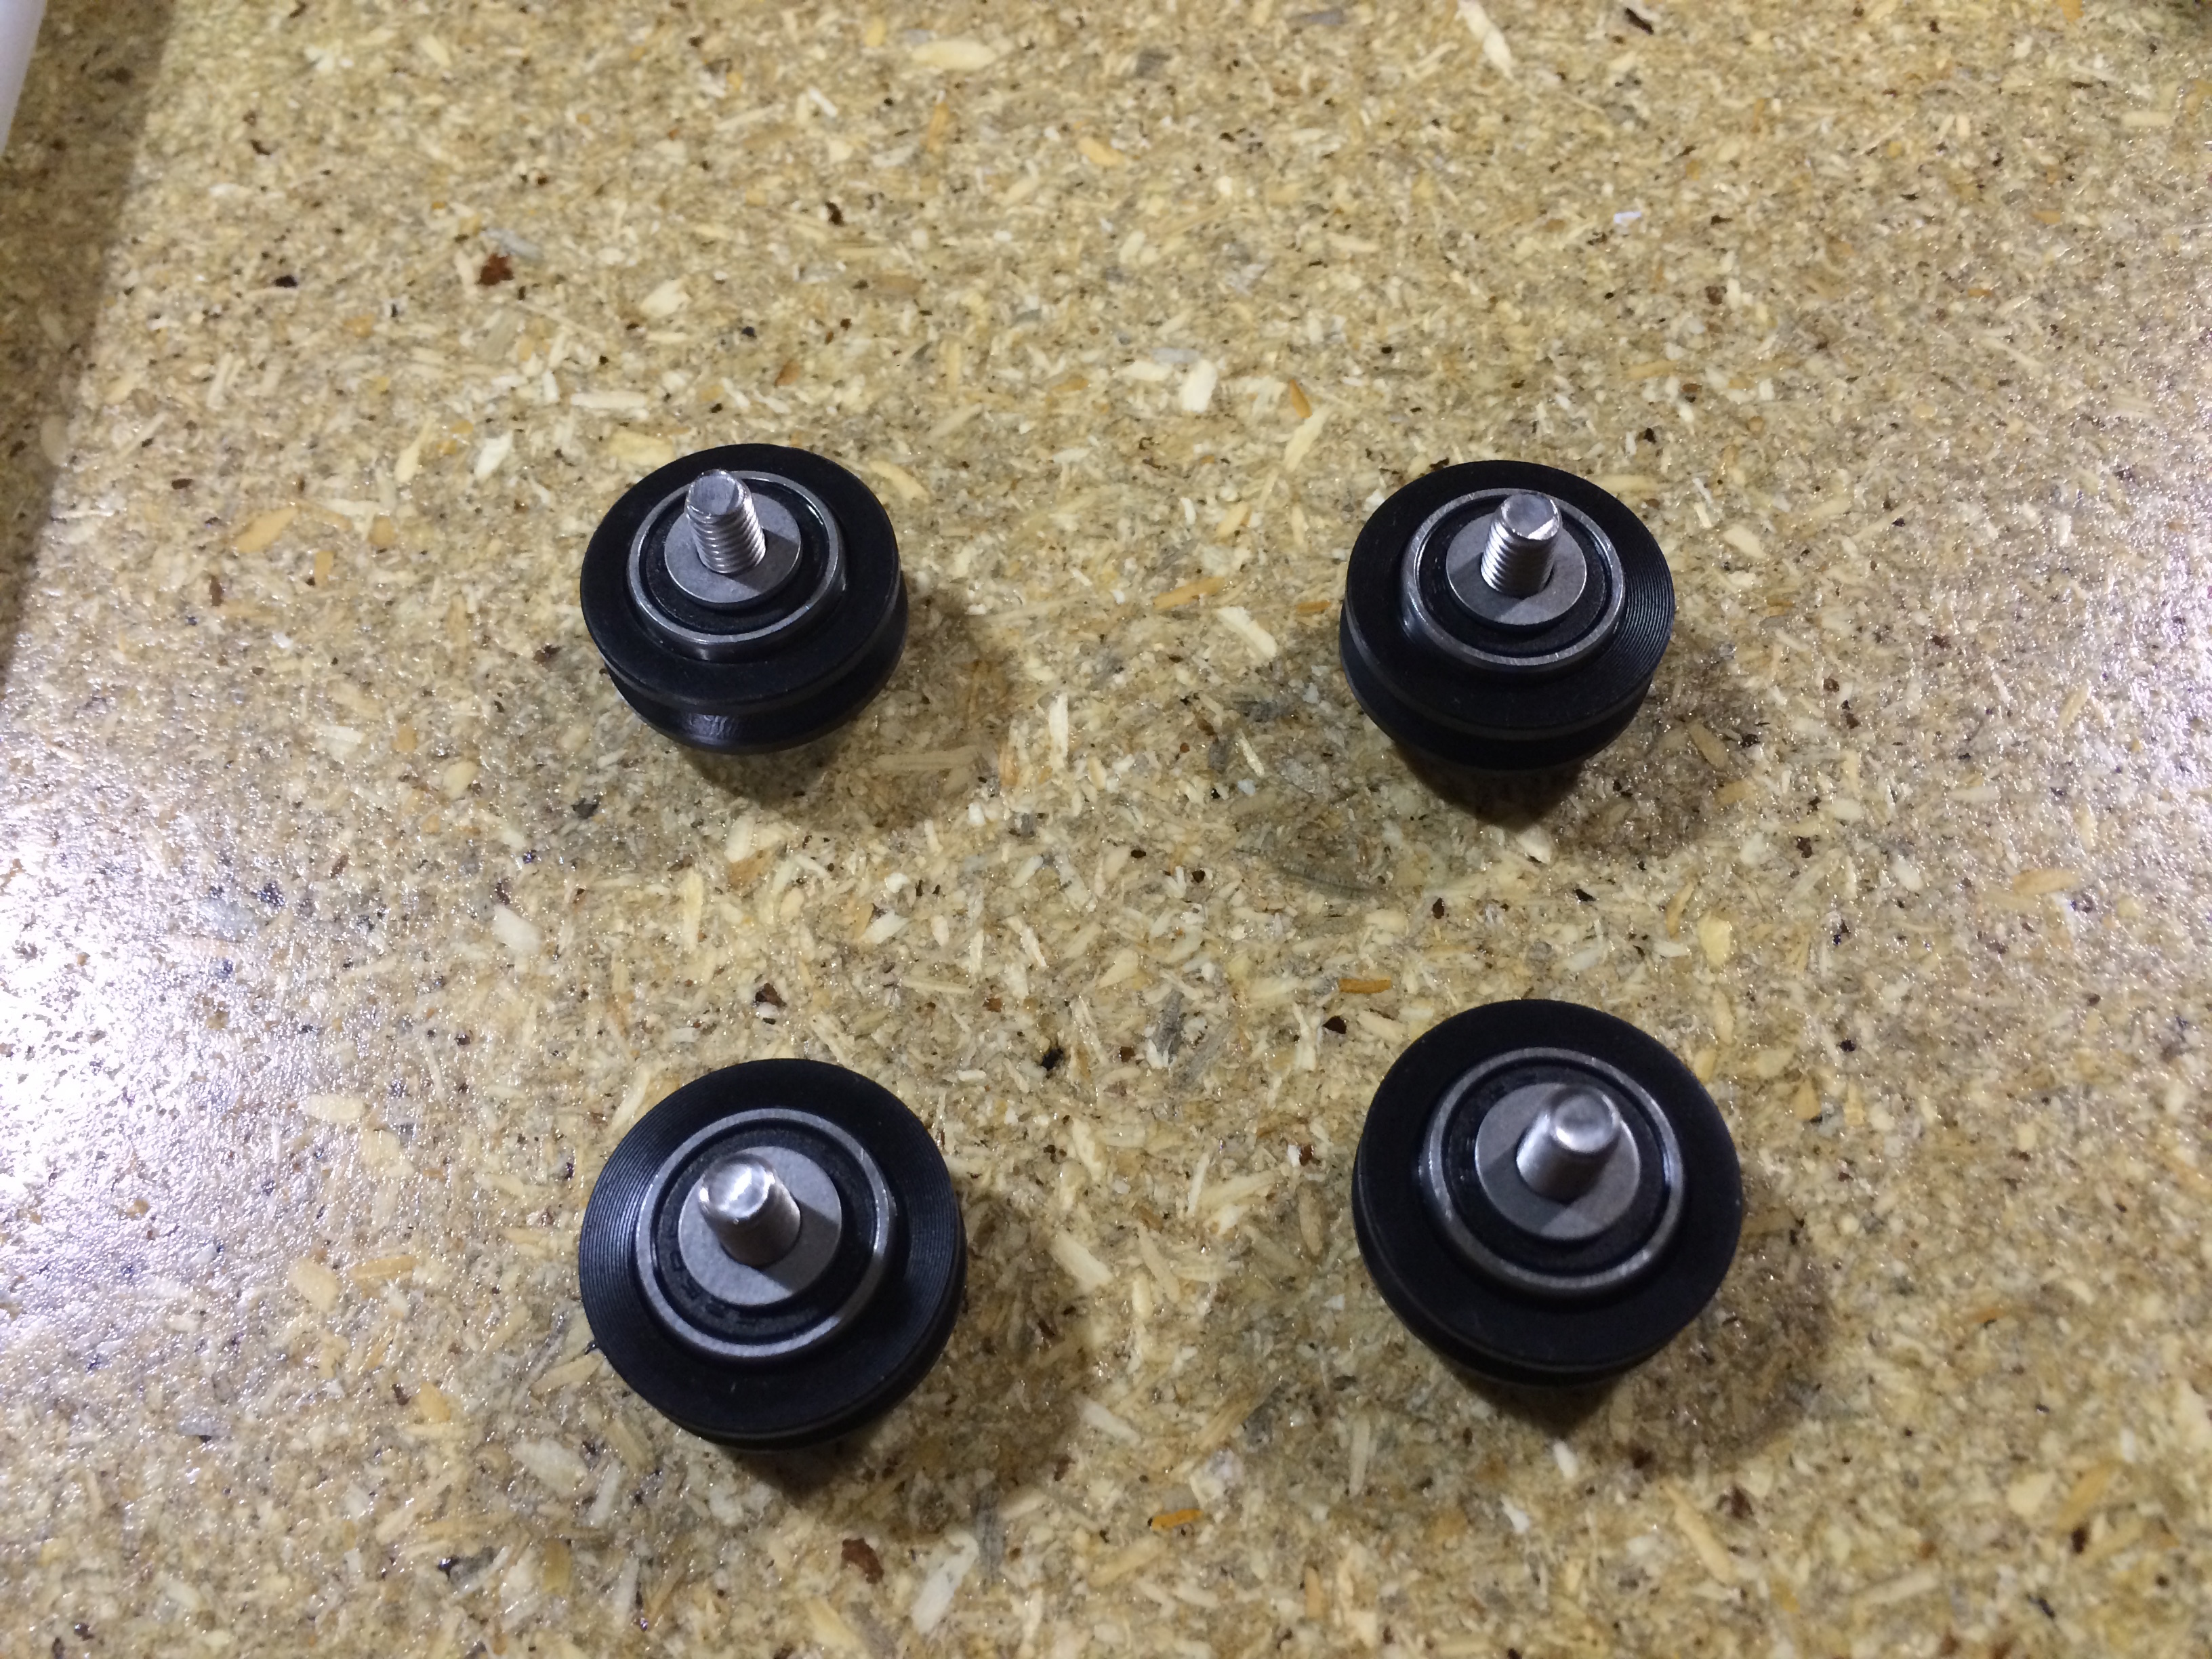
(we assemble the vwheels, then use a precision shim between the wheel and the plate, to ensure everything is in line)

I’ll post another update tomorrow. We should have some pictures of machines shipping!

wow looks awesome, I’m almost drooling now. I think it’s a great thing you are doing, it will probably cut down on some support issues trying to figure out where someone went wrong assembling as well I would think.

Yeah, getting the work-holding holes outside the working area only affords a little extra space (esp. proportional to the larger work area on the XL and XXL), but every little bit helps, and I didn’t want to give up any.

Edward, looking at the photos, does this mean that the shaft length of the motor is not increased w/ the 9mm wide belt upgrade so as to get the shaft all the way through? I’ve been debating on whether or no I should put my Y-axis motors on stand-offs so as as to reverse the pulleys and get them all the way on the shafts since doing my 9mm belt width upgrade — how does the shaft being too short work out mechanically and from a long-term perspective of wear on the pulleys and a potential for belt mis-alignment?

Edward,

You make me a little happier every time you post. Thanks. :heart_eyes:

1 Like

Will the expansion packs be serialized?

Any suggestion on how to remove the serial number plate from the old extrusions for the expanded SO3’s?

Edward

You mention pics of units being shipped. Will we get an email stating when a kit has been shipped to alleviate any wait time anxiety…

@edwardrford

On the topic of PEM nuts…on the original SO3 of mine (serial 447 I believe), I have had to “reattach” 4 or 5 of those PEM nuts already. This is a dubious process as best. I’m not sure how they were originally affixed, but the only solution I could come up with was CA (superglue). This meant a possibility of getting glue inside the threads and effectively ruining the nut or permanently making my fingers part of the Shapeoko as I try to press the nut into the perfect position as the CA sets.

Anyway, the point of all this is: since you/Carbide/Shapeoko are going full-on PEM nut, has the process of installing these onto the plates, straps, and so forth been improved such that they won’t be breaking loose from shipping, machine operation, etc.?

I’m very much looking forward to my new kit…was worried about being the early adopter and pre-ordering shortly after the announcement, but seeing all the additional upgrades, improvements, and pre-assembly info now has me excited about the arrival. I would love to see some of the same improvements made available for upgrading the original SO3 (without changing the extrusions/work envelope) as well.

Thanks for keeping us updated and always working to make these machines better.

Are we able to pickup XXL ? I am only about 2 hours away and would love to visit :slight_smile:

If you are going to use Cyanocrylate then use Loctite 493. Its specific to metal and is a wicking solution,put the part in place then literally drip on to the outer edge,its is bloody excellent stuff.

I can confirm that an email does come out with tracking info. I just got mine for my XXL.

Thanks John;

Curious when did you order your kit?

Hi All,

Time for another update!

We spent the last few days working out the mechanics of actually packing the boxes. Like most things done for the first time, we figured out our mistakes as we went and had forgotten to include a couple of items, then went back to both include the items and work them into our process of fulfillment (so we didn’t forget the same items on subsequent boxes).

The X/Z assembly took us much longer than we anticipated, mostly due to the fact that we hadn’t built a jig for it yet. We should be knocking these out by next week.

We finally shipped out some units this afternoon! Here is one of the pallets waiting to be taken out to the dock. That’s Adam in the background, probably grabbing assembled plates for the next box.

So, although we all really wanted to be at this point last week, we’re essentially a week behind. The good news is that Next week is going to be a big week! Barring any sort of catastrophy - we should have all of the XL machines shipped by the end of next week and ALMOST all of the XXL machines.

I’ll be sure to keep updating this thread as we move along.

Thanks!
Edward

1 Like

Hi Craig!

Your machine went out today :slight_smile:

The sheet metal parts (and PEM) for your S3 were made by a different vendor than we’re using now. In fact, we ditched the old vendor about 1 batch into shipping the machine last year - his quality wasn’t up to our standard, and a lot of the PEM nuts he delivered had to be repressed here in our shop.

We’ve never had a problem with the PEMs from our new vendor.

The other thing is that because the parts are pre-assembled - the PEMs will be shipped in tension (with locktite) so the chances of something coming loose are pretty slim. I think you’ll be pleasantly surprised with what you’re getting.

-Edward

1 Like

Looks like February 26th.

Are the upgrade ships after the full machine? I ordered mine Feb 24 and have yet to received an email.

Just anxiously waiting!! :slight_smile::slight_smile:

1 Like