excellent Mike. Thanks for the input. I’ll post a pic of the build.
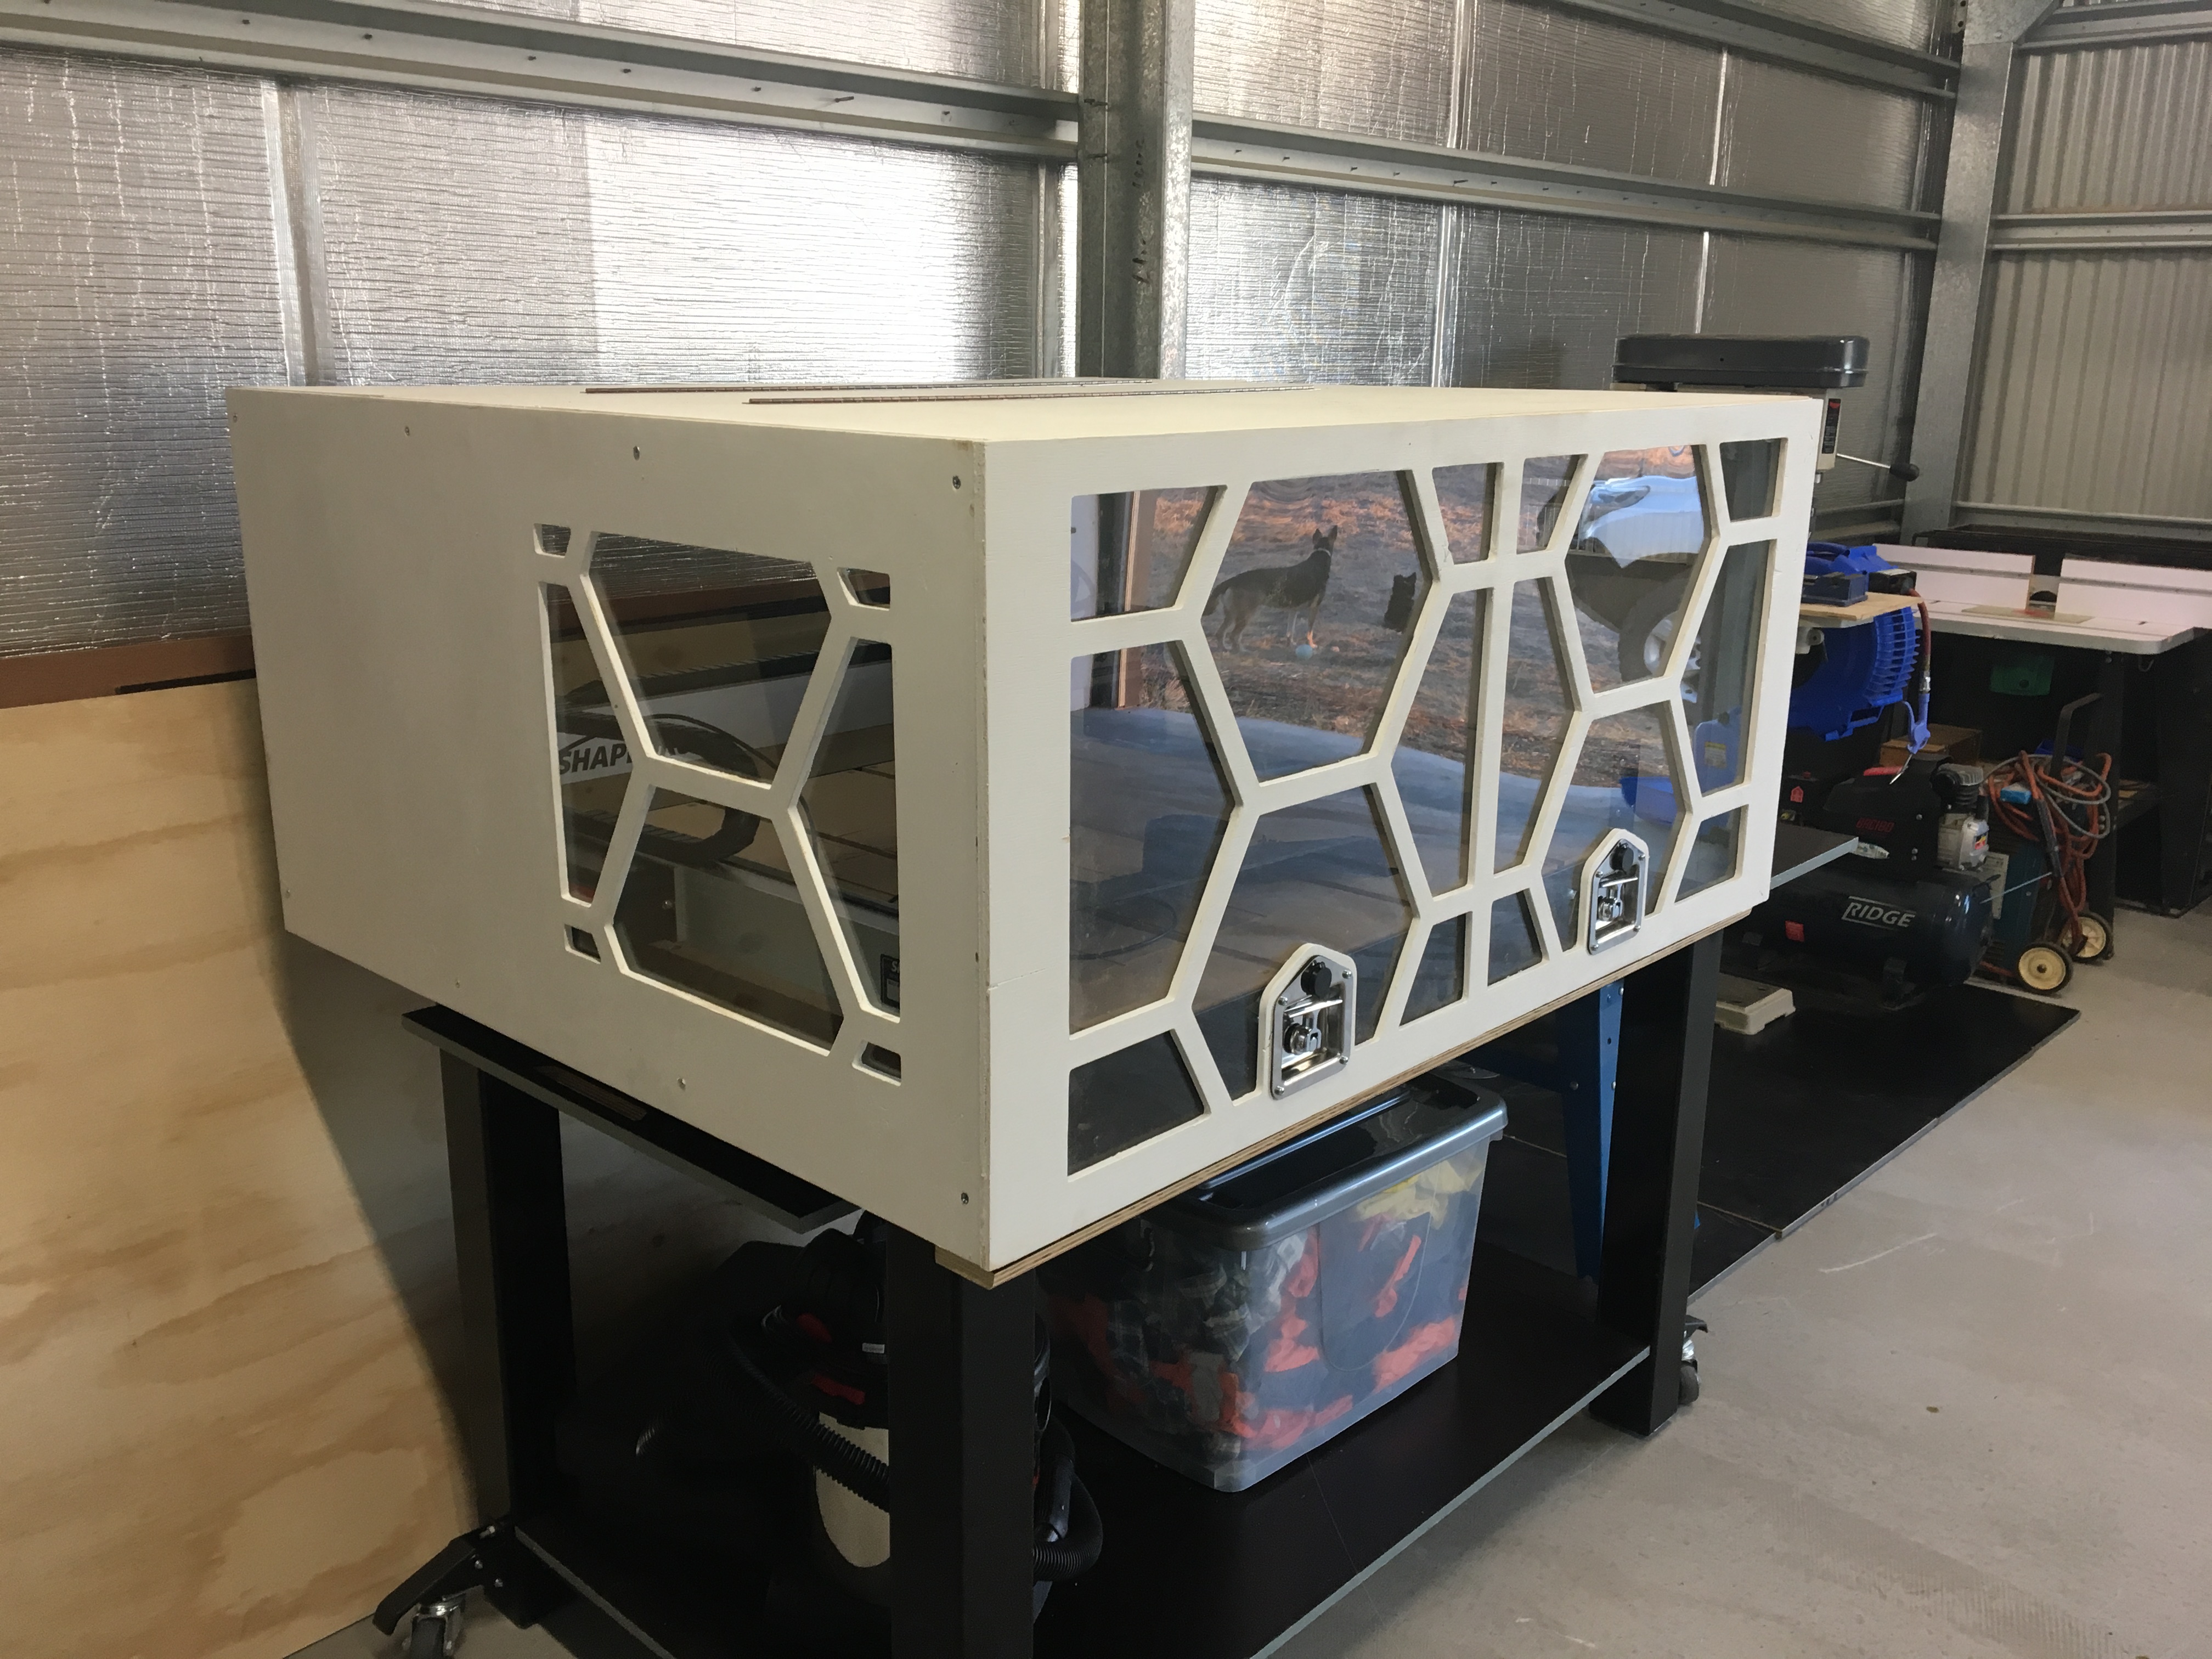
Here’s mine, it’s 90% finished. I intended to do a write up but it’s taking a while so I thought i’d throw it up in here for now. The front and rear panel both lift to allow access. The viewing panels are 3mm acrylic sheet that is recessed into the front and side panels.
I’m working on a “blow” rather than “suck” concept for chip removal and the floor of this enclosure has two large slots at the rear connected to two dust collection ports hooked up to 4" dust extractor hose. This is because I like to see the cutting (for trouble shooting) and don’t like the idea of working around a dust removal boot. We’ll see how that works in practice though.
12 Likes
On longer jobs the first indication I generally have of something going wrong is a change in the tone of cutting, or hearing an axis miss a step, this looks so well built that you may not hear those things. Do you have any issues with it being too quiet?
1 Like
I have yet to cut anything with the machine. But I guess I’ll find out soon. Awesome looking enclosure and shop!
1 Like
Our enclosures don’t have noise deadening material, but we used small rectangular air filters cut in the side or rear, wherever good airflow would be allowed. Personally I can’t tell any difference in sound levels with or without the openings.
The Festool dust Extractors are louder than the DeWalt routers with the enclosures enclosed.
Don’t worry about a carpeted baffle system until you listen to it with just a 2" hole first. You might not need the baffle. Just leave enough room inside or outside the hole to add something later if you need to.
If you need something I would try a Hayden central vac muffler first. They are cheap and super easy to add. https://www.thinkvacuums.com/vaculine-central-vacuum-square-muffler-765500w.html?account=&st-t=adwords&vt-k=&vt-mt=&vt-ap=1o3&gclid=CjwKCAjw_b3cBRByEiwAdG8WqiPiax9ui2jRu9o_Fcmql9zLtDCmAVp4cQ5_fq2lf0eNb3LmiyunkRoCtXgQAvD_BwE
2 Likes
You really need a vacuum system to keep dust down. Otherwise you will have an enclosure full of dust degrading your mechanicals and you will be forcing some dust out of the enclosure. A low flow compressed air stream + a dust shoe would be fine.
1 Like
hi Tony
I like what you built.
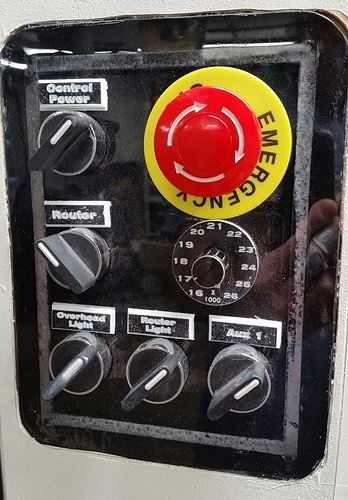
how did you manage to control the light and speed of your dewalt router from that control panel?
I am very interrested in that .
thanks for your answer.
Check this out… SO3: How to mod the Dewalt DW611 for remote speed, light and power control
I described how to modify the router to remotely control the speed and light there. Let me know if that’s what you need.
2 Likes
thanks a lot tony, this is exactly what I needed.
I just gonna wait 6 month until my router’s warranty is over, we never know!
thanks again for your sharing, my shapeoko enclosure looks like almost the same as yours
Made a quick video showing the sound difference with the enclosure. Hope it is helpful!
1 Like
Thanks for sharing the video. I’d guess the double walls knock an extra 5dB or so off. It’s hard to say for sure because bit size, router speed, material and feeds, shop floors and walls all influence sound levels.
For a reference here’s my sound attenuation video. http://bit.ly/2NYYXxR-sound-and-dust
It’s great seeing more enclosures in action. I’d never want to use a router without one now that ive gotten used to the benefits.
Hi Tony I am Loving your work I would be very keen to know how you moved the stepper control box to the outside of the housing. It looks like you have plenty of slack on the nema control wires, on my vanilla installation, I had just enough to connect with an inch or so spare so would love to know how you achieved this.
did you add longer wires etc, any help from you or others on this will be gratefully received
Thanks in advance
Sherpa
The community has notes on the connectors at: https://wiki.shapeoko.com/index.php/Shapeoko_3#Connectors
I’d recommend coiling the wire at the motors, then doing straight runs from there all the way to wherever the controller ends up using shielded 4-conductor cable. See: https://wiki.shapeoko.com/index.php/Parts#Wiring
1 Like
I just soldered in extensions. It was easy but tedious.
Tony: I am laying this box out now in CAD for the XXL - Just to be clear ,are you recommending that it be wider than your original recommendation of 48 x 48" foot print like 50" w + x 60" DP? and higher than the 19" ? Thanks
The electronics hang off the left edge a bit, and you’ll want room for cables to run.
1 Like
That is correct. I originally designed it to use less plywood but adding a couple inches to the width is worth the extra cost. Figure out how you want to handle dust collection and base the height on that. If I were to make another one I would probably try to bring the DC hose from the top. However the way I have it now works great 99% of the time.
I hope that helps.
I don’t know if I would make it any bigger front to back. The way it is I can reach the back of the cabinet easily but I have to leave the door open if I need the full 33" front to rear. I rarely need to use that extra travel up front so being able to reach the rear is worth the trade.
If I understand something like 52" w x 48" deep x 25" H? I have not figured out the DC hose but top mount makes sense to me