Hello Forum and Happy New Year!
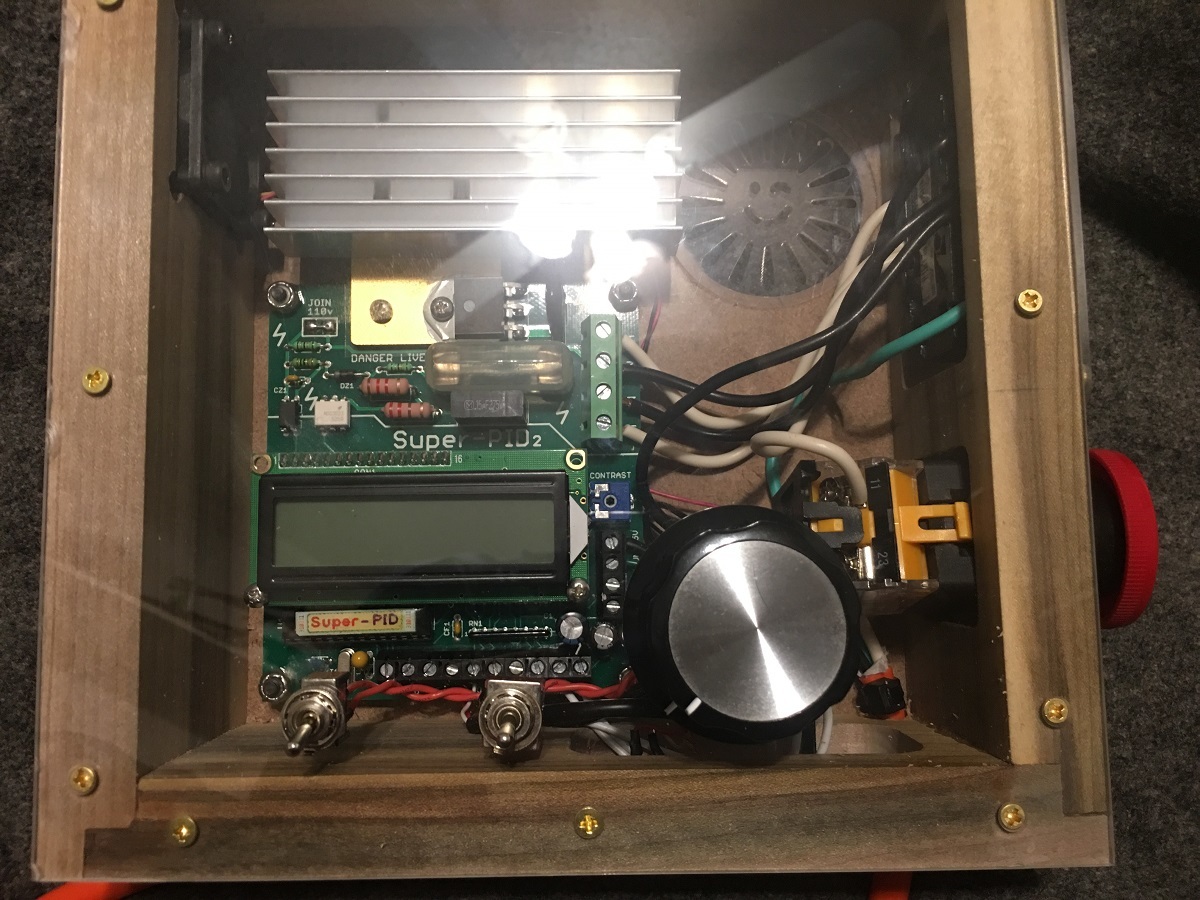
I built my XXL this past Summer and wanted to make it as versatile as possible, the first thing I noticed was the relatively high spindle speed of the Dewalt router even at its minimum speed (16,000 RPM). A little research and I found http://www.vhipe.com/product-private/index.htm and noticed at the time they were running a special 10 or 15% off, can’t remember now, so I put in an order. The order arrived from Australia a couple weeks later. Adding the SuperPID is a fairly straightforward installation, but it does take a little thought and preparation. Since I’ve only had my XXL for a little while this was somewhat of a learning/building experience. First order of business I needed to add a heatsink to the high voltage side of things, SuperPID recommends just using a small length of metal for a heatsink, but since I didn’t have that I decided to go ahead and order a proper heatsink from Amazon. Drilled/tapped a couple holes and the heat sink was installed. Next was building an enclosure of some sort (they sell some premade project boxes on the Vhipe website, but since I own a CNC router, why not make my own? Cutting the acrylic was the hardest part, my first few cuts just made a gob of melted plastic on my end mill, which I successfully cleaned off the first couple times, then finally broke my end mill in the process. I learned that if I used a small 0.063" flat end mill at a fairly aggressive 54 ipm feed, 24 ipm plunge, with a shallow 0.010" DOC and Dewalt at speed 5 I could get a pretty clean cut that wouldn’t take forever and didn’t make a gob of plastic out of my endmill. Anyways, here’s the results:
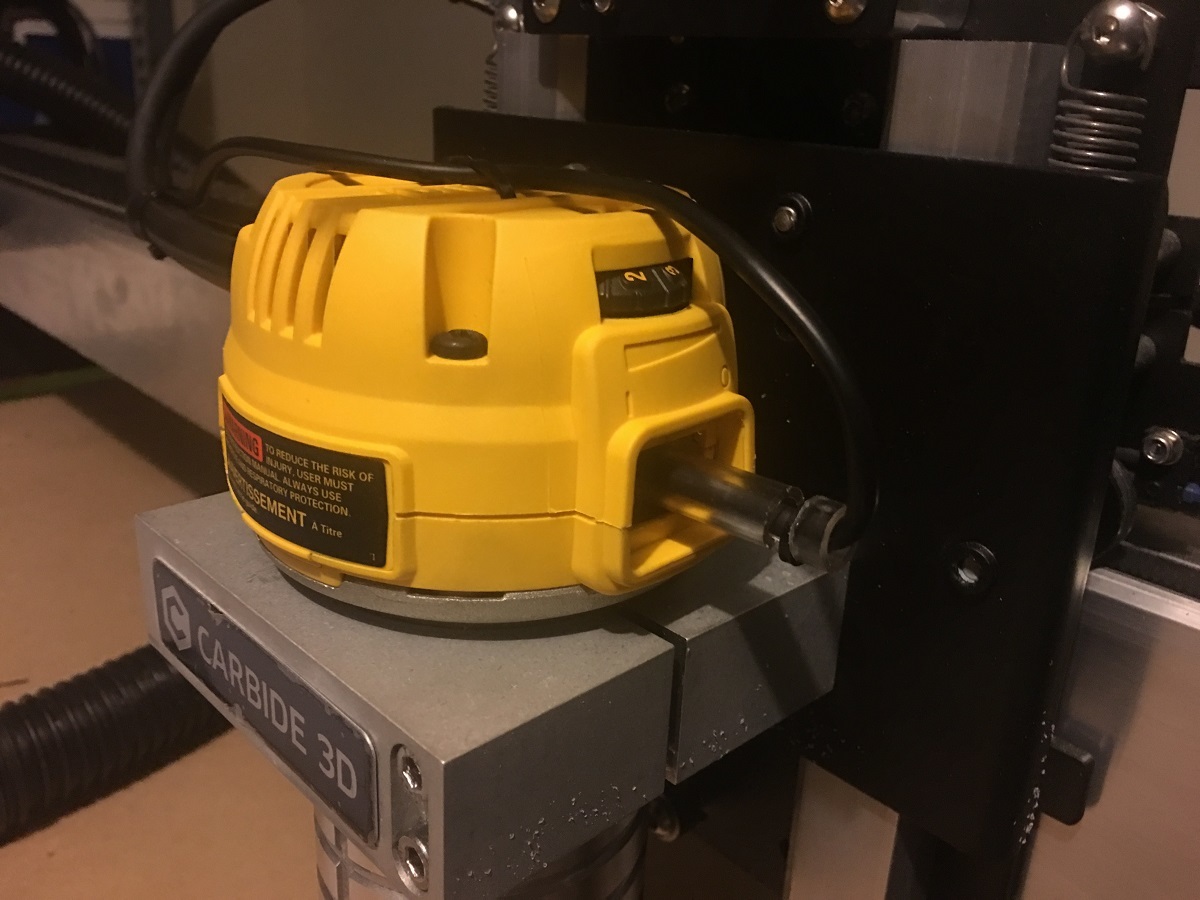
View of the spindle sensor installed on the Dewalt router. Was pretty simple, soldered a couple wires together, removed the switch and drilled a hole for the sensor tube which I epoxied in place, then secured the sensor in the tube with a zip tie. This is loosely explained in the SuperPID documentation, but the actual execution is up to the end user:
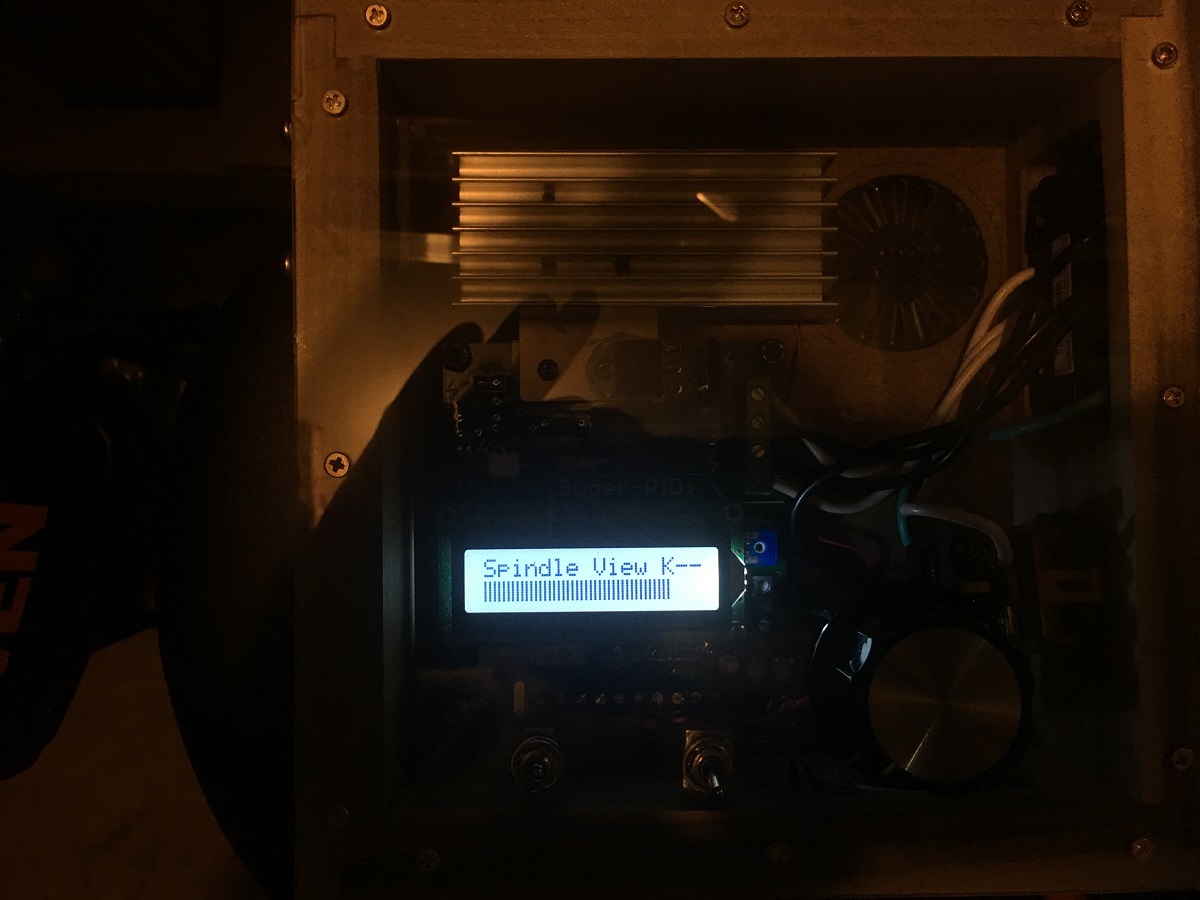
This is the spindle view which is used to adjust the distance of the spindle sensor and ensure proper operation:
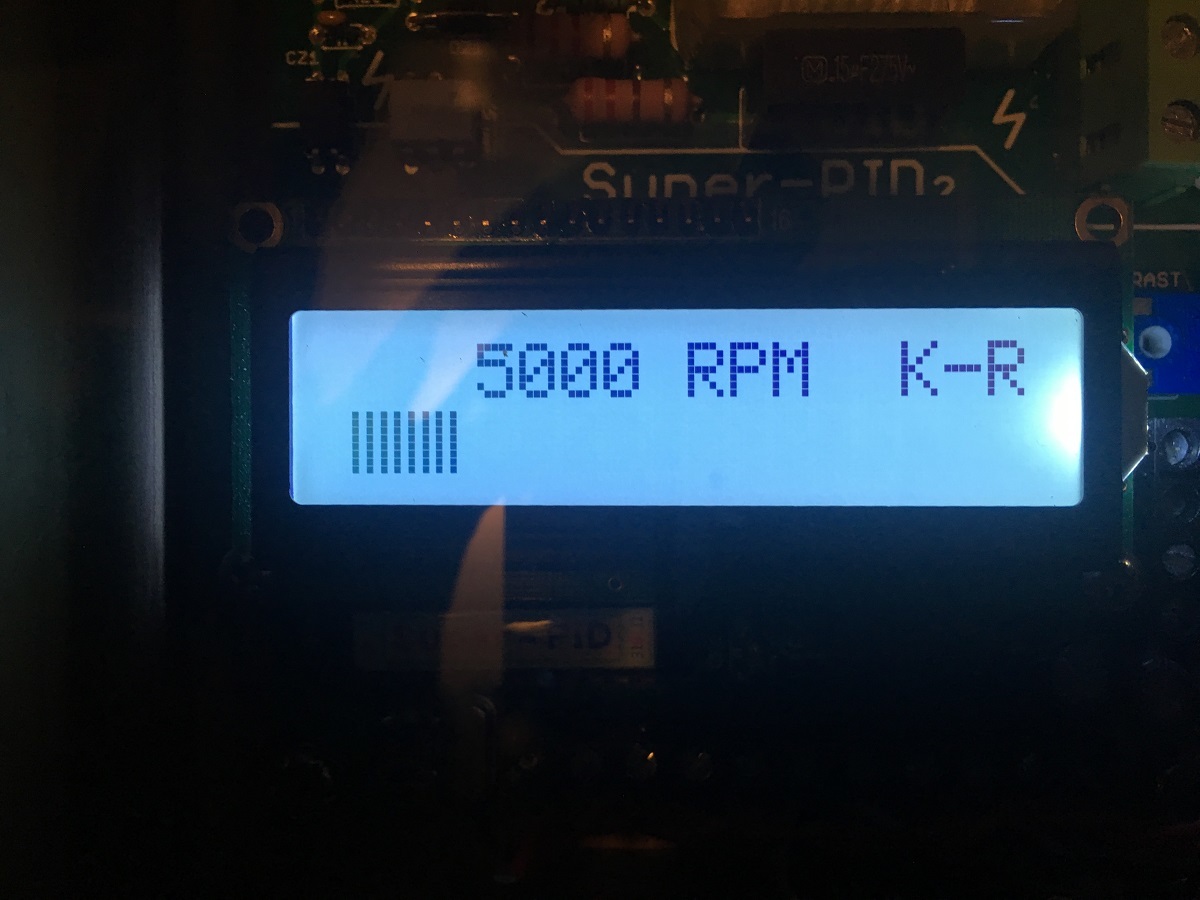
Running view of the Dewalt running at its lowest speed. There’s some fluctuation in RPMs, but very little, maybe +/- 5 RPM, I doubt it’ll make any difference when cutting:
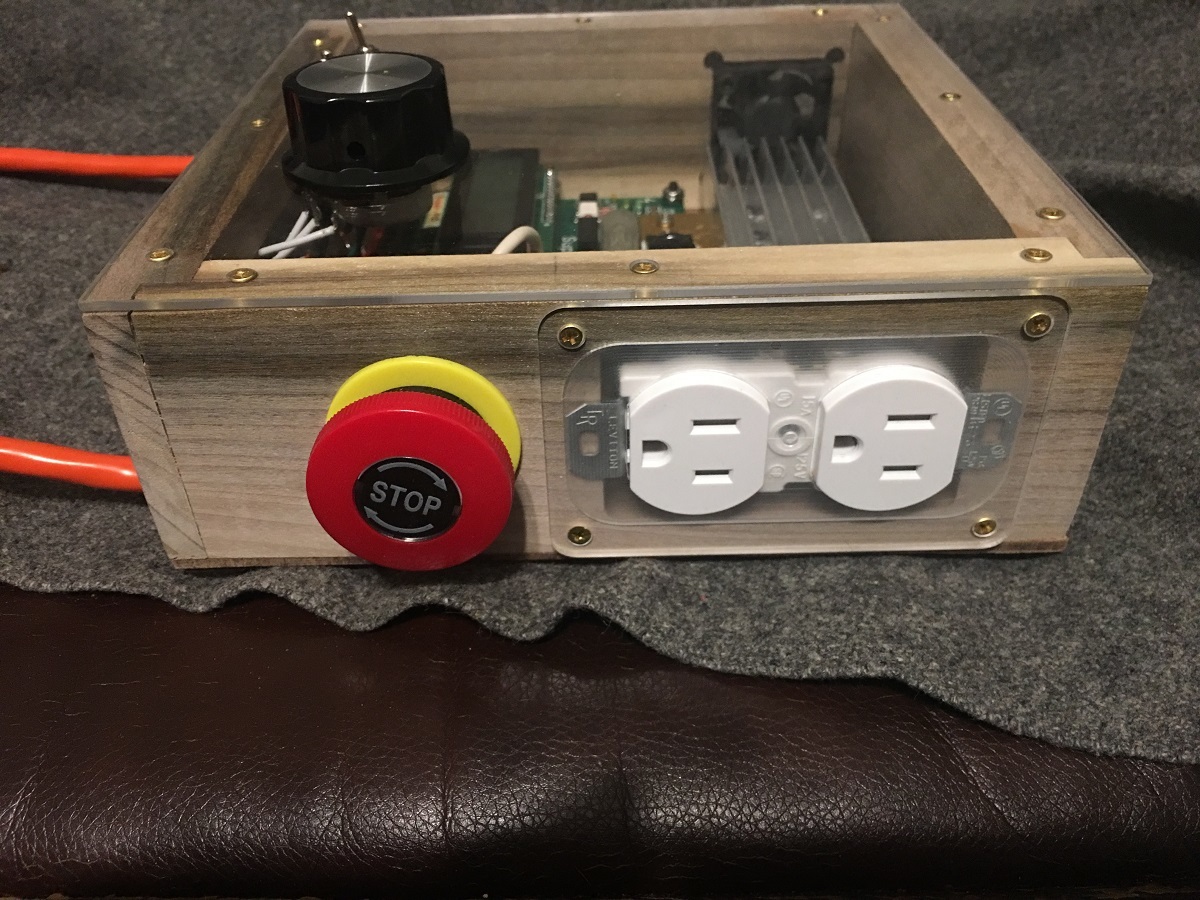
And here’s the completed enclosure. I opted to use knob control rather than PC control, maybe I’m a control freak, haha!!!:

I integrated a kill switch that I’ll use to cut power to my SO3 (bottom outlet), as well as cut mains power to the SuperPID itself (5V power to the SuperPID IC itself is not cut, but it isn’t going anywhere without mains power):
5V power (right hand) and RPM sensor signal (left hand). I grabbed 5V from a USB cord and just changed one end to a power plug I picked up at Radio Shack, the signal wire plug I used a 1/8" stereo headphone jack. As I got more comfortable cutting acrylic I decided to inlay this piece rather than top mount it as I had done with the power outlet plate. The wood I used is just 2 1/2"x 3/4" strip Poplar that I picked up at Home Depot. I’ve been doing wood work for years and have always been happy with how easy Poplar is to work with, and sometimes you even get a nice piece with some mineral streaking like the piece I used for my enclosure…I know it’s not “real” wood like Walnut or Maple, but it’s also much less expensive and you don’t feel bad when you ruin a piece:
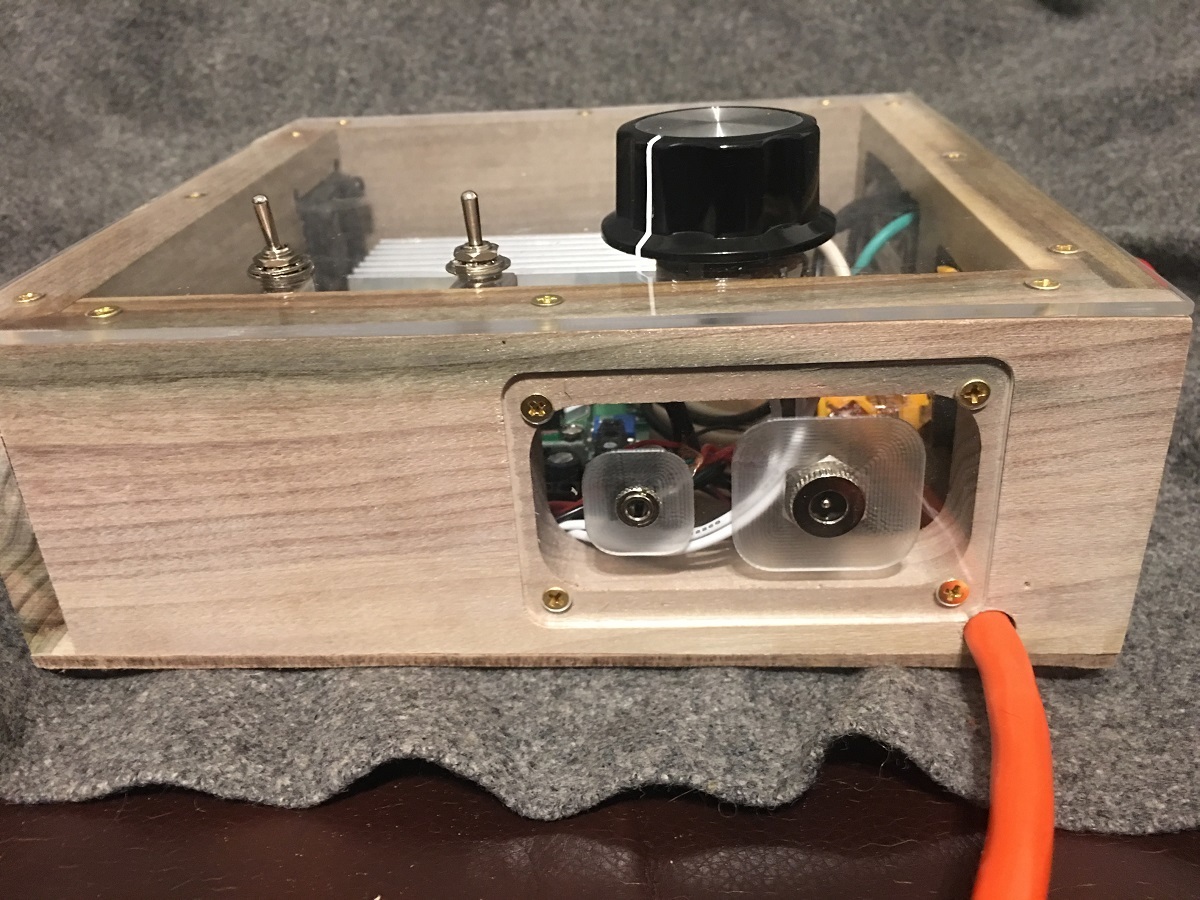
I bought this little fan from the Vhipe website when I ordered my SuperPID, it’s also powered from the 5V USB I use to power the IC board. It draws air OUT of my enclosure to keep the dust to a minimum.:
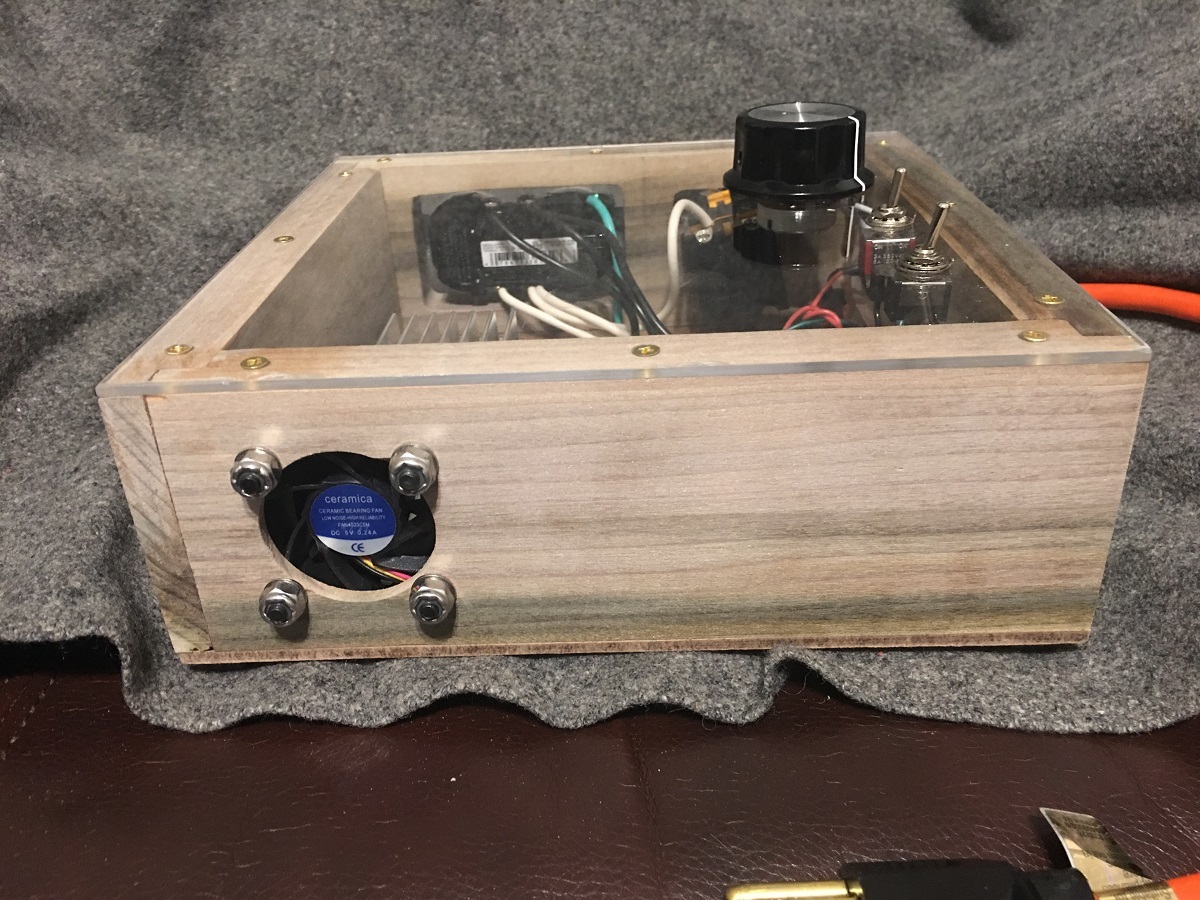
Air comes in from the backside of of the enclosure through this little acrylic inlay I did (yes, I stole some elements from the Carbide Create library to create this vent). I was starting to feel pretty comfortable with acrylic at this point and actually did a two stepped inlay in the hardboard and acrylic. It is fixed in place by friction only, very impressed with the tolerances of the SO3 at this point:
Final view of the whole thing from the top (SuperPID/fan power switch on left, “run” switch middle, and big RPM knob on right). I finished it all off with some small brass wood screws. I used some overlapping joints on the enclosure and just glued together with wood glue, seems pretty stout.
All in all I’m pretty happy with the finished product and I’m hoping with the more versatile speed envelope I can work with some materials that tend to melt rather than cut. I learned TONS doing this project as well, really happy I didn’t just buy a project box.
Dan
