I am trying to remember one with a feather. Do you have a picture?
John:
Sorry for the delay in responding. I was watching this on YouTube a few days ago. I will have to somehow try to go back and find that before I can give you more information. While I have you on the hook, in one of your box making projects you used the design of a gecko lizard. Any chance of getting a copy? I found one but the image is so bad I don’t think it can be used.
Again, thanks so much for your precious time and help.
No problem at all. Mr Lizard can be found here:
I thought I had him linked in the comments, but it’s been a while.
2 Likes
John:
Got it. You’ve spent a lot of time with me. Thanks for your graciousness.
Blessings to you,
Mark
1 Like
John:
I am wondering if you would allow me to intrude on your time once again. I have designed a simple door or wall nameplate and am wondering if you would take a look at it (file attached) and make any comments you feel would help me with this. One of my concerns is with the lettering. In the past I have had lower case letters, like “e”, chip out the center of the letter. Any thoughts on this?
Thanks,
Mark
Pastor Letrell.c2d (709.9 KB)
Looking at the file, I don’t see any big issues. The letters are a little on the small side, but they should still be doable. There are two things I would consider, first is the material itself. If you are using wood, it needs to be a hardwood. Anything soft like pine is going to be a mess. Woods with a big grain like oak can also be a problem. Hard Maple or another tight grain wood will work best.
A sharp bit is the second piece of the puzzle. With smaller pieces, you can also back off on the depth of cut a little bit, so that each pass is a bit more delicate.
Does that help?
2 Likes
John:
Thanks. I will bump up the size of the letters. I am using wood. There aren’t any hardwoods in the local stores, even the big box stores like Home Depot and Lowe’s. Poplar and oak are about the only hard woods. If I want to drive 2-3 hours to a big city I can probably find it. Thanks, you’ve been such a great help.
Mark
Yeah. Georgia is the same right now. Poplar is an option if a bit ugly. I did find a place outside of town but it’s an hour drive. Very much worth it though. I go about once every 2-3 months.
This is fantastic! Thanks so much for posting this.
1 Like
Thanks for posting the tutorials. They were really helpful. I decided to give them a try this morning. Worked with your basic idea but made some modifications to match the way I usually handle work holding. I don’t have great clamps and really like bolting the wood directly to my spoil board. Started with the board and had the CNC carve out the two holes on either end with a larger hole that was done like a counter sink. Those holes are exactly spaced so they match the threaded inserts on my spoil board and then I can bolt it down. The other thing I changed to save time was to drill a hole directly in the centre of the board. That could act to help me center for carving the top.
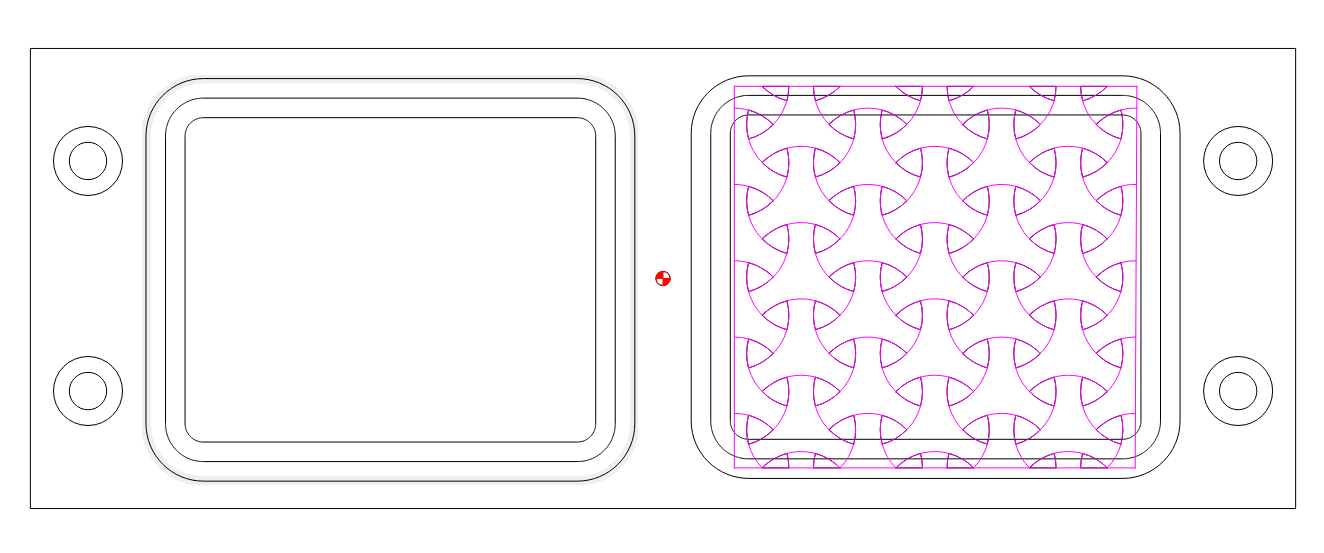
After I mounted the board with the bolts and re-centred the machine off the hole I drilled I surfaced it. Since the bolt heads are sunk into the board I could surface the whole thing. I then carved the design in the top. Then I flipped the board re-centred it again using the hole I drilled in centre and carved the actual box lips, pockets and the cutout.
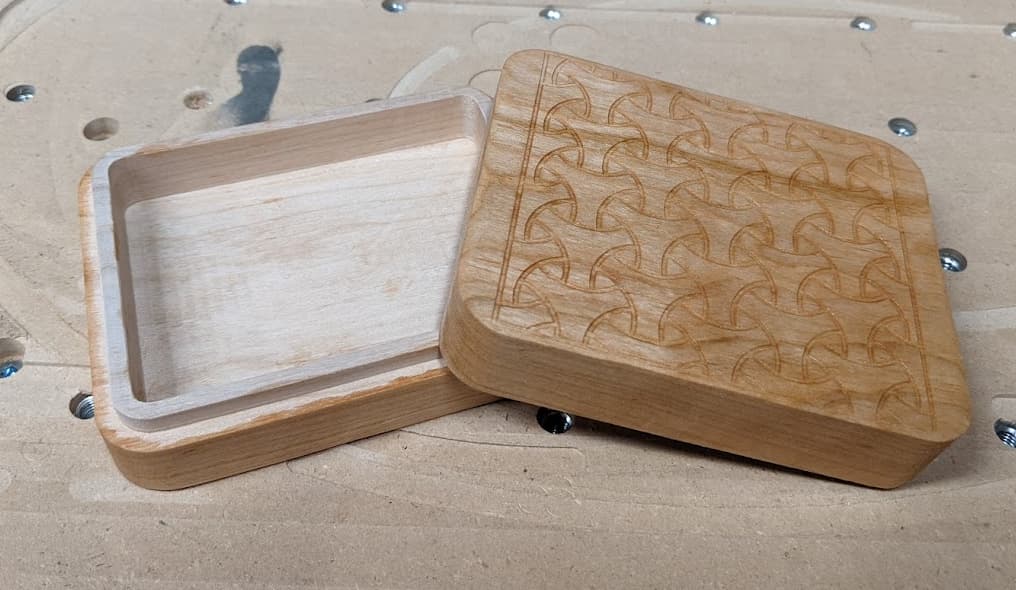
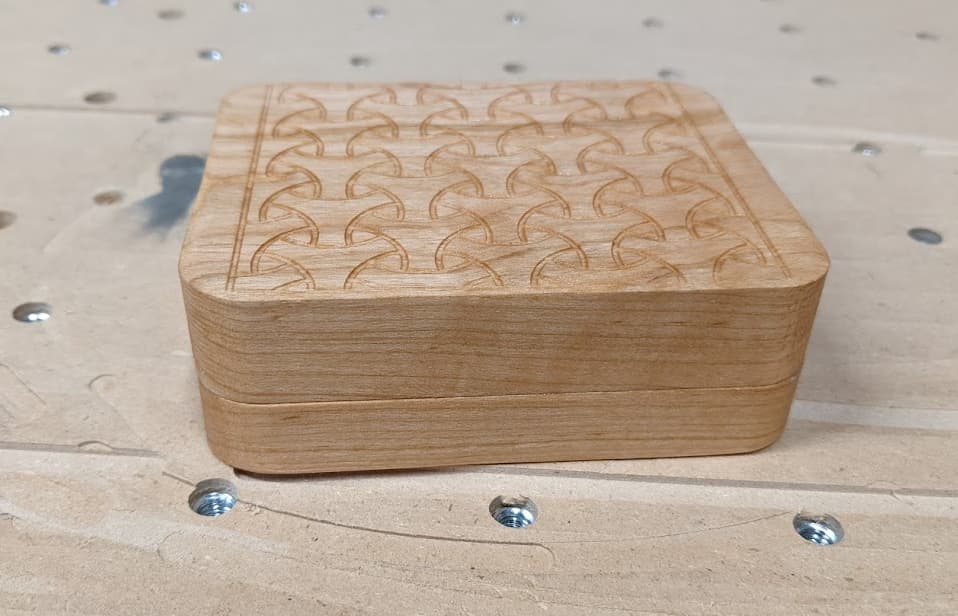
Here are a couple pictures of the finished product. There is obviously still finish to be applied but I am really happy with how it came out.
I will definitely be going back and watching more of your videos. You have done a great job and I can’t wait to see what other videos you have.
4 Likes