@rderstadt G10 - nice choice.
The material will be what I have on hand- I know I have some hardwood and plan to use some brass for an inlay as well.
I will start with some tests in acrylic to prove the design first.
My kit arrives tomorrow!
Parts are in-
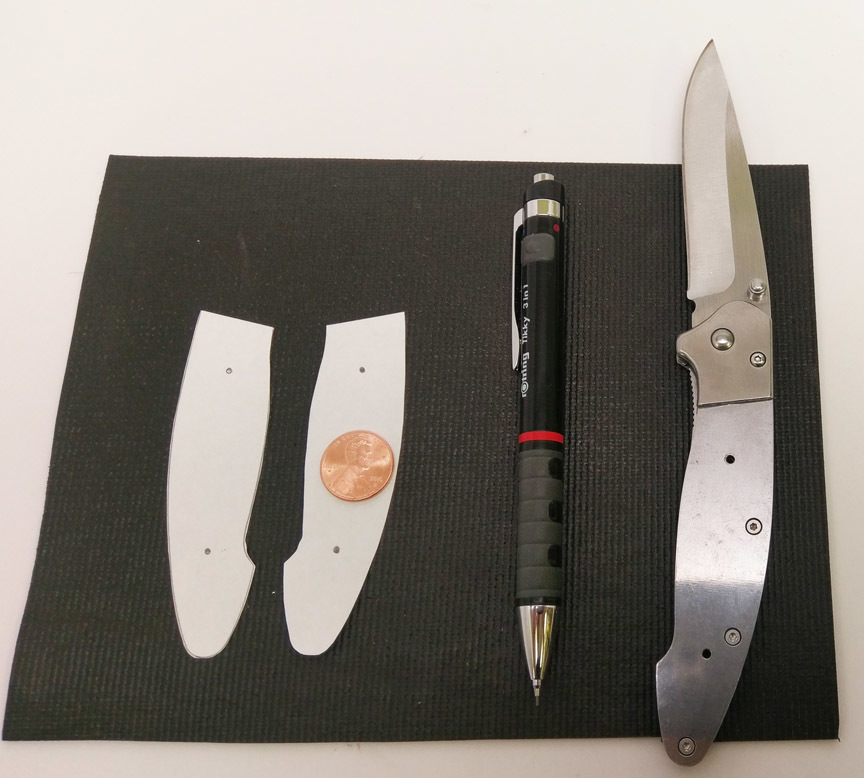
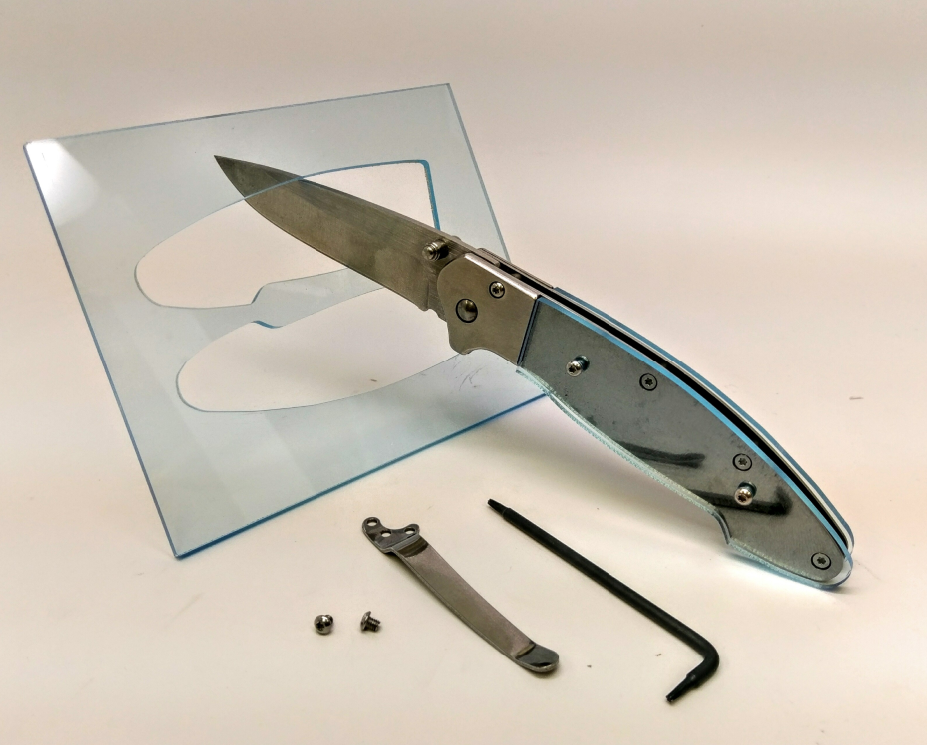
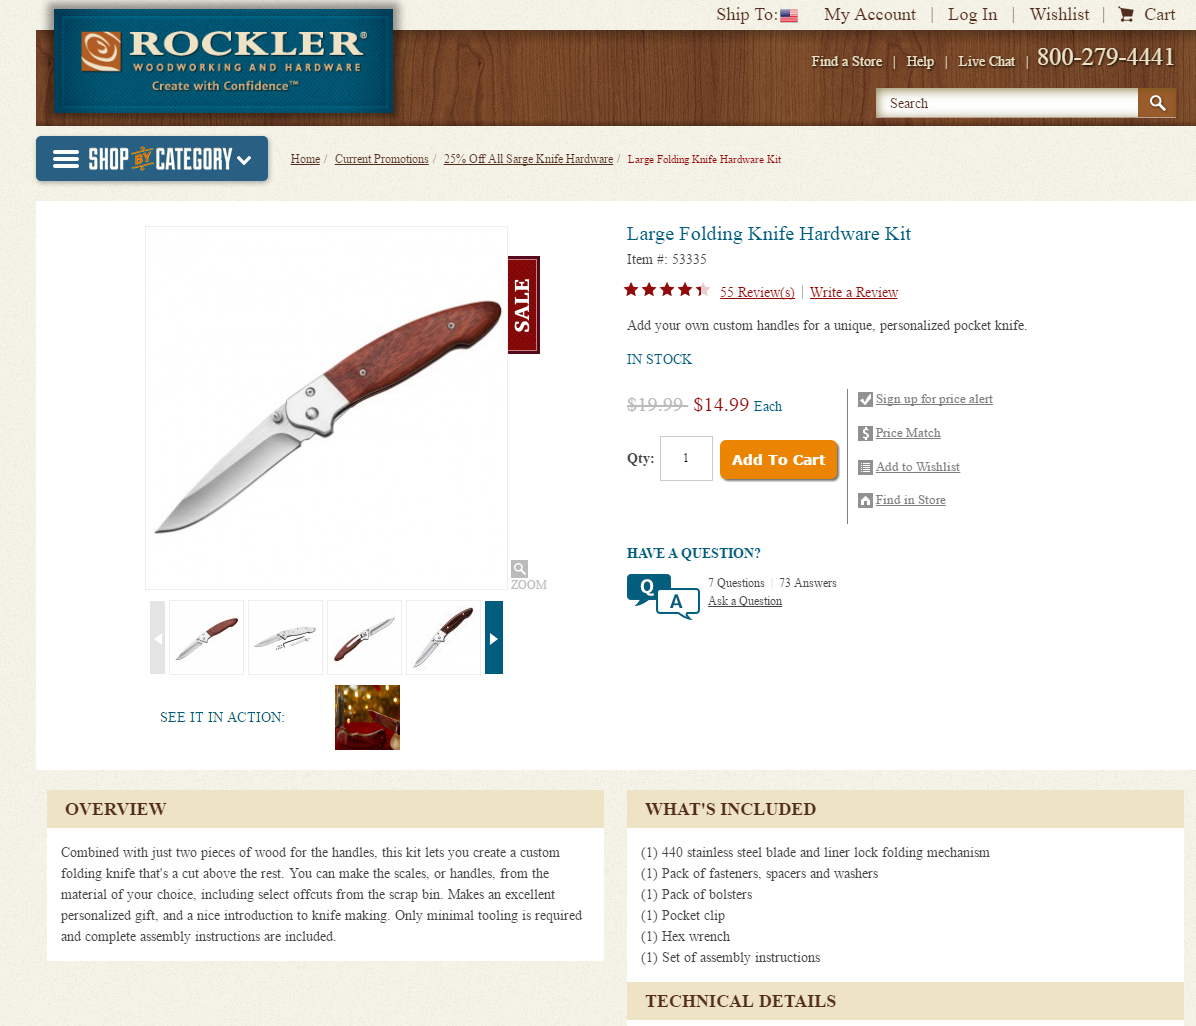
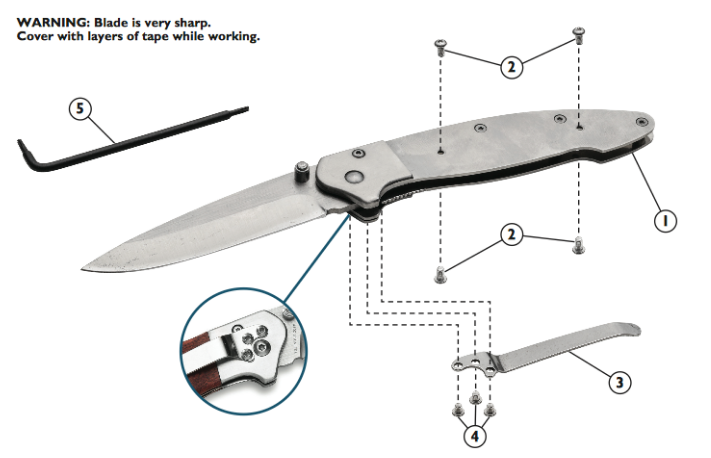
The Sarge Folding Knife kit contents:
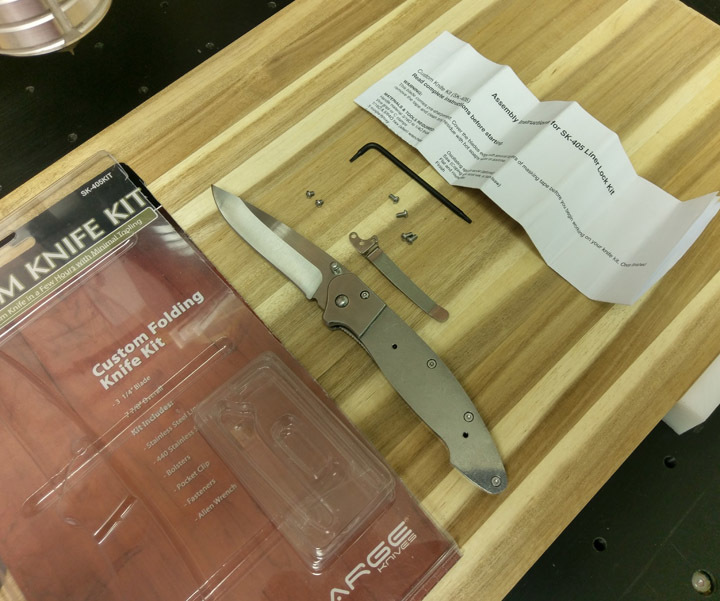
The kit was missing a little screw…
Rockler has some nice instructions for the kit:


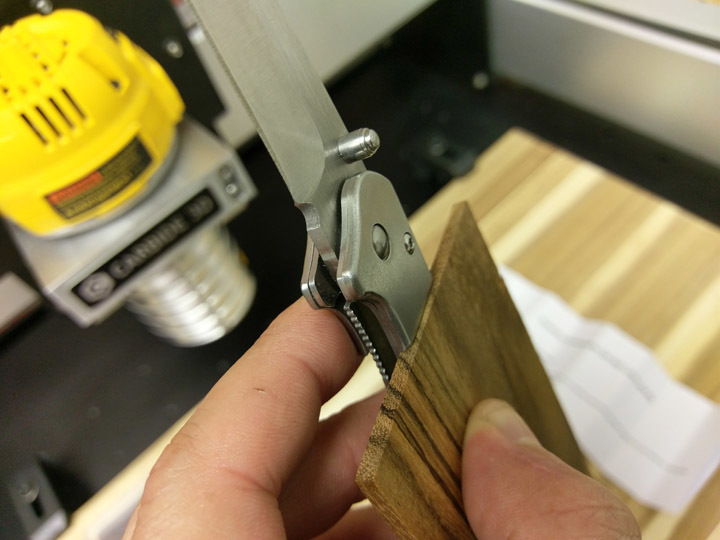
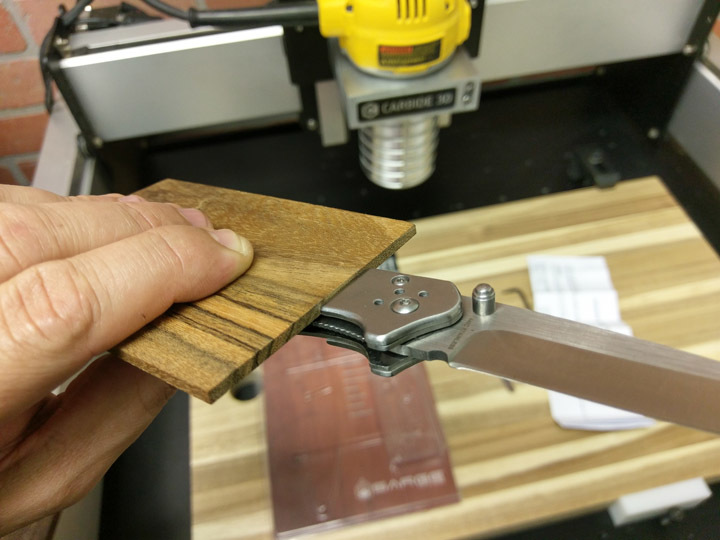
Heres some 1/8" thick stock, this would be the thinnest that would work with the stock belt clip.
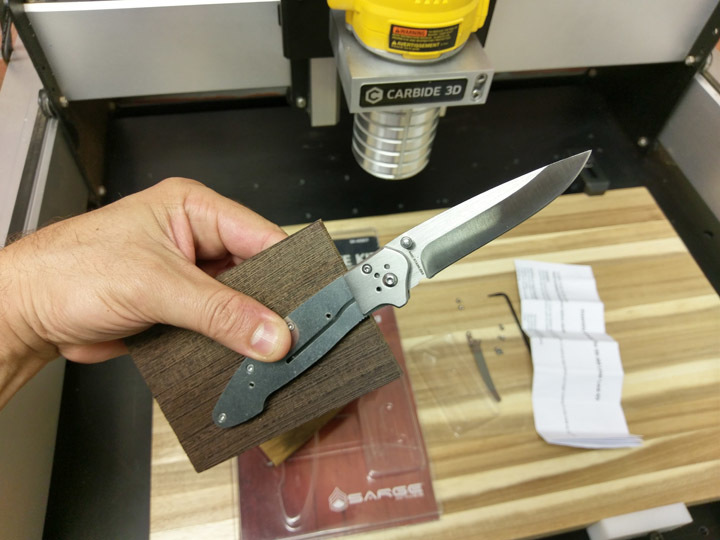
Ok, next step is tracing the knife handle in Carbide Create, or your CAD of choice.
Almost ready to get the Knife “Scale” project into Carbide Create, First I need a clean tracing of the Handle and something for Scale.
A Penny happens to be .75" in diameter so Im going to use that dimension in Carbide Create to scale my background image map to.
Any body know why they are called scales?

I folded some paper over to make a matched pair to trace in CC.
I prefer a mechanical pencil for tracing, this (Rotring tiki is pretty neat.)
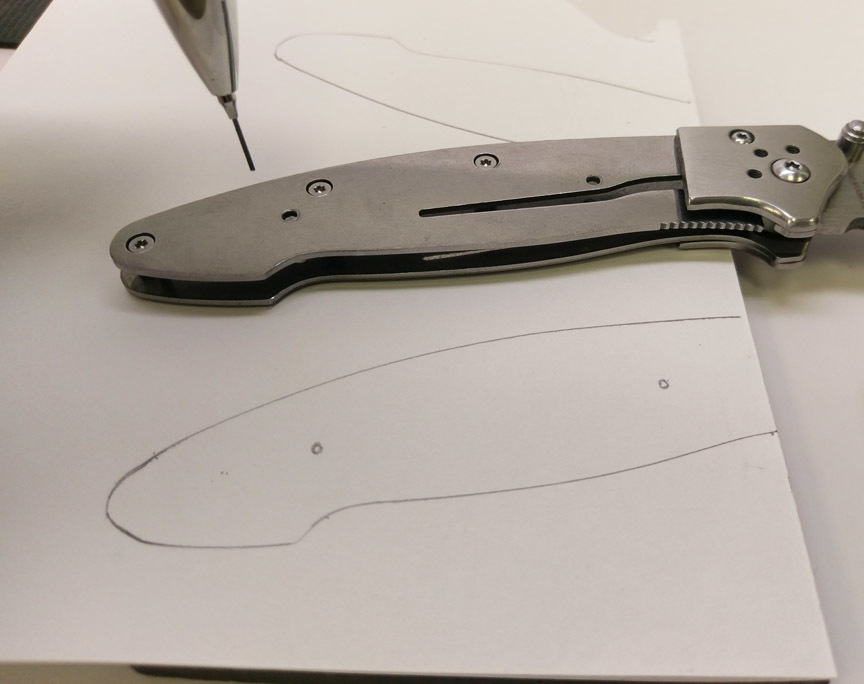
I was able to extend the lead and get all the way through the knife to mark the Hole locations.
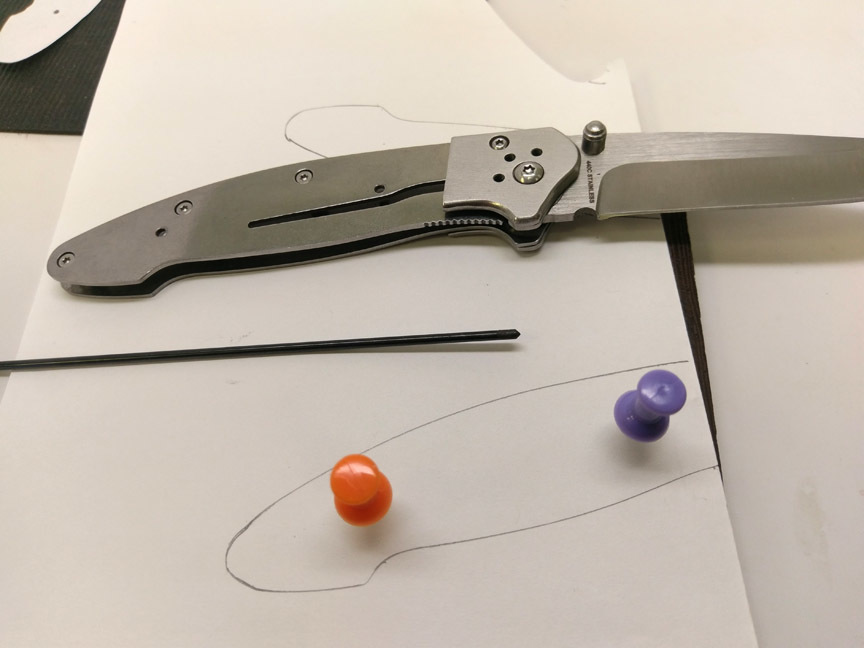
I also could have used a transfer punch, 2mm was closest. Dont forget to transfer the hole locations through the paper to the other half.
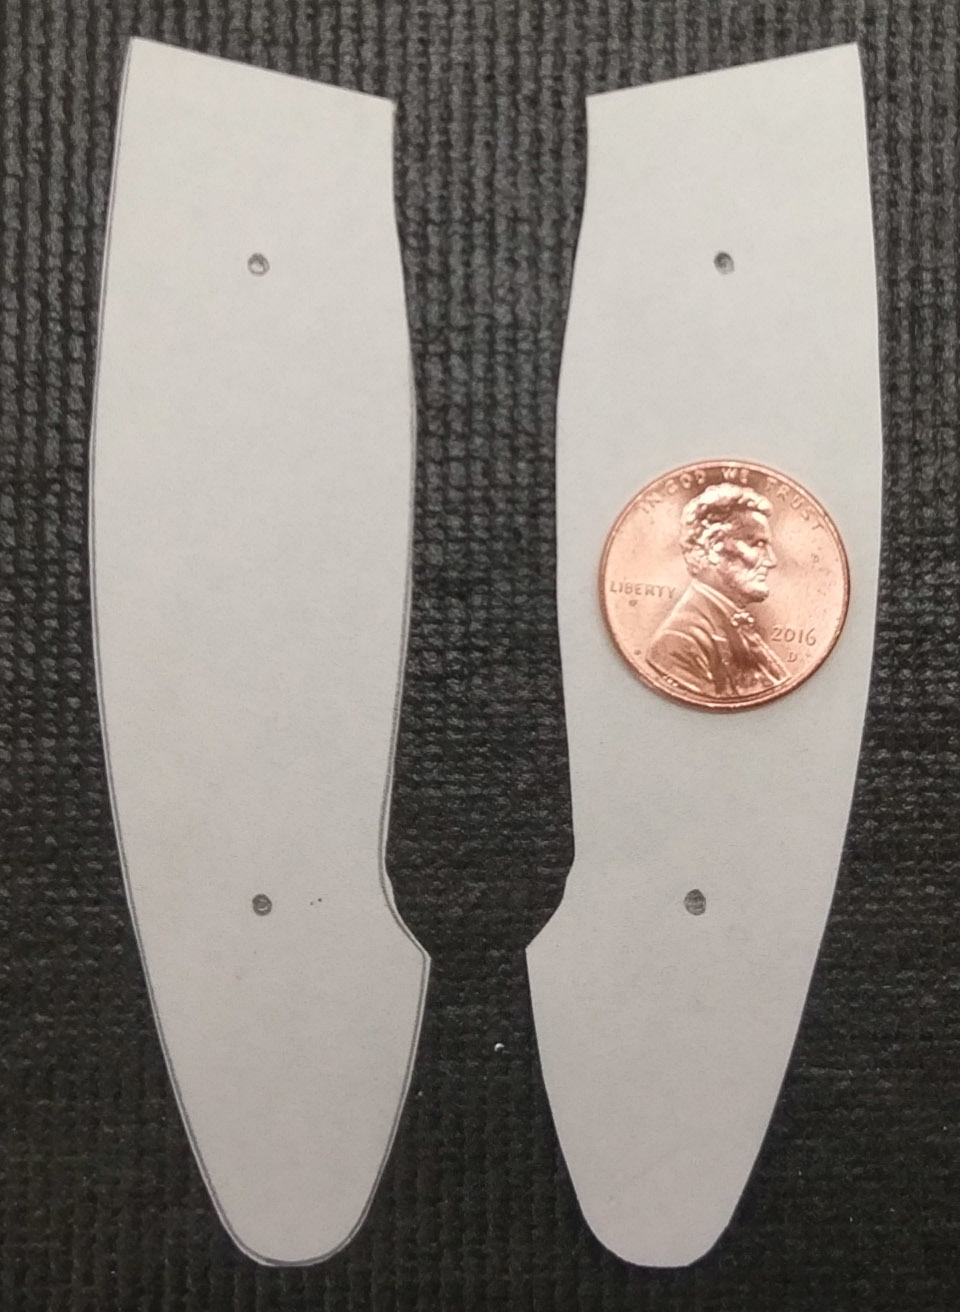
Scissor magic and heres the picture that will be used as the background image in Carbide Create and traced.
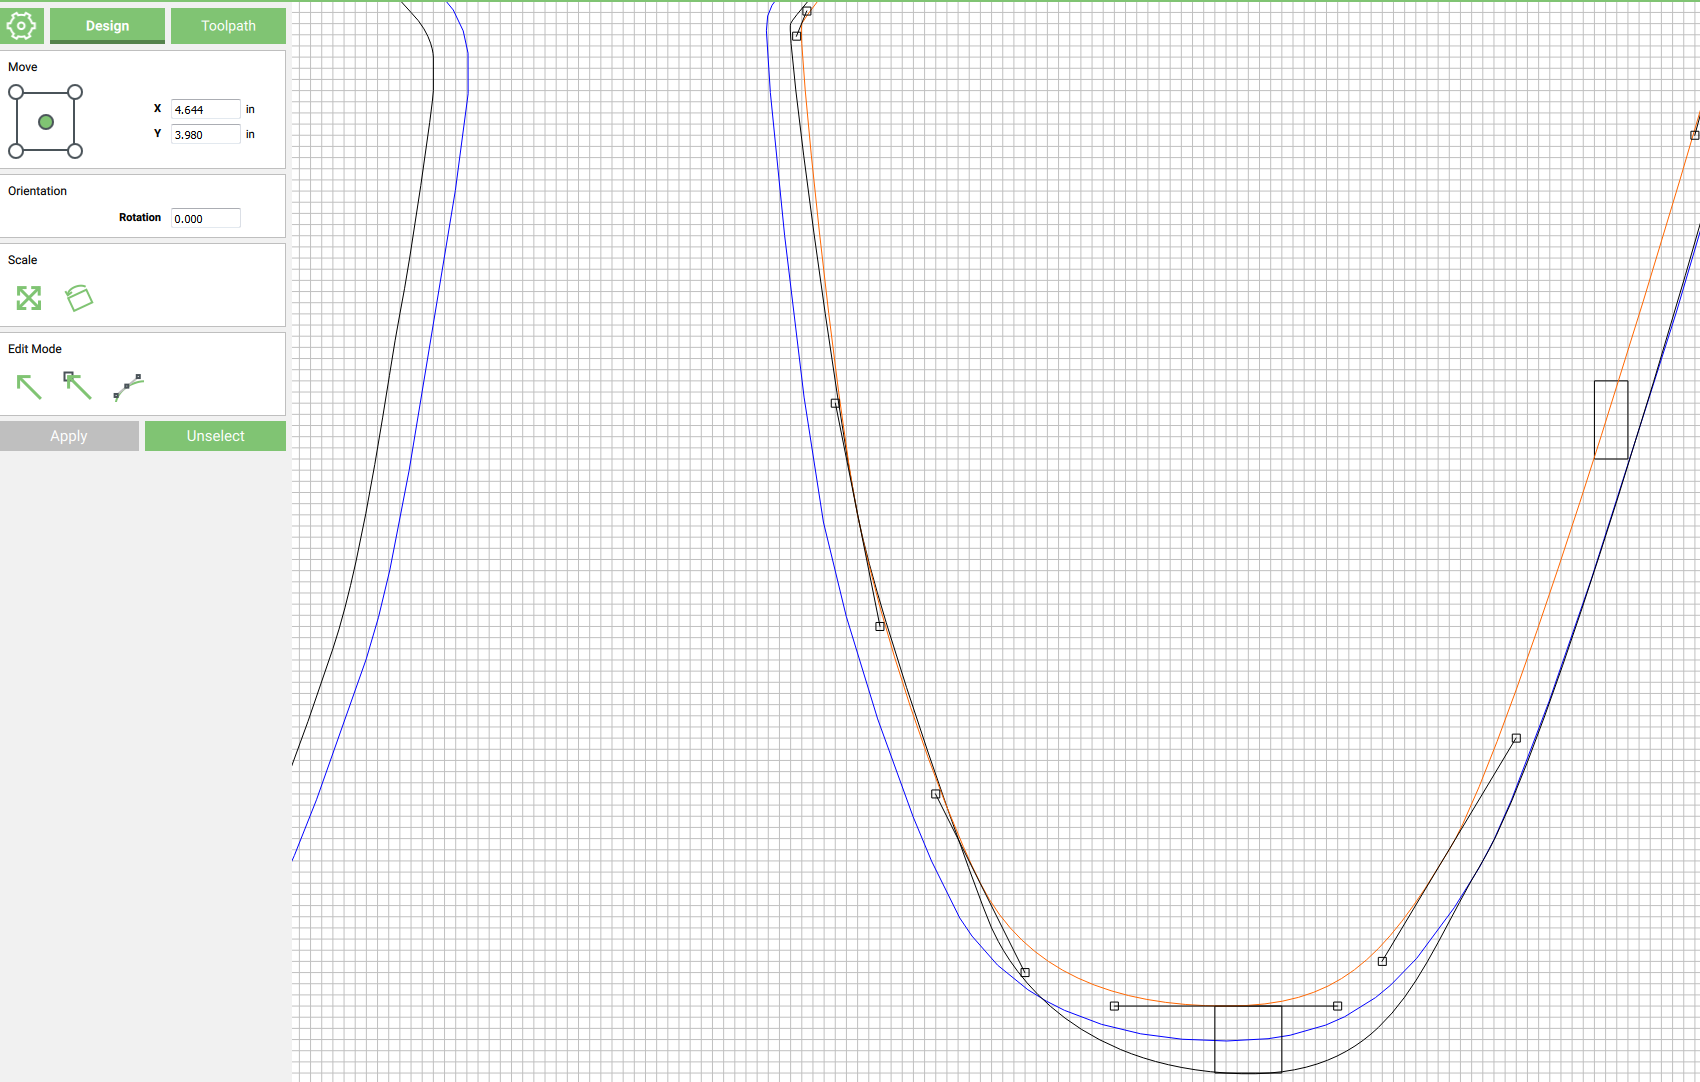
Next is scaling the image in Carbide Create and tracing the outline.
Hows everyone doing?
Happy Friday!
Tracing the knife scale pattern in Carbide Create
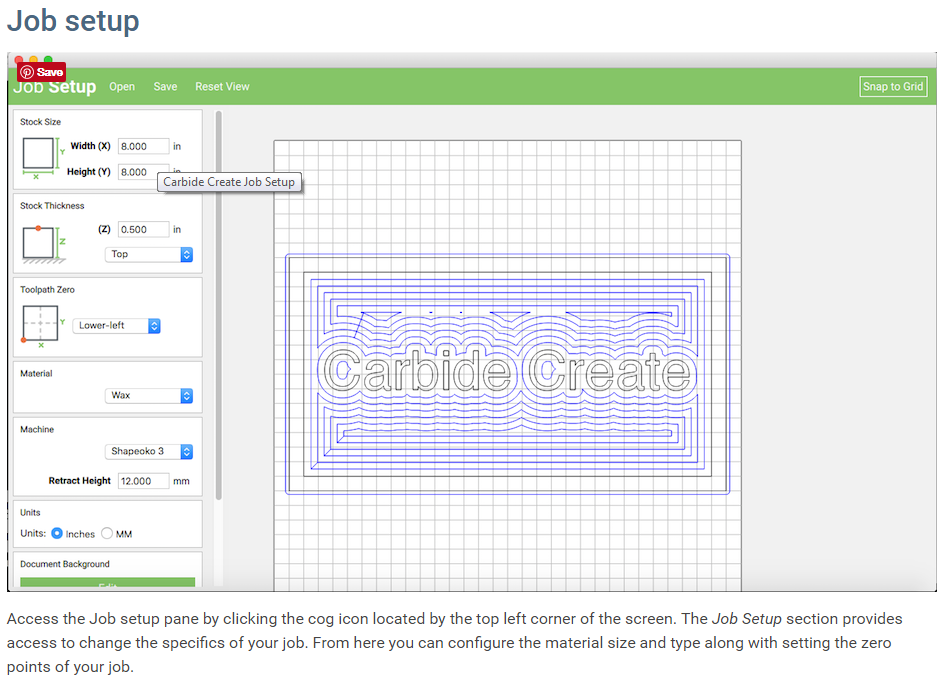
To place the knife scale image click the Document Background on the Job Setup pane in Carbide Create.
This is where Grid Spacing can be adjusted, as well as placing, scaling, and adjusting a background image for tracing.
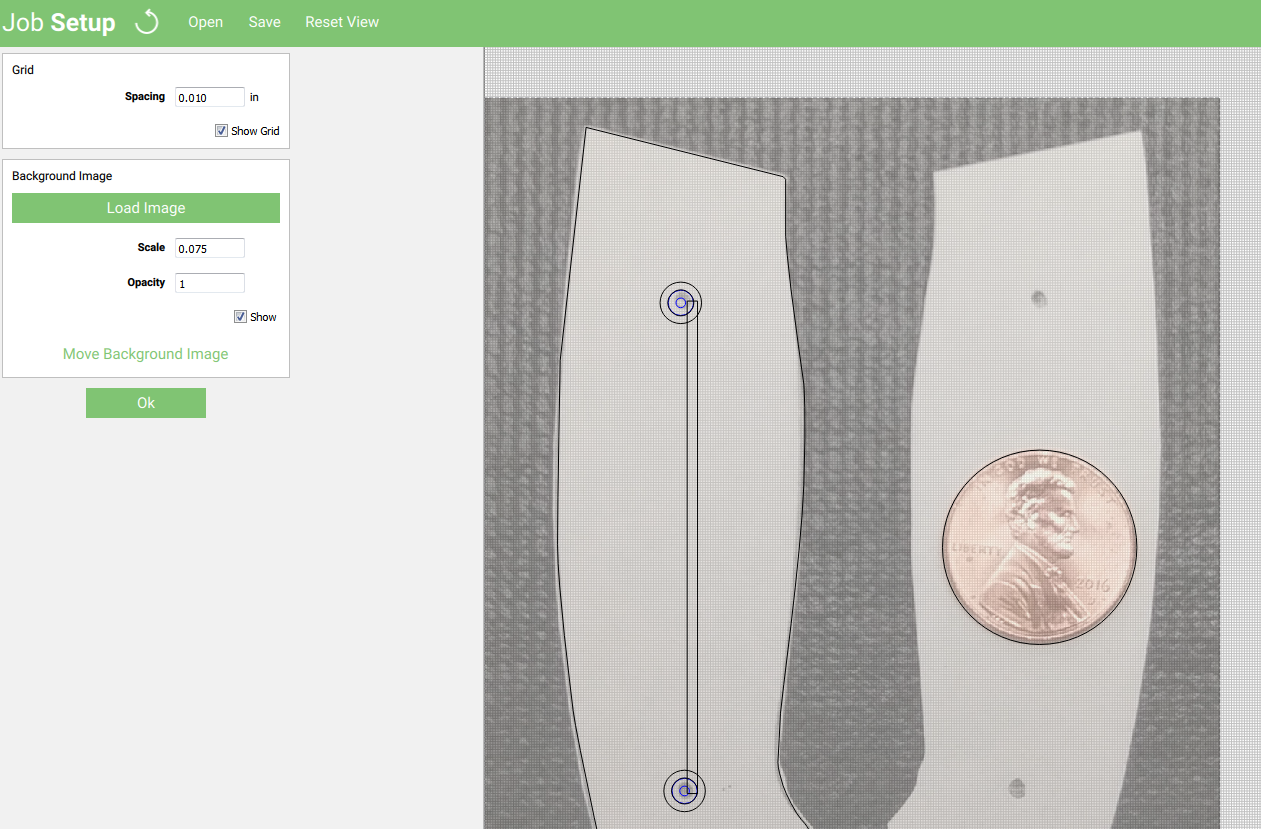
I drew a circle with a .375" Radius to match to the .75" diameter Penny in my background image and scale the image until it matched. I also measured the scale mounting holes in the knife at 1.9" center to center, and double checked my scale with a 1.9" tall rectangle.
Next we need to draw a closed curve around the handles.
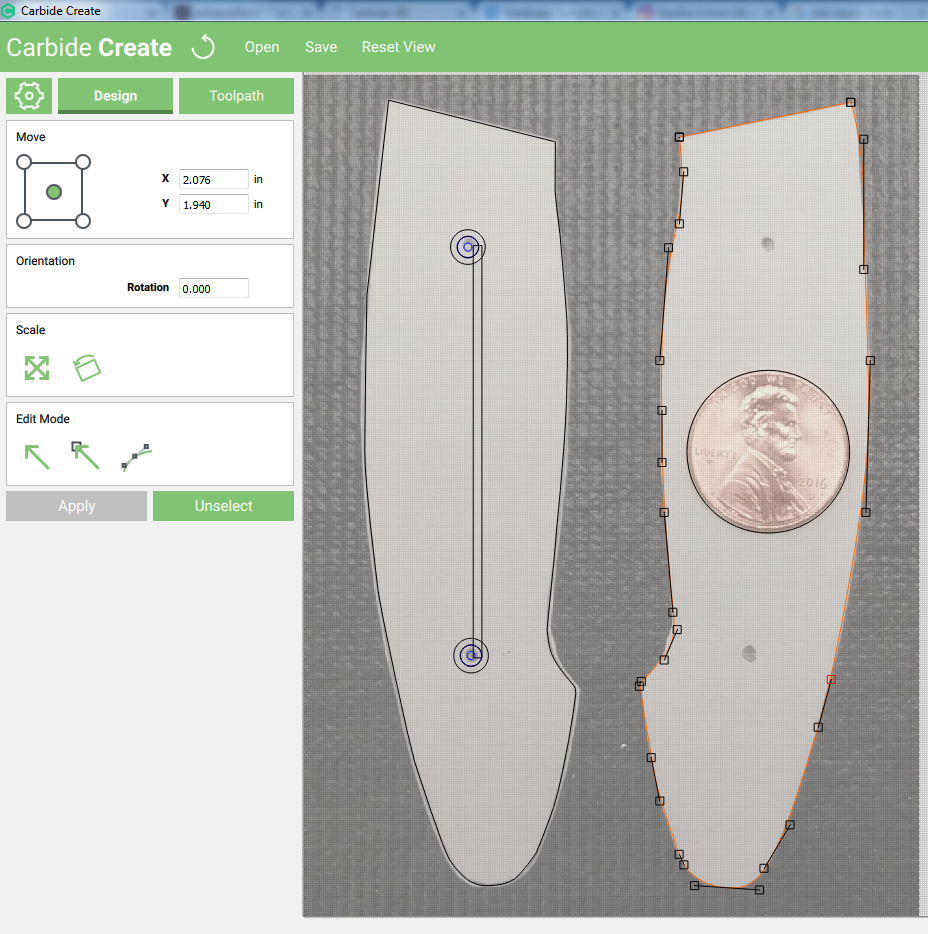
Couple tips here:
1-To get your curve to be closed- zoom in and make sure to end the line on the same grid intersection that you started on.
2- I found using as few control points as possible will create the smoothest tracing when doing the final adjusting of the Nodes with handles.
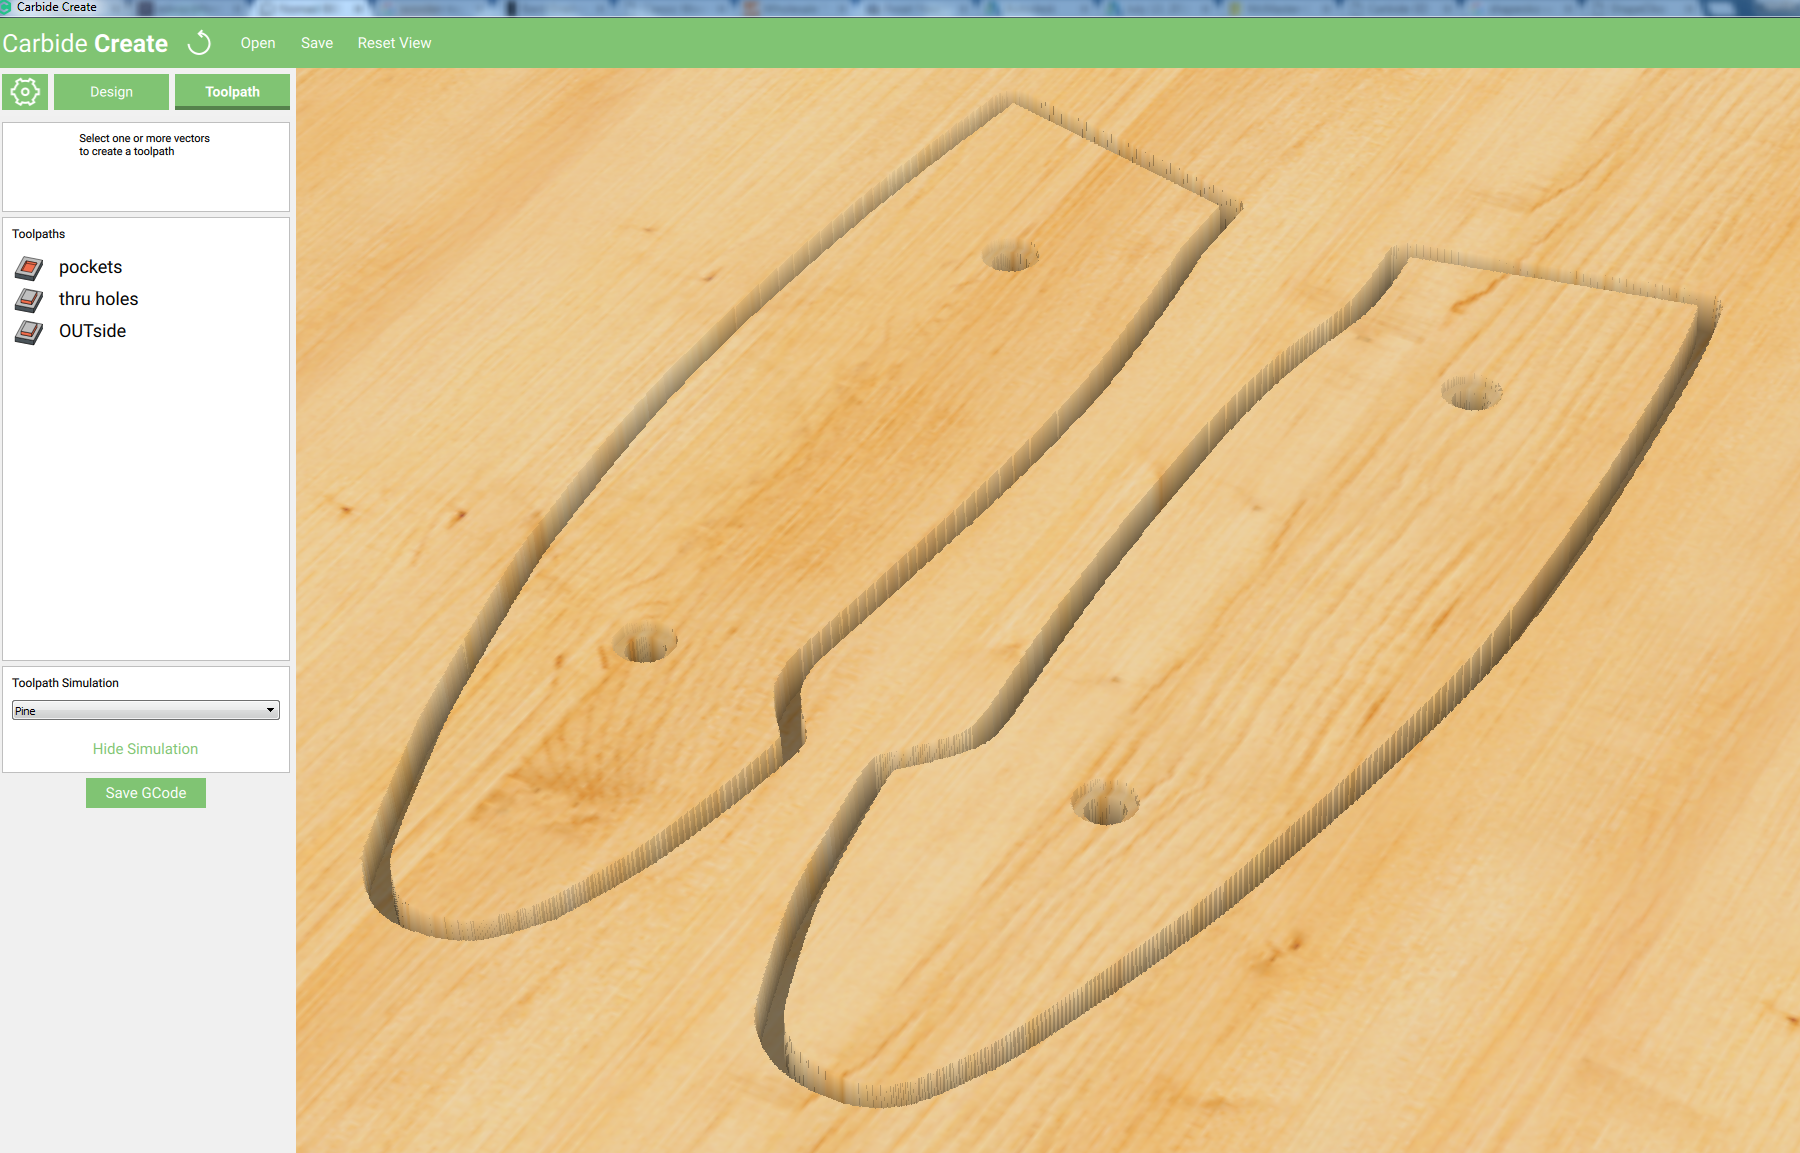
Next Step will be to select a tool and material to cut a first test for fit.
I will be using a 1/16th square endmill and 1/8th acrylic.
There’s a bit of information on Bezier curves on the wiki
2 Likes
Heres the First test in Blue acrylic, the fit was really close, close enough to prove the penny for scale method, but using graph paper and perspective correction would be a more correct approach to this tracing step of the process.
Using clear acrylic for the first test made it easier to see what areas of the design needed to be modified.
The Outline curve was close to the perimeter of the knife, but it needed to be fixed.
-
I copied the existing outline and corrected it based on the measuring first sample cut.
-
To re-assign the toolpath to the corrected curve; Edit the toolpath and CNTRL unclick the first outline and then CNTRL click on the corrected outline.
2 Likes
I’ve stuck an object on a scanner with a reference (like a 6" metal ruler) and then pulled that scan into CAD and worked from there. That can work well if the object sits flat.
2 Likes
@ApolloCrowe - I would like to do two layers for the scales, so there is a thin line of color (from the first layer of G-10). I’ve been debating on the best approach:
Option A) Model each part individually, then sandwich them together.
Option B). Glue them up as if making a traditional handle, then routing one side, then the other…treating it as one large block.
Seems like (B) is riskier, but might yield better results.
What do you think???
First I would test the design and run a first cut in some scrap with either option.
FYI- You can get 2 sets of scales from a 5" x 4" x .125" sheet of acrylic.
I prefer fasteners over adhesives, but I have a feeling option B) glue up would be best if your doing a 3d contoured design.
Can you post a screen shot of your design?
I have attached the Carbide Create file and a DXF file as well.
Folding knife kit scales 405.c2d (565.7 KB)
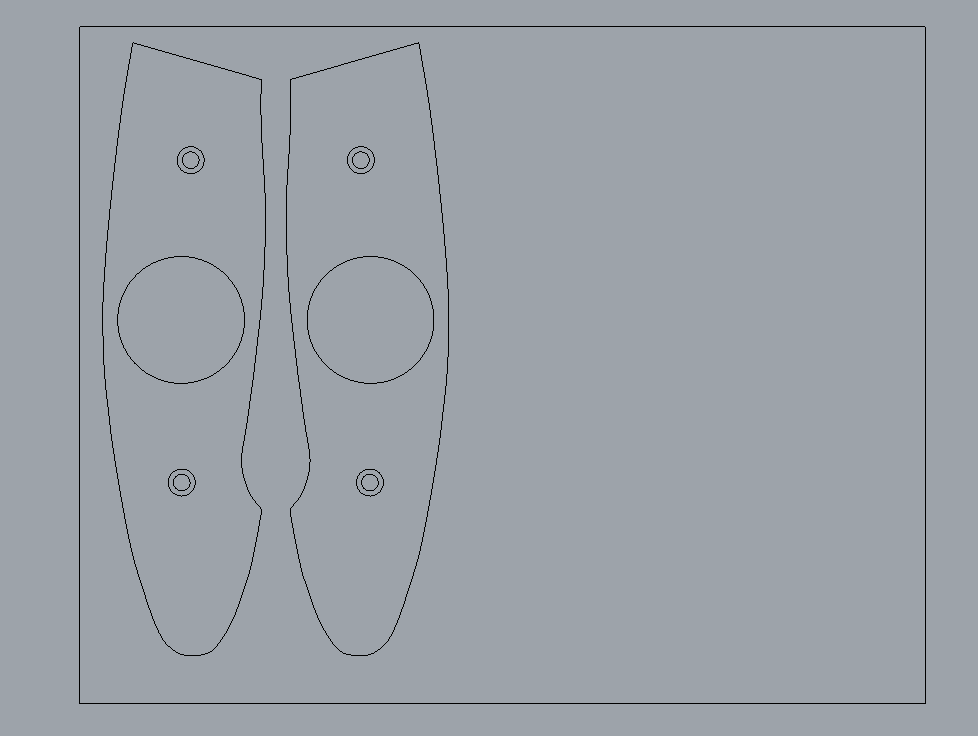
folding 405 handles with penny pocket.dxf (586.6 KB)
If anyone is interested in a Knife Project- Rockler is having a Sale on Knife Kits through Sept. 2nd.
They have several designs to chose from, the Large Folding Knife (SK-405KIT) is the model used in this tutorial.
http://www.rockler.com/rockler-promotions/current-promotions/sarge-knife-hardware
Curious if anyone has tried this and used fasteners to hold the scales down. If not, what did you use to successfully secure them? I am working on a similar project and am having issues with getting the right type of hold-down.
@ChiknNutz
You may want to check out Jantz knife making supply.
Heres the fasteners page link:
http://www.knifemaking.com/category-s/75.htm
I mean to hold the scales while CNC routing them. The reason is because the screws are so small, like a #2 or #3, there are no inserts or helicoils that I can find this small to put in a piece of wood. Next choice would be aluminum, but for the long term, not sure this is a good option either if used more than a few times (threads stripping or galling in the aluminum over time). Don’t really want to use a steel plate, but that may be the best option. Have been looking into vacuum fixturing, but there really isn’t enough material to properly hold them (1.5" x 3.5"). Further, I am not even sure the screws will hold due to side load of the cutter unless the feeds are really reduced.
@ChiknNutz
You can use double sided tape or clamps.
Hot glue may work as well depending on your material.
I recommend leaving a thin skin on the material.
If your part is breaking free, you can reduce the DOC.
Have you seen this video:
The material is kinda spendy, so near-net size is used for the blank which precludes the use of a clamp. Dbl-sided tape may be okay for a few, but this is more of a production run of parts (dozens, 100’s perhaps even 1000’s is possible). Am considering trying to leave a skin as I’ve seen mentioned elsewhere for similar purposes, but still need a means to hold the near-net blank.
Sorry, didn’t mean to hijack this thread, should probably start a new one so this isn’t all co-mingled.
Probably deserves its own thread, and I can imagine some custom setup will be the result.
What is the material?
Three materials will be used…Dymondwood, bone and ivory.
Whatever happen to this? No interest? Sounds cool to throw a project out every month or so. Did you end up with a finished knife appollo? Ray
This was the First Weekend Project and I used it to demonstrate a useful function in Carbide Create.
To bridge the gap between existing products and custom CNC parts I showed how to scale and trace in Carbide Create.
You can place an image or photo as a background image in Carbide Create, then Scale it, then you can trace it and cut it.
I refined the file and cut a couple tests parts in clear blue acrylic.
I posted the DXF and Carbide Create (.c2d) file above if you want to try it.
The second weekend project is here:
Do you have a material, theme or specific project on your mind?
Request lines are open.