It could be a number of things… V-Wheel tensions, wasteboard and Z-axis not square, stock not square/level?
There’s a wiki section that discusses truing up your machine: http://www.shapeoko.com/wiki/index.php/Calibration_and_Squaring_the_Machine
It could be a number of things… V-Wheel tensions, wasteboard and Z-axis not square, stock not square/level?
There’s a wiki section that discusses truing up your machine: http://www.shapeoko.com/wiki/index.php/Calibration_and_Squaring_the_Machine
did you level / resurface the bed/waste board?
Roger is spot on. I put on an additional piece of Mdf and flattened it as well as a piece under the bottom. The supports on the bed sag and will cause you to have as much as .005 - .010 gap in parts of the stock table. Or at least that was my experience. Now mine is as smooth as a baby’s butt
Are the set screws on the stepper motor/belt pulley’s tight?
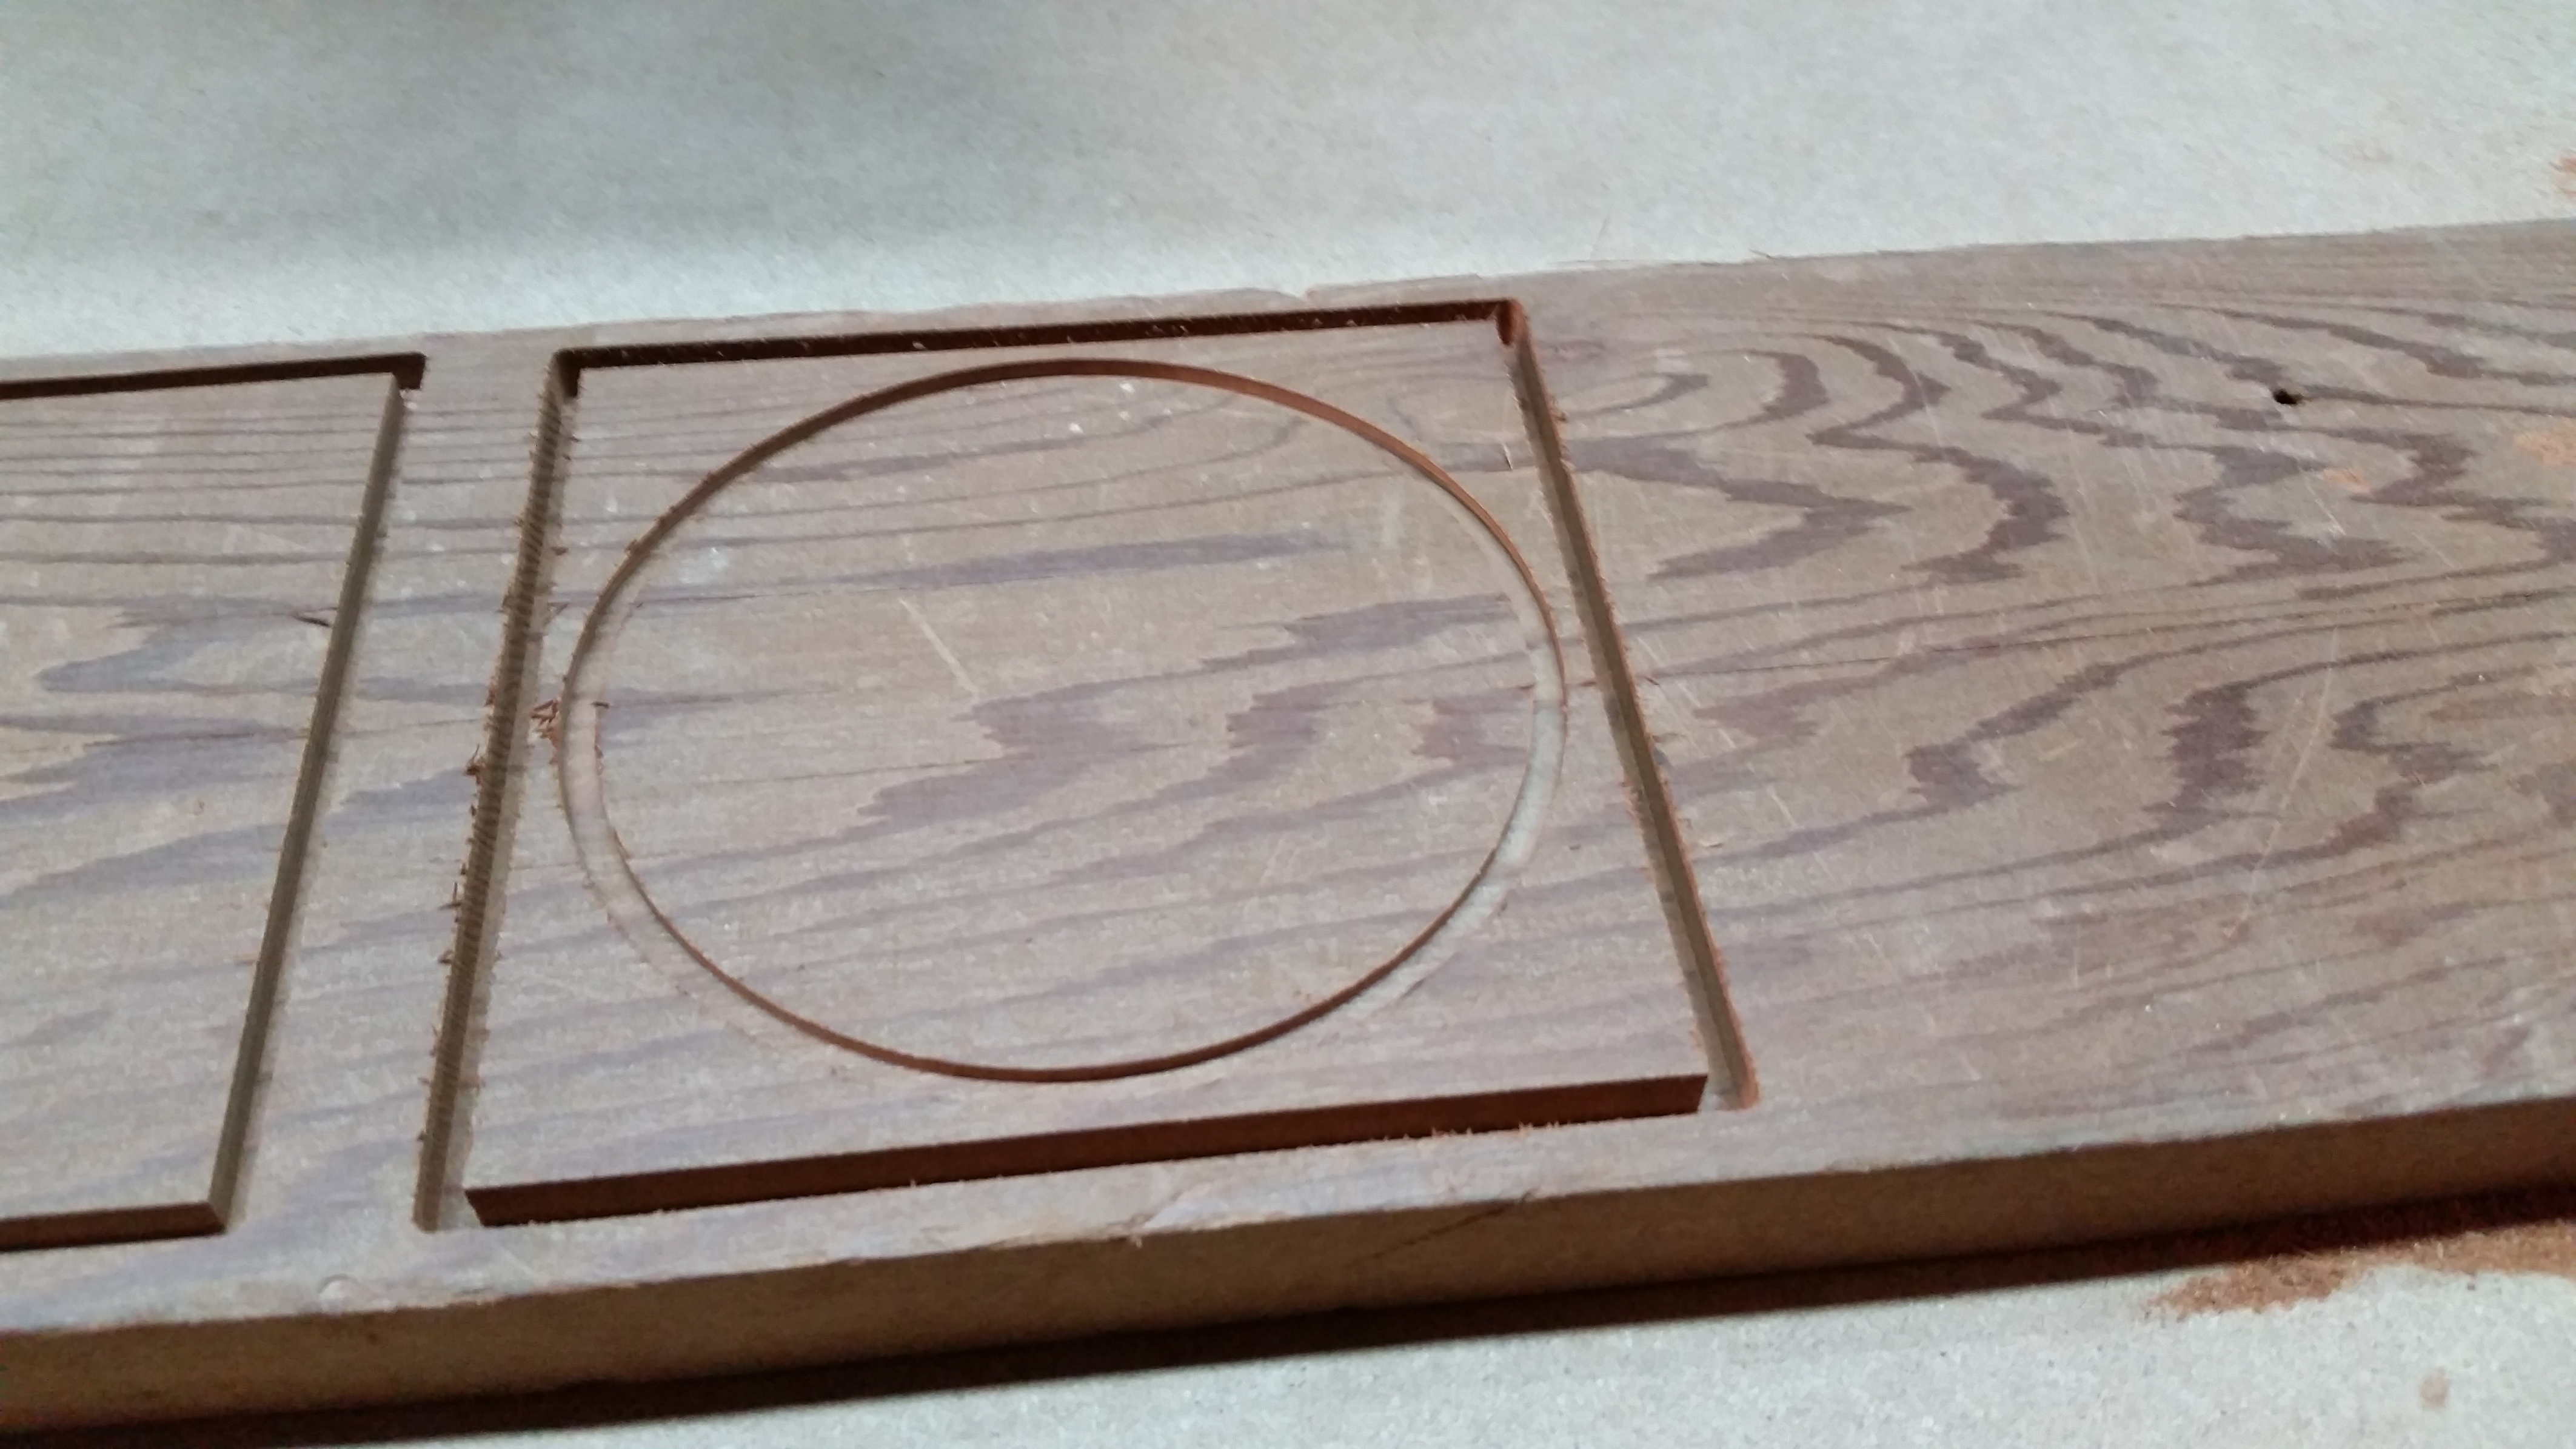
I guess I’m not properly communicating what’s going on. But first, I did check to make sure everything is level. The wasteboard is pretty flat already, I don’t think there has been time for it to sag too much at this point, but as I jogged the head across the wasteboard, it seems pretty flat (flat enough for my purposes, I’m not doing any precision milling yet…I’m just learning how to use the thing). So looking at the Wiki that Jim posted here, I found a test pattern that might help show what’s going on here. It’s a modified version of the Square/Circle/Diamond Pattern. I’ll provide the files, maybe I’m doing something wrong in CarbideMake as well…
The pattern is supposed to cut each shape at 3/8", but it’s not doing that. The first shape, the square, cuts to 15/64" pretty consistently all around the perimeter (far short of 3/8). The circle cuts to 5/64". The diamond doesn’t reach the wood at all, and neither does the hexagon (which I added to the pattern). Each shape (with the exception of the square) starts off progressively higher than the top of the stock.
The X and Y measurements are correct though.
SCDH_Pattern Test.c2d (7.3 KB)
SCDH_Pattern Test.egc (70.5 KB)
How did you set Z to 0?
May sound silly but I have to ask.
Jog Z to 0 and ensure it’s actually touching the top of the wood.
Do it again AFTER the cut is completed.
IF AFTER the cut is completed the Z0 is no longer touching the wood it indicates that the belt has skipped.
If that is the case you need to tighten the Z belt.
Based on the file you have they appear to all be the same depth cut therefore one should not be less then the other which means more then likely the Z belt skipped.
Thx for checking things Rodger.
I open Carbide Motion, connect device, click on Jog, jog my bit all the way to lower left corner, jog Z so it touches the material. I then load the program, and start it and let it run…which ends up with the results I show above.
I don’t know how to make it go to zero once the program finishes running. If I go to “jog”, then the only option I have under “Rapid Position” is to press “current offset (X&Y)” which goes to X & Y zero but not Z zero, or “current offset (Z+6)” which just makes the bit drive down some.
Also, the Z belt seems real tight already.
You would essentially just jog the Z axis until it reads 0 on the readout.
You could use the z+6 then jog down until it shows 0.
My feeling is the z belt is skipping.
Just doing a visual, it doesn’t look like it is.
I did not see any mention of the “Set Zero” operation… we’ll presume you’re performing said step?
Normally it skips during a plunge step. If you listen you probably hear a small thump sound.
Sorry Jim. Forgot to mention that in the first paragraph. I did set zero, yes.
Roger, while it ran I felt for the thump and looked for it while it ran the Z axis operations, and did not detect a skip.
Probably going to email Carbide direct. Thanks for the time y’all spent on this.
@UncommonDad
Just following up on this Z axis issue -
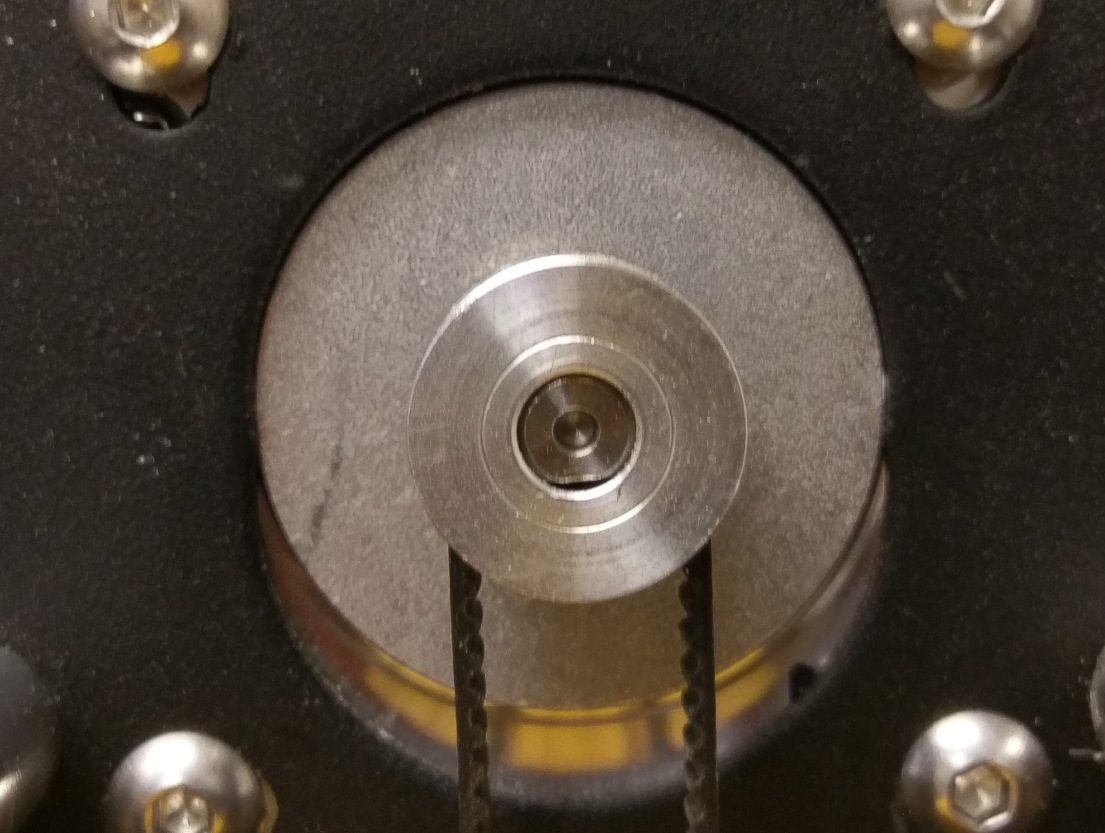
A- Check your Set screws on your Pulleys.
B- Have you checked to see if you have enough travel to reach the Maximum depth of the job?
Yes, I believe I had the same problem. In another topic
I found a discussion of the Z axis pulley set screw. I found mine tight but not tightened against the flat spot on the motor shaft as they were discussing. When I took it off, I did see evidence of a slight groove (more of a scratch) on the motor shaft. I put the pulley back on, but not so far as to have the setscrew go past the available flat area, and tightened it there. I’ve only done one experiment since, but it looks like it took care of the Z-axis variation.
I did readjust the set screws. Couldn’t get the pulley off to align it properly to the flat spot on the shaft. Any tricks to get it off so I can make sure it’s on right?
But after loosening and re-tightening the set screws, it seems to work correctly, but I’d feel better making sure it’s on right.
I’m having the same issue with losing the Z depth as well (definitely some slipping but not in the belt). Chances are you will need to take off the belt and reinstall it after making sure the set screw is on the flat.
Thanks Apollo, that really helped. Edward also responded via email and it definitely was off the flat. I only managed to tighten it enough to keep it from moving.
With Edward’s advice, I got it off, moved and back on. Testing it later (got a busy household…lol).
Mine was on the flat and the only other thing it could have been was a belt slip. Maybe I have the retract or plunge speed too high and it slipped, I’ll try that next.