I’ve been running my program over and over and can’t figure why the vcarve isn’t working. It looks like my z-axis zero changes when the program is running. I see a z-2.50 and it’s still above the workpiece.
There are areas where it does cut in though.
i’ve tried even zeroing my z axis 1/4" below the workpiece and still it hovers too high.
I watched the code at the beginning, starts of fine but as soon as it first goes up to rapid transit level(set at 5mm) then it begins to mess up the z axis. Looks like it goes up to 15 mm.
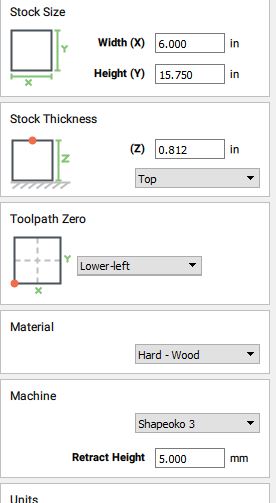
I have zero set on top of the 3/4" workpiece.
Please post the .c2d and the G-Code files and we’ll gladly look at them.
I suspect you’ve set the zero in your .c2d file for the bottom, not the top of the stock.
You can zip the .c2d file to post it here.
I am not saying this is your problem . . . but once I had an “1/8 inch” shank that wasn’t. It was not getting a good enough grip in the collet and would slip and change my Z even though I had just milled my waste board to be level. I have to laugh at how simple the problem was in hindsight.
1 Like
thanks for your patience, great at woodworking, not so great at computers
narrow indian.zip (498.1 KB)
I’m going to look at it again today. I purchased the machine used. I wonder maybe something is loose in the belt or z-axis motor.
Things to check electromechanically (the file looks fine if the origin is where you want it):
- Z-axis belt tension — needs to be guitar string tight (but careful not to bend the motor mount shafts
- pulley set screws — article on that here: http://docs.carbide3d.com/shapeoko-faq/shapeoko-3-how-to-check-the-pulley-set-screws/
- eccentric nuts for V wheels: https://www.shapeoko.com/wiki/index.php/Makerslide#Tightening_V-wheels
Thanks for the help. I think I’m going to have to pull it apart somewhat.
I should have checked it over fully before using, guess I got too excited.
Looks like the set screws are missing and there’s 2 bolts off in behind.
Is there a .doc for assembly I can download. Guess I’ll have to find some set screws to fit as well.
edit: found the assembly guide.
any info on set screw size?
For the .doc version of the assembly guide — suggest copy-pasting from the web pages.
Specific parts information, including the set screws is at: Shapeoko CNC Router, Rigid, Accurate, Reliable, and Affordable.
(pulley set screws (2 ea.) are M3, ~4.75mm o.a.l.)
Note that there’s enough clearance to allow one to use an SHCS, which some folks have switched to.
Excellent, thanks
Any direction on where to get those set screw. Inventables does’t seem to have them.
You should be able to purchase them from any decent hardware store — the local True Value has them (though it’s better stocked than most).
I bought of kit of them from Amazon for a couple bucks, and have enough to fix my SO3 a ton of times, and a bunch of other things too 
Thanks for all the hep.
A question on x-belt installation. Looks wrong to me. Works okay but it’s pulling to the front on the spindle. Should it be riding more vertical on the pulley?
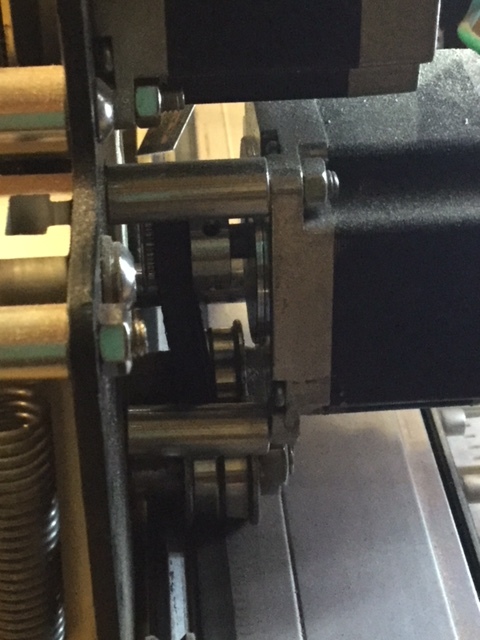
Yes, the belt routing should be much straighter than that — please pull that motor, loosen the set screws on the pulley, then push it further onto the shaft to get the desired alignment, then replace / re-tighten the pulley set screws — see: http://docs.carbide3d.com/shapeoko-faq/shapeoko-3-how-to-check-the-pulley-set-screws/
EDIT: actually, should that pulley be reversed? See if the X-axis pulley is on the other way in which case swap.
2 Likes
Thanks, fxing all that went went well.
Running much better now. Z-axis is now doing what it should.
Except for a serial port error halfway through it looked great.
For the serial port error see: https://www.shapeoko.com/wiki/index.php/Electronics#USB_Disconnection