1st Time - Material comes loose

Yes 1/16 - 1/8 inch all you want to do is get it off the inside of the shaft to allow for any expansion.

or it can go deeper as needed but not bottoming out in the router shaft and change acording to material thickness

Yes the space under the brush. if you are cutting thick material you will have a greater distance from the material to the brush tips. When cutting thick material 1 3/4 and going to full depth you will need the extra clearance and possibly a bit that is longer and placed in the collet as mentioned earlier to get you to the bottom of the stock being cut.

Shop vac’s do create a lot of suction and also increases drag on the vac motor and draws more current. Better flow is more efficient.

Anthony

I’m trying to remember what I did. I may have noticed it was going to cut through the plywood (3/4") and wanted to be sure it had enough room (even below the Sweepie brush) for clearance. So maybe I didn’t put it far enough in. That might also explain why the first time it went bad quickly and not on the other one. I may have gone a bit paranoid and put it farther in the last time around, but still not enough.

Again, to make sure I get it, the idea is to put it in as far as you can and still leave room for it to expand into when it heats up. So I don’t want to put it in only, say, half way, since that might not hold it enough, but I want to back off a bit from putting it all the way in.

I’m going to certainly work on erring on the side of caution until I know what I’m doing!

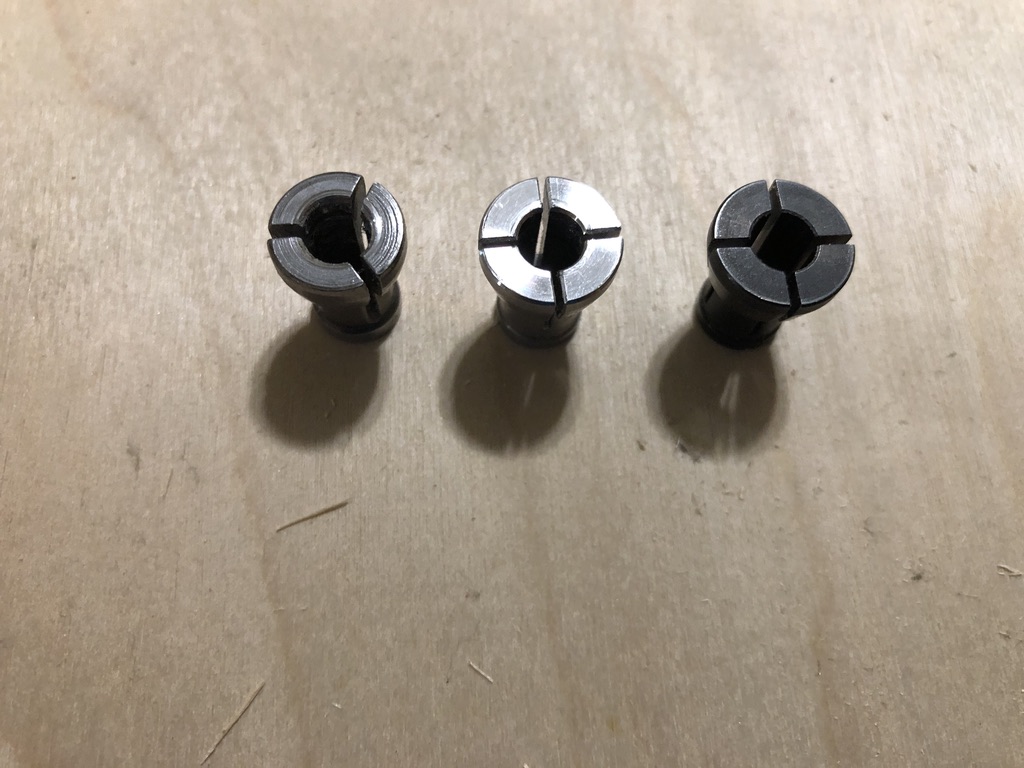
Looked things over and put a few mental pieces together. I thought I had three 1/4" collets, but only found 2. Then I checked and one was in the router, staying in even without the nut on the end. Here’s all three:


There was also a 1/8" collet. When I ordered my Shapeoko, I ordered a set of end mills to go with it. Due to the long time between when I ordered and when I finished putting the system together, I can’t remember exactly what item was in which box. I did find a small package that said, “Precision collets.” It contained a 1/4" collet and a 1/8" one. I suspect that package was included with the end mill set, but I can’t remember.

I had been using the collet on the left, with three slots in it, when everything went sour. I haven’t used the collet in the middle yet. (Forgot I had that extra one. I think my Shapeoko included a collet and a 102 end mill. Not sure, though.) The one on the right is from Amazon. For reference, it’s a Makita 763637-1 Collet Cone, 1/4-Inch. I used that this evening. I could not get the 1/4" 201 end mill but so far into this collet. (Again, the one on the right.) It had a tight grip and when everything was done and it had been sitting there for 5-10 minutes, I took it out of the router and had to use a vise grips to pull the end mill out of that collet. I think it’s graduated and gets narrower near the top, since it was so hard to get the end mill deep into it.

If I were to guess, I think the collet on the left probably came with the system and the included 201 end mill. I’m betting the middle one will work well, probably just like the Makita on the right. I’m also guessing that the middle one came in the “Precision collets” wrapped package. If I’m right, basically it was the default collet that came with the CNC that may have been less effective than the 2nd one and the Makita I ordered.

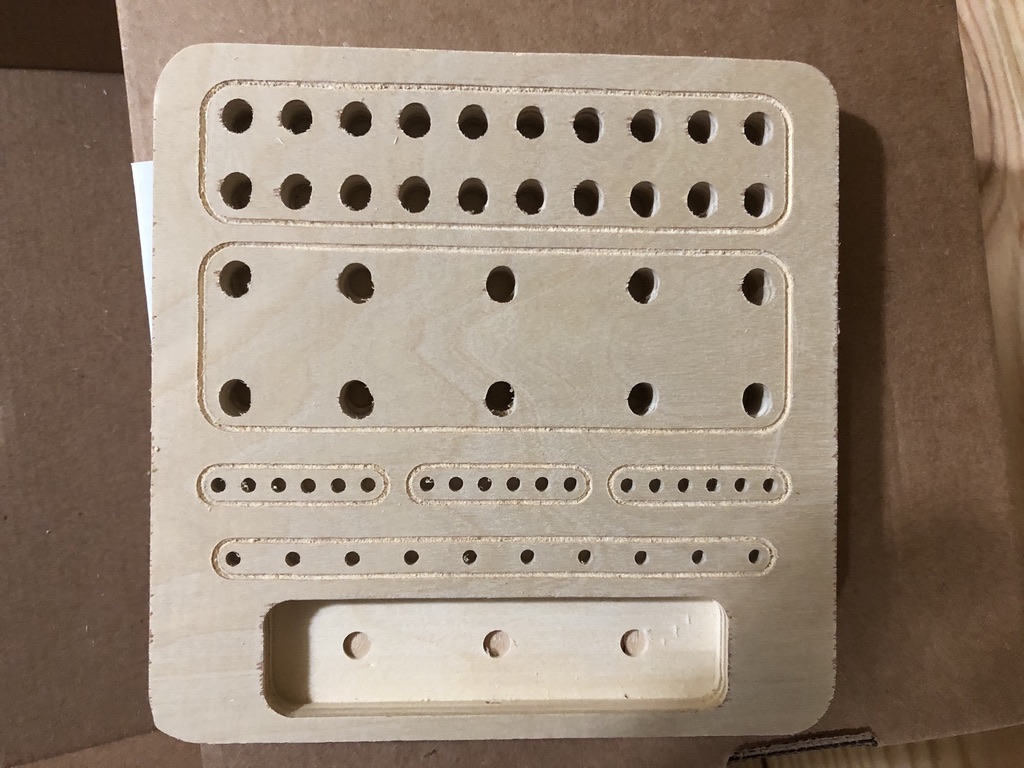
This is what I got tonight:

You may note the 1/4" holes are a bit oversized. I had a roller on the carriage come off while the 201 end mill was in use and I had to stop, re-initialize, and restart and there was a bit of a difference in alignment after I replaced the roller and fixed it all up.

I have one question about this, now: What works for sanding an etched line like the ones in this project? I can use sandpaper for a lot of the sanding and a file for the holes, but I’m not sure what to use to sand and clean up the etched lines.

Hi @Tango,

The shiny one in the middle is the precision collet, so definitely favor using that one (you can still reach out to support if the standard one seems to be defective)

Weird, if that is an original Makita piece and it is indeed the 1/4" version, you should not have this problem. A 6mm version of that collet exist, so there is always the possibility that the seller sent you the wrong model (but I would be surprised if you can force-fit a 1/4" #201 into a 6mm collet. Anyway, maybe try and double-check the inner diameter of that collet, in the side that does not have the slots.

That all points to a (very) loose vwheel, and for sure that would explain the distorted holes. You need to tighten the vwheels just enough that they are snug against the rail, and don’t spin freely:

Sometimes you can get away with folding a piece of sand paper and running the folded edge in those lines.
Sometimes just re-running the toolpath a second time helps clean-up the groove.
And there’s always manual clean-up with an xacto fine (tedious)
But in plywood it’s never going to be super clean anyway.

1 Like

Shhhhh! Don’t tell anyone this secret!

You can run your job again, perhaps with Z a couple of thousandths lower, and clean up a lot of the fuzzy stuff.

But keep that a secret. We don’t want too many folks to join the club of anti-fuzzy stuff! :smiley:

3 Likes

It took some human effort (no tools involved) to get the 1/4" end mill in, but I don’t think I could have slid it in more even with tools. I’ll check the size next time I get down to the barn (where the workshop is). Also, there’s the other precision collet, the one in the center, that I’m going to try. At this point, I’m just so relieved that I found something that works!

There weren’t any eccentric nuts on this. It just had a hex screw on it to hold it on. This was a lower roller and the other one was on seriously tight, so I looked at it carefully and saw there were bearings in it, so I think it’s designed to be fastened on as tightly as possible. I put it on loosely and move the carriage and the wheel wasn’t turning. I think maybe it may not be fitting exactly and that wheel might not be making contact.

I think the reason the holes were off was not so much that this was loose, but that I did the holes and while it was carving out the rectangular recess, the wheel came off. I stopped the job and re-initialized the machine. Then I had to move the carriage along the X axis to get it away from the corner so I could work on that roller. Once I put it on, I had to run it back and forth to test it. Then I re-initialized it again, sent it back to Job Zero, and kept going. I’m betting that my fiddling with the carriage changed the alignment just slightly and caused an offset.

Okay. I’ll keep it on the QT!

This topic was automatically closed 30 days after the last reply. New replies are no longer allowed.