I recently got my XXL and finally got the workbench and XXL finished this past week. I am just writing this in case any other newbies come along that have the same mindset I had. I watched countless, I mean countless videos, multiple times each to try and get a full understanding assembling and using the XXL. I have multiple 3D printers so the world of X,Y, and Z are not new. But I also found out real quick that CNC routing is a whole new beast!
I was very wrapped up in trying to get everything setup perfectly and get the perfect wasteboard, etc. Then yesterday someone just candidly said “forget the fancy wasteboard, get a roll of tape and super glue and start making something”. So today I did just that. It took me 3 hours to cut out two 18" circles of 1/4" luan and had anyone in this forum been watching you would thought “what an idiot!!”.
So what’s the point? I learned more today in 3 hours of trying to cut these silly cirlcles for my daughter than I have over the last 8 hours of video watching. It took me just getting in there and doing it. I have to believe there are other folks like me who spend too much time in “getting prepared”. If that is you, then just jump in and start making something, even if its an 18" door hanging circle.
My mistakes today included but not limited to:
Laying out job in vcarve but failing to set center to bottom left corner of material. Almost cut a 1/4" notch in my front support panel.
Go back and layout in Carbide Create. Set to cut out circle to inside and not outside. No biggie on that. But also missed that Carbide 3D defaults to 1/8" Endmill. You can’t bail out of starting a job with carbide motion without just shutting down the program so I let it run thinking wrong tool was in there.
Obviously did not have depths set correctly because it did not cut thru the 1/4" wood
I redid the the cirlcle in Vcarve again, but this time selected lower left corner. However, set the cutout to run counter clockwise which apparently was not good. Collet must have been a tiny bit loose and it burried the bit in my MDF but I quickly shut everything down. there were a few others.
Speeds and feeds still seem like trig to me but I will get there… I thought learning how to do surveying for Drone mapping was the hardest thing I had done but I believe this might top that one. I know someday I will get there and I look forward to learning!
so, a reply from another Newb.
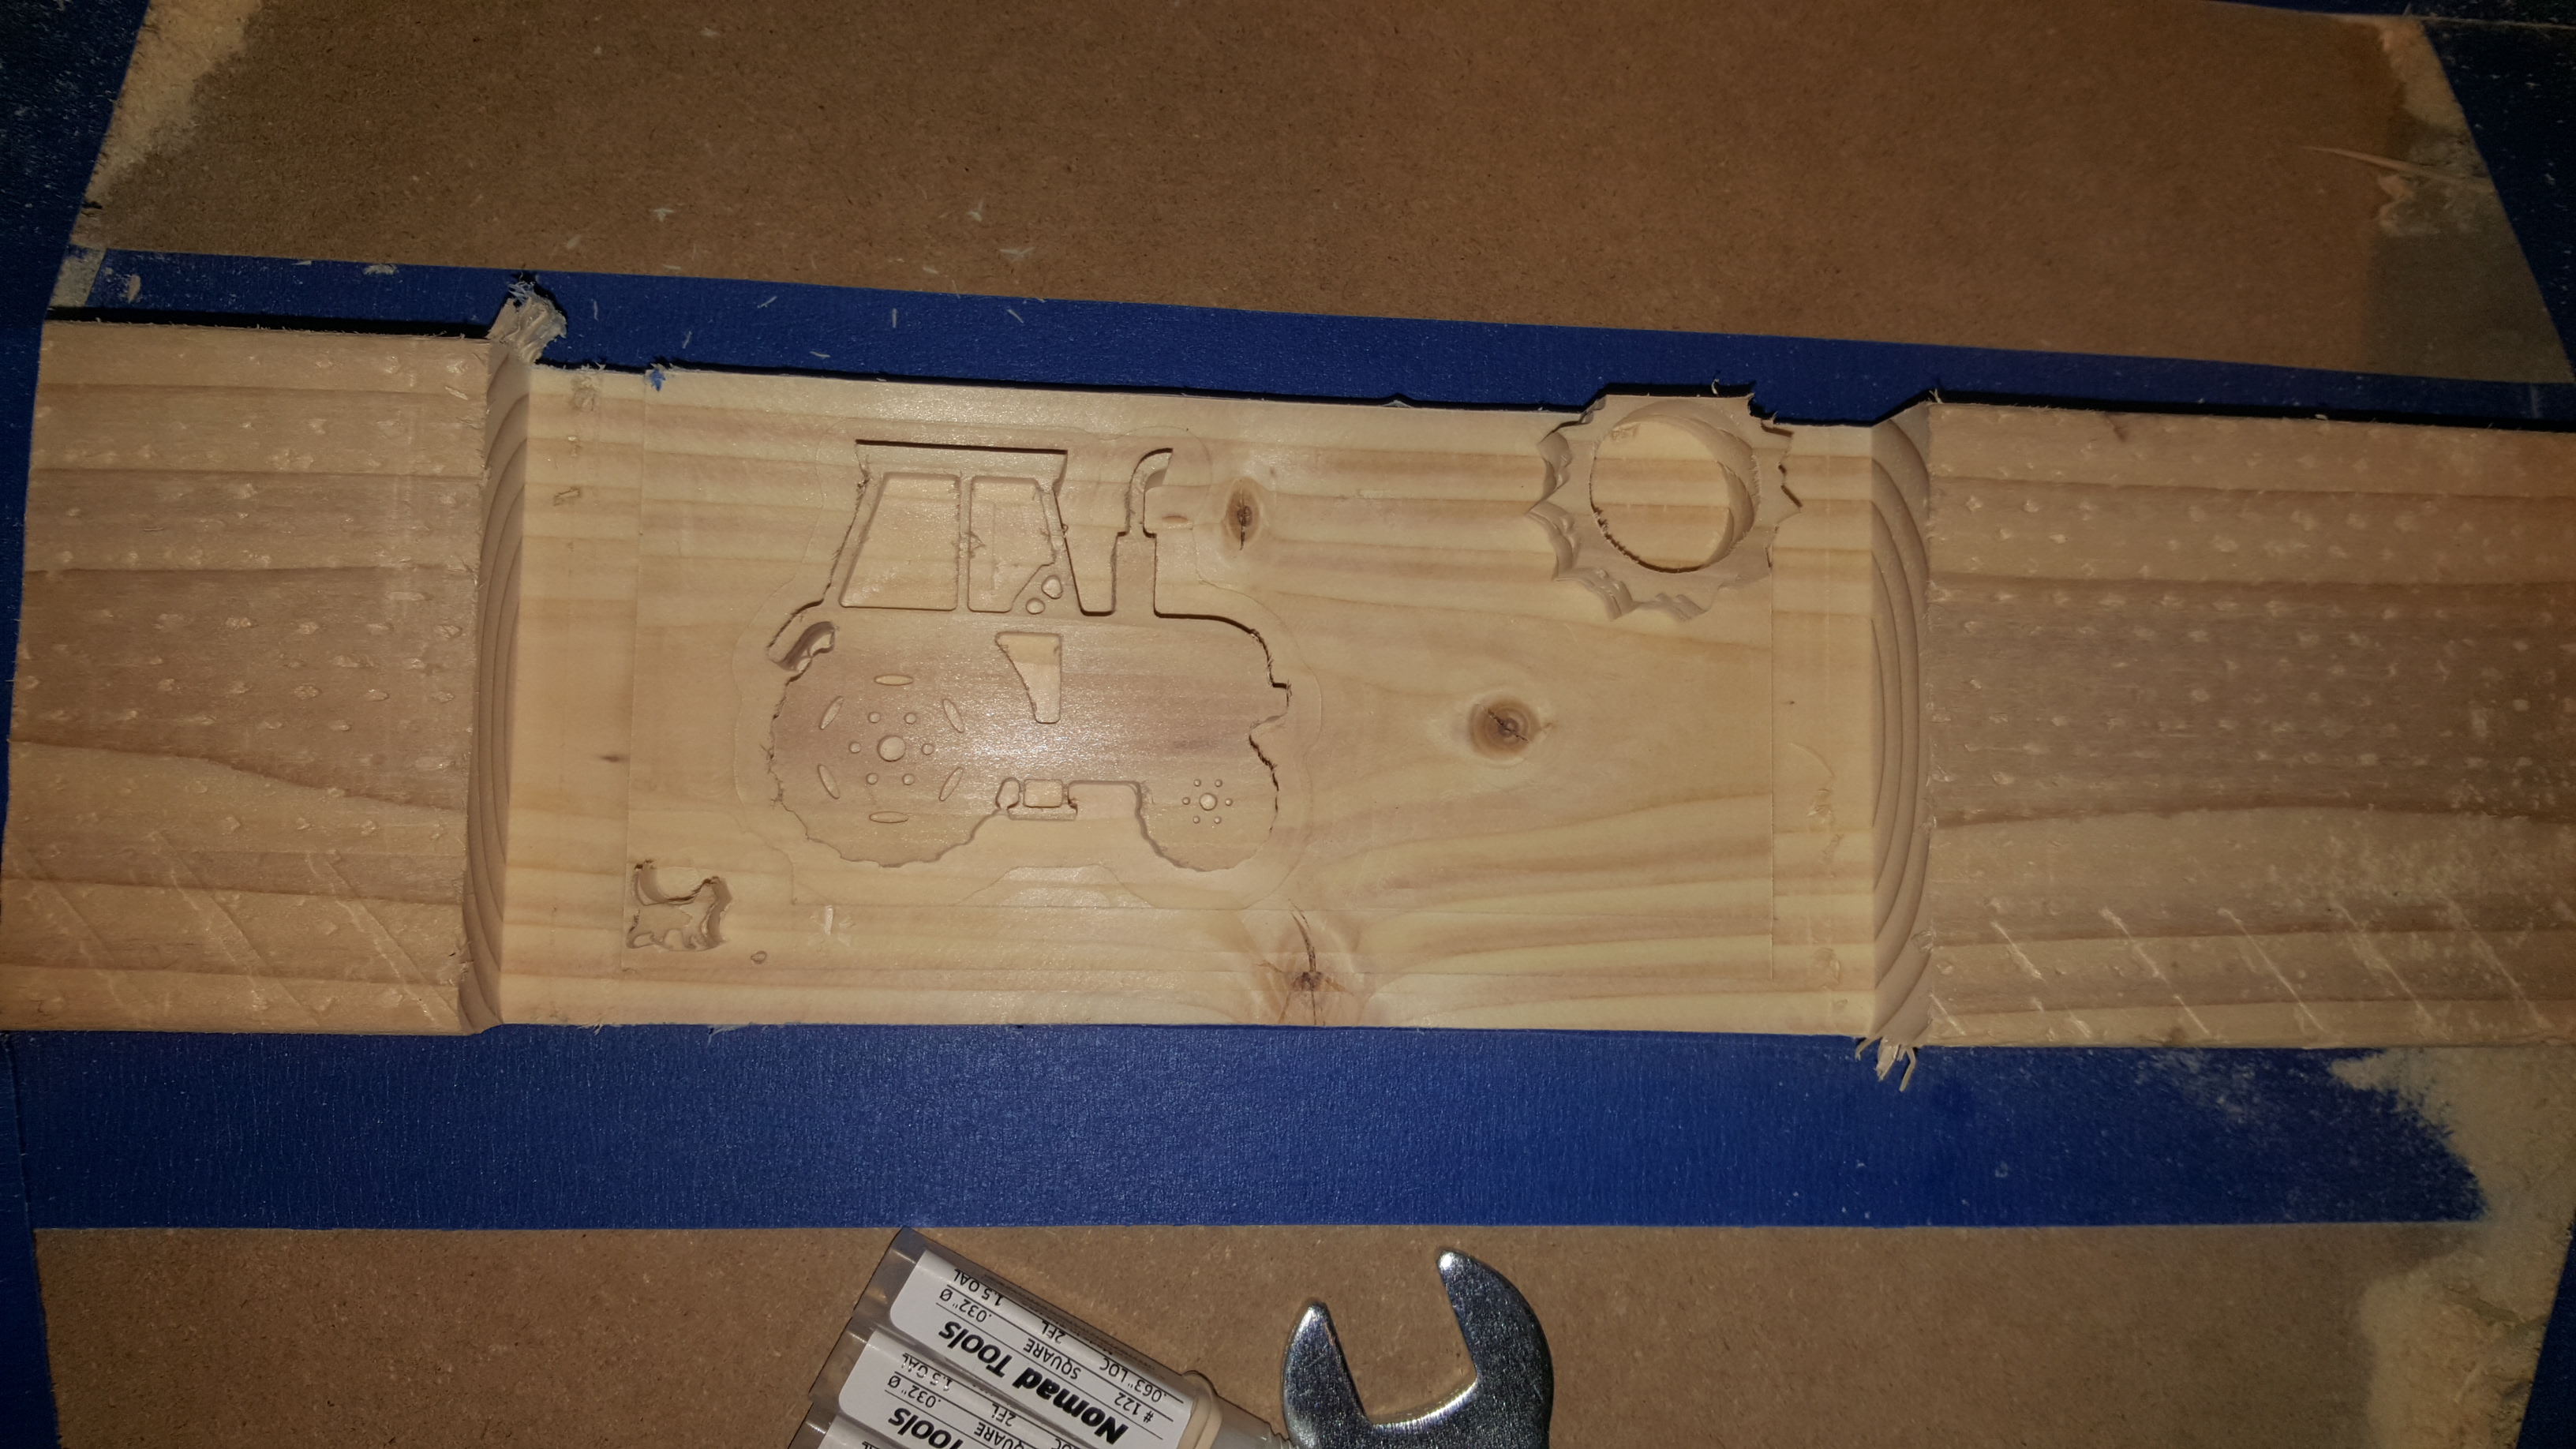
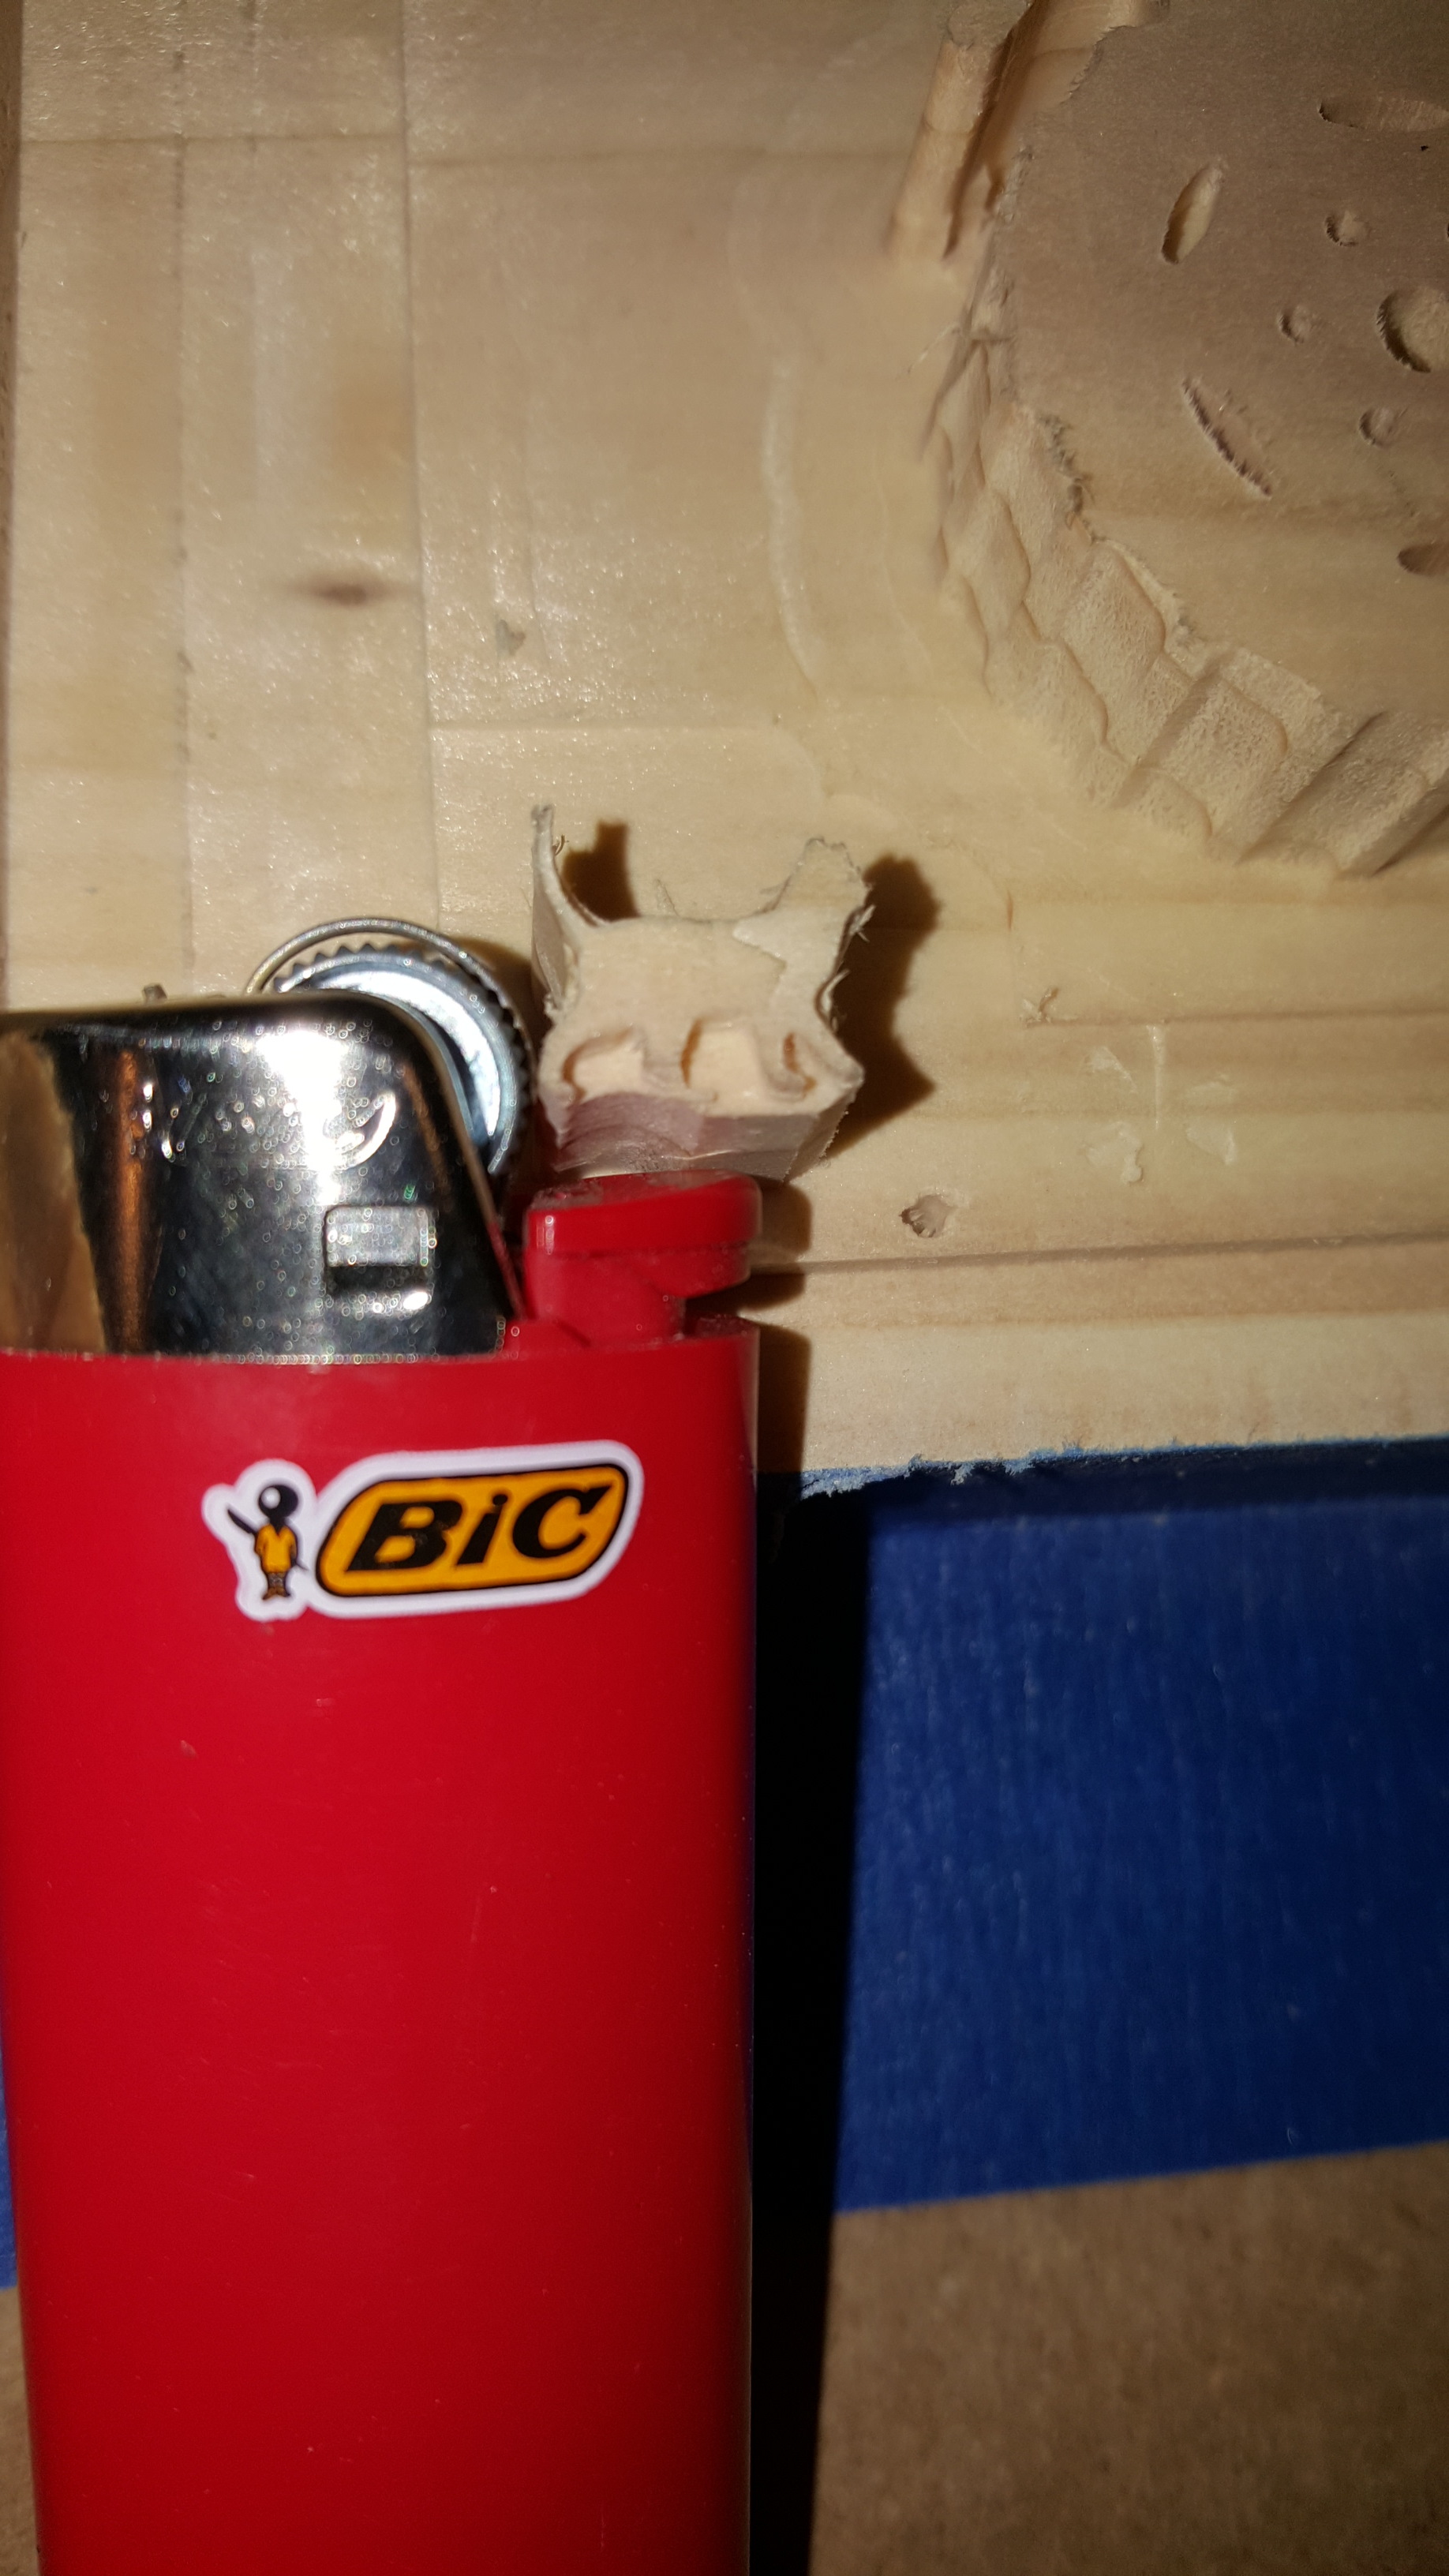
I did some of the same. Watched videos to try and get a bit familiar with the processes. Found it best to just open carbide create, lay a simple design (for me that was a 2x4, mill the face, cut a deep profile and carve a kitty cat, a tractor and a sun.)
while not exactly a newbie anymore (a year into this now), one thing I use a lot is 3x12x0.25" premade little planks of wood that are available on ebay in many different wood spiecies (and somethings at 3 1/2x 12 1/2) … great for making signs with, especially walnut or cherry, and small and thin enough to not need heavy forces/big bits to get things done in reasonable time.
@MindlessCorpse very nice! That is sure enough well ahead of me I figure I have some scraps but I am going to head to some of the construction sites and get some of the scrap wood they are throwing out to have extra to play on. @fenrus would love to see some pics!
There is alot to learn but I know I will ramp up pretty quick over the next few weeks. I would love to hear from some of the “sort of newbies” on what you consider to be the main things that changed once you really felt like you had a handle on the CNC process. Be it work flow, machine setup, or just simply your though process.
What are some of the things you really thought you needed and purchased (or made) and then later realized that you don’t every use it?
I have enjoyed reading thru this forum. Thanks to all who contribute!
if you get “random” scrap wood, make VERY sure there’s no metal nails in it somehow… that’s a great way to ruin a lot of things… and if it’s treated, make sure to have a good dust mask
the big “over the hump” for me was once I had the Z carriage properly set up/tight/etc… from there I could get more good than bad cuts.
One thing that helped there was to start with more shallow cuts at lower feeds/speeds with smaller end mills, and get more aggressive over time… slowly.
I used to work as a system support engineer on enterprise unix computers. One of my co workers had a PHD in BioChemistry. He read and studied and studied but was paralyzed with analysis. I had 30 plus years of field experience and would just tear into a problem and try things and got my systems fixed and back up while my co worker would just keep researching and researching to find a solution. So I think your watching the videos did you some good in the long run you cannot beat experience and hands on when learning how to use your Shapeoko. I would say that watching videos can be informative and useful but practical application is better for you than all the videos on youtube.
A practical example would be if you needed brain surgery and your surgeon read the procedure and watched videos but had no actual experience with brain surgery. Would you really want that person to operate on your brain or would you want someone that had actually split skulls open before. Obviously a brain surgeon needs training but there is no experience like experience. So gets your hands dirty, make mistakes and enjoy. You will never create a perfect project. You can strive for perfection but you must accept what you make and try to constantly improve.
One phrase that stuck with me from this community was -“when you buy a new hammer, everything else looks like nails”. The Shapeoko can do lots of things , but sometimes it’s better to use the appropriate tool for the job.
Yes, but it’s an incredibly flexible, programmable thing — I like to view it as more of a shop assistant/robot than a woodworking tool — I also am really limited in shop size/space/working area — the Nomad and Shapeokos are the only stationary power tools I really have access to, so using it as a router table/sled, or in lieu of a planner or jointer makes sense for me.
Interestingly, the router was the first electric powered woodworking tool (because circular saws and bandsaws well address most requirements?).
Just signed up and haven’t purchased yet. I am glad I read this post. I’m a bit anal when it domes to this kind of tool so set up is something I plan to do, but I also want to play with it. My two sons (17 and 20) do as well.
I think that a combination of watching CNC videos, reading documentation and practice provides the best learning experience. Some people get a CNC and think that it is an appliance, you get it and start cutting and then realize after receiving a box full of parts that they can’t put it together or know that they have to design something, create toolpaths prepare the workpiece, place it on the CNC and then start cutting. I’m flabbergasted by the number of people who have not read the assembly instructions, watched videos or even read the e-mail from Carbide you receive after making your purchase.
I find that some of the YT videos created by John @45rpm and Stufftokeepyouentertained who take you from design to cutting are an excellent source of knowledge so you can try to follow along and create something with the Shapeoko basic tools are best but only after you have your CNC setup working properly. Watching those in advance is probably pointless, you need to have done some practical homework before.
 I figure I have some scraps but I am going to head to some of the construction sites and get some of the scrap wood they are throwing out to have extra to play on.