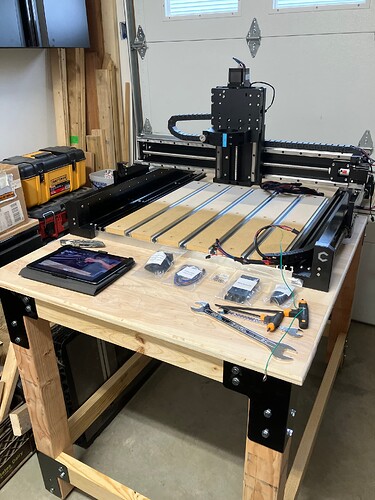
I mostly use the cheap bits for figuring out new toolpaths. Once I am comfortable with the workflow I might switch in an expensive bit and try to push things.
I have come to think of bits as consumables, just like blue tape, workholding clamps and glue, it helps avoid disappointment ![]()
But more seriously, it’s worth finding a trade bit supplier in your area with a web store, I use a few here in the UK with very decent prices on the common size bits that I use
has good prices on wood cutting bits
do DLC coated single flute aluminium cutters for < $20
are more trade focussed, and do other nice toys like reference straight edges
These vendors typically ship same day, as their customers are working machine shops who need it next morning and when you can buy your regularly worn out or broken tools at sensible prices, you worry a lot less.
I’m sure the Amana bits are great, I use some expensive cutters to get good finishes on plastics and plywood, but most of my cuts and almost all the roughing is done with cheaper cutters.
HTH
Yeah I think I am dealing with a similar company. This is the guy I get the Kyocera bits from:
https://www.ebay.com/str/carbideplus
He’s in Texas and I’m in Florida. Ordered bits at 3pm on Friday and they arrived Sunday afternoon.
10 pack of 1/8th in endmills for $34. Yes please.
On eBay there’s also Drillman1.
For the local sourcing, I was able to use Harvey’s “Find a Dealer” page to locate a company which was willing to let me drop in, and drop off a check for an order, then pick it up when their shipment came in, saving on shipping.
Pretty sure carbideplus IS Drillman1. ![]()
I should have mentioned that I get busy at work and don’t check the forums I’m on for a few days sometimes.
The salesman I spoke with said a dust boot is included with the pro 5. I don’t remember what it’s called.
The extra collets sounds like a good idea. I will look into different bits when I get time.
I will ask this here on the forum because the answer may help others besides me.
Can you tell a little more about the upgrade? Is 220v better or is it a better VFD that just happens to be 220v?
More HP and ER20 collet
Note that we have an 80mm mount and matching spindle in development — I suspect it will offer a 220V option, and it seems likely it would be ER20 to match the spindle in the HDM.
And you will sell a bunch if you ever actually release it ![]() I feel like it’s been “in development” for quite some time.
I feel like it’s been “in development” for quite some time.
The idea of having a spindle that can hold bigger shank bits is ideal for so many of us. The spindle would be able to handle harder pushing. Run times could be reduced. The bit selection would also increase by what could be ran. Hopefully the offer of a cooled spindle would also be there. Water cooled would be great.
Please note however that both the ER-11 collets in the VFD/ER-11 Carbide Compact Router, and the proprietary collets for the Standard Carbide Compact Router/Makita RT0701 allow up to 8mm shaft sizes, which is a marked step up in rigidity from 1/4" tooling, and has not yet been exhaustively explored for the advantages which it might offer.
I’ve bought a couple of tools w/ an 8mm shaft, and all have worked well thus far.
I suspect 8mm tooling will become more popular because of this collet availability, and that it is the default size in the router used in the Shaper Origin.
Like I have said before, I will purchase the 8mm collet and get some of the 8mm shank tools. There are a few things I would like to run that will hog off material without skipping a beat.
A couple of nice things about the ER20 are that
- I can run a 10mm edge finder (wobbler), but you need to go down to about 1,000RPM for that
- There’s quite a bit of 1/2" tooling out there which is really well priced as it’s standard for big routers
I have used many a’ edge finder but have found a faster way to find the edge of a part for zero. I have come to use a piece of paper and the edge of a tool. I moved the tool to the edge of the part in very small increments and slide a piece of paper back and forth between them until the paper stops moving. Then I set zero to that location, then move the tool over until it is half the size of the tool. Then I reset zero to part. I set X and Y zero this way.
If I’m finding center of a hole, I take a tool and move it into the hole just a bit below the hole top surface. Then I move the tool to the inside edge of one side of the hole in X or in Y, whichever I am working on first. I use the paper move the same way, moving the paper and moving the tool until they touch and paper stops moving. Then I set zero there. Then I move the tool to the exact opposite of this touch off and use the paper again to find the total distance from tool set zero and this new locations. I take that number and divide by 2 and that gives me the exact center of the hole. Then I move the tool to this location and set zero. I do the same for the other direction to find that direction’s center.
I run too many stainless steel tubes to always use an edge finder to find center each tube. Working in a machine shop really helps me put into perspective the workings of my Shapeoko 5 Pro.
What are you using/recommend as a table for 5 Pro 2x2. Any DIY plans or purchase ready-to-go? Thanks!
I am using a Kobalt Husky Workbench which is only 24" deep:
for my 4x2 and it is working well (but since I bought that on sale, it has gone back to normal price, and since then the price was raised — I don’t think it’s a good value at the current $349)
We use a number of Kreg tables at Carbide 3D:
and Lee Valley just announced:
which at the introductory pricing looks to be a good value (depending on lumber costs in your area).
I built a 62" x 62" table. I sections my table off in two sections. The back section has areas for all of my wiring to be routed out of the way to one side of the table where I have 2 shelves built to hold the power supply and the spindle power box. Then I have ran a multi plug to a designated outlet where it all has its own circuit breaker. The front section of my table is for all of my drawers for tools, supplies, and anything else that I would like to keep out of the area of the sawdust flying. I will add a slide drawer for a computer to hide in when not being used, and when being used, the drawer will come out and give me access to the computer. I also plan to add a computer monitor on my wall beside the machine so the little computer can plug into and allow me to see progress of the machine.
I know that was a little winded. Sorry about that. Some have used toolboxes back to back if they are wide enough.
Ended up building my own because of space limitations.
Took @WillAdams advice and bought brackets to firm it up for stability.
Base 51"x34". Top 53"x36". 3/4" maple plywood.
Still need a bottom shelf for the vacuum and dust collector.
Also, a drawer for laptop and endmills, etc.
Ripped 2x8s instead of using 2x4s for better straightness.
Brackets $58. Wood $140. Leg levelers $10.
I should have raised the bottom rails up a few more inches to install retractable casters. Too late now.
You probably still have room to add these:
Pair them with the removeable plates so they are not poking out when you don’t need them.
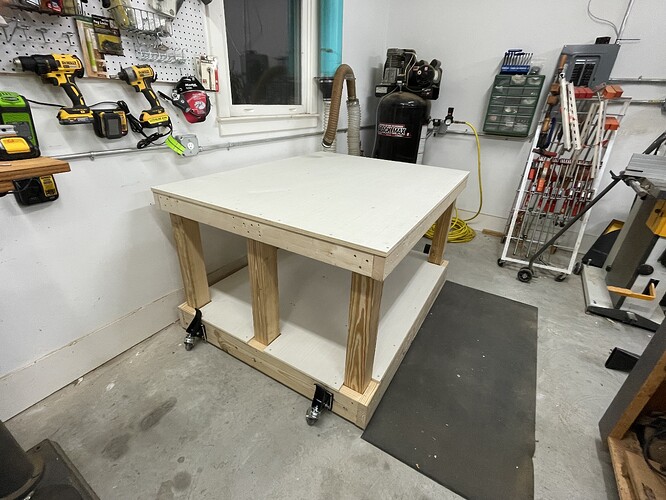
Here are mine before I added the machine


