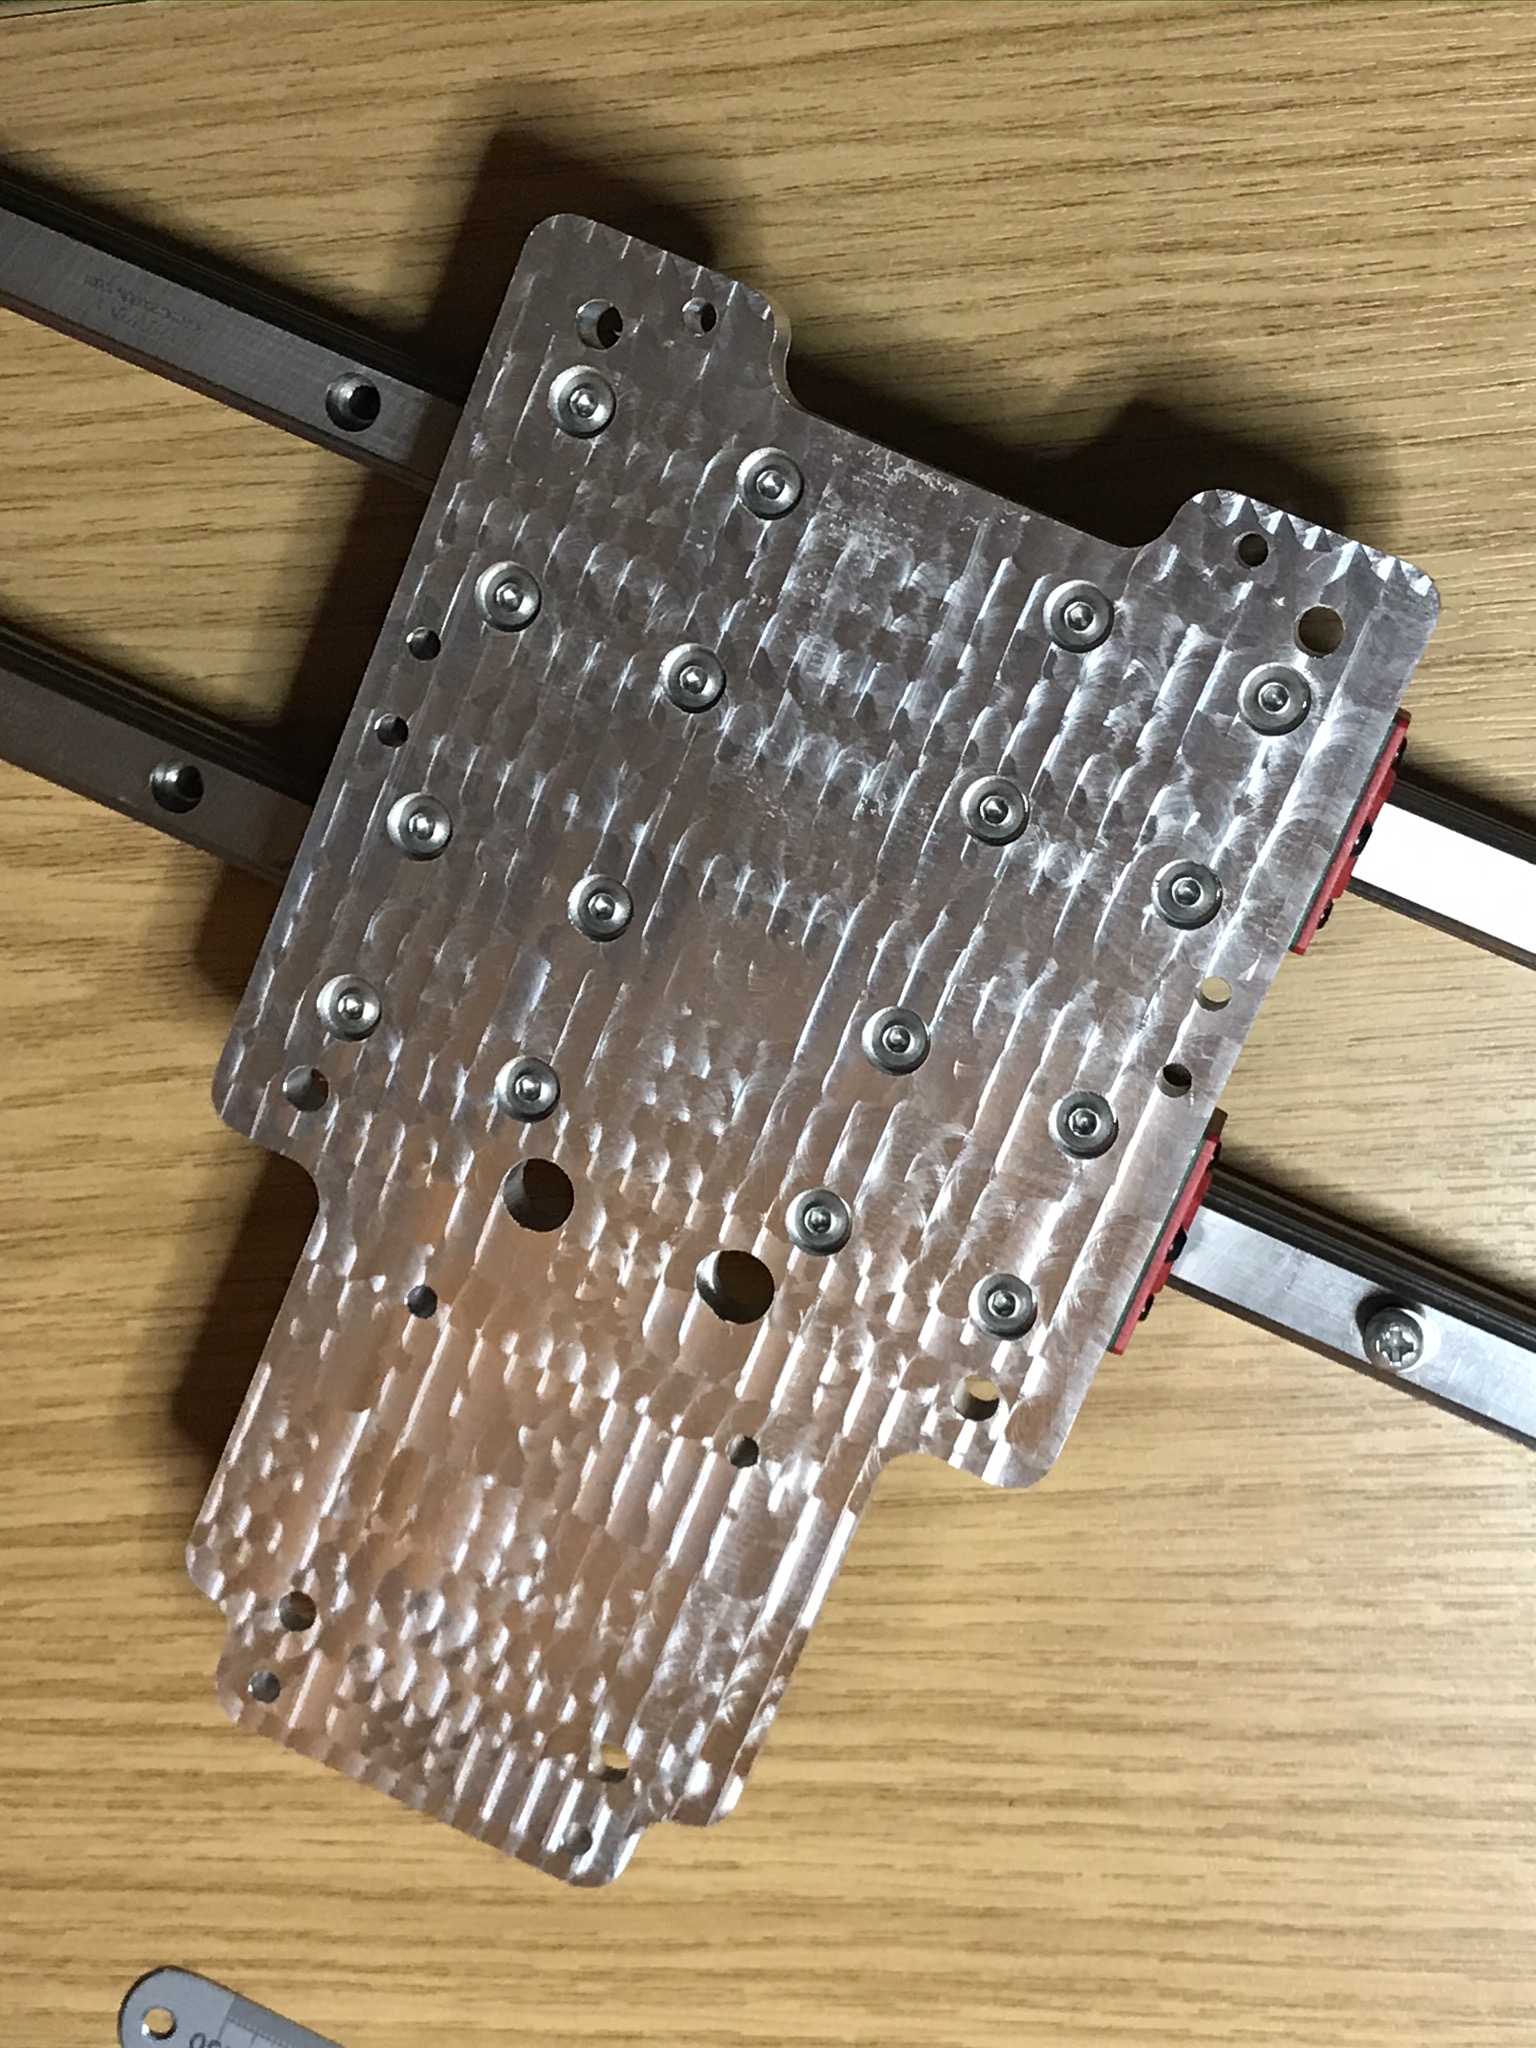
I decided to have Xometry machine the main HDZ to linear rail adapter plate for my conversion so I could get an accurate, anodized part in 7075 aluminium whilst I would machine the smaller parts on my Shapeoko. I am now regretting this decision, 36 days after the order the part finally turned up and I’m confused as to how exactly it got the way it is, which is bent.
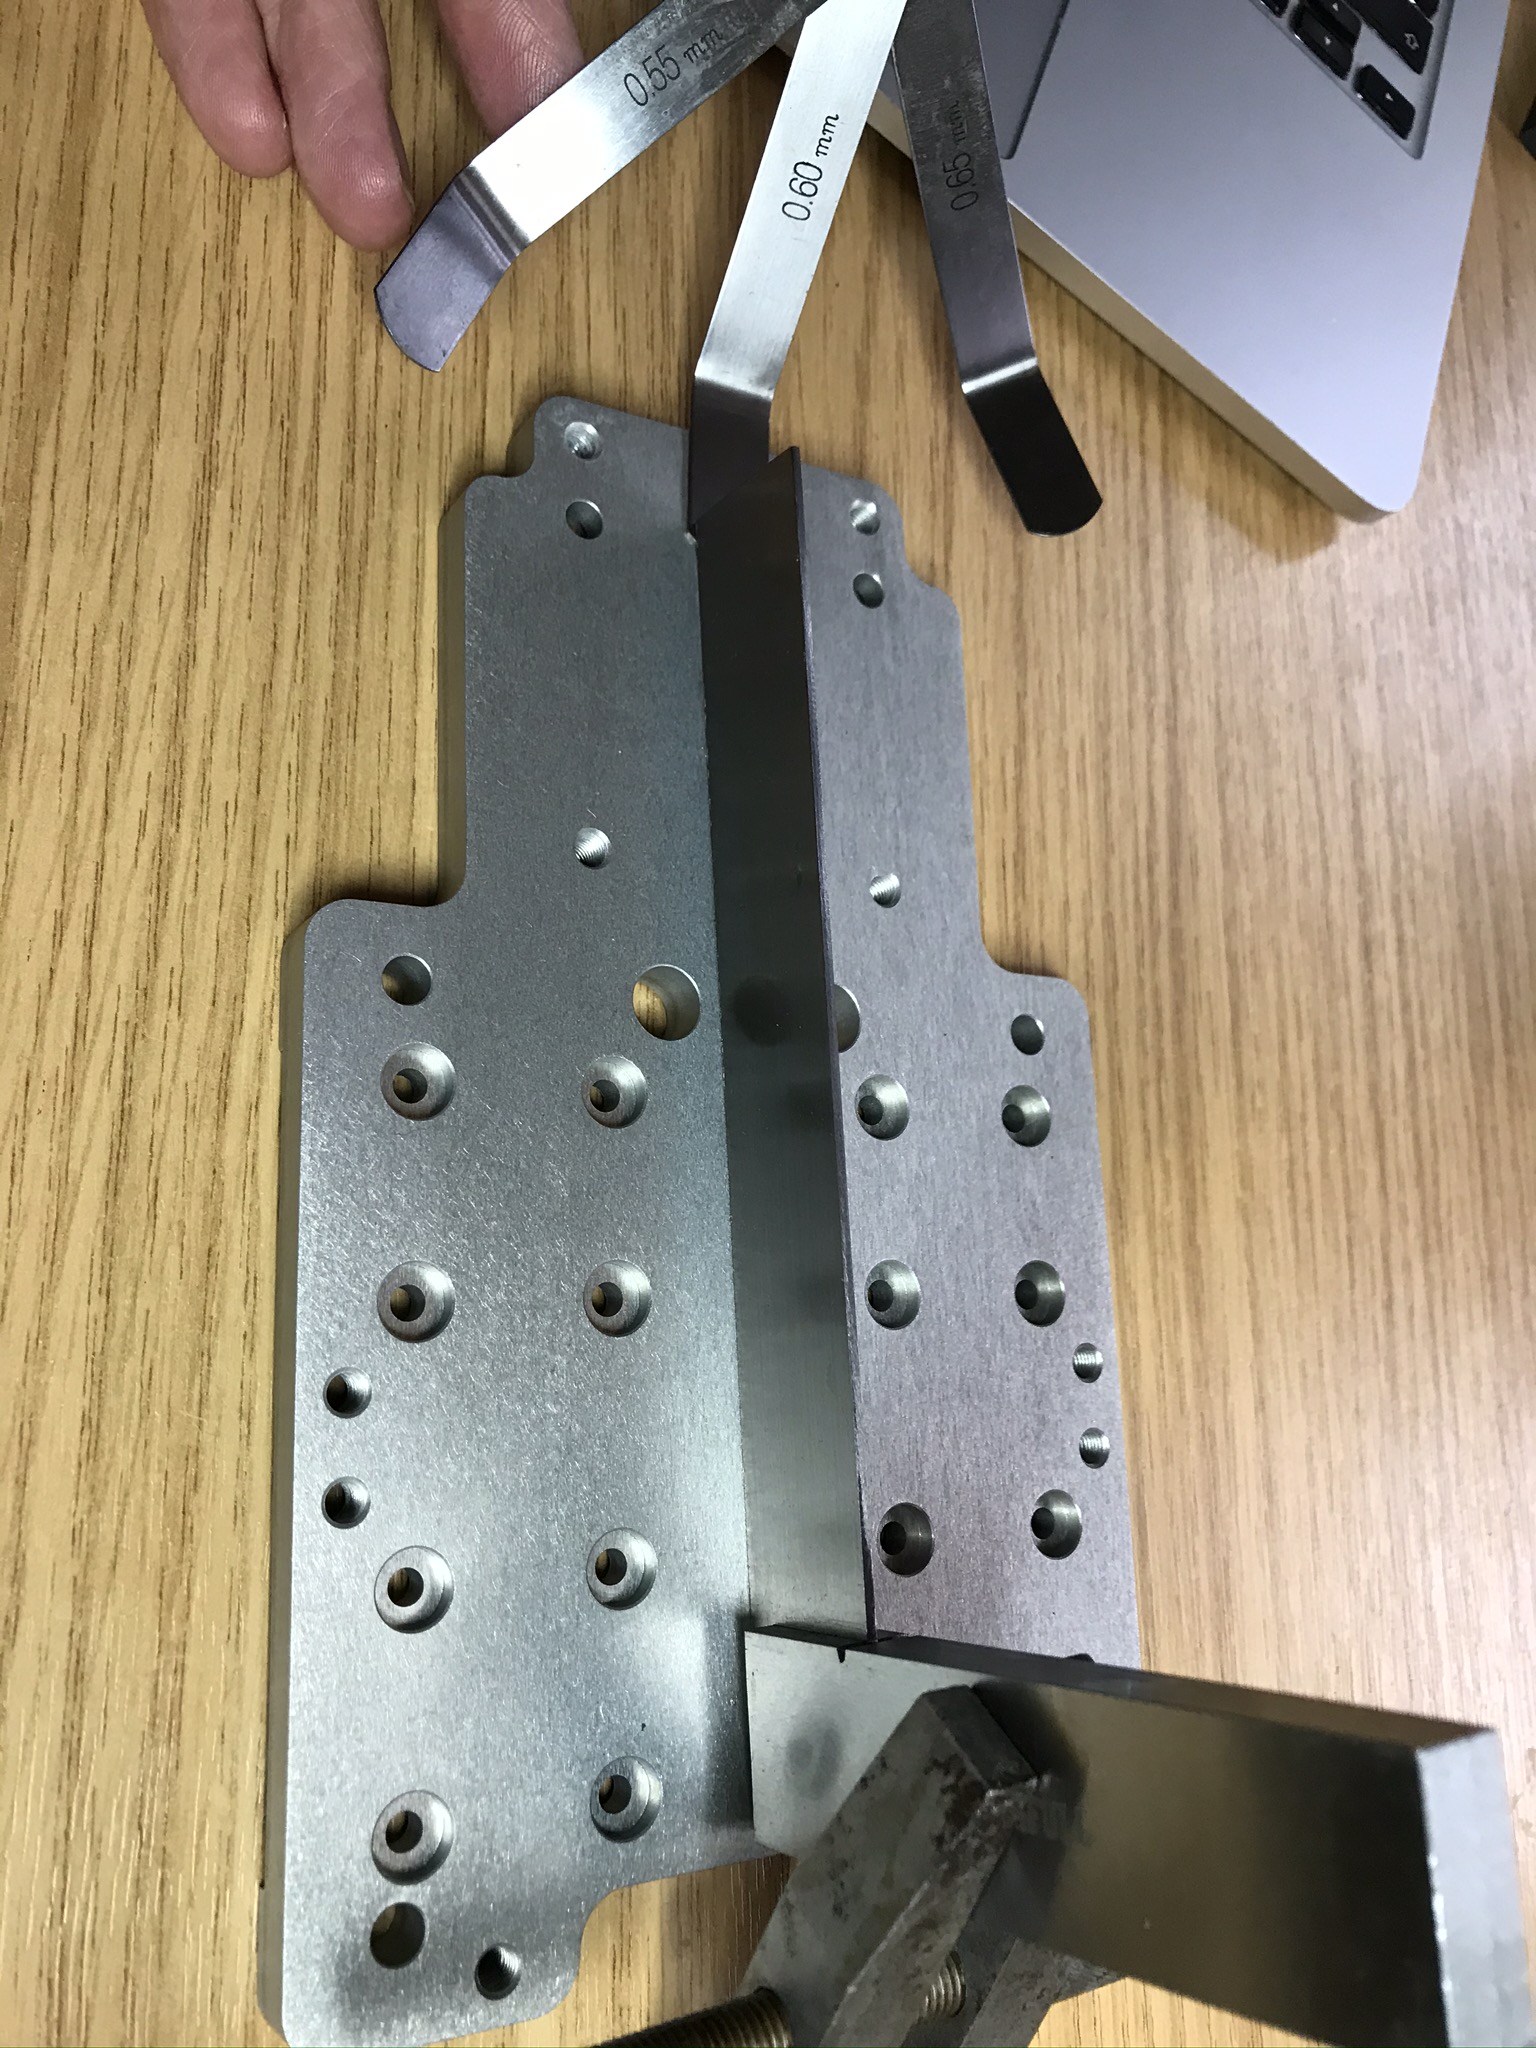
The thickness is accurate to within ±0.05mm all the way around, the counterbores are all within 0.03mm of target depth, the holes all seem to be in position and of the correct dimensions.
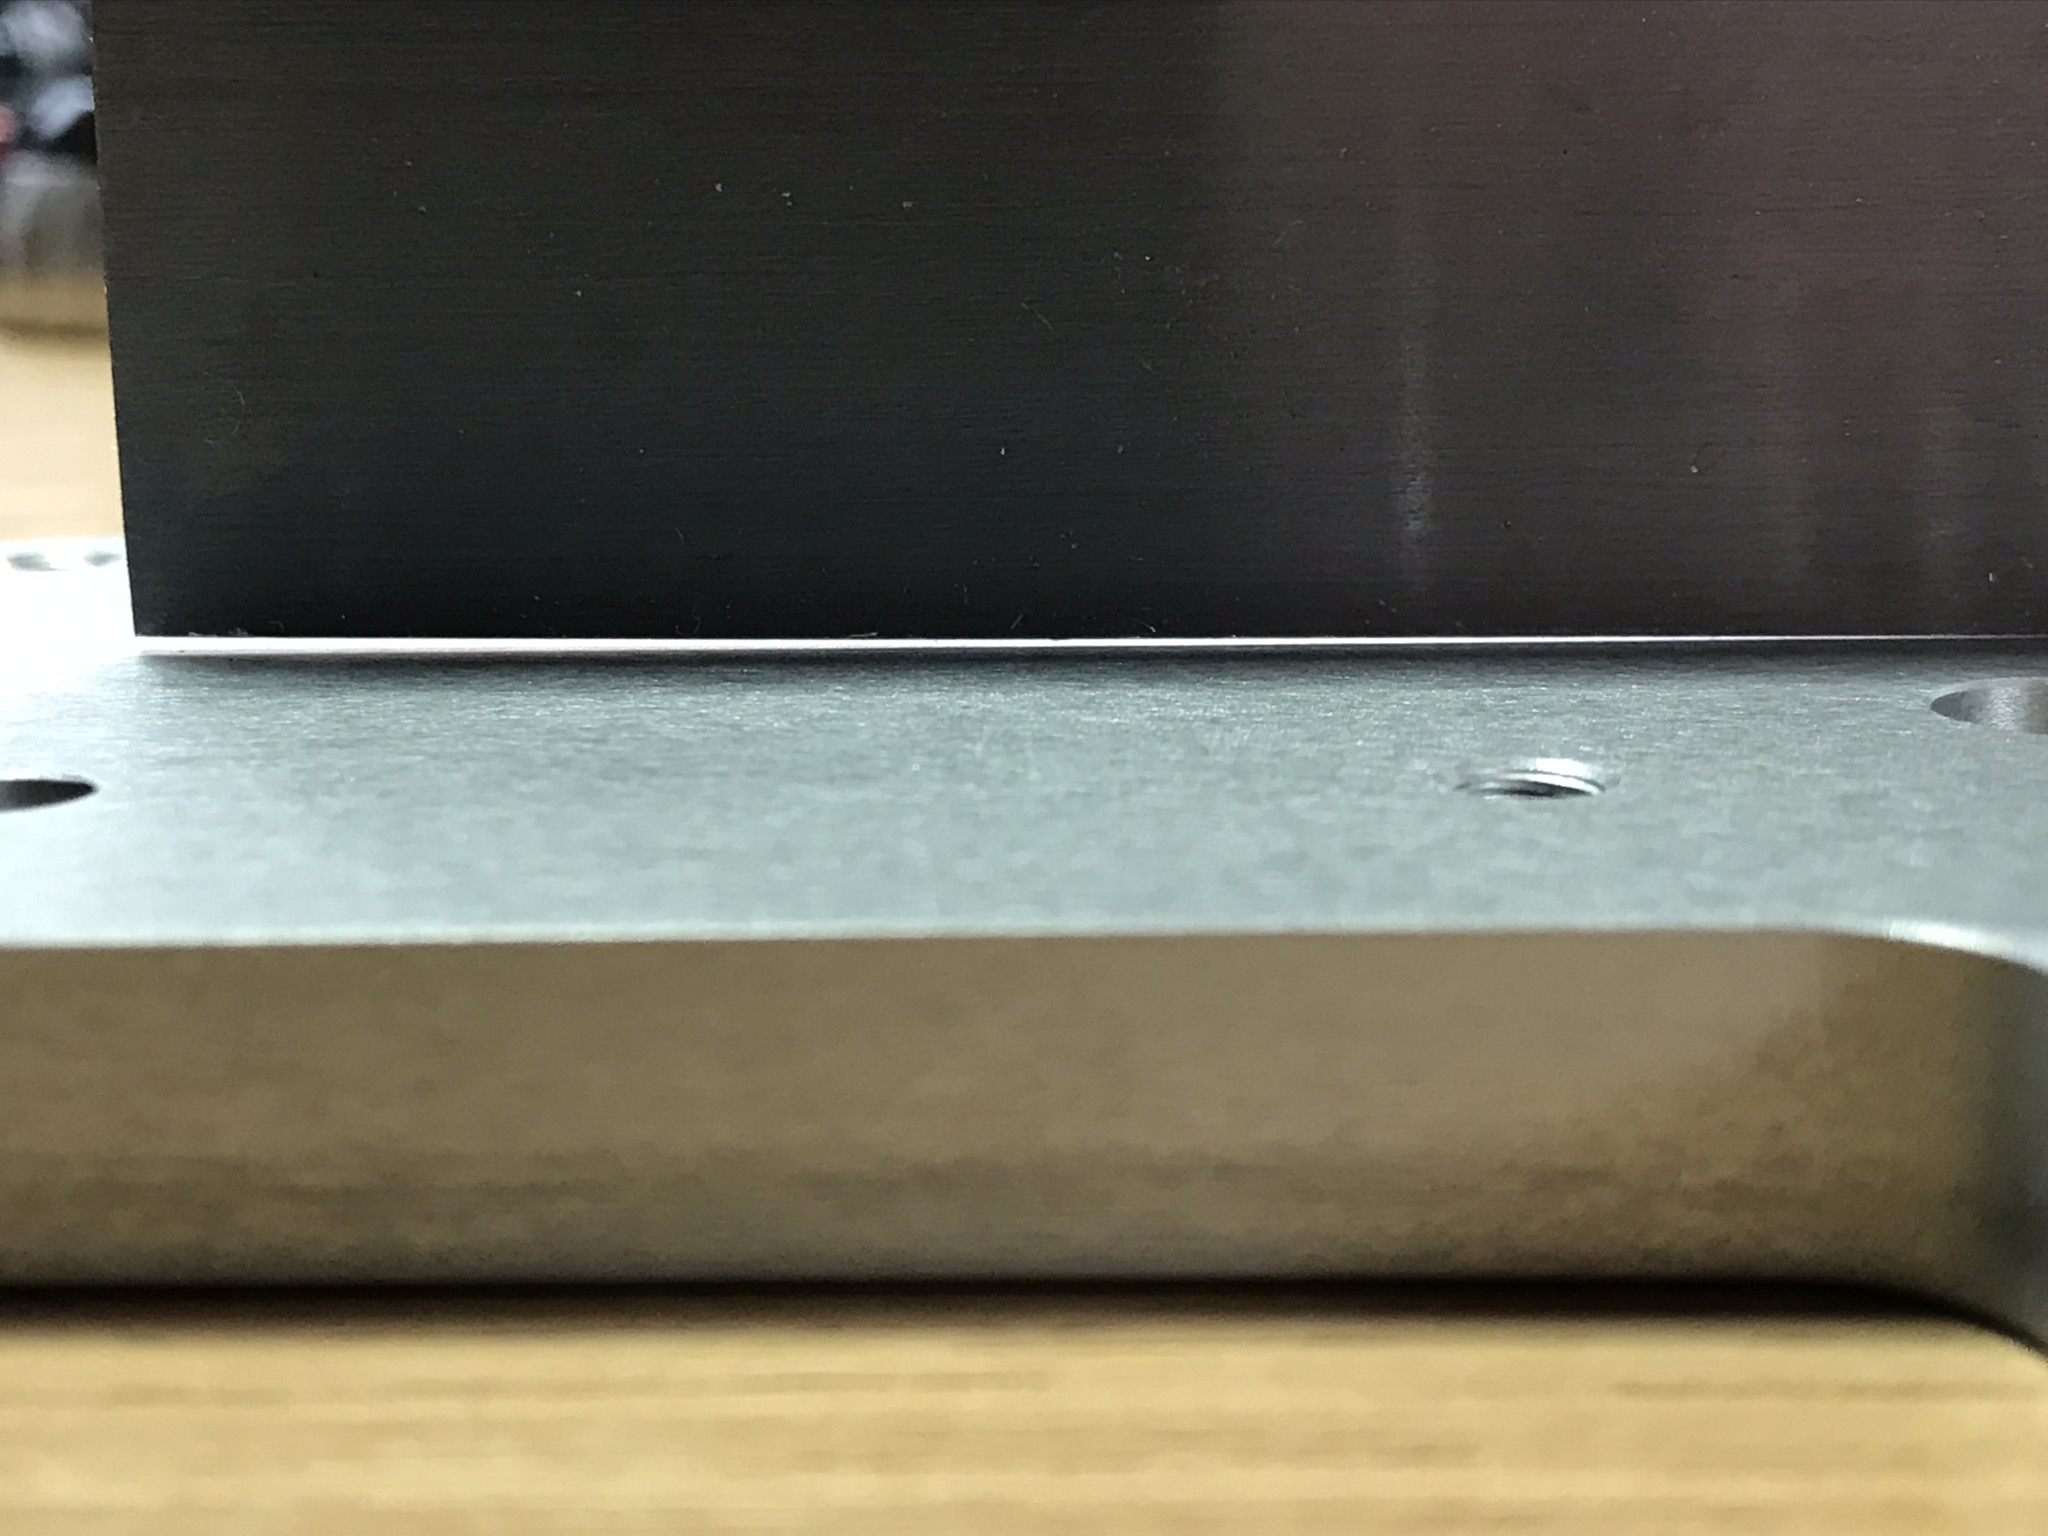
But, it is curved in both X and Y directions, a straight edge on the long dimension is 0.6mm clear by the end, the bow in the shorter direction seems to be of similar curvature.
As I’m probably going to have to give them a chance to supply a replacement I’m concerned as to how they managed this, clearly there wasn’t any QA, the box it arrived in was completely undamaged and unmarked (although obviously not it’s first use, remains of tape and other labels torn off), there’s no surface marking on the part to indicate any substantial force was applied after machining and anodizing, so the only things I can think of are;
a) They managed to clamp it down so hard in their work fixturing that it was “flat” whilst machined and sprang back to banana shape as soon as it was released
b) The alloy they used has changed shape since machining by this amount (at least 0.3mm over 200mm length)
If it was a then a replacement might be acceptable, if it was b then I really don’t want any part from them.
Thoughts from those with more metal maching experience please?
You trust your square? I like to use a granite surface plate to check for bow/cupping. A small 9x12x3" (or 2") can be reasonability price for a lower grade but should be adequate for this.
I don’t think 7075 is stress relieved, that could have played a factor depending how much stock they removed and how they handled getting to dimensions. But idk, could be anyone’s guess.
It does look nice but I guess it ain’t all about looks
Nope, so I tested against some other straight edges too, they agree and show the opposite curve on the other face. It even rocks when placed on a worktop and it’s visibly curved when you look along the length.
A surface plate is on the list to buy along with a compressor and several other toys…
The finish is ‘natural anodized’, oddly the price went up significantly if I selected any colour for the anodizing.
My experience with xometry is that their parts can be on the very edge of what’s within spec. Those 0.6 mm flatness deviation would be within tolerance class L (ISO 2768 T2), so if you specified even just class K (which I thought was their default?) they would need to send you a good part, no matter the reason.
For parts with required accuracy, I’ve switched to spanflug or Weerg. At spanflug in particular, the surcharge specifying extra accuracy on concentricity or flatness tends to be fair, but it all needs to be in the drawing.
As for the reason - 7075 plate is notorious for large internal stresses (which the T651 treatment is supposed to reduce), but those are unlikely to produce that much distortion in a plate this thin. Unless… xometry milled that one out of a much thicker plate.
Perhaps you could use a thick piece of 6061 plate drilled to match your holes. Start your bolts then heat it and tighten the bolts and let cool or possibly quench with it locked flat.
Xometry finally replied, 5 days after I raised the part unacceptable ticket and offered some reduction on the useless part or a new part which would take another 2.5 to 3 weeks on top of the 6 weeks they’ve already had. I’ve given up on them now.
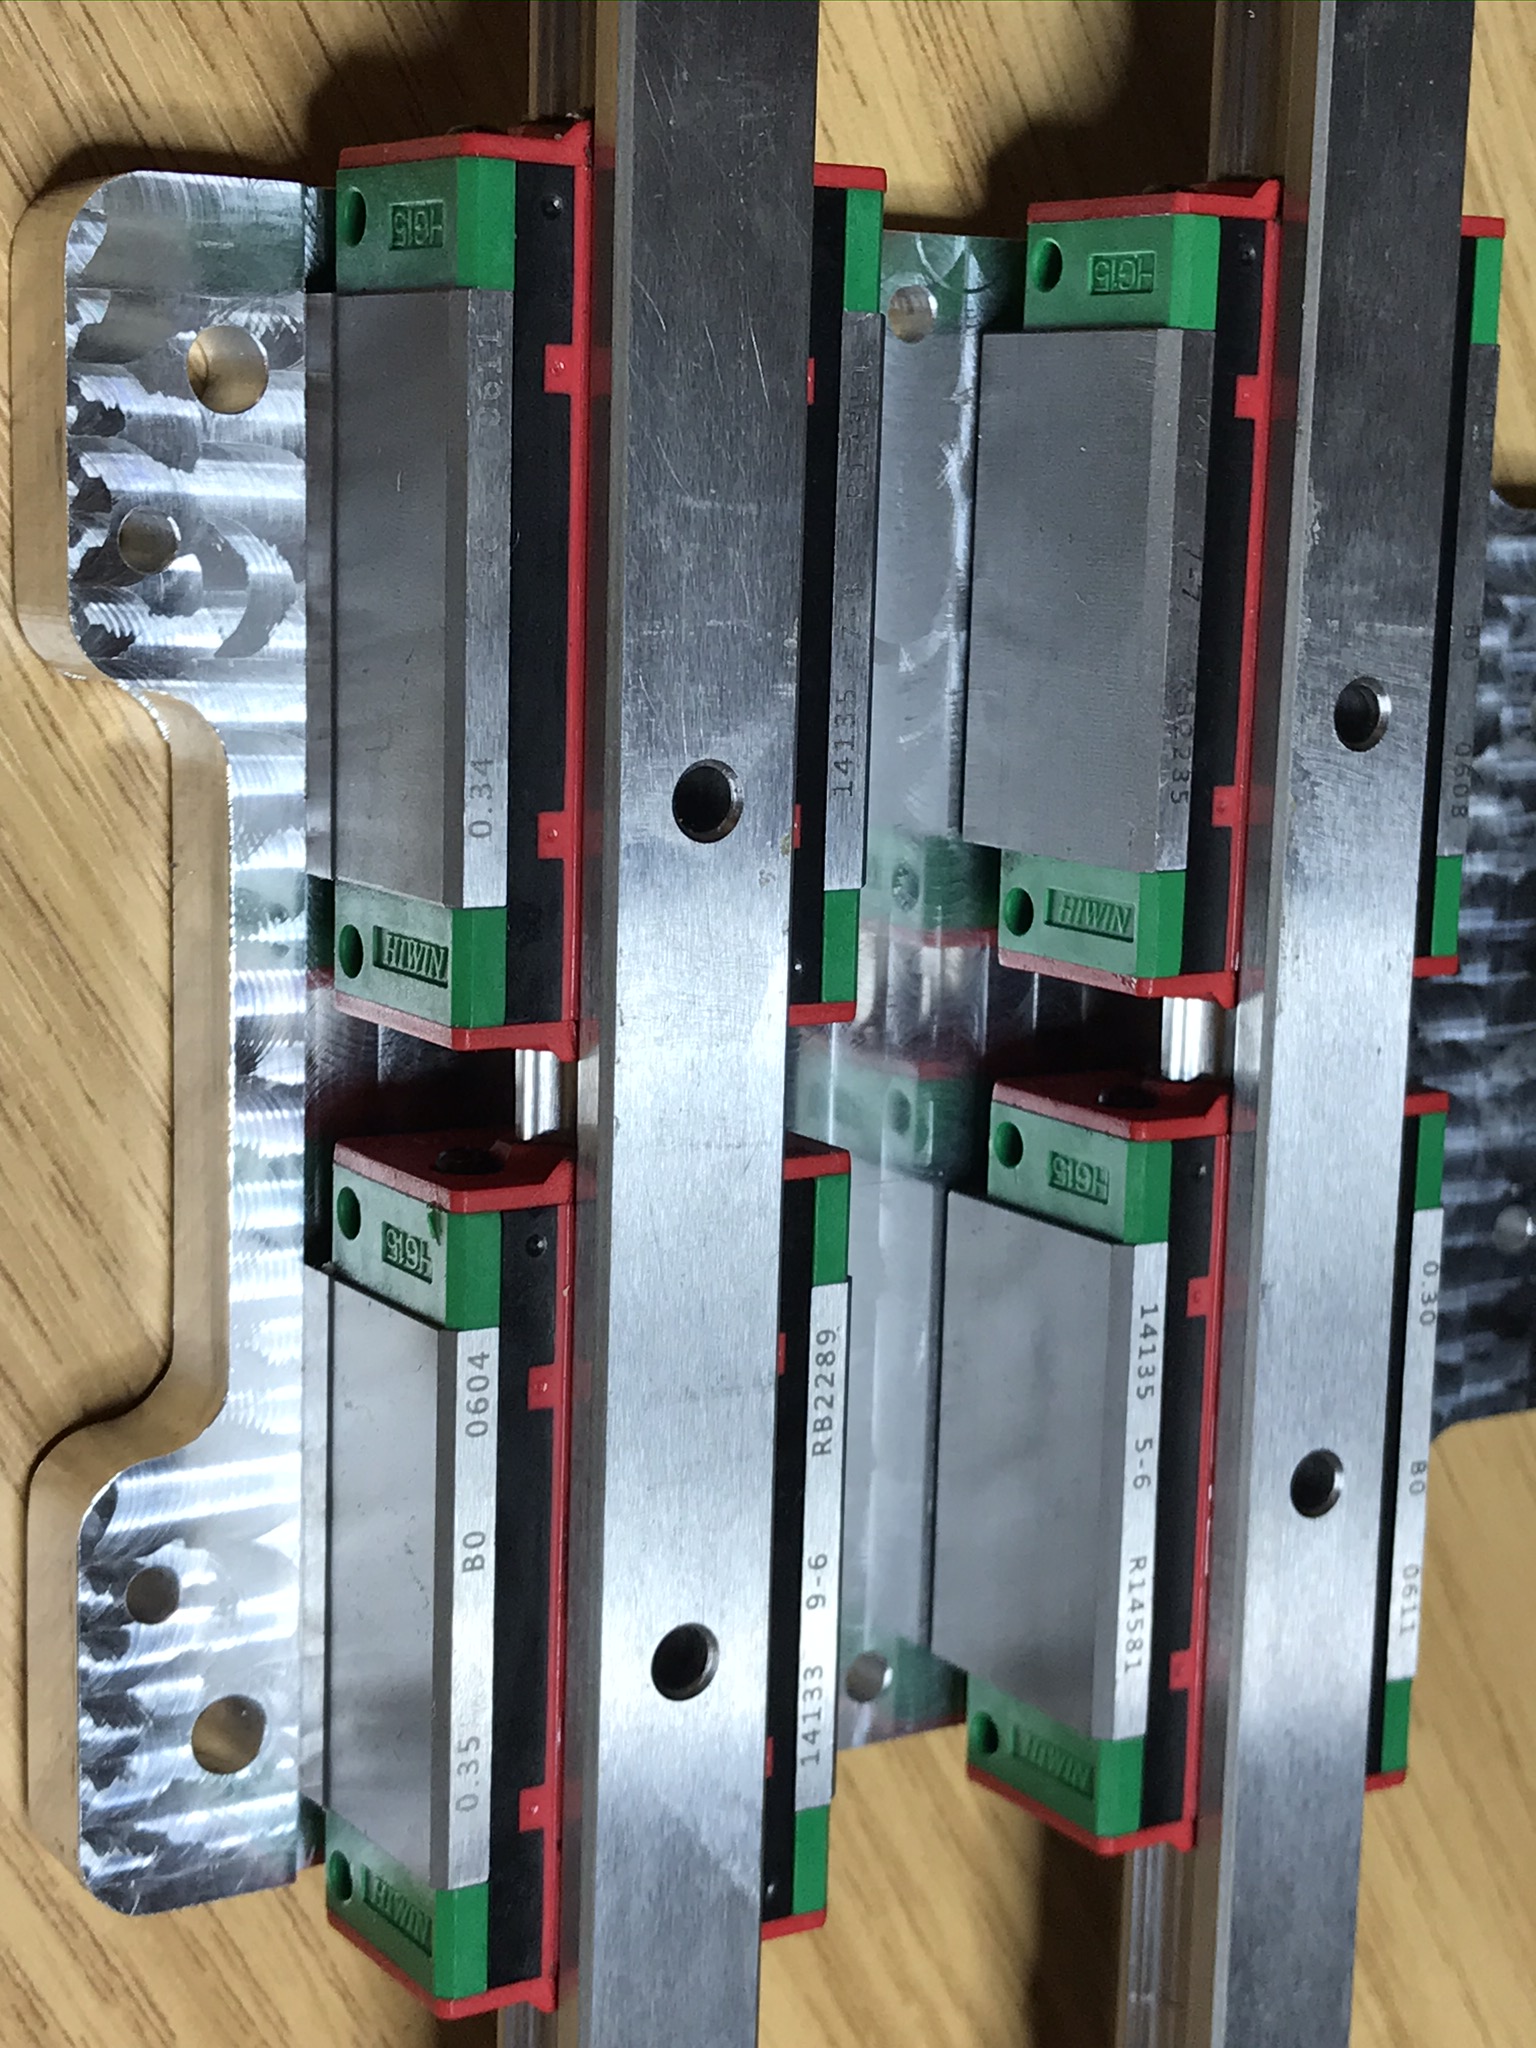
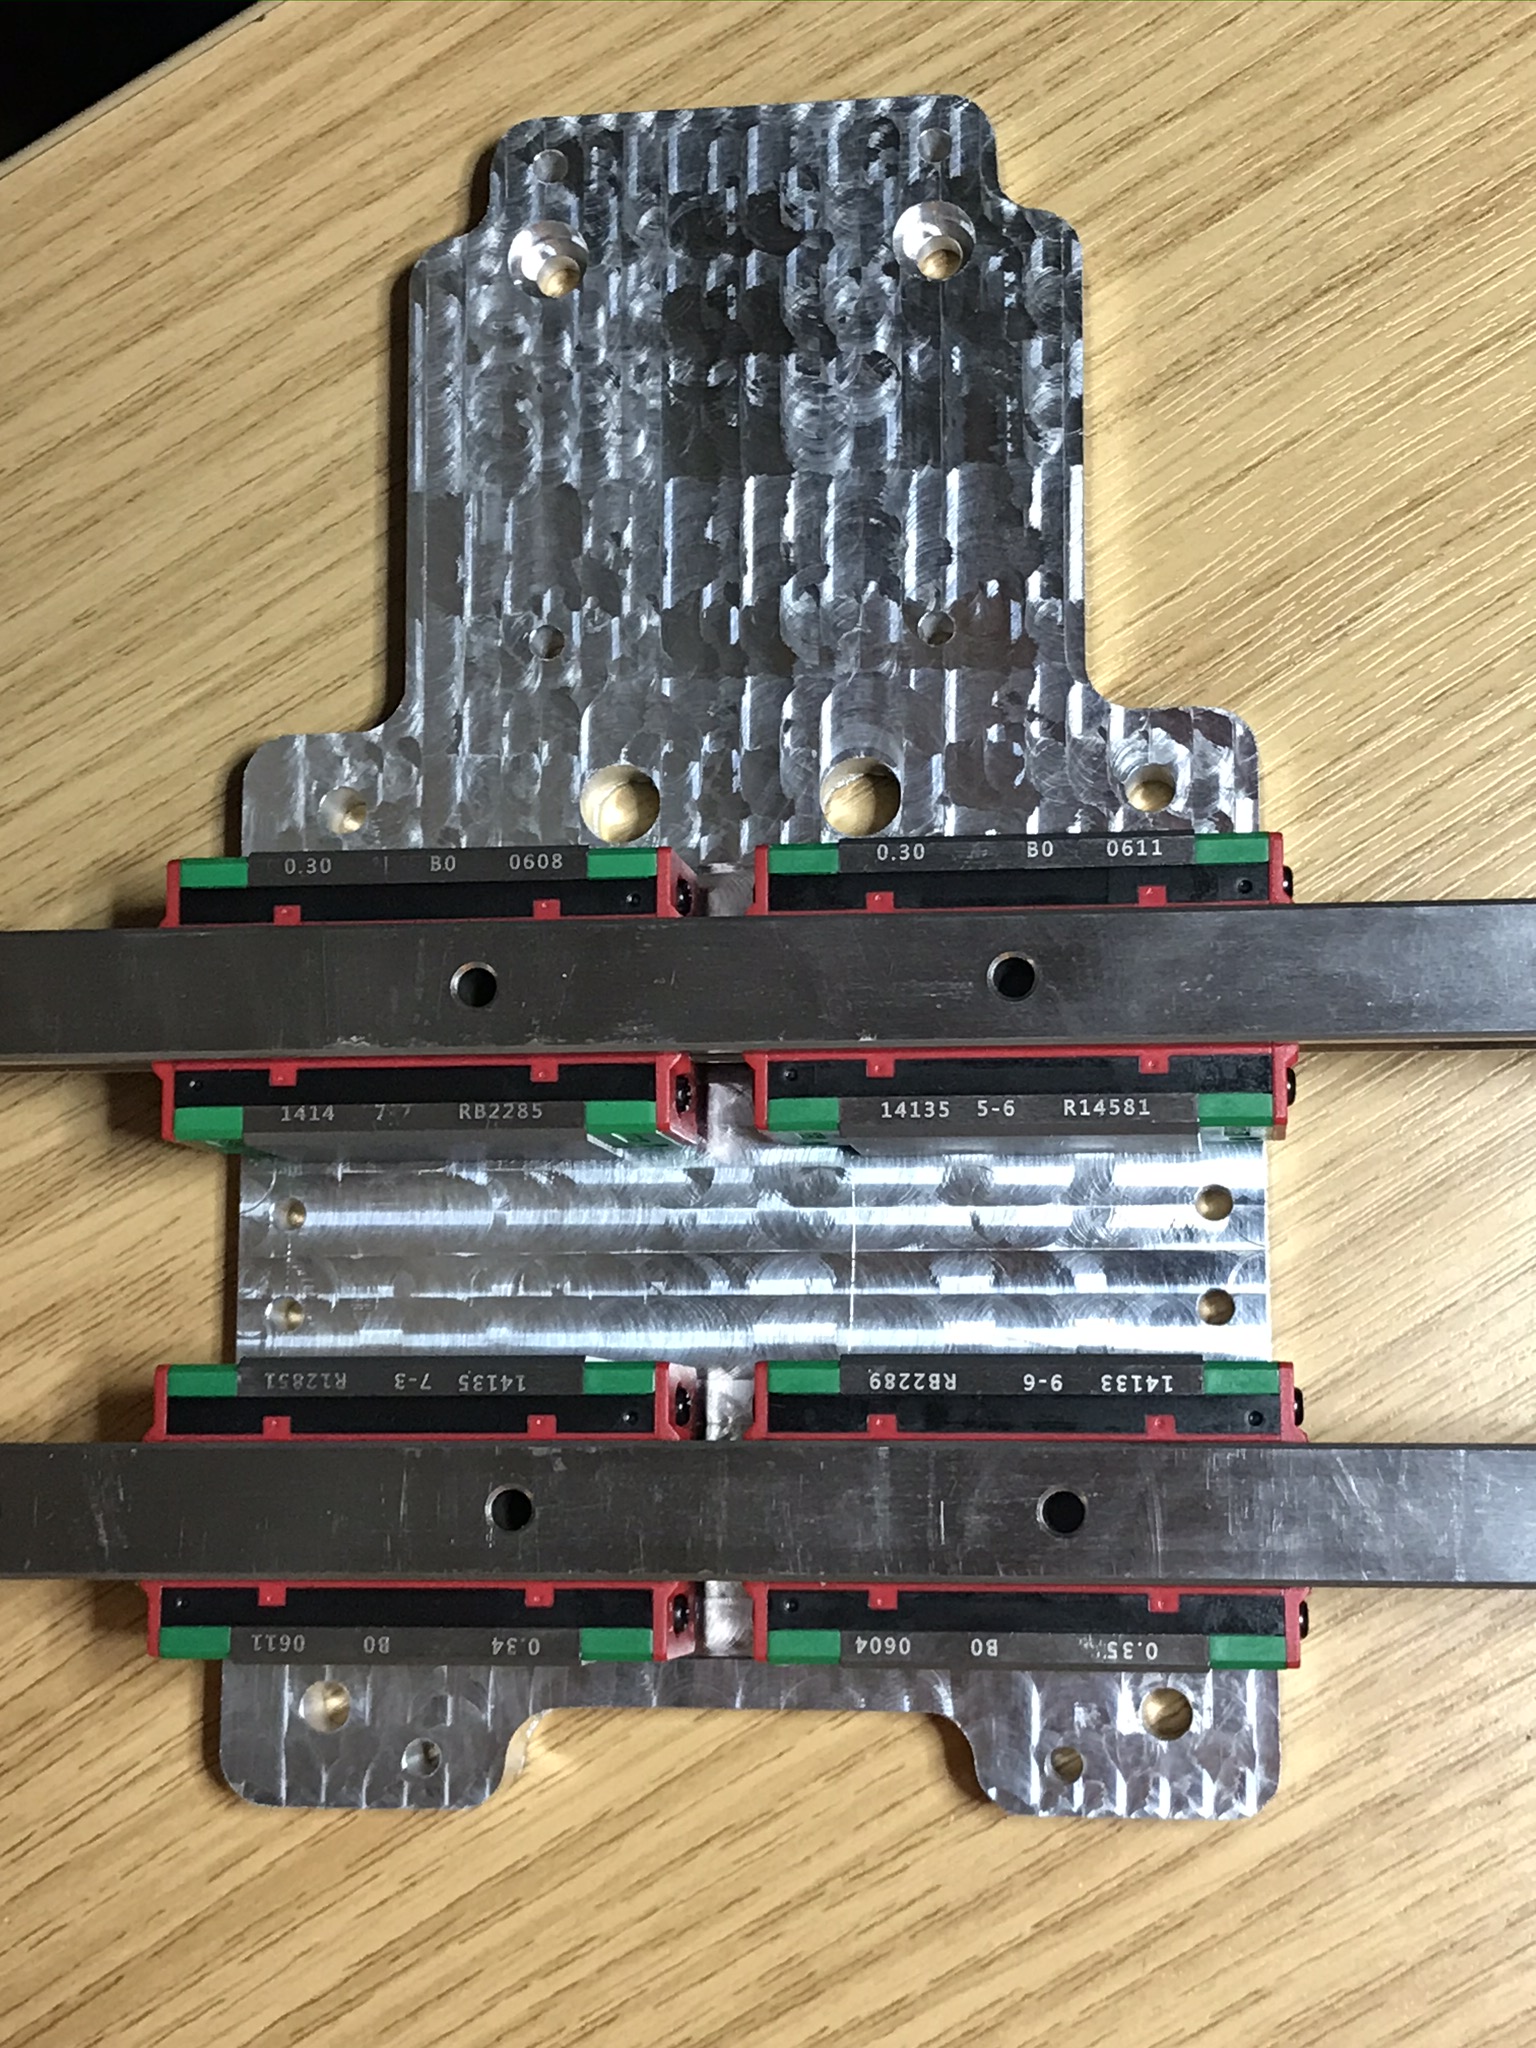
I should have had more faith in the Shapeoko, this time the reference edge for the linear bearings is there too;
It’s Dan’s Fusion model with a few small mods, he’s done so much of the work already and tested it out.
I’m just doing the X beam for now as I agree, the Z-X V Wheel coupling is the weakest part of the machine. I’ll test with the X rails in place and see how much better the machine is and whether I think the extra effort of the Y rails is worth it for me.
I’m taking measurements of the behaviour before and after so hopefully I can give quantitative data on the improvements.
Will do, it may be early next year before I get there, life is a little tough and busy at the moment (I haven’t been home since feb because of Covid state border restrictions) but it should be sorted out by the new year.
How long did it take to machine and will you be sharing your design changes?
This will be my next upgrade step until I can rebuild my savings enough to start building my 25mm linear rail CNC and having a more rigid shapeoko will help when I make the end plates for it.
This part, which is the largest and most important to get right, took an evening to do the CAM and then two evenings to do the actual machining. I think there’s about 3.5 hours of toolpath time between the two sides, add on setup, probing, tapping holes after etc.
There’s a few other plates in both this design and in Dan’s, mine is a bit more complex and may or may not work out to be any better.
I’ve spent a while learning how to machine Aluminium, with lots of help and hints from folks here, figured out what cutters to use and found a vaguely reliable eBay seller selling 6082T6 in cut sheets. I learned not to buy the bar stock but cut sheet for example.
I’ve also spent time fishing round AliExpress for parts (found an excellent Chinese seller for real HiWin rails and ballscrews) and 3D printed a few prototypes to test my changes and find the problems faster and cheaper than machining Aluminium.
If I’d just stuck to cutting the plates for Dan’s design then there’s probably a week of evenings to machine that stuff for the Z-X axis as an Aluminium newb, after you’ve learnt the basics.
It’s worth it even if just for the satisfaction of bolting together your own machined parts.
I’ll be sharing my changes, especially as I’m only building on other’s shared works. Don’t know if they’ll be any better or not yet, but I’ll share that too.
You realise that there is no end to that iterative process?
 but I guess it ain’t all about looks