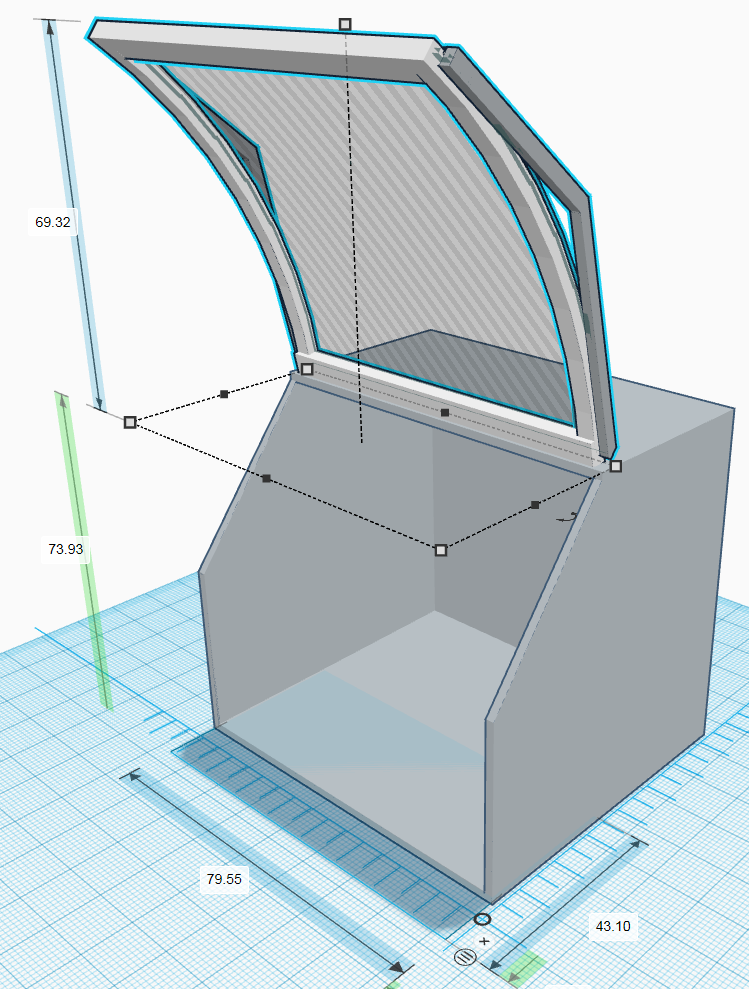
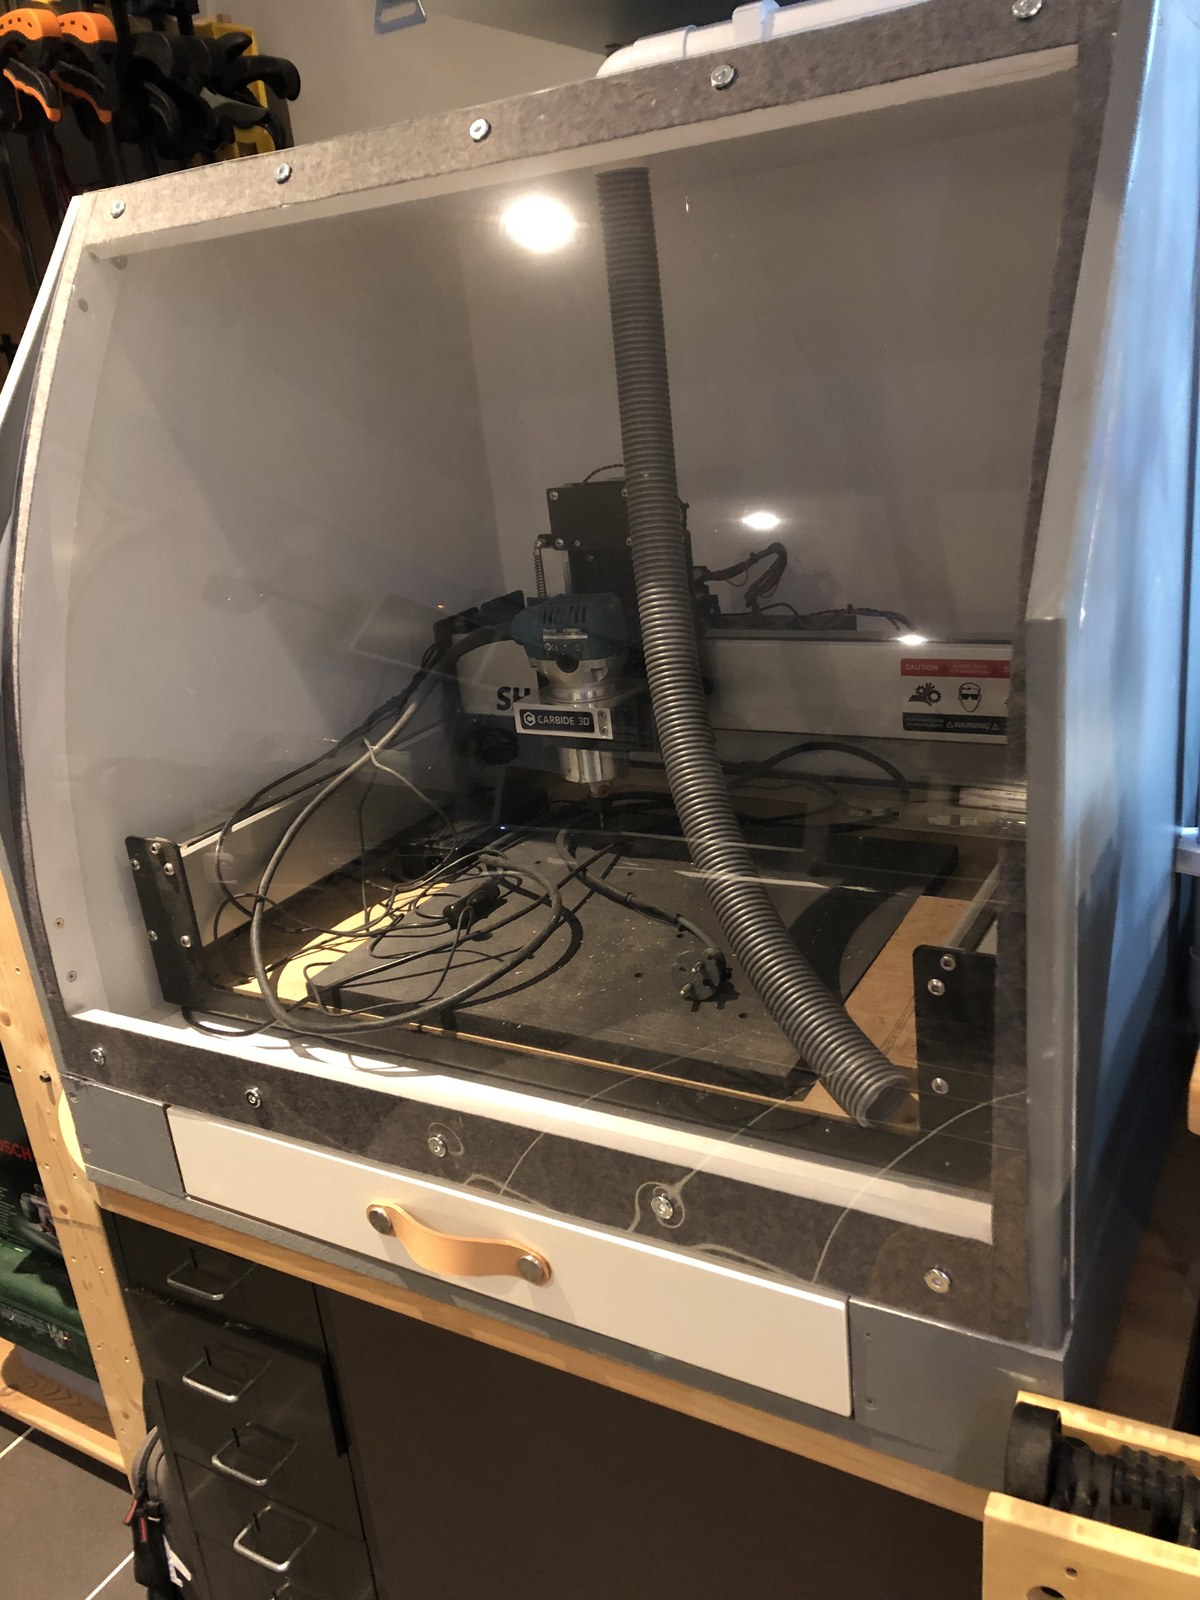
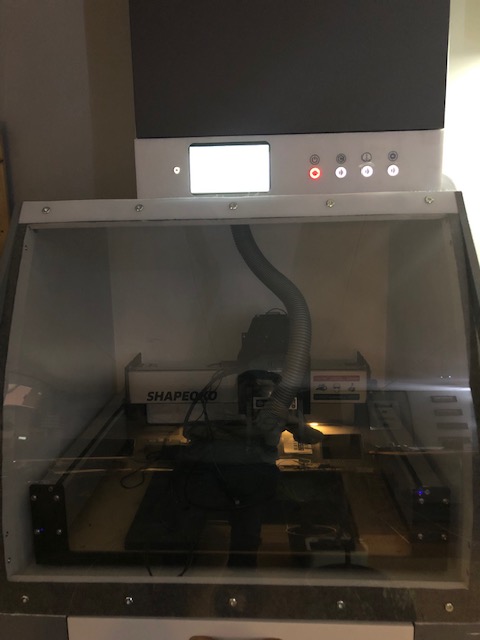
This is my take on a enclosure for the Shapeoko3. I have limited space in my mancave and I also wanted it to look nice, dampen the sound somewhat and keep the dustcloud on a manageble level.
If I understand, your control module sits on top. Will you be able to use it with the door open?
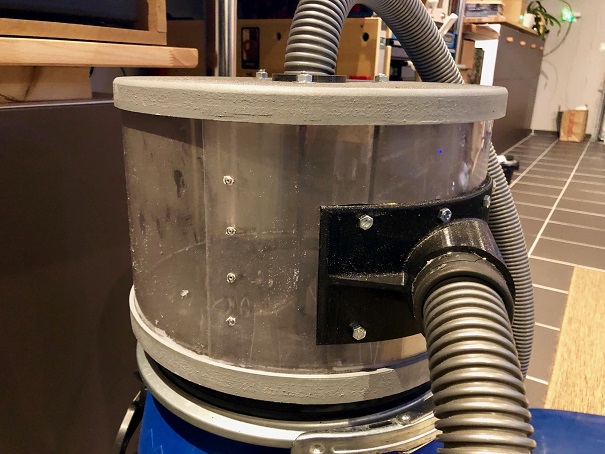
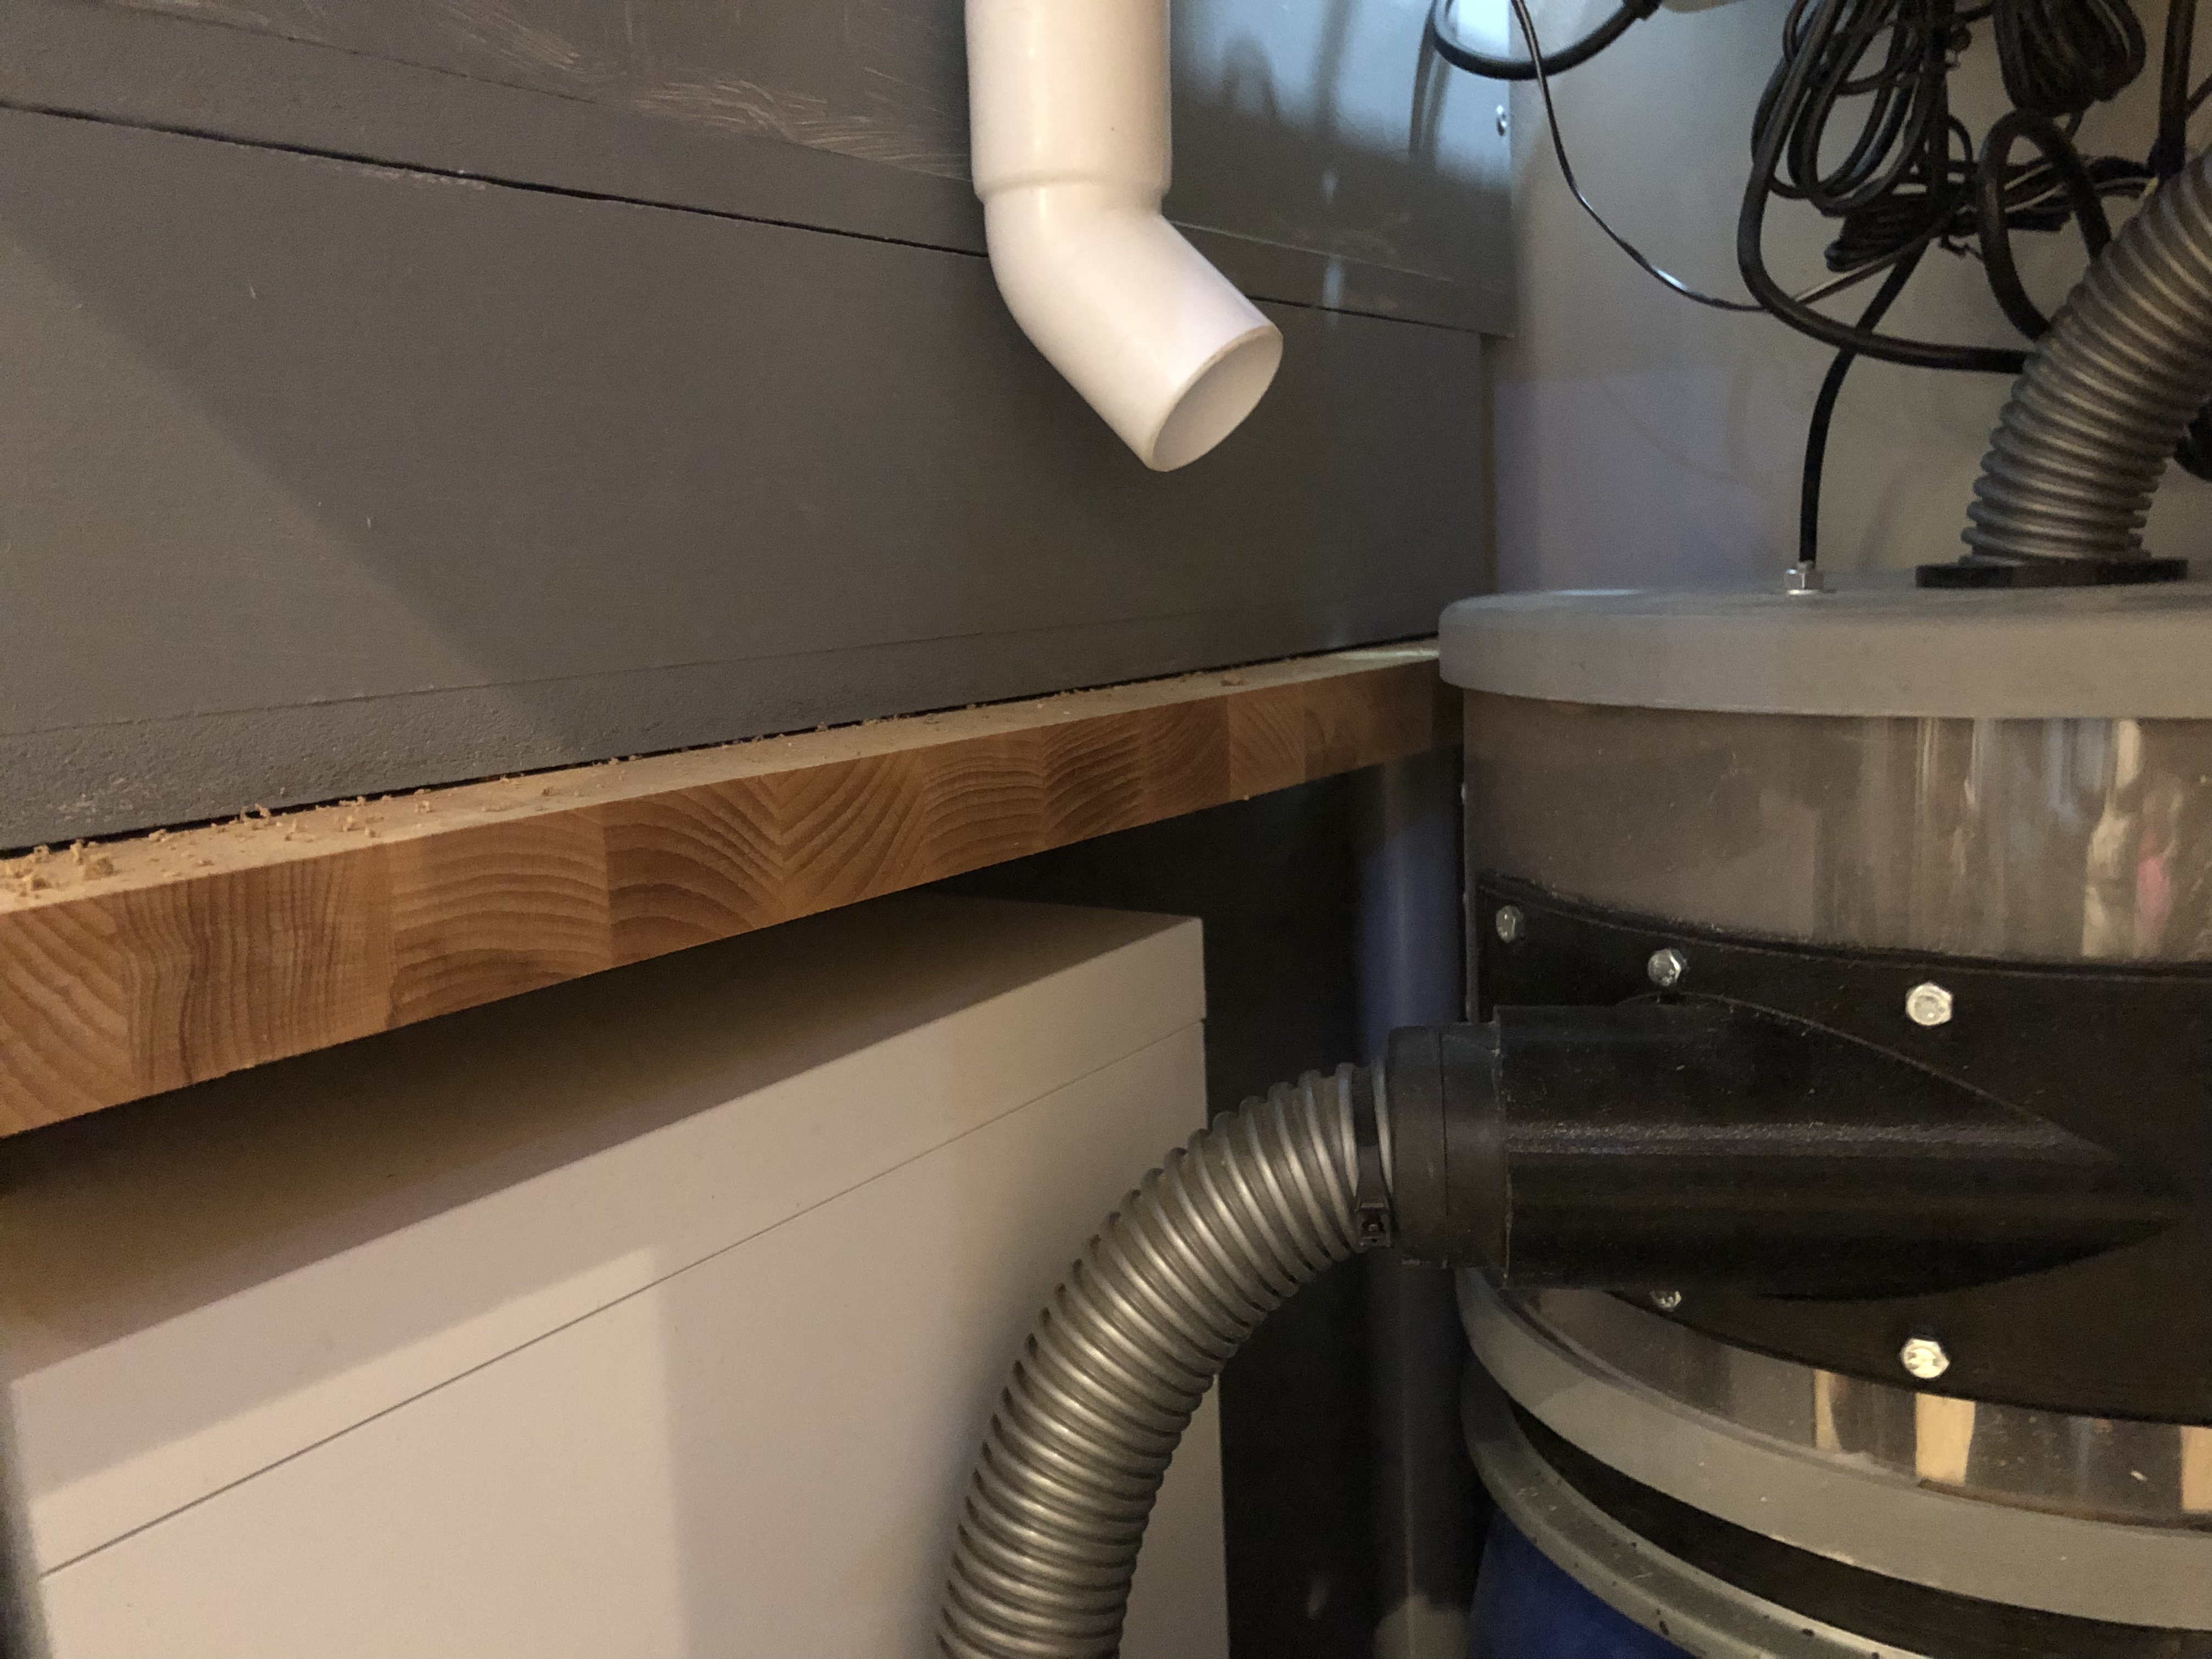
Where is the dust collection going, I don’t see a port in your enclosure? Do you have a dust shoe?
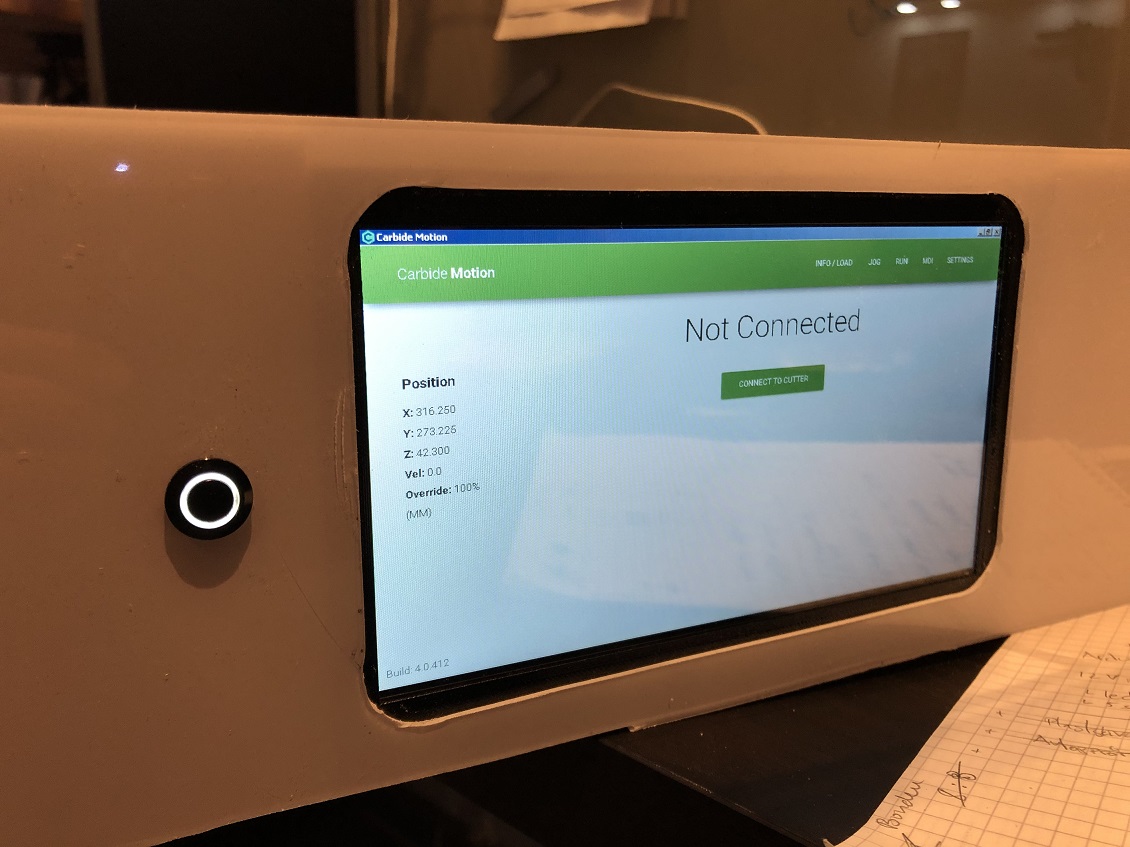
Thats a good abservation. I had the same thoughts when I decided the design (thats why the hinges is not mounted yet). At the moment the door has a “friction fit” and can be removed all together. If I mount it with hinges on top I will propably not be able to use the screen when open, but maybe I dont need to. “Jogging” and other key features will be able to do with a joypad. Still need some thoughts…
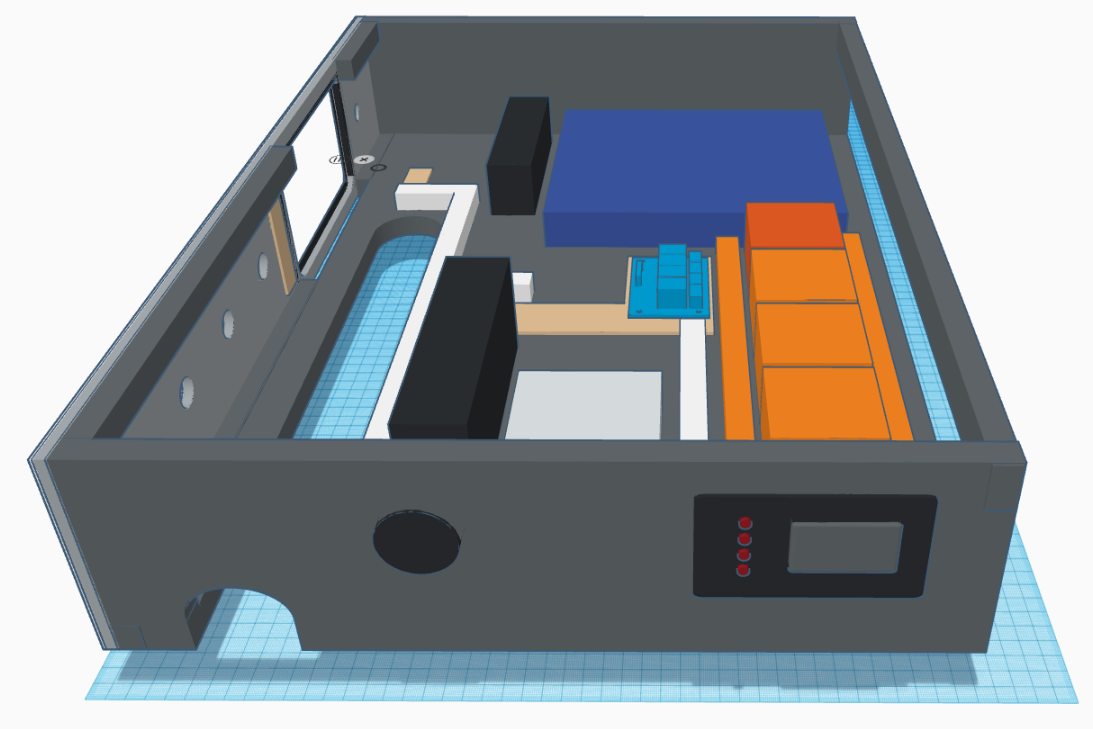
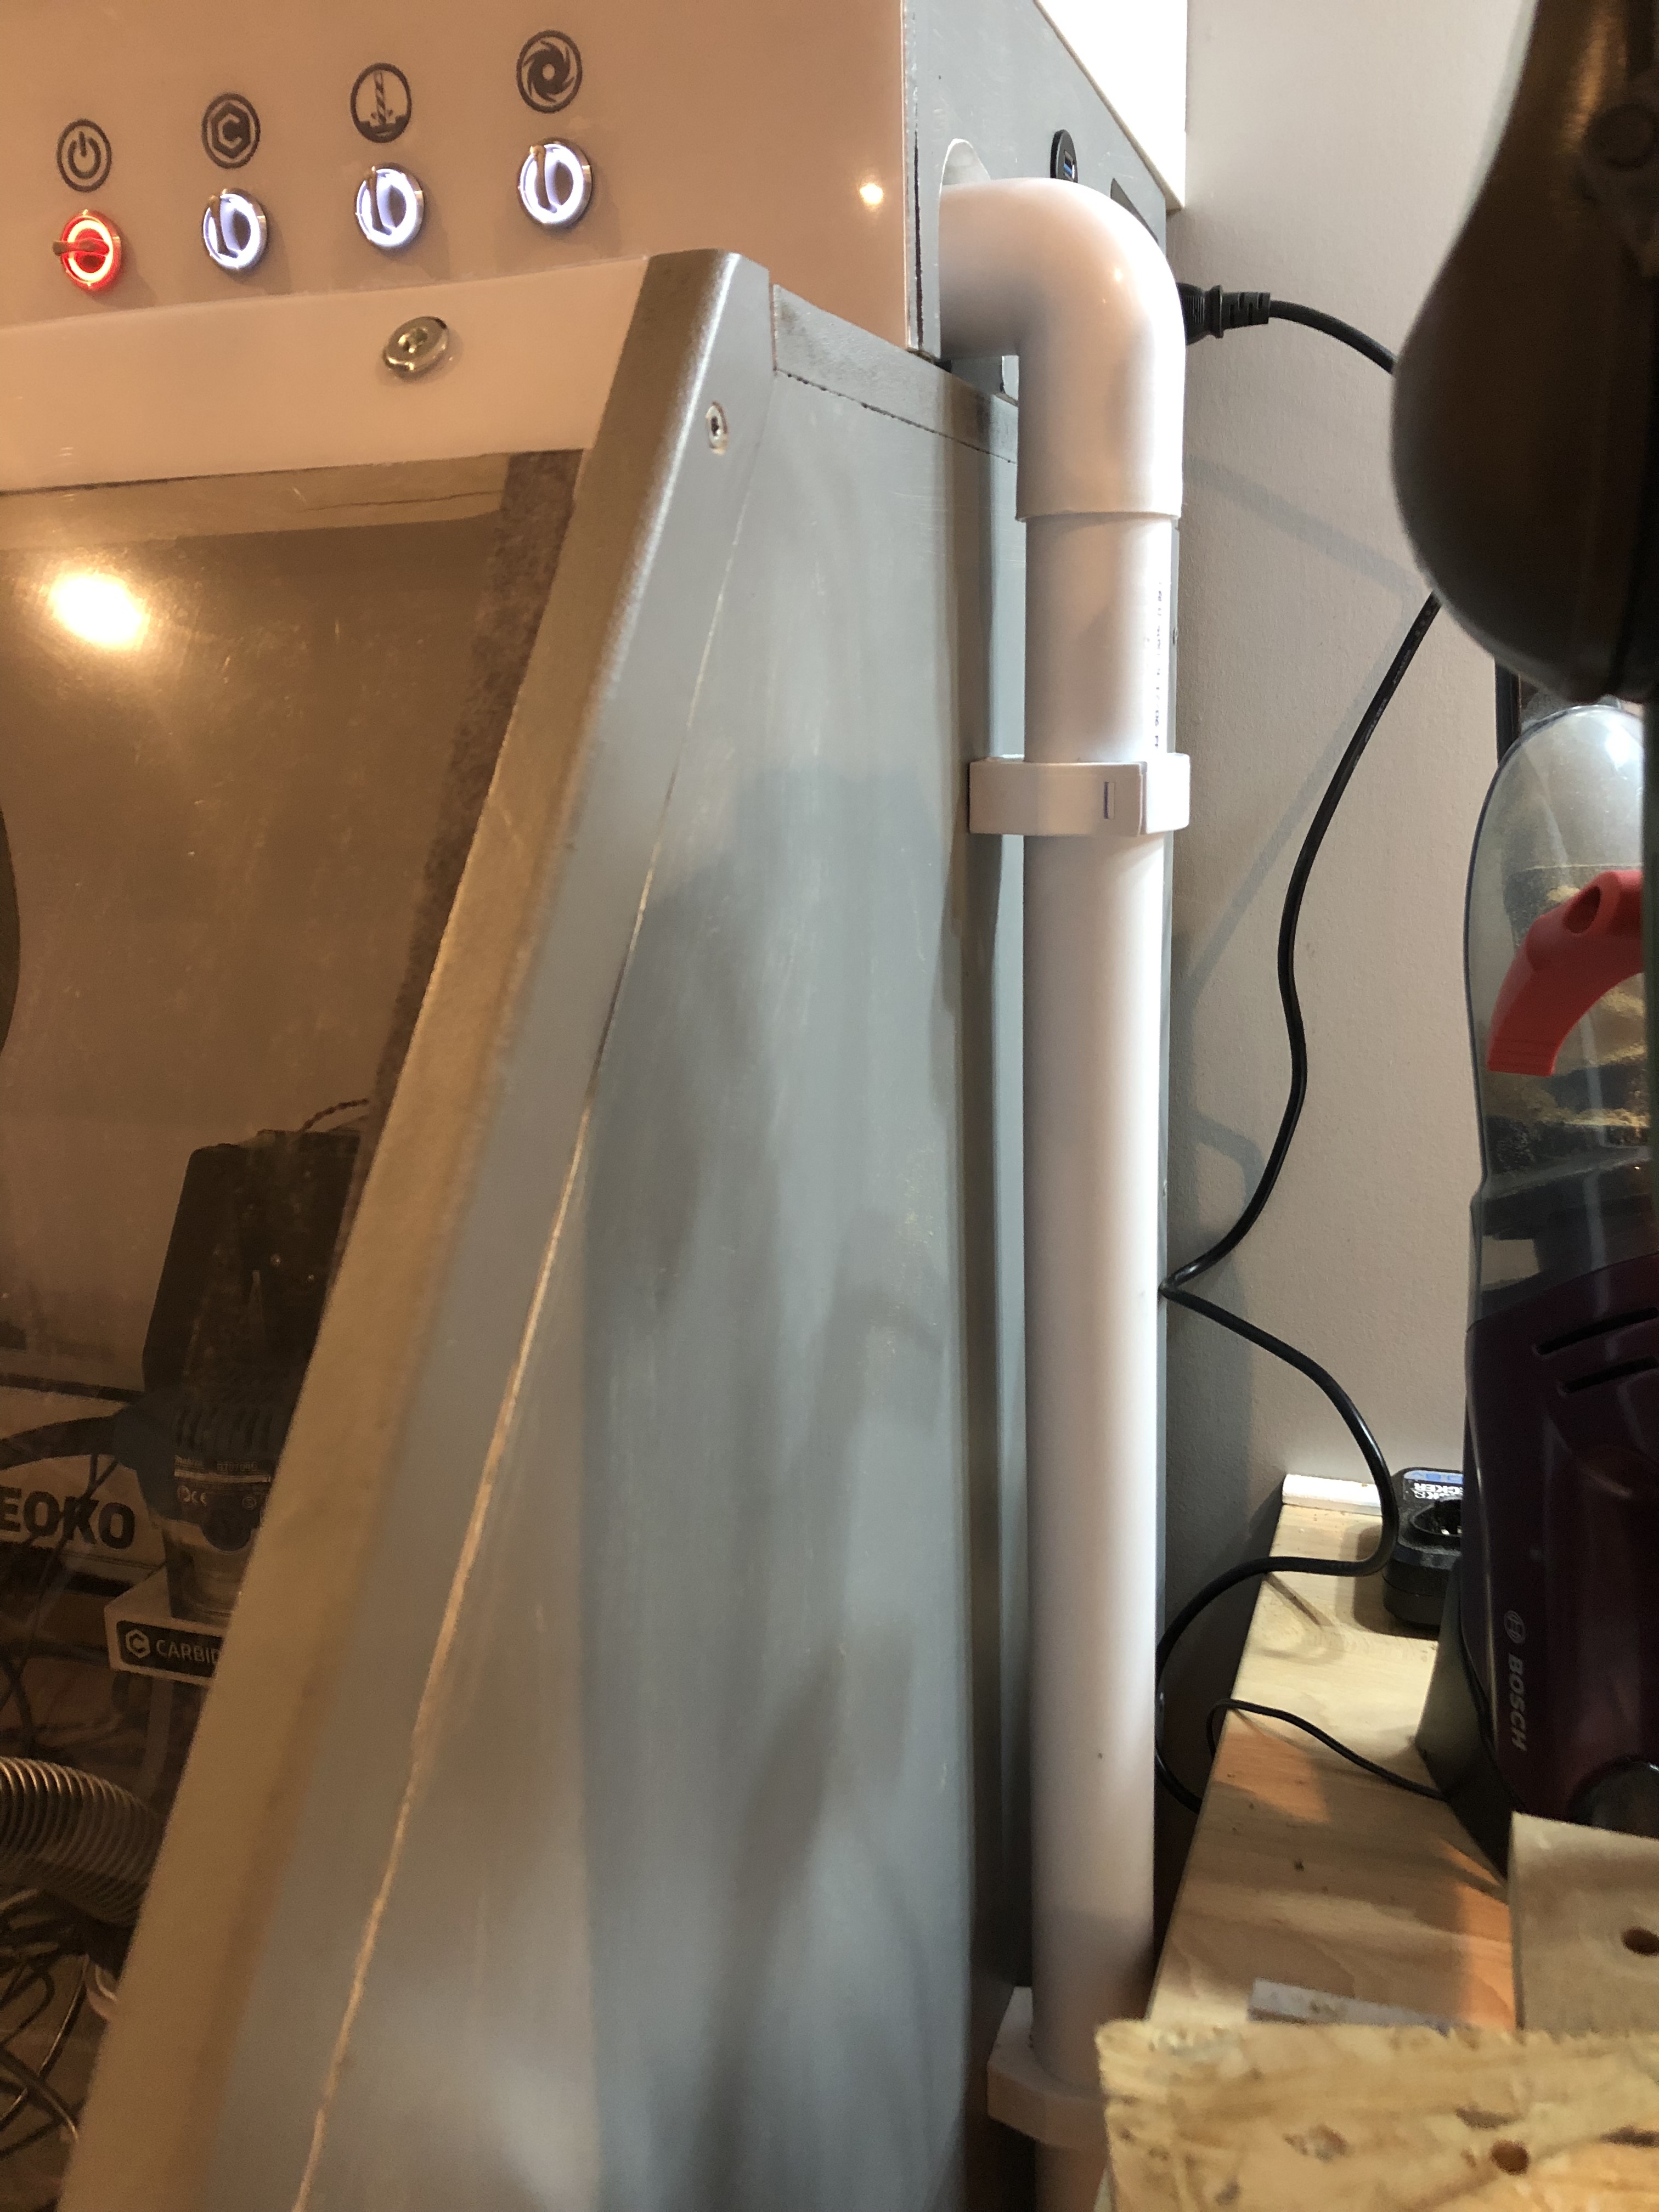
The dust collection is going on top, there is 2" piping going down the side to my cyclone separator, I can post a better picture when I get home. There is a cutout in the control panel, thats where the piping goes.
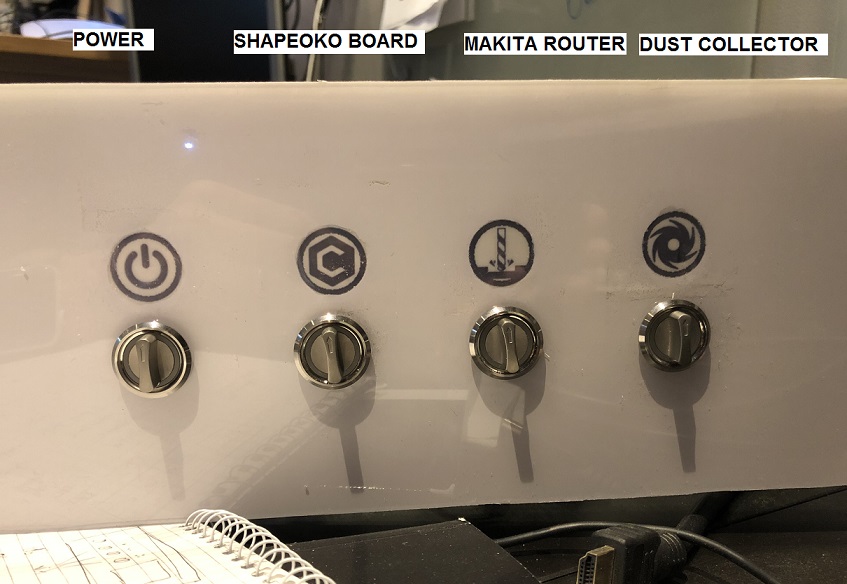
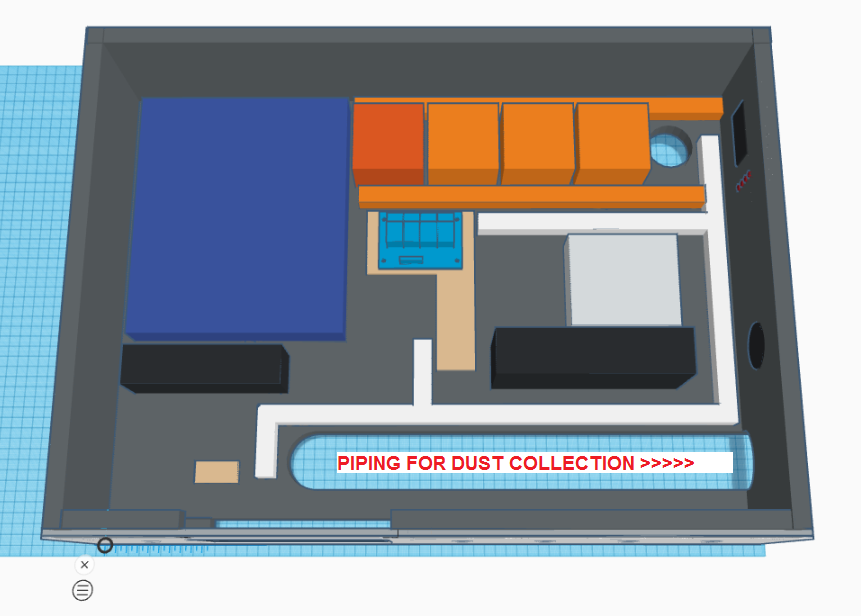
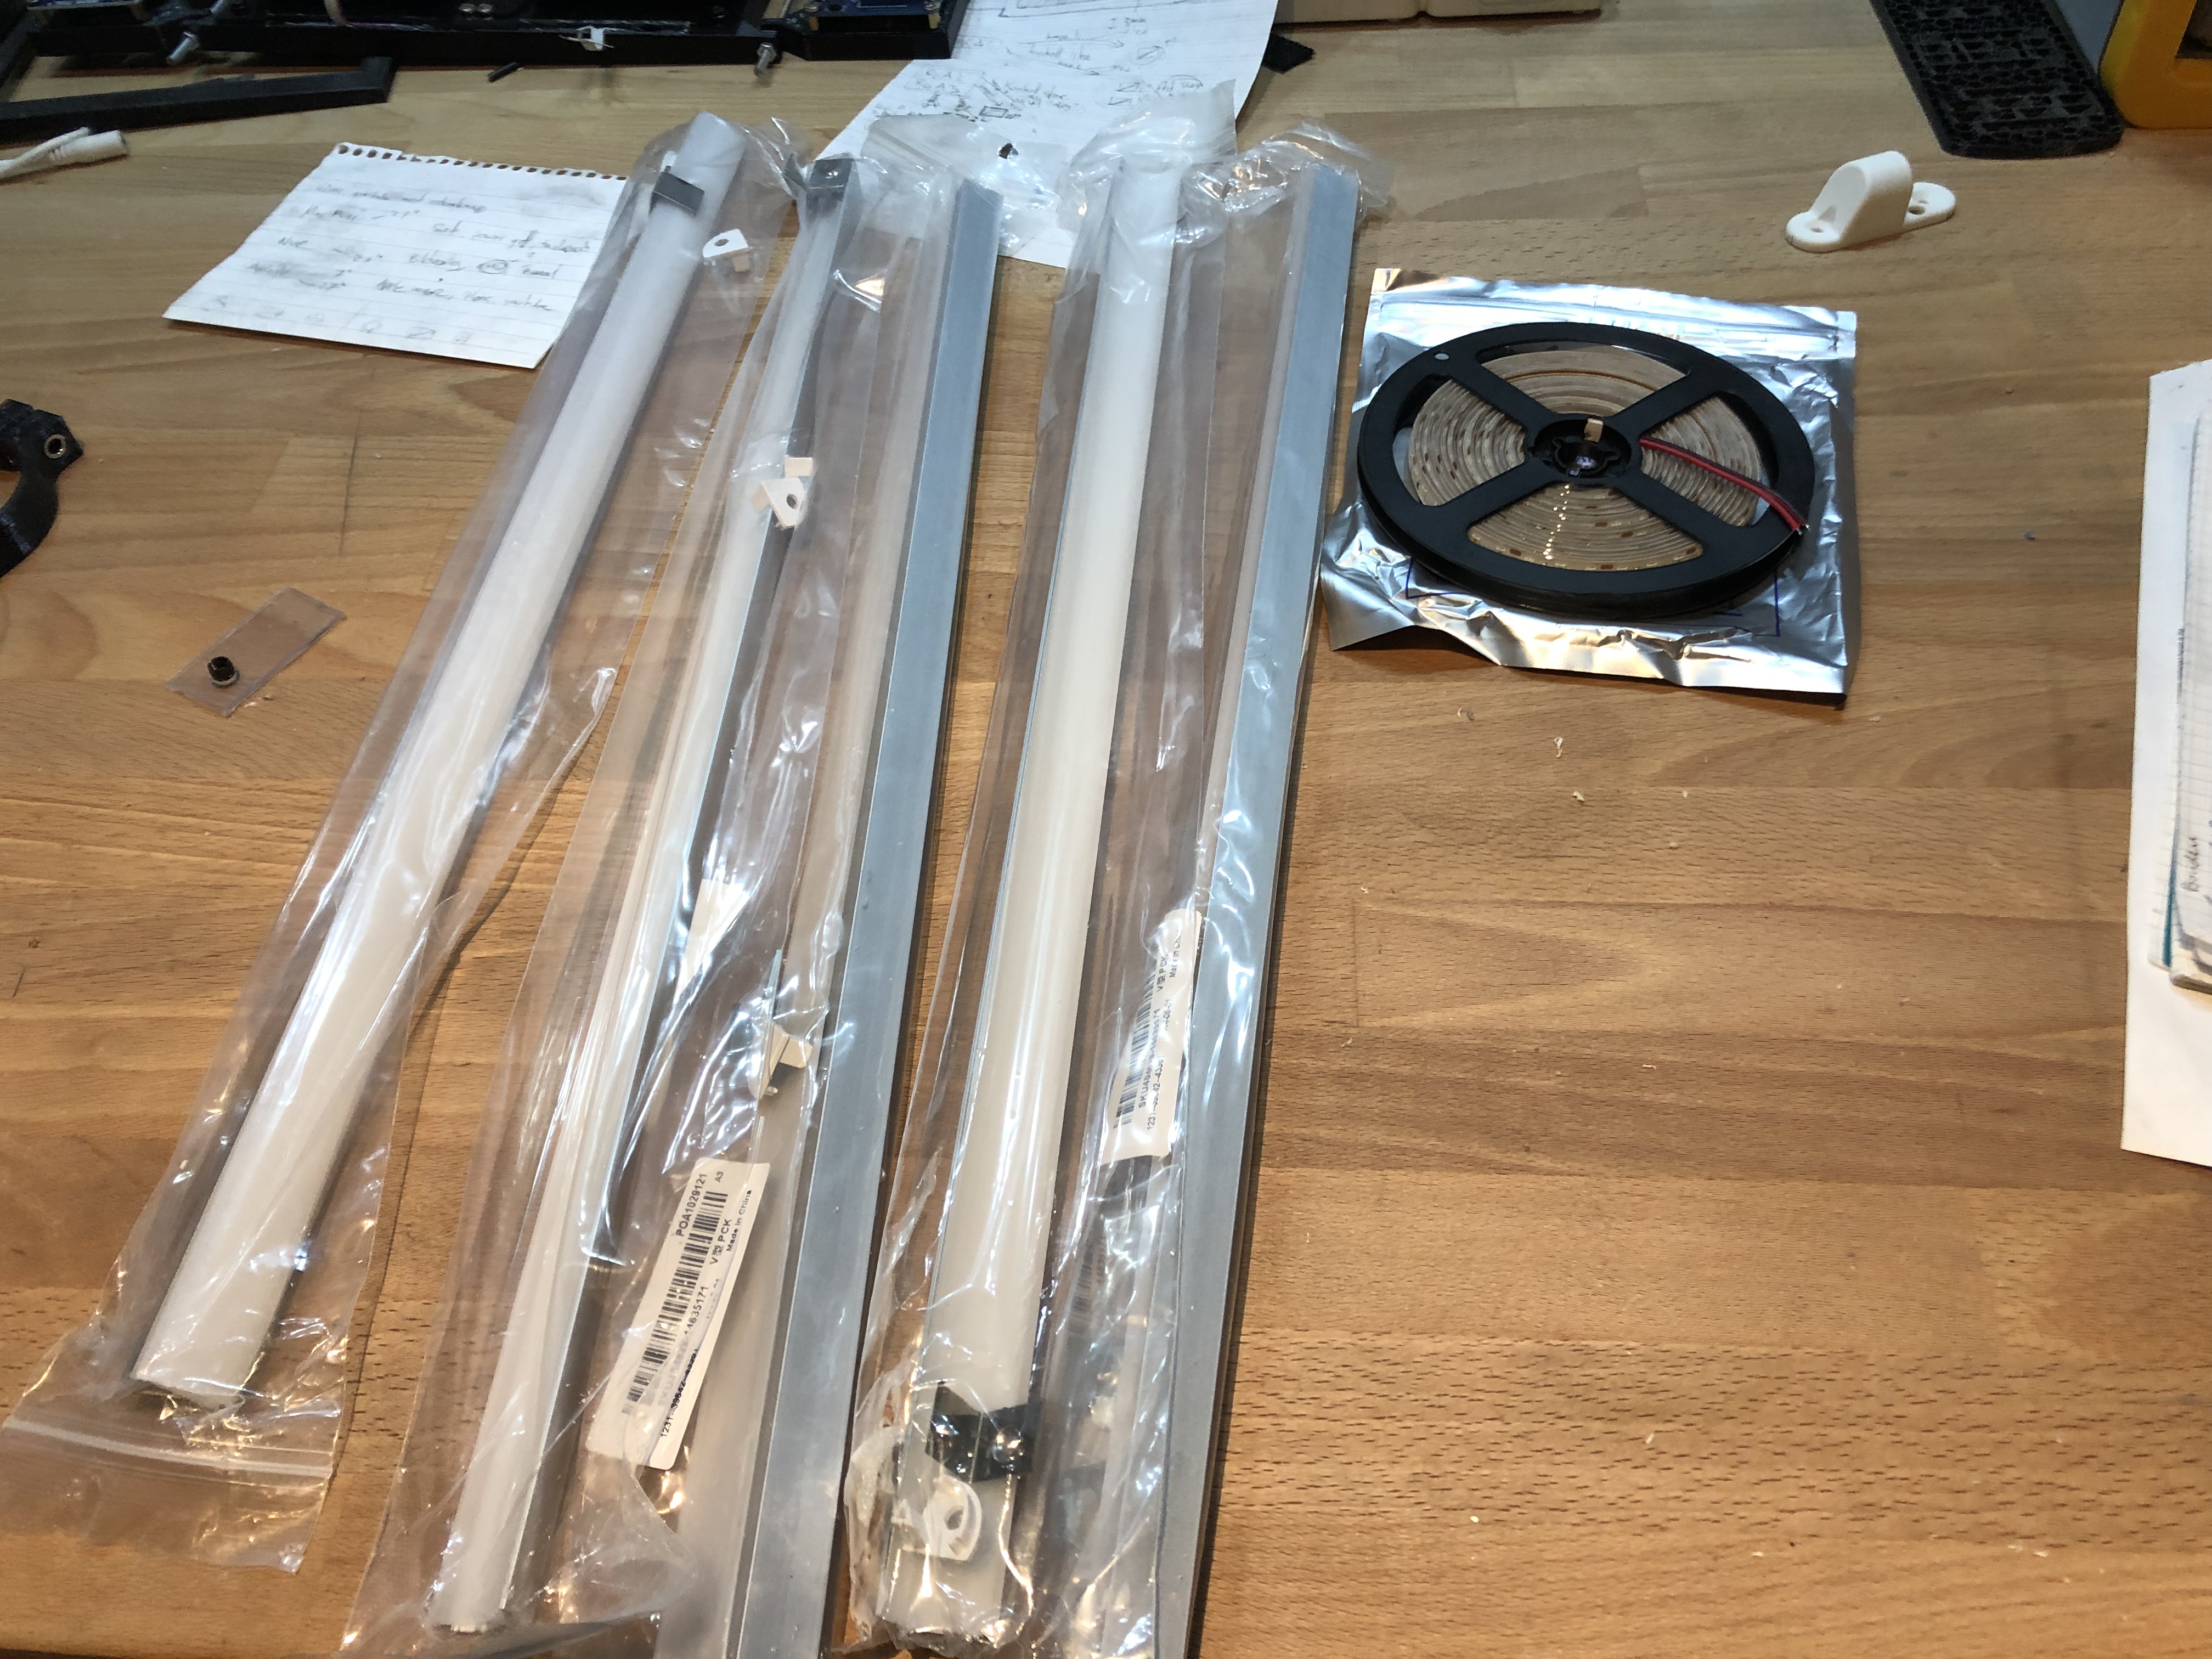
I am look at various designs for an enclosure. The only trouble with enclosures is cleaning the machine periodically. Leaving the door so you can take it off may be your best bet. You have to zero and have access to the router so leaving it loose may work better than hinges. I like your control panel with the switches for the various functions. There are led strip lights that may work better for lighting the inside of your cabinet. LED technology has come a long way in the last few years and is dirt cheap. The LED strips give a tremendous amount of light and make seeing what you are doing nice. I also like the way you painted the interior white to give good reflection of light inside the cabinet. Good work.
Thanks for your reply! This is the leds I will try to use, they are not the brightest in the world but I think it will be ok. I will put the strips inside the metal ”tubes” and fit them in the corners, if its not bright enough I will put a strip under the X axis rail too.
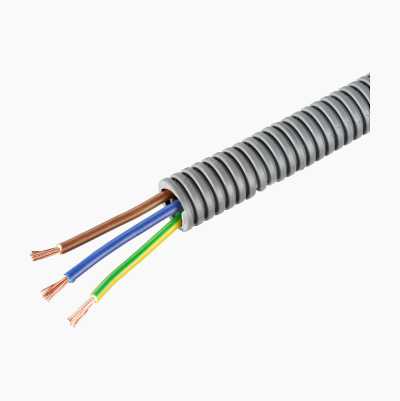
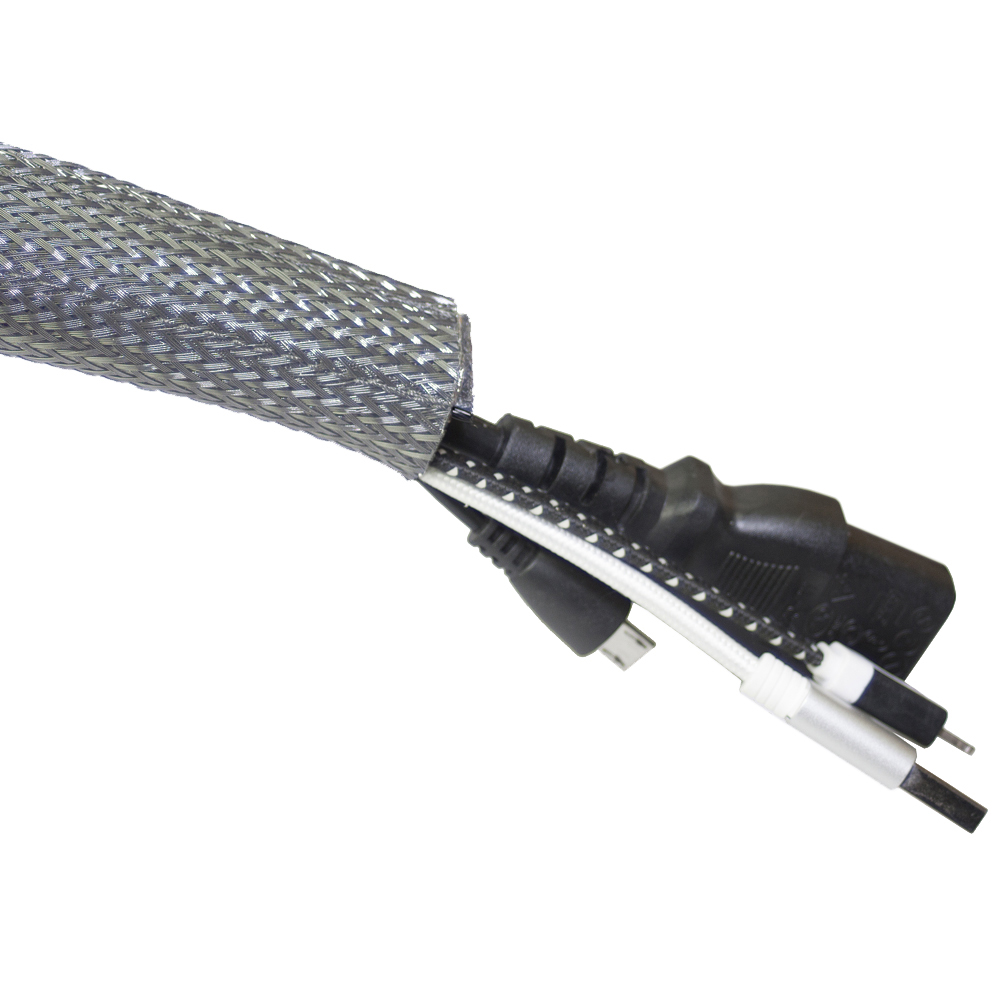
If I have time I will do some work this weekend with putting the led-strips in place and fitting all the wires. Since I have the small Shapeoko without the nice “cable snake” I need to fix it some other way, maybe with a flexible installation pipe as showing below. That will put me in a situation where I need to solder all the cables since the connection is too big to fit in the tube, and that will make it harder to modify the setup later… Lots of decisions with pros and cons to make.
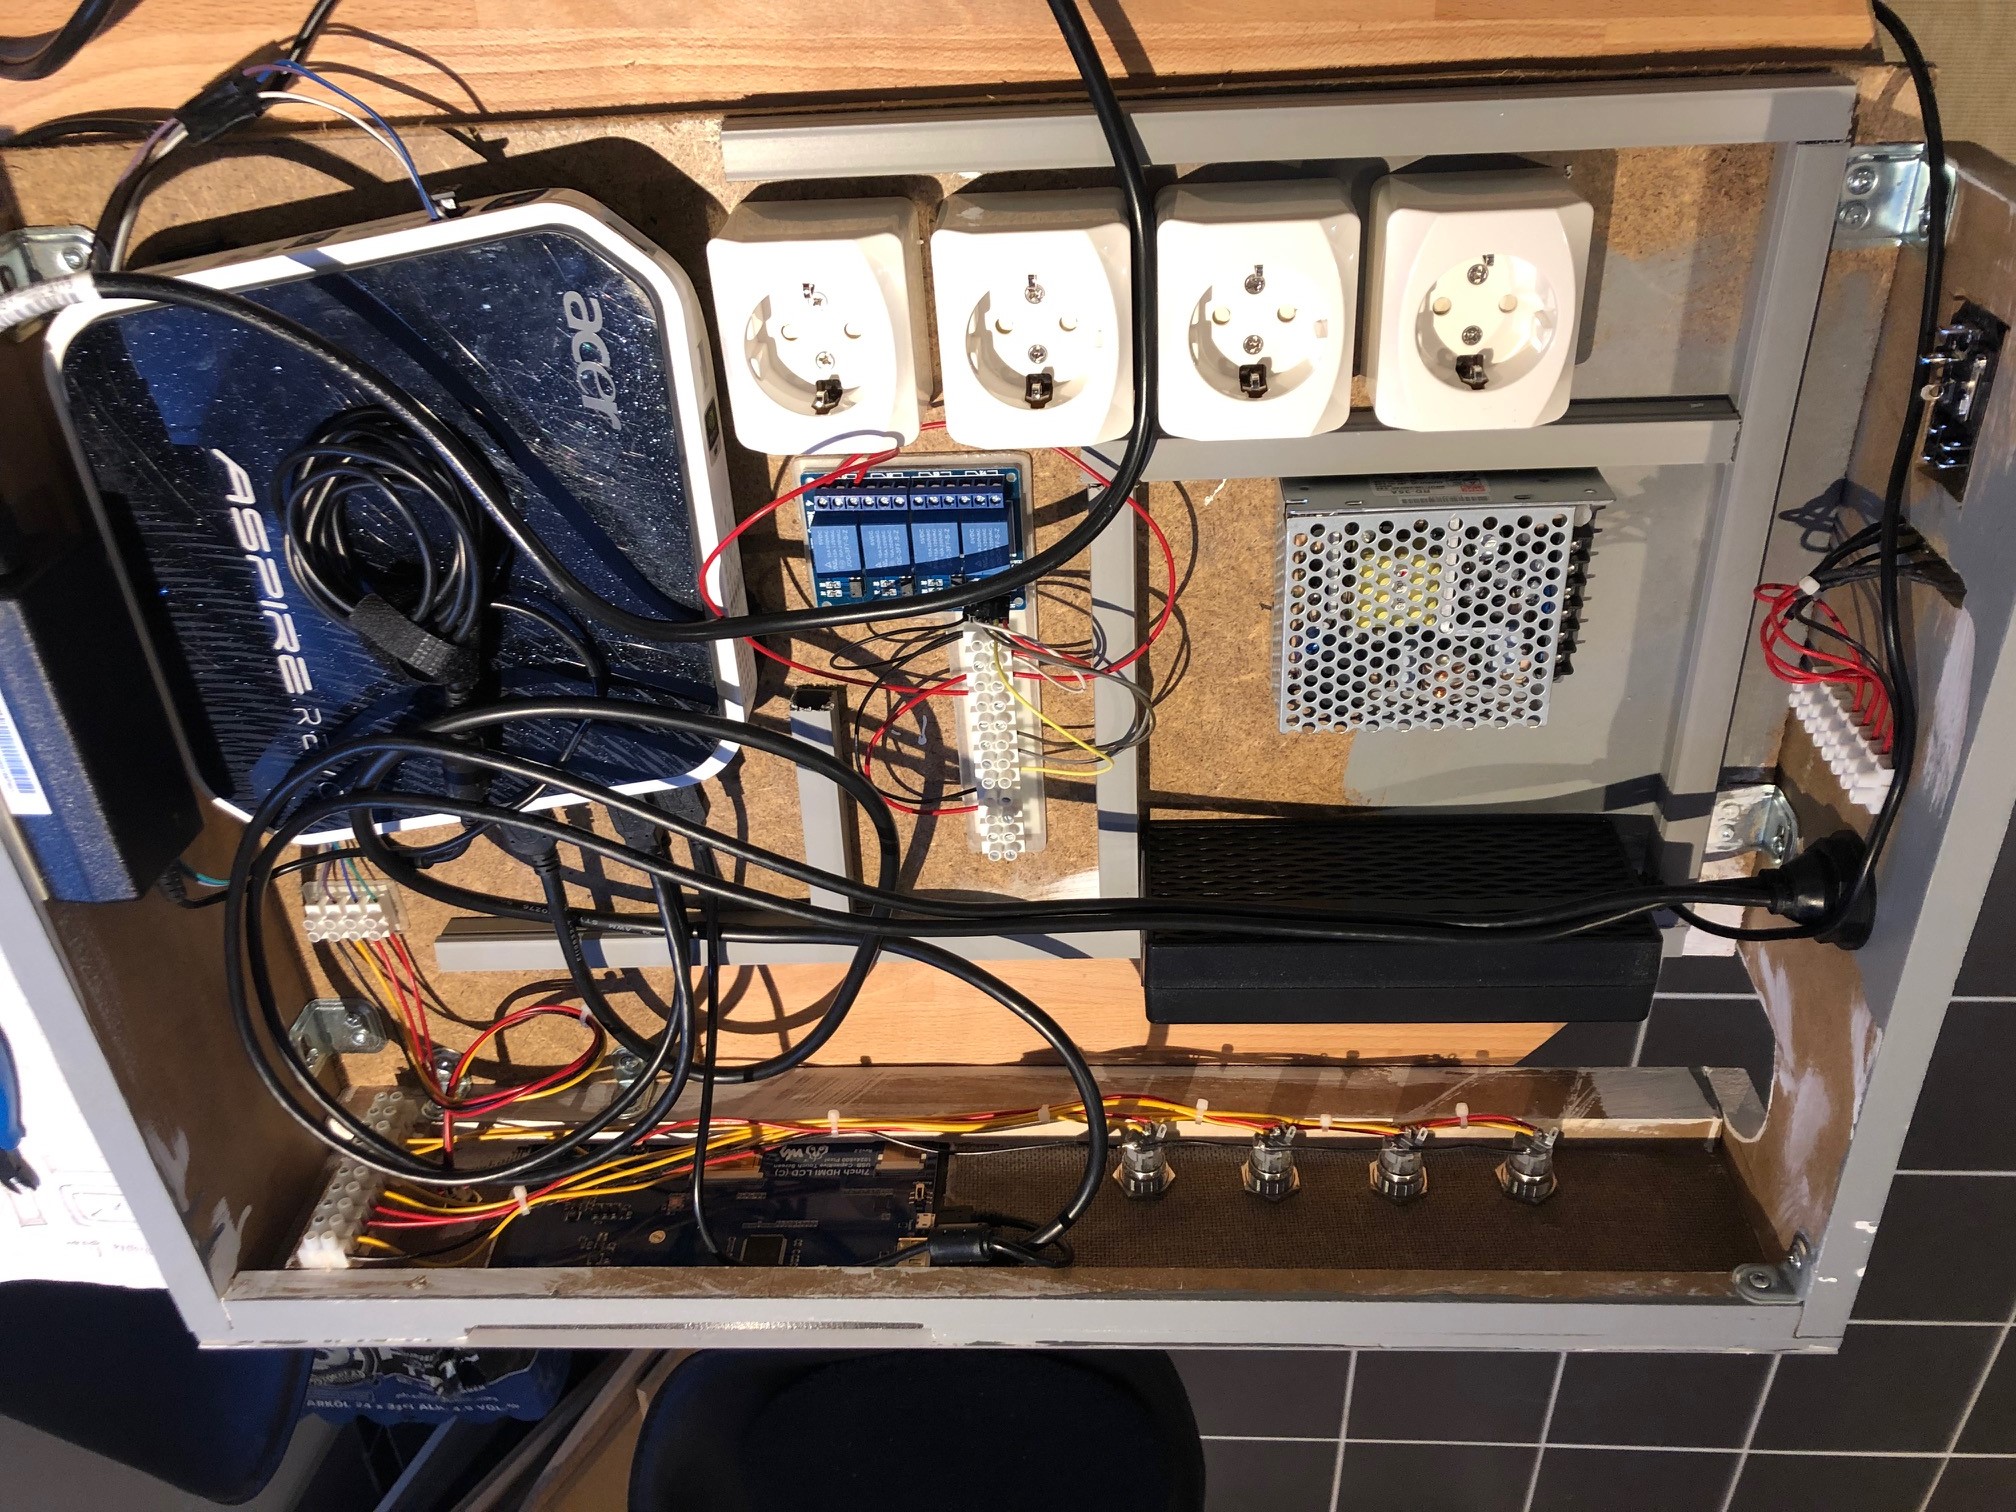
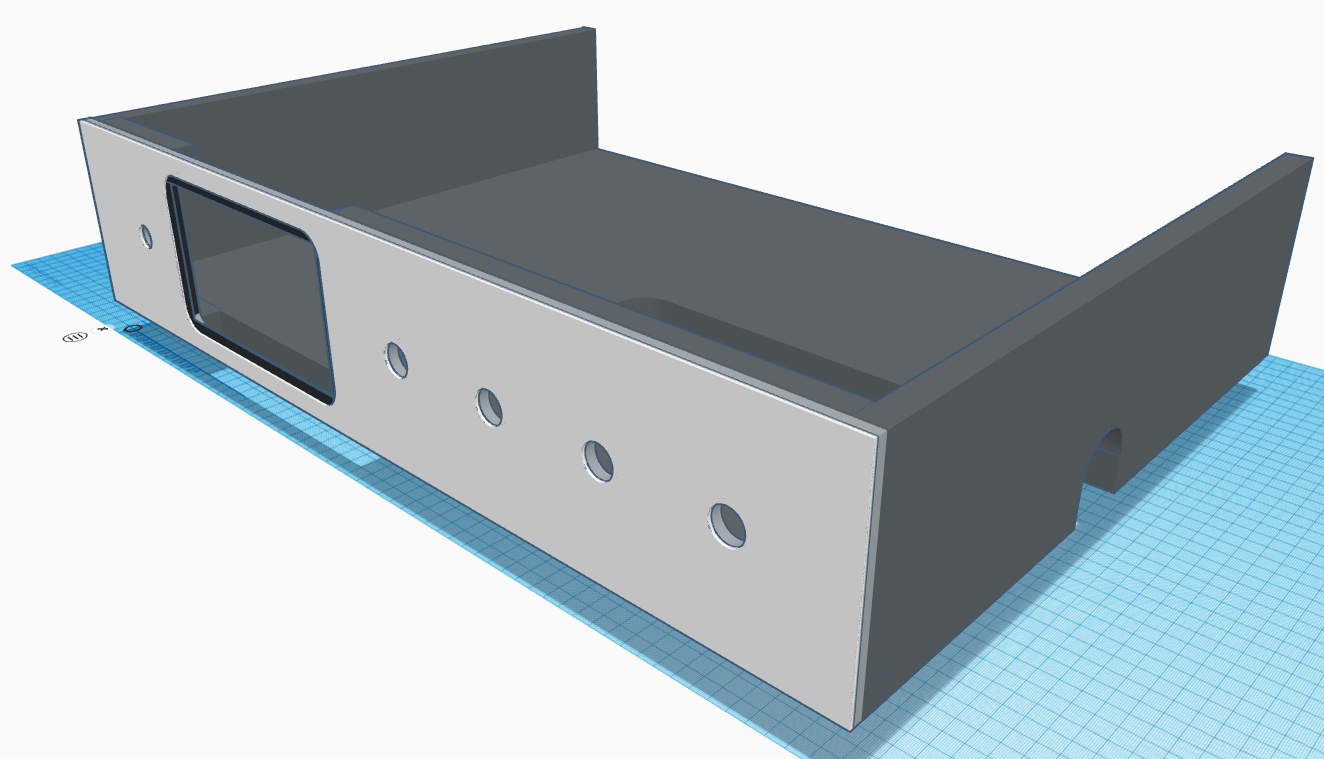
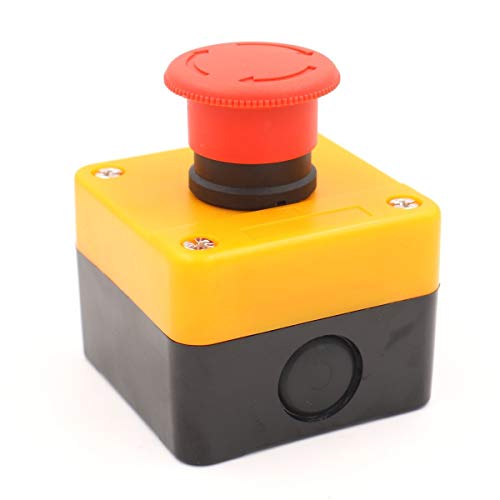
Thanks! Actually I have a plan for a E-stop, the relay-module (shown in lightblue in the cad-picture above) is controlling all 230V equipment, except from the computer. I do have a plan to put a big NC red button to quickly cut the power to the relays. Then everything will stop. I could place some kind of switch on the 230V C13 connection to the “controlbox”, that will have the same effect (switching the red switch in the pictures will also kill everything, but its not very convenient with a rotary-style switch for emergency situations). Some more thinking to do on this topic…
To organise cables on my standard size shapeoko I used expandable braided sleeve, it’s a bit of a pain to pass connectors though them but then keeps everything nice and tidy.
Yep, the one I used looks exactly like this, just black. Just don’t order it too small or you’ll suffer to pass cables through
I used a few tie-wraps to guide it along the rails, just like one would do following the original cabling recommandations.
Looking good.
I always worry about electrical cross-talk with the USB signal cable and like to keep separation of mains and signal.
Your enclosure is inspiring me to clean up my act.
Ironically a friend gave me a large curved plexiglass sheet that looks just like yours. I am going to be a “copy cat.”
This is looking very nice to me. I like your modular approach so you can move it in pieces. At least I think thats what you intended. Yes, very nice looking indeed!
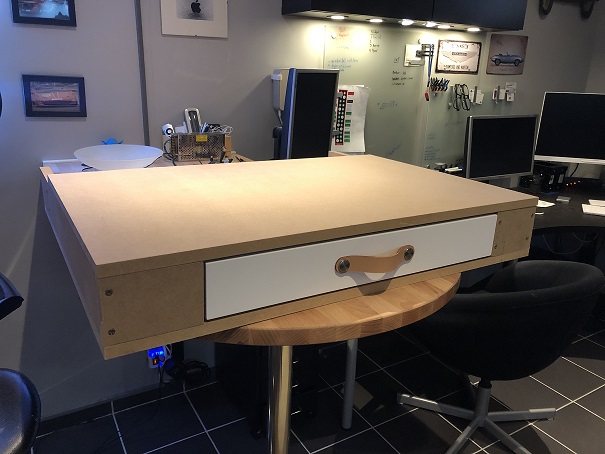
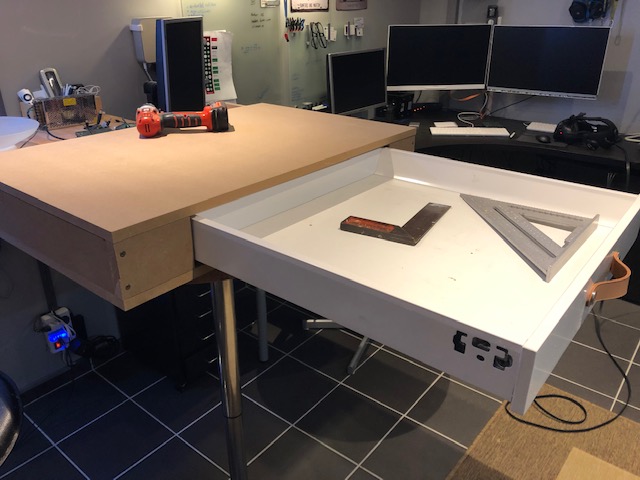
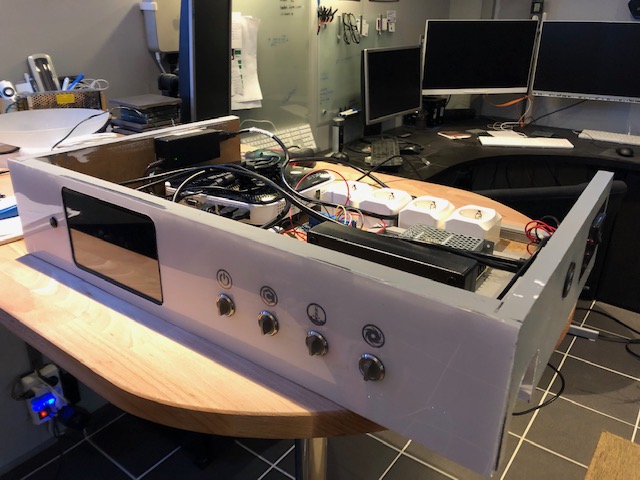
Thats exactly what I intended, the “storage-unit” at the bottom, enclosure in the middle and the control panel is completely separated. It makes it much easier to move, with all equipment in place its not a one-person-operation to move it in one piece.