@vegasracer
Have you had a chance to use your clamps yet?
Not yet…I’ve been busy with other life stuff but I have something in mind to test them out on. Stay tuned…will post my results here. 
1 Like
thanks for sharing brother…very nice design
1 Like
Apollo,
Off subject but what is the small notebook your using in this photo?
Donnie
RCA Cambio, I have the same one and it works great for CNC.
1 Like
I’m pretty new at this and I’m struggling with what seems to be simple stuff. So excuse the noob question.
I downloaded the “5 small clamps with step blocks” file, but not having any success cutting out the parts.
The problem is in the Z axis. If I zero Z at the top of the 1/2" stock, it doesn’t cut at all. The spindle moves around in what appears to be the right pattern, but I never moves down far enough to actually cut. If I set the Z axis zero to the bottom of the stock it cuts too deep.
To zero the Z axis I go to the MDI window and send “/G10 L20 P1 Z0”. Then go to the Jog window and zero the Z axis.
Thanks in advance for any advice.
Ray
You don’t need to do any of this in mdi mode.
Just use the jog controls to move the spindle to the zero position you want. Then use the set zero button on the jog page, clear the offsets, and you’re set to go.
1 Like
@very_old_noob
Welcome to the Forum Ray.
I have attached a file below that you can load directly to Carbide Motion and should work.
What machine are you using? Nomad?
Center at the Top of your stock, should be good to go, let us know.
5 clamps Center top Zero 125endmill.egc (273.7 KB)
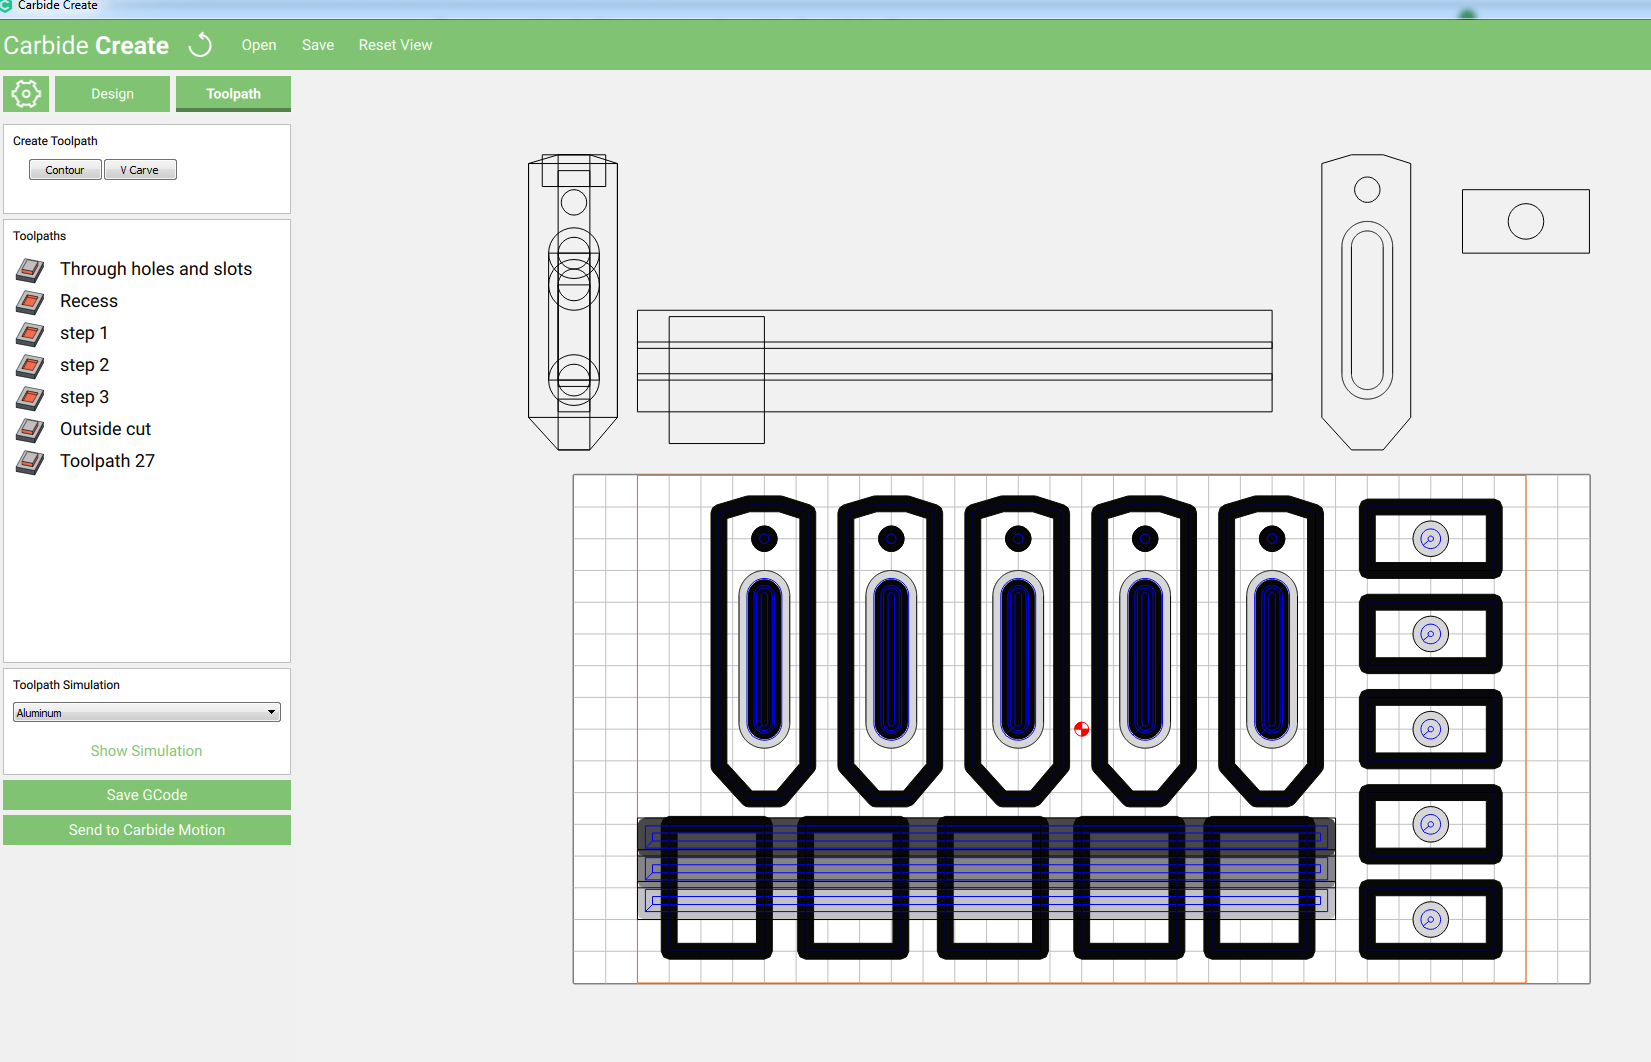
Something in the Clamp file you are working from may have lost the toolpaths possibly?
If you can upload some screenshots similar to what you see above maybe we can see what setting needs to be changed.
Heres the Carbide Create user guide for your reference:
3 Likes
Thanks for the quick response, Apollo,
The Carbide Motion file you send didn’t work. I suspect it’s a Nomad file because I got a “limit switch” message.
The good news is that I was able to get the original file to work after re-generating the GCode.
I’m not sure what the original problem was, but as I usually say “mistakes were made”.
1 Like
Ray,
A limit switch error message usually (99%) means that during the “look ahead” feature of the controller saw that you were going to hit a limit switch somewhere during the run.
Yes, it would be real nice it it also told you WHICH axis it was, but it doesn’t That means you need to do some research, (too close to the left, right back, front, of Z bottom.
It can happen if the program file you just uploaded’s home position, and your setup are not the same. Example (You picked the Top Left, but the program was written Bottom Left)
I hope this explains this error message to you and the many that will see it in the future.
Rich
2 Likes
Rich,
I believe in this case the limit switch error was due to the fact that the CM file that Apollo sent me was for a Nomad (he didn’t know at the time that I have an SO3)
When I ran new SO3 GCode version of the same CC design it works fine.
Ray
We all gotta believe in something. Be safe Ray, have fun. That’s more important.
R
Shapeoko version of the file is from an older build. d/l’d it and fixed it somewhat for 289.
shapeoko_clamps289.c2d (1.2 MB)
Lost CAM settings for the stuff I duped and repositioned. Left as an exercise for the reader to reapply — hopefully we’ll get this fixed tomorrow.
And this happened again with the new build. Hopefully this will work:
shapeoko_clamps_308.zip (71.4 KB)
shapeoko_clamps_308.c2d (1.3 MB)
EDIT: UPDATED!
I’ve updated a sacrificial clamp design that I’ve been using which works rather nicely in maple:

The stock size this is setup for is 20mm tall by 40mm wide in cross-section, and the work area is 100mm long, so you can get a bunch out of a rectangular board of wood. Be sure to use a sacrificial layer underneath as the cut-out path cuts through about 0.2mm
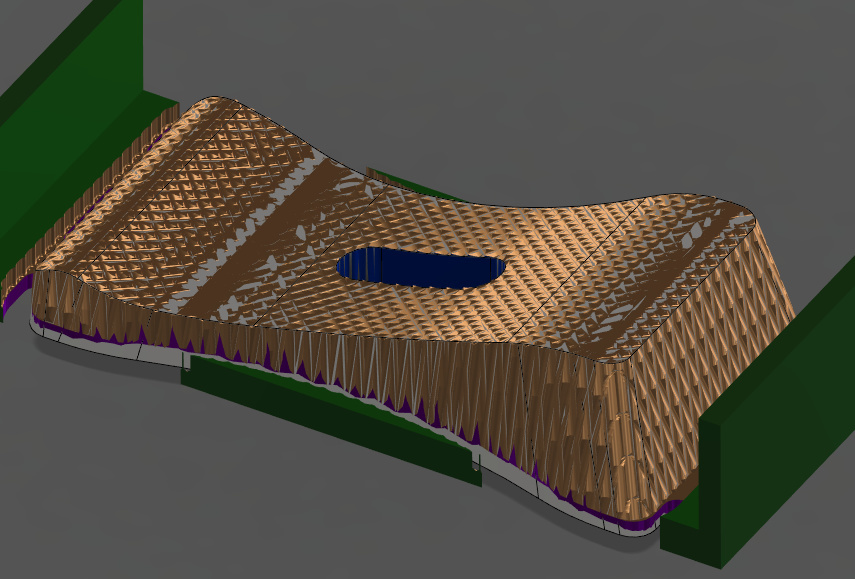
The way it’s sloped makes it so you can use it without a step-block on thin material, or only a small shim on thicker materials. Works nicely with my t-slot setup, and would work well for the threaded hole table as well.
ShapeokoHoldDownClamp.nc (383.0 KB)
This is to be cut on a Shapeoko3 at 24000rpm-ish with a single-flute 1/8" flat end-mill. You could just as easily cut it with a 2-flute tool at a slower spindle speed to keep the chip-load similar.
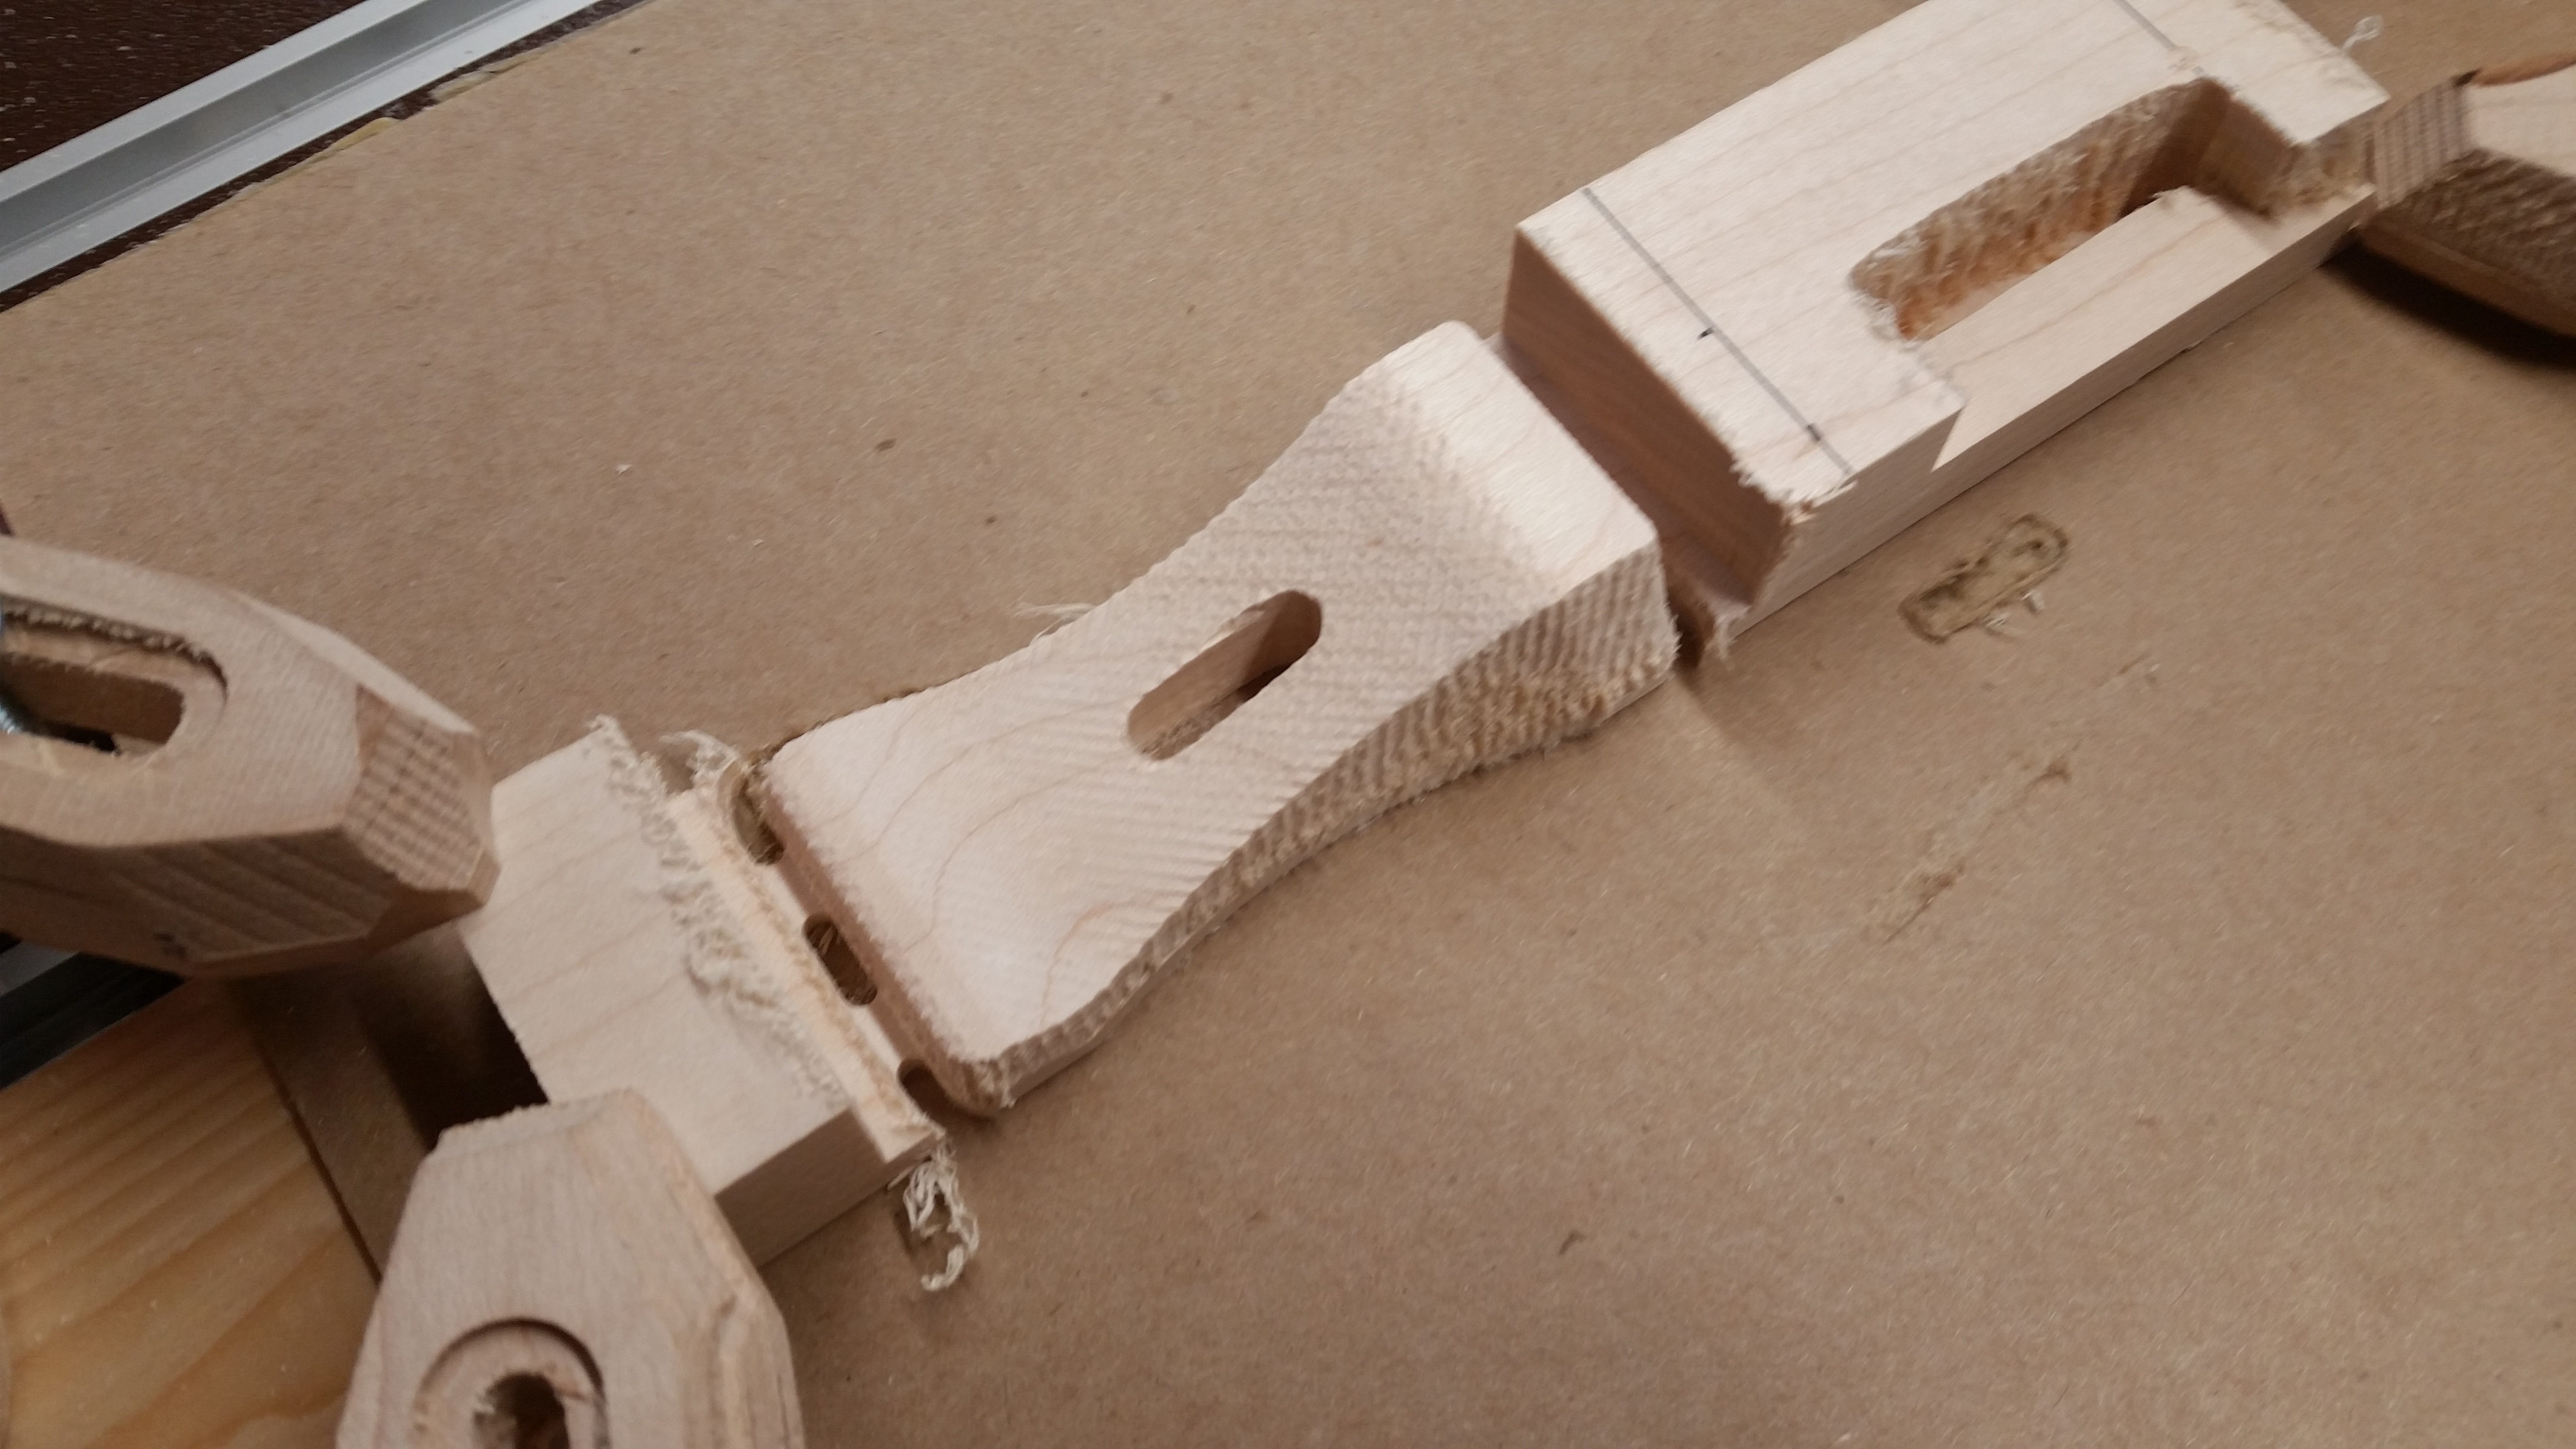
Old Clamp design holding down for the new clamp design:
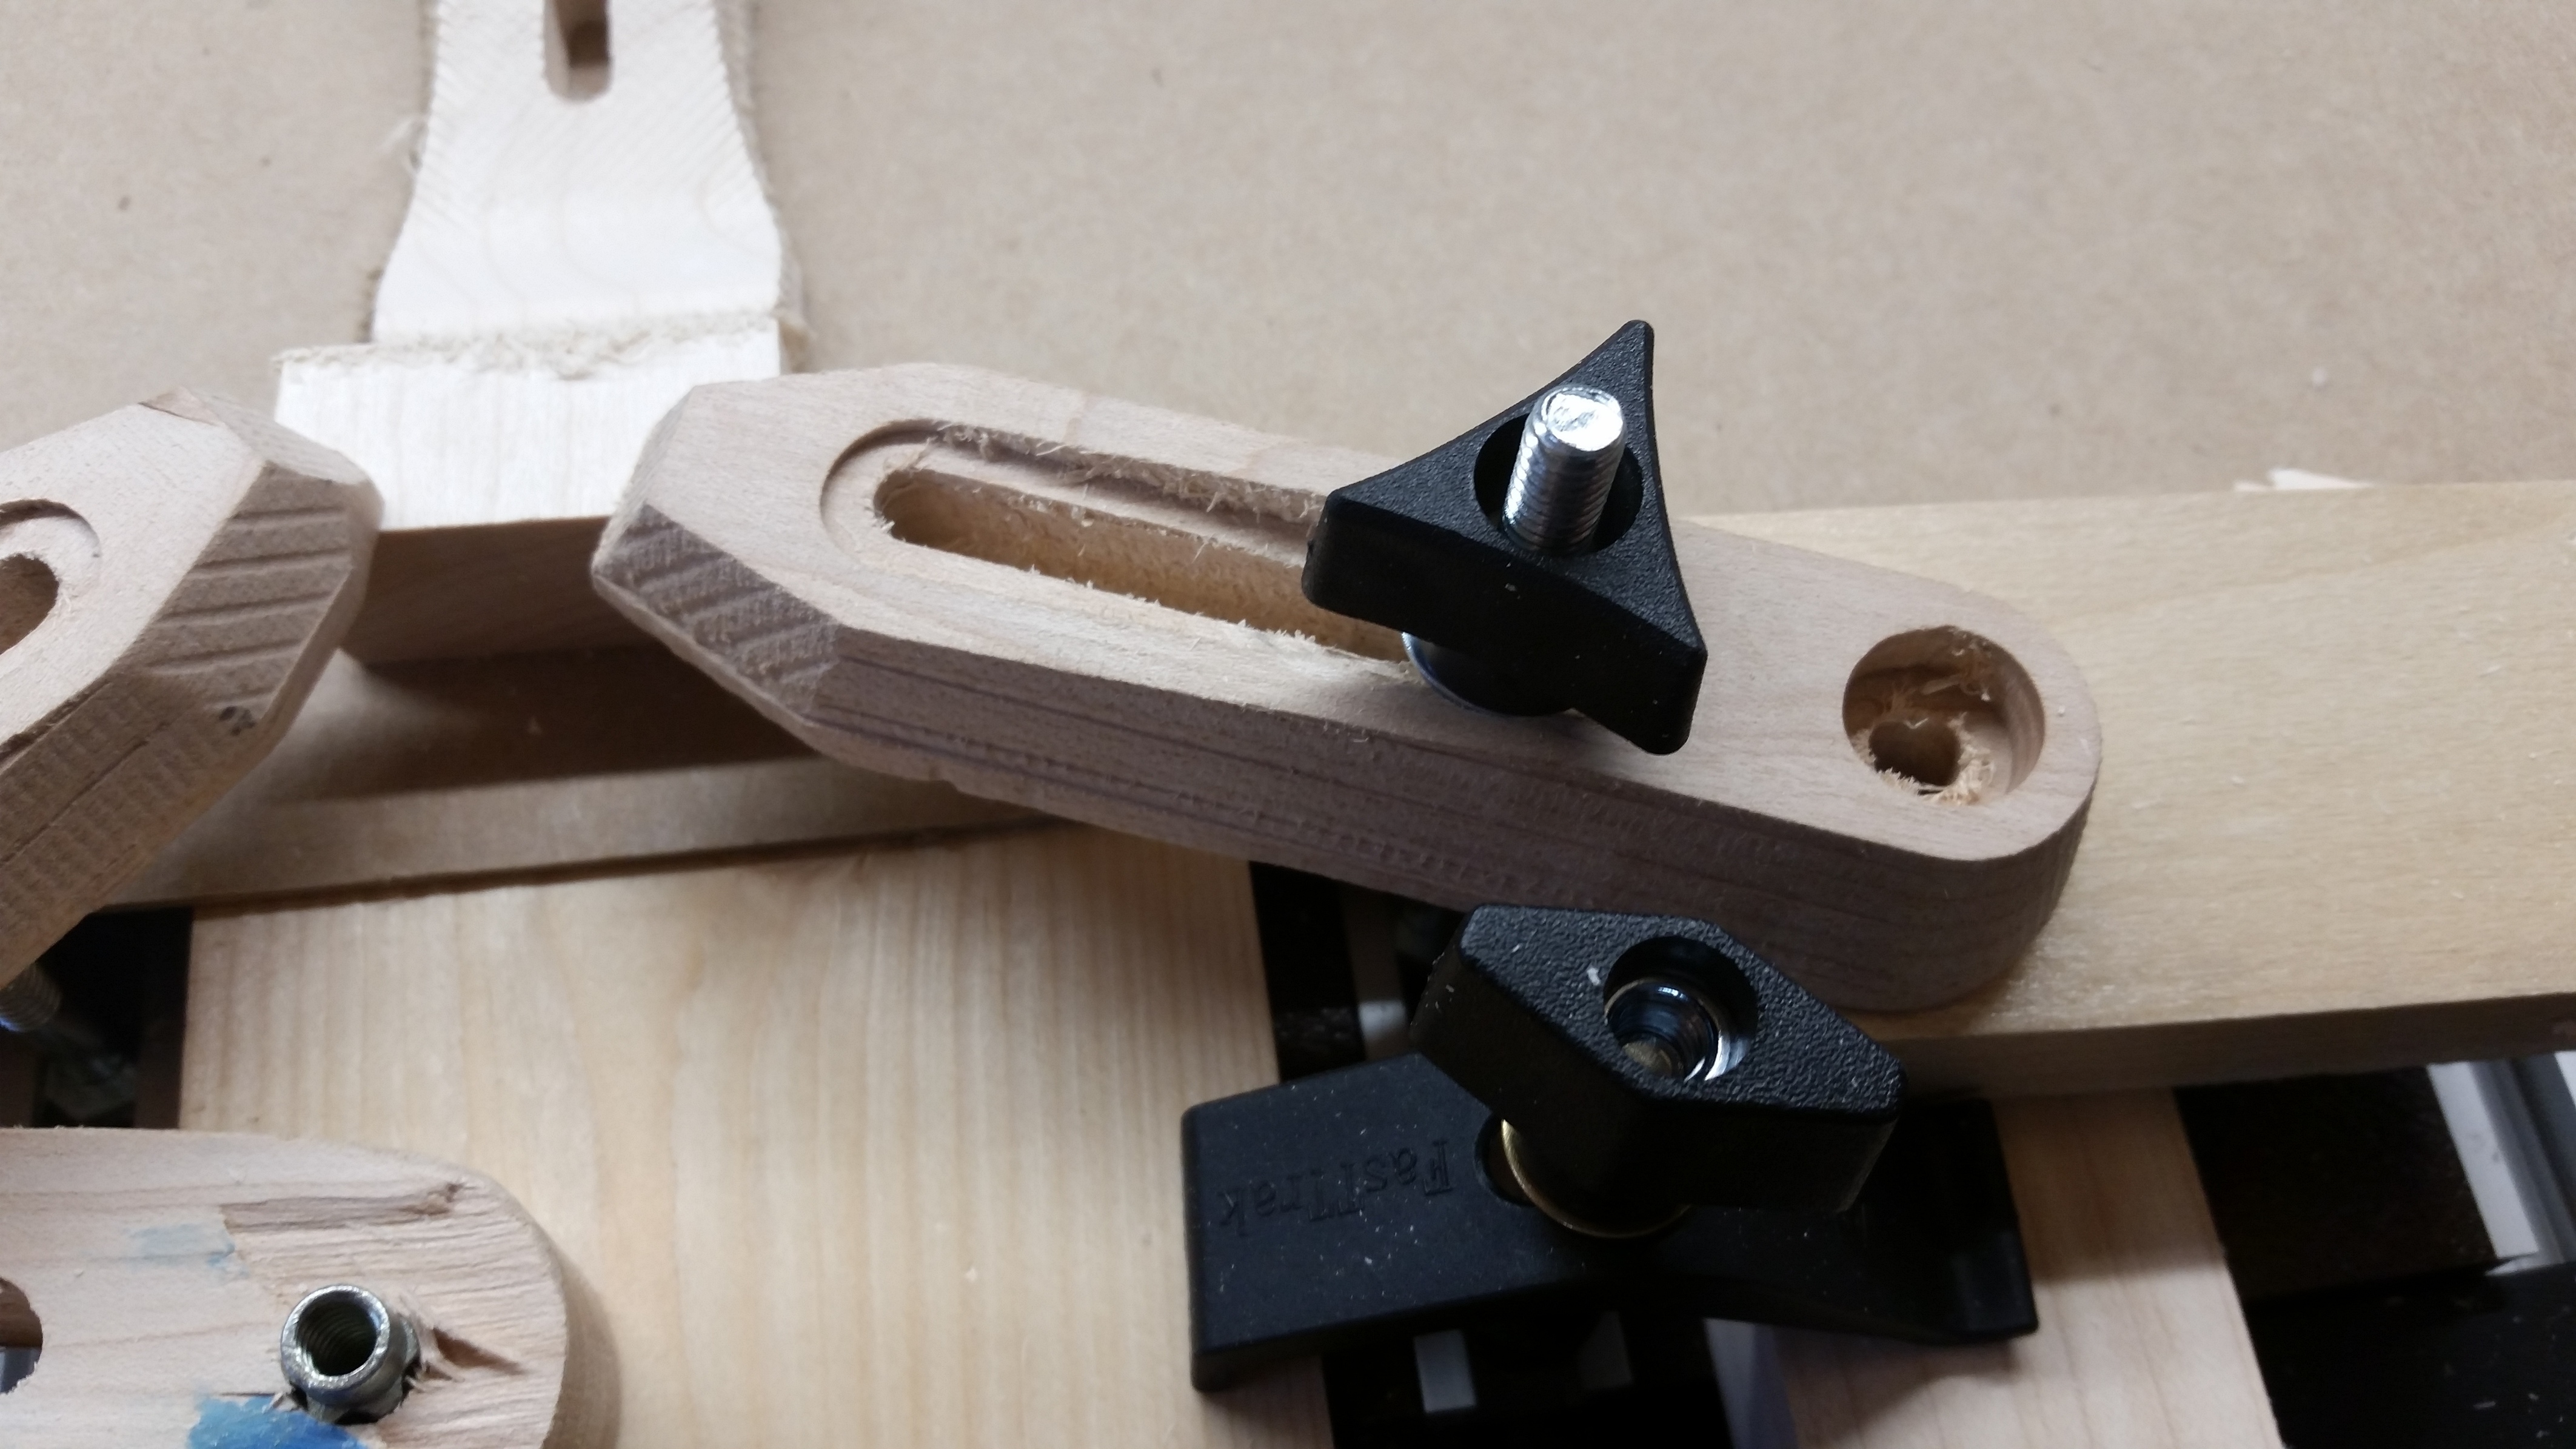
New clamps in addition to some Kregg clamps holding down a large panel:

2 Likes
I like the recessed hole detail, lets see the clamps!
…and if you are concerned with the wood splintering, you can paint it with thin super glue… although none of my bamboo clamps have broken.
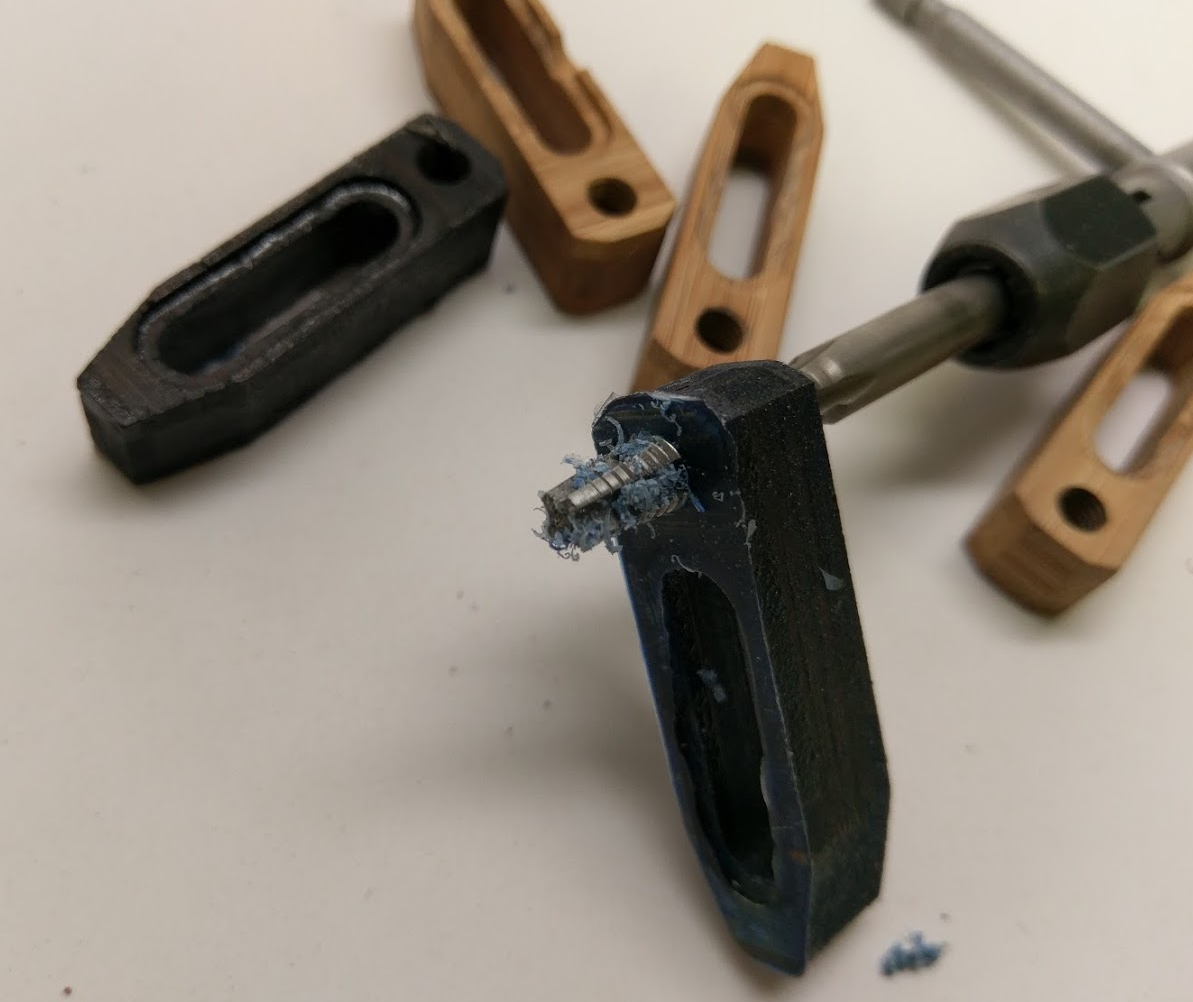
Dyed and super glued for a “stabilized” bamboo
1 Like
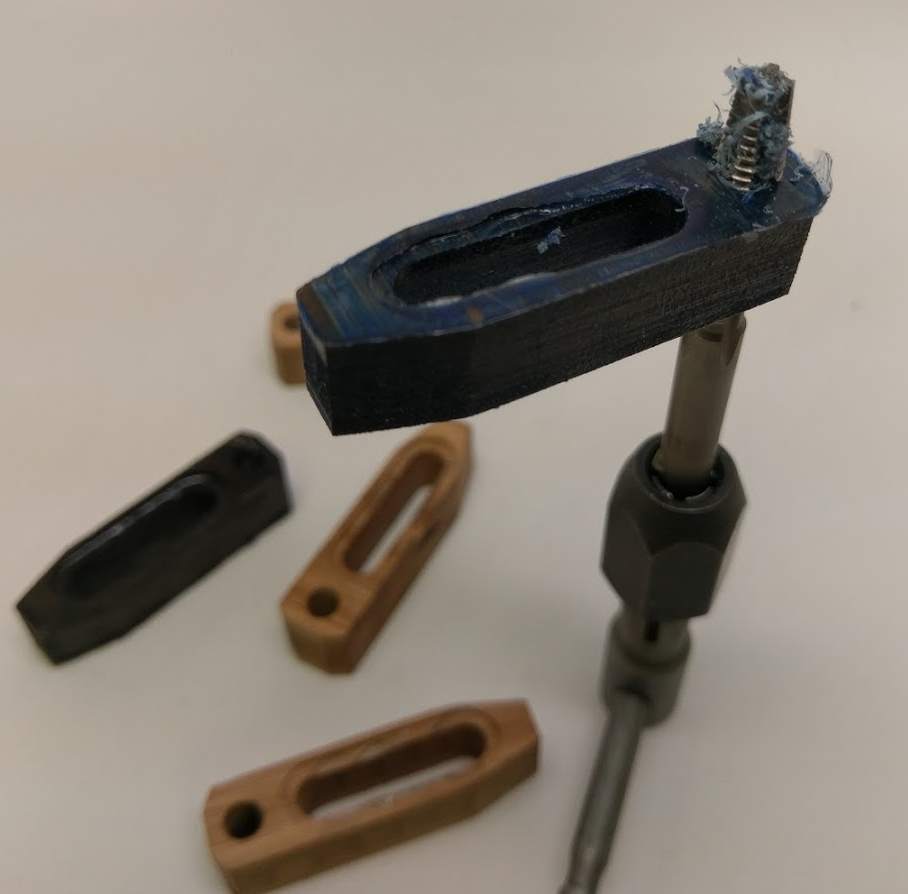
Well, the first versions didn’t work out too well as the short clamps were going cross grain—I wanted to see if it’d work, but not so much. When I put the threaded inserts in they split, whereas the longer ones were fine but I should have had it cut all the way through and into some sacrificial material rather than leave a full 2mm at the bottom to remove later, ended up being a pain and not looking so hot.
So I’ll switch the next version to small tabs or much closer cutting to go nearly all the way through (like .1mm material remainder) to make removal easier. Probably will also cut in a dimensionally stable material rather than Maple which I’ve discovered really likes to bow when material is removed, and needs some legit clamping and not just a layer of double-sided tape or tooling wax.
I’ve updated the CAD/CAM setup considerably, and am working on a 2nd round of them now. Will post pictures when they’re done and out!
-Jonathan
1 Like
Just discovered this, want to say Thanks! Jumping on it today.
Here’s the final design of the original bar clamp I had done, with the stock/material size:
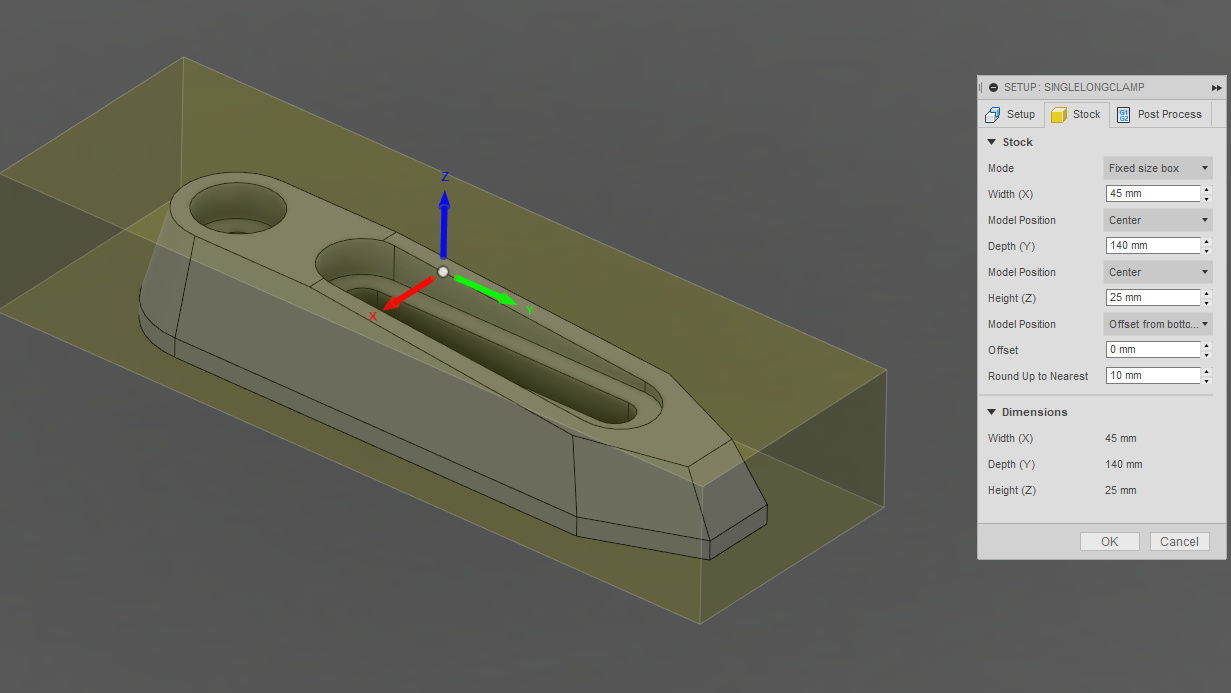
Setup for running with a single-flute 1/8" cutter at 24000rpm:
ShapeokoHoldDownClampLong.nc (193.4 KB)
If you want to arrange your own with your own tool setups in Carbide Create or elsewhere:
LongClampTapered.stl (47.4 KB)
The Fusion File:
http://a360.co/2rX7jxx
(I had started monkeying with a step-block, but didn’t finish that out, but it’s in there too, just as an FYI.)
1 Like
Another thank you to you UnionNine! A huge help to this struggling F360/Shapeoko student. So much better to learn from directly applicable, real-world-things-I-need, tweakable designs.