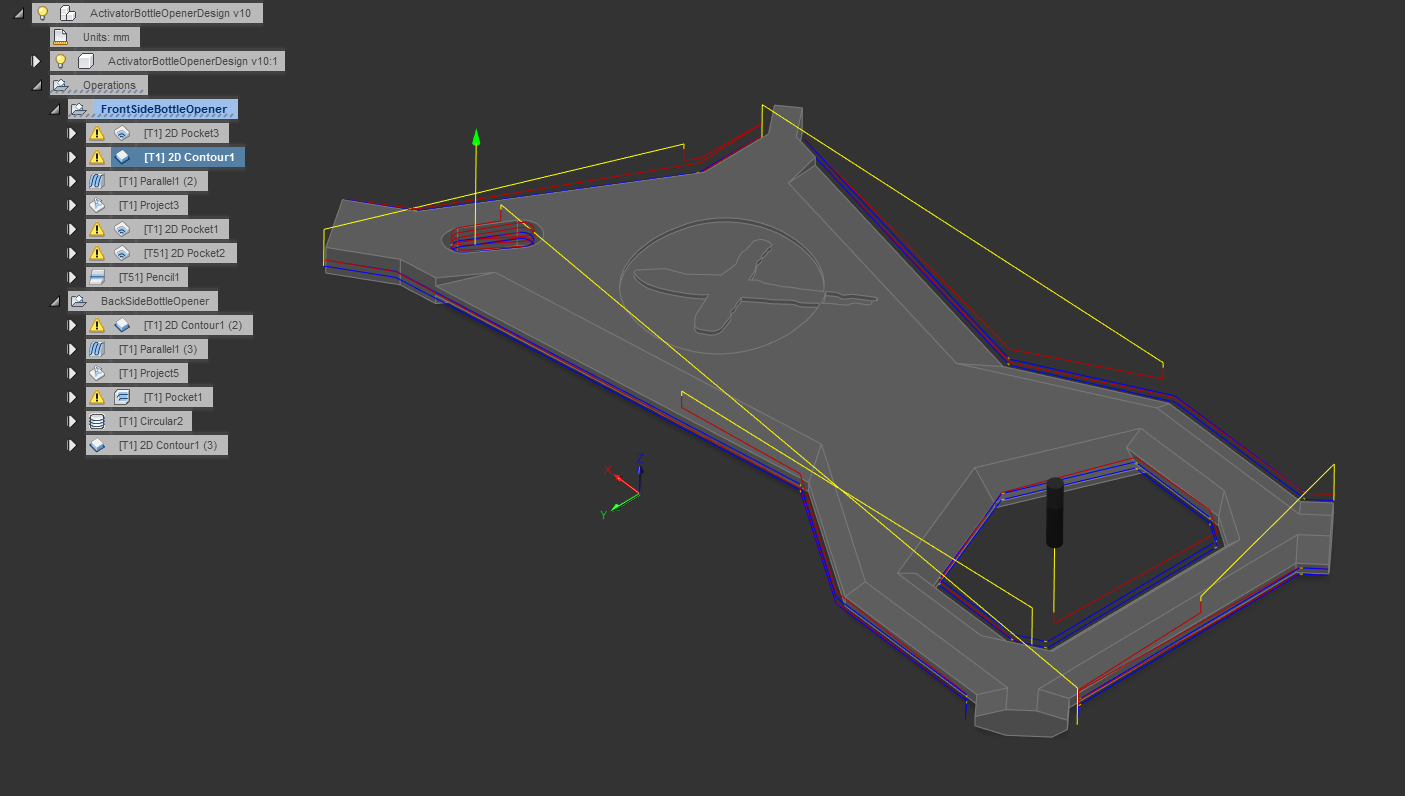
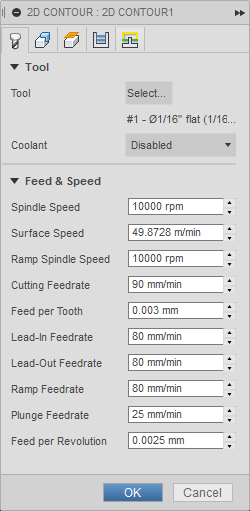
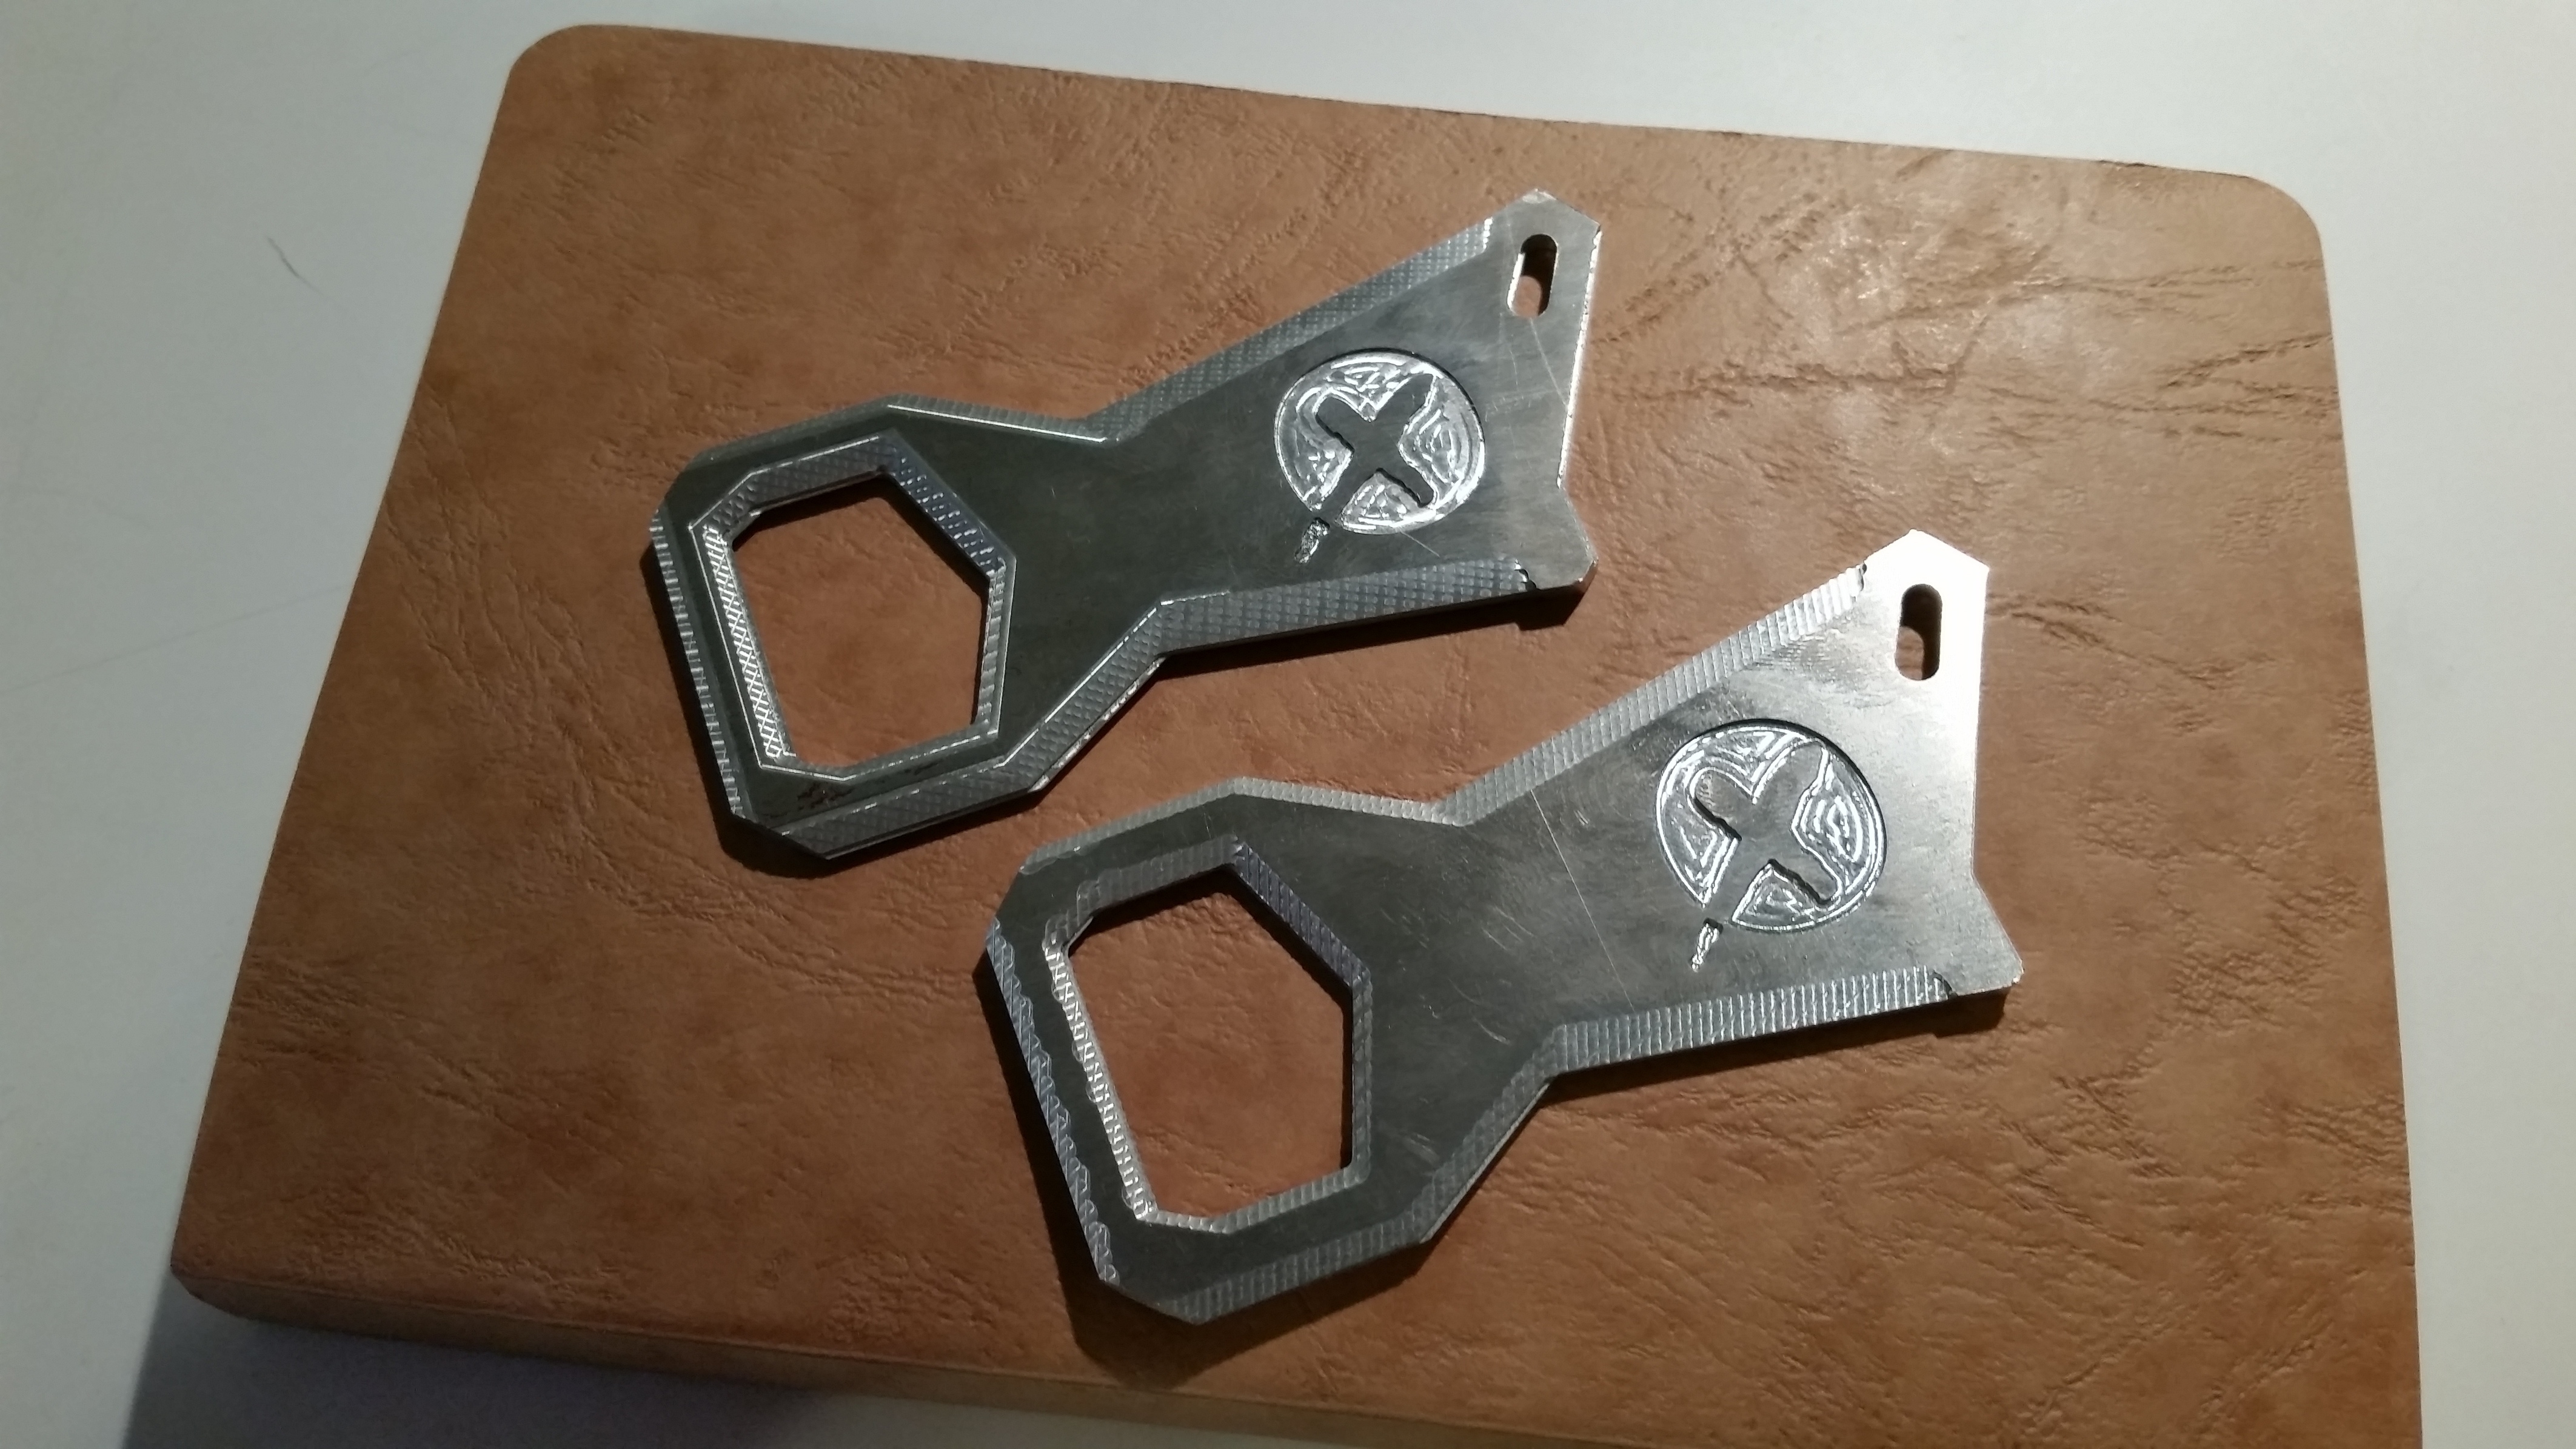
This is all cut with a 1/16" flat cutter from the standard 6061 blanks that you can pick up on the Carbide store, except for a pencil pass and small pocket clean-up work on the logo which is done with the 1/32" flat cutter. I need to get more precise with my zeroing, since I’m being rather lazy with my flip setup in the low-profile vise and paying for it in time that I’ll need to spend filing the edges later.
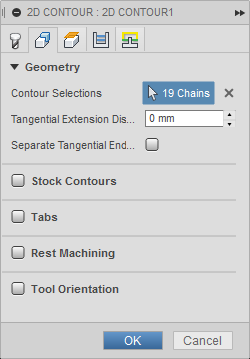
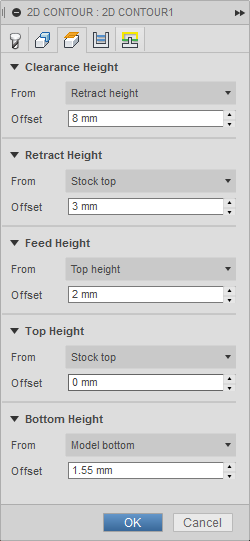
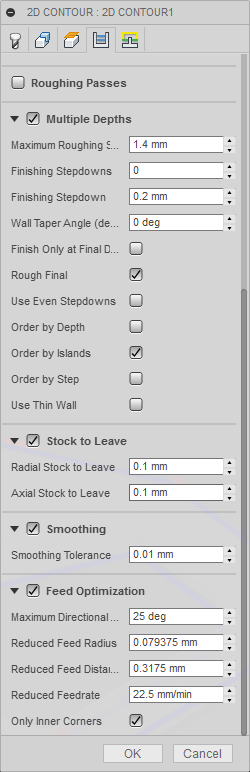
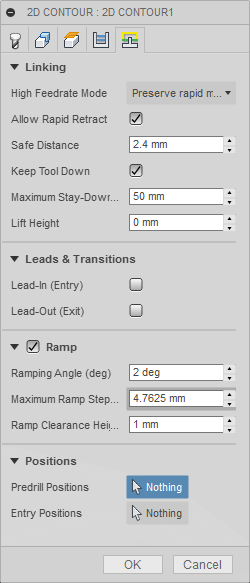
After breaking a tool and tuning in for optimal clearing and chip loading, and now having run two of these on the same tooling without issue, here are the relevant feeds & speeds details in Fusion360:
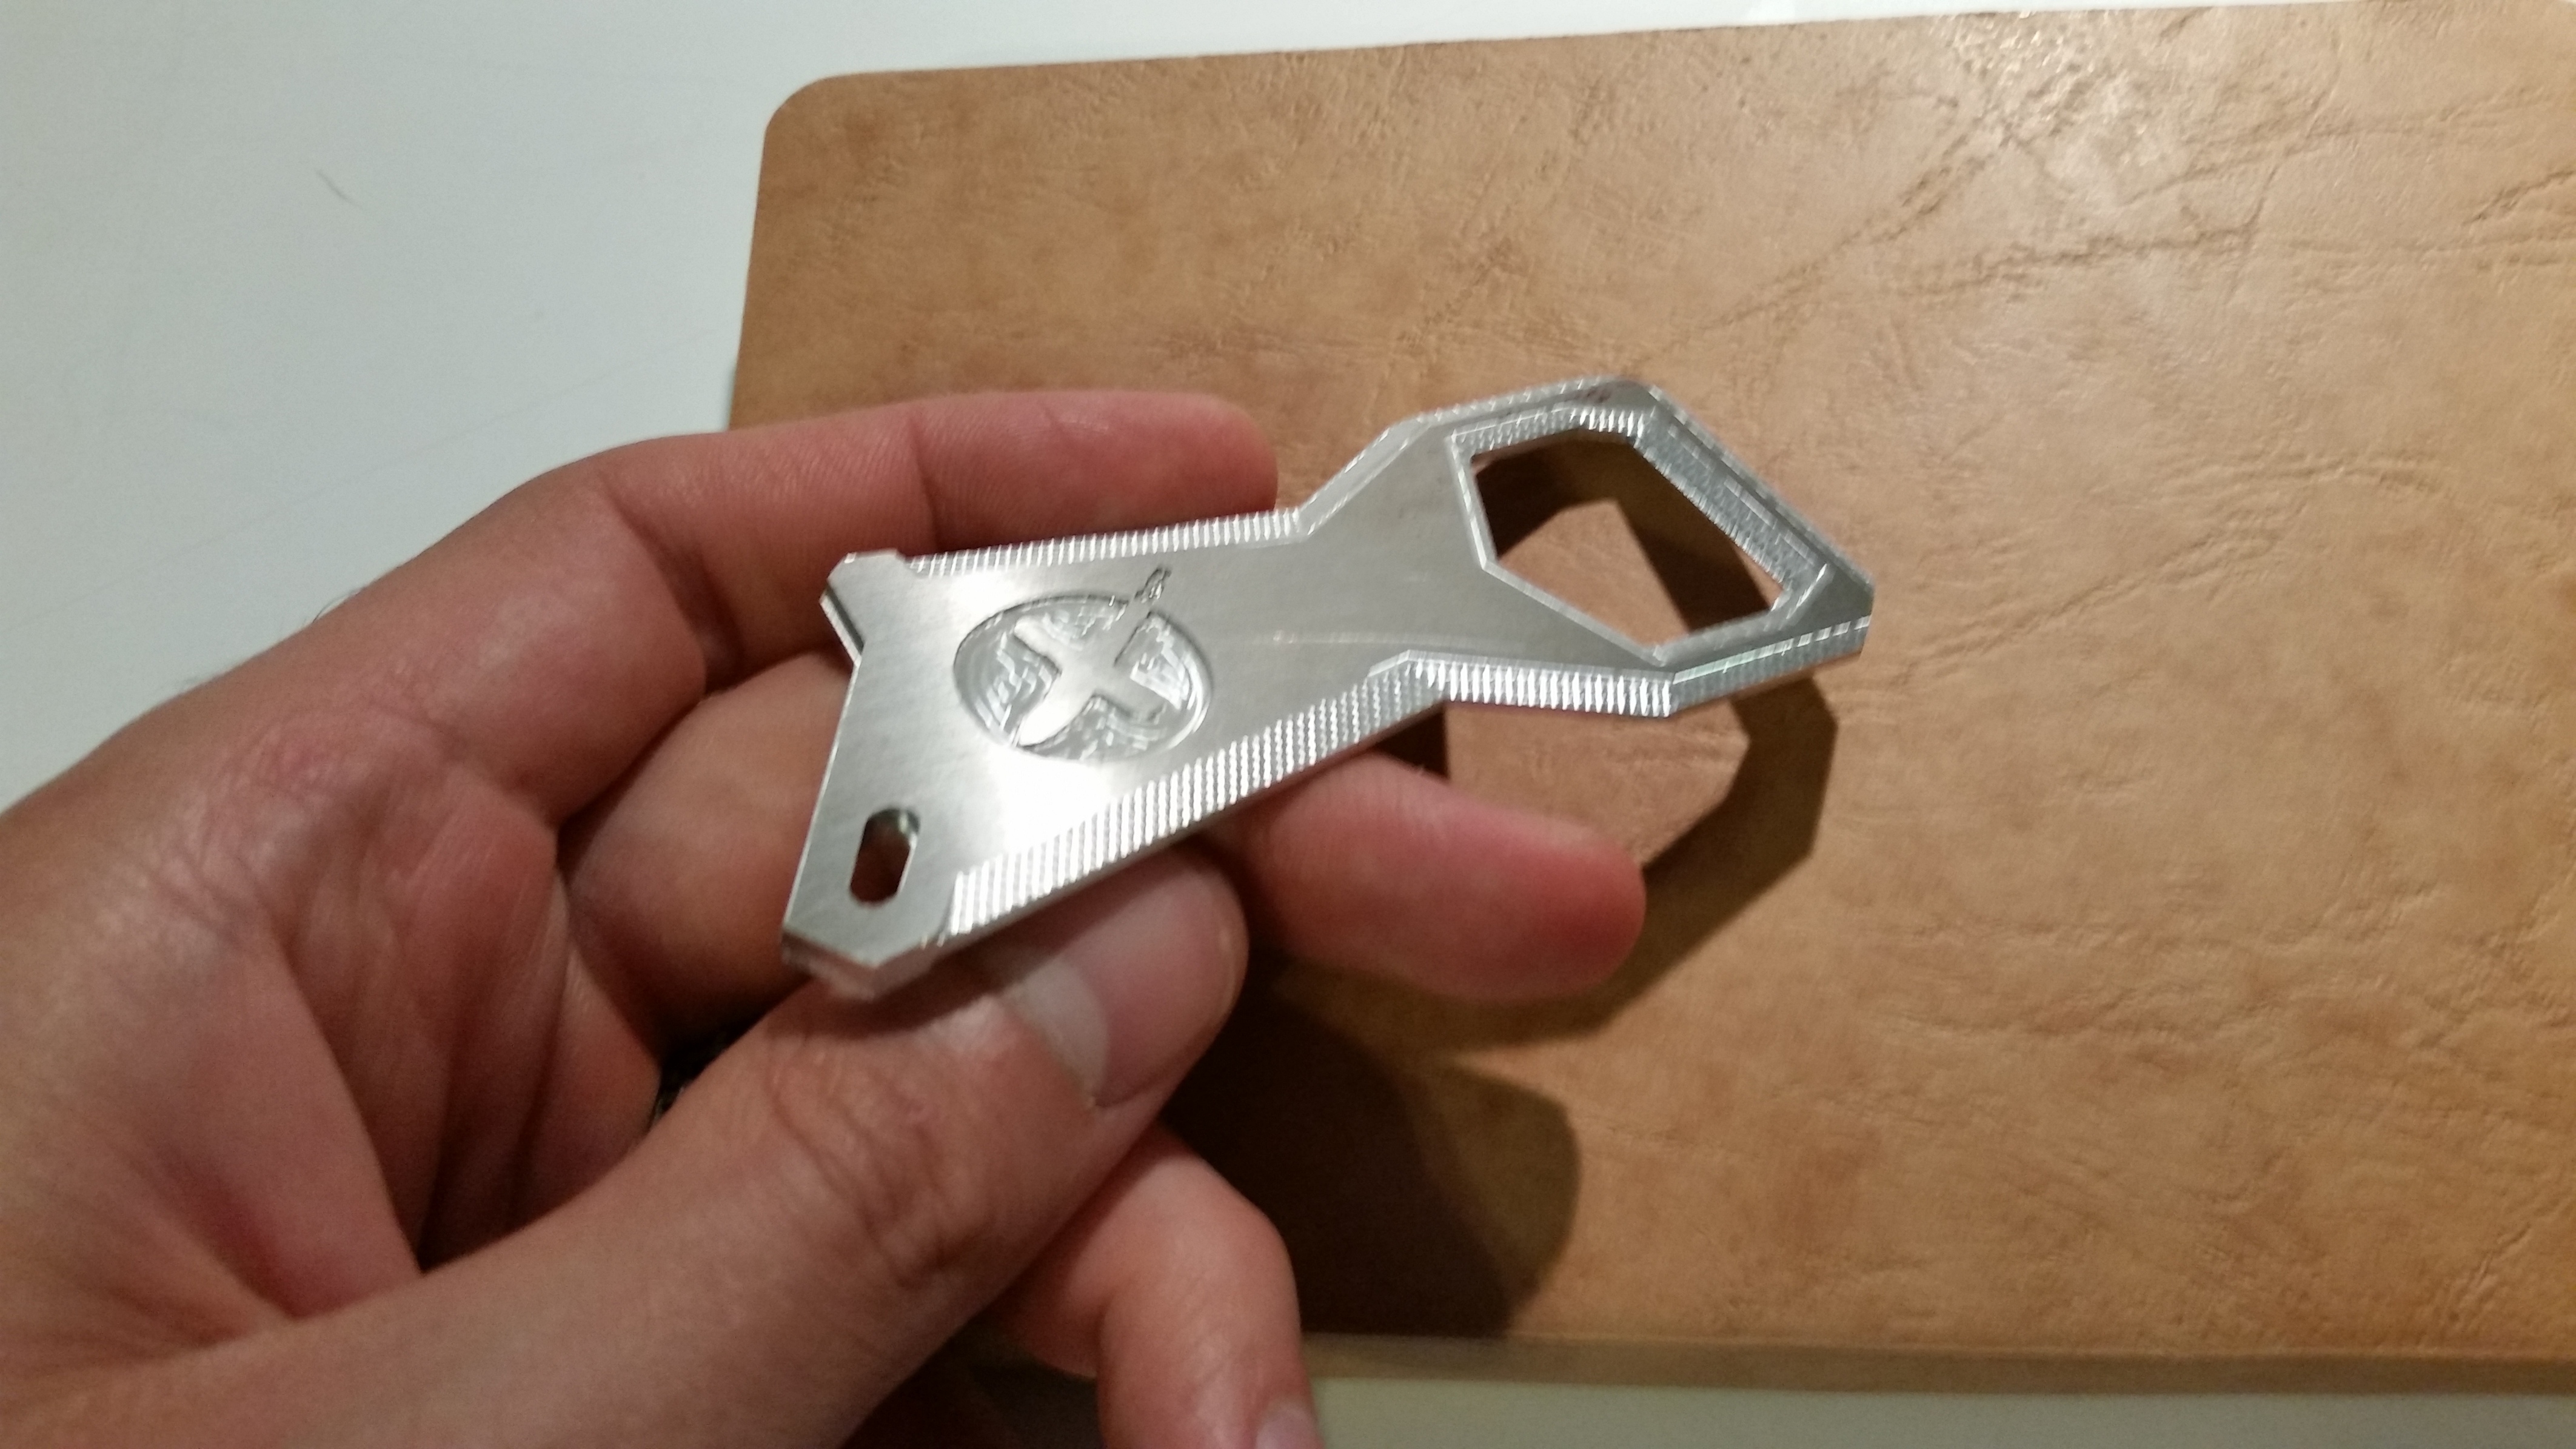
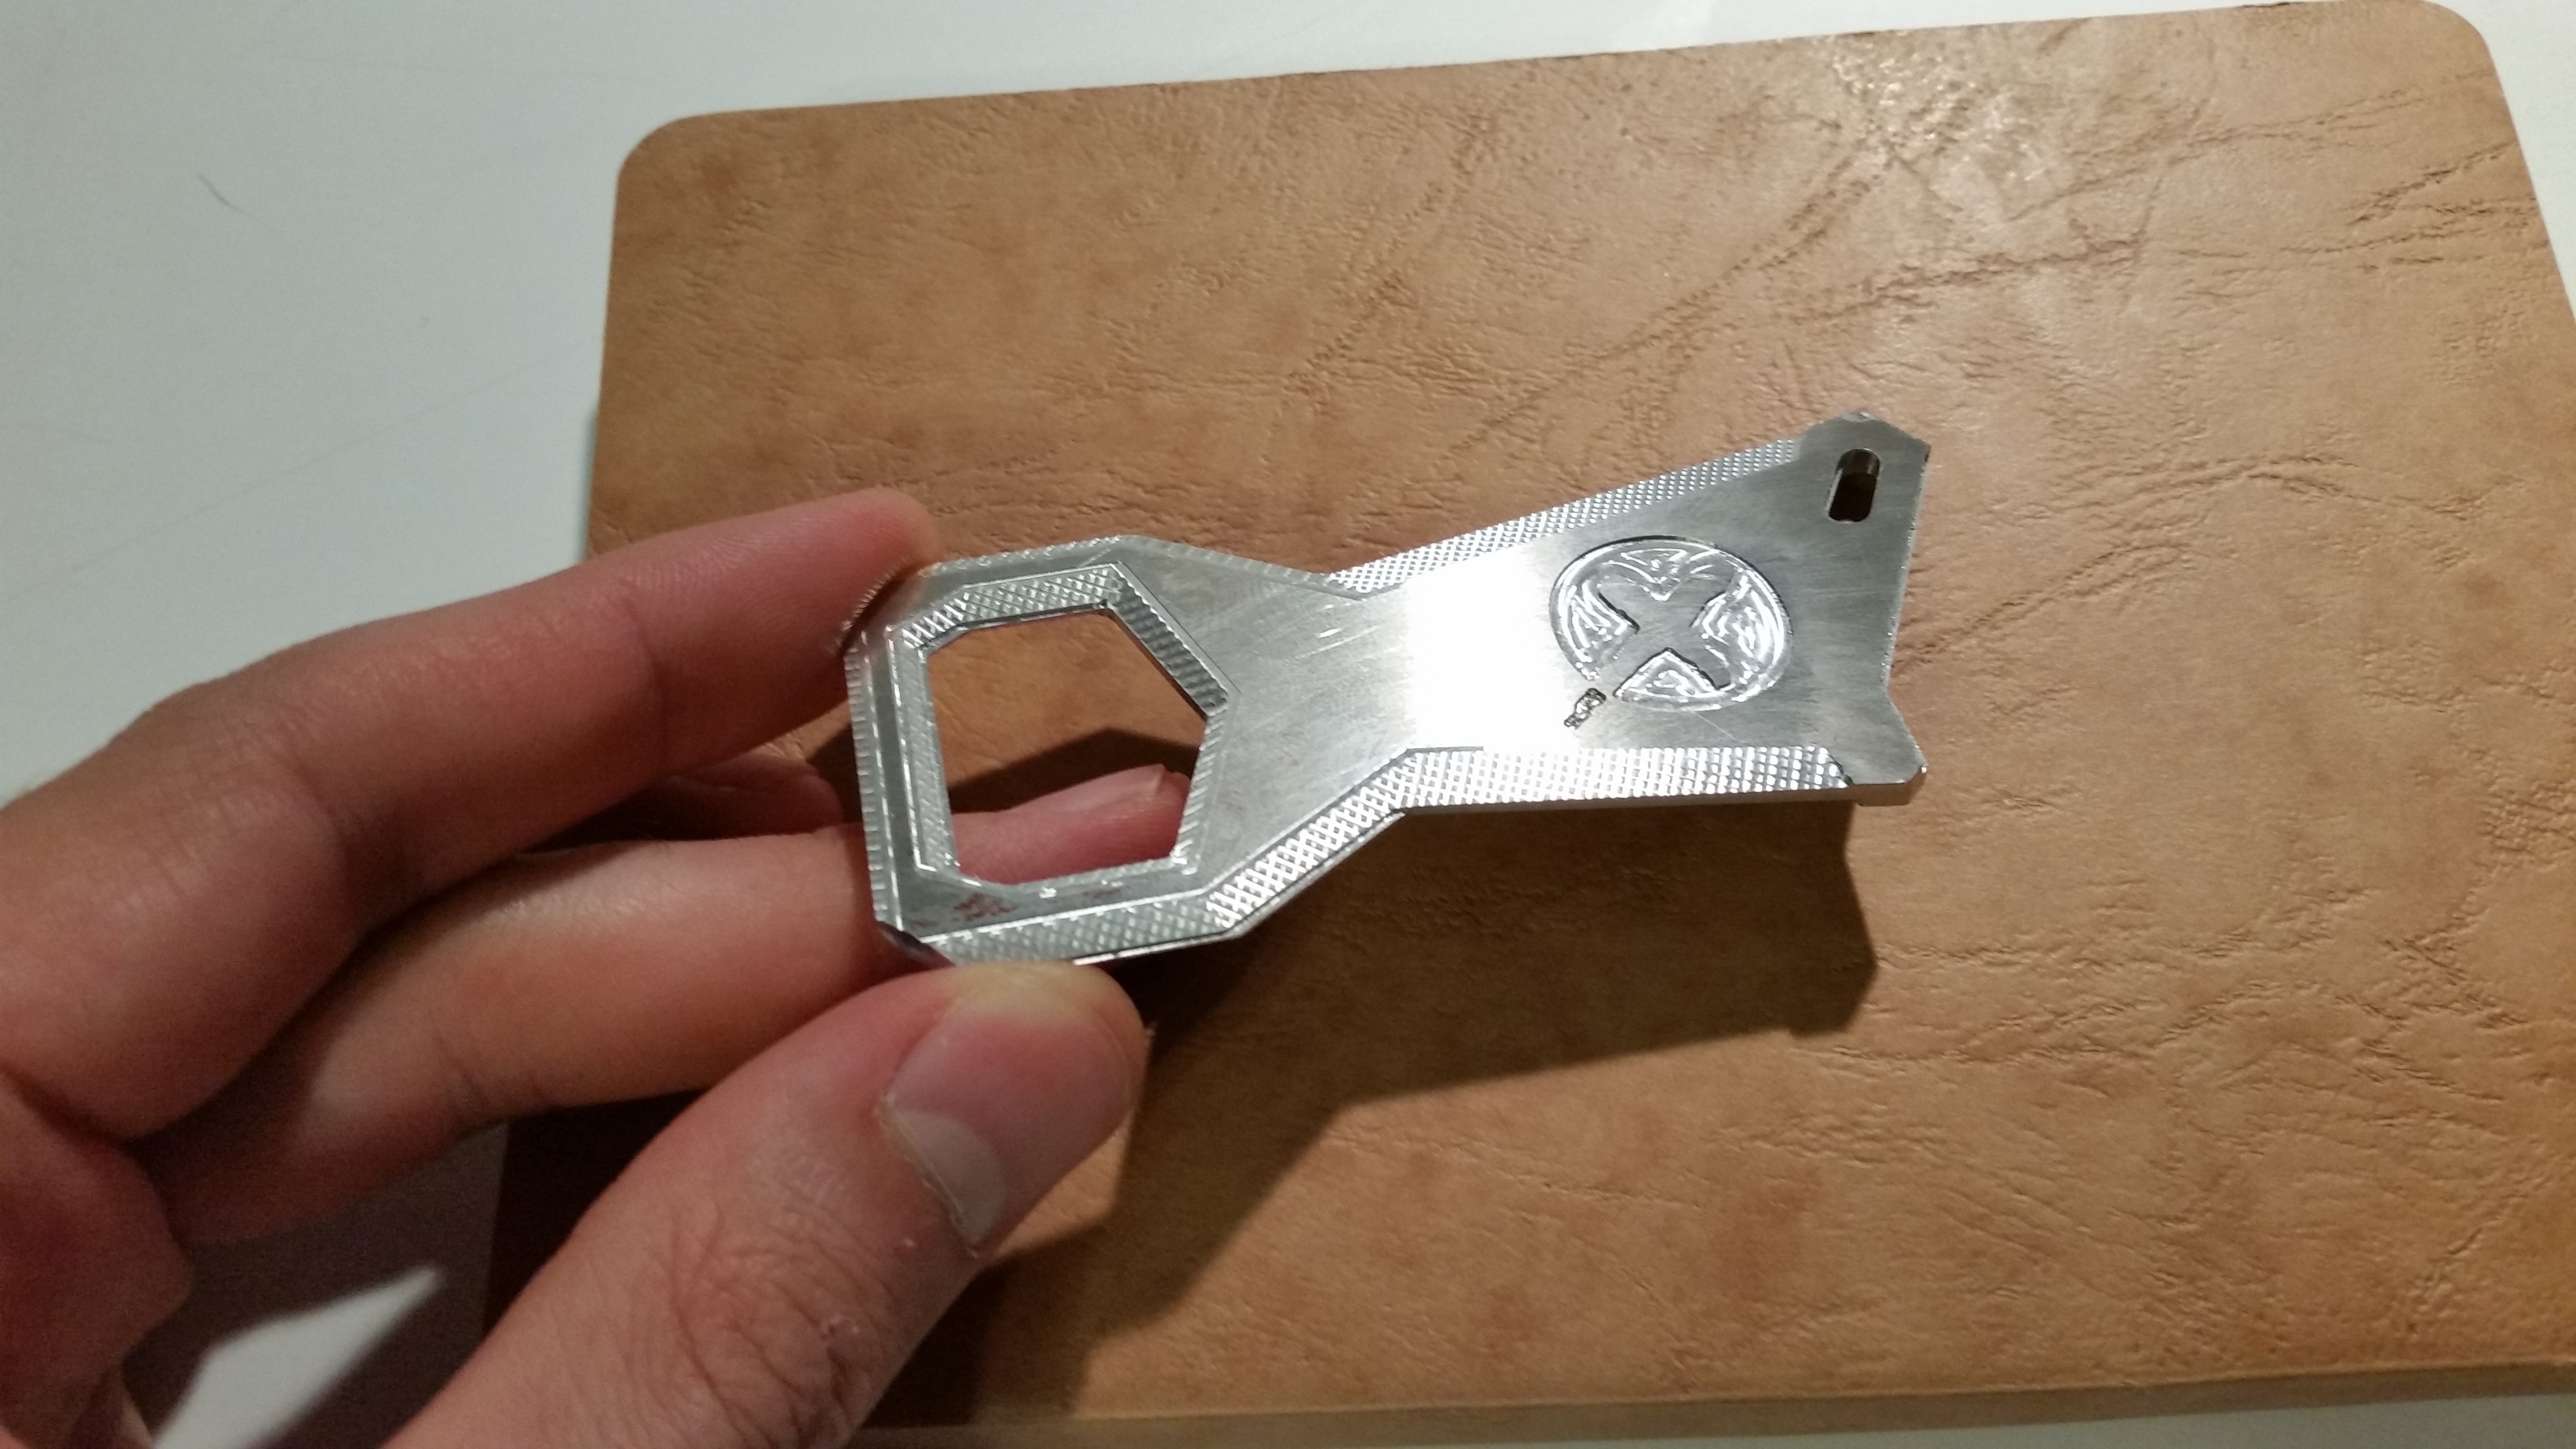
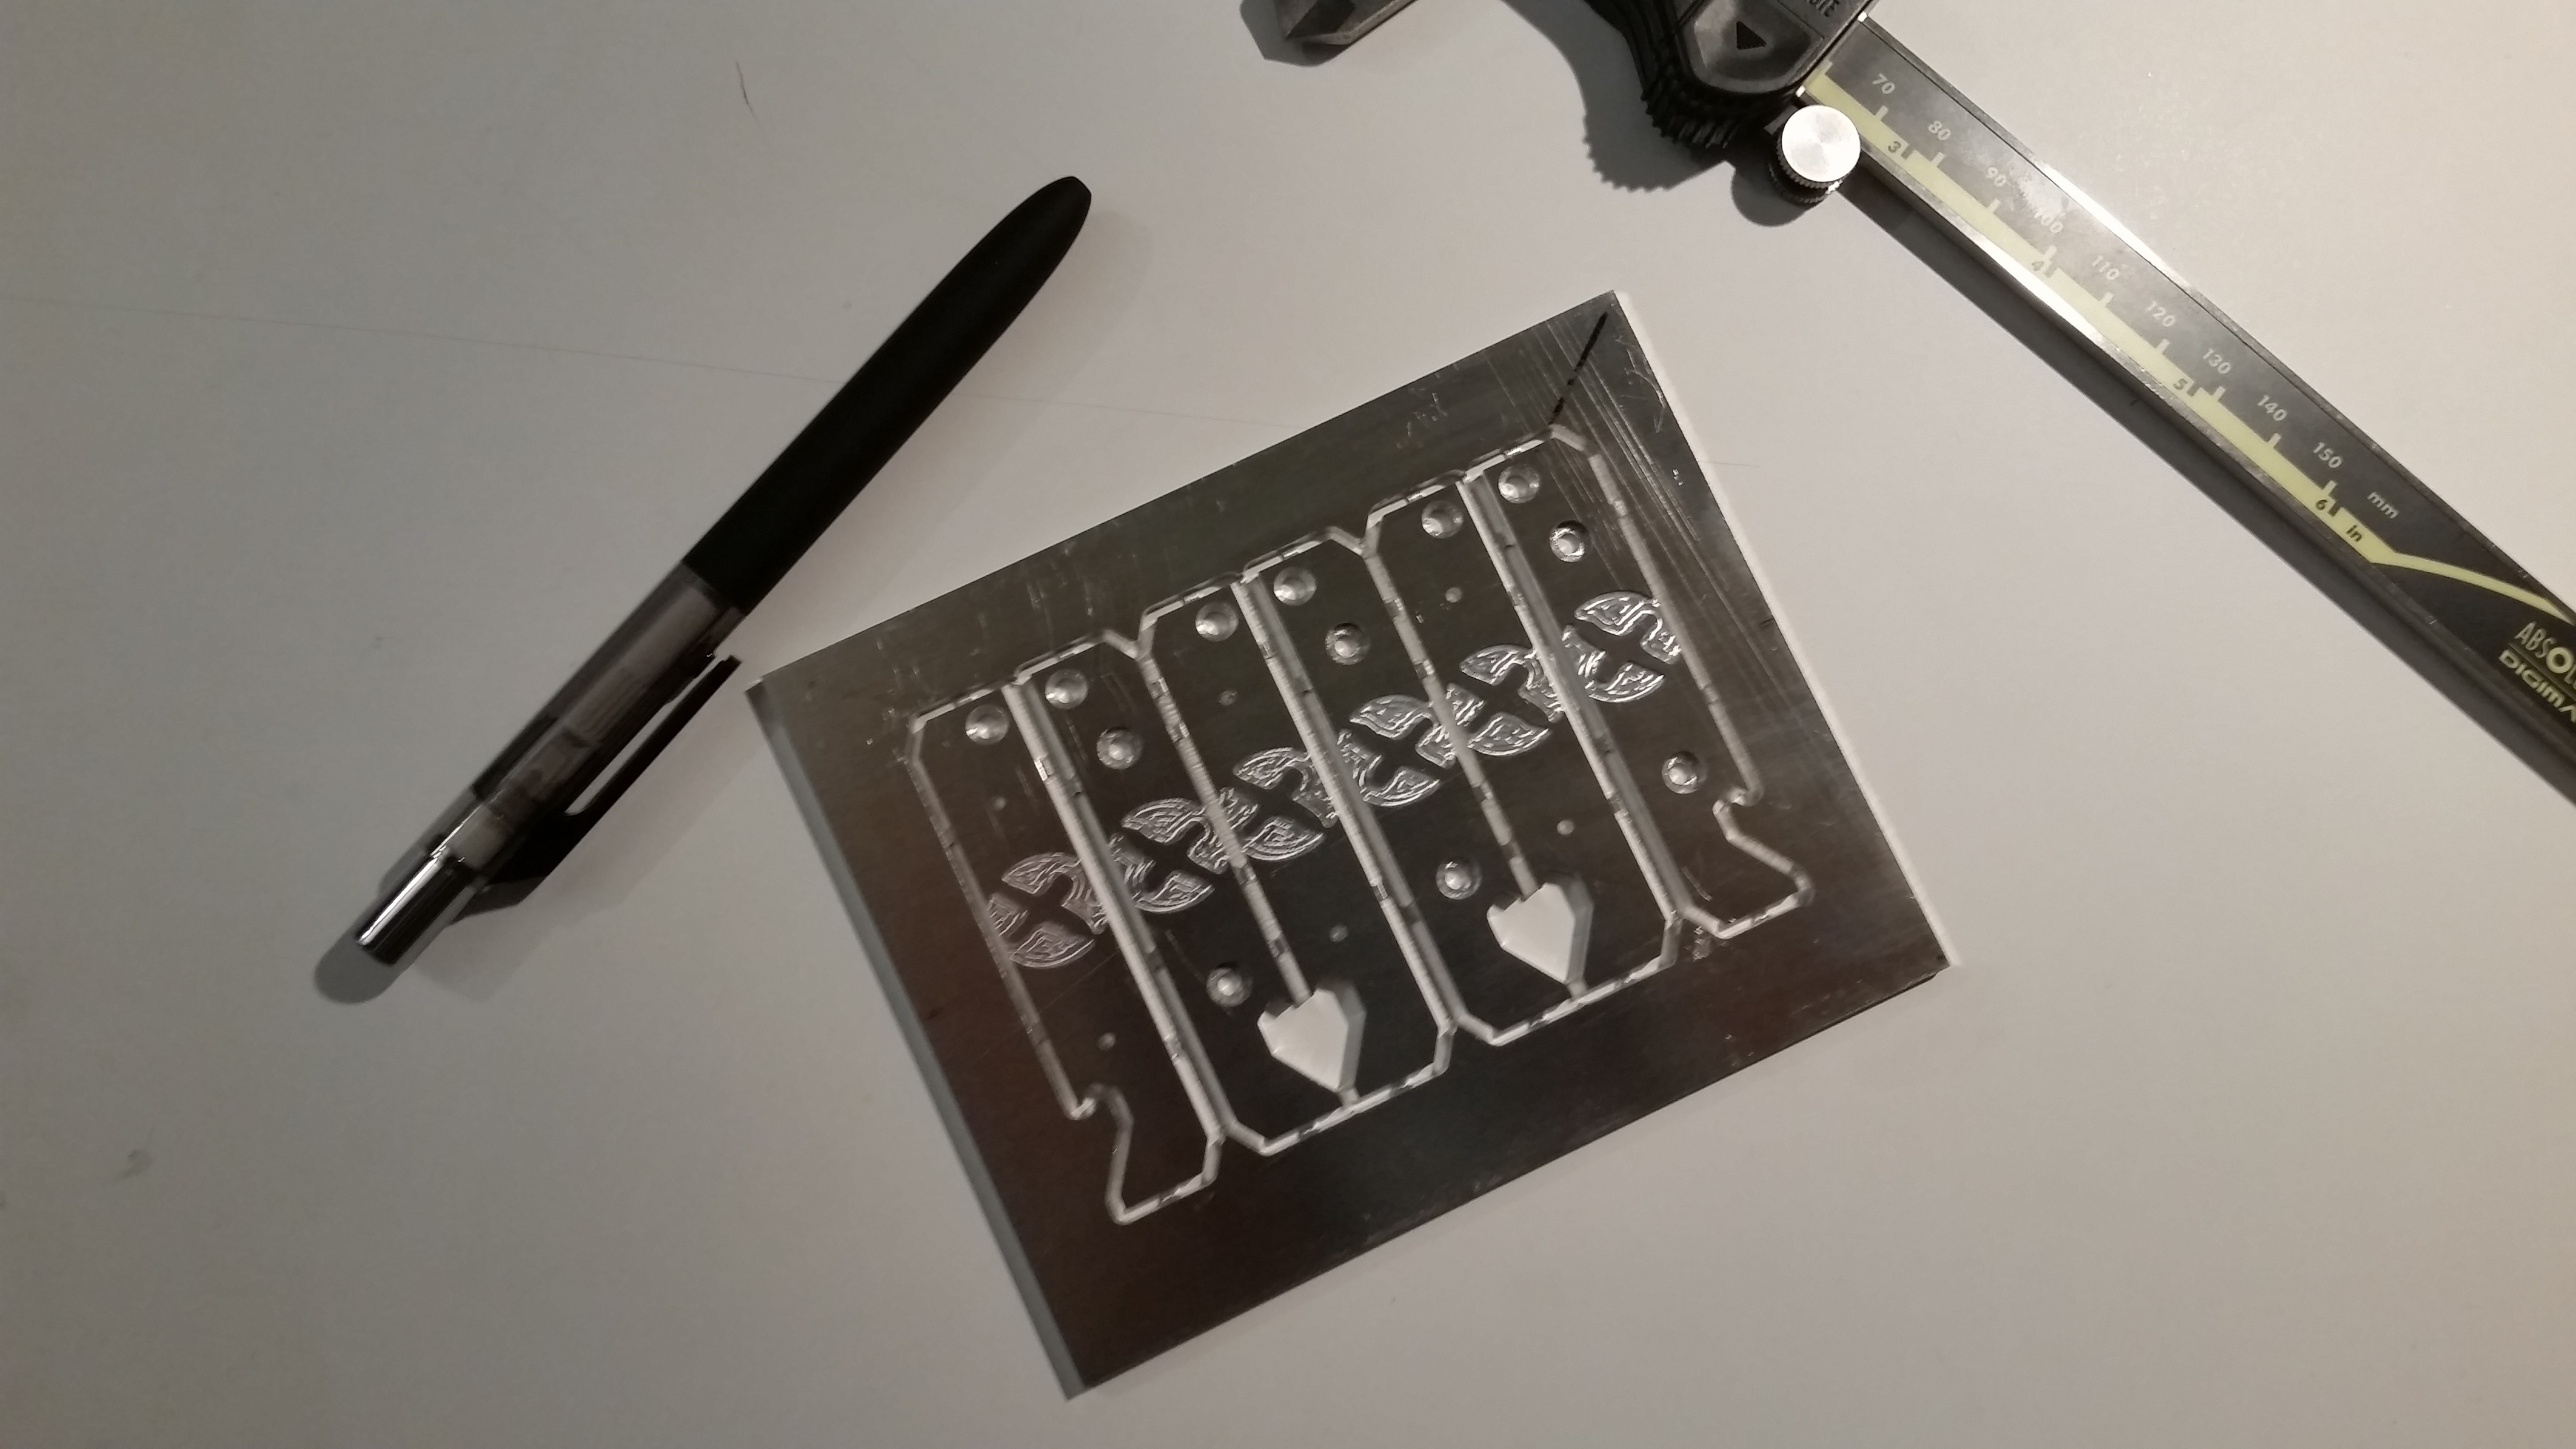
Just some more photos. Note the bottom one has “nibbling” at the edges of the sloped areas rather than the clean trim line. Pay no attention the misalignment sloppiness on the outside edges & the key-ring hole… I’ll get my centering fixed up before I run the next set. They come out 2 per square of aluminum.
AWESOME! Can I ask how much time the Nomad 883 Pro took to mill out one of these? Just curious because some of my simple projects seem to be going 9 hours. Not sure if I’m just way off on my speeds and feeds or it’s just the nature of the beast when dealing with 1/32 and 1/64 size bits.
The 0.125 inch Tools are total fine with the Nomad. I can told from my projects that the easiest way to safe time is to increase the step over (I go for 80% of the tool diameter) for roughing.
If you just want a simple cut out, leave roughing and only do a waterline finish.
@Apotessar@Munk with the settings and tool paths as designed and optimized, these were taking ~1 hour and 15 minutes per side, the front being slightly shorter, but then you have to account for the tool change to the 1/32", so it comes out the same. That said, in total it probably takes closer to 2 hours and 45 minutes, but I budgeted 3 hours to account for clean-up and flip in the middle.
I personally stick to a narrower step-over with climb-cutting in most cases in order to maintain a deeper plunge within what the Nomad can push while using more of the flute length to distribute wear better on the cutter. It also ensures better chip clearing to prevent the aluminum from gumming up the tool or dulling faster from re-cutting more chips than necessary.
Thanks for sharing. Very detailed explanation as to what and why you use these settings are really helpful. We all owe you for a few broken cutters. Lol
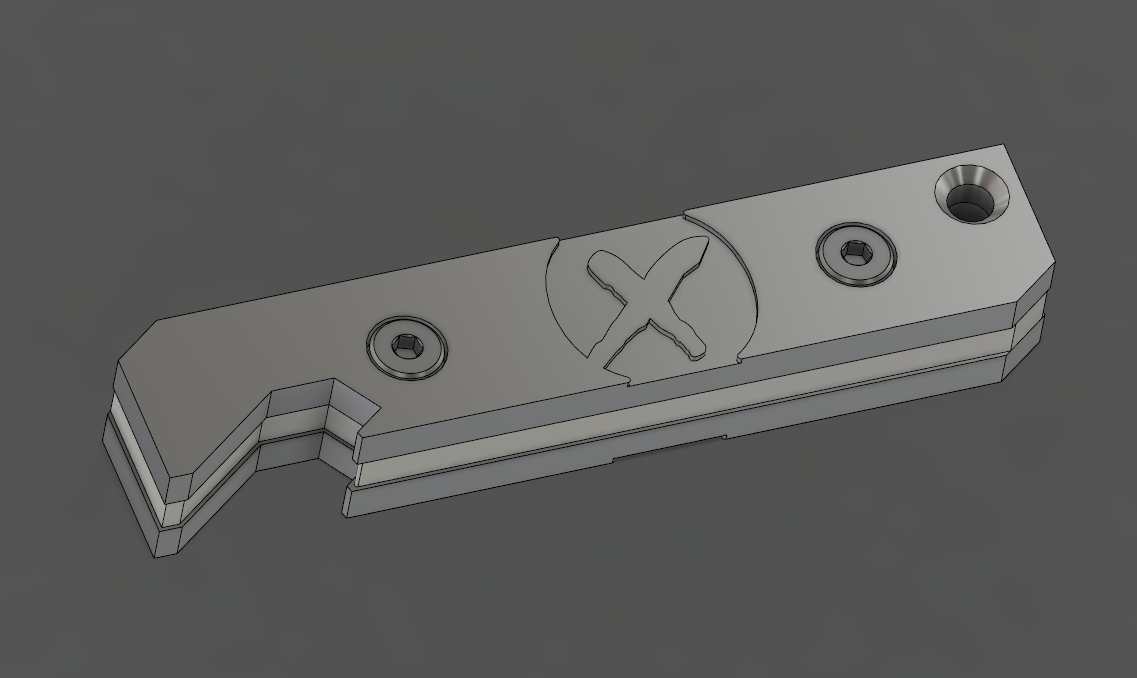
I’m cutting these out of the ~3mm aluminum 6061 plate as well, there’s a front and a back piece that will be bolted together with a recessed low-profile SHCS (socket head cap screw) with a layer of different material in the middle to give it a comfortable thickness and a wide enough “bite” to work well on a variety of bottle tops.
I also get 3 pair of them per-plate of stock I have, and 6 middles per piece, so more economical as well
The idea of “leave roughing and only do a waterline finish.” is this specific to Meshcam? I have tried this before with some good results. Basically do not to use the “Cut x…” and the “Cleanup” options. Thank you very much for the tip.