Chaging bit without setter

Simple newb question , can i change bits without the bit setter using the Vcrave PP? or i will need to purchase a bitsetter ? i have multiple tools paths with different end mills and was wandering if this was even a possibility , thanks in advance

Hey Q - I don’t currently use VCarve but I imagine without some method to measure tool offset within the program (BitSetter), you would just group toolpaths that use the same tool in one gcode file then the proceeding operation with the next tool in a separate file. You would load and run one file then switch tools and zero your Z-axis in-between each file.

Does that make sense?

2 Likes

Of course there’s no need for a bitsetter, however, you need to run each toolpath separately and manually change tools and reset Z between each tool.

This isn’t quite as bad as it sounds, as you get pretty good at reducing tools used, and grouping toolpaths that use the same tool together to save yourself the hassle.

1 Like

To do this without a BitSetter please see: https://docs.carbide3d.com/tutorials/tool-change/

Some folks have used gauge blocks or depth collar rings to ensure consistent stickout.

yes it does, just a little confused on the z-axis zeroing would that be accurate for the next gcode cut?

i guess how would i know i have zeroed out z correctly ?

Do you have a bitzero to do the initial setting or are you setting X, Y, Z zero manually?

There will always be potential for error, even using the BitSetter; but the BitSetter does it’s job as long as your machine is setup correctly and the operator follows the procedure.

There are several methods to perform tool changes and reset Z-zero manually in-between jobs and some are better than others. People do it often.

3 Likes

am doing this manually

OK, so you’ve found a method of lowering the tool down to your reference zero point which you’re happy with and you’re pressing “Zero All” to reset the work zero.

If you export your toolpaths in groups where each group uses on specific tool, here’s one of mine from Fusion360;

Screenshot 2020-05-29 at 13.40.21

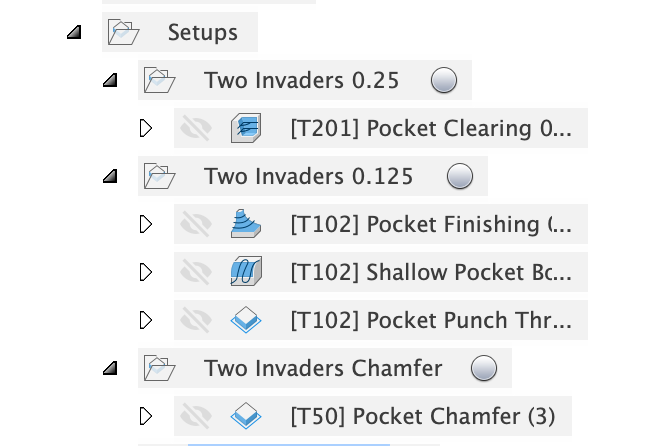
This group is set up for a 0.25", 0.125" and 90 degree V for a chamfer. I export three files with cut paths for one tool in each file.

I set up the X, Y, Z zero for the start of the process with the first bit, in this case 0.25" for the initial clearing cuts.

Make sure you choose a location where you’ll still be able to re-zero the Z after each of the cuts, some part of the stock which doesn’t get cut away, or alternatively zero from the wasteboard and tell your CAM tool that’s where the zero is (either way you need to measure your stock thickness to get things accurate)

After the first gcode finishes I use the rapid to current X, Y option and then change the bit for the new tool, I then re-zero just the Z axis for the length of the new tool, preferably on the same location on the stock or wasteboard.

I then run the next gcode for the new tool, and so on.

Does that make sense?

3 Likes

oh yesssssssss this is exactly what i am looking for , thank you so much

1 Like

NP,

By the way, I forgot to re-set the zero enough times whilst doing it this way that I ended up putting reminders all over my machine so I’d remember to go reset the Z height after changing the bit. The sticker where the other part of the dust boot goes on was an effective reminder, whenever I went to put the dust skirt back to start cutting I was reminded of what I’d forgotten :wink:

2 Likes

This topic was automatically closed 30 days after the last reply. New replies are no longer allowed.