CNC Box (Finger) Joint Box

Selecting “LuaLaTeX” and rerunning got me this: any idea what I am still doing wrong ?

This is LuaTeX, Version 1.10.0 (MiKTeX 2.9.7000 64-bit) 
 restricted system commands enabled.
(./cncboxfingerjoint.tex
LaTeX2e <2018-12-01>

luaotfload | main : initialization completed in 1.050 seconds
("C:/Program Files/MiKTeX 2.9/tex/generic/luatex85/luatex85.sty")
("C:/Program Files/MiKTeX 2.9/tex/latex/base/article.cls"
Document Class: article 2018/09/03 v1.4i Standard LaTeX document class
("C:/Program Files/MiKTeX 2.9/tex/latex/base/size10.clo"))
("C:/Program Files/MiKTeX 2.9/tex/lualatex/luacode/luacode.sty"
("C:/Program Files/MiKTeX 2.9/tex/generic/oberdiek/ifluatex.sty")
("C:/Program Files/MiKTeX 2.9/tex/luatex/luatexbase/luatexbase.sty"
("C:/Program Files/MiKTeX 2.9/tex/luatex/ctablestack/ctablestack.sty")))
("C:/Program Files/MiKTeX 2.9/tex/luatex/luamplib/luamplib.sty")
("C:/Program Files/MiKTeX 2.9/tex/latex/tools/calc.sty")
("C:/Program Files/MiKTeX 2.9/tex/latex/xcolor/xcolor.sty"
("C:/Program Files/MiKTeX 2.9/tex/latex/graphics-cfg/color.cfg")
("C:/Program Files/MiKTeX 2.9/tex/latex/graphics-def/luatex.def"))
("C:/Program Files/MiKTeX 2.9/tex/latex/forloop/forloop.sty"
("C:/Program Files/MiKTeX 2.9/tex/latex/base/ifthen.sty"))[\directlua]:9: attem
pt to index a nil value (field 'Sample')
stack traceback:
	[\directlua]:9: in main chunk.
\luacode@dbg@exec ...code@maybe@printdbg {#1} #1 }
                                                  
l.185 \end{luacode}

Oh yes, there’s one other thing.

I disabled the \typein of querying for which Saved Preset would be used:

%\typein[\boxspecification]{What preset is to be used?}

and instead, hard-coded it to:

\newcommand{\boxspecification}{Sample}

You’ll need to either name your pre-set “Sample”, or change that line in the .tex file to match your name — please avoid using underscores or special characters.

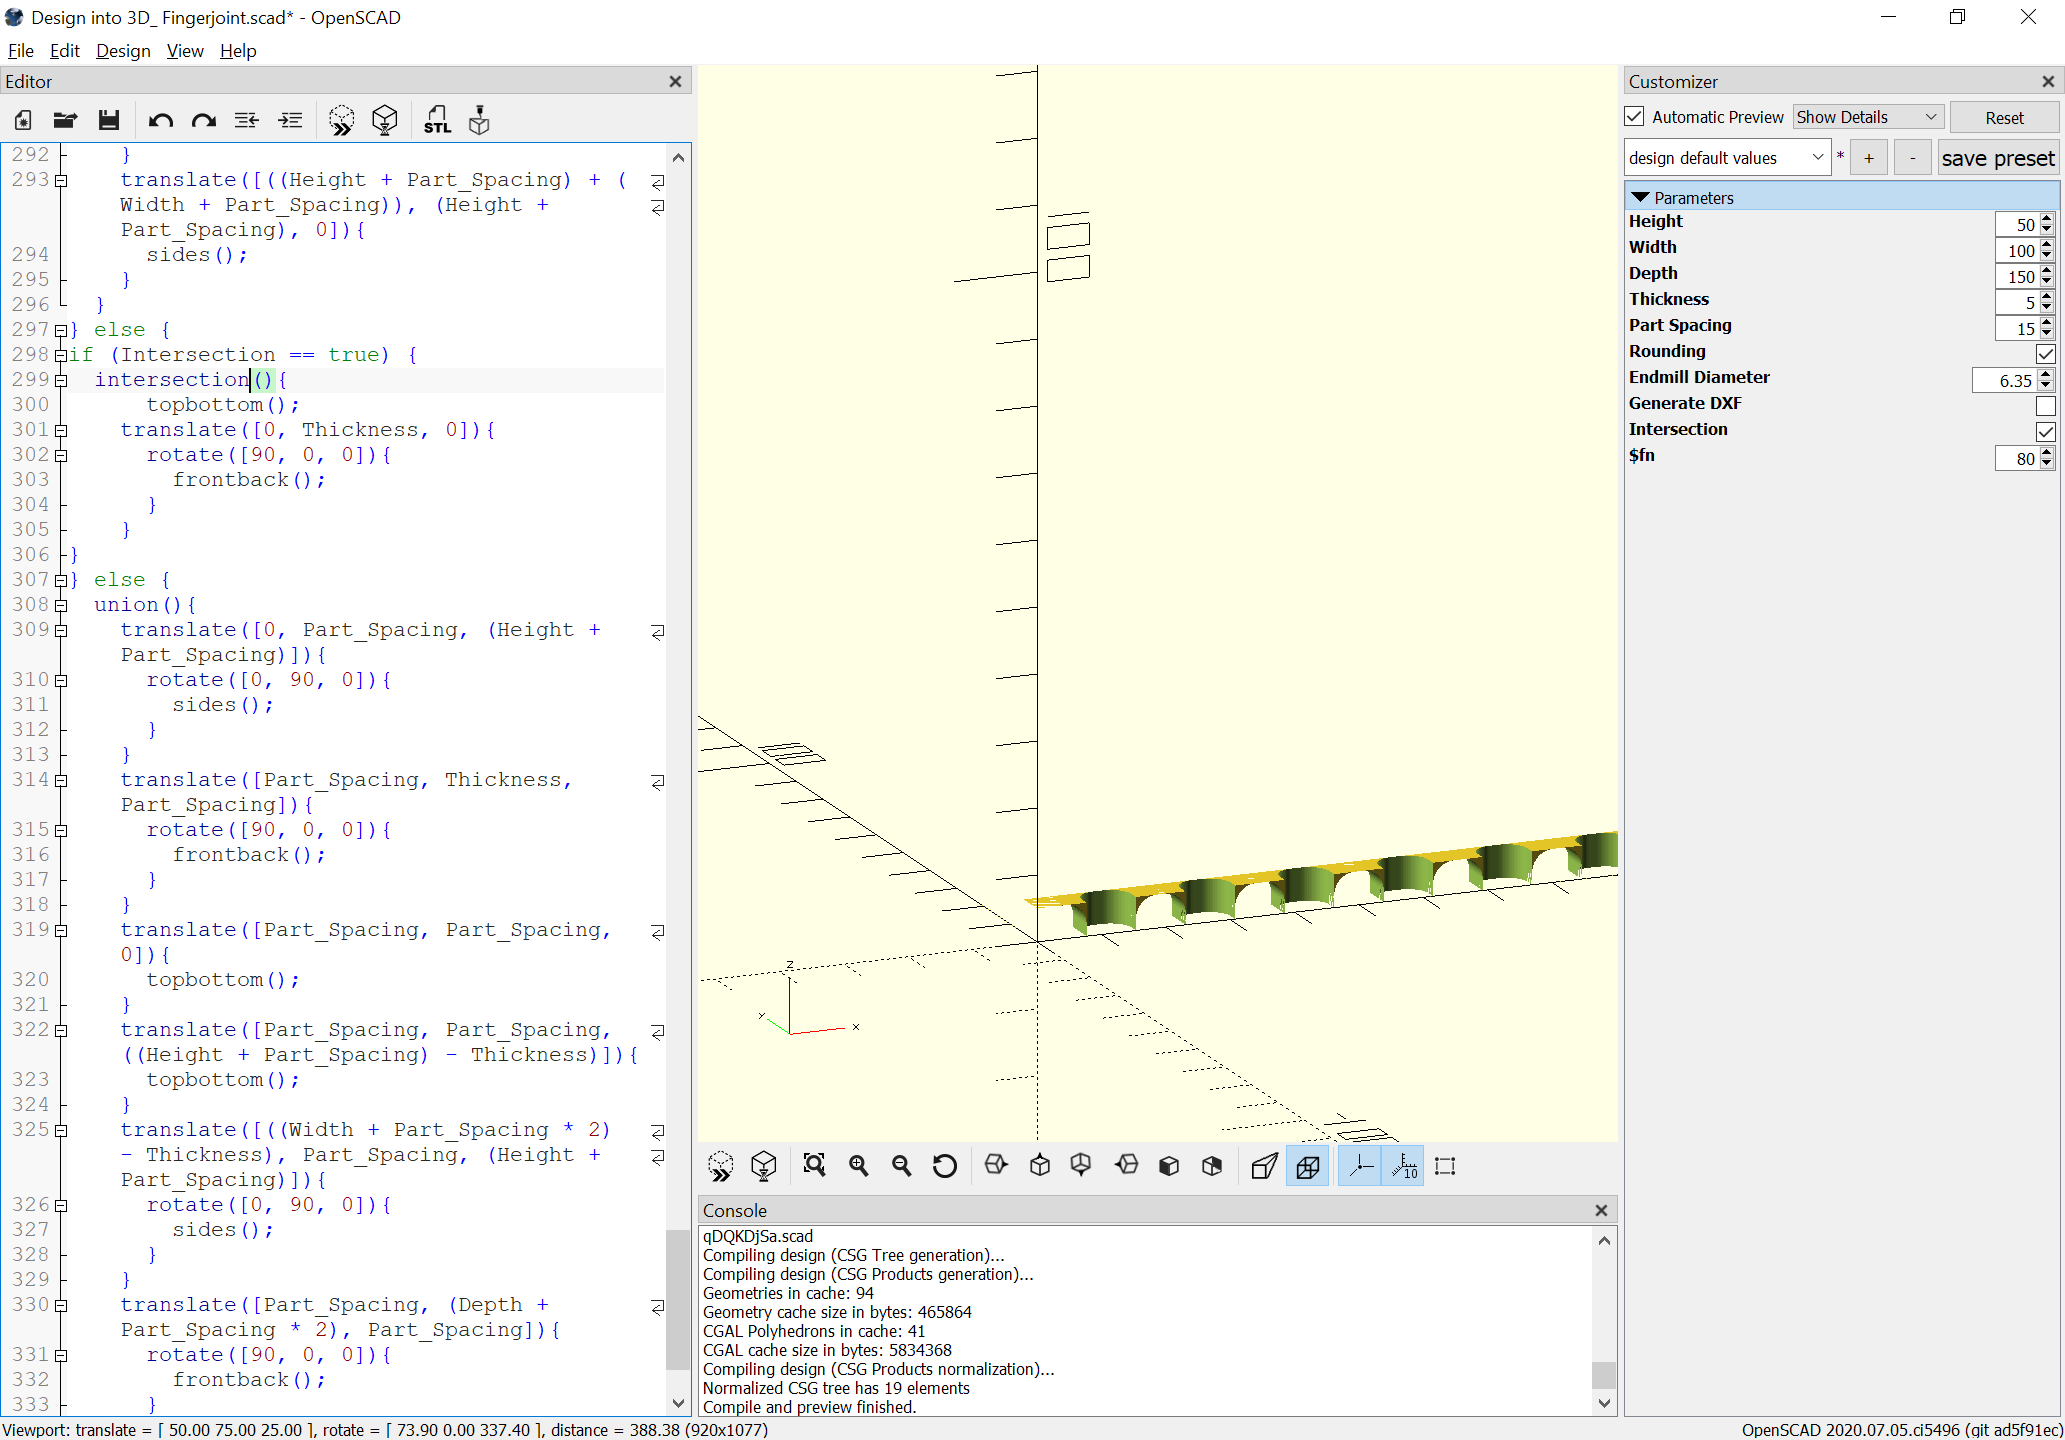
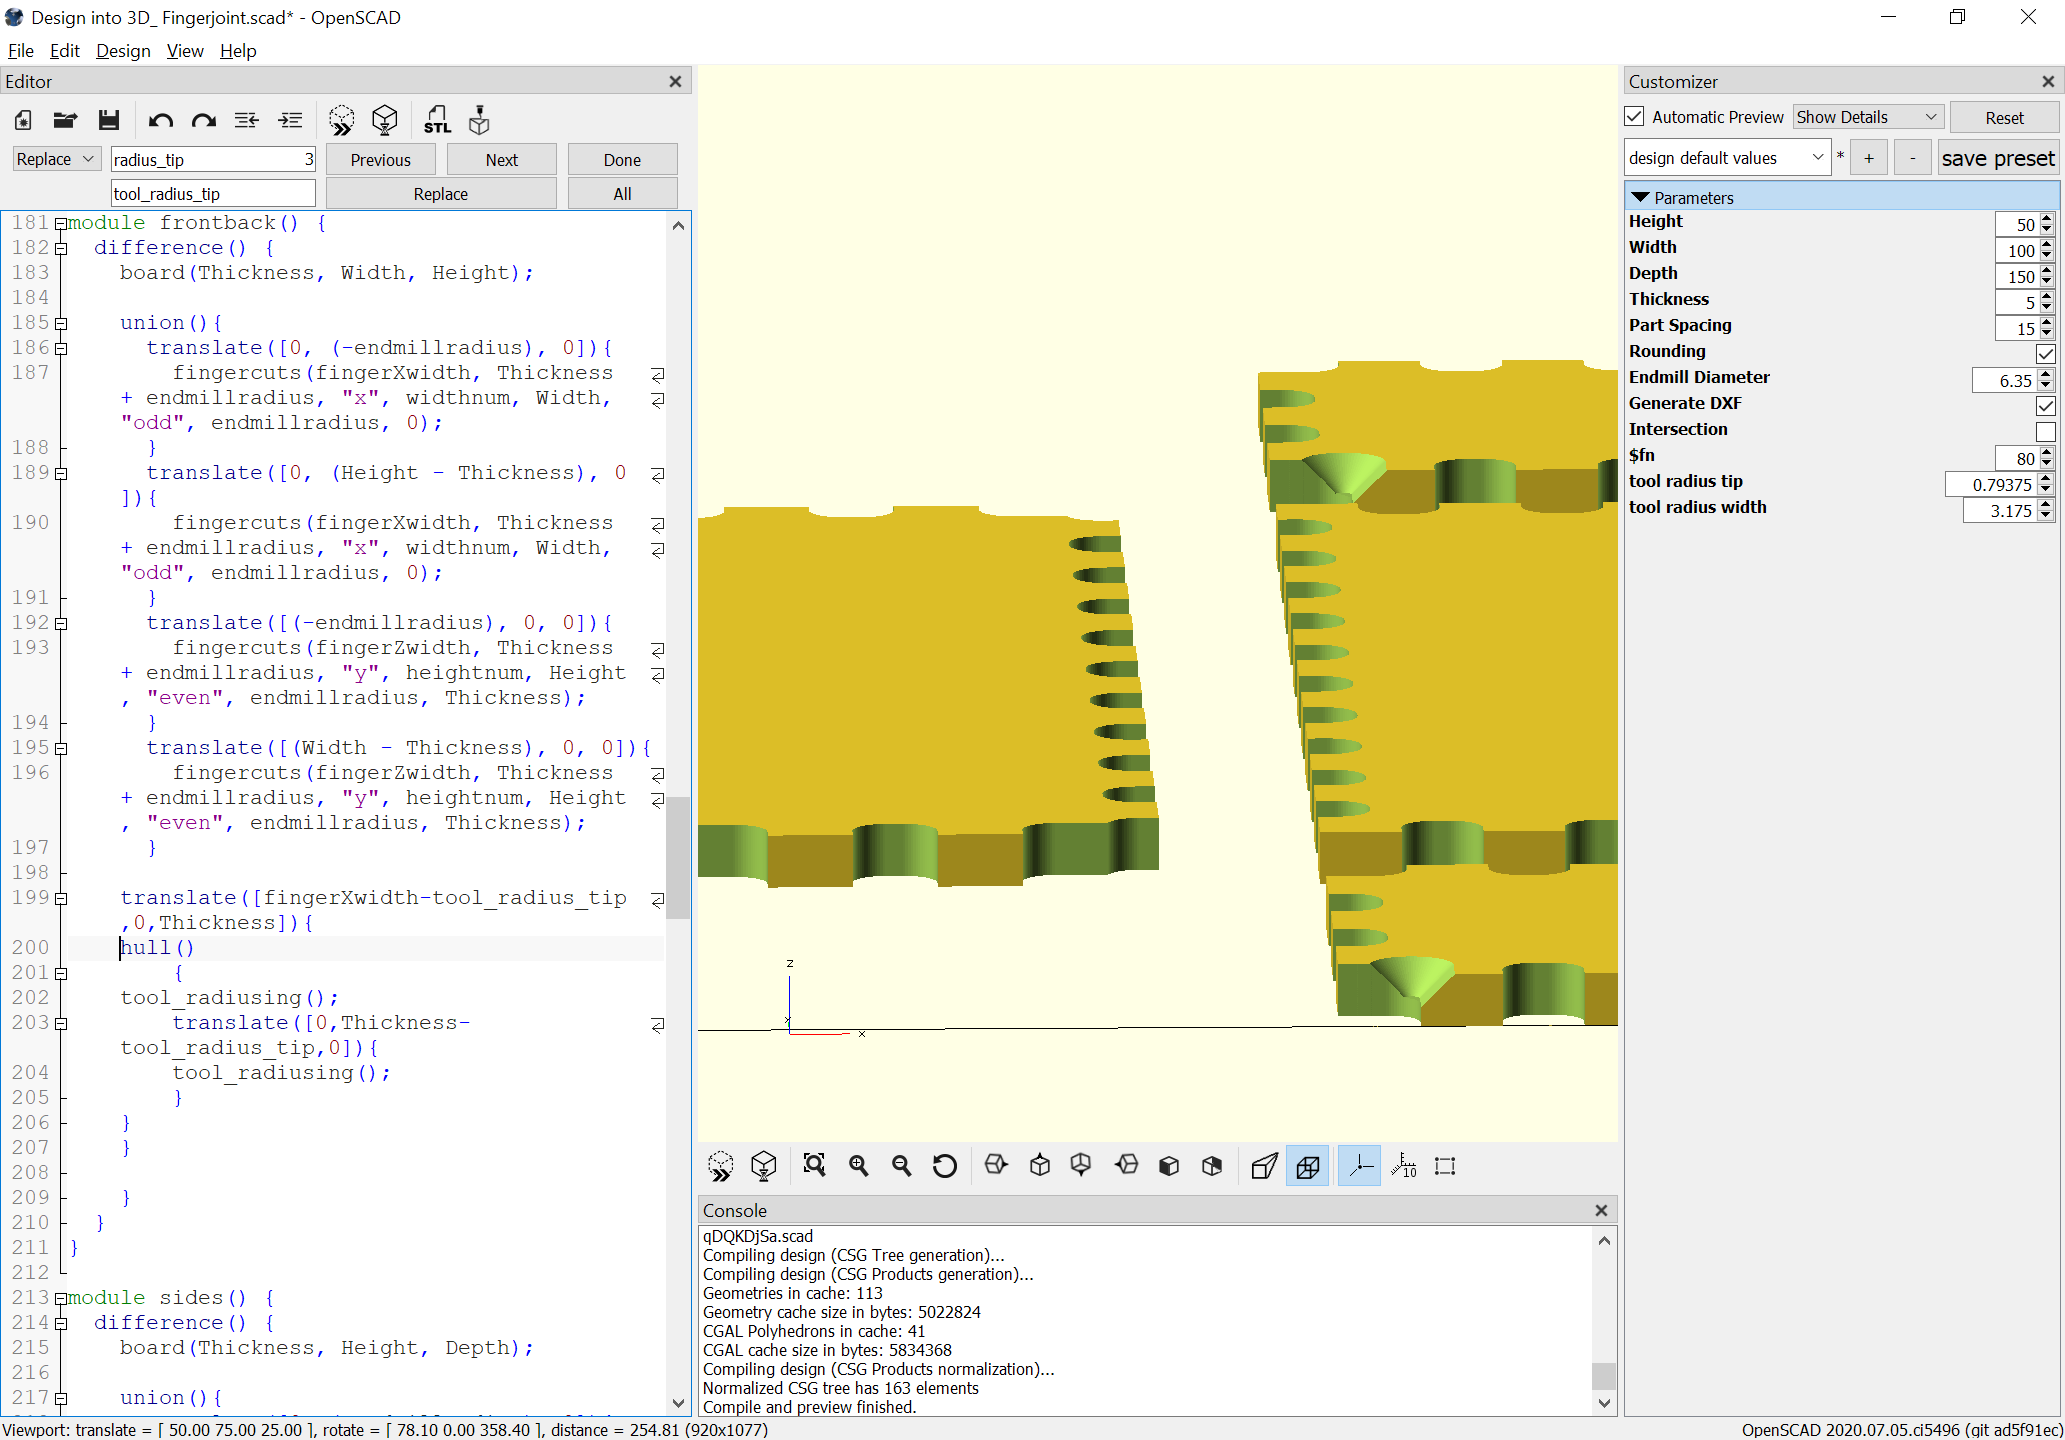
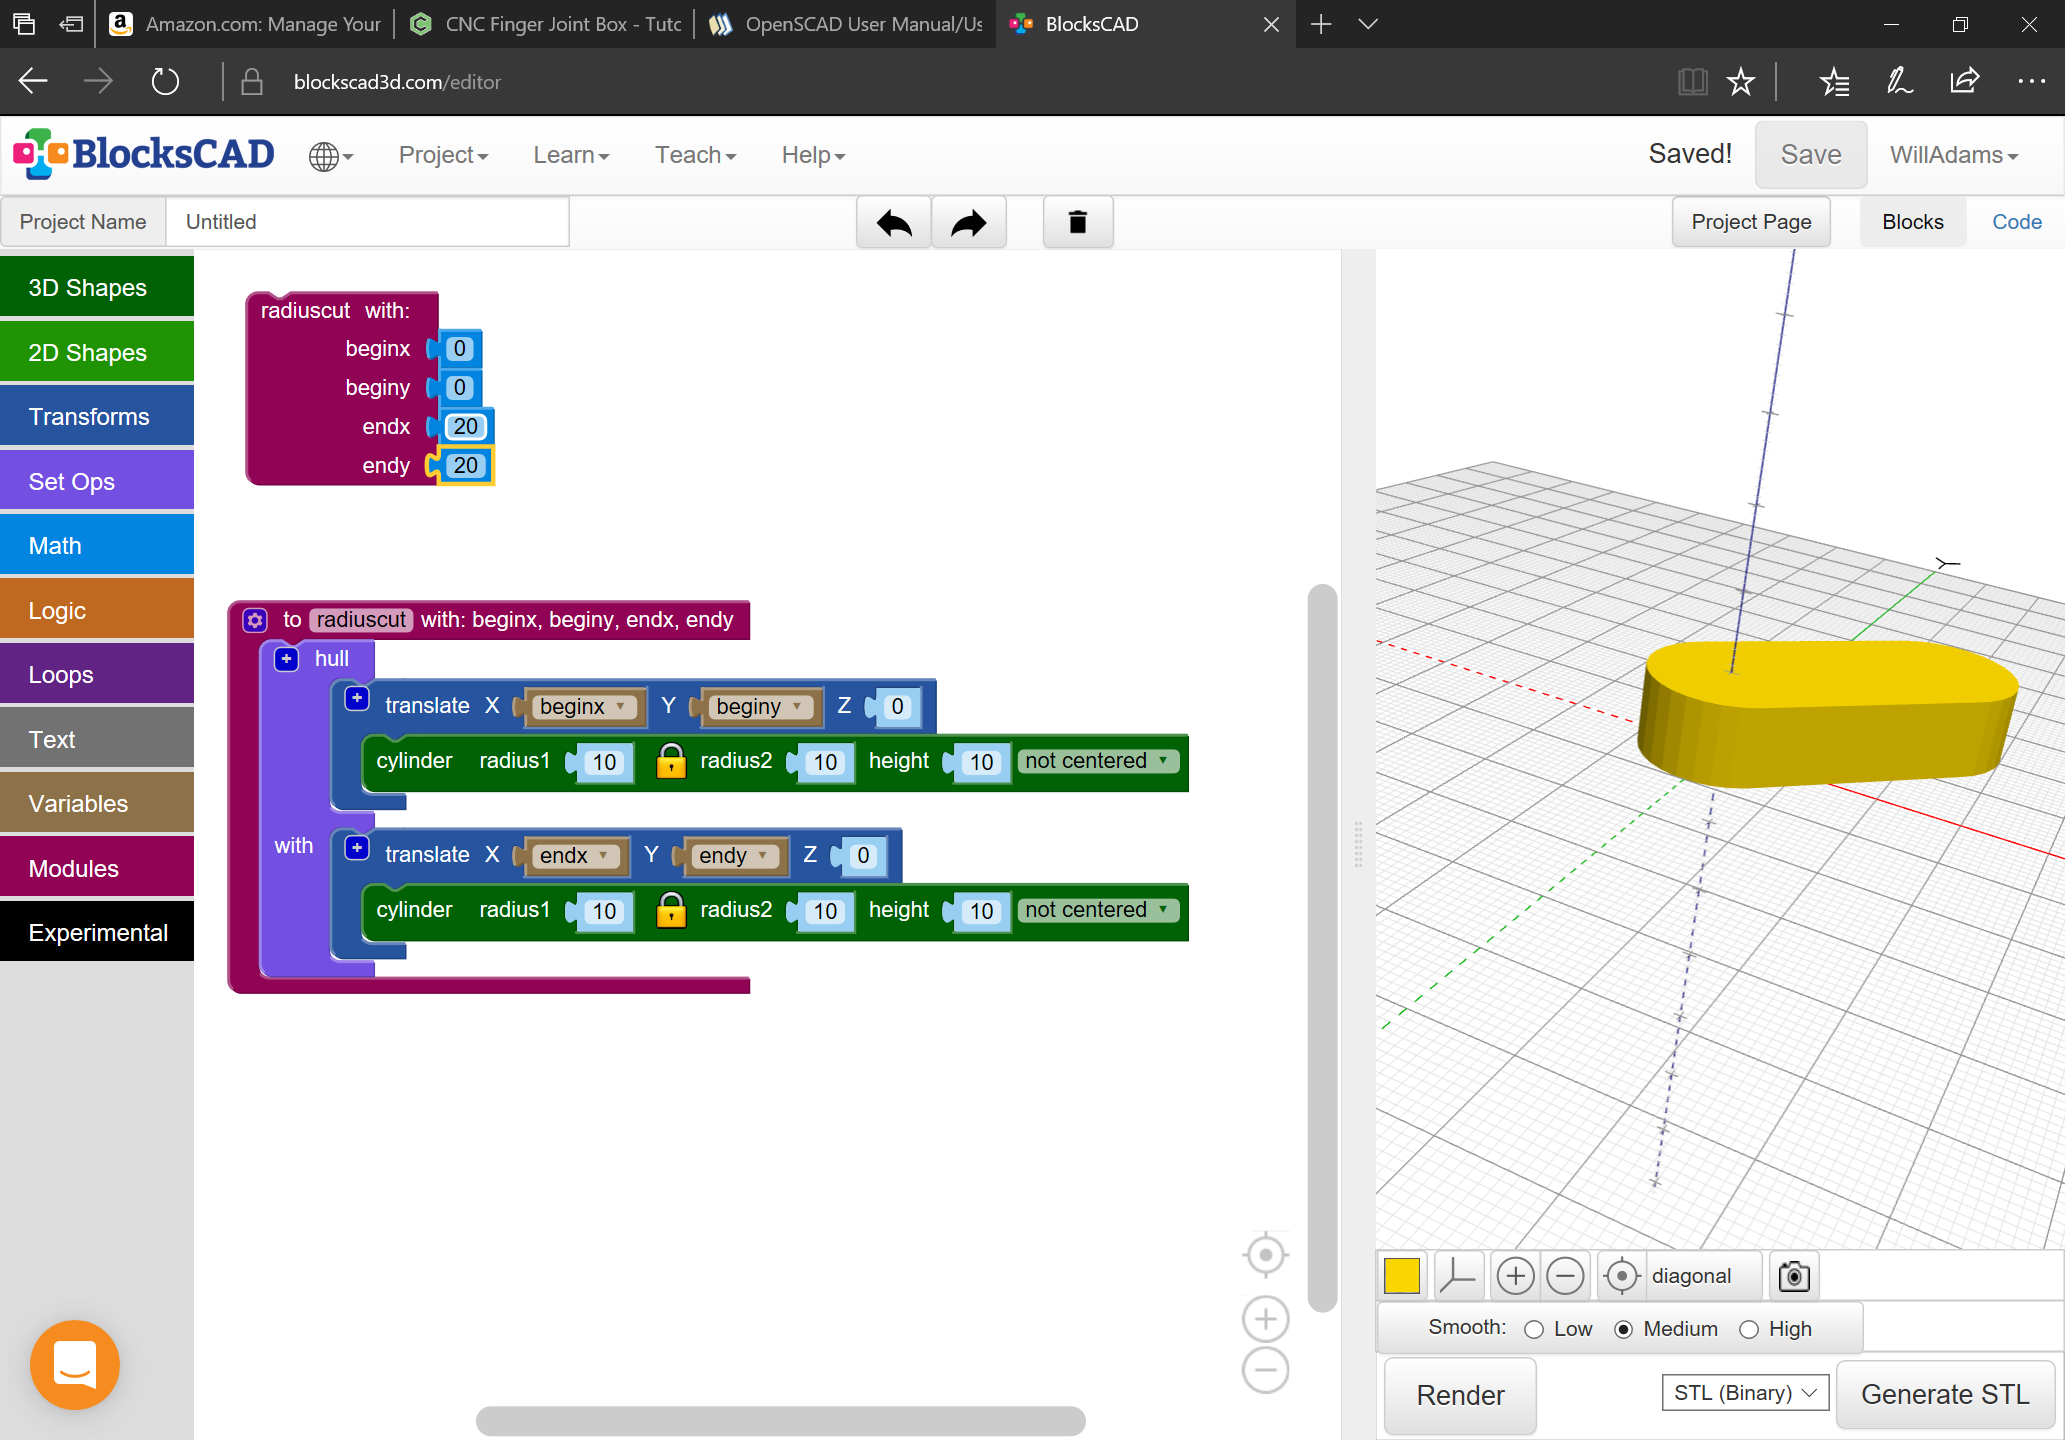
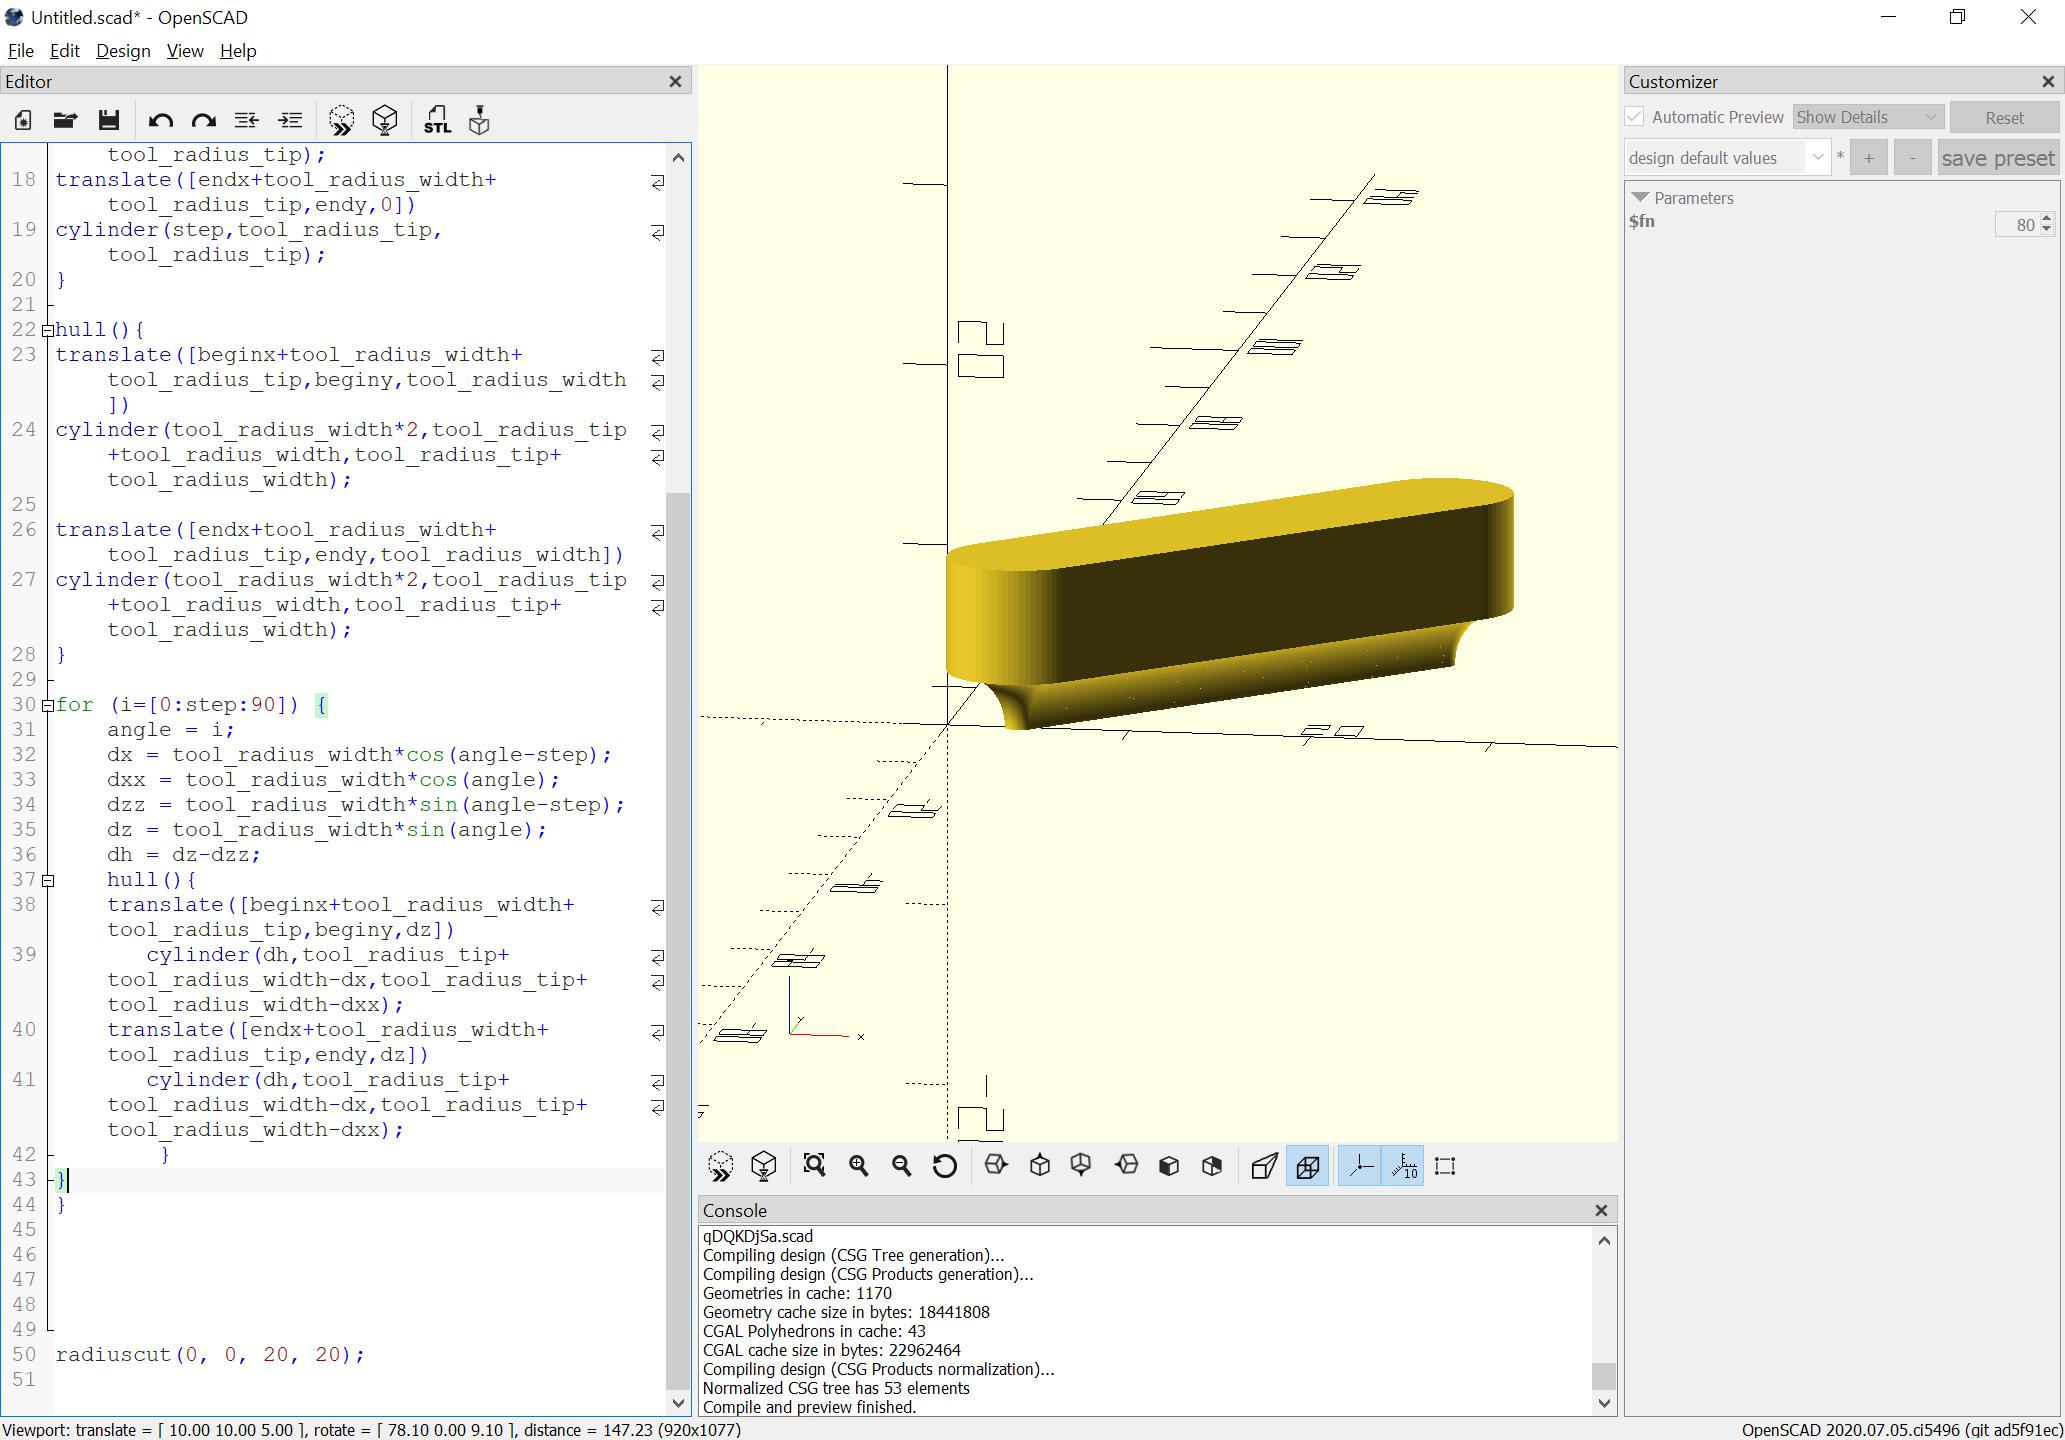
Another reason to use METAPOST (besides the fact that I want to learn it so I can leverage that to learn METAFONT so as to do a typeface design I’ve been working on for decades) is that it allows analysis of paths and intersection, which some of the boxes require:

Renamed my preset to “Sample”, and success:

So to sum up what I did for other members, the workflow is easy enough:

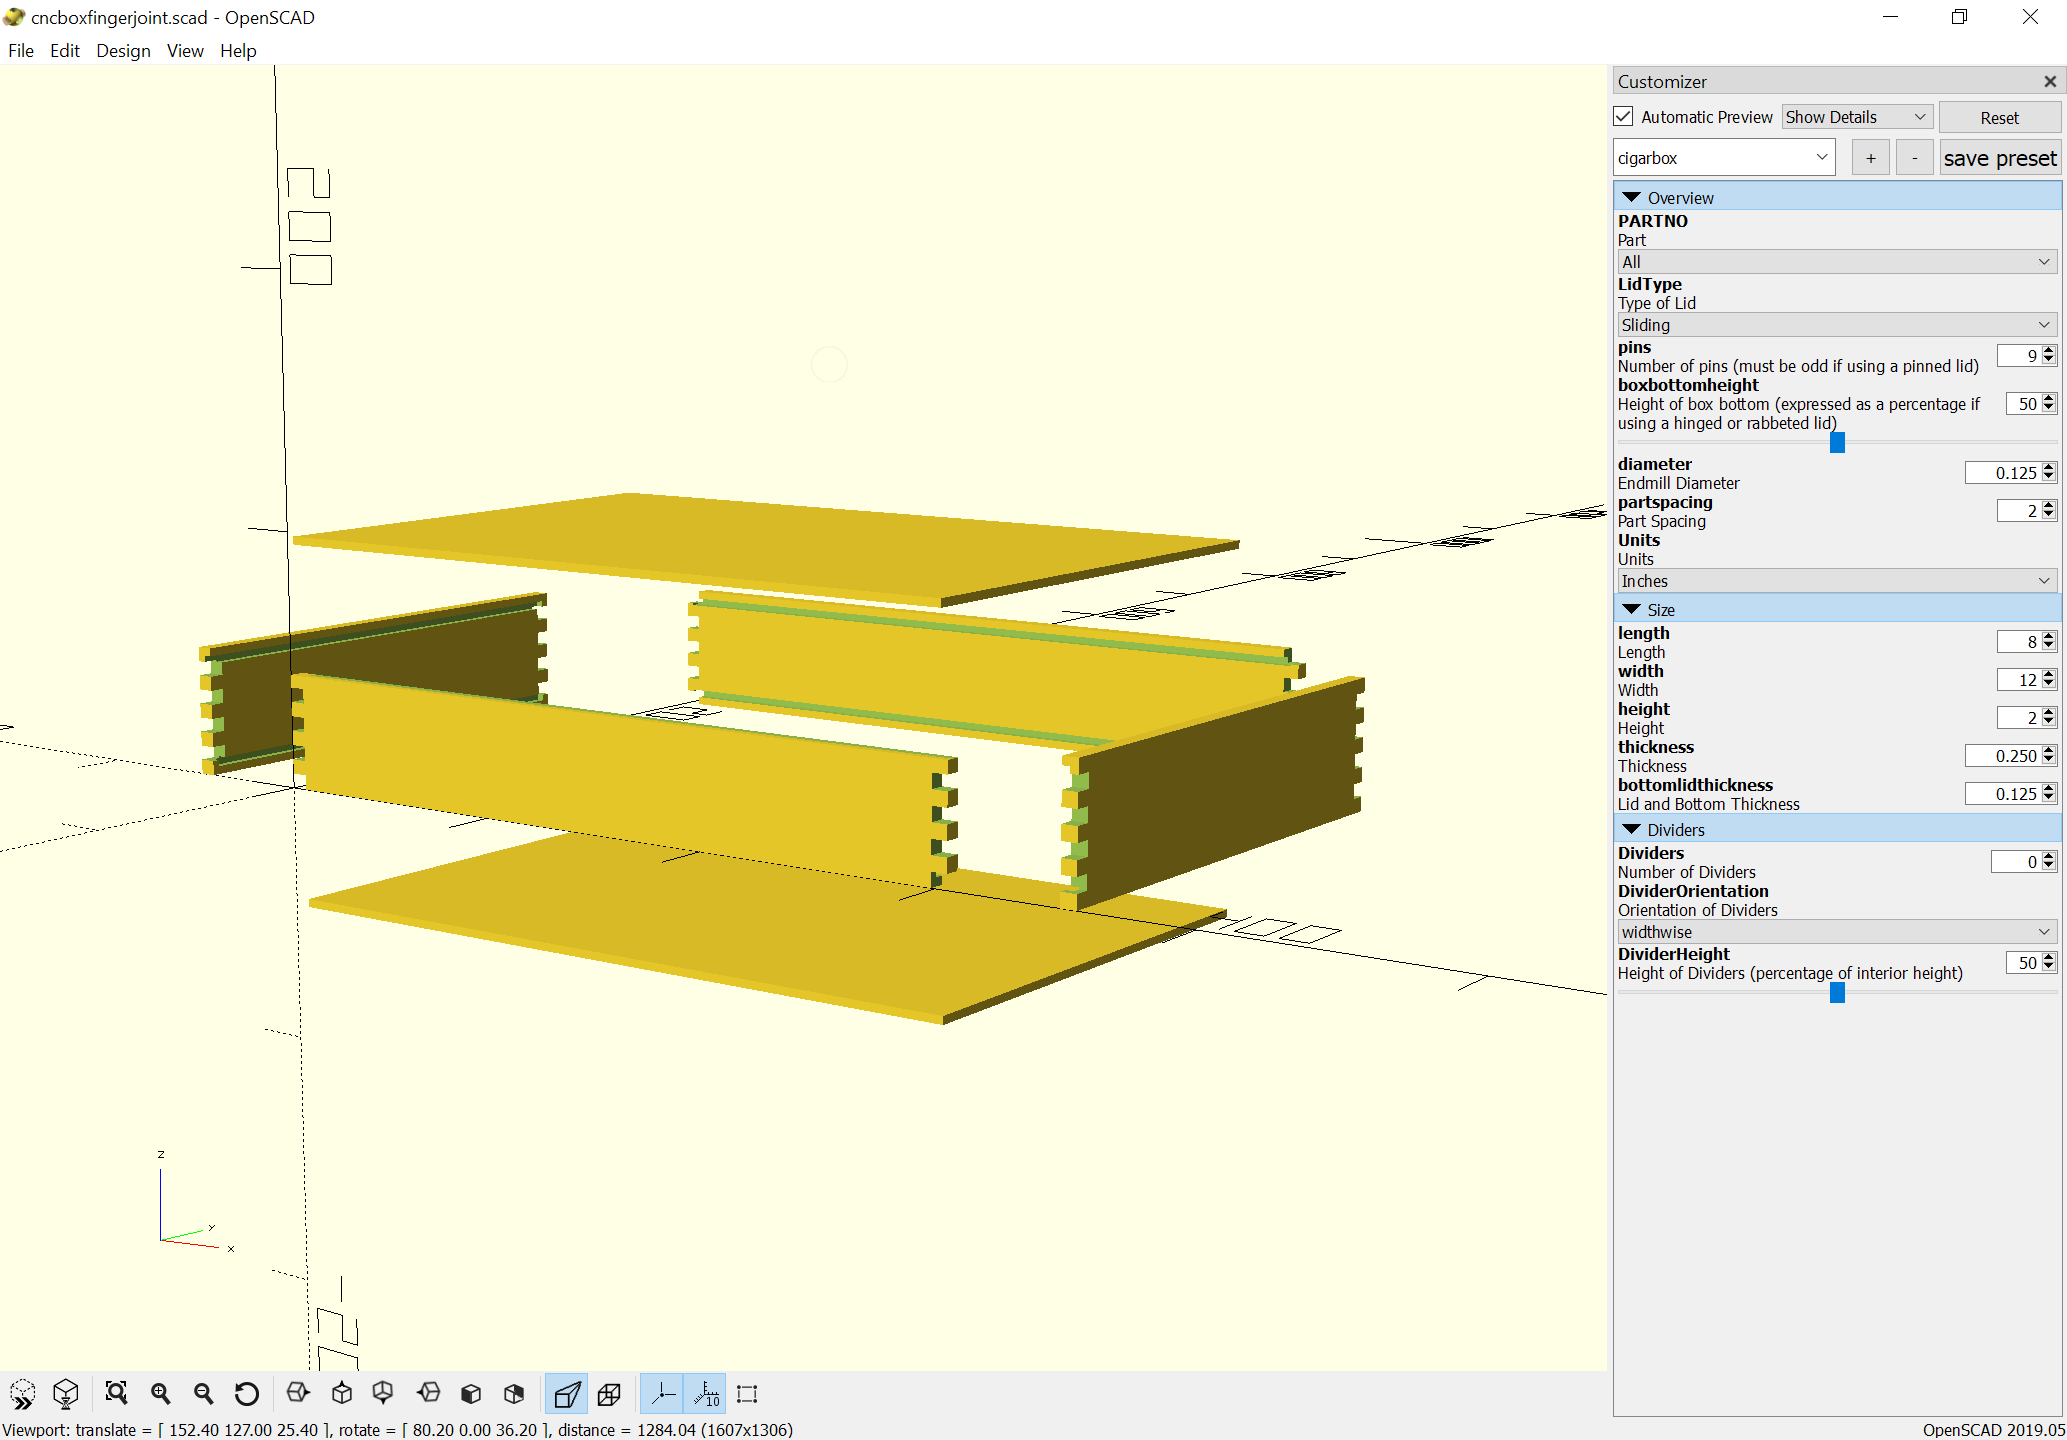
  1. install OpenSCAD (2019 RC4, not the latest stable 2015 version)
  2. open the .scad file, modify the parameters in the Customizer, then create a “Sample” preset with the “+” button, hit “Save Preset” to get the JSON file.
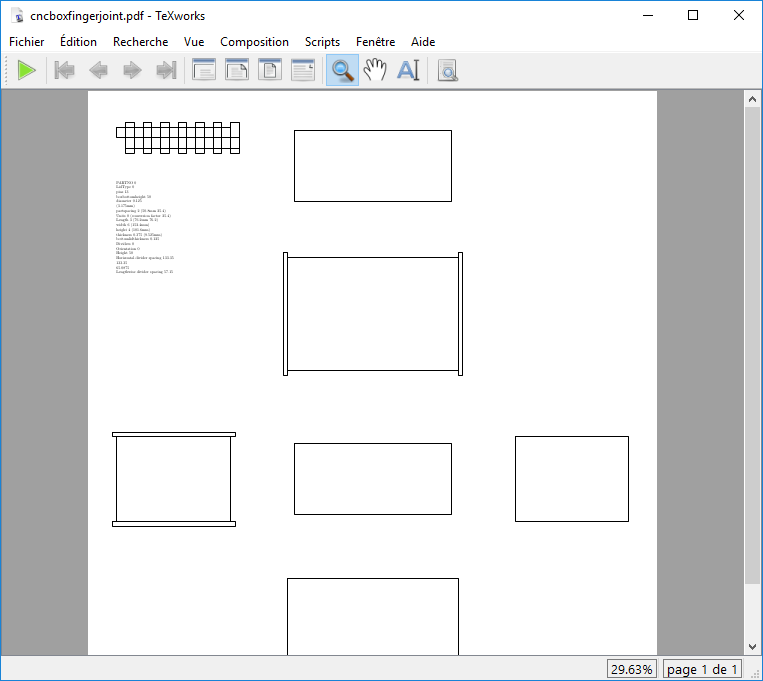
  3. install MikTeX, launch TexWorks, open the .tex file, select “LuaLaTeX” in the drop-down menu, hit the “play” button, and voilà, the PDF.

Not having to open Inkscape to get from the PDF to an SVG would be a good improvment to the workflow.

1 Like

METAPOST will directly create an SVG — I just need to structure the files to allow for that.

1 Like

Hey, Will, will one be able to make the finger cuts a bit deeper - and before they come out of the fixture use a 90 deg Vbit to put a chamfer on the ends of the fingers so they will be proud, and finished, when assembled?

I’m still not sure how you’re doing this as once it stated that all four pieces should be milled at the same time and then it was two. Have you done a video - or do one when this is all completed?

Thanks for the work. Don’t know where your kick-starter is located, but I’ll kick in a few bucks if it is still open. Location??

Thanks!

Working on a video and set of photos now.

The Kickstarter is at: https://www.kickstarter.com/projects/designinto3d/design-into-3d-a-book-of-customizable-project-desi

Leaving the fingers proud and chamfering is an interesting idea — it’d make assembly easier if nothing else — I’ll see if I can work that in as an option.

Hit Kickstarter. Thanks for the link.

1 Like

Working up a design:

which makes this:

cncboxfingerjoint-cigarbox.pdf (8.7 KB)

which can then be opened in Inkscape and resaved as an SVG:

cncboxfingerjoint-cigarbox

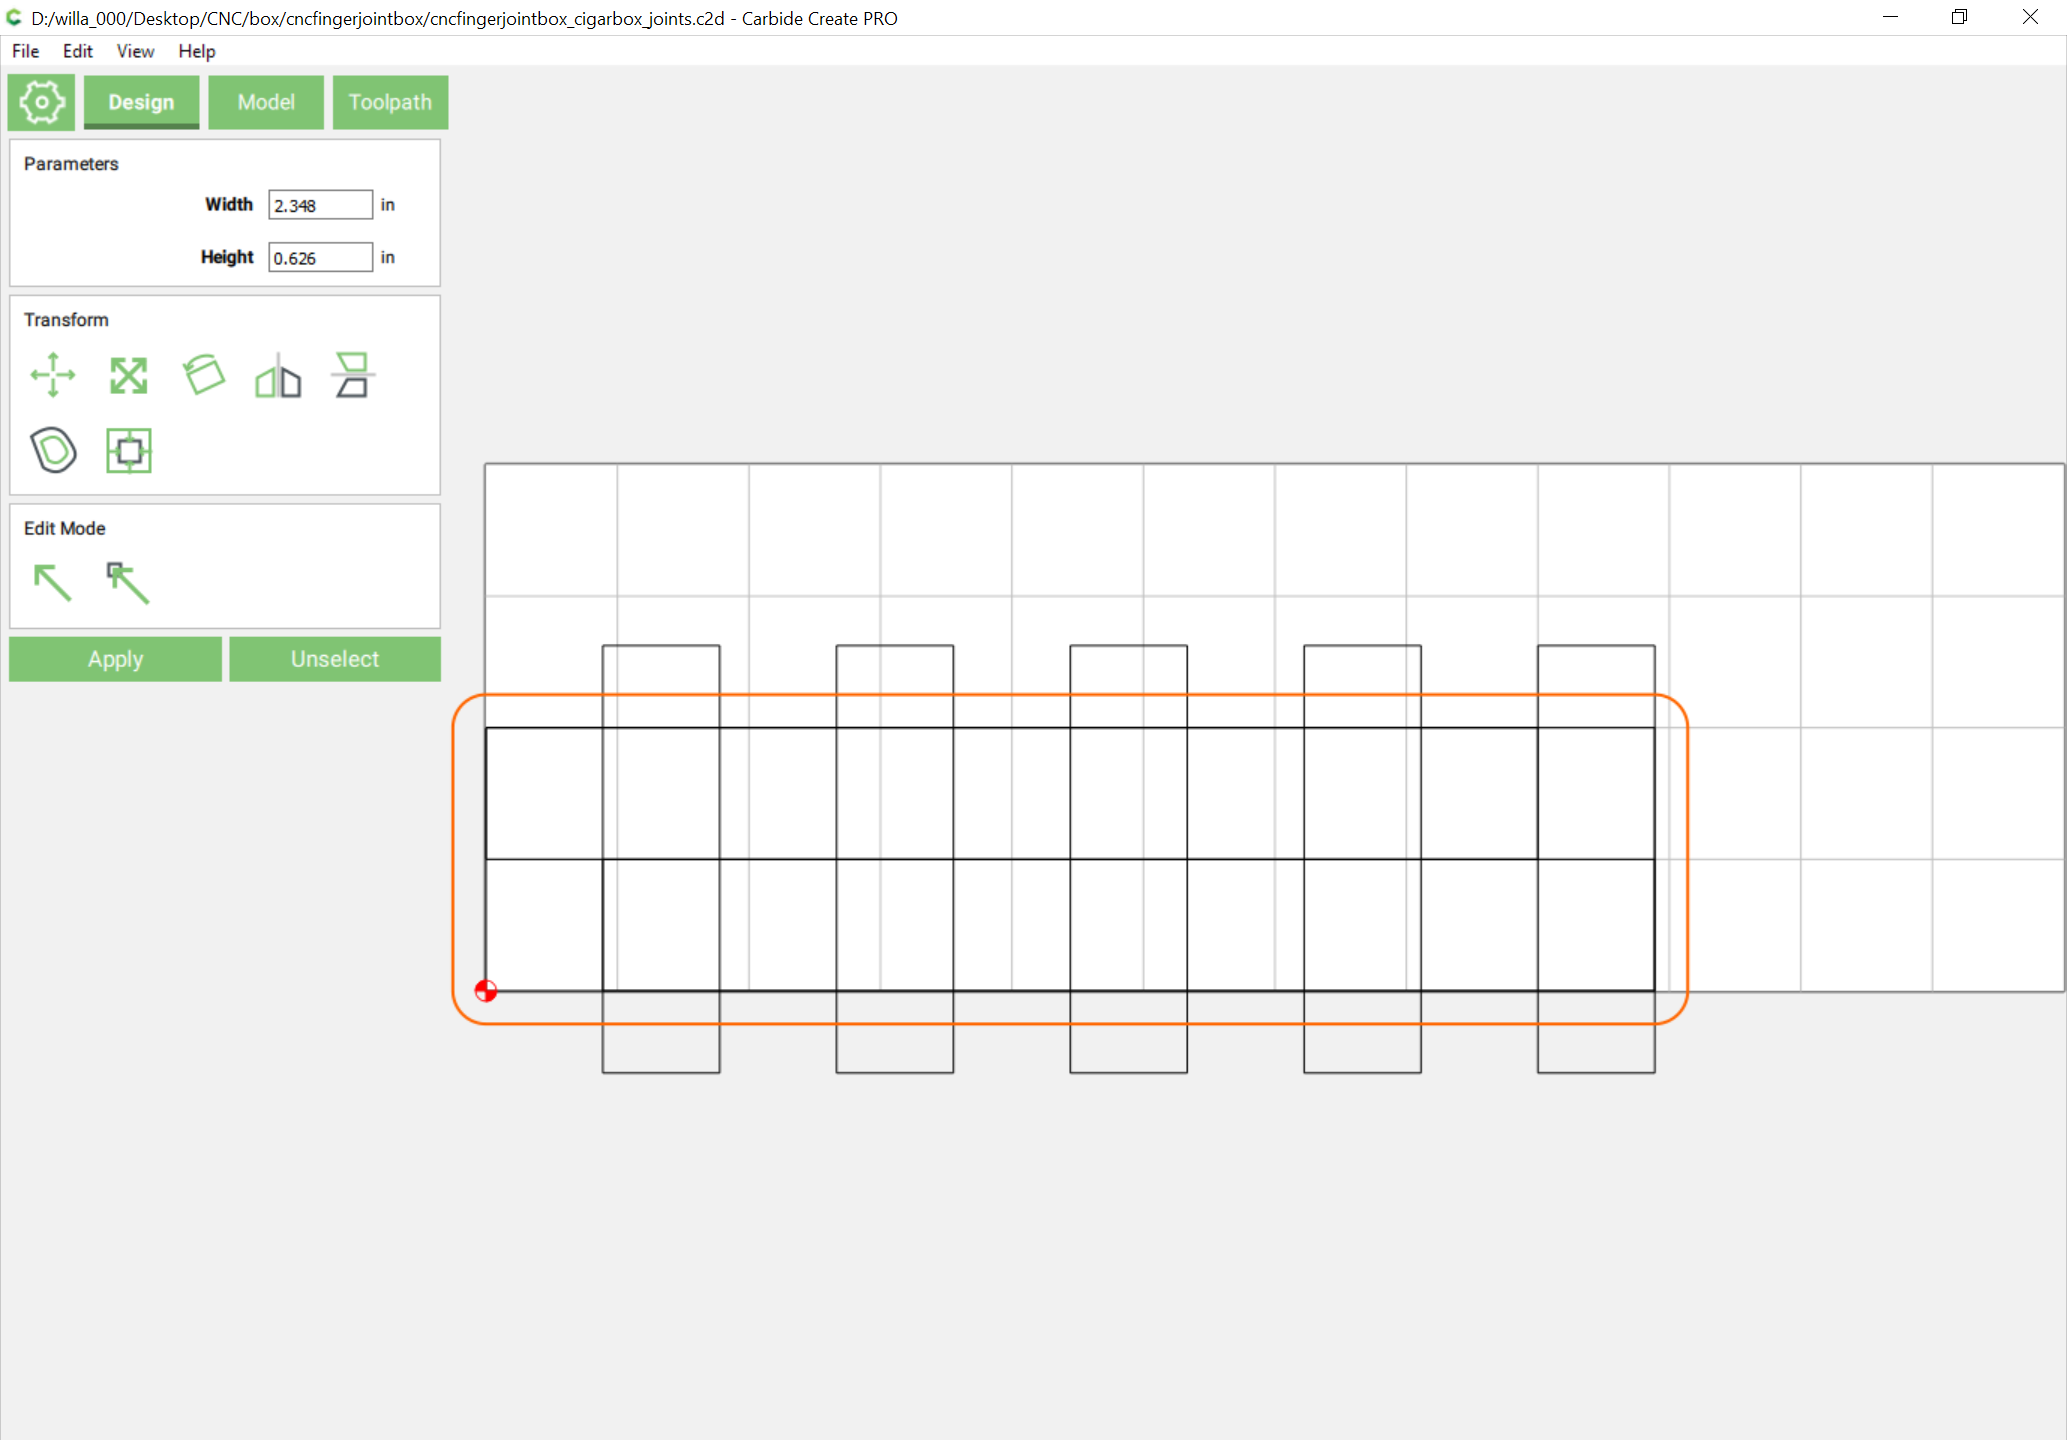
Which can then be opened in Carbide Create. Use the two boxes which have three boxes to cut the sides and front and back — the top and bottom can be cut directly from the geometry for them. It will be necessary to draw in the geometry for the dividers.

Then use the structures at the top left to cut the fingerjoints using the fixture at: https://cutrocket.com/p/5cb25f3380844/

1 Like

That .svg will need to be sized down to 75% of the size

The sides will need to have mirrored slots for the sliding lid added:

cncfingerjointbox_cigarbox_sides_front-back.c2d (43.5 KB)

For the joints, if you wish, you can cut the boards a bit long and then when you mount them use this geometry:

to machine them flat/even before cutting the joints (I would recommend doing so).

cncfingerjointbox_cigarbox_joints.c2d (50.7 KB)

1 Like

Here is the source file which has the lid and bottom in it:

cncfingerjointbox_cigarbox.c2d (55.1 KB)

Worked up a generalized fingerjoint box with fingers all around:

https://www.blockscad3d.com/community/projects/966268

1 Like

Reworking this a bit, I now have a version in OpenSCAD which previews without thin not quite removed parts when modeled with rounding:

Putting two parts together and showing their intersection shows the material which needs to be removed:

A glitch. hull doesn’t work properly with concave geometry:

Will need to define a module in such a way that that isn’t an issue.

One option here is to do pairs of cylinders at the begin/end points which are joined via a hull operation:

it just needs to be joined up with a loop which stacks them in increasing sizes so as to create the radius endmill shape.

Which once made produces a representation of the cut:

Which works when one is placed manually:

next up is seeing what’s involved in adding them to the appropriate module or in some other programmatic fashion.