None taken, I’m mostly a very prosaic person, w/ a minimalist design aesthetic which was usually criticized as being too austere in college critiques.
It is really ingenious some of the joints folks have worked up — the really interesting thing is how old some of them are such as Knapp joints (which dates back to just after the American Civil War).
That guys glue approach seems to mimic how I’ve seen some people solder (the bigger the glob, the better the job). Still though, I love seeing creative joinery. Trying to figure out how to do my next box and may try my hand at something like that eventually. Thanks for posting that video Chris.
(and my thanks for the interest in the book to @Gerryattrick )
I’m afraid I had to pull an all-nighter to finish paging a book at work so as to not fall behind schedule, so no cutting this evening — knocking out a quick tutorial at: Using textures to create a rustic letter
Hopefully I’ll do a test cut and then cut the boards which I’ve got mounted tomorrow — did get the file for the joints drawn up at least.
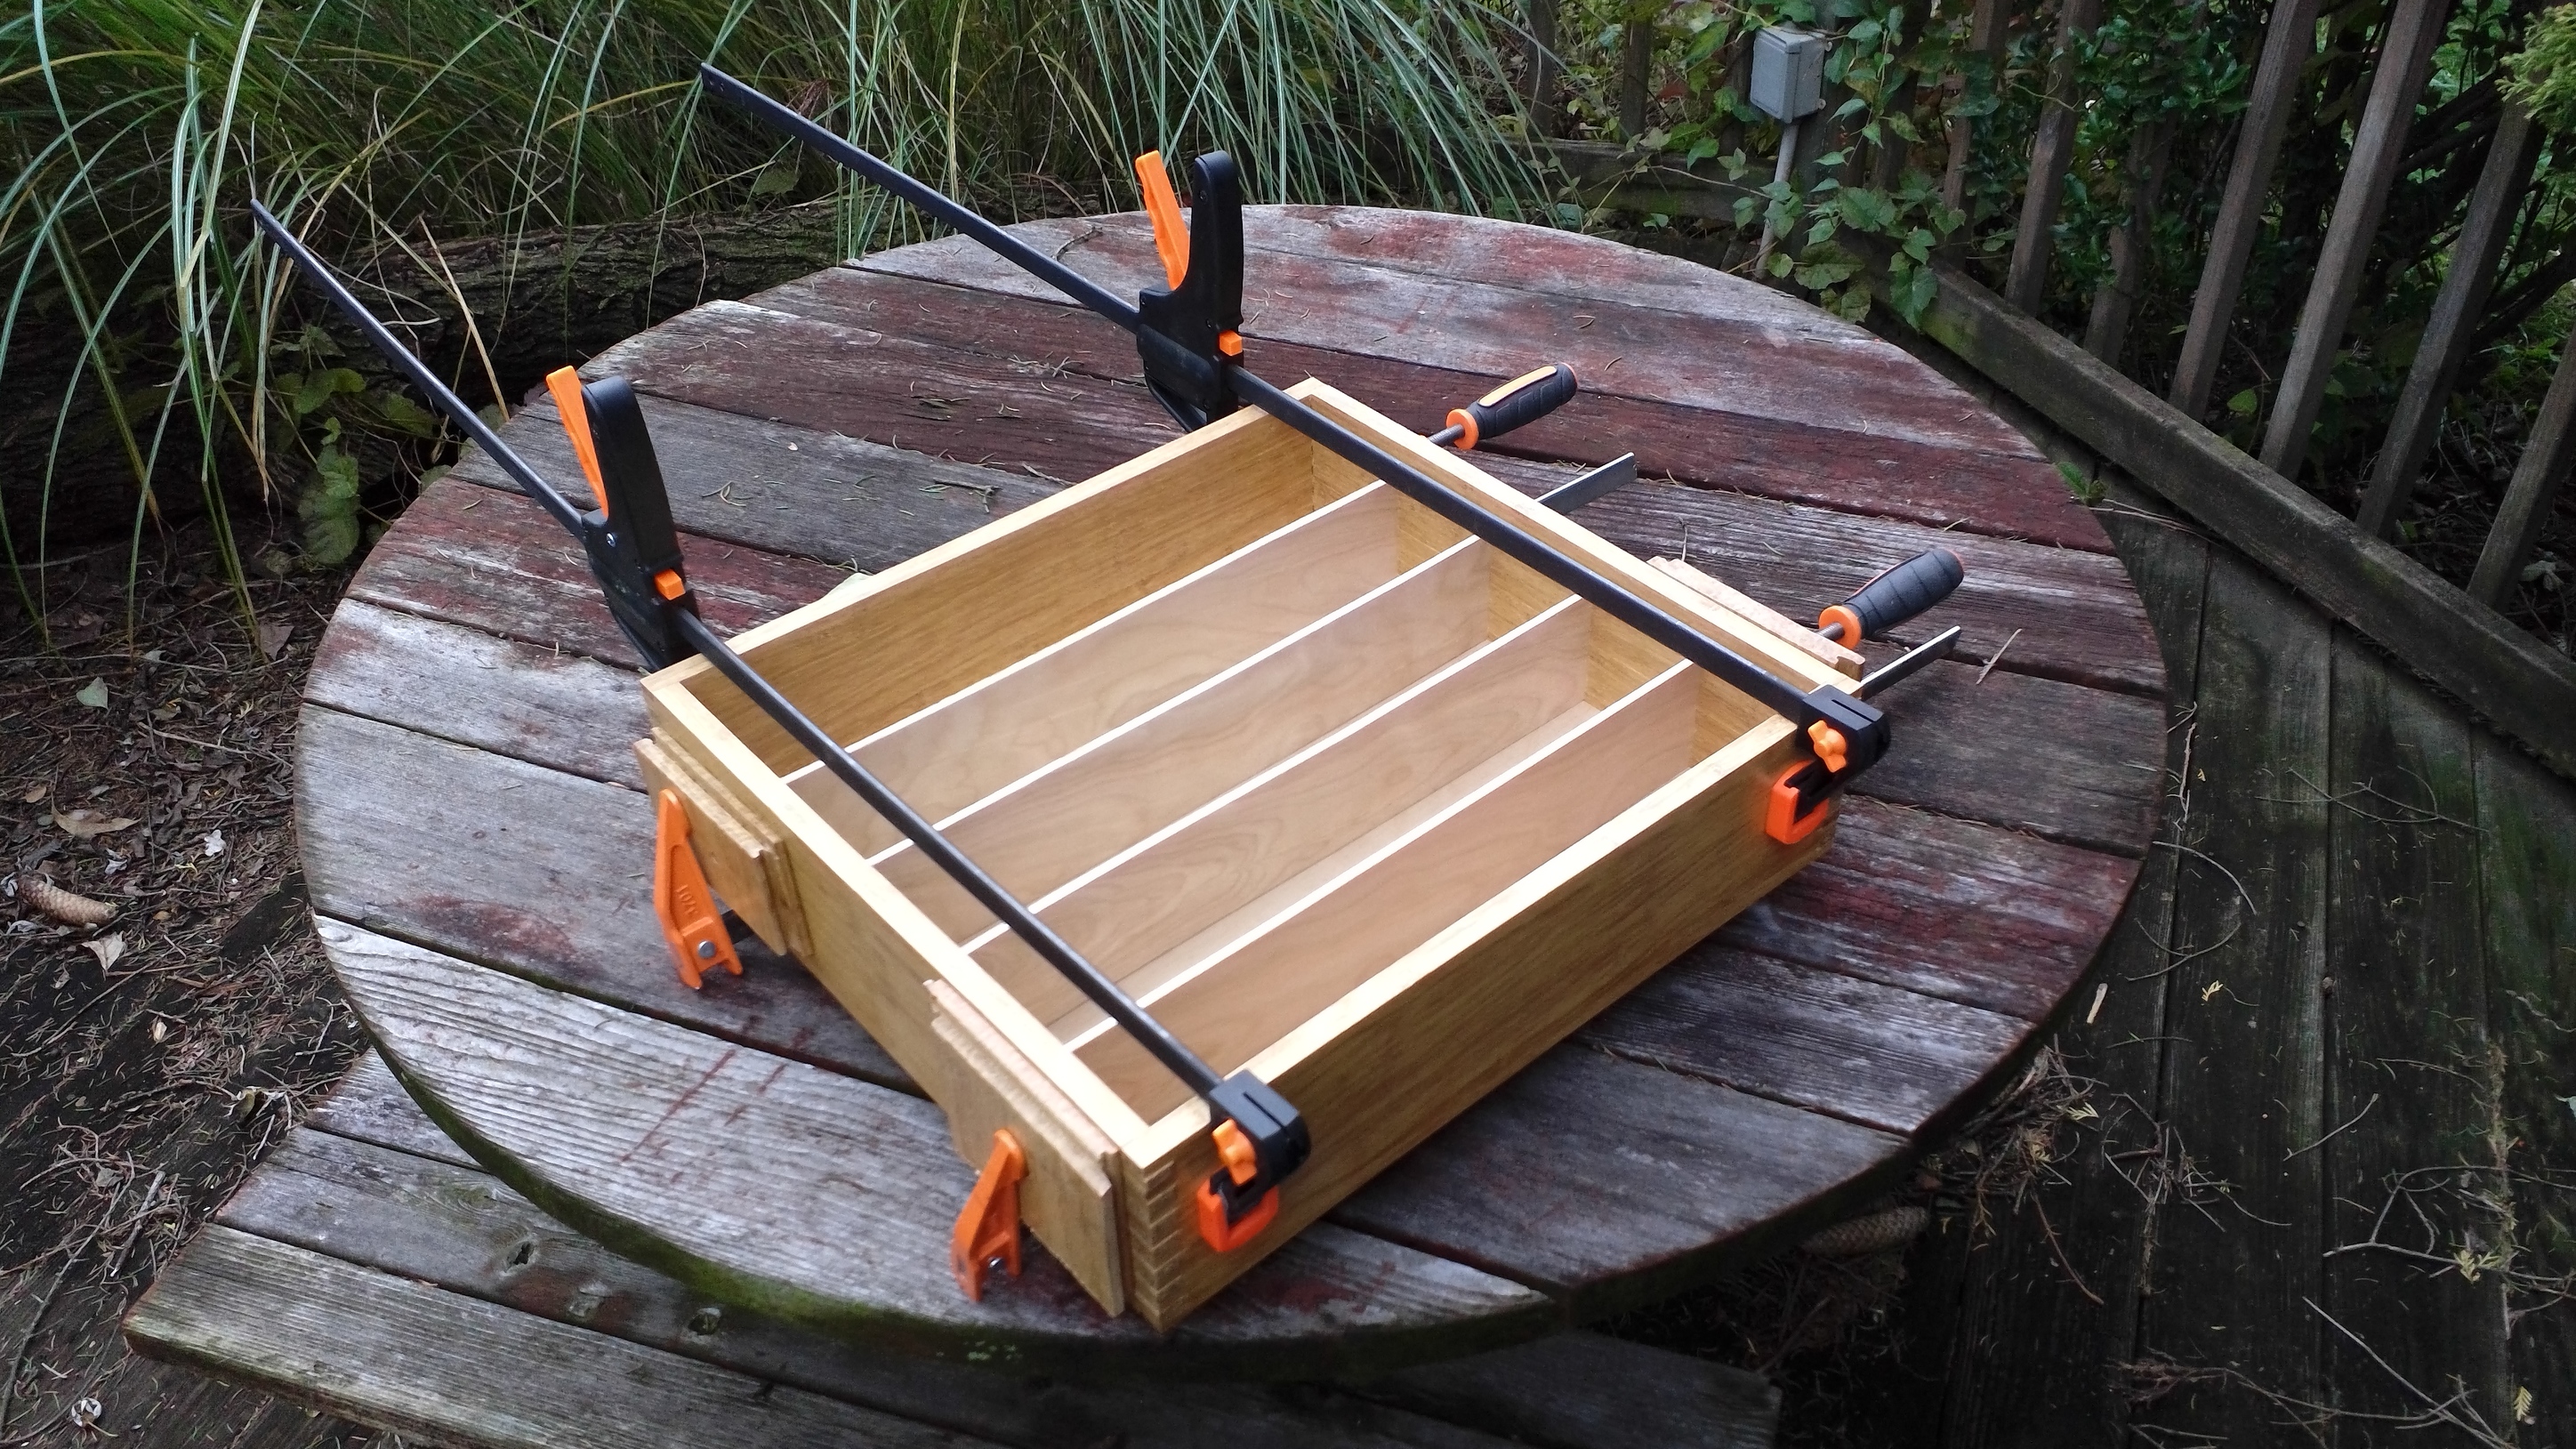
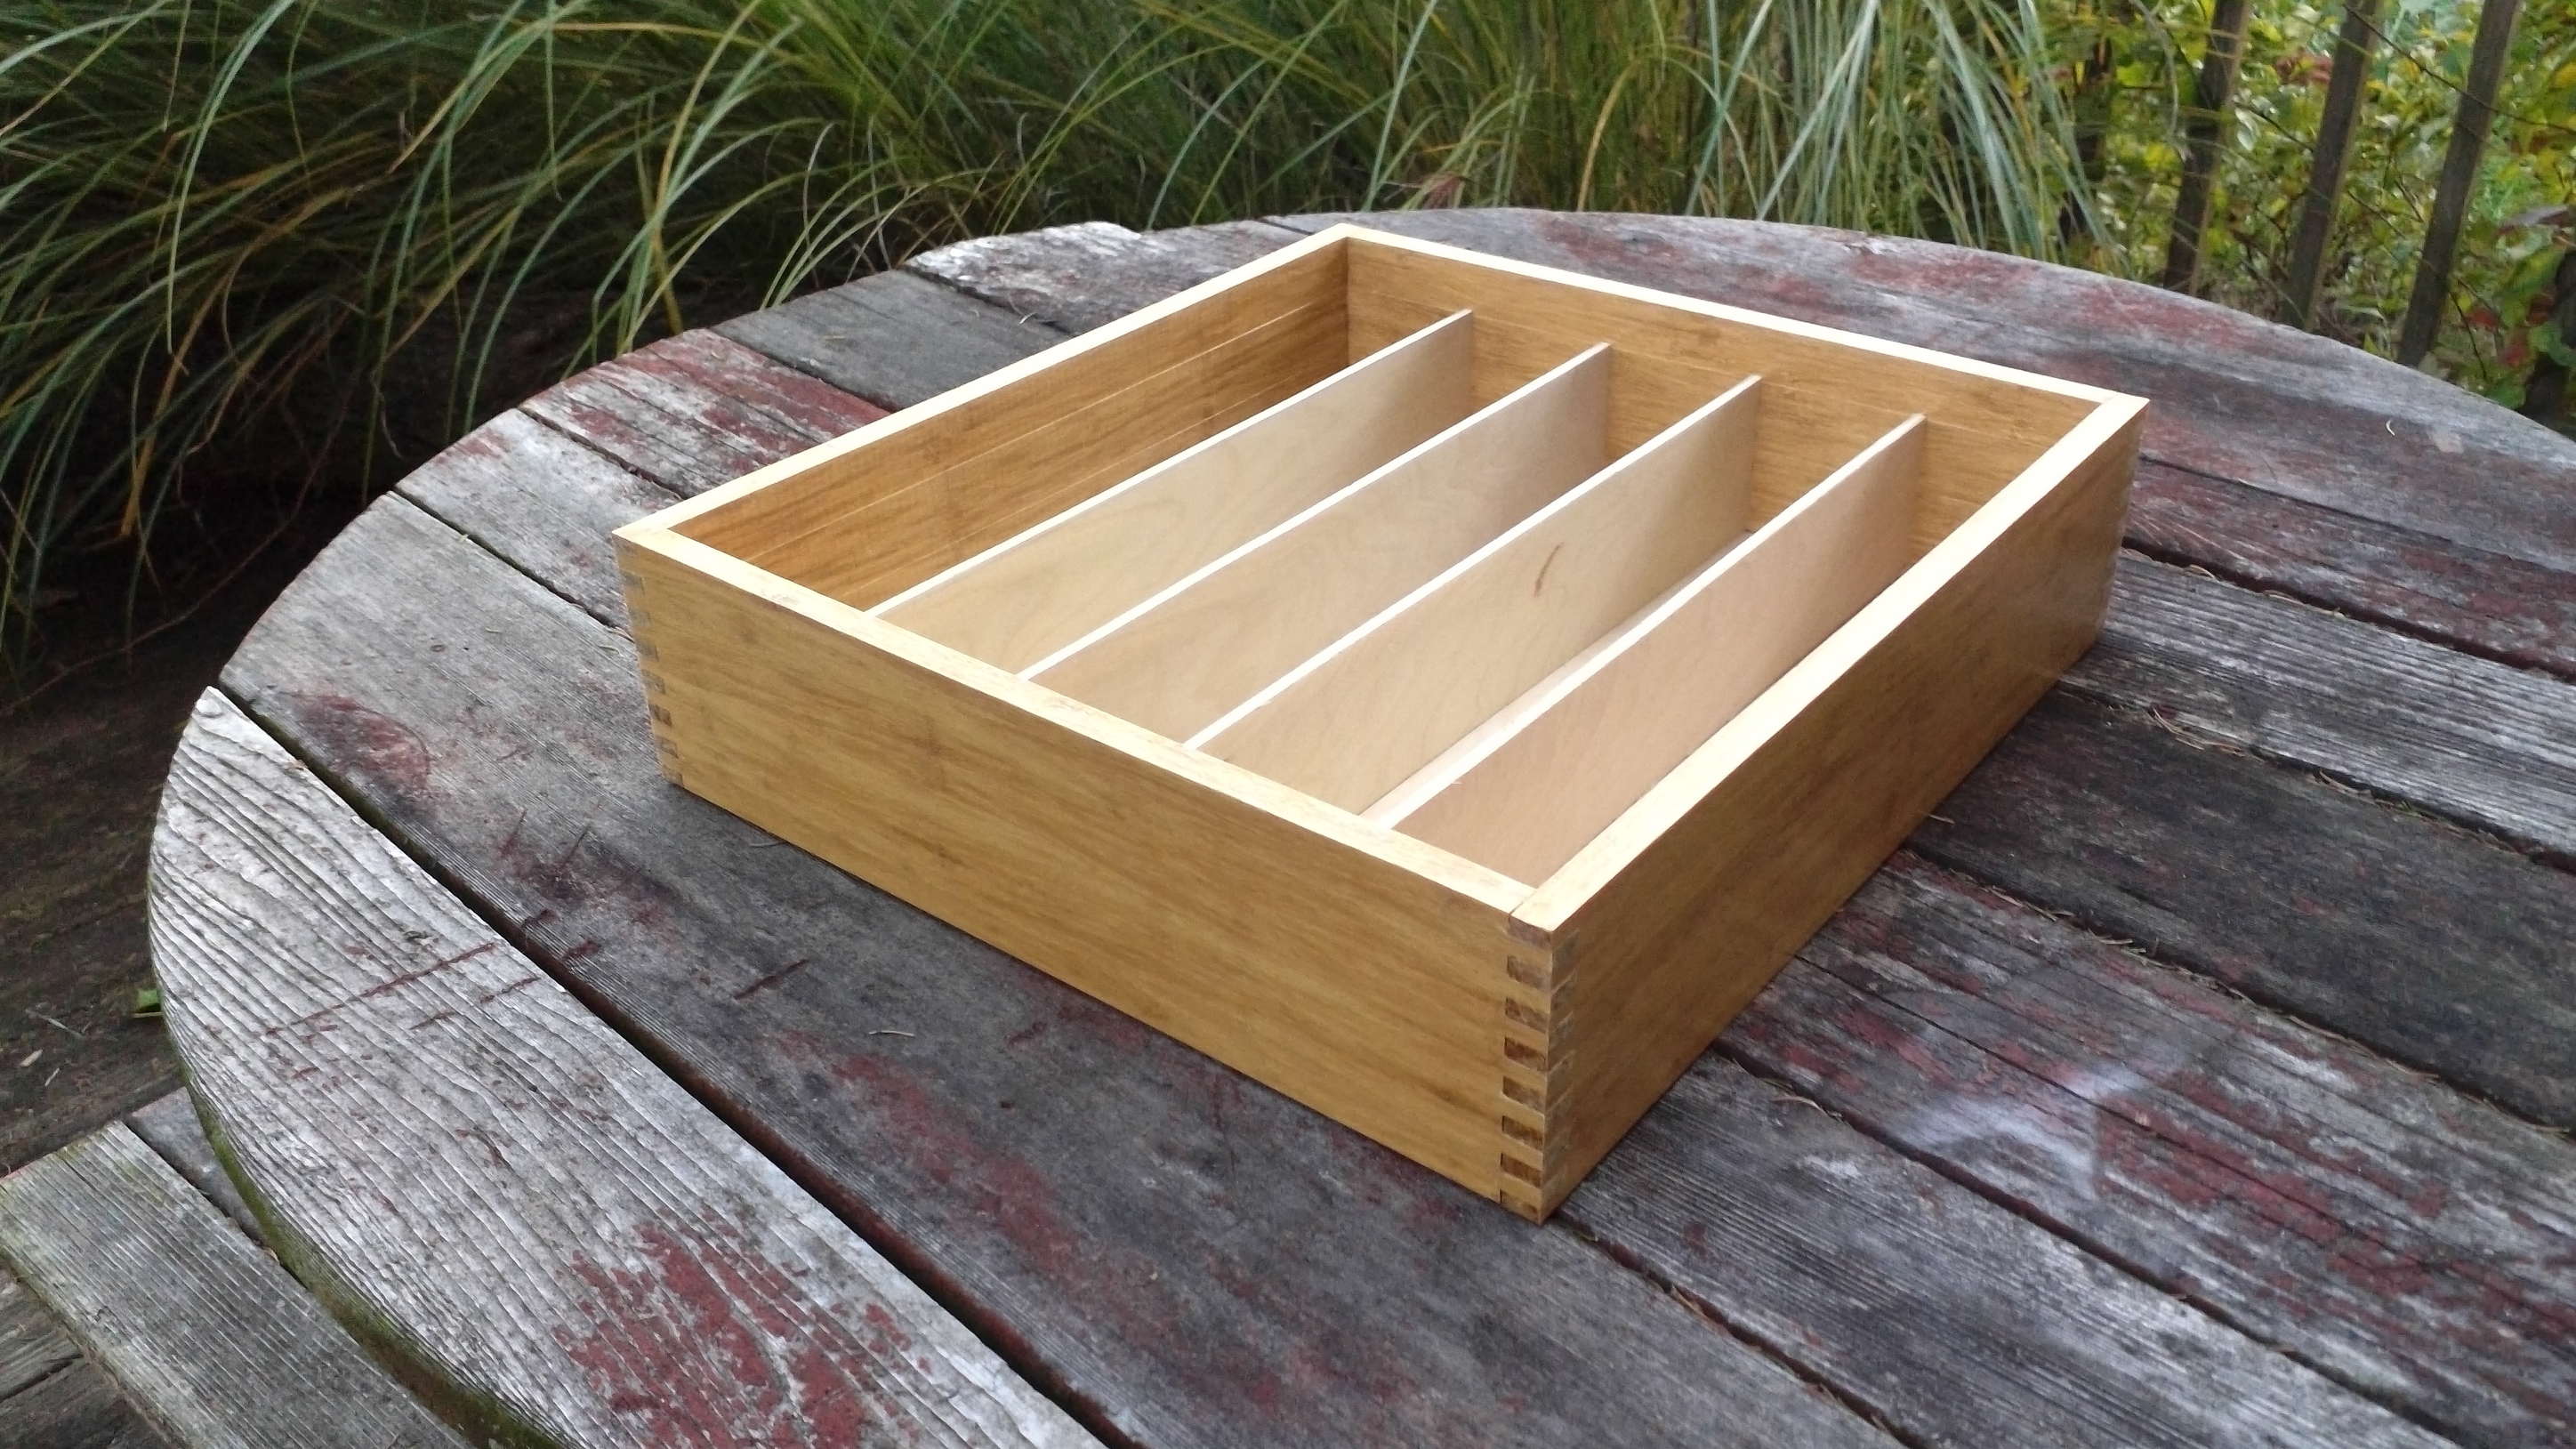
Finally got the cuts done — had to do two boards at a time, and somewhat messed up on the depths — I guess I should add a surfacing pass to ensure I’m getting them consistent (and may need to recalibrate my Z-axis):
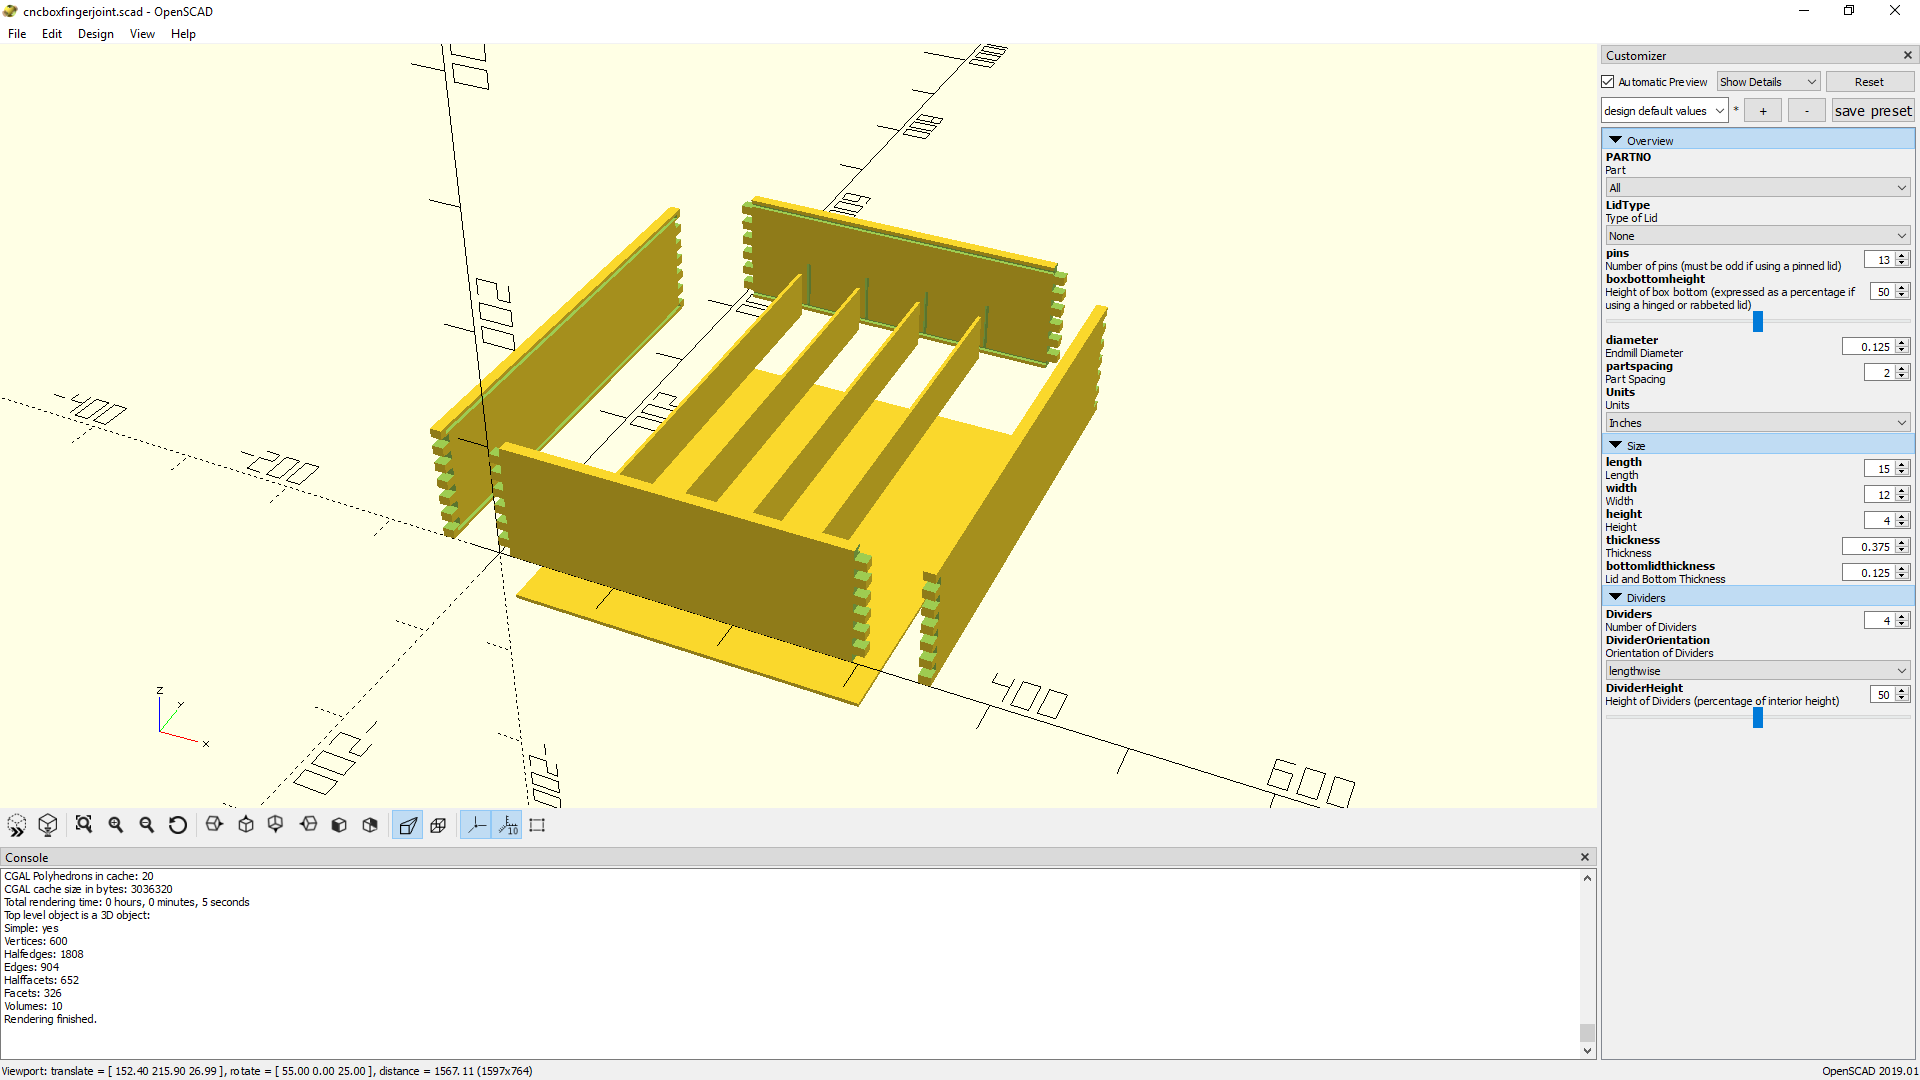
download the OpenSCAD file (hang on a bit while I post an updated one — there’s an old one further up, but it may have some errors/problems)
open OpenSCAD, hide the editor, then disclose the settings in the Customizer (should be viewable on the right) and adjust them as desired until you get a box you want. You could then save the preset under a suitable name (use the [+] button to get a new name, then press “save preset” to save — this will make a .json file — post that here and I’ll work up the SVG file and post it — eventually I’ll have a better system for this.
run OpenSCAD and adjust settings — when you save a preset, that saves them to a JSON file
run a LuaLaTeX/METAPOST file which imports the settings from the JSON file — the creates a PDF (currently) which has the geometry for cutting out the box as shown above — note that I haven’t made this available yet — it would require installing MikTeX, and I’m not sure I’m going to stick with it.
open the PDFs in Inkscape, save out as an SVG
import SVG into Carbide Create and assign toolpaths
Worst case is I’ll do that for folks and put the files up on Cutrocket or the wiki or something — I’ll put the lualatex file up somewhere as well, but it’s a bit involved to get MikTeX running, and it doesn’t make for that nice an interface. METAPOST, which is the graphical programming tool I’m using can write out SVGs directly, but running it directly is even odder.
I’m hoping that what I can work up is a program (say a LiveCode file) which opens OpenSCAD and works as an external editor (it’ll probably change the JSON file) — adjust that until you get the settings you want (I want to use a separate program from OpenSCAD so that things such as changing dimensions will work properly and one can do data validation and so forth) — once you’re satisfied with the preview of the design in OpenSCAD one could then write out a Carbide Create file complete with toolpaths.
Or, maybe we can get the OpenSCAD files hosted at Libre3D so that they’re interactive, and the site runs lualatex in the background so that it makes an SVG — still working out the details based on how much money comes in.
Well I can already do the files then as I have silhouette pro and that will convert to svg anyway, and I have Vcarve so it will work
For me ok…by the way I donated to the cause $50 I hope others are just as smart as me
Please let me know how it works out and if you have any difficulties.
Once you’ve got the box file read you’ll need to make a fixture to stand the boards on end and cut the joints — there’s one here: CNC Finger Joint Box and in the following couple of posts.
ok, i get this error, what do i need to do? I see it has your file path in it, but maybe you can give me a clue, what i need or need to do?
//ERROR: Cannot open Parameter Set ‘C:/Users/willa/Desktop/cncfingerjointbox/cnc_box_fingerjoint.json’: C:/Users/willa/Desktop/cncfingerjointbox/cnc_box_fingerjoint.json: cannot open file
I was unable to use the Mac version of OpenSCAD for this, it did not even install correctly but since I had Parallel and Windows 10, Will provided me the link to download the 32bit version and it seems to work. I was able to open the finger joint file Will provided.
Please don’t worry about the content of the Editor which has that error statement:
//ERROR: Cannot open Parameter Set 'C:/Users/willa/Desktop/cncfingerjointbox/cnc_box_fingerjoint.json': C:/Users/willa/Desktop/cncfingerjointbox/cnc_box_fingerjoint.json: cannot open file
as a comment (that’s what the // indicates).
Please hide the editor (click the close box or choose View | Hide Editor) and use the Customizer (if need be clear the checkbox in front of View | Hide Customizer)
Click on the “View All” button (third from the left in the button bar) and disclose the various elements of the interface and play around with it!
Here’s a copy with a typo on line 206 fixed and which replaces the error comment with a hopefully helpful message: cncboxfingerjoint.zip (2.1 KB)
Once you have a design you like, use the [+] and save preset buttons to preserve it in the drop down menu (click on the down arrow next to “design default values”)