The problem I have is I’m working from a position of complete ignorance.
I ran the macro you posted, it moves the spindle to the front, left and then, very slowly, descends and fails.
Does this help?
The problem I have is I’m working from a position of complete ignorance.
I ran the macro you posted, it moves the spindle to the front, left and then, very slowly, descends and fails.
Does this help?
I can’t even figure out how to manually set z-zero!
@Griff I’ve got a video uploading to youtube with a basic demo. I’ll update with a link when it’s ready.
I don’t know why you got that probe fail, but I didn’t see the macro prompts anywhere. Did you click continue? at each program pause?
Keep up the good work! I also am in love with cncjs, just discovered it and was asking the same questions you are now. I will do my best to contribute to get this probing stuff to work.
Have you figured it out? or are you still stuck at a certain spot. I’d love to continue where you left off. I have a friend who is a retired machinist who could help. I can definitely pick his brain about this ( was going to anyway)
@Luke, i thought I’d move the discussion here so we don’t hijack the thread about the Z-axis upgrade.
Not in the GUI, but easily done with a macro.
One of the reasons I like it so much. I’ve tried all of the free senders, and the dev for cncjs (@cheton) has been constantly making improvements and taking suggestions (almost to a fault). Once it gets an auto-leveling widget, I don’t see why i’d need anything else.
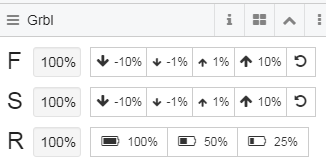
Feedrate, Spindle Speed, and Rapid overrides.
@patofoto Just wanted to bump this to see if you made any progress, I’m in the same spot as/with @Chrislee.design.
@rmhco and @Chrislee.design. Sorry for my long absence. I have not made any headway since last post unfortunately. With the Nomad, the offset value needed after probing with the tool length probe is something that I have not figured out. I was able, thanks to @neilferreri, to determine that Carbide Motion does something internally after tool length probing that cannot be done with GCode alone and CNCjs. At least that is what I remember. @neilferreri wrote a macro that performed the probing but the values stored afterwards were wrong. This only applies to the Nomad as it has a dedicated tool length probe. If you use a touch probe instead Neil’s macro works perfectly. What I would love is to be able to run a job where the GCode asks me for a tool change and after the new tool is set, probes automatically and continues milling. This is why I still use Carbide Motion. I am aware that breaking a job into separate GCode files would be easy but once I have a job dialed in, I like the convenience of a single job file.
I can’t find the Macro for this feature you were showing on your video which I believe you said you posted on the other thread. Do you have a link to that post? Thank you very much for your code.
here is the main mans list of macros! All wonderful
I’m hoping to add some details on that github. Maybe on the Wiki. I’d like to add videos for each macro, but I’m not set up for anything quality.
Is there like a CNCJS getting started for idiots? Because I think I need to find that video.
If only Carbide would give us a way to remove the hard limits in Motion. lol.
For the life of me I couldn’t figure out why my Z limits were not woking. Answer; because I over looked $20=1. Which I might add is also talked about in this thread. Yeah, I feel a bit of an idiot. lmao. Soft limits are now working fine.
Griff / neilferreri Does, or is the macro you guys have been workin on for the Carbide 3d probe?
Ha ha! I can relate, same place I was 6 months ago. @neilferreri was a huge help to me, search his posts.
But you need to learn the basics, pretty much by trial and error. That’s what mdf and sketchy end mills are for
Hang in, you’ll get it.
Should work fine. I don’t have a C3D probe, but I believe @Griff used it.
I don’t have that one on the GitHub site, but I’ll add it later after I track it down.
EDIT: Here’s one that you can enter your end mill’s diameter.
And here’s one that will calculate the diameter of your end mill for you! (Edit: wrong link. Corrected and explained a few posts down)
Would love feedback as when I have a minute to use the machine, I’ve usually got something more pressing than macro testing to do.
@Griff. Thankfully I have a stack of scrap MDF, and some older end mills. lol. Trial and error I’m good at.
Lots of practice.
@neilferreri. Thats awesome. I will try and get those up and running tomorrow. As for feedback, well I will do the best I can. Just keep in mind that I don’t even know what I don’t know yet. lol. Still trying to figure that out. I am currently using my"googlefu" skills and reading through the wiki to learn about how to add macros. I think I have the general idea.
The hope is that once I get this figured out I can start playing with the new laser for the machine. lol.
Oh, and thanks for the help and encouragement!
Once you get it, it opens up a lot of doors.
CM is kind of like a black box of gcode senders…it works, but it’s hard to understand what’s going on.
BTW: Adding Macros
So, Today in the game of push the button and see what happens. lmao.
@neilferreri The probe macro is nifty, though I think I am messing something up. I used the one you linked to that will calculate the diameter of the end mill. I was thinking it would find not only the diameter of the end mill, but set the work zero for X,Y, and Z. It sets the Z fine, but then jogs a couple inches away and sets that as my X, and Y zero. I honestly have no clue how I messed this up.
After playing with this several times, and it doing the same each, I found that if I homed the machine I now have to make sure that my Z is within 3 inches or so of the Z homing switch or it errors out. So, I closed down CNCJS, turned off the machine. I then decided I would not be defeated (read as not done screwing things up yet). I brought UGCS for the nifty list of what $ does what. After another several rounds, my Z axis will only move about 4 inches before it is convinced that it hit a soft limit. Currently I have $132=150. I finally admitted my defeat and called it a day. I think I will print out another list of the default $settings and give this a try again tomorrow.
@Kat I jacked that up. Thanks for testing. The link I gave you was for the wrong file (I named them incorrectly), the probe dimensions were off (I think…what are the X & Y dimensions of the C3D probe?), and there was probably something else.
Anyway…the one you want is linked below. Because I don’t want anyone to mess up their probe / end mill, some of the moves go too far. That can be tightened up.
Also, my probe diameter was consistently 0.1mm small (I used a carbide blank), and after checking everything else 100 times, I am guessing I have some belt stretch calibration to do. I’ll get to that eventually.
Video - braved the freezing garage just to get this.
C3D Probe Macro (Tool Diameter Independent)
Beaver CNC Probe Macro (Tool Diameter Independent)
If you have your own design for a probe block, you can just modify the “User defined variables”.
The Beaver CNC version works better for blocks where the wire connects in the back. C3D’s version is if wire connects on the right.
For what it’s worth, I think the macros above are a bit of a novelty. They might be a decent solution for probing with a v-bit or tapered end mill. In most other cases, though, you would know your end mill’s diameter.
In this macro, you can manually change the diameter as you need.
@neilferreri. Thanks! I understand the freezing part. lol. Though luckily its not been to bad here the last couple of days. I will try and give this a go either tonight or tomorrow with the new macro. I first need to figure out what I messed up with the $ settings yesterday. I printed out the base (factory) settings so am going to go through and double check that.
My normal method for probing might be wrong or just off the wall, I don’t know, but it works for me. I generally pick an end mill (typically .250) and probe X, Y, and Z. As most of the projects I run use more than one end mill I normally only probe Z after that. Or if I have to stop part way through a job and turn every thing off, I can grab the same .250 end mill, or what ever I used, probe X, Y again, switch to what ever end mill I am using for the tool path I stoped at, probe Z, and pick up where I left off. Hope that makes sense.
To be honest I really don’t understand enough about the G code to edit, or make macos yet.
I will take some measurements of the C3D probe this evening as well.
Thanks again!
Dimensions are at:
and I believe are on Thingiverse as well.