Hey there @Griff. Glad more people are learning. I find that there is not much to learn with GCode senders. They pretty much all perform the same duty with different interfaces and bells and whistles. I think our main limitation is our control board. It uses GRBL and, it’s my impression, is on the basic end or control for CNCs. Mach3 seems to be more powerful for example. GRBL is all I’ve ever used so it’s only my impression.
CNCjs has a great interface and with knowledge of GCode you can mimic all the functionality of Carbide Motion and probably more. This is why I have started this thread. I am a little disillusioned with Carbide3D and their probe. I love my Nomad and Carbide Motion but feel I could no more with CNCjs.
Using CNCjs you will have to get comfortable with how your workflow needs to change. Carbide Motion automates a lot of things for you and makes it almost foolproof. You can, with Macros, have the same functionality as any GCode sender, I think. It’s a matter of just getting used to it. Not a lot to re-learn, just a new order of things. It will give you more flexibility in the end. Once I have it figured out, I will post a tutorial on my process for anyone interested. Thanks to @neilferreri I am getting very close. All the mechanics are there. I need to figure out how some calculations are made and where those values get stored for everything to work as we expect in Carbide Motion.
I switch to cncjs about 9 months ago are so and really enjoy using much better that UGCS. I had some issues with UGCS with large gcode files over 1 million lines of instrutions. With CNCJS I have sent some jobs taking upto 20 hours with no issues. The developer is very open to changes and new features and easy to communicate with you with issues and concerns.
I just saw your video showing the Nomad, @patofoto. Now I get what you mean. That’s gonna be a different type of probe, but I believe CNCjs can handle that in a macro.
I’ll put something together after we get the kids to bed. Also giving me ideas for my SO3.
Thank you so much @neilferreri!. As I’m looking at videos and some tutorials on GCode, I am getting excited to learn it more. The second video I posted is so didactic. I need to find a GCode editor that can show me a preview of what I’m doing like in the video. Anyone have any advice on any for macOS?. I know of GWizard Editor but it’s a little too expensive for me at the moment.
Griff
(Well crap, my hypometric precursor device is blown…)
26
Thanks for the replies.
I’m working my way through the cncjs wiki now. I’ll check out the video later this pm.
I’m one of the fortunate few to have snagged a C3D probe on the first go round. I’d be interested to see a macro (I have a vague recollection of what they are) for use with cncjs.
Hey @Griff,
Do you know the offset distances for the Carbide probe? I could show you how the macro (basically a block of code) above would work.
I’m waiting to hear back from @patofoto on the location of the Nomad’s tool length offset probe, and then I’ll share one for him to try.
I thought it’d be cool to have a probe plate pocket in the wasteboard of the SO3. Basically what I’m thinking would be to use my corner probe to get my initial 0,0,0. Then I’ll drop my probe block into its pocket. When I need a tool change, I could use the plate (in its pocket) to set my tool length offset.
I’m going to have some aluminum milling questions I’m sure as I try to make my own corner block probe.
Hey @neilferreri. In the Nomad, the Y position is irrelevant since the bed moves for Y positioning. The spindle only has to move on X to reach the probe.
Was looking for a good spot for you to actually change the tool. No worries…you could always modify later.
Anyway, try this if you get a chance…I attached as a txt file.
Probe for XYZ zero, run whatever code, and at a tool change, you’d run the attached macro.
EDIT: File removed because it was no good.
I can’t upload txt files, so it’s a nc.
It will prompt you a couple times. It will go to a tool change location, wait for you to “confirm” you’ve changed tools, go to probe location, wait for you to confirm you’re ready to probe, probe & retract a bit, go back to the tool change location, wait for you to confirm, go to where it was before you ran macro. I would try changing to a shorter end mill in case something goes wrong
My apologies. You said tool change position and my brain got tool probe position. What you have is fine. It is very close but not working yet. At least I don’t think so. Do I need to run code before running it?. Can I just zero with a bit, change the bit and run the macro and see if it goes to the zero position?. This is what I did and the bit goes under the stock surface.
Notes:
-Can the pop-up windows display instructions in plain layman terms?
-You can rapid move to a height of Z-35 before slowing the feedrate to make the probing a little faster
-Since the tool length probe is a switch that needs to mechanically move to make a contact, how do we calculate how much it moves before contact is made?. Does it matter?.
Here is what I’m doing:
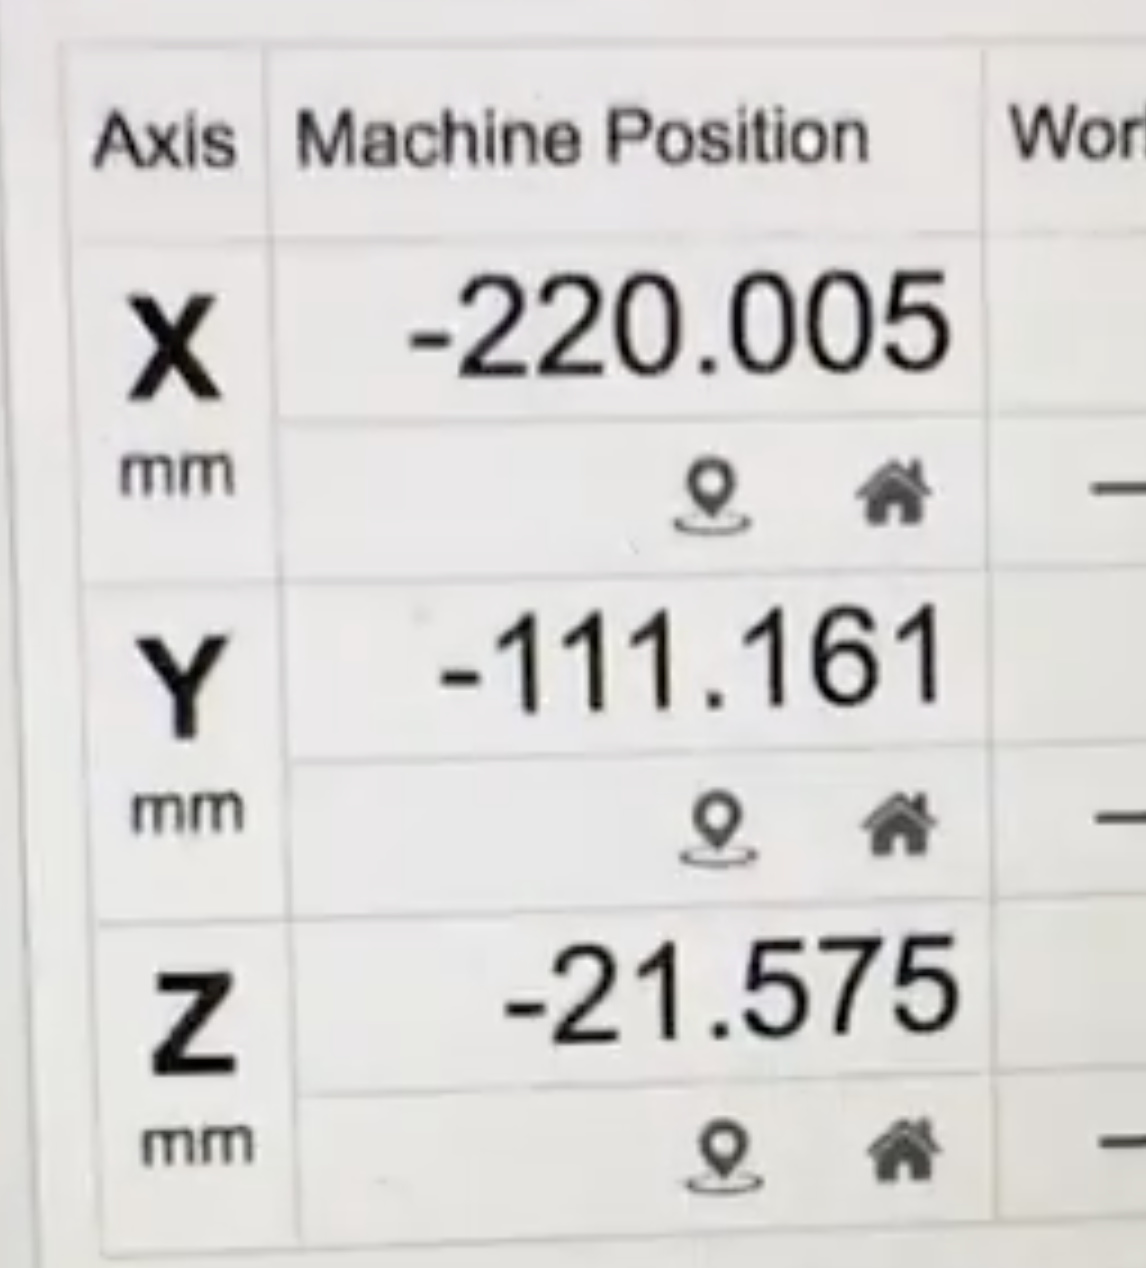
If I look at the machine coordinates for Z at the beggining Z is -19.980. After probing it is -78.030. Does this tell us something?.
Griff
(Well crap, my hypometric precursor device is blown…)
34
To be painfully honest, I don’t know what you mean by offsets .
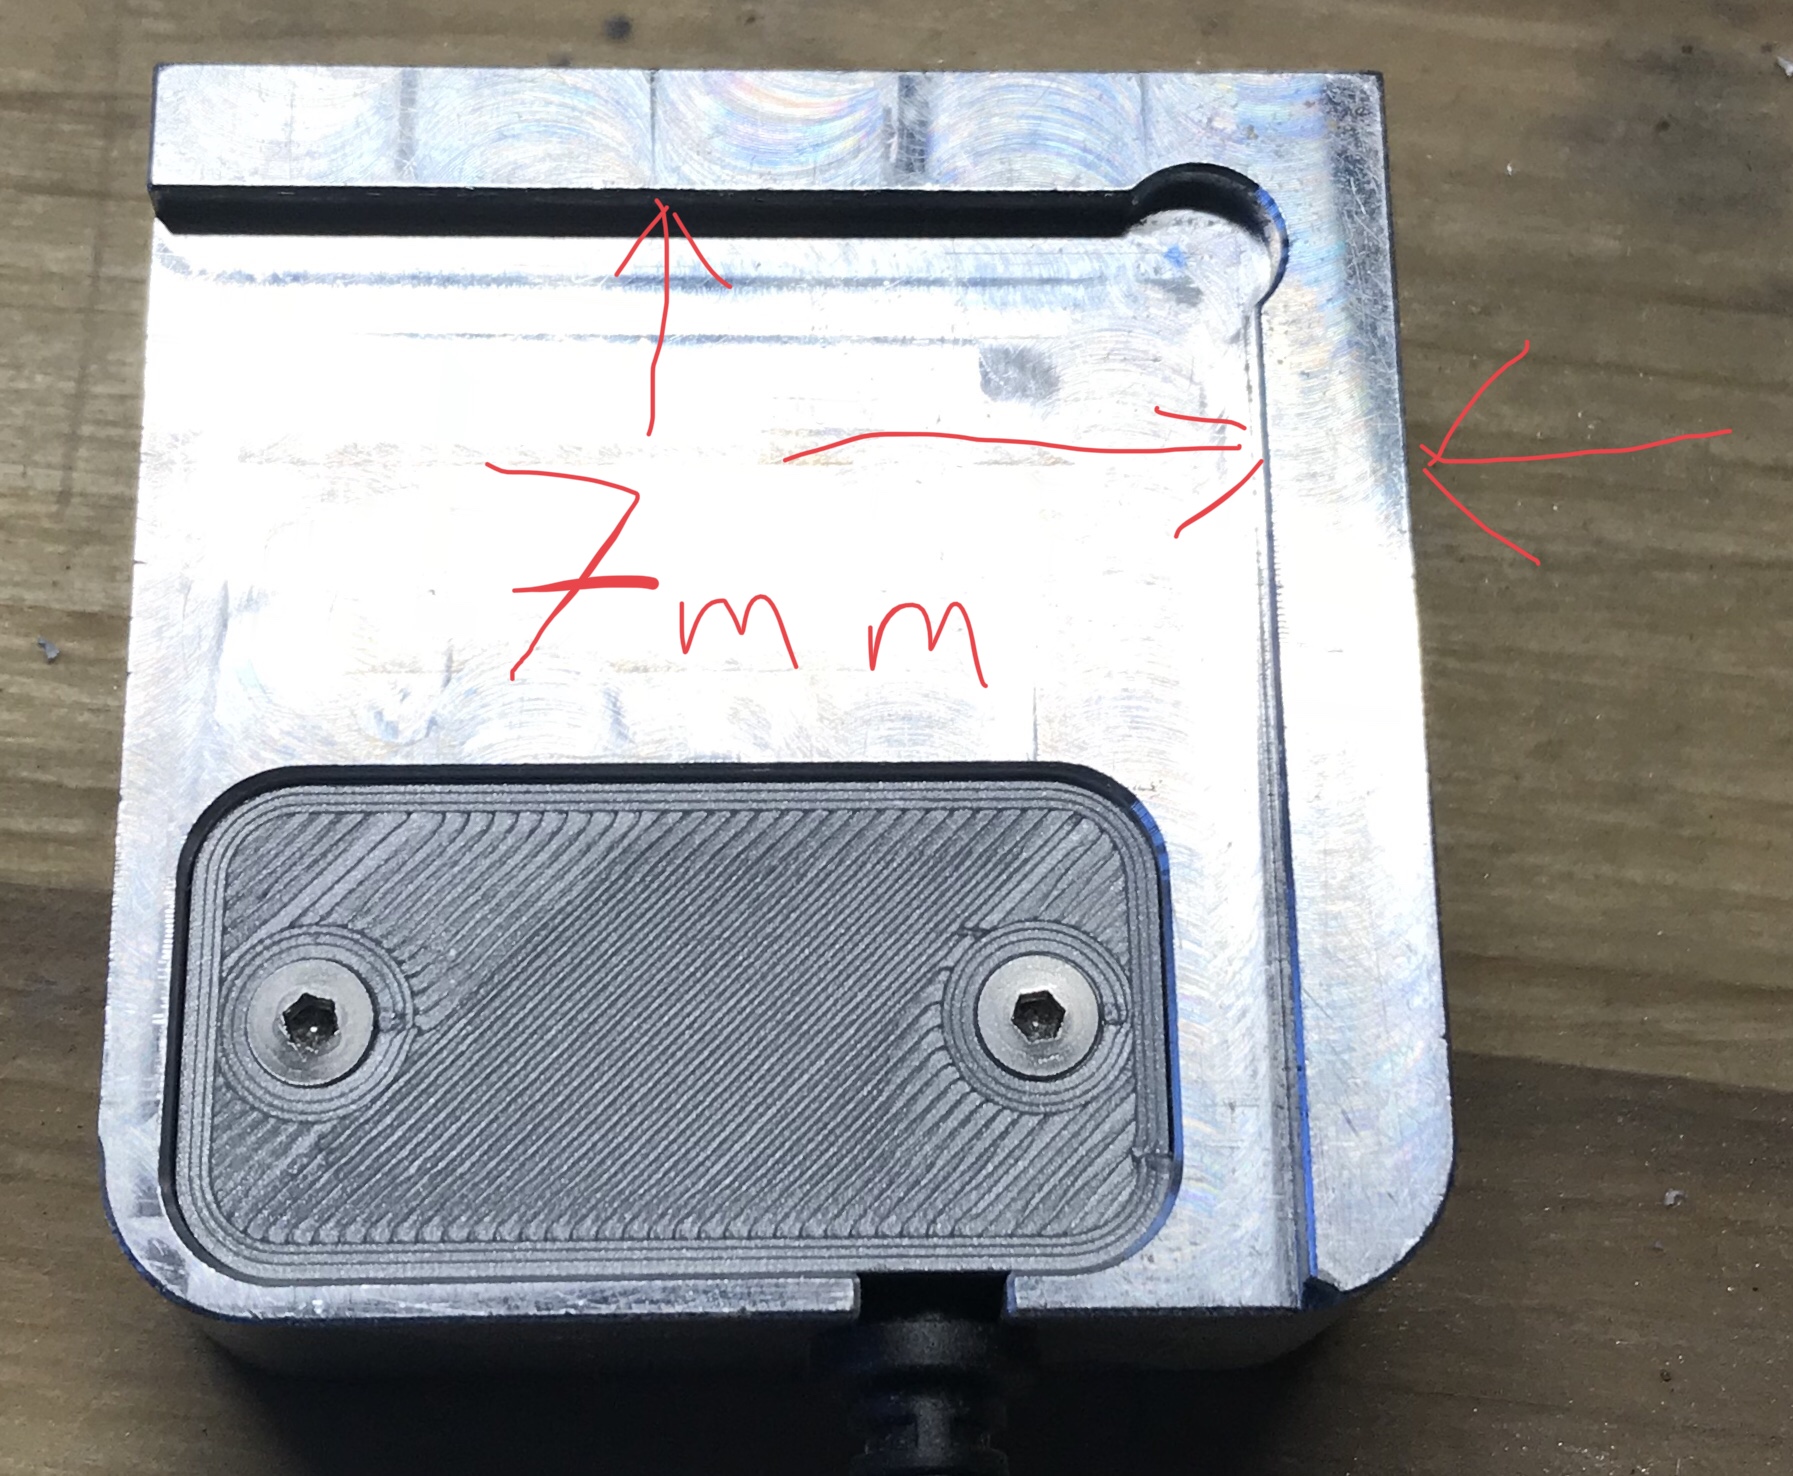
Is it the physical offset of the pocket in the bottom of the probe? Then the offset is 3 mm on each X,Y,Z. Or?
I have very slight offsets in my machine for belt stretch in x and y, do you need those?
I like your pocket idea for the probe.
As for aluminum advice, I’m not the one to ask as I’ve only just started cutting it. Lots of help elsewhere in the forum though.
If you put the probe on the corner of your stock, how far is it from the actual stock?
How far does it extend to the left on the X-axis?
How far does it extend to the front on the Y-axis?
How far does it extend up on the Z-axis?
I got a macro working with CNCjs, when I clean it up and test a bit more I’ll share here.
Griff
(Well crap, my hypometric precursor device is blown…)
36


 .
.