Looking into options to add a little bit of contrast to the v-carved regions of my projects.
I love the look of natural wood, and under the right lighting conditions there are shadow lines that real set off the v-carves.
Still, would like to find a way to add just a hint of darker color to the v-carved regions. Not looking to fill in completely with epoxy, and don’t really want a solid paint color, looking for a subtle darkening or staining with navy blue or black for example.
Kind of like ink, but maintaining the dimensionality and shadows?
Wondering what others are doing?
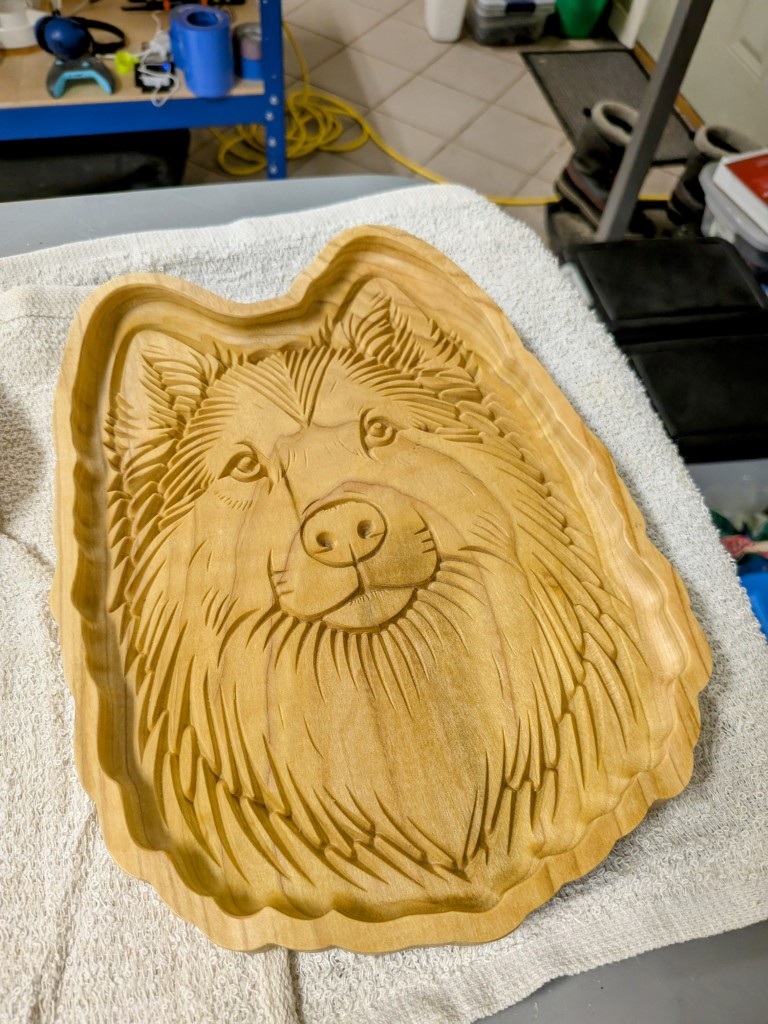
I’ve attached a picture of a recent project, cut from Tulip Poplar and finished with Walrus Oil and Wax.
I have not used it, but you could try this semi-transparent spray stain with light passes before you remove the oramask so it only stains in the carved area. That is the easiest way I can think of without needing an air brush setup or other gear.
What ever you decide to use do a test on a scrap the same as the original material. You need to see if the material is porous. If it is and it soaks into the finished project you will not get the results you are looking for.
I have used clear epoxy to seal before stain and using filler to color fill. this seals the material and wont let the color you use bleed.
Other things I have used is acrylic craft paints.
I have not had any issues with the paint bleeding.
You can blend colors to get what you need but if you thin out the paint it mar increase the chances of bleeding… I have sealed with epoxy before using this and also just used the paint alone. Again test on the same material to verify your results.
For projects that I’m going to paint… I apply a coat of sanding sealer, let dry, then oramask then cut the design. After a quick cleanup of oramask on the cut edges I use “hobby” paint from the dollar store, remove the oramask then after an hour to let the paint fully dry I do a light sanding to remove any paint that has been applied to places where the oramask may have been peeled away. The sanding sealer does a good job of keeping the paint from bleeding into the wood.
You might also try a trial piece using a GEL Stain.
I’ve used those and you never get all of the gel out of tiny crevices, but those also make the carving POP!
Mask areas you don’t want to stain at all with an appropriate tape. Seal the surface with dilute shellac (half or one pound cut) Apply an oil-based pigment stain (Old Masters is much better than Minwax from the Borg-- 3x more pigment in the can) with a brush and let it dry until it is pretty tacky. Then burnish off the surface with a loose wad of clean cheesecloth or similar. Stain will be left in the corners, gone from the highest protruding elements, the amount left behind depends on how vigorously you rub. Then let the stain dry completely and apply a compatible clear finish. The only trick is in judging when to rub the stain off, so practice before doing it on a valuable piece-- too soon and the stain will mostly come off, too long and it will never come off. The rags can spontaneously combust, so dispose carefully.
This method has been used successfully for many centuries to highlight carvings.
Oh-- and if the piece is not nicely sanded or burnished with a tool it can be blotchy and ugly. As always, surface preparation determines finish quality.