Sure,
And/or you can edit your existing entry as many times as needed before the deadline.
Sure,
And/or you can edit your existing entry as many times as needed before the deadline.
I’ll be cutting my first acrylic sheet this evening. Fingers crossed!
Just in case: If stuff melts and wraps around my bit, is the bit lost or what is the best way to clean it from the plastic?
A bit is never lost until it’s broken 
Usually, you can remove the melted plastic by hand/with a pick if you are careful, else you could soften it with a heat gun. You can also use acetone, plastics don’t like acetone.
But…this will be unnecessary, as you will be using adequate feeds and speeds
Keep you finger on the feedrate override button, and hit +10% if there are signs of melting
I just read this post:
Guess I grabbed extruded acrylic, but let’s see … ![]()
I’m editing this post to document my entry:
Seems the whatever type of acrylic was no problem.
I did an “advanced” (w/o bitsetter) V carve using a
During pocketing it startet to smell of warm plastic very quickly, so I added 30% to the feed rate.
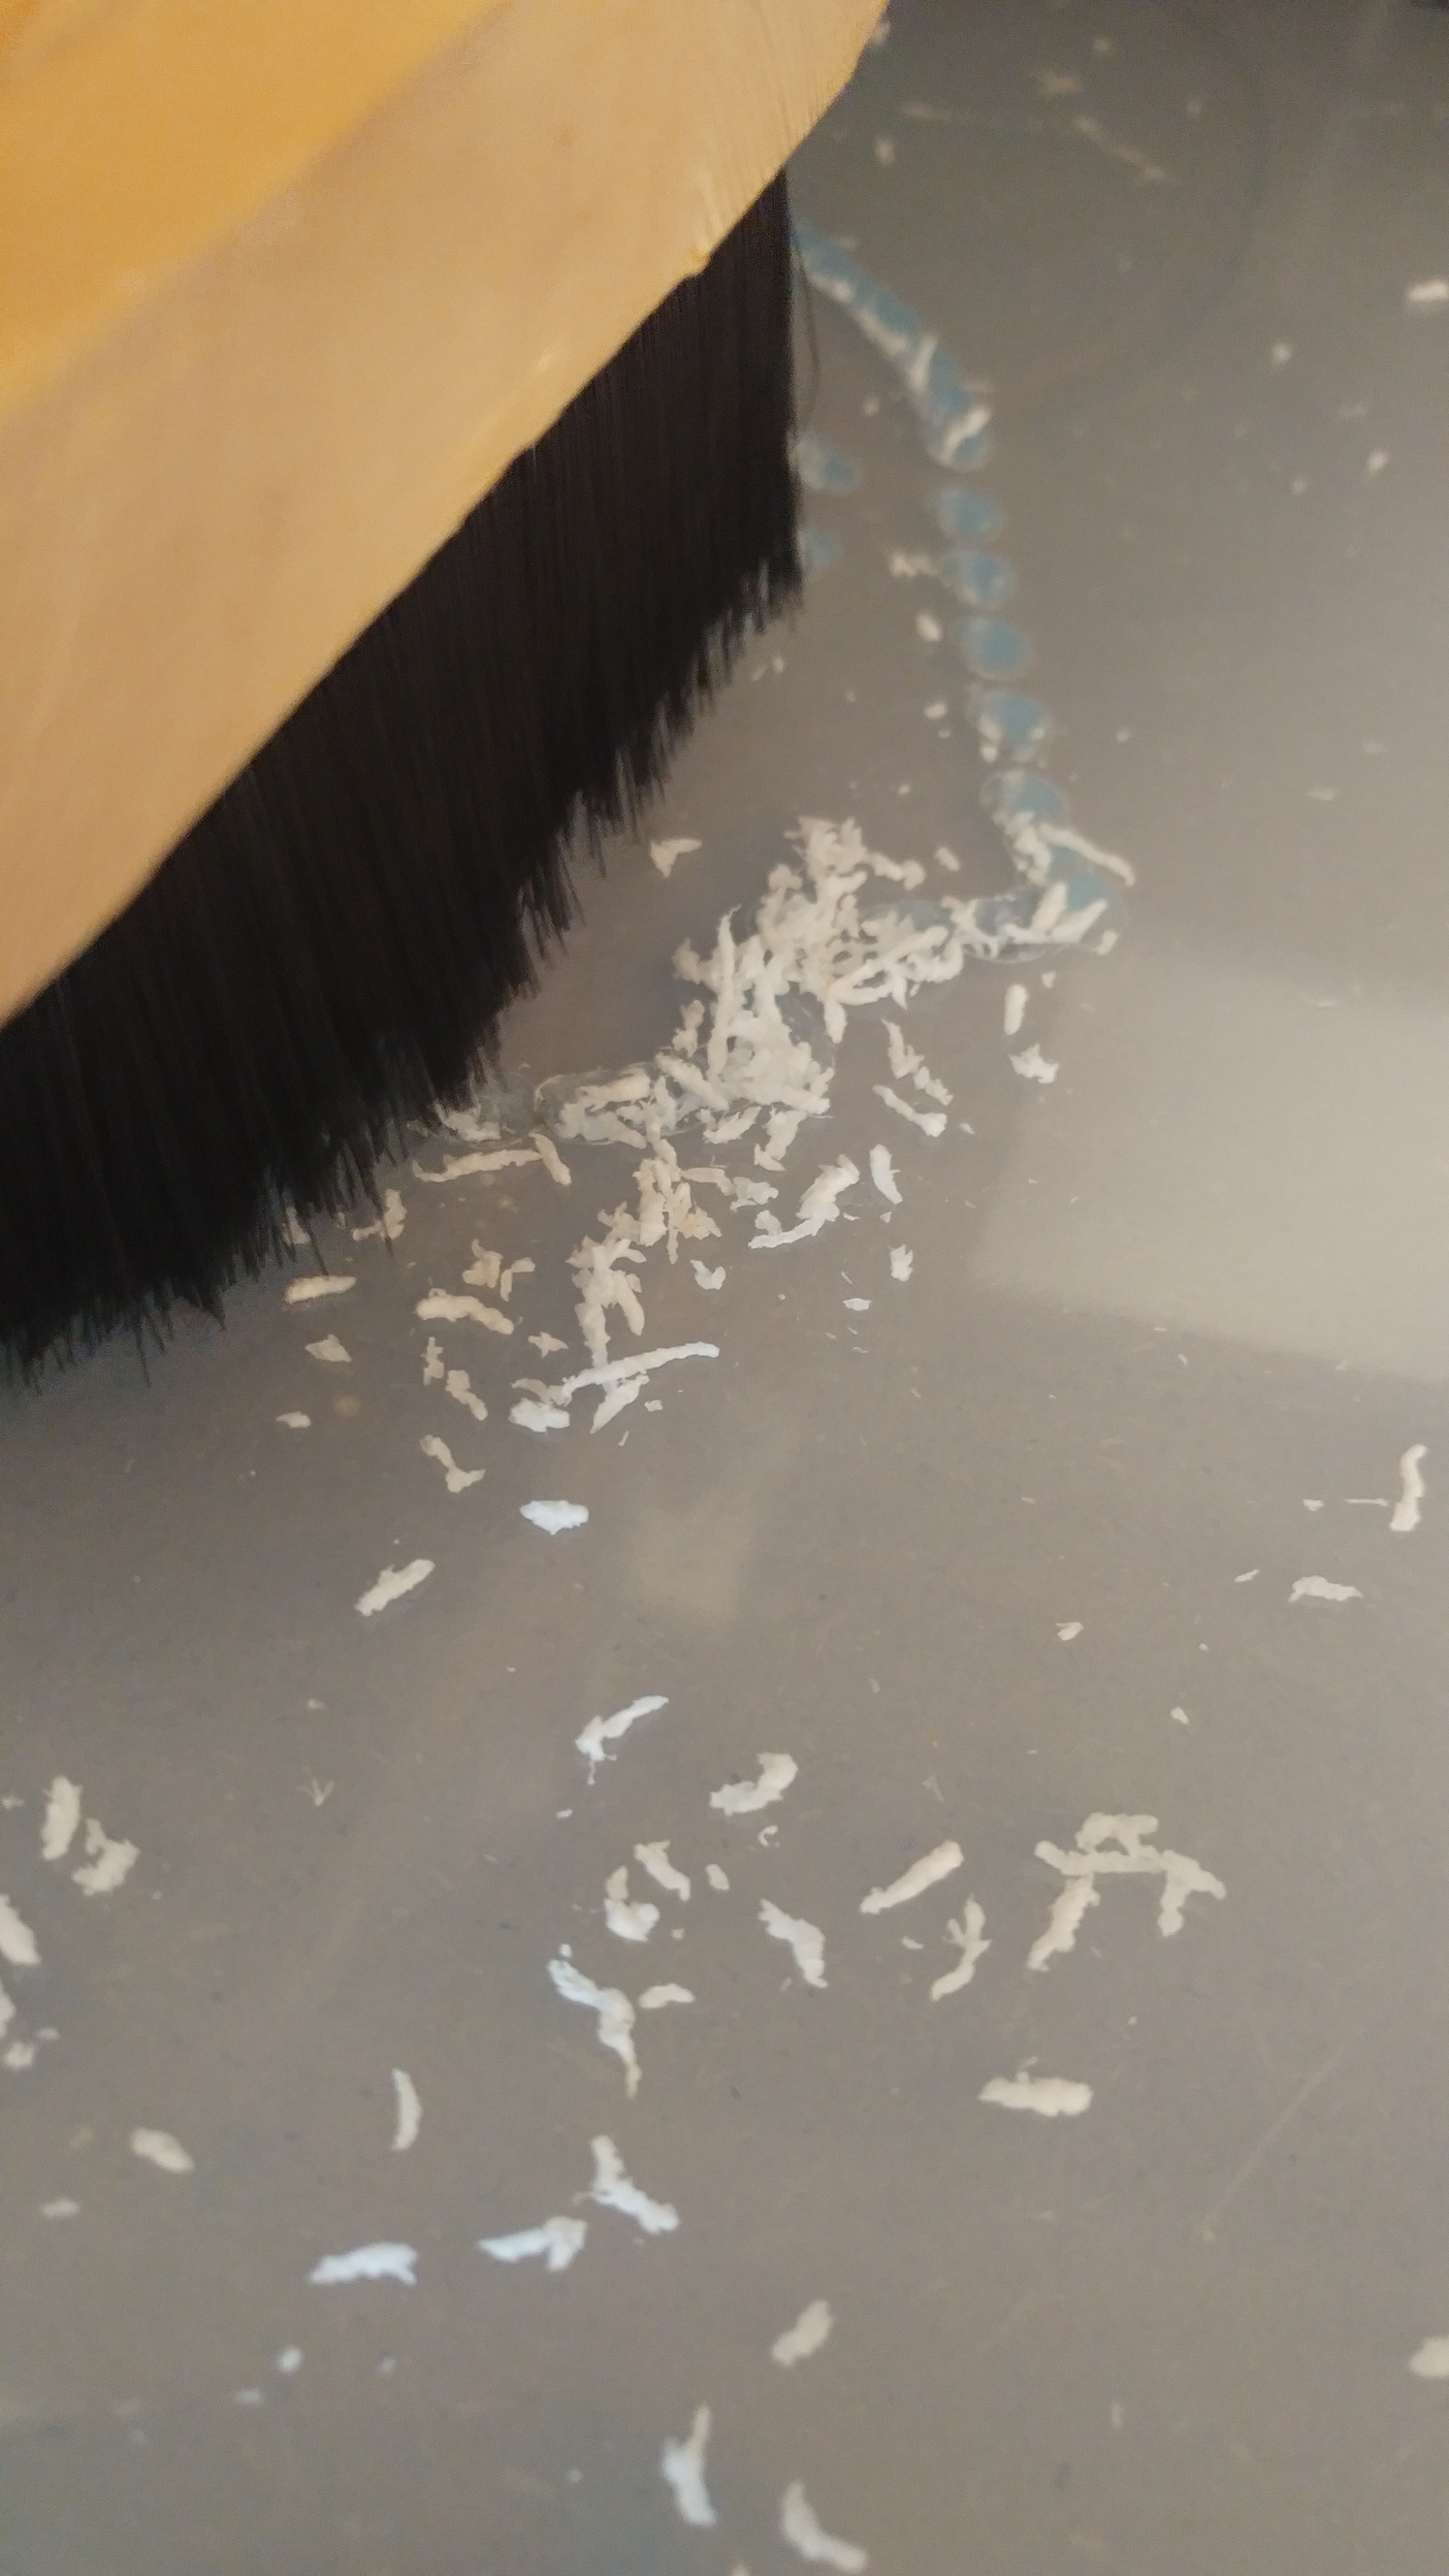
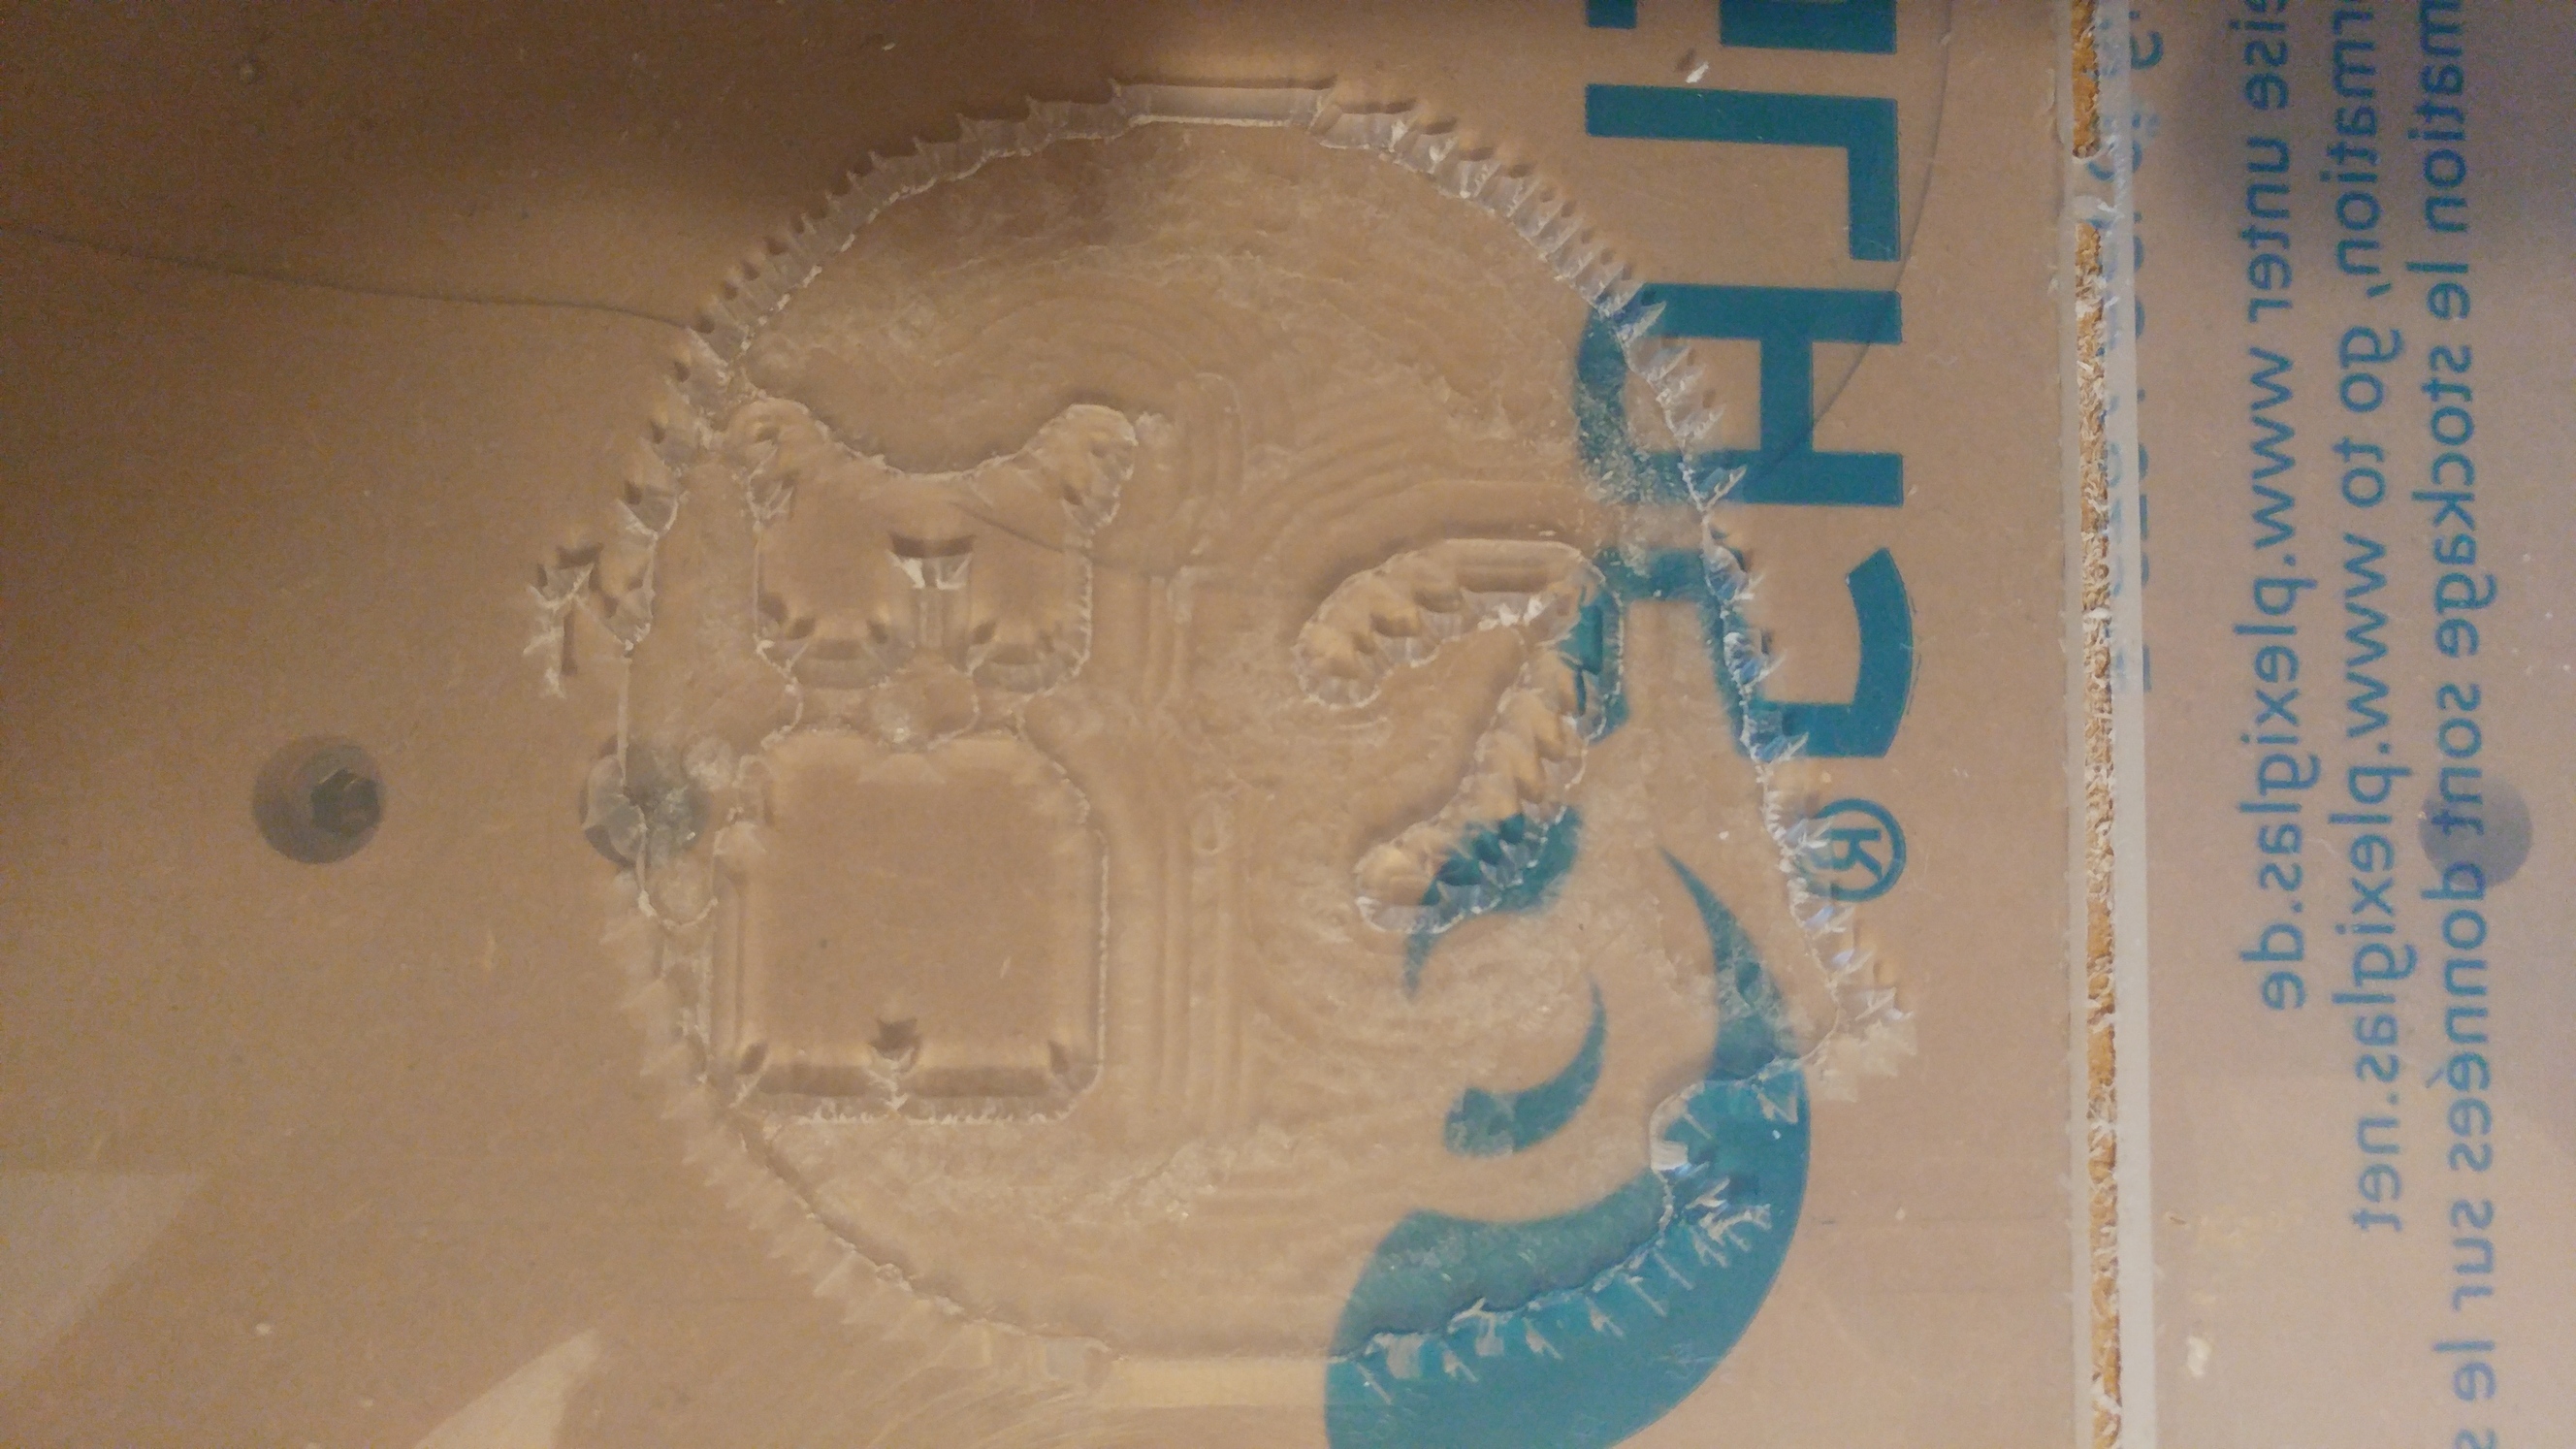
Those are the V carve chips:
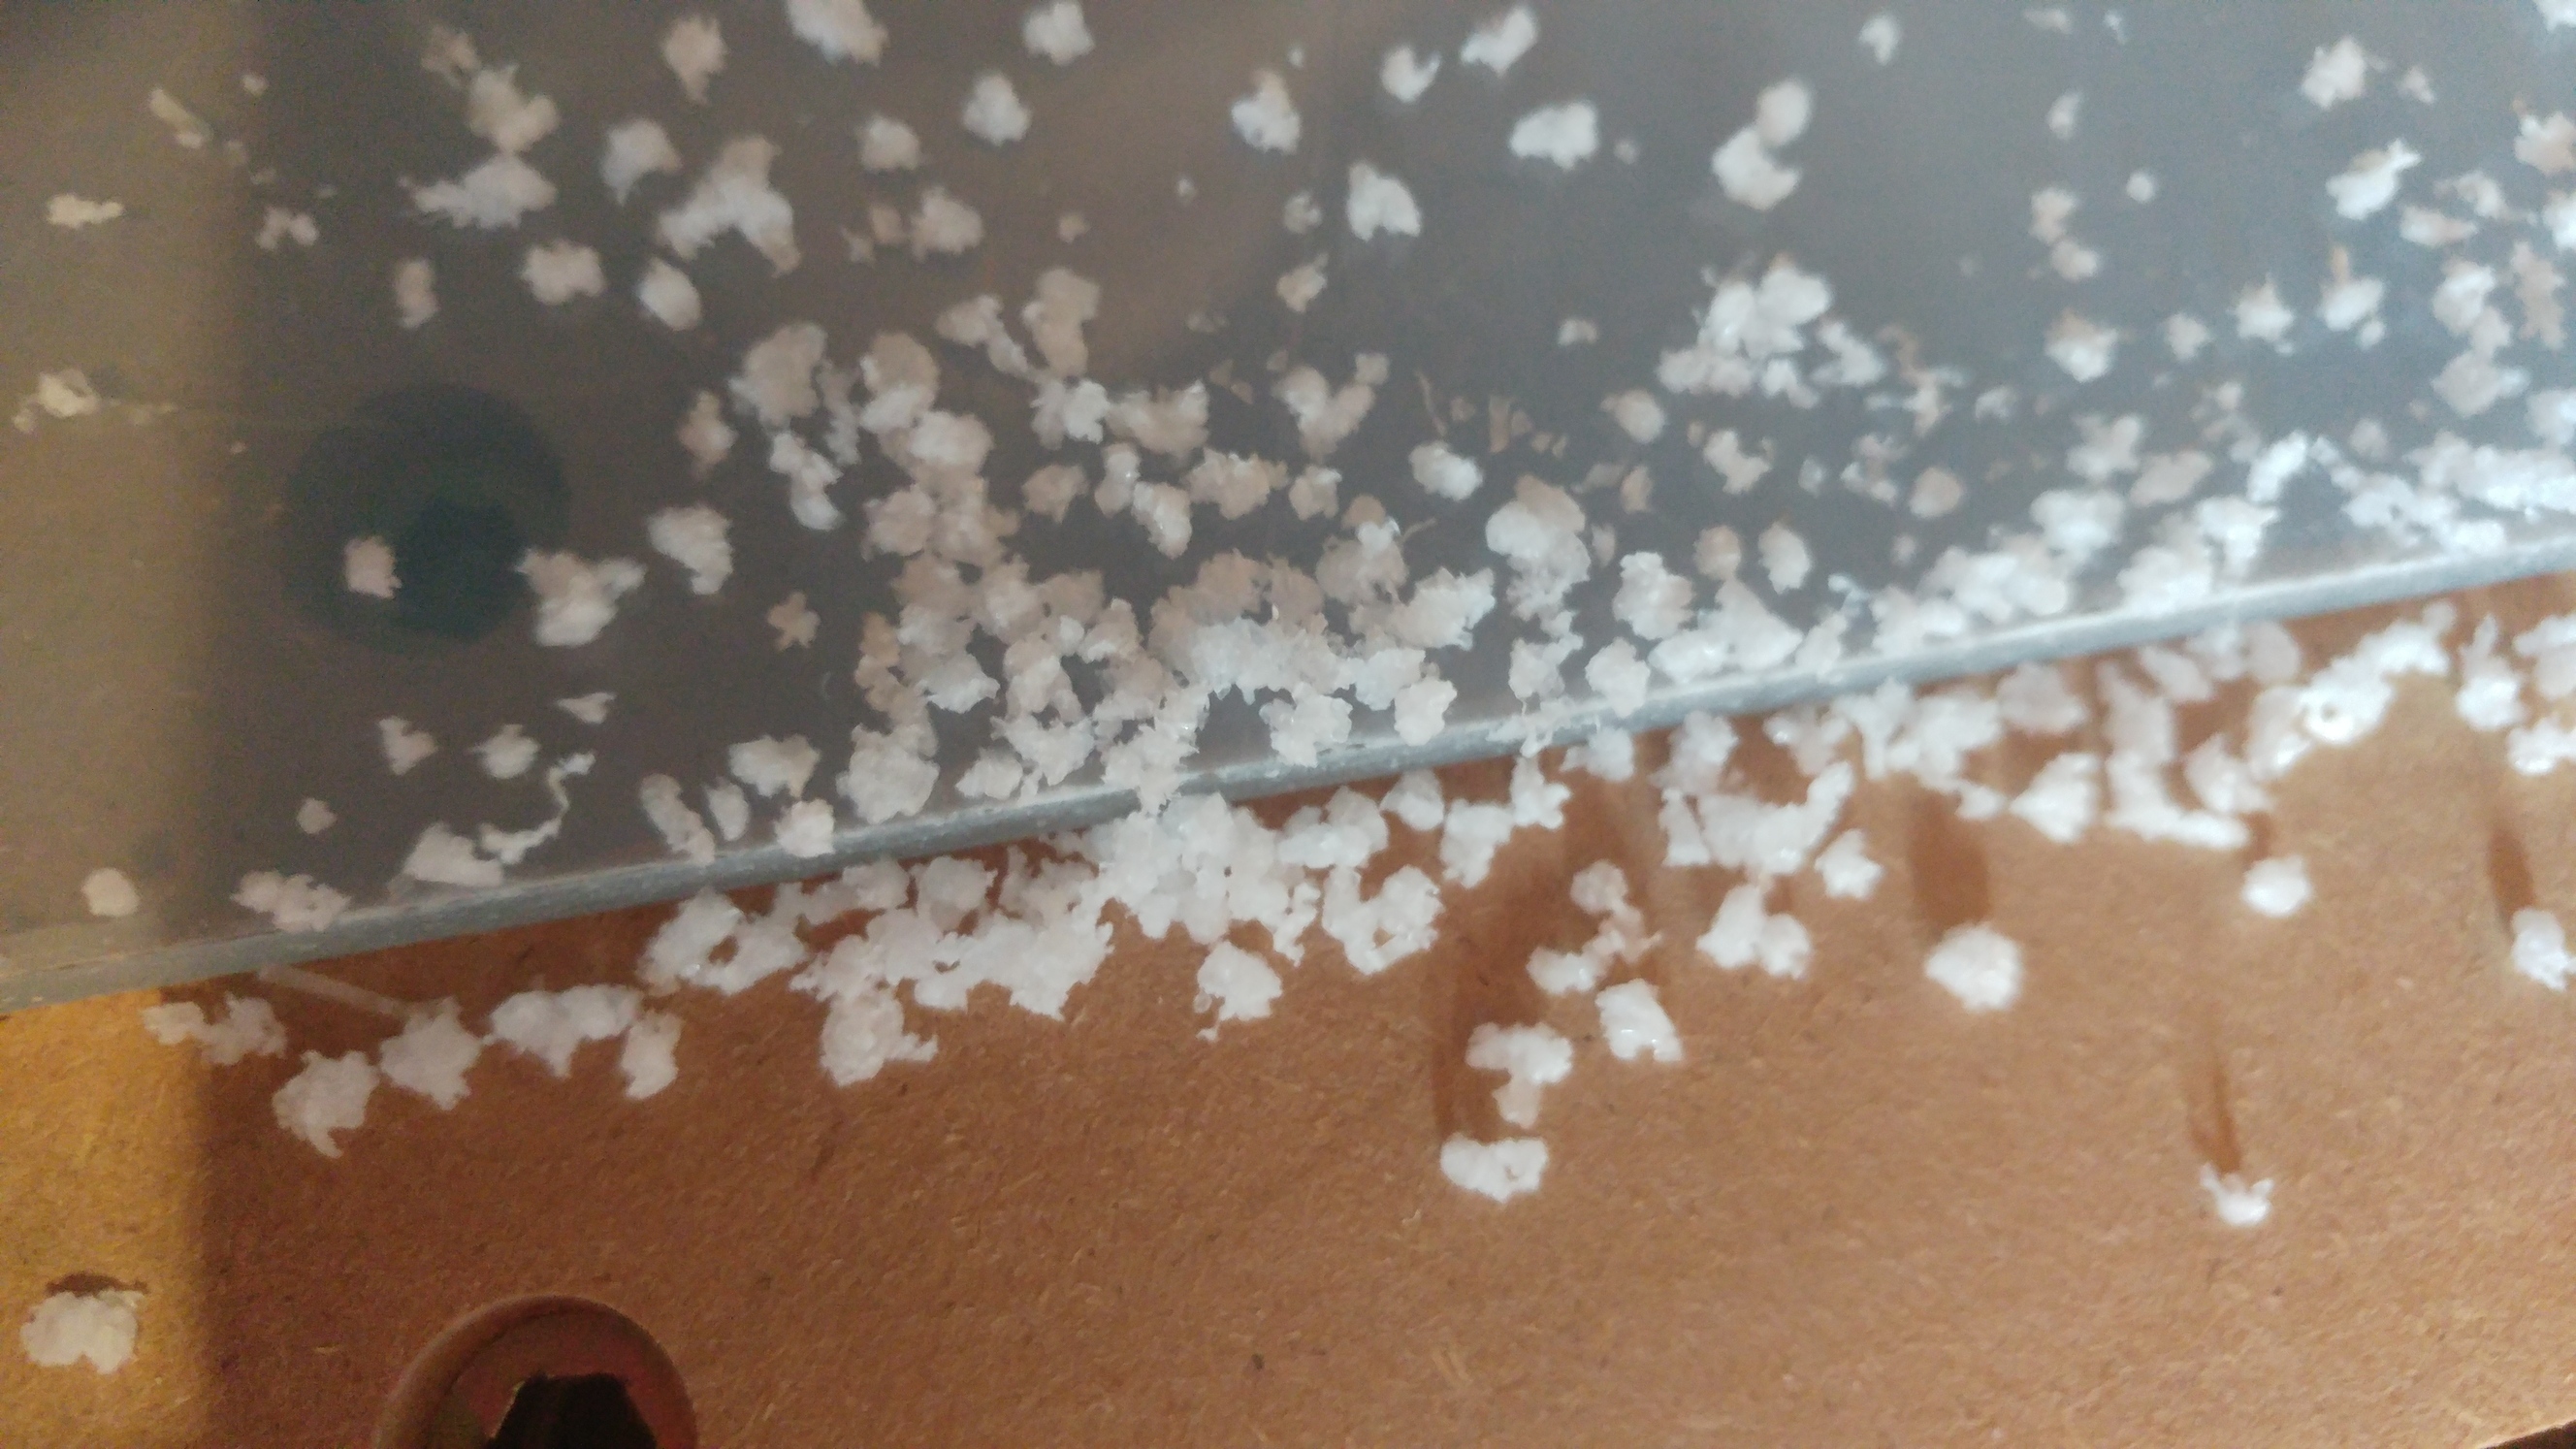
And the end mill chips:
Seems that in both cases smaller chips melted together to bigger chunks but nothing sticked to the bits!
It all went quite well, until my clamps gave in to the high feed rate: The stock started moving and the result screwd up.
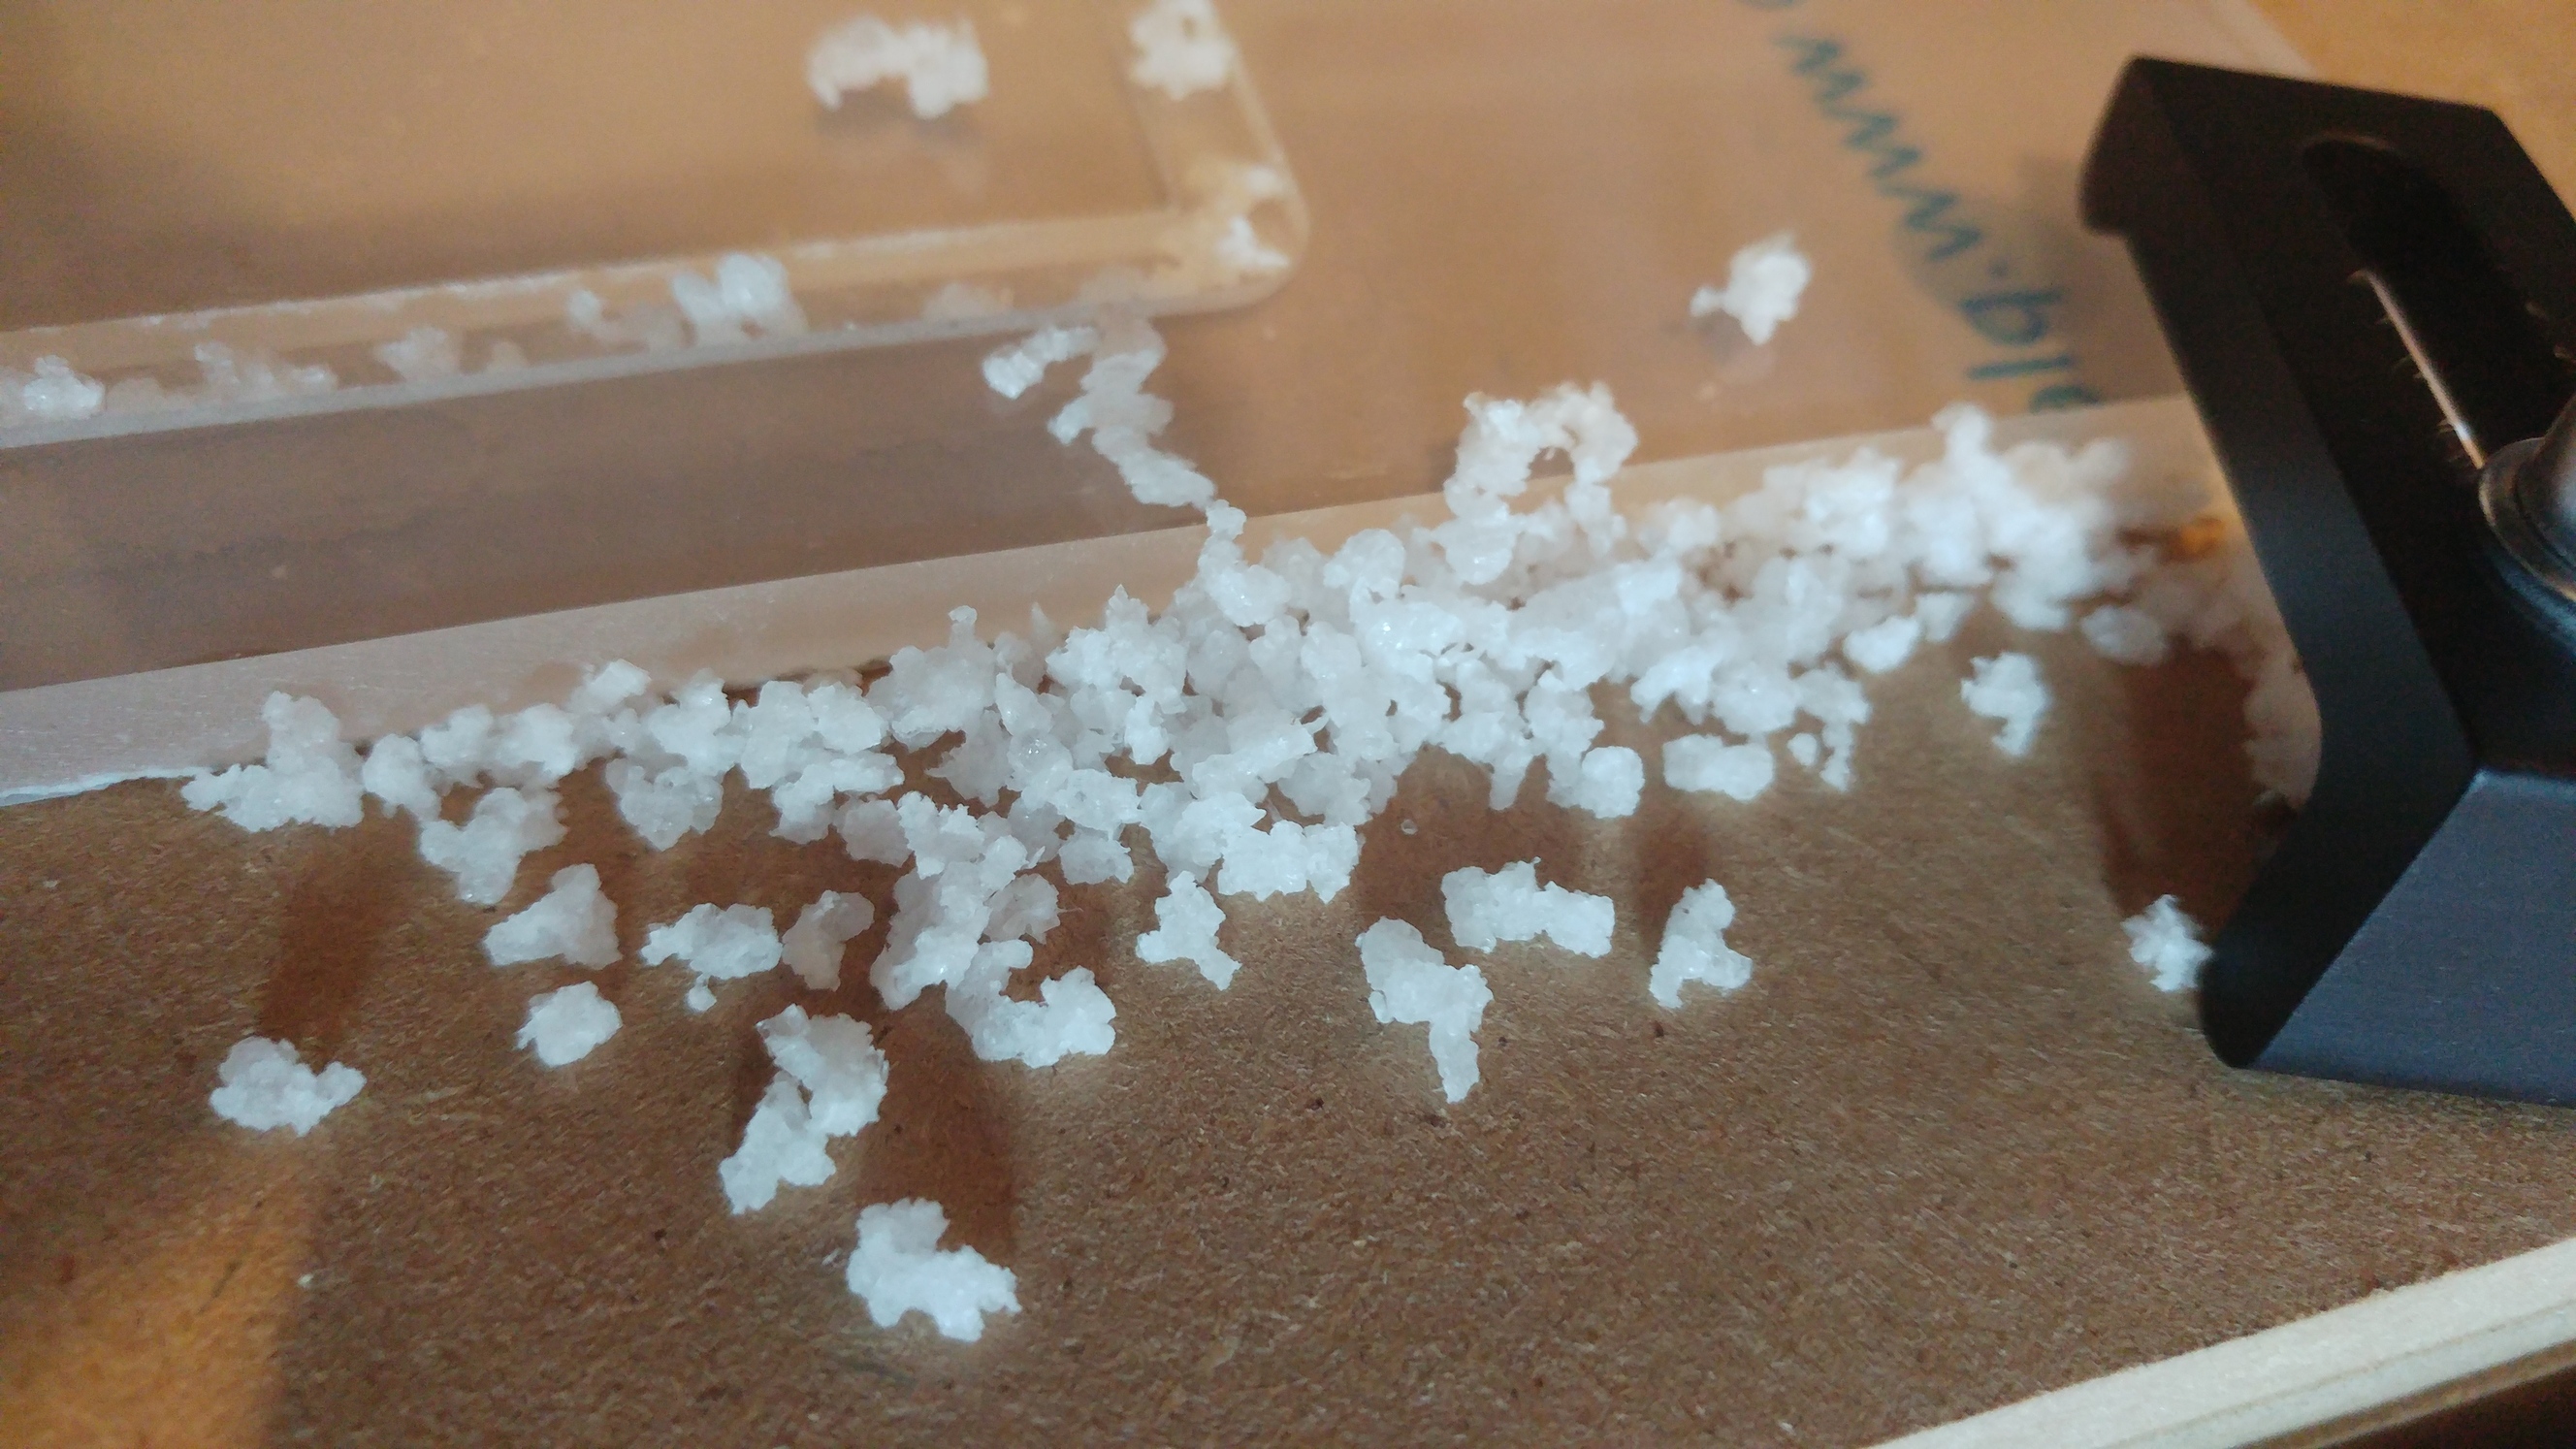
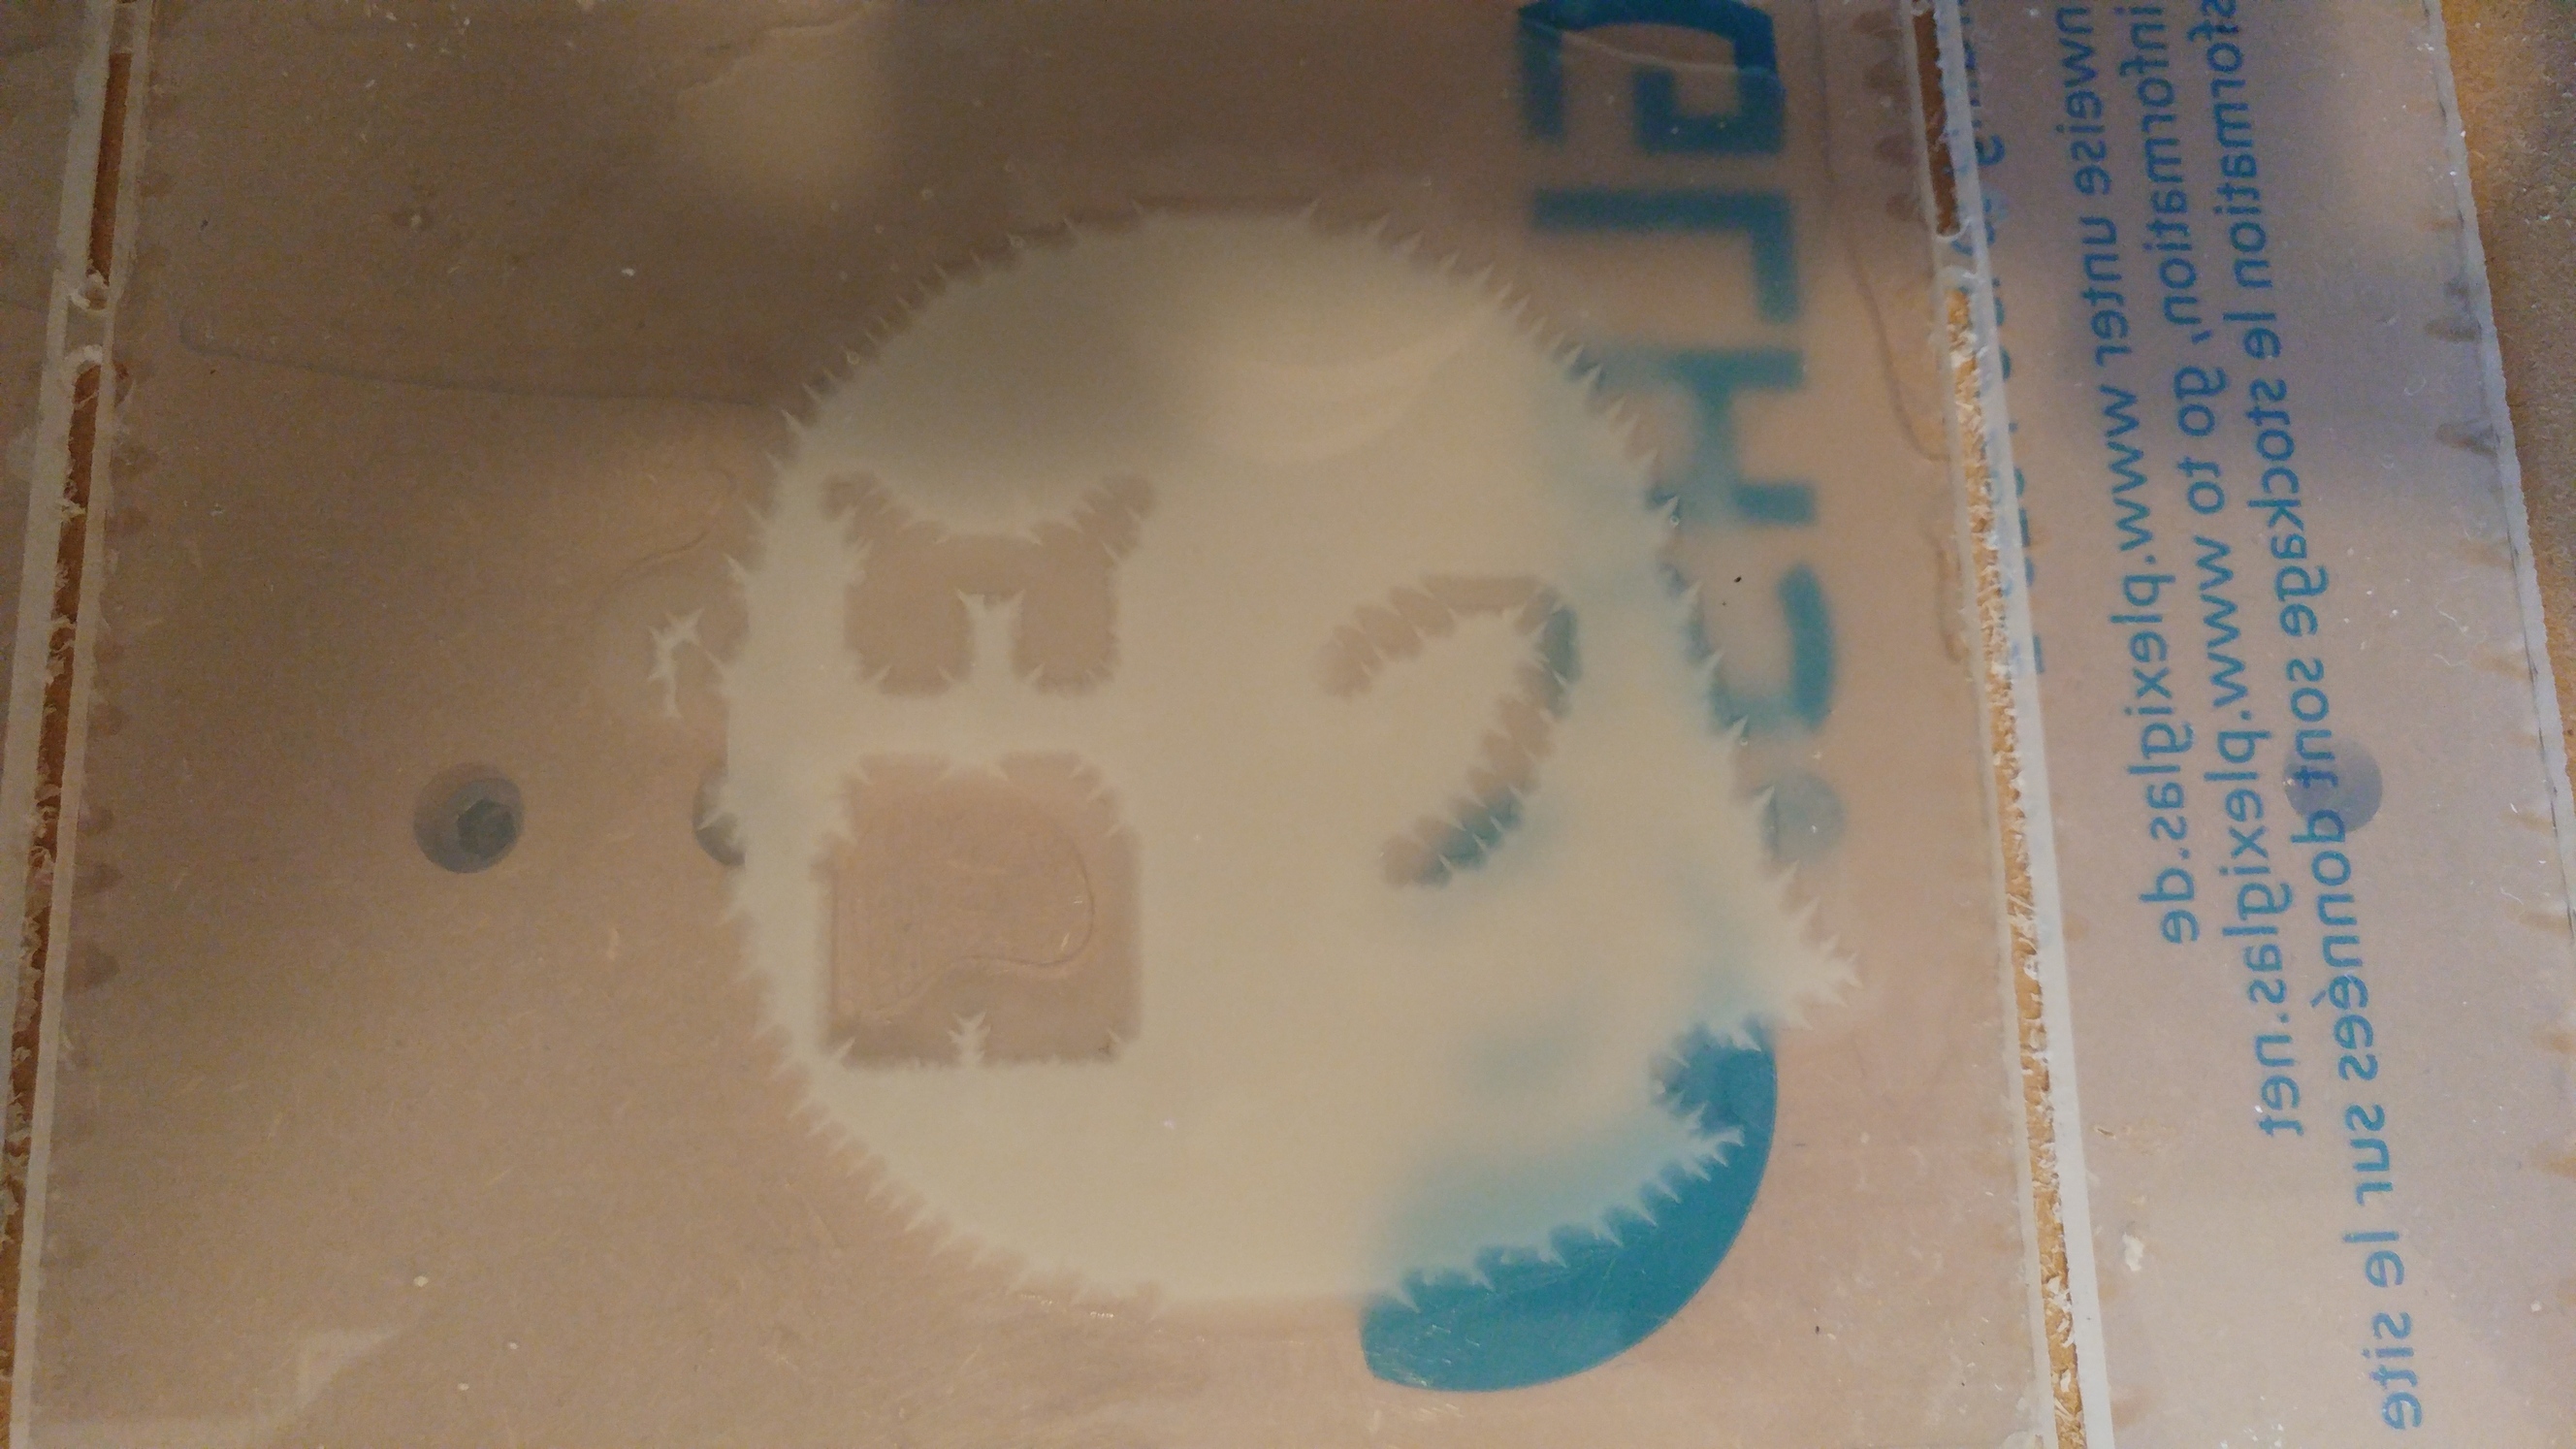
So I had to do another round with feeds&speed decreased for the pocketing:
The chunks got even larger this time and the bit was notably heated up, but nothing sticking to the bit.
So next time I might increase the feed rate a bit or decrease the spindle speed a bit further.
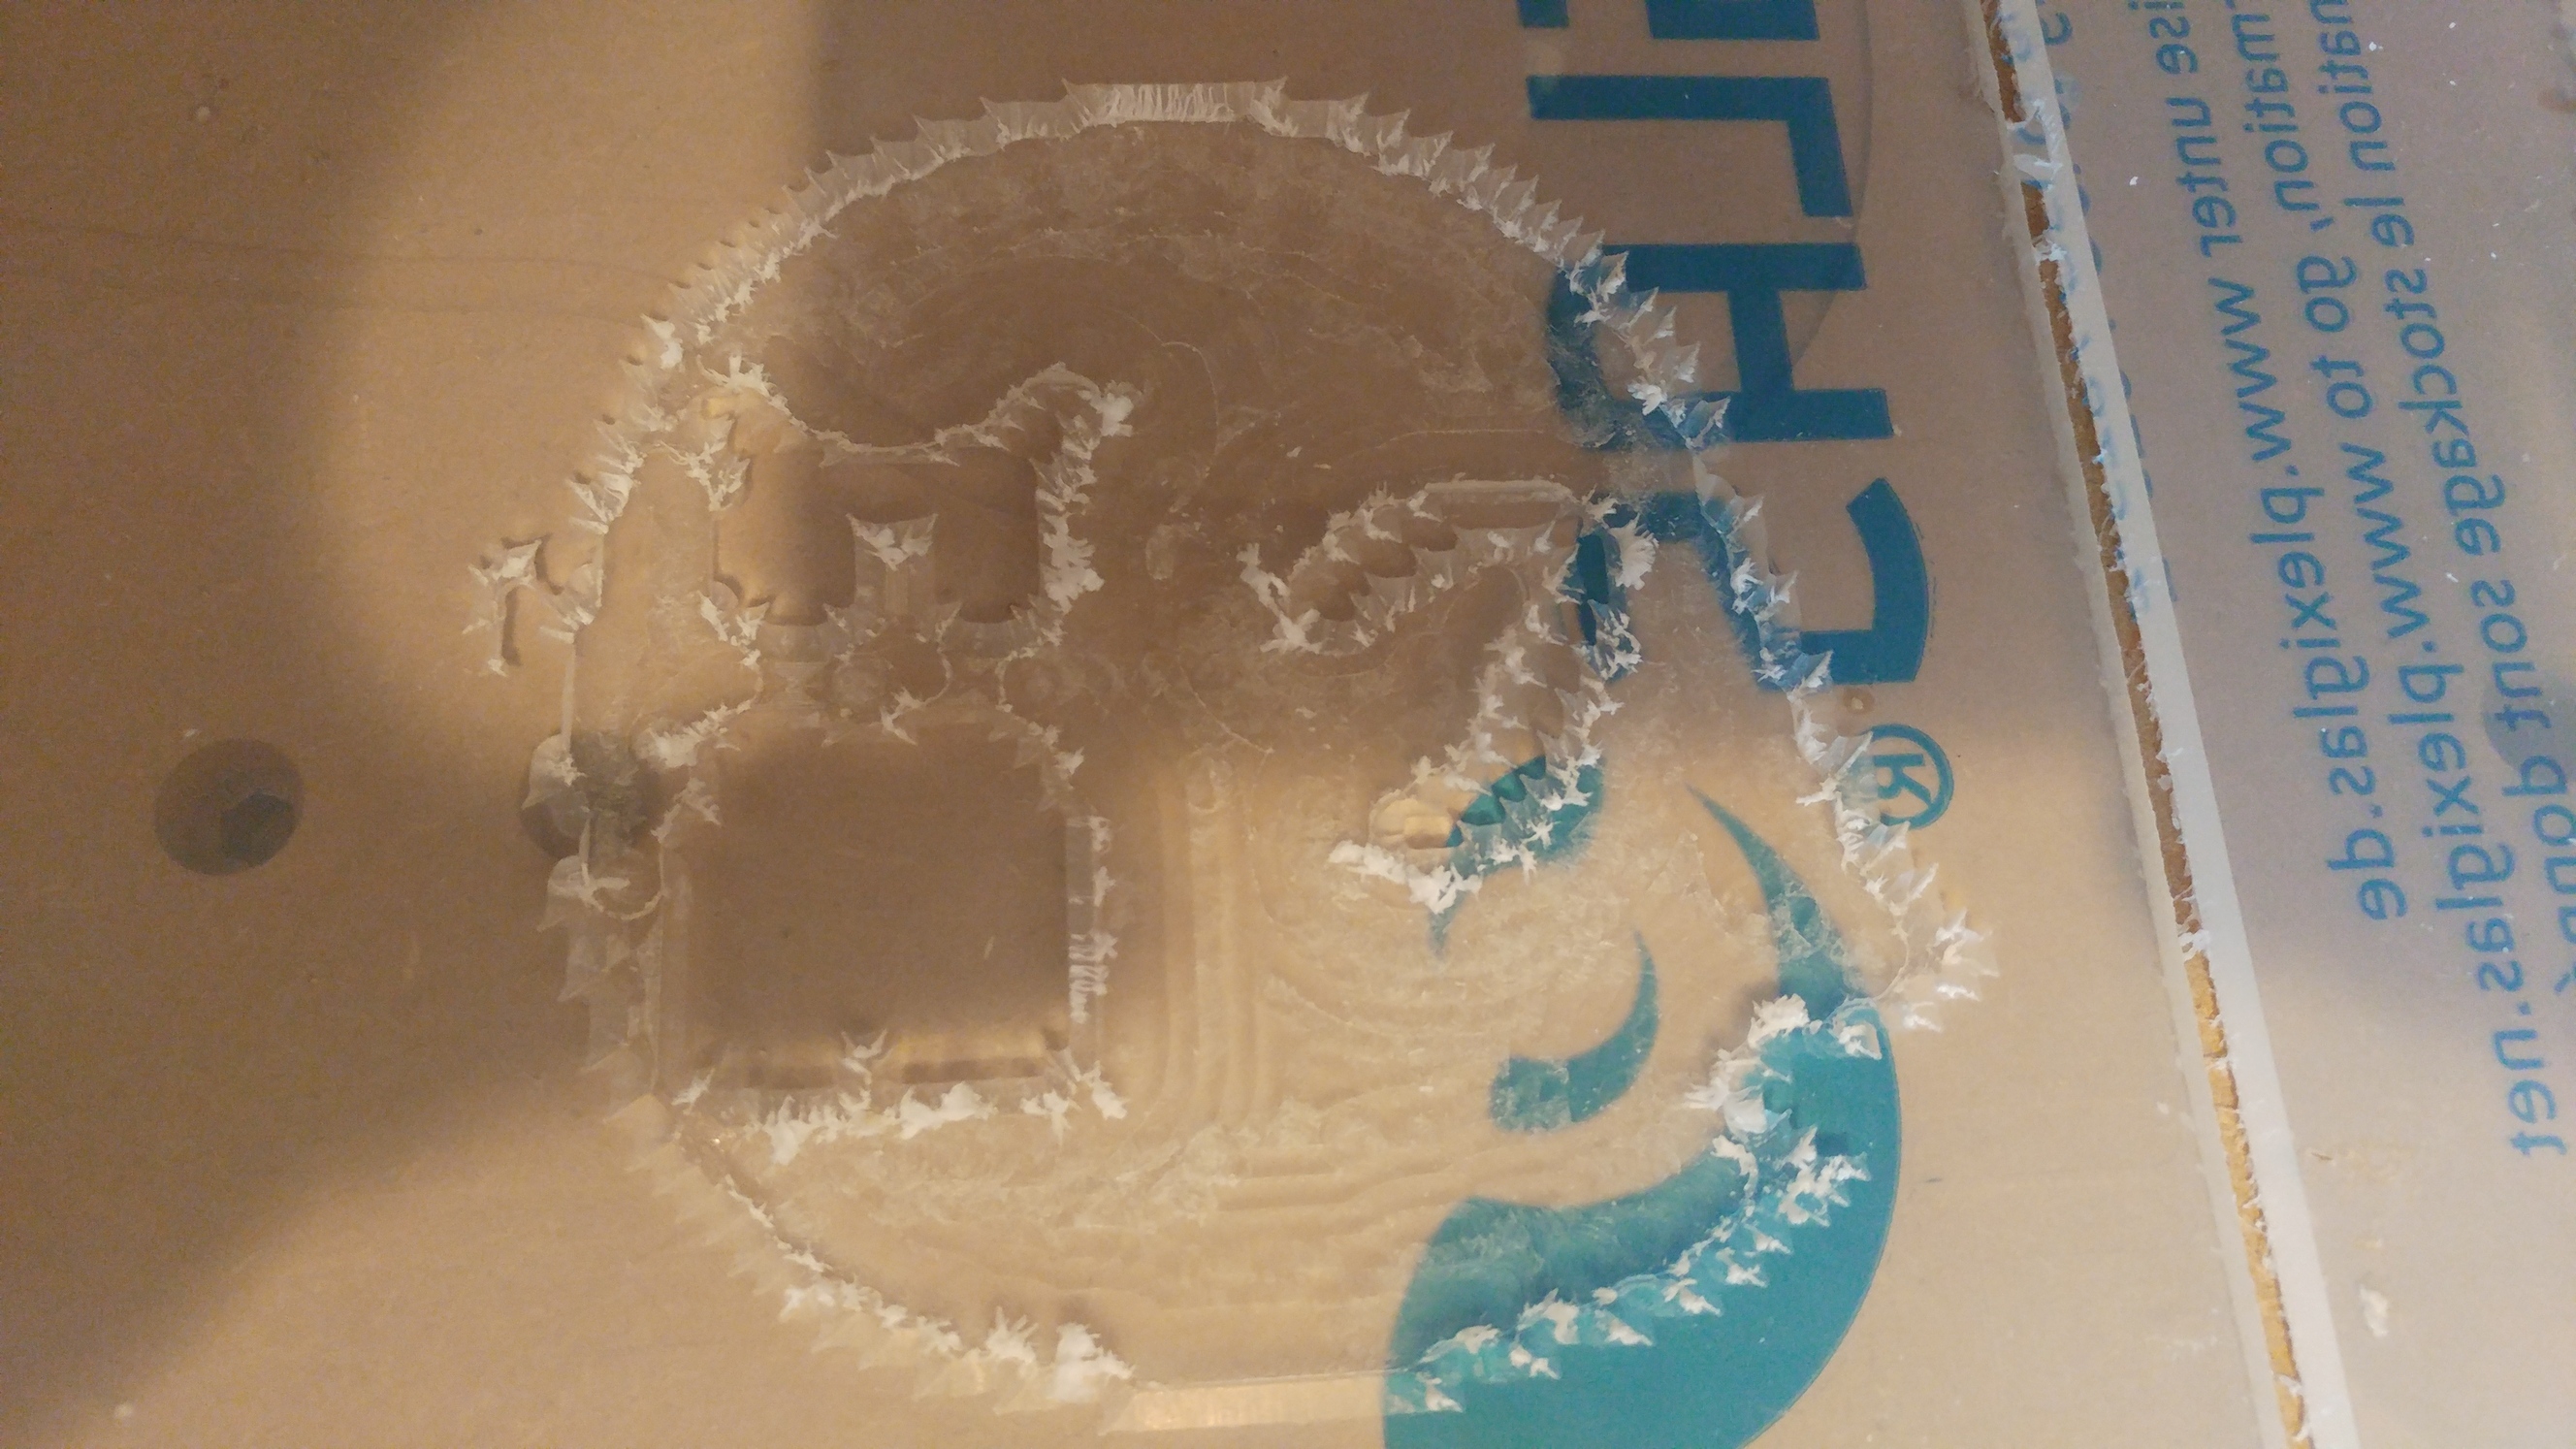
Here’s the result after one pass of the v carve portion:
And then after a second pass and minimal sanding with a sanding fleece:
The next step was to fill the pocket with epoxy resin and fluorescent paint, which I’m currently waiting for to harden.
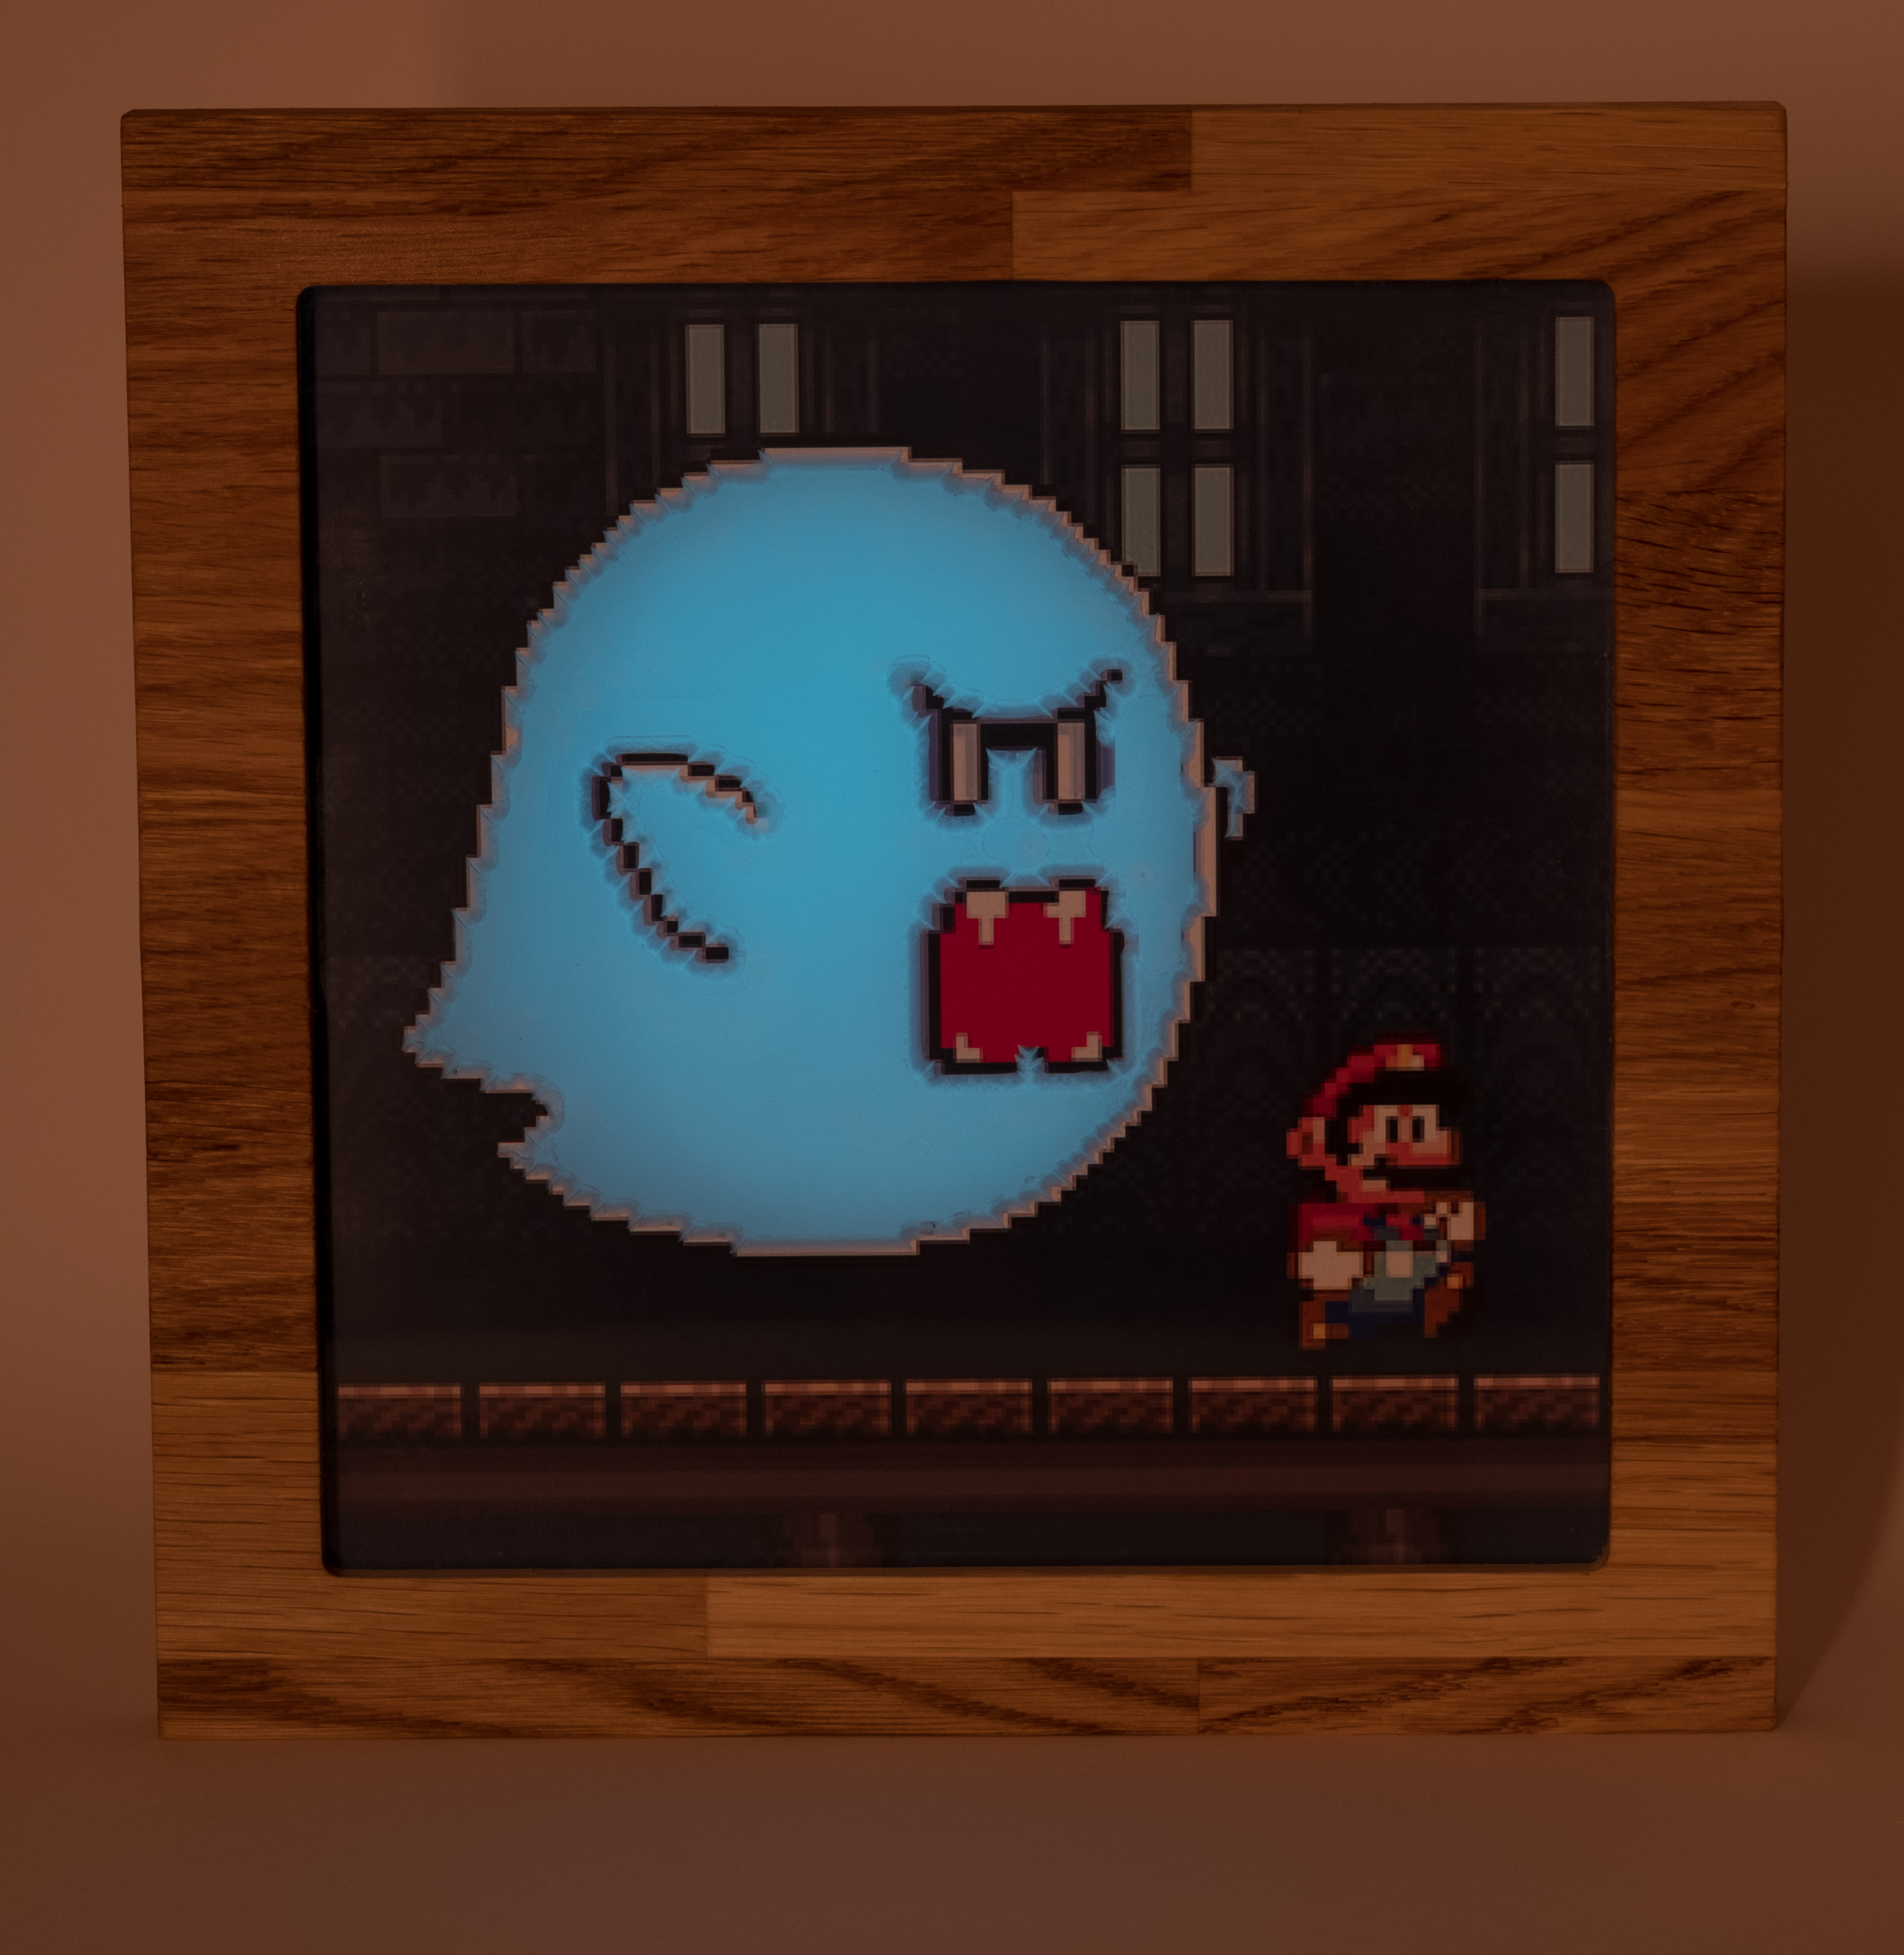
Based on your SNES experience, you might be able to guess where this is going. ![]()
Today I milled off the protruding epoxy and sanded the acrylic.
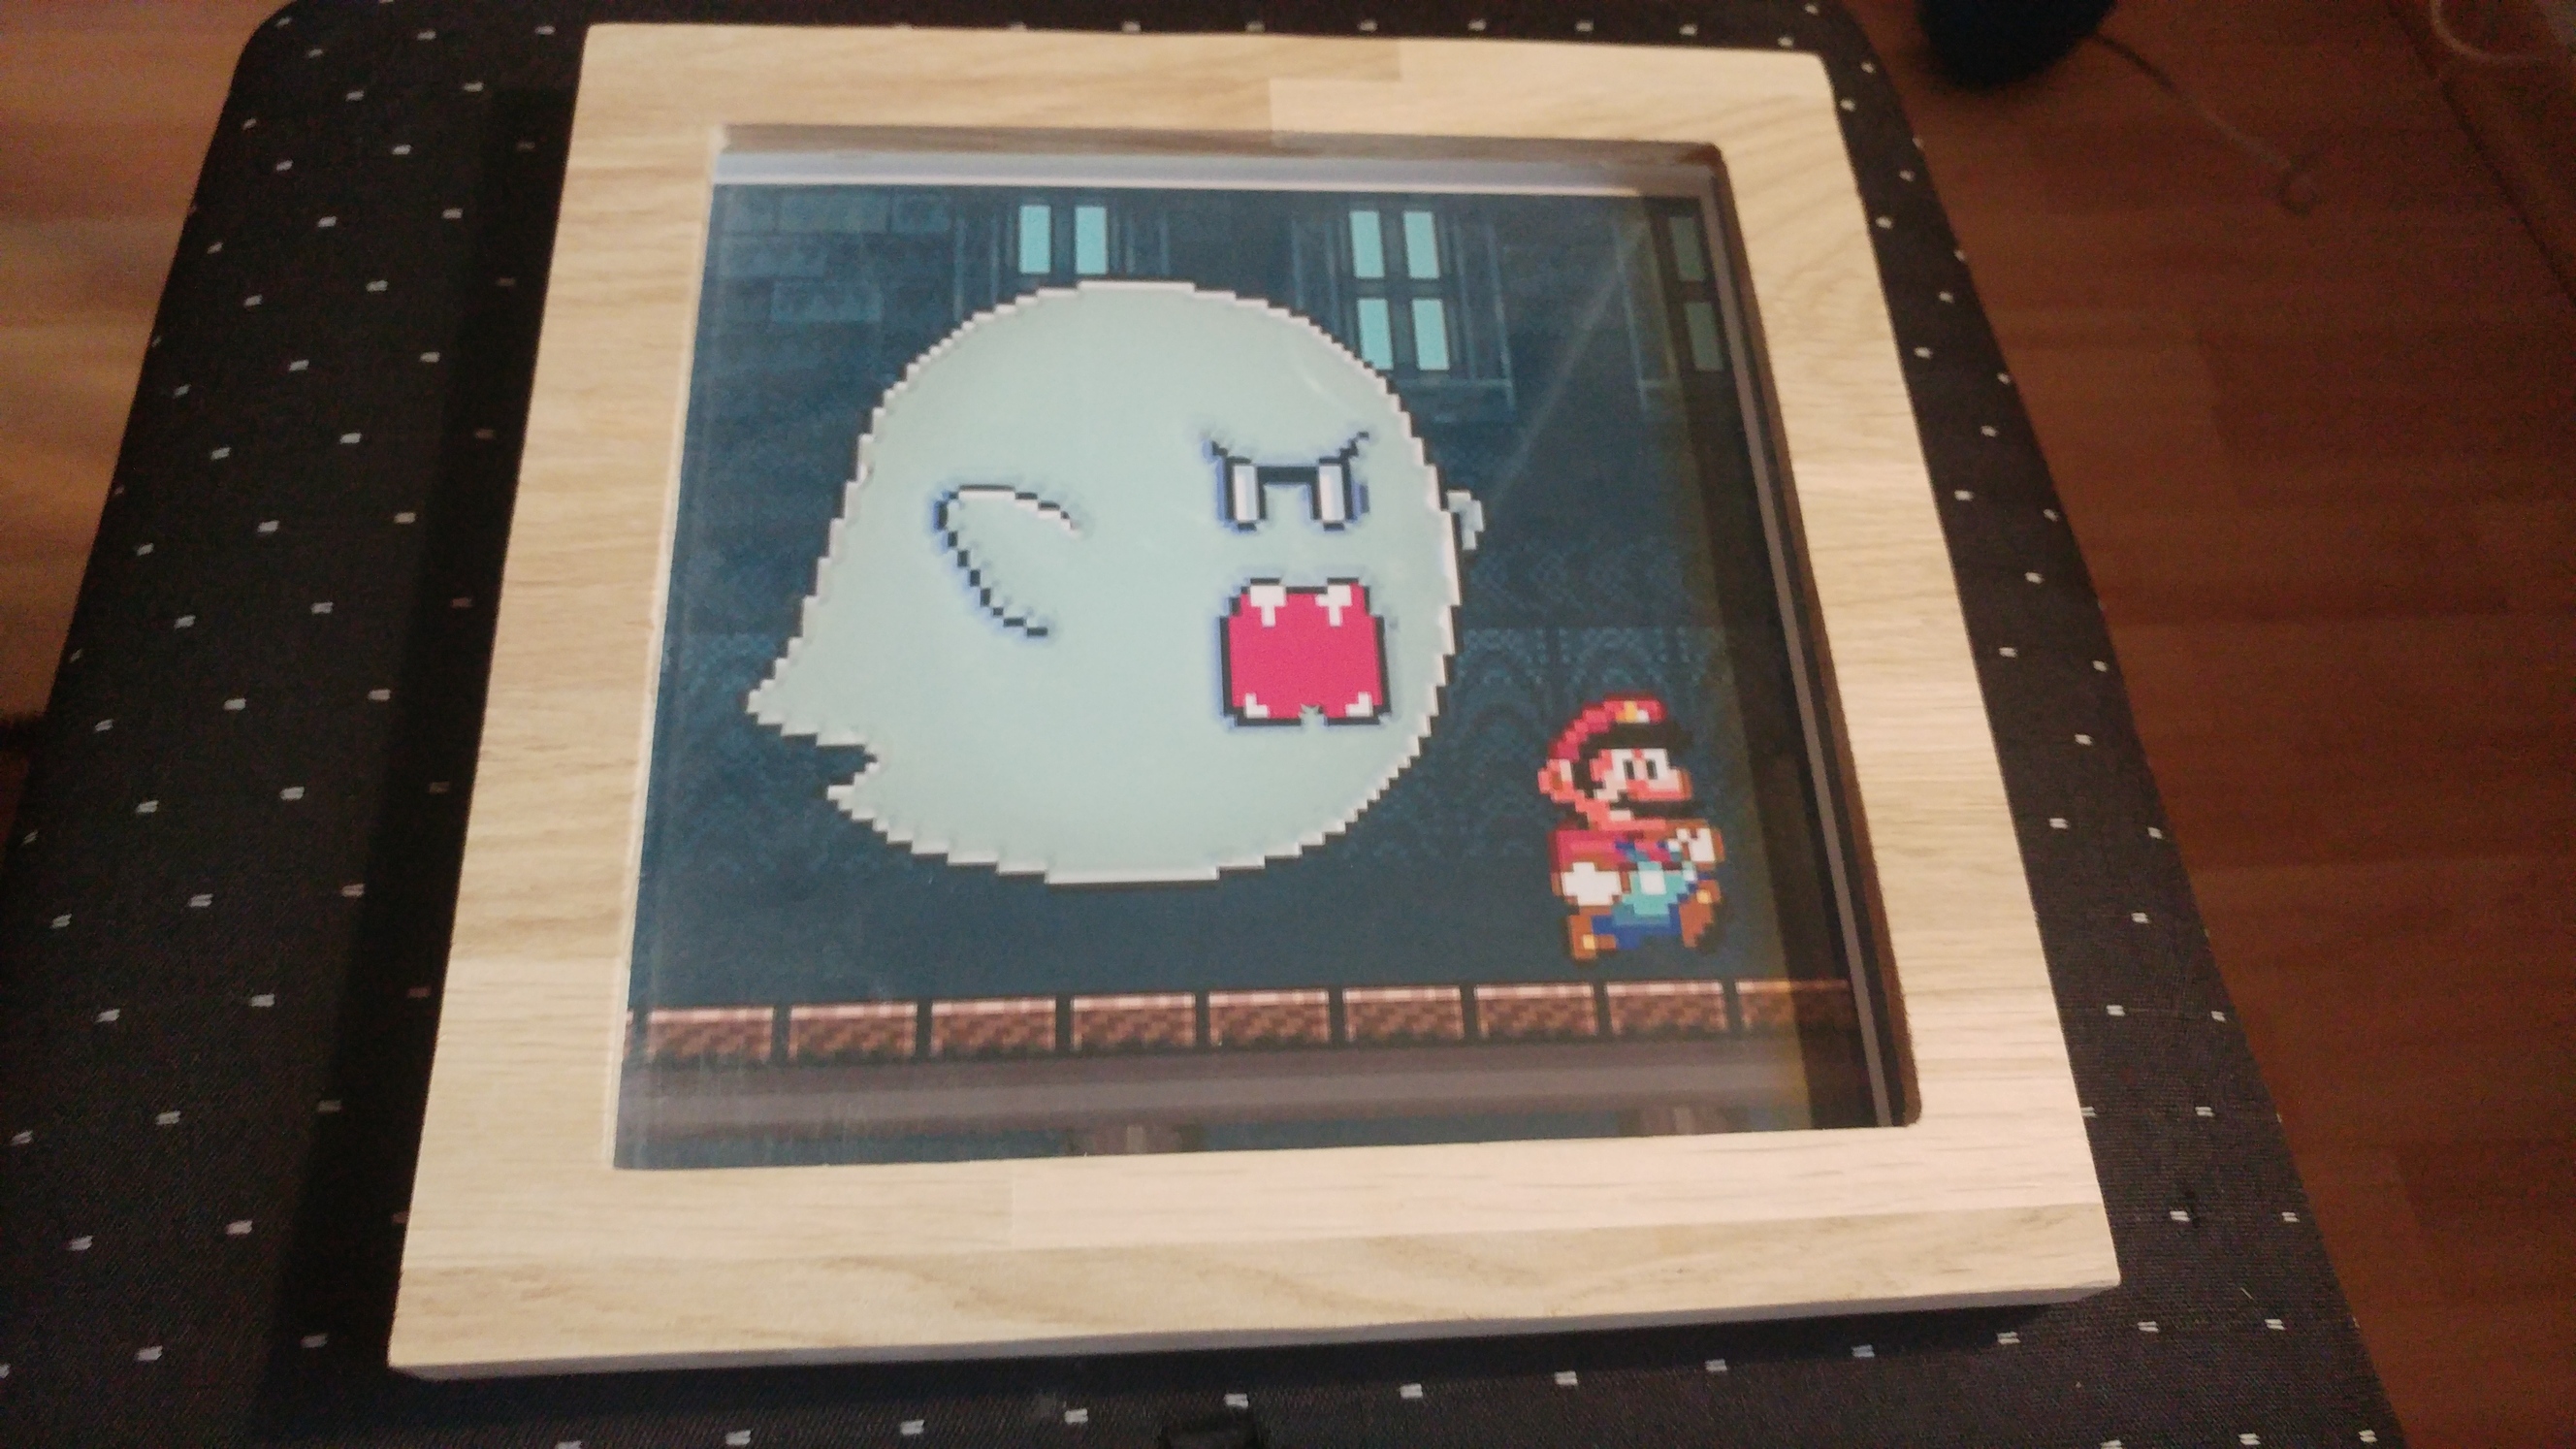
A frame will hold the epoxy Big Boo with a picture of Super Mario beneath:
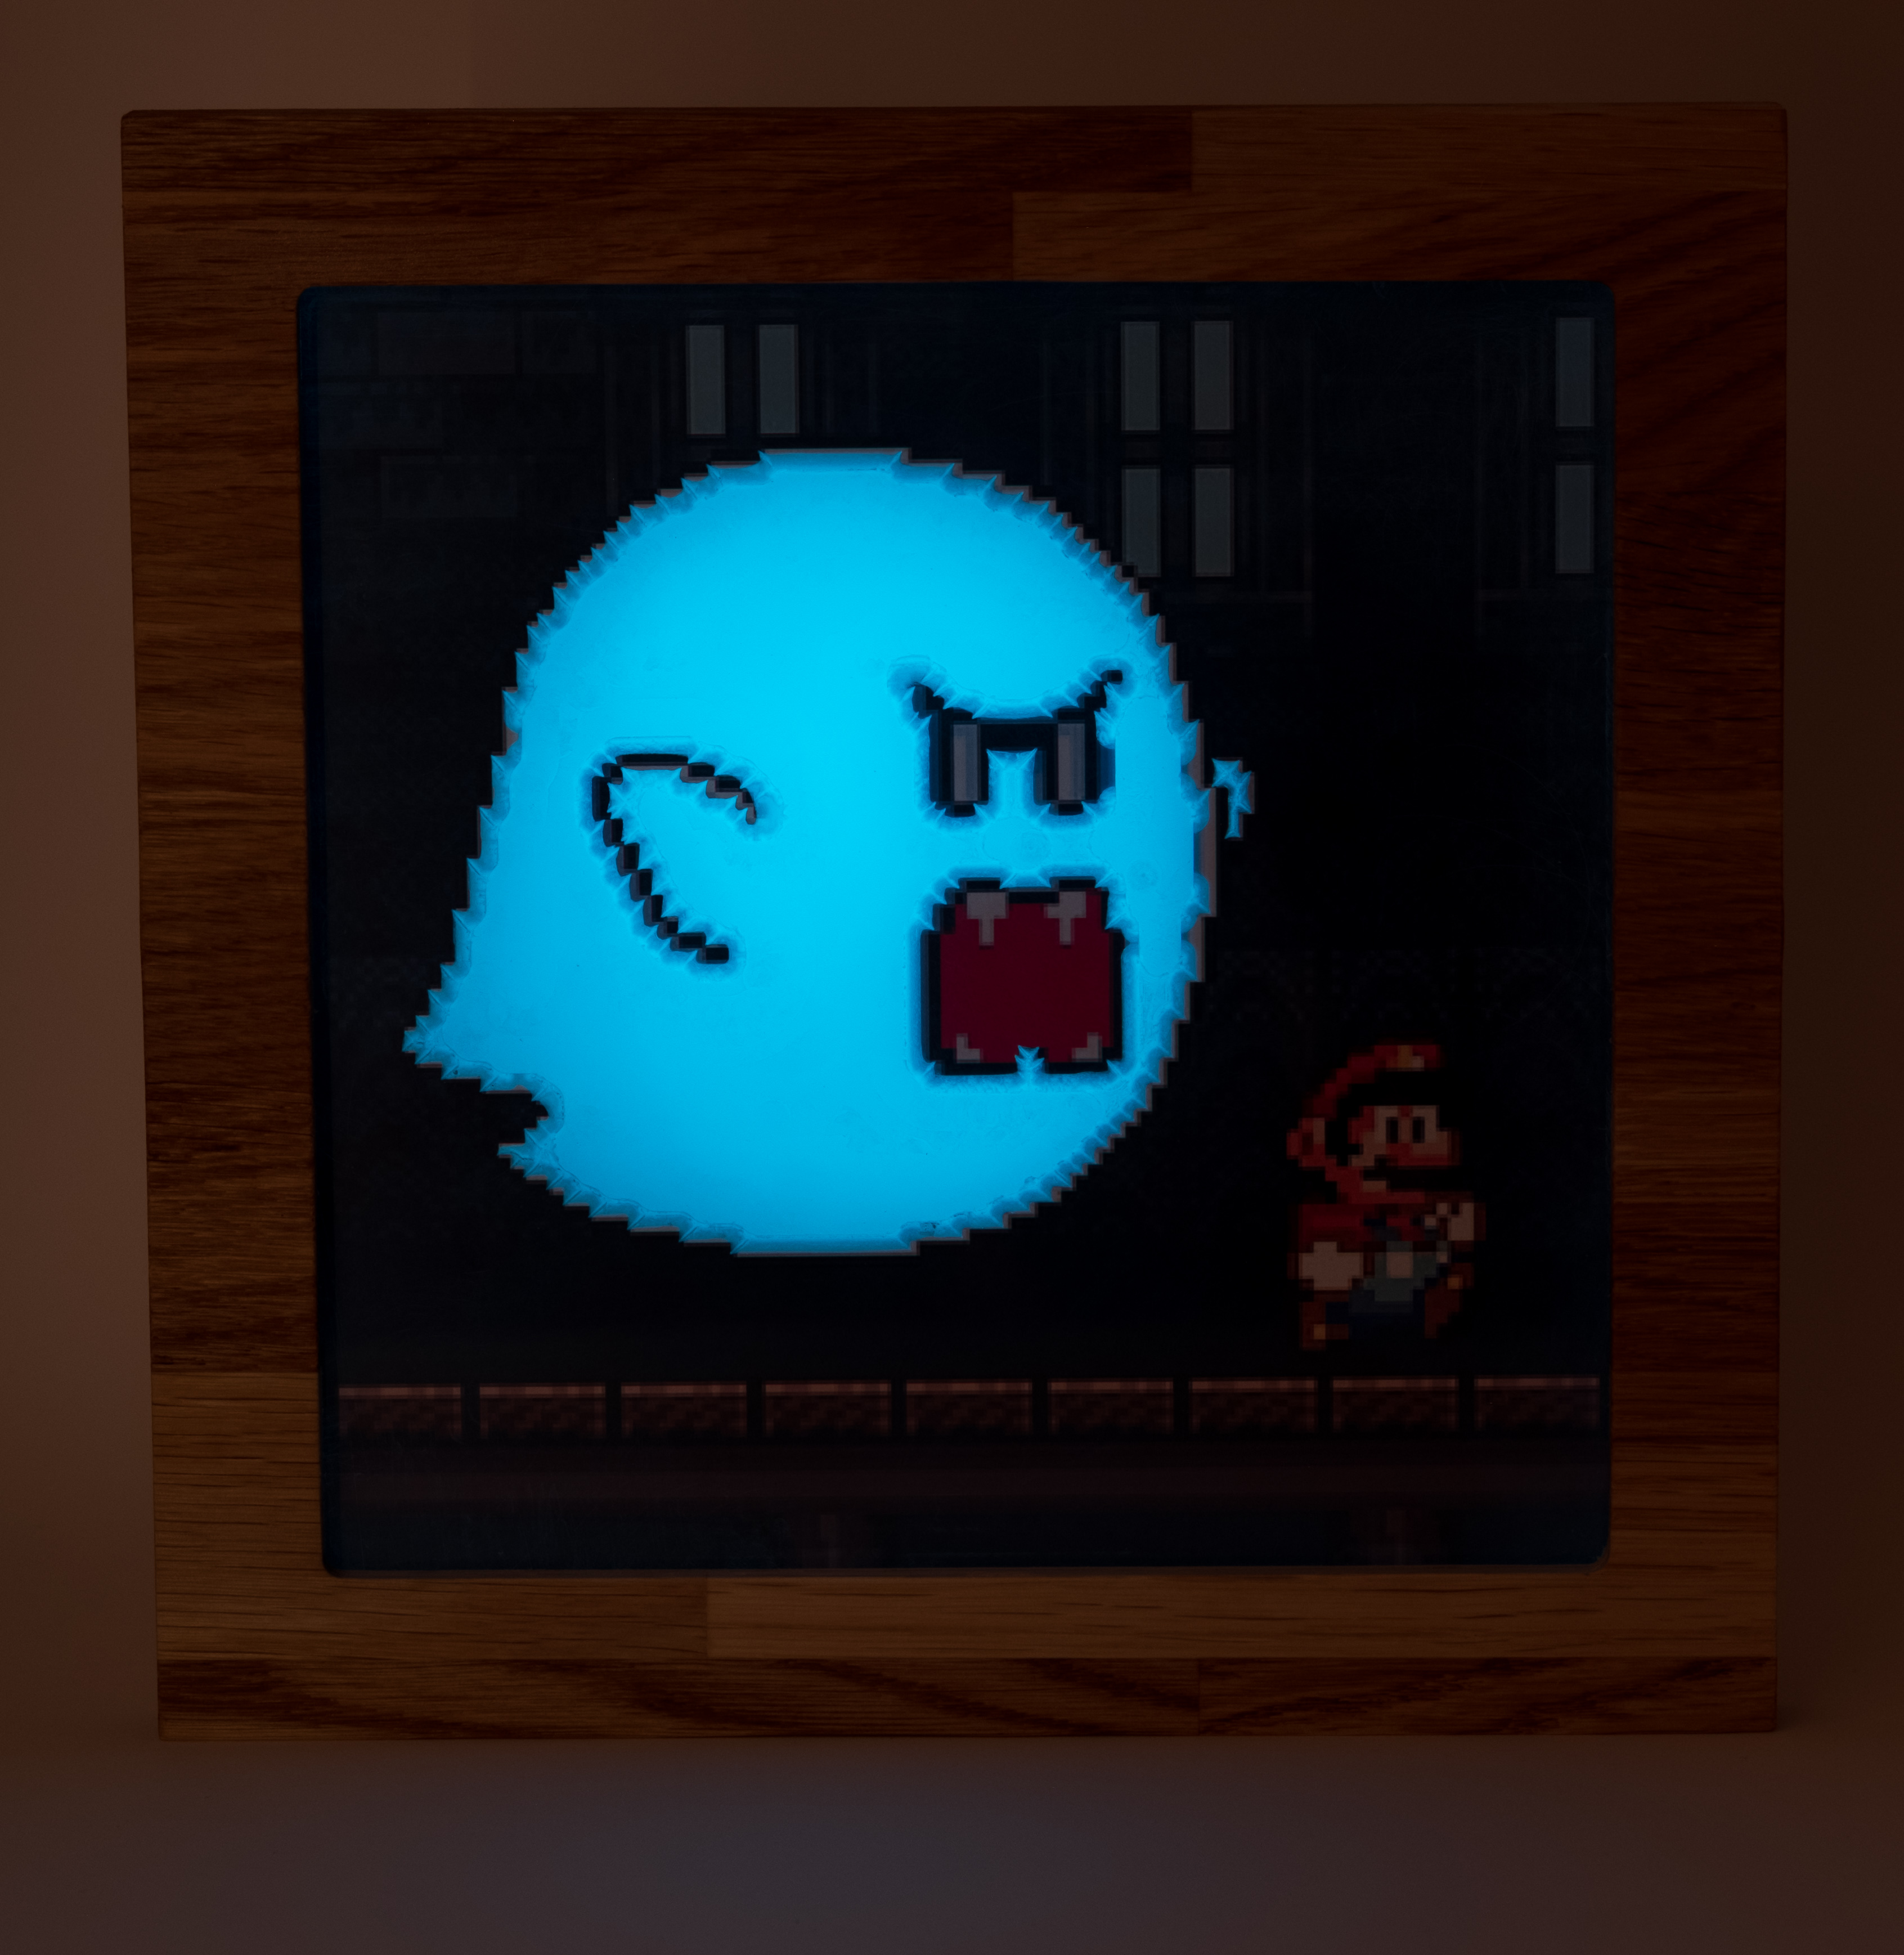
Unfortunately, the glow is not as strong as I hoped, so its hard to see both, the glow and Mario.
The next steps will be finishing the frame and putting everything fixed together.
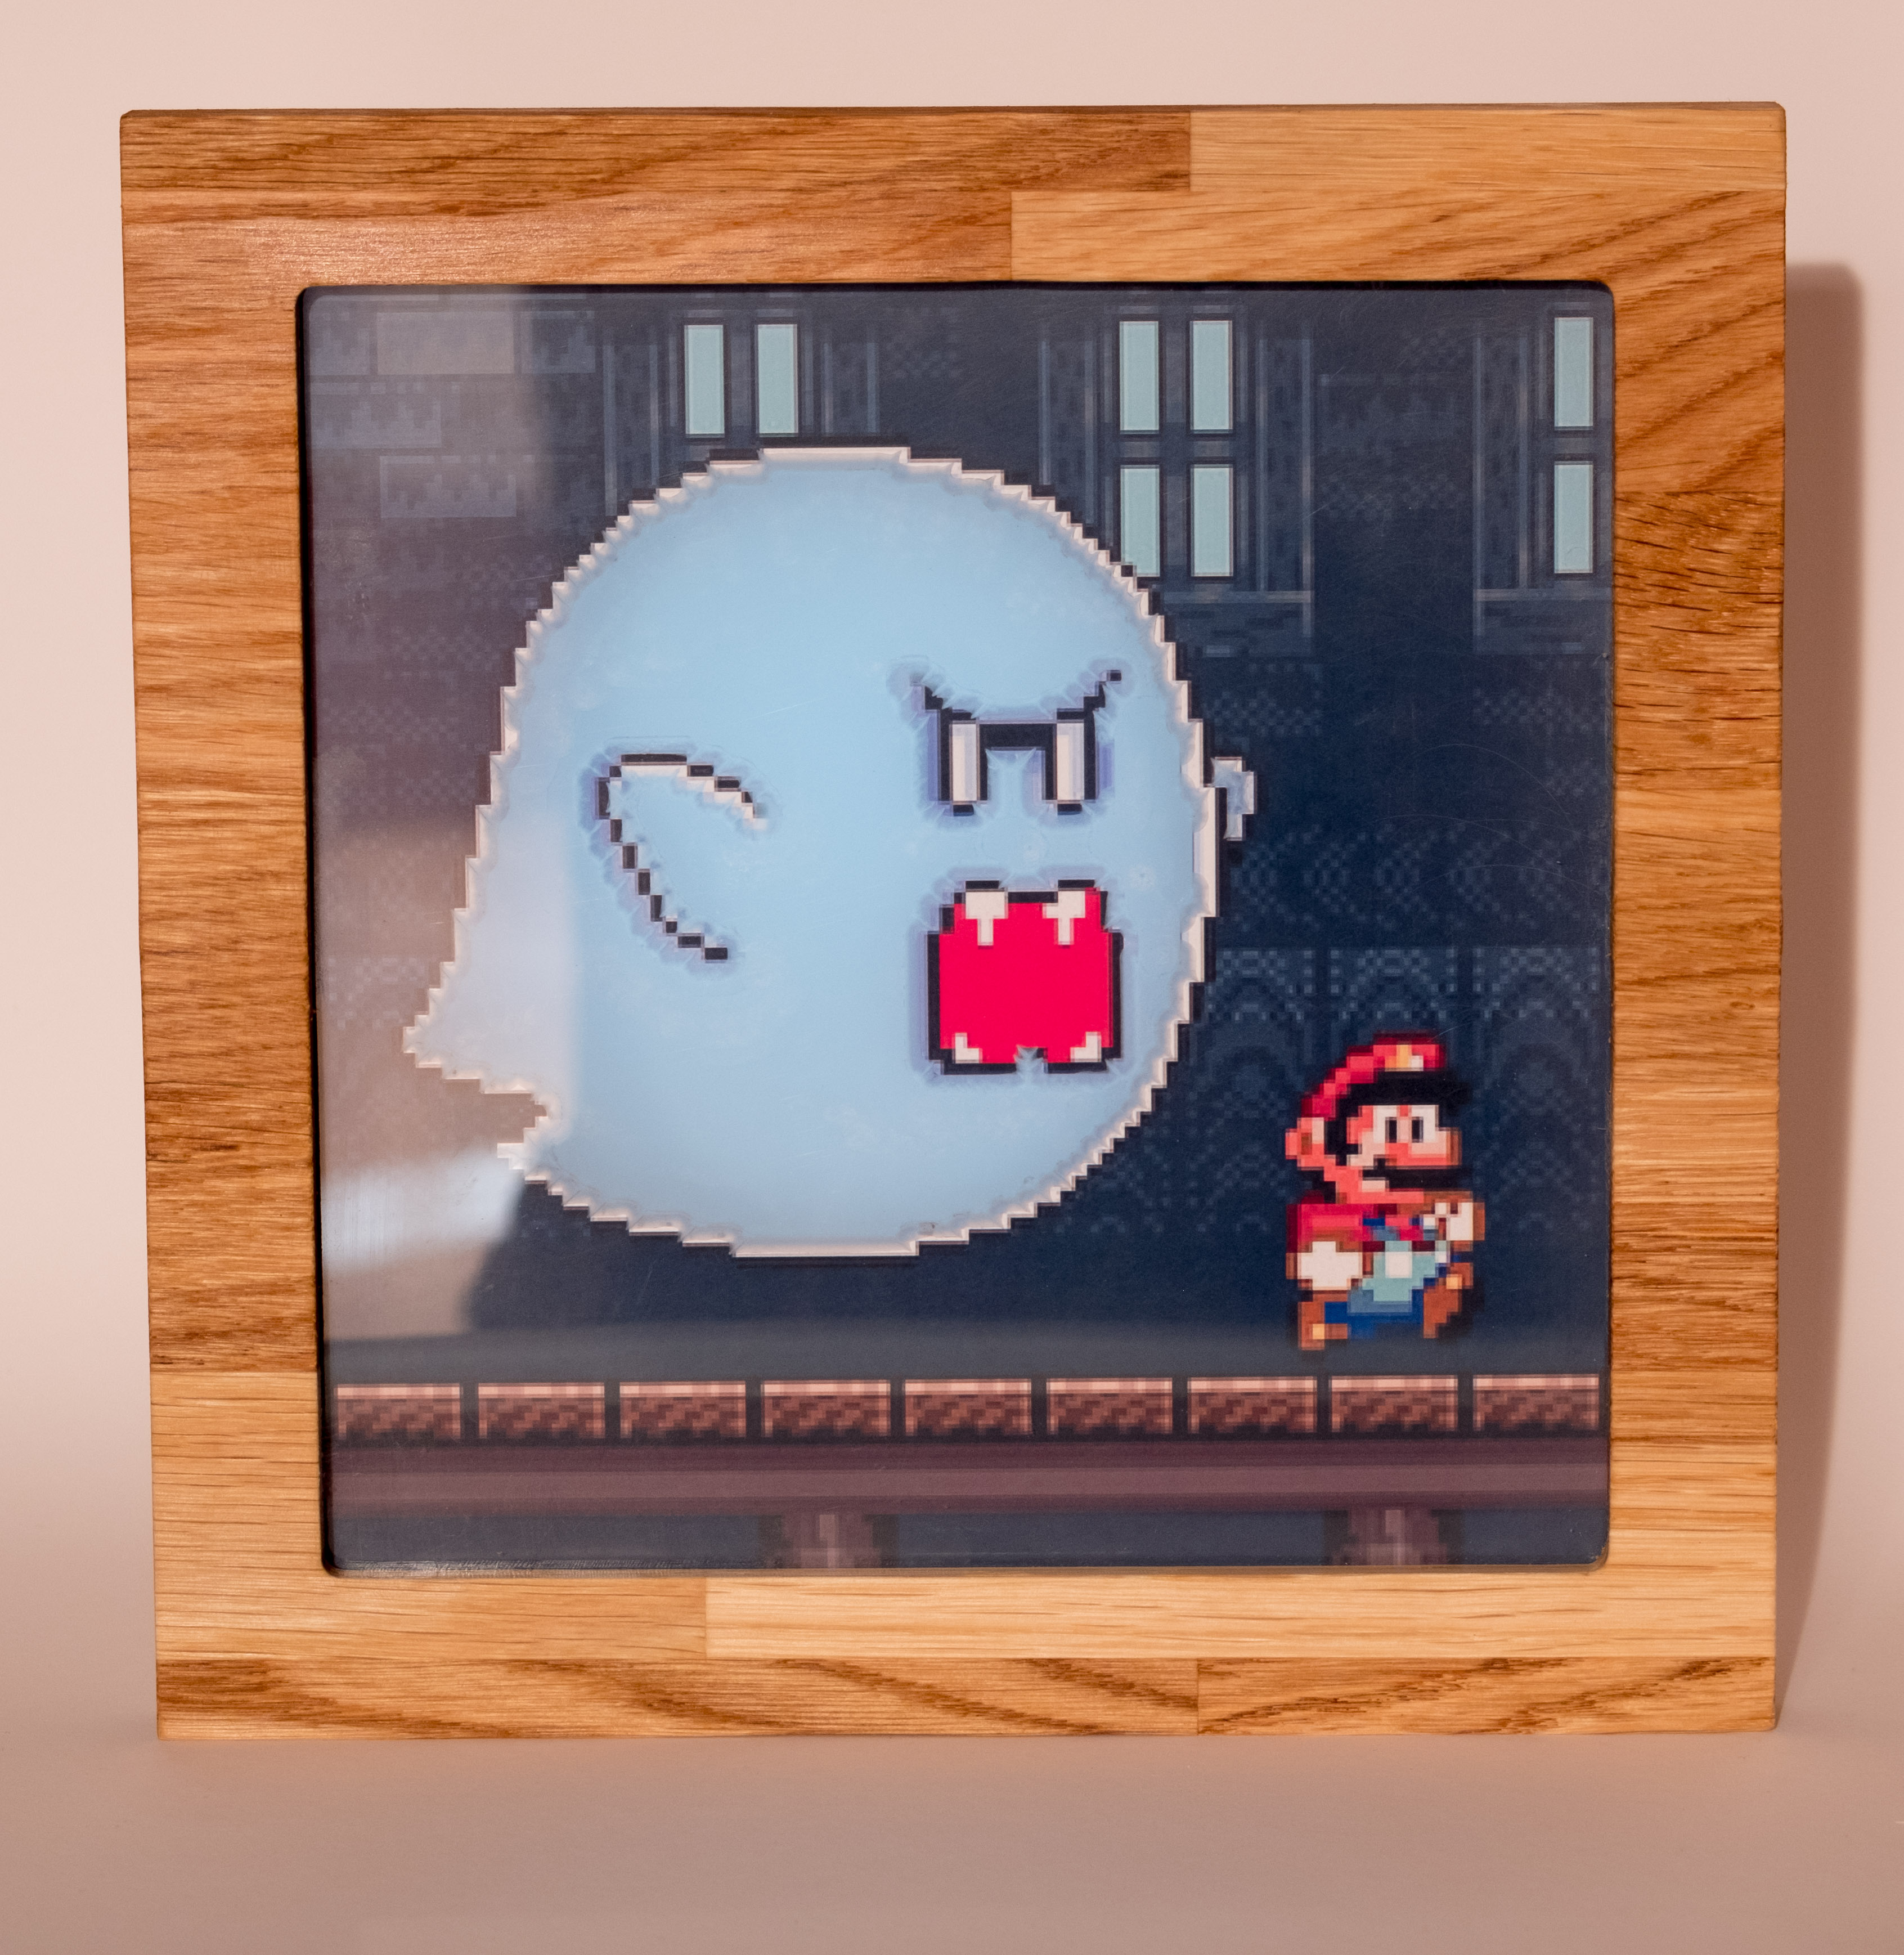
Finished the frame today. I was wondering what I might change to light the Mario a bit more, but I couldn’t come up with anything. A thin layer of glowing epoxy wouldn’t have changed much and rather spoiled the color of the image, I think.
So, a final image series:
And the files:
bigboo.c2d (3.8 MB) rahmen.c2d (19.1 KB)
and Cutrocket link: Glowing Big Boo by nlichtenberg
that chipguard I posted above was cut from acrylic of unknown origin, but was protected by a transparent film layer, so was likely extruded acrylic, and still machined well. Don’t overthink it, ignorance is bliss
Winston covered wrong acrylic on the infinity mirror video
to be honest it is hit and miss, first time i was able to simply pull it off - the second time doing the same thing snapped the mill  the third time i tired pliers - dont’t do it… snap! so i woudl just try to use a bit of heat mabey
If you’re looking for some Acetone to soften up the melted acrylic then it’s worth checking any nearby bottles of nail polish remover…
Hi it was not melted acrylic, sorry if it was not clear it was 3m double sided tape the residue it leaves behind after I stuck down the sheet
Goo Gone will do the trick.
Ah, that stuff really is horrible, I use label clene or this from Servisol.
They are that citrus fruit based lemony solvent.
You might want to try the painters tape and superglue trick for less sticky goop too.
@Sherpa: EPIC post…I have some reading to do now
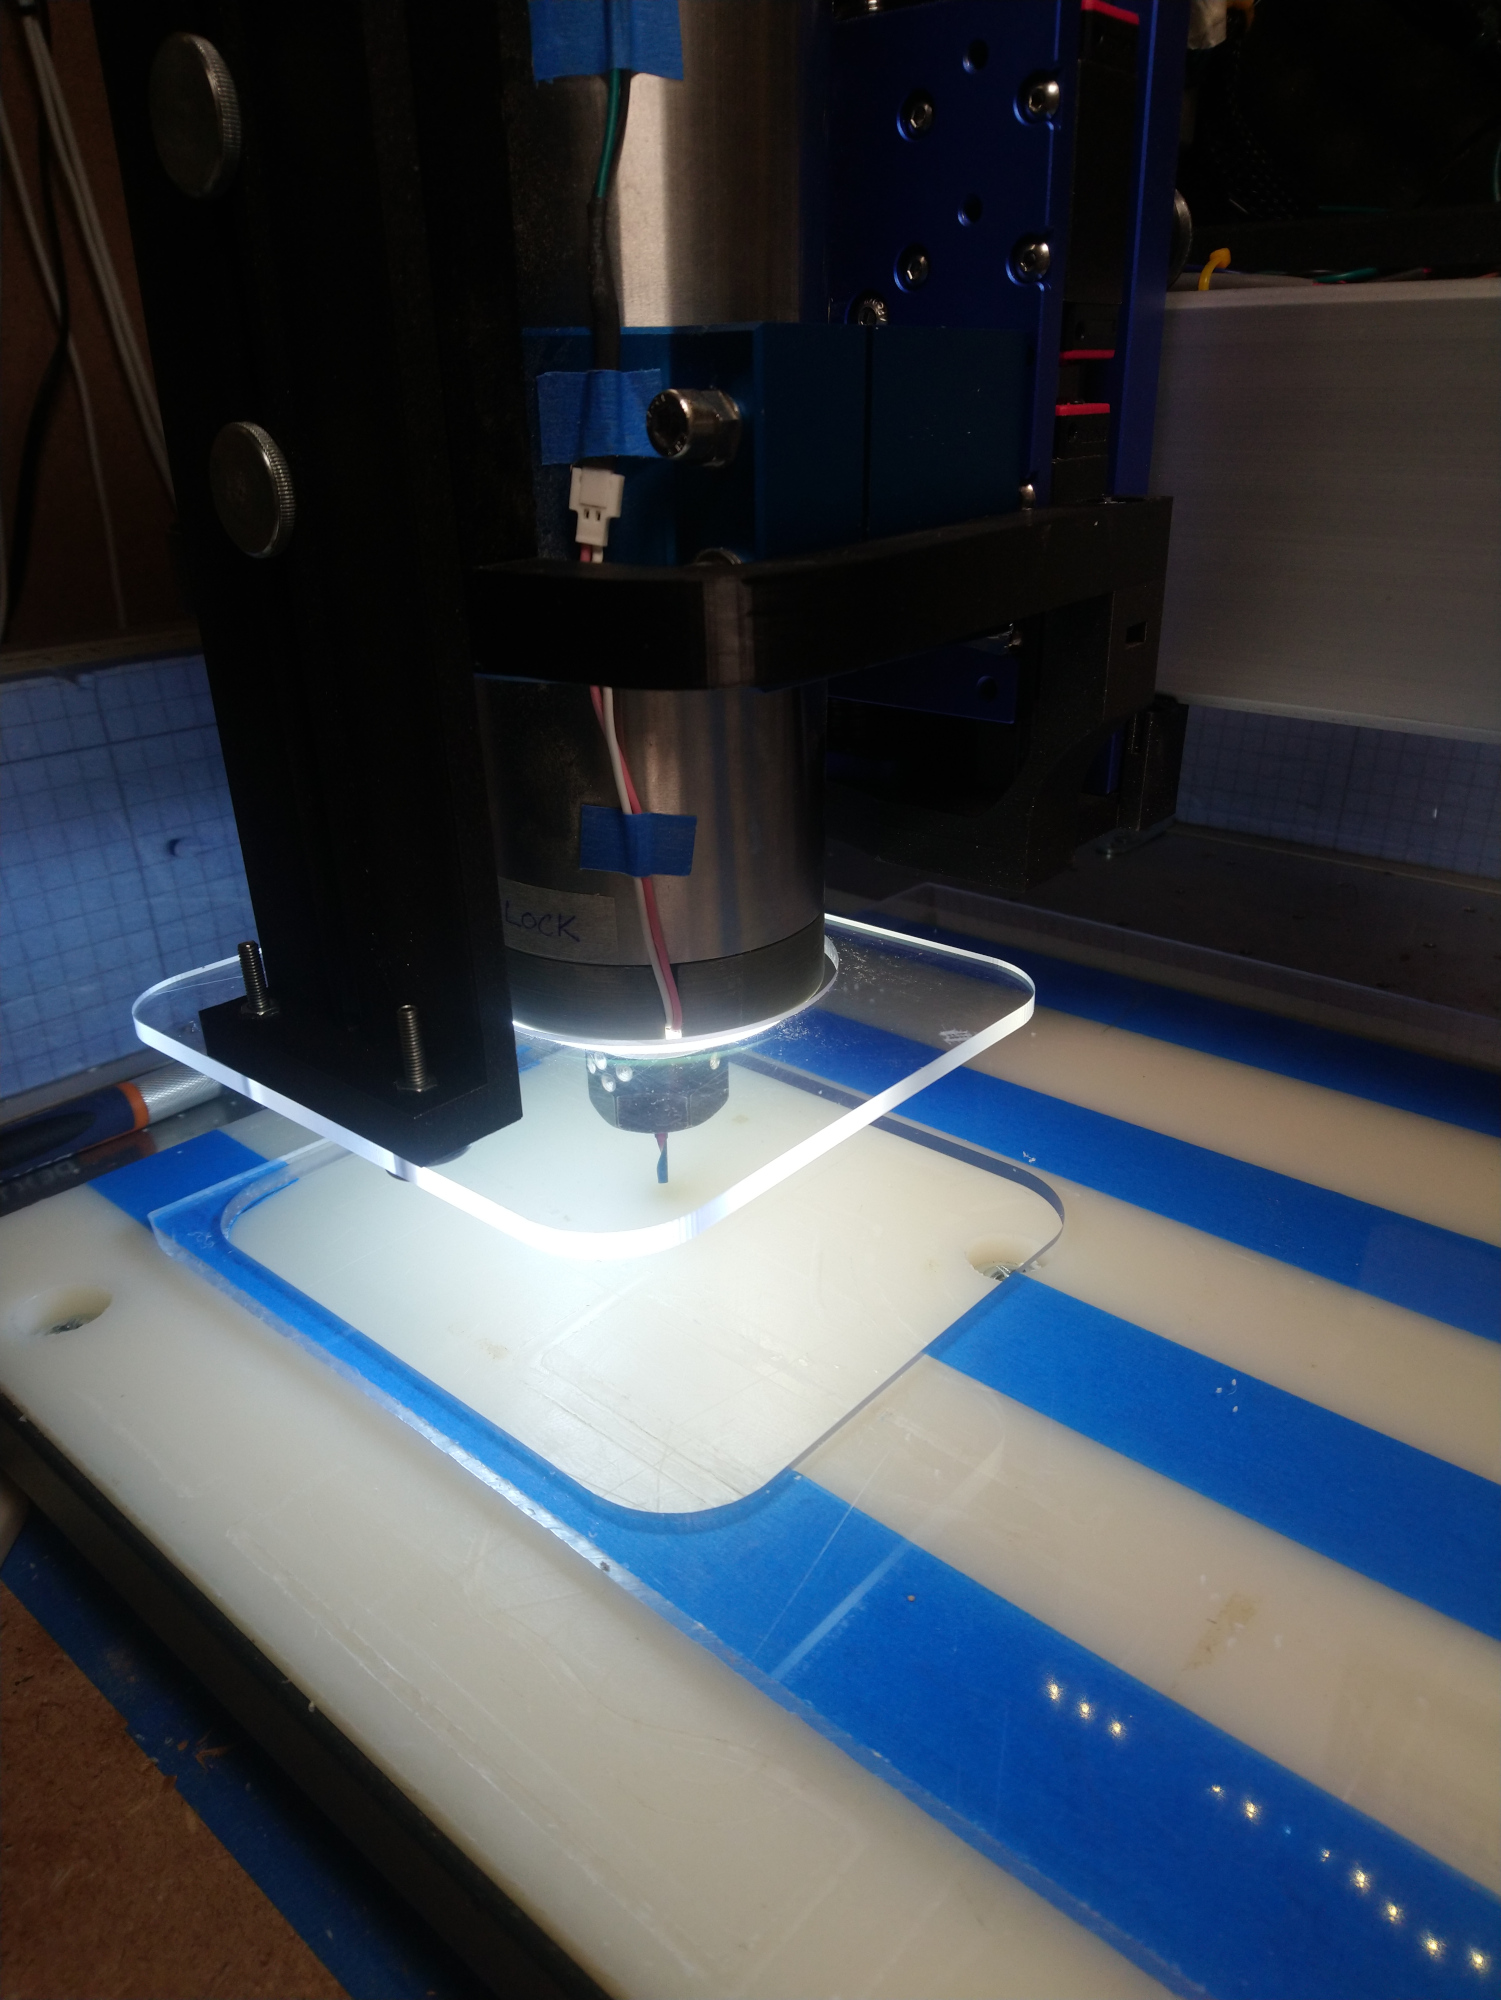
In other news, my acrylic chipguard did not fit (v1 never does, sigh), so I made a second one (gotta love parametric modelling, updating one dimension value and having a new piece ready to cut in less than 2 minutes). What I had not anticipated at all, is the interaction between this chipguard and my spindle ring light, so I unintentionnally made a backlit chipguard!
Ok, I’ll stop hijacking the challenge thread now. Maybe.
How can you hijack the thread when you started it? 
“Let’s rush one more test before going to bed, 10 minutes should be plenty enough”
“Oh, and let’s forget to double-check that toolpath, and leave a lead-out at full depth, that will spice things up”
sigh…rust in piece, little Amana. You will be missed.
@nlichtenberg, great finished piece! I must admit I initially wondered what the deal was with all those jagged edges, but that retro 8-bit pixel look is fantastic!
EDIT: don’t forget the CutRocket bonus
I don’t get how the forum works when an existing post is edited, I don’t see it as a new post, so I missed your latest update before. Glad I went back and checked!
You can add more edge-lit LED light on the two corners where Mario is. Wouldn’t take much.
Thanks! And right, the cutrocket upload!
I think I also missed the edit made by @Sherpa even though I put a like on the post. Maybe the admins can change that notification behavior?
True, but then I would have to add LED in the first place. Currently all the light comes from the luminescent color in the epoxy: no need for a power source.
Well, how’s that working with Mario? Just sayin’. ![]()