So first a brief history to give some context. My mum’s family used to wrap each other Christmas presents in such a way as to make it difficult/annoying to open. For example, imagine wrapping a pencil, as the gift, in a small box, then wrapping that with some plastic to waterproof it. Finally, pour cement around that to encase in an approximately 18”x12”12” block of concrete. This was their way of entertainment.
Once I heard these stories, I couldn’t help myself, so I ended up “wrapping” my, at the time, girlfriends presents in such manners as to make it difficult for her but entertaining for everyone else to watch. This went on for a few years until she asked for me to make them more like a puzzle as opposed to need brute strength and power tools to open. So now every year I need to come up with a puzzle/riddle/maze or some combination thereof to wrap my wife’s Christmas present. Needless to say this was definitely one of the reason for getting a Shapeoko in June.
Now that the history of why I do this is there, now lets talk about the project itself. For me, there are several firsts involved in making this.
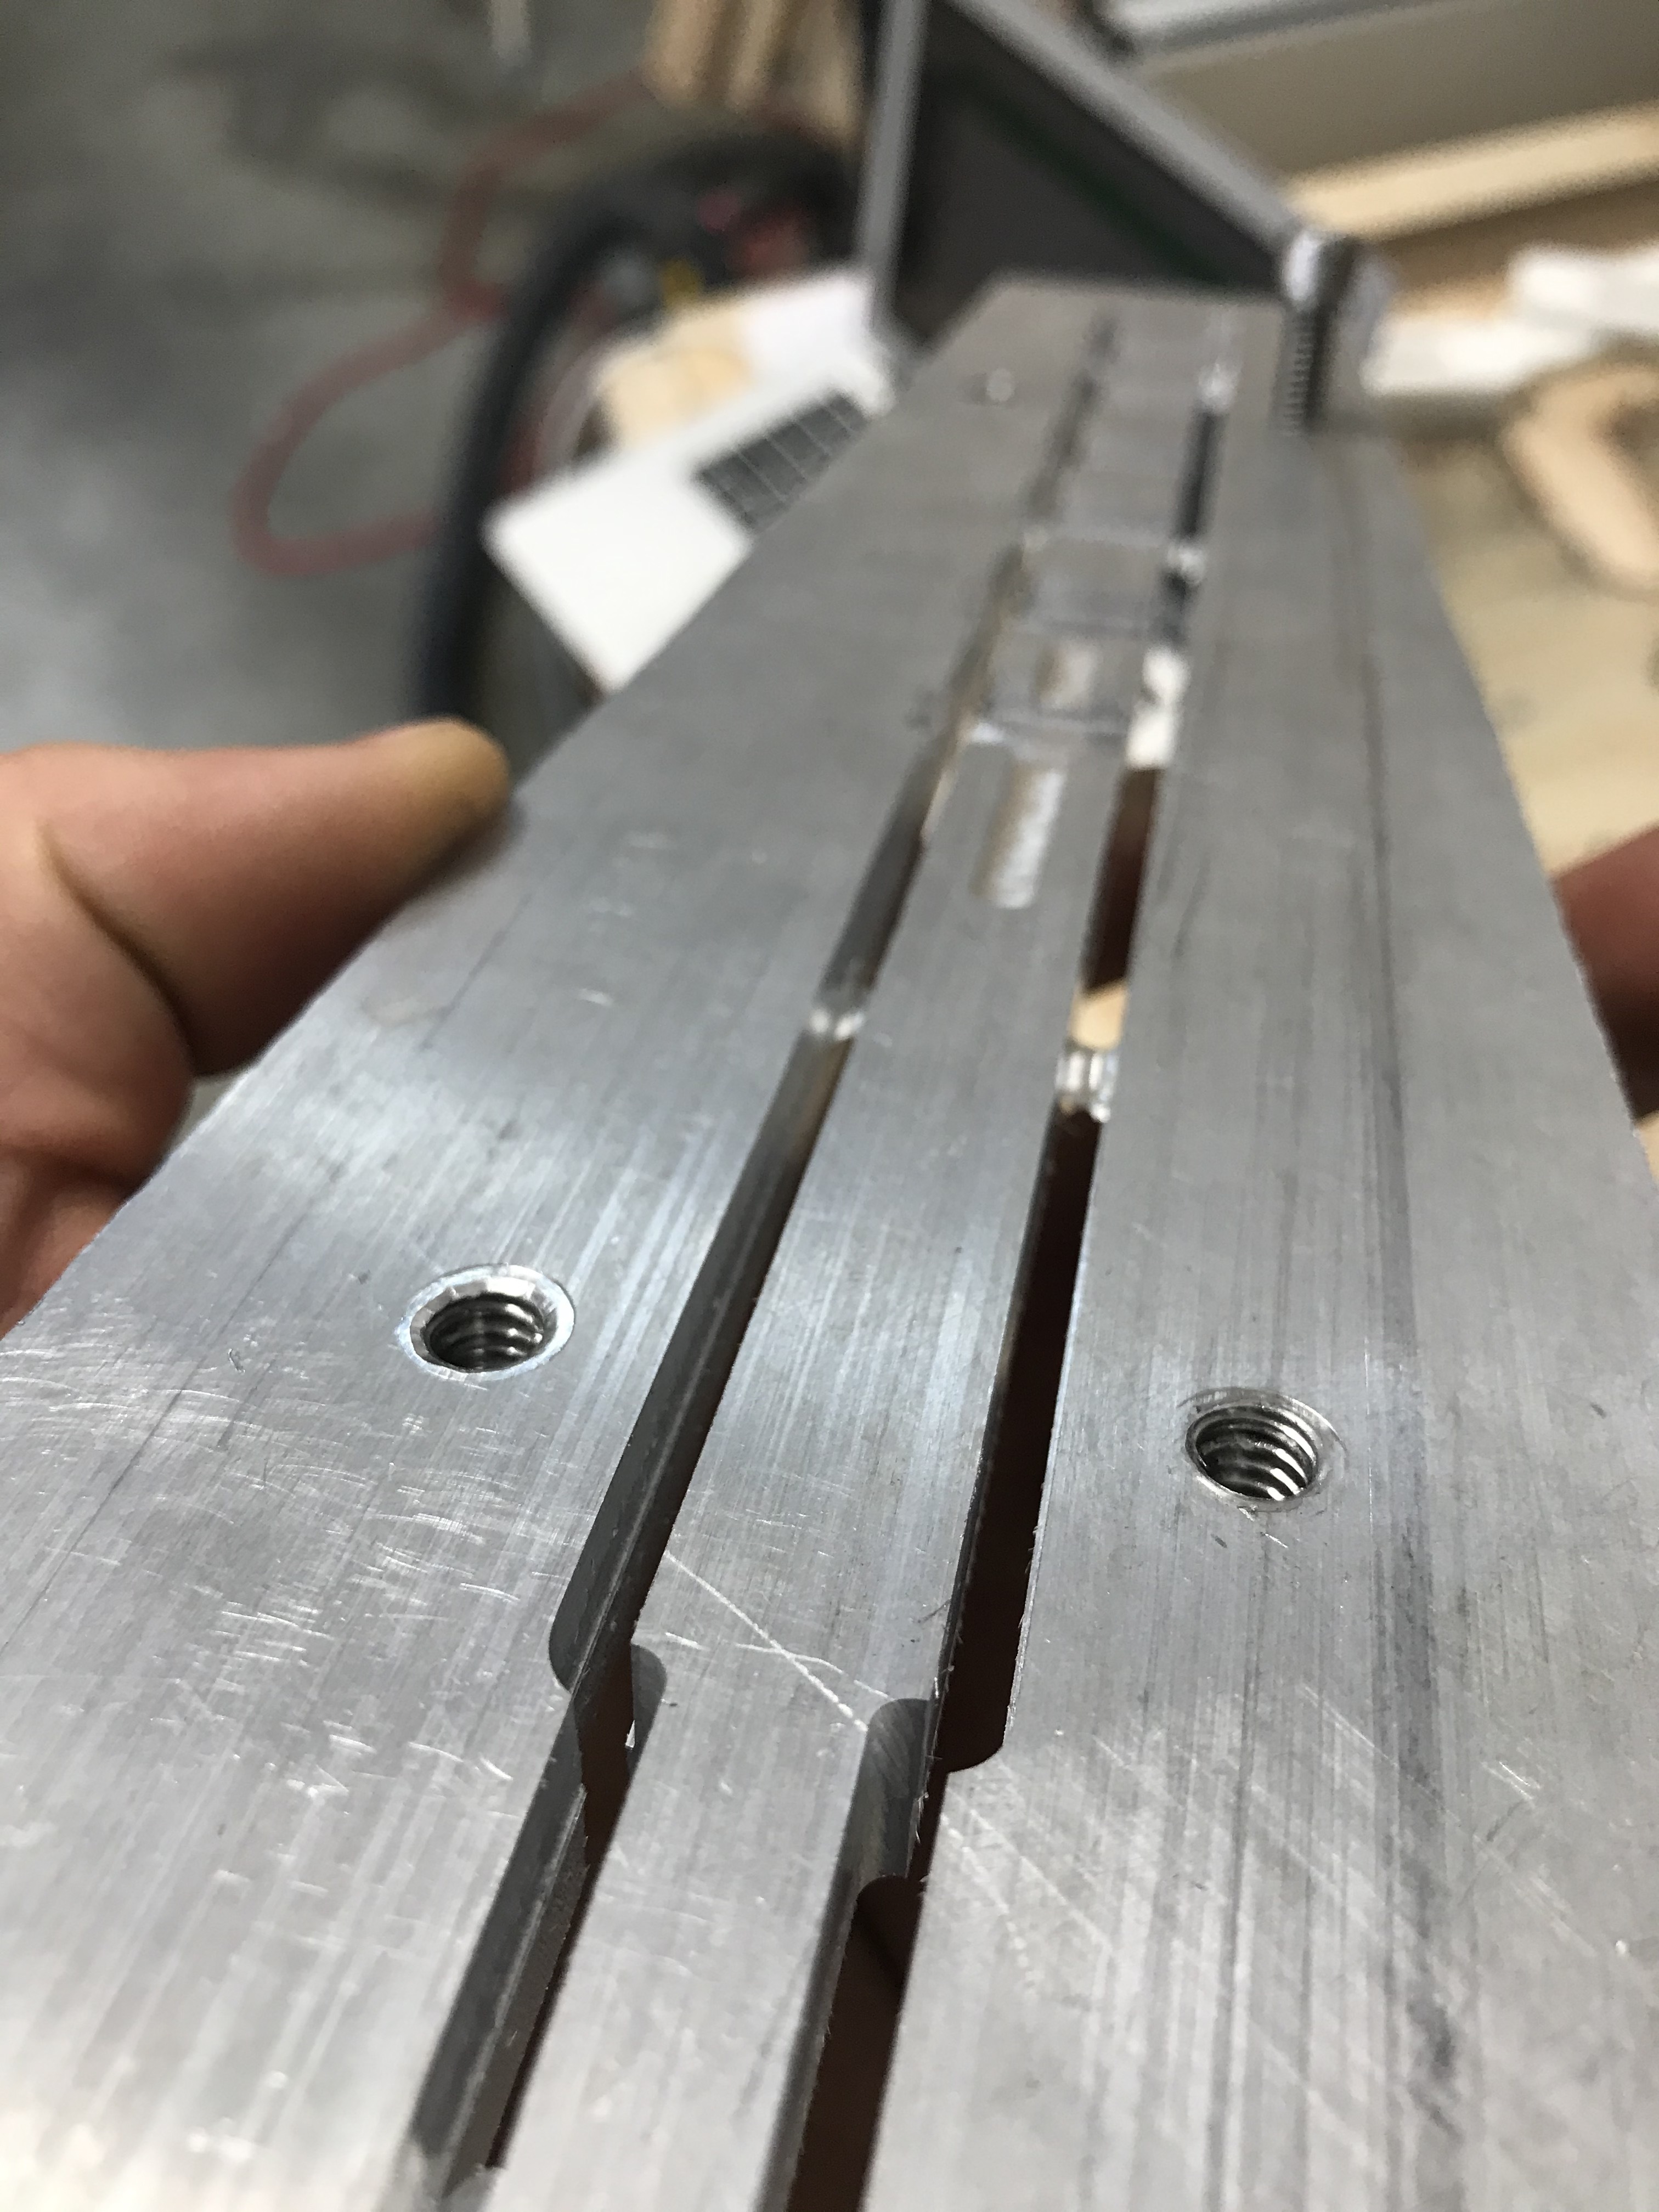
-Machining metal on the Shapeoko, Thanks Winston/Carbide for the great S&F videos
-Designing parametrically in Fusion 360, at least initially, the design got a little messy towards the end after a few modifications to how parts interact
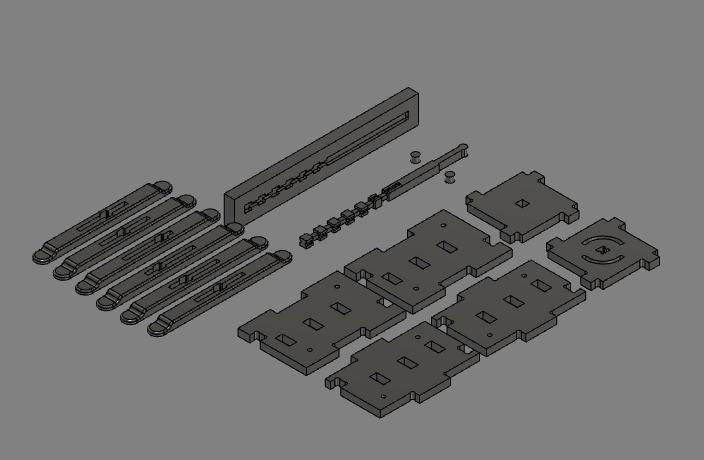
-Making an assembly with joints in Fusion 360, have only done individual parts or static assemblies before
-Finally, first time posting on this forum, been creeping a while though. And hopefully I can figure out how to post on cutrocket too . I think I got the fusion files posted to CutRocket
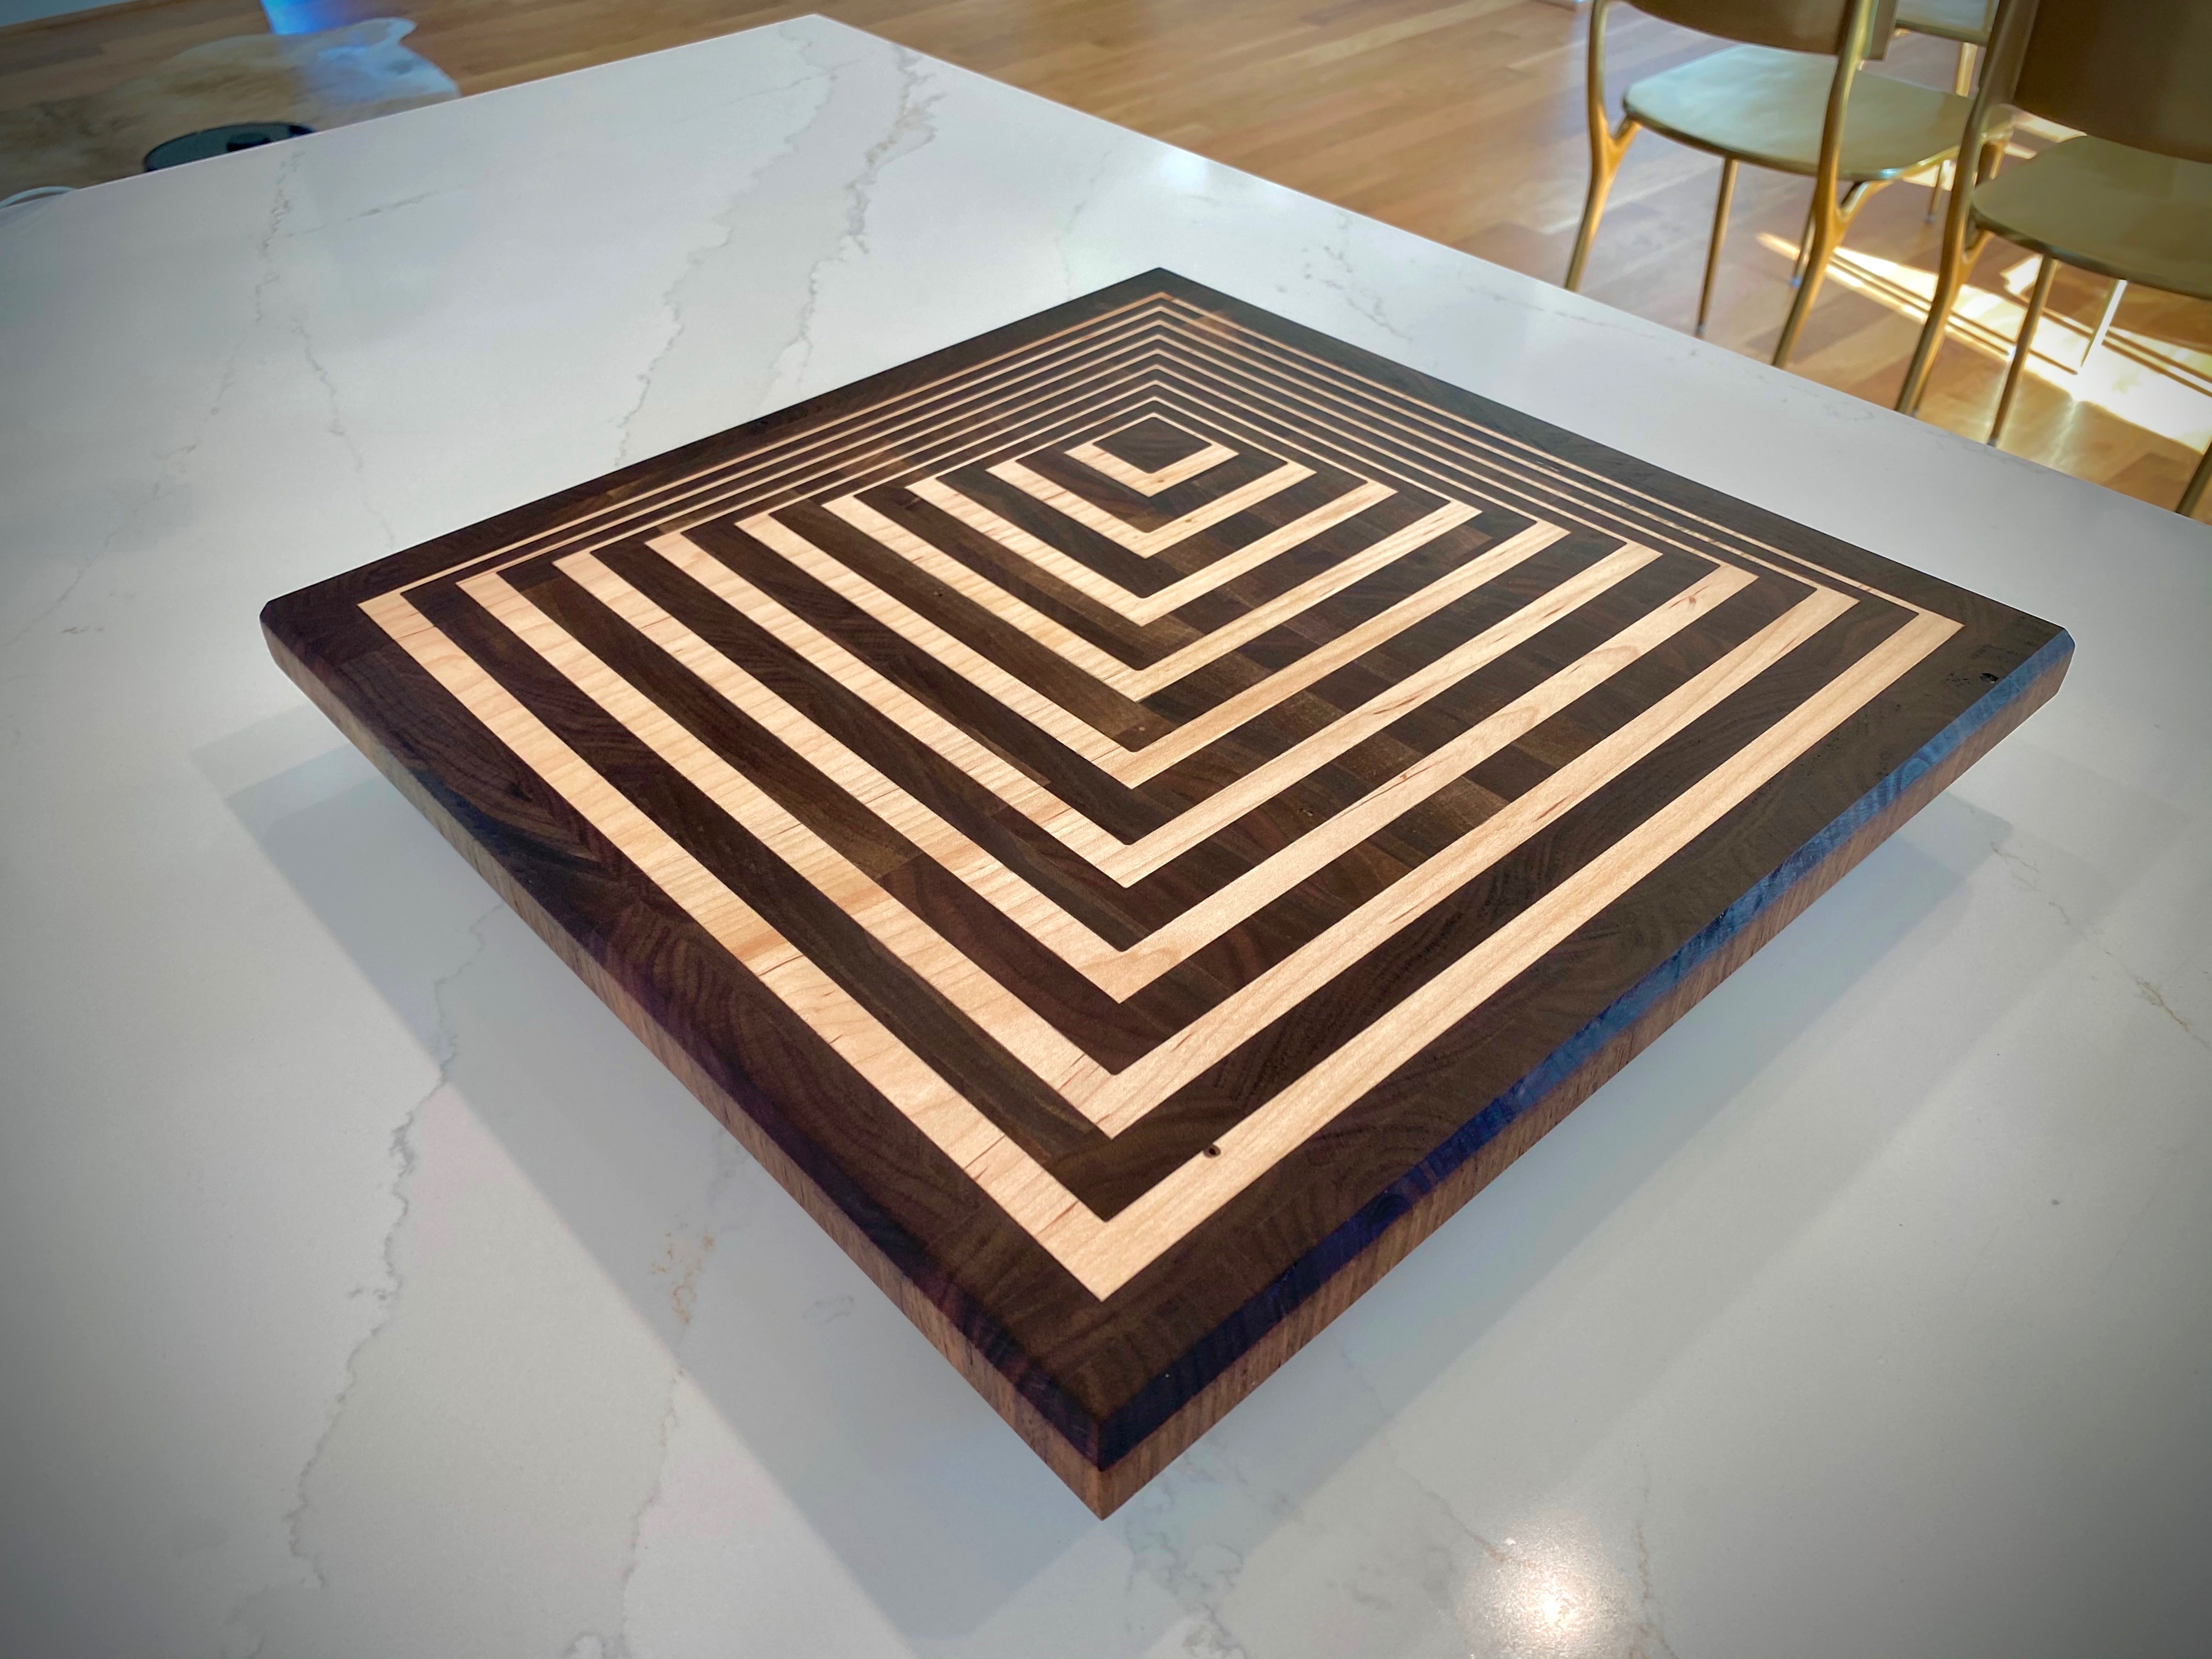
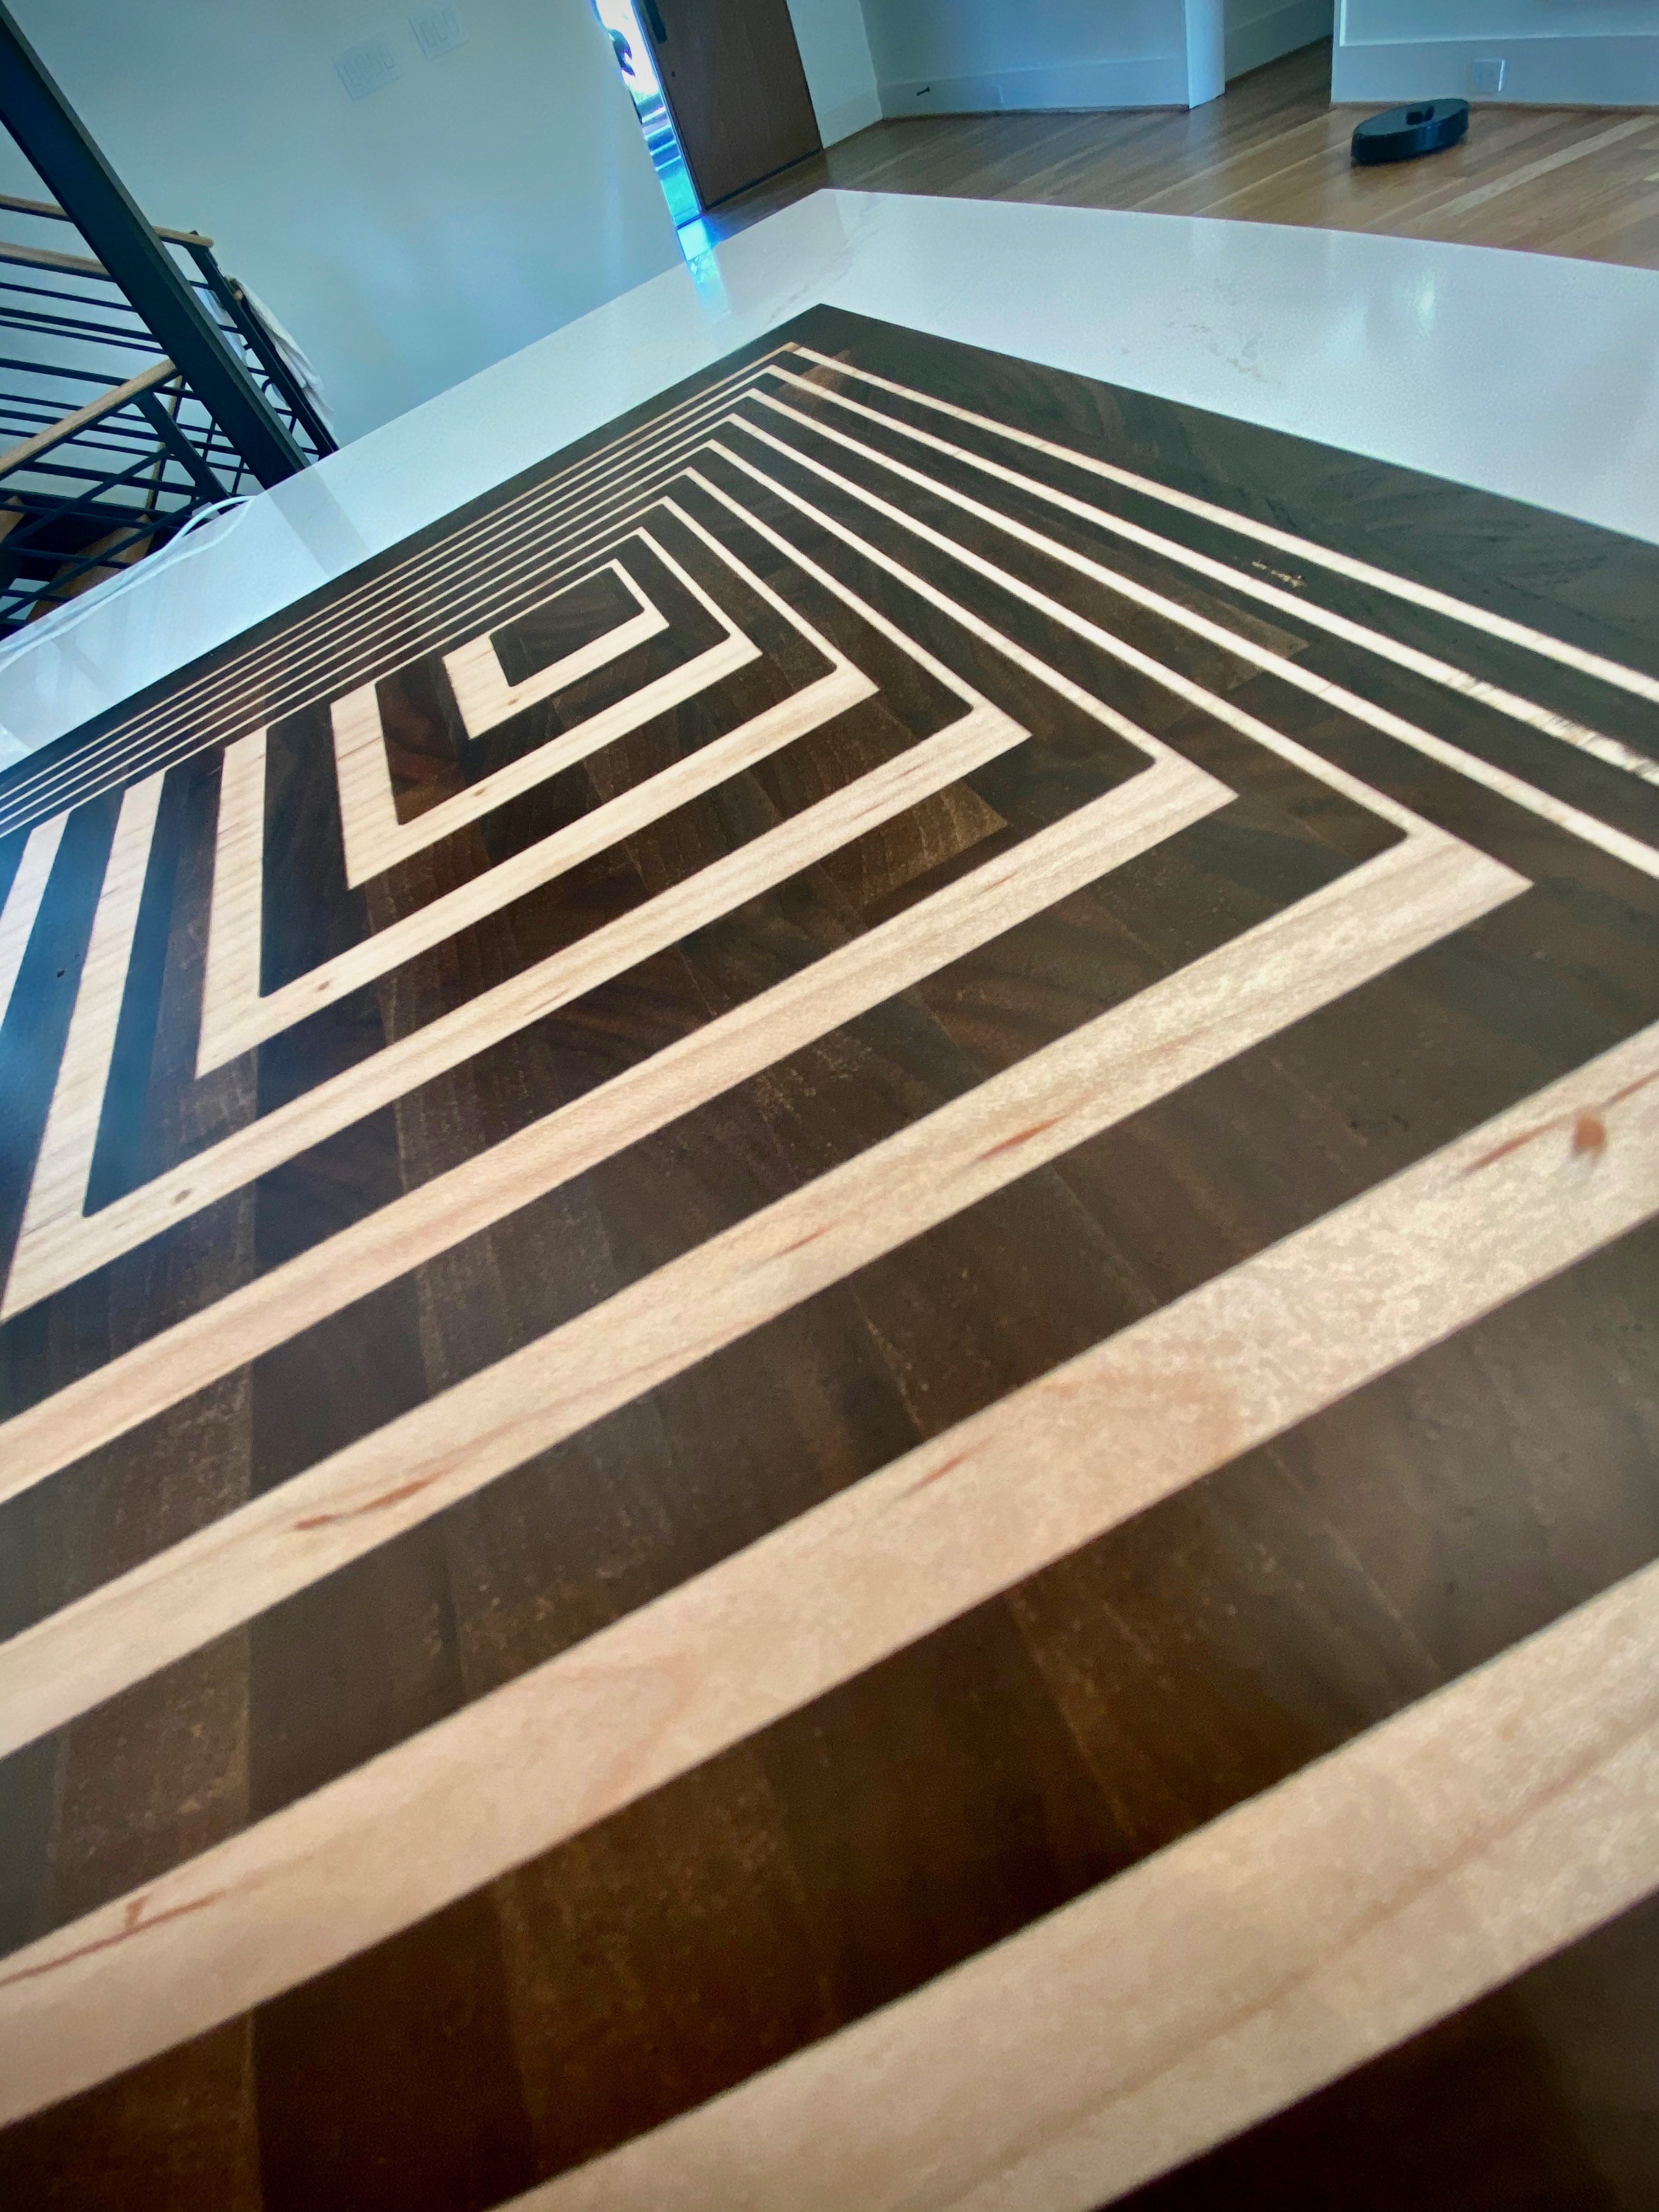
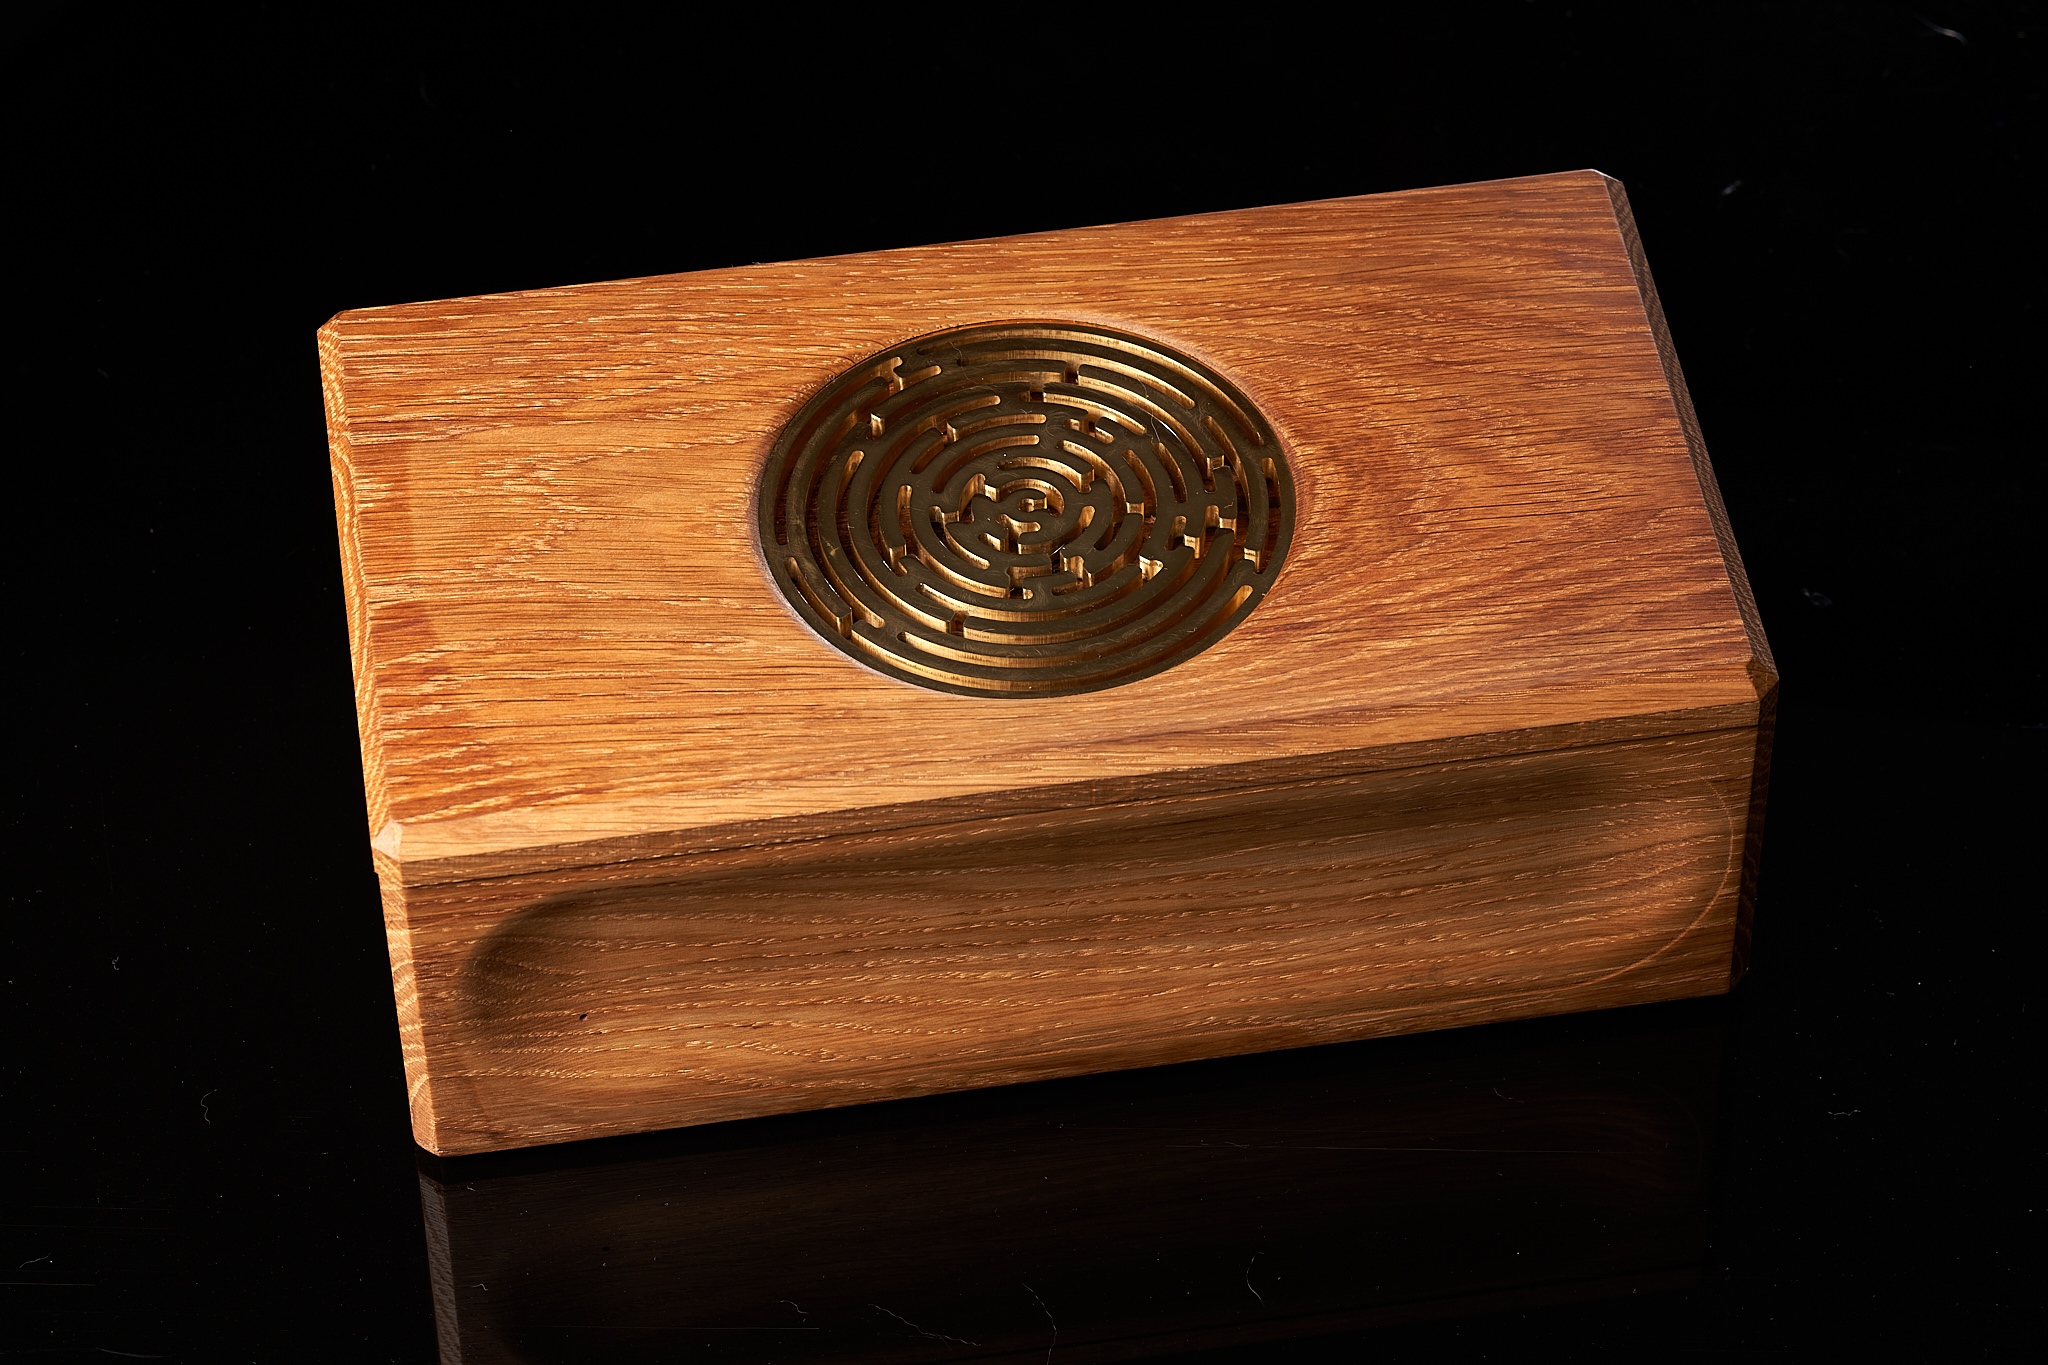
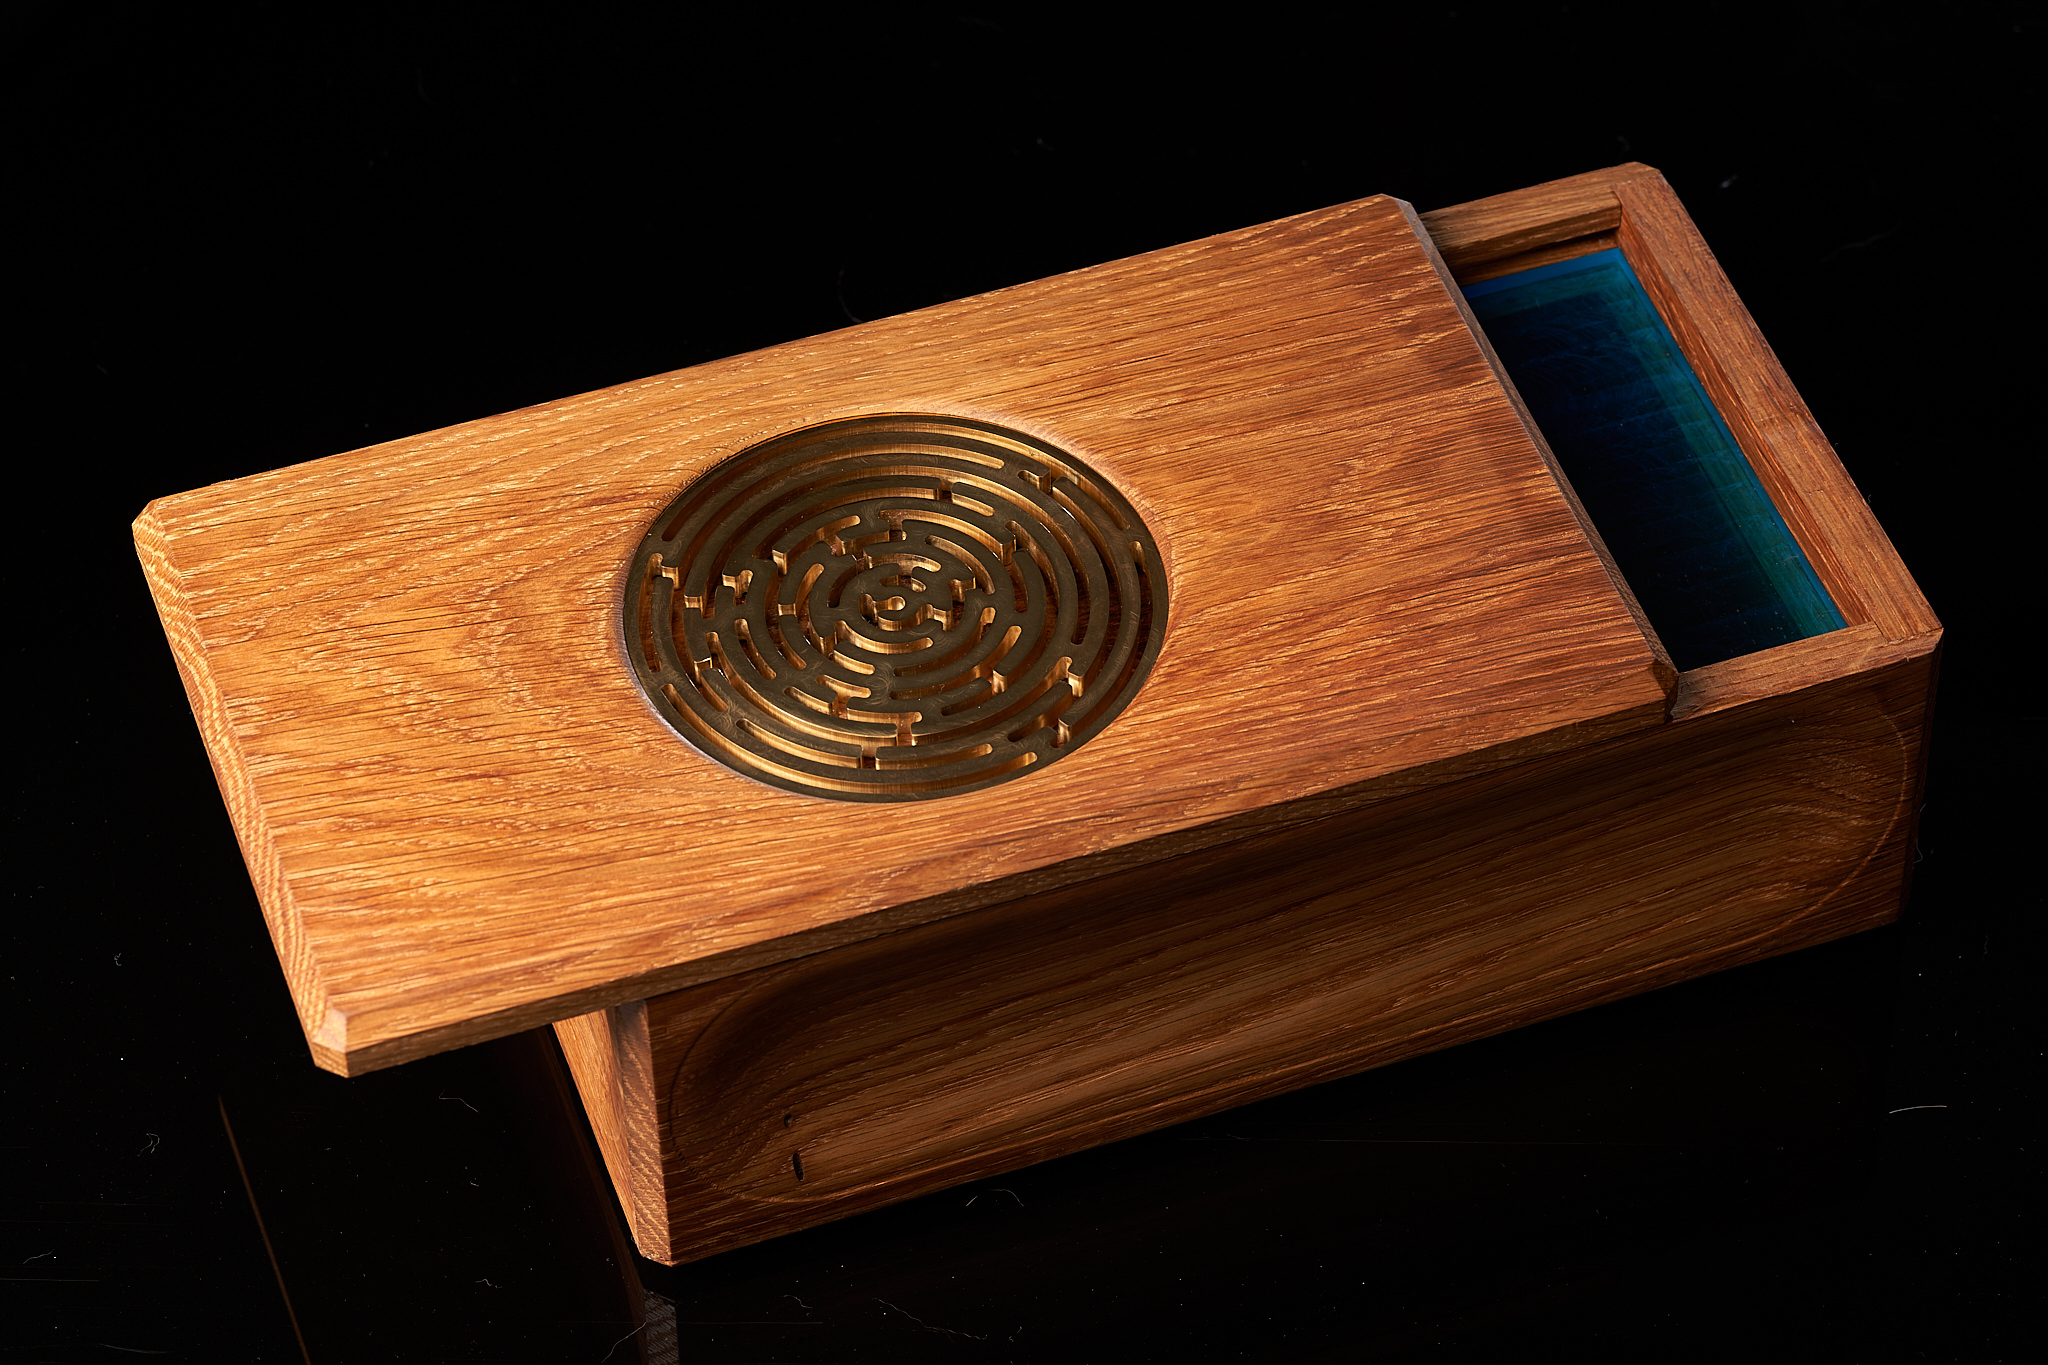
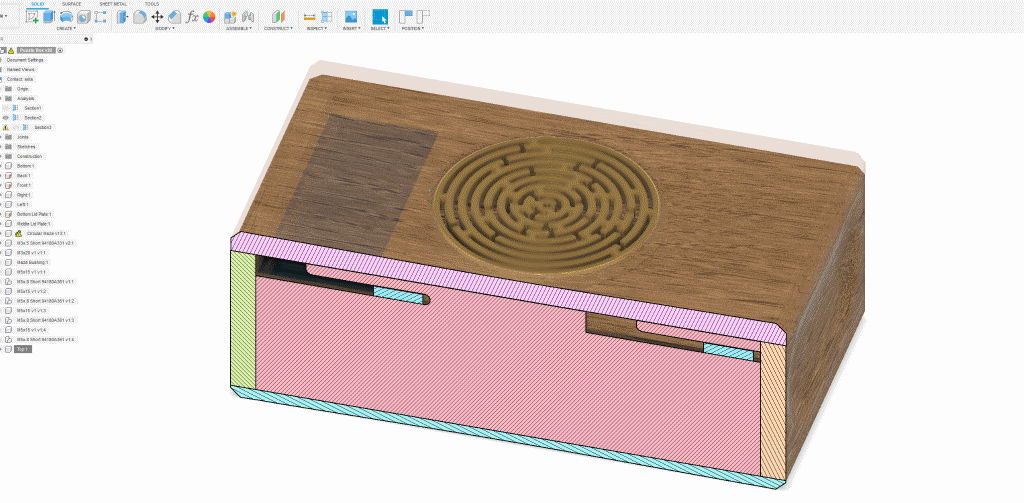
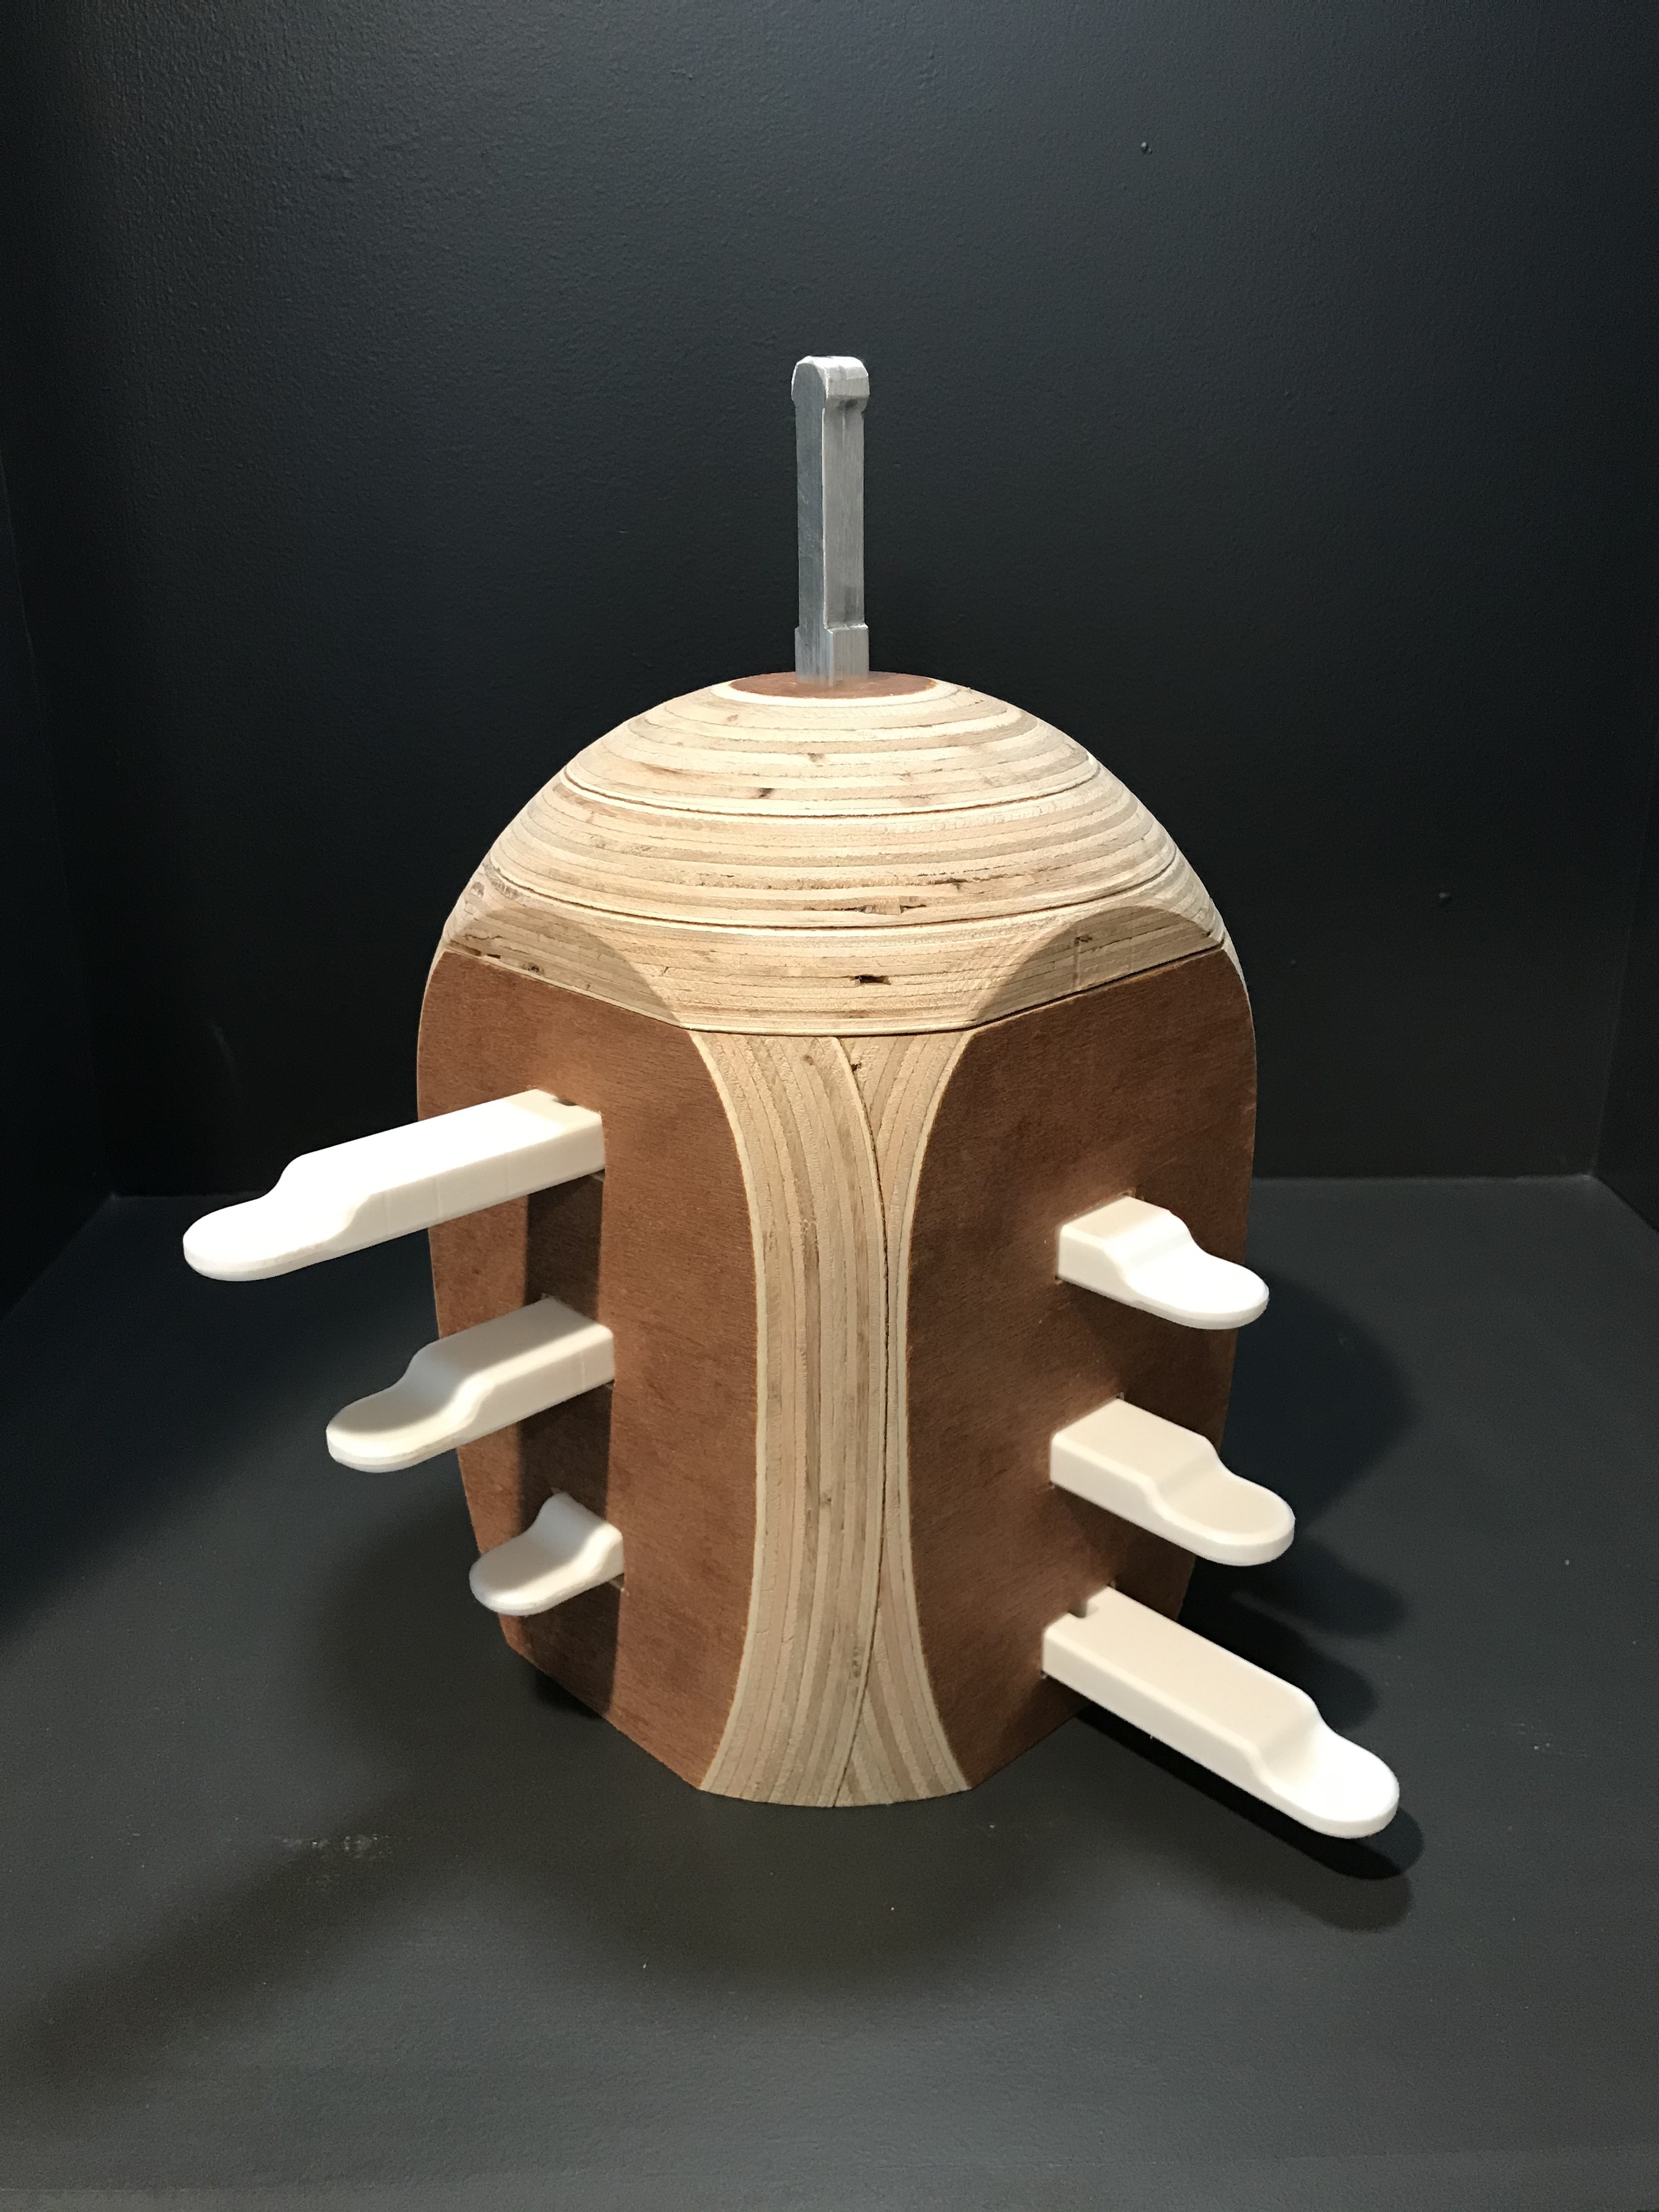
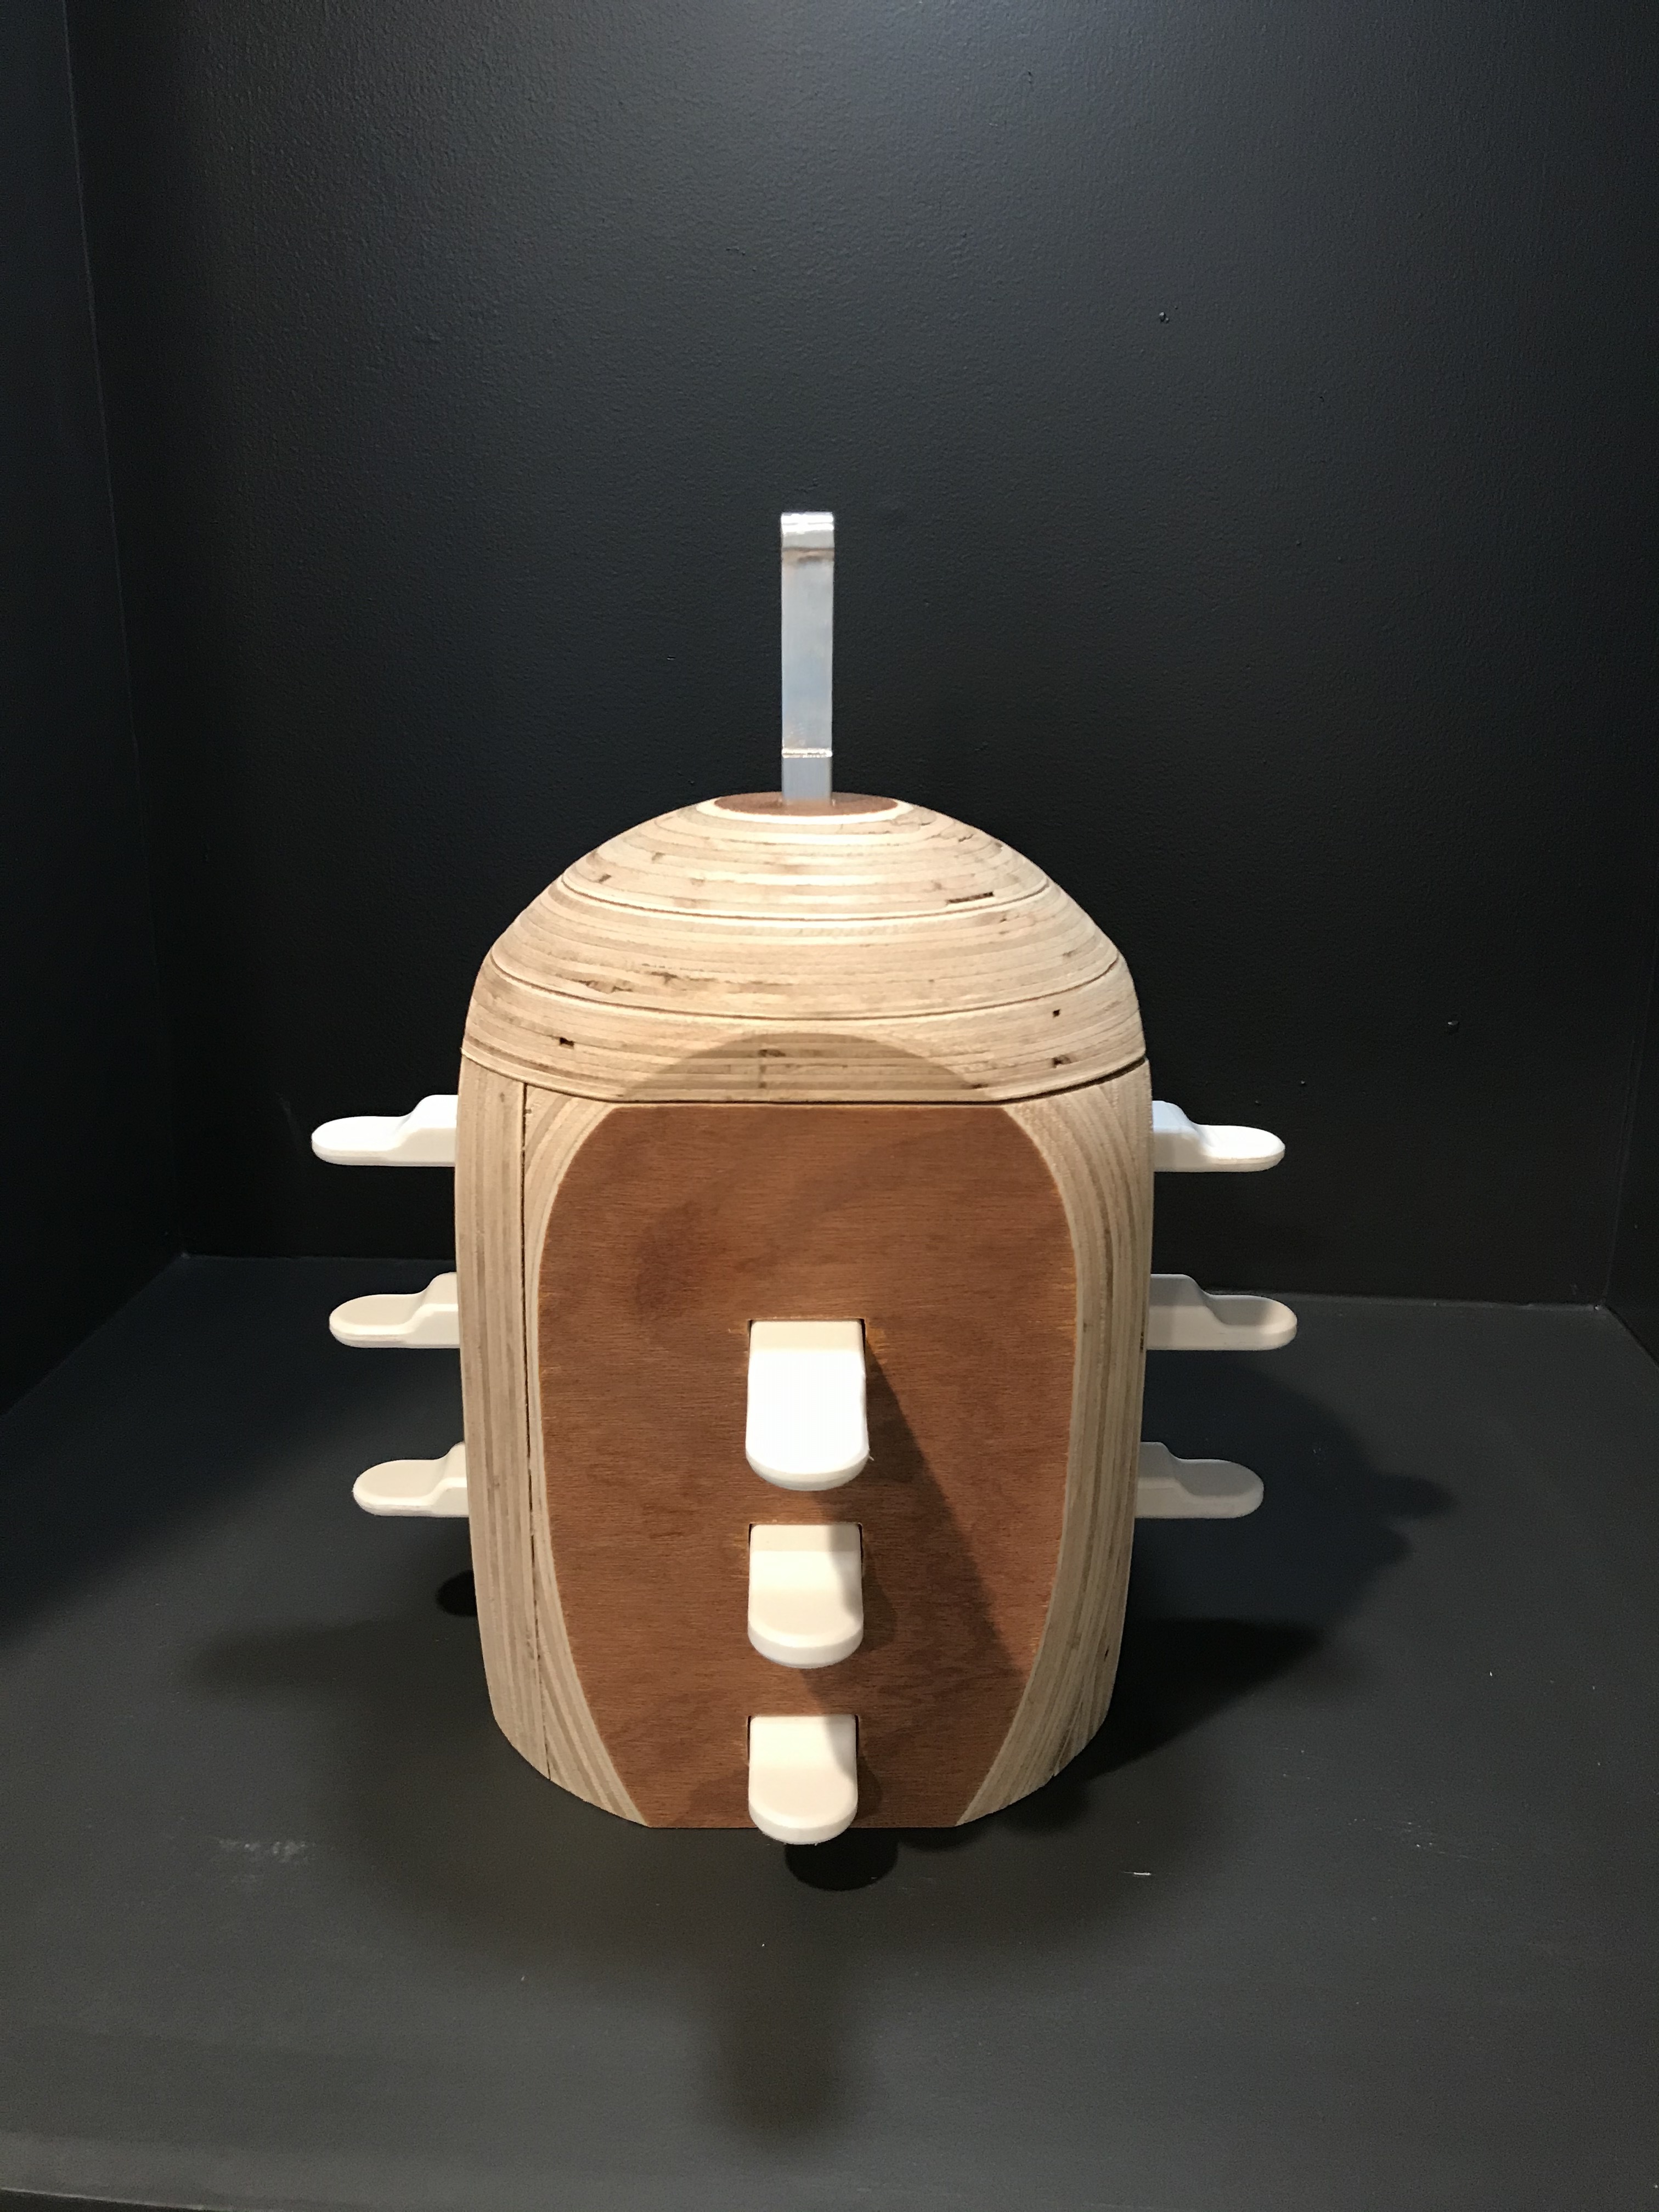
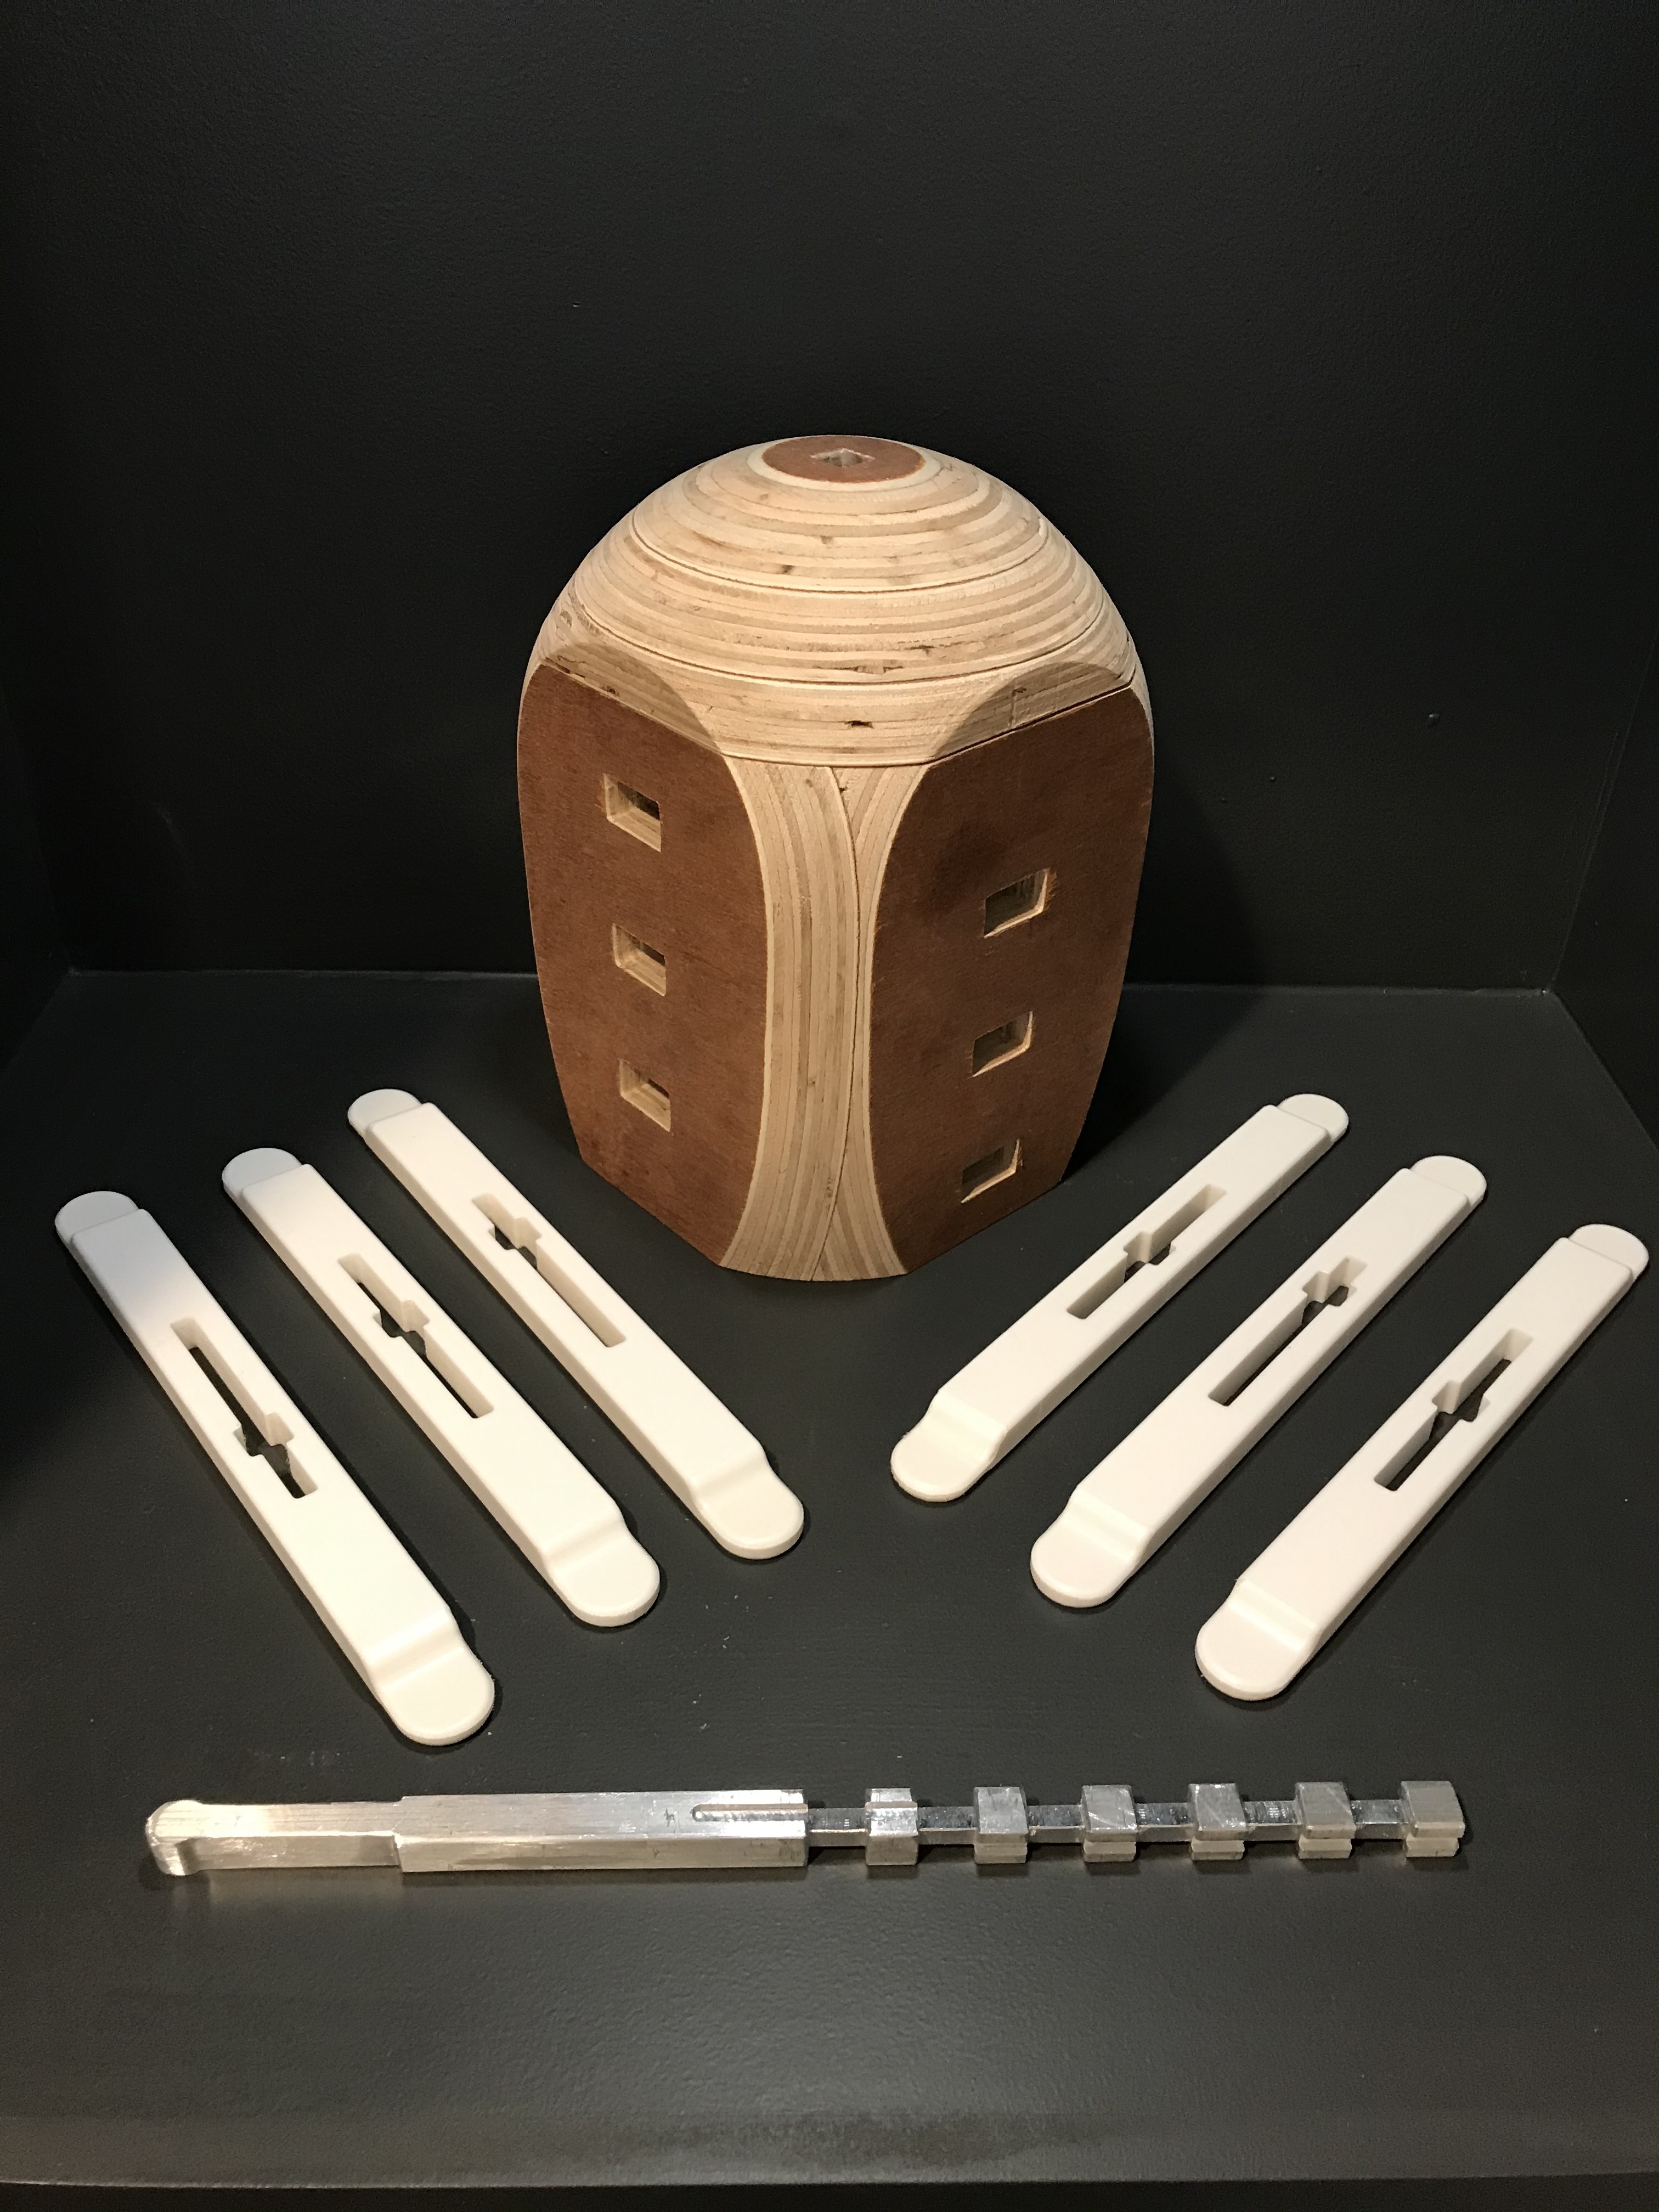
Finished product glamour shots:
Now to get into how I designed and made it. First off there were a few design considerations that I had in mind.
-The exterior just had to appear like a simple nice looking box.
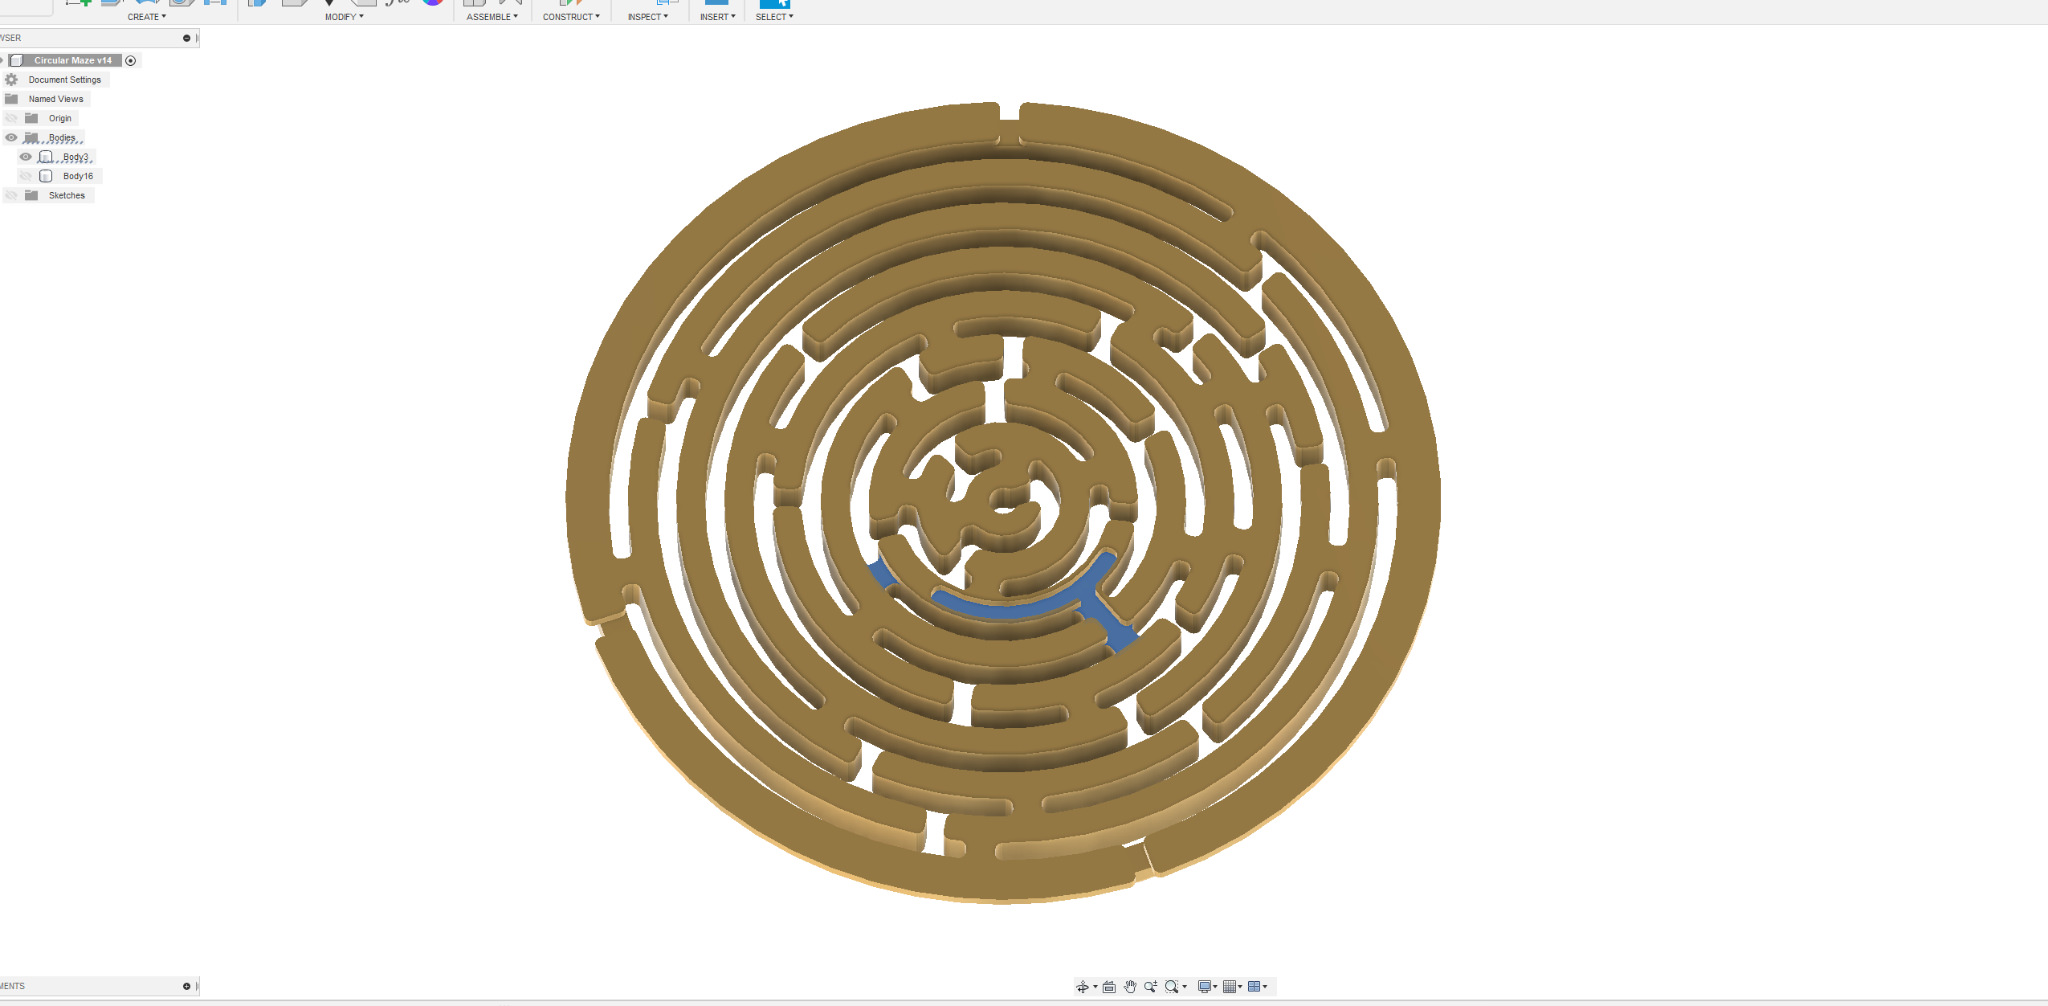
-I wanted the maze section to be fully self-contained in the lid, so when opened it came off in one piece.
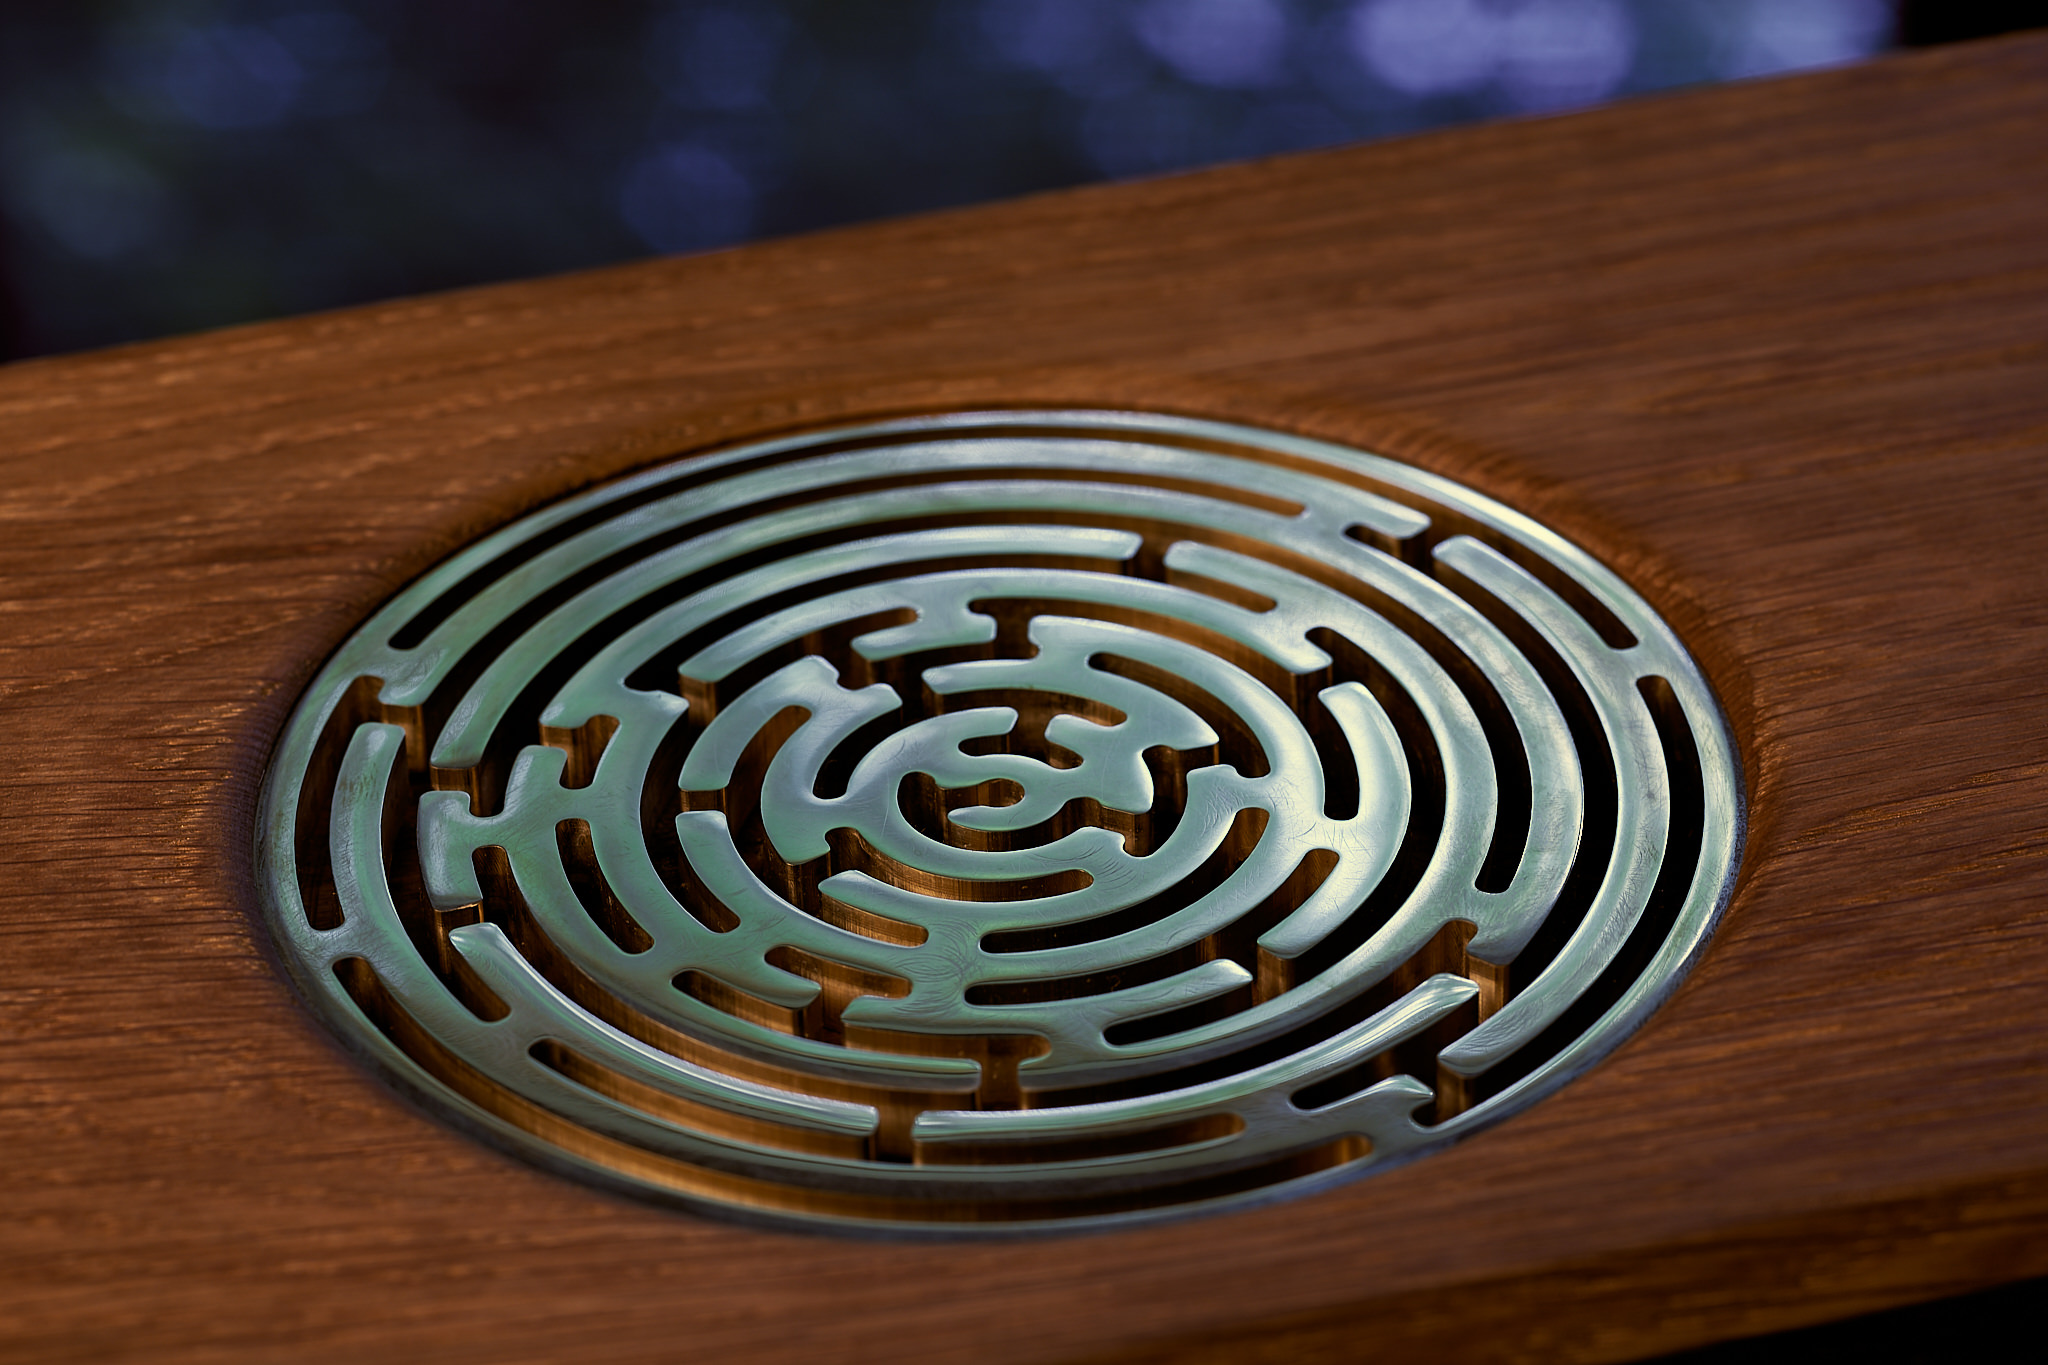
-I wanted the “start” to be hidden, so it’s not obvious where/how to start the puzzle.
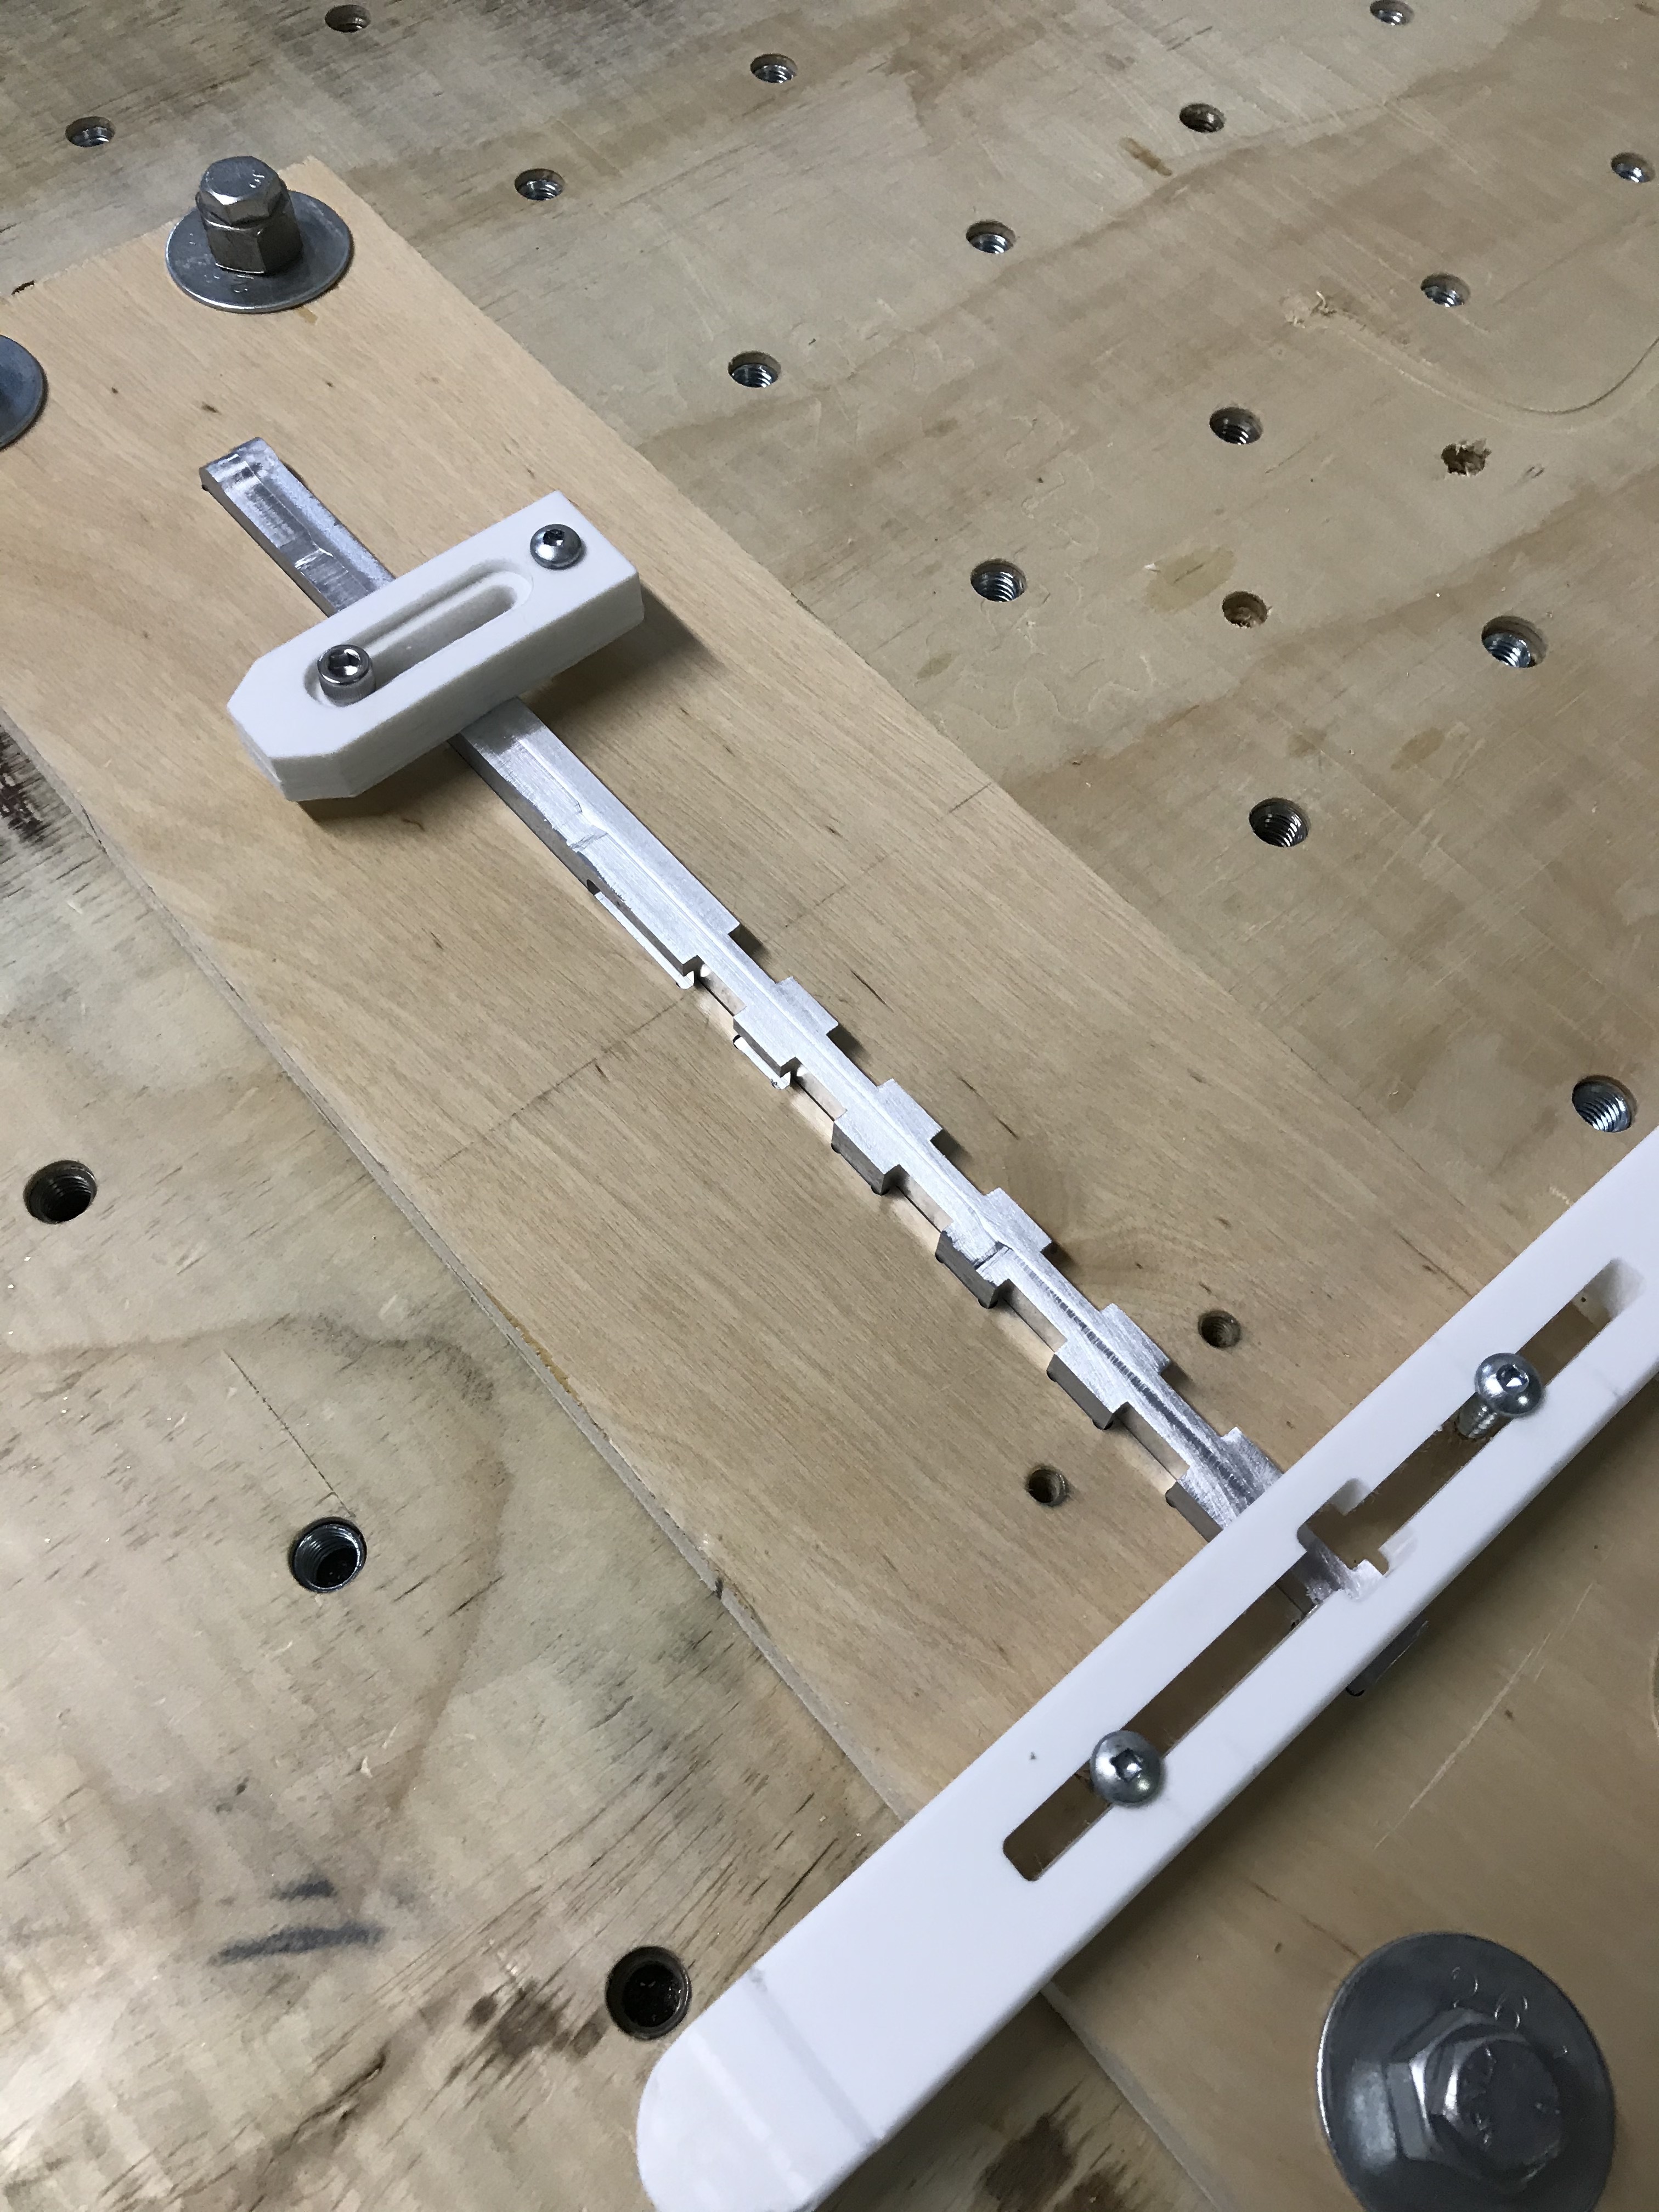
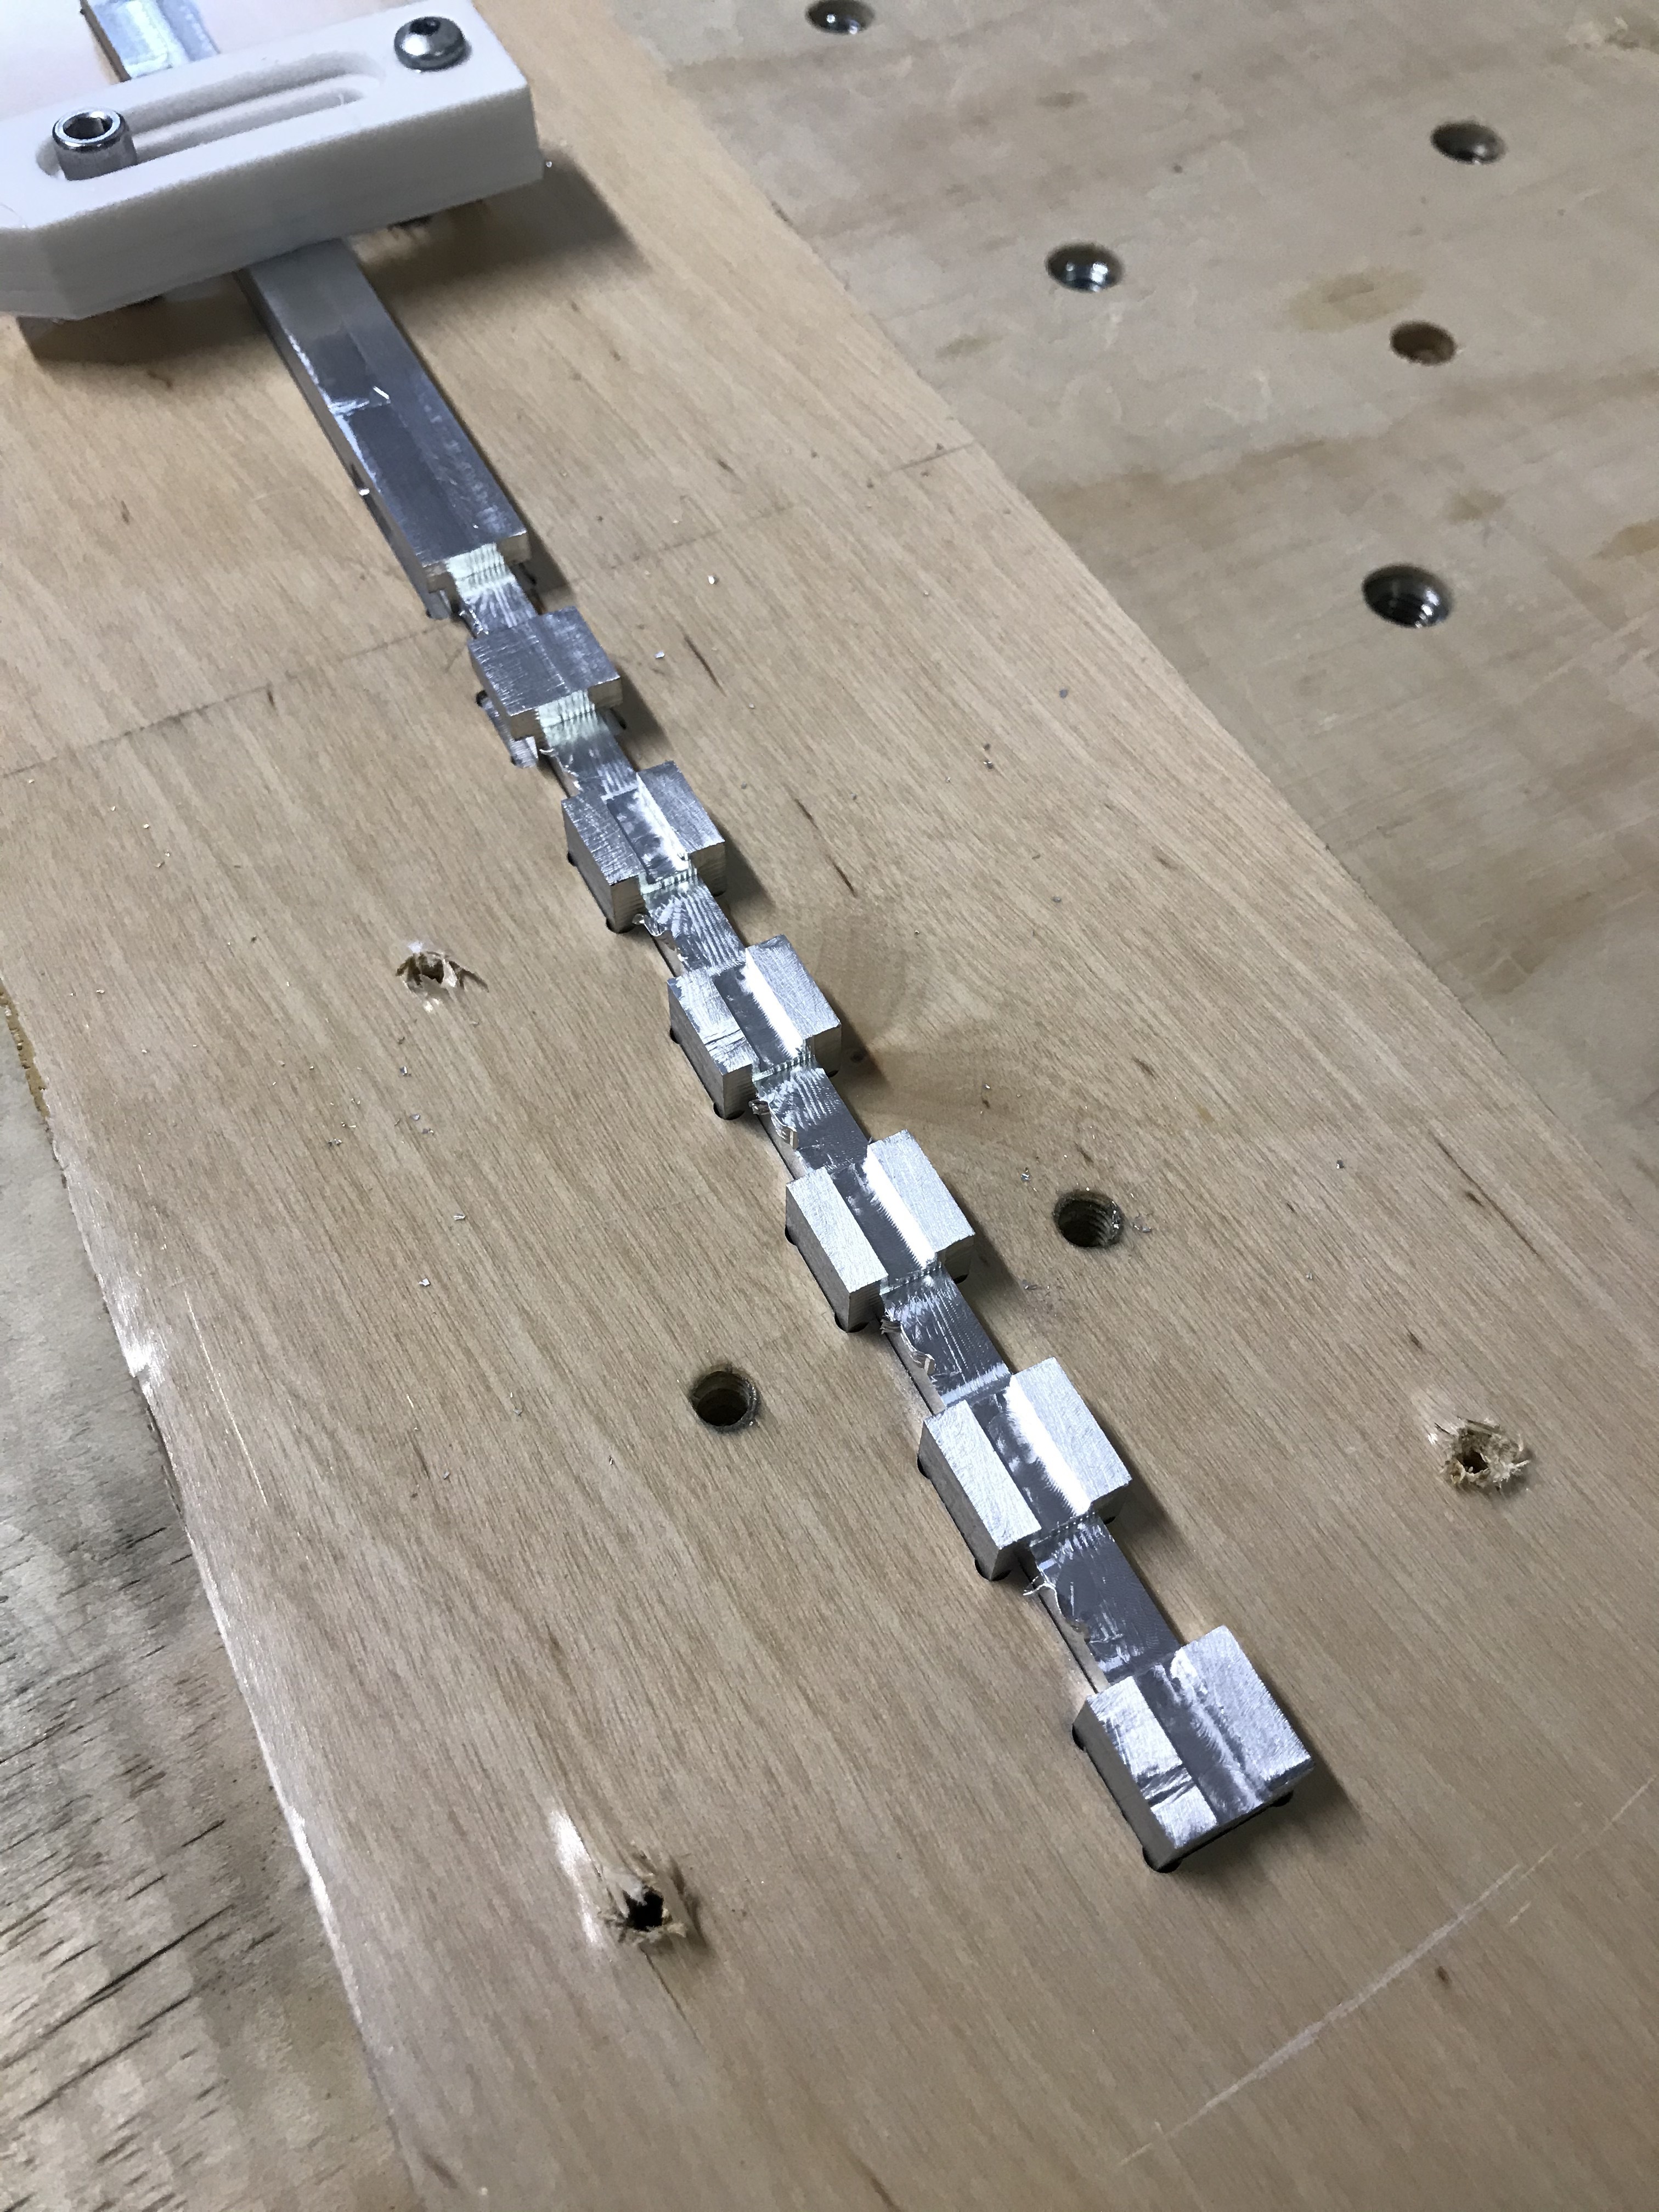
-Finally, I wanted it to have a hidden path/wall, similar to top-down video games like Zelda.
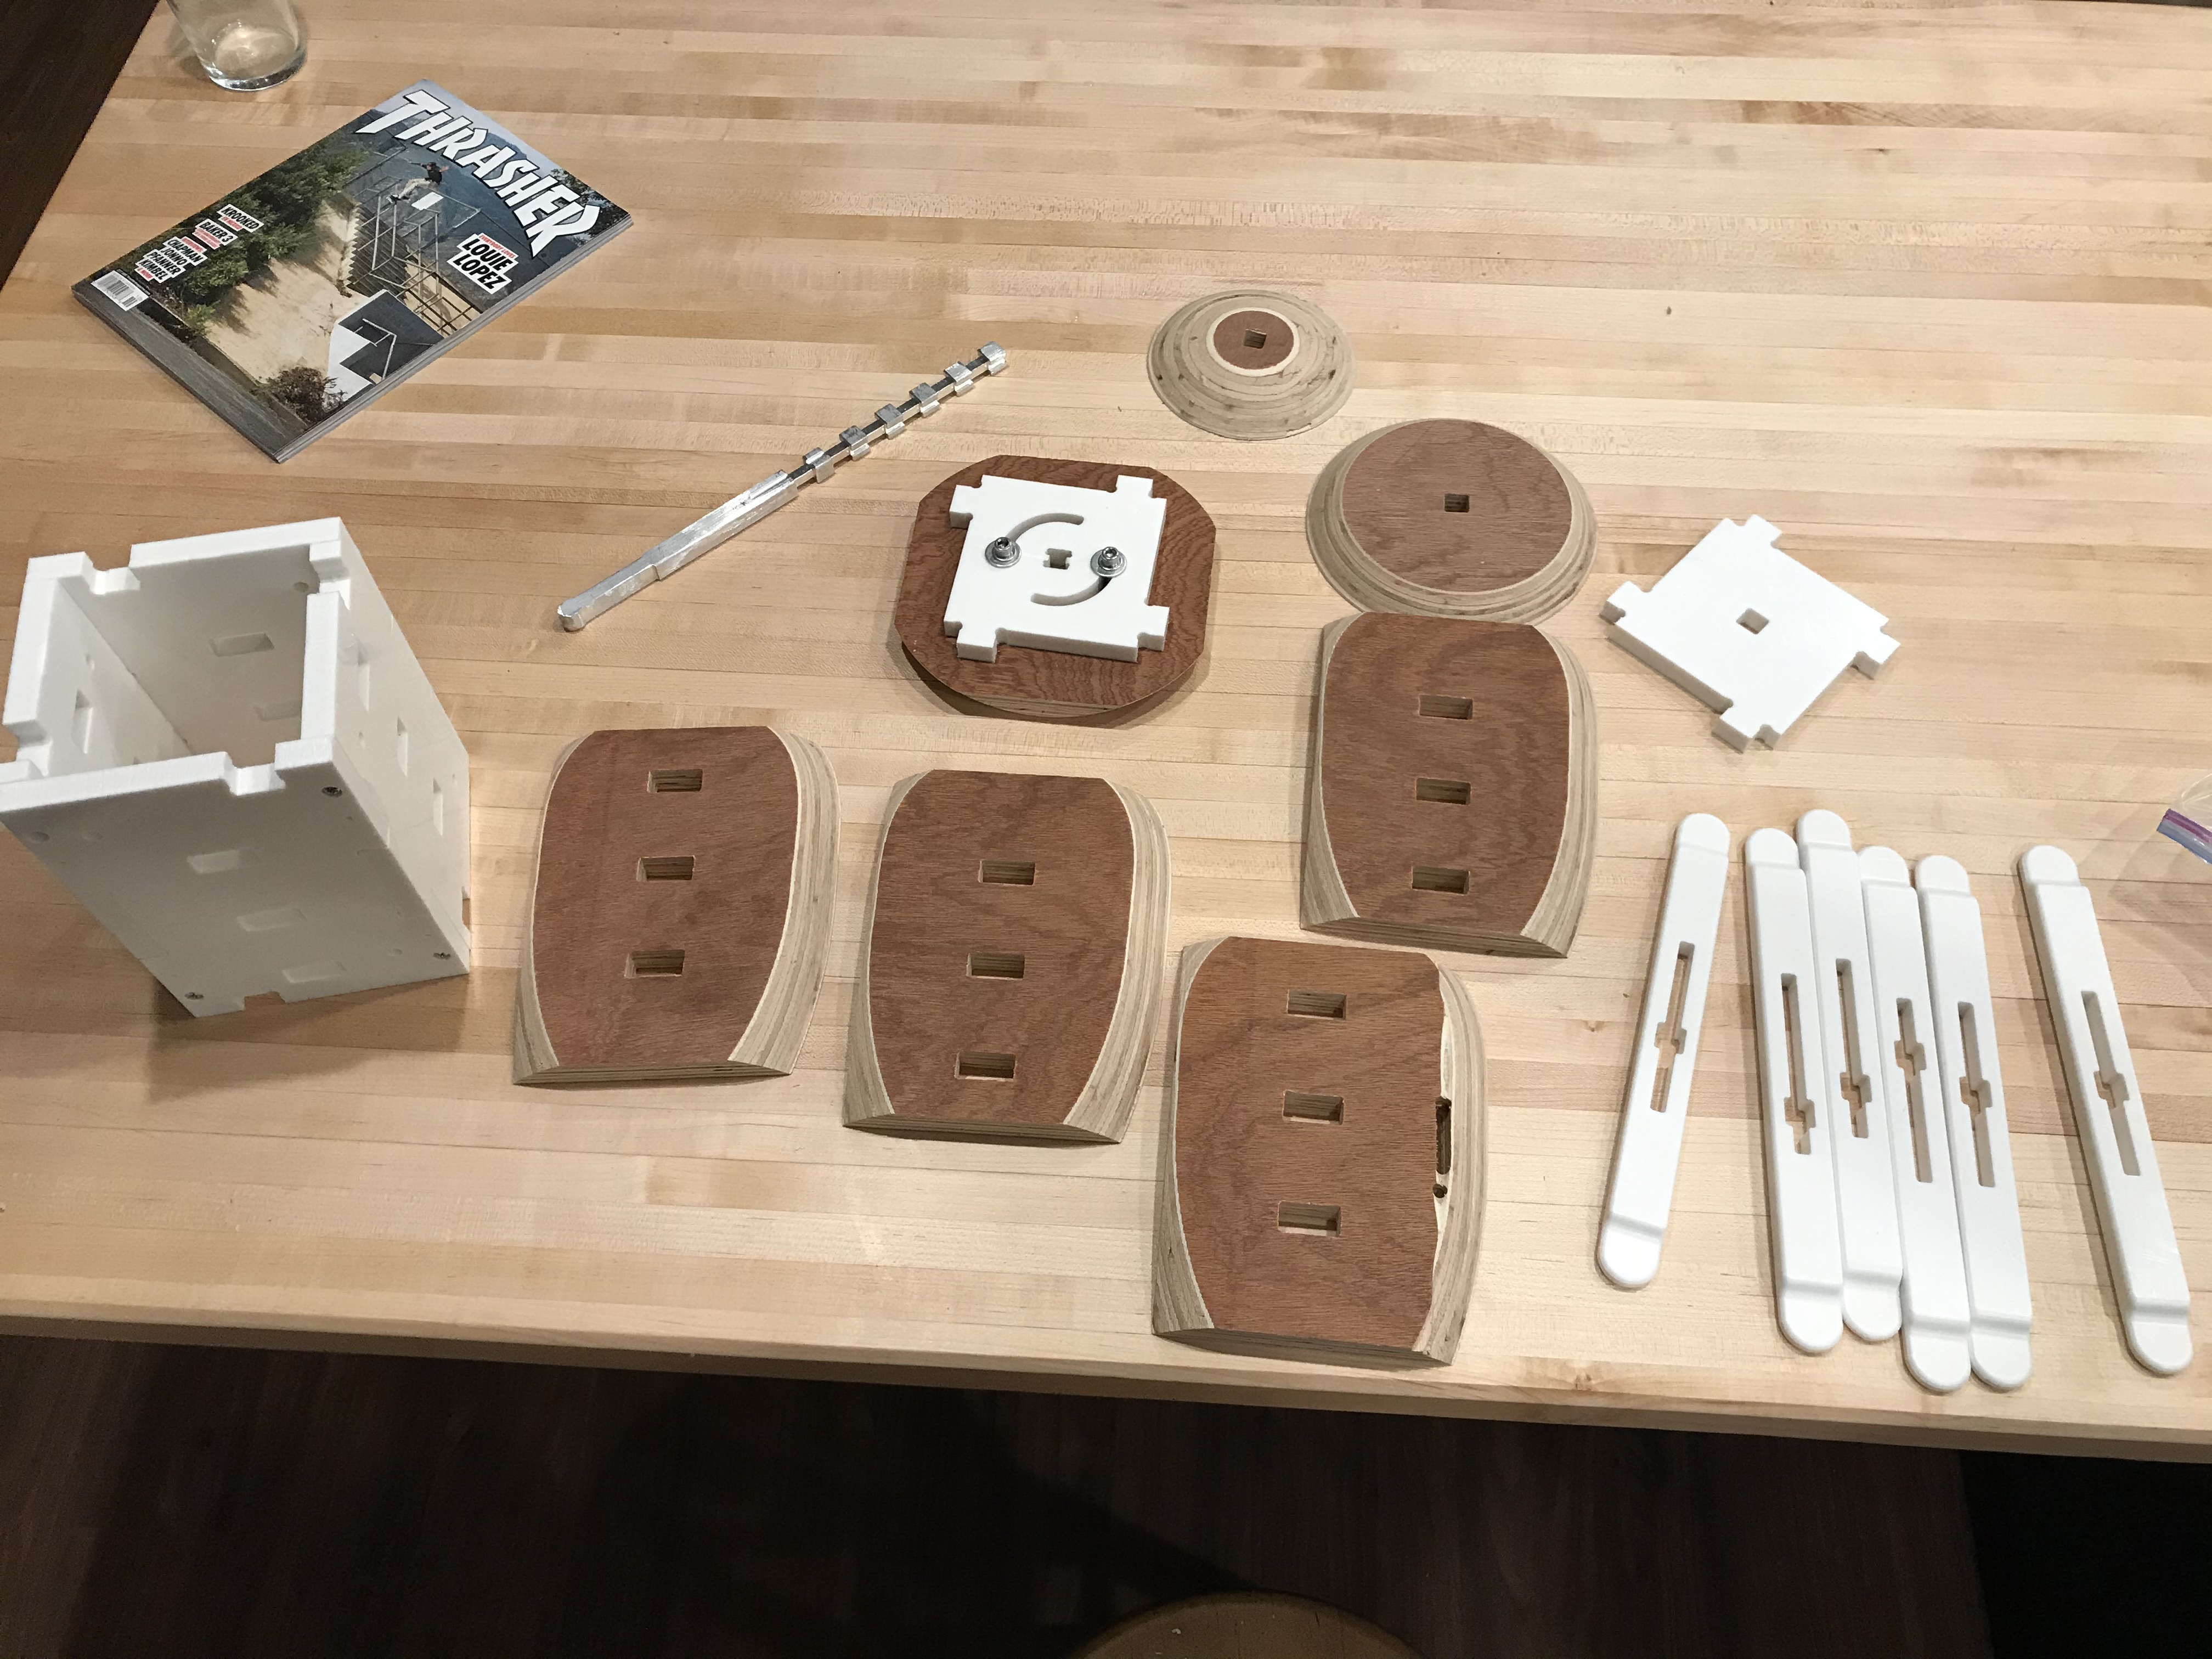
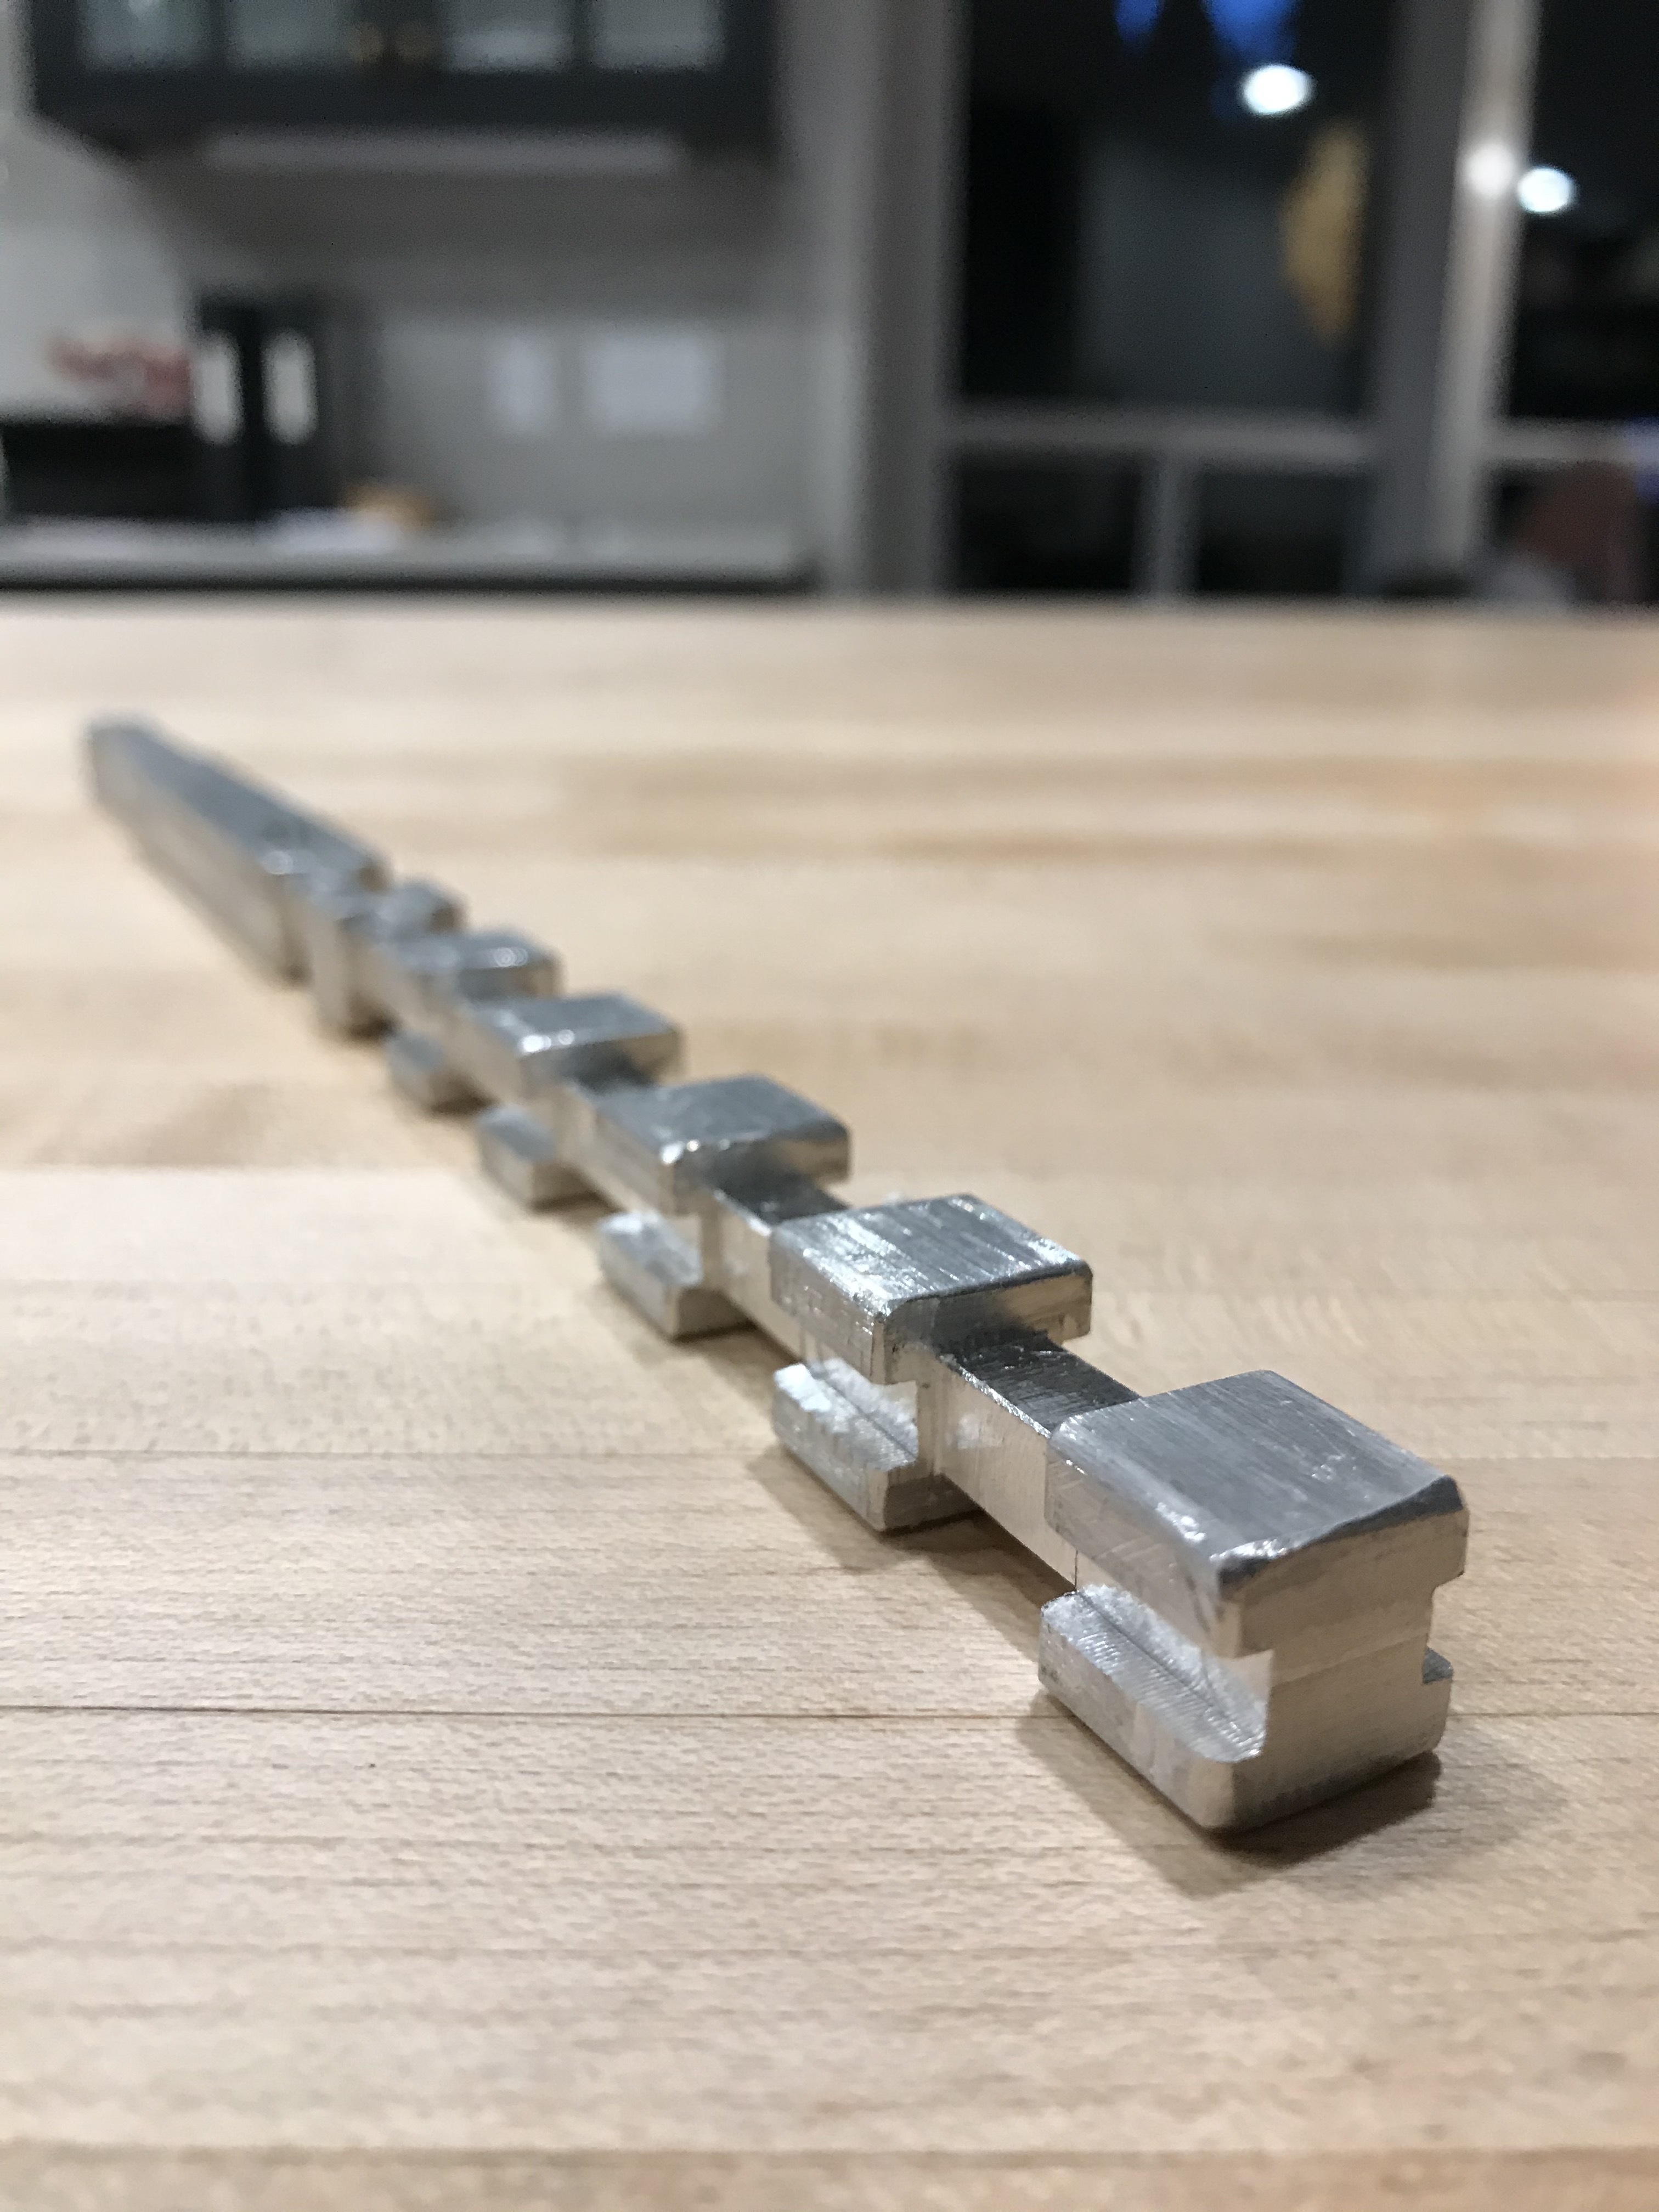
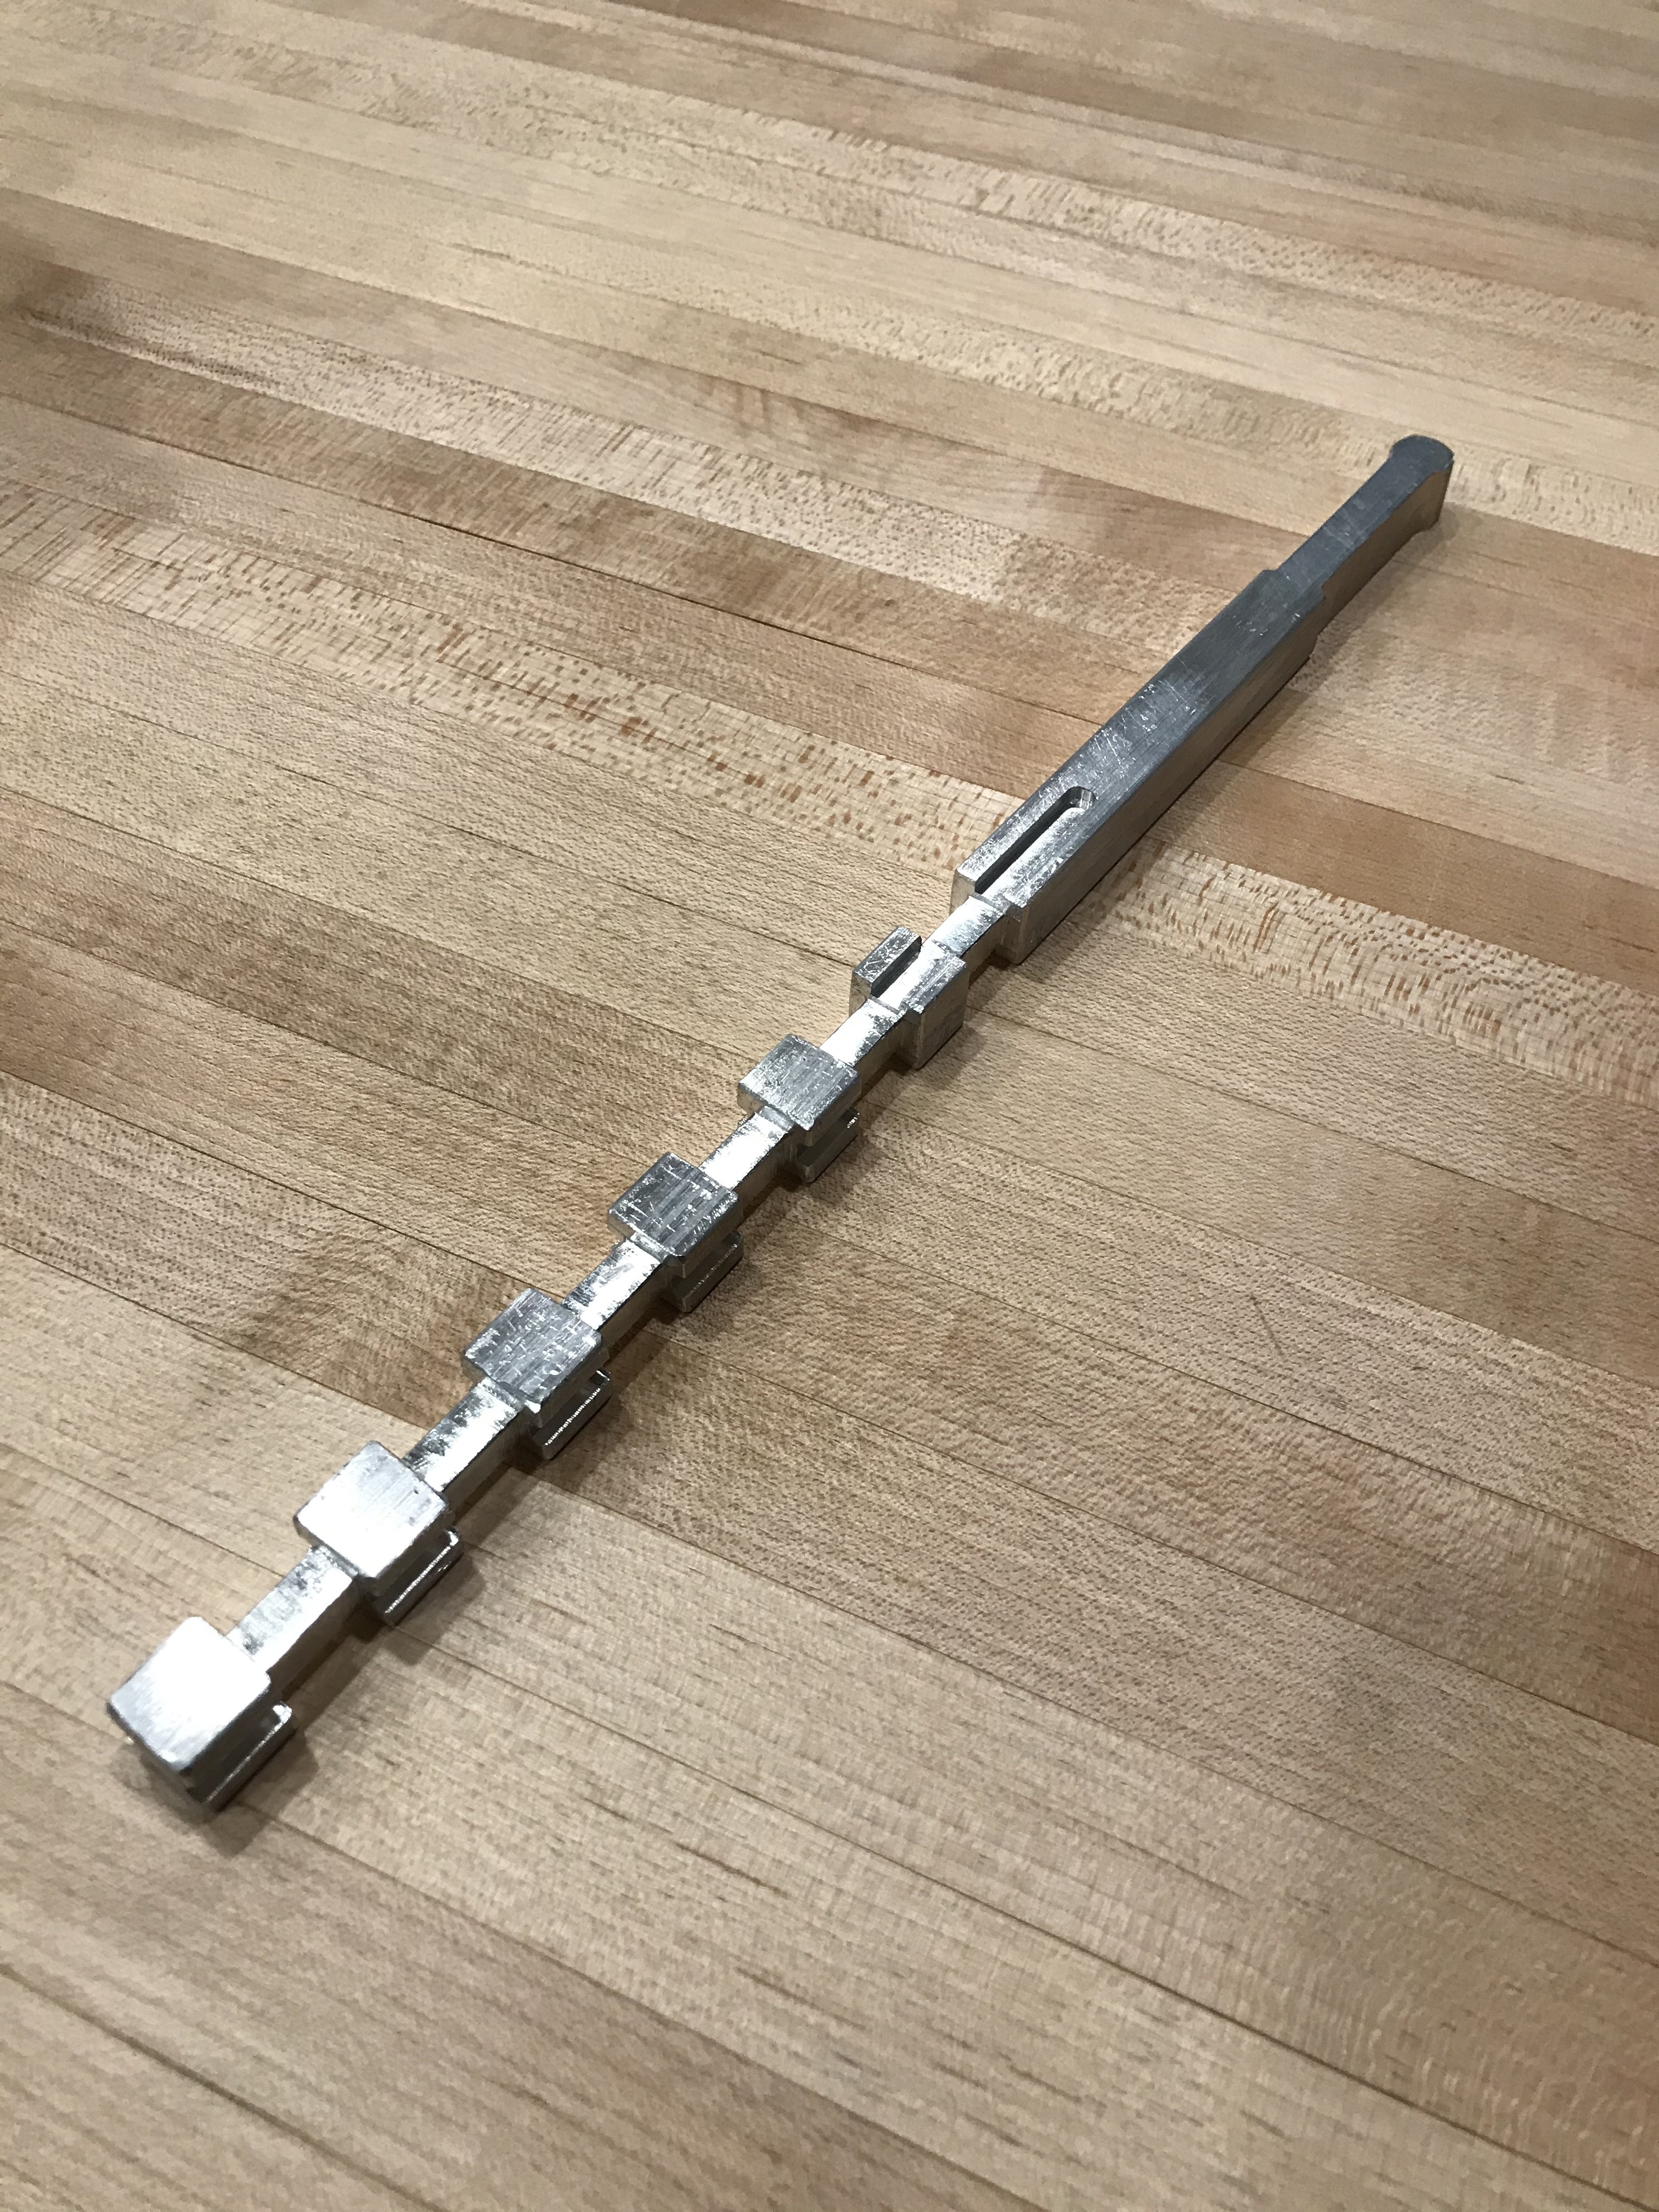
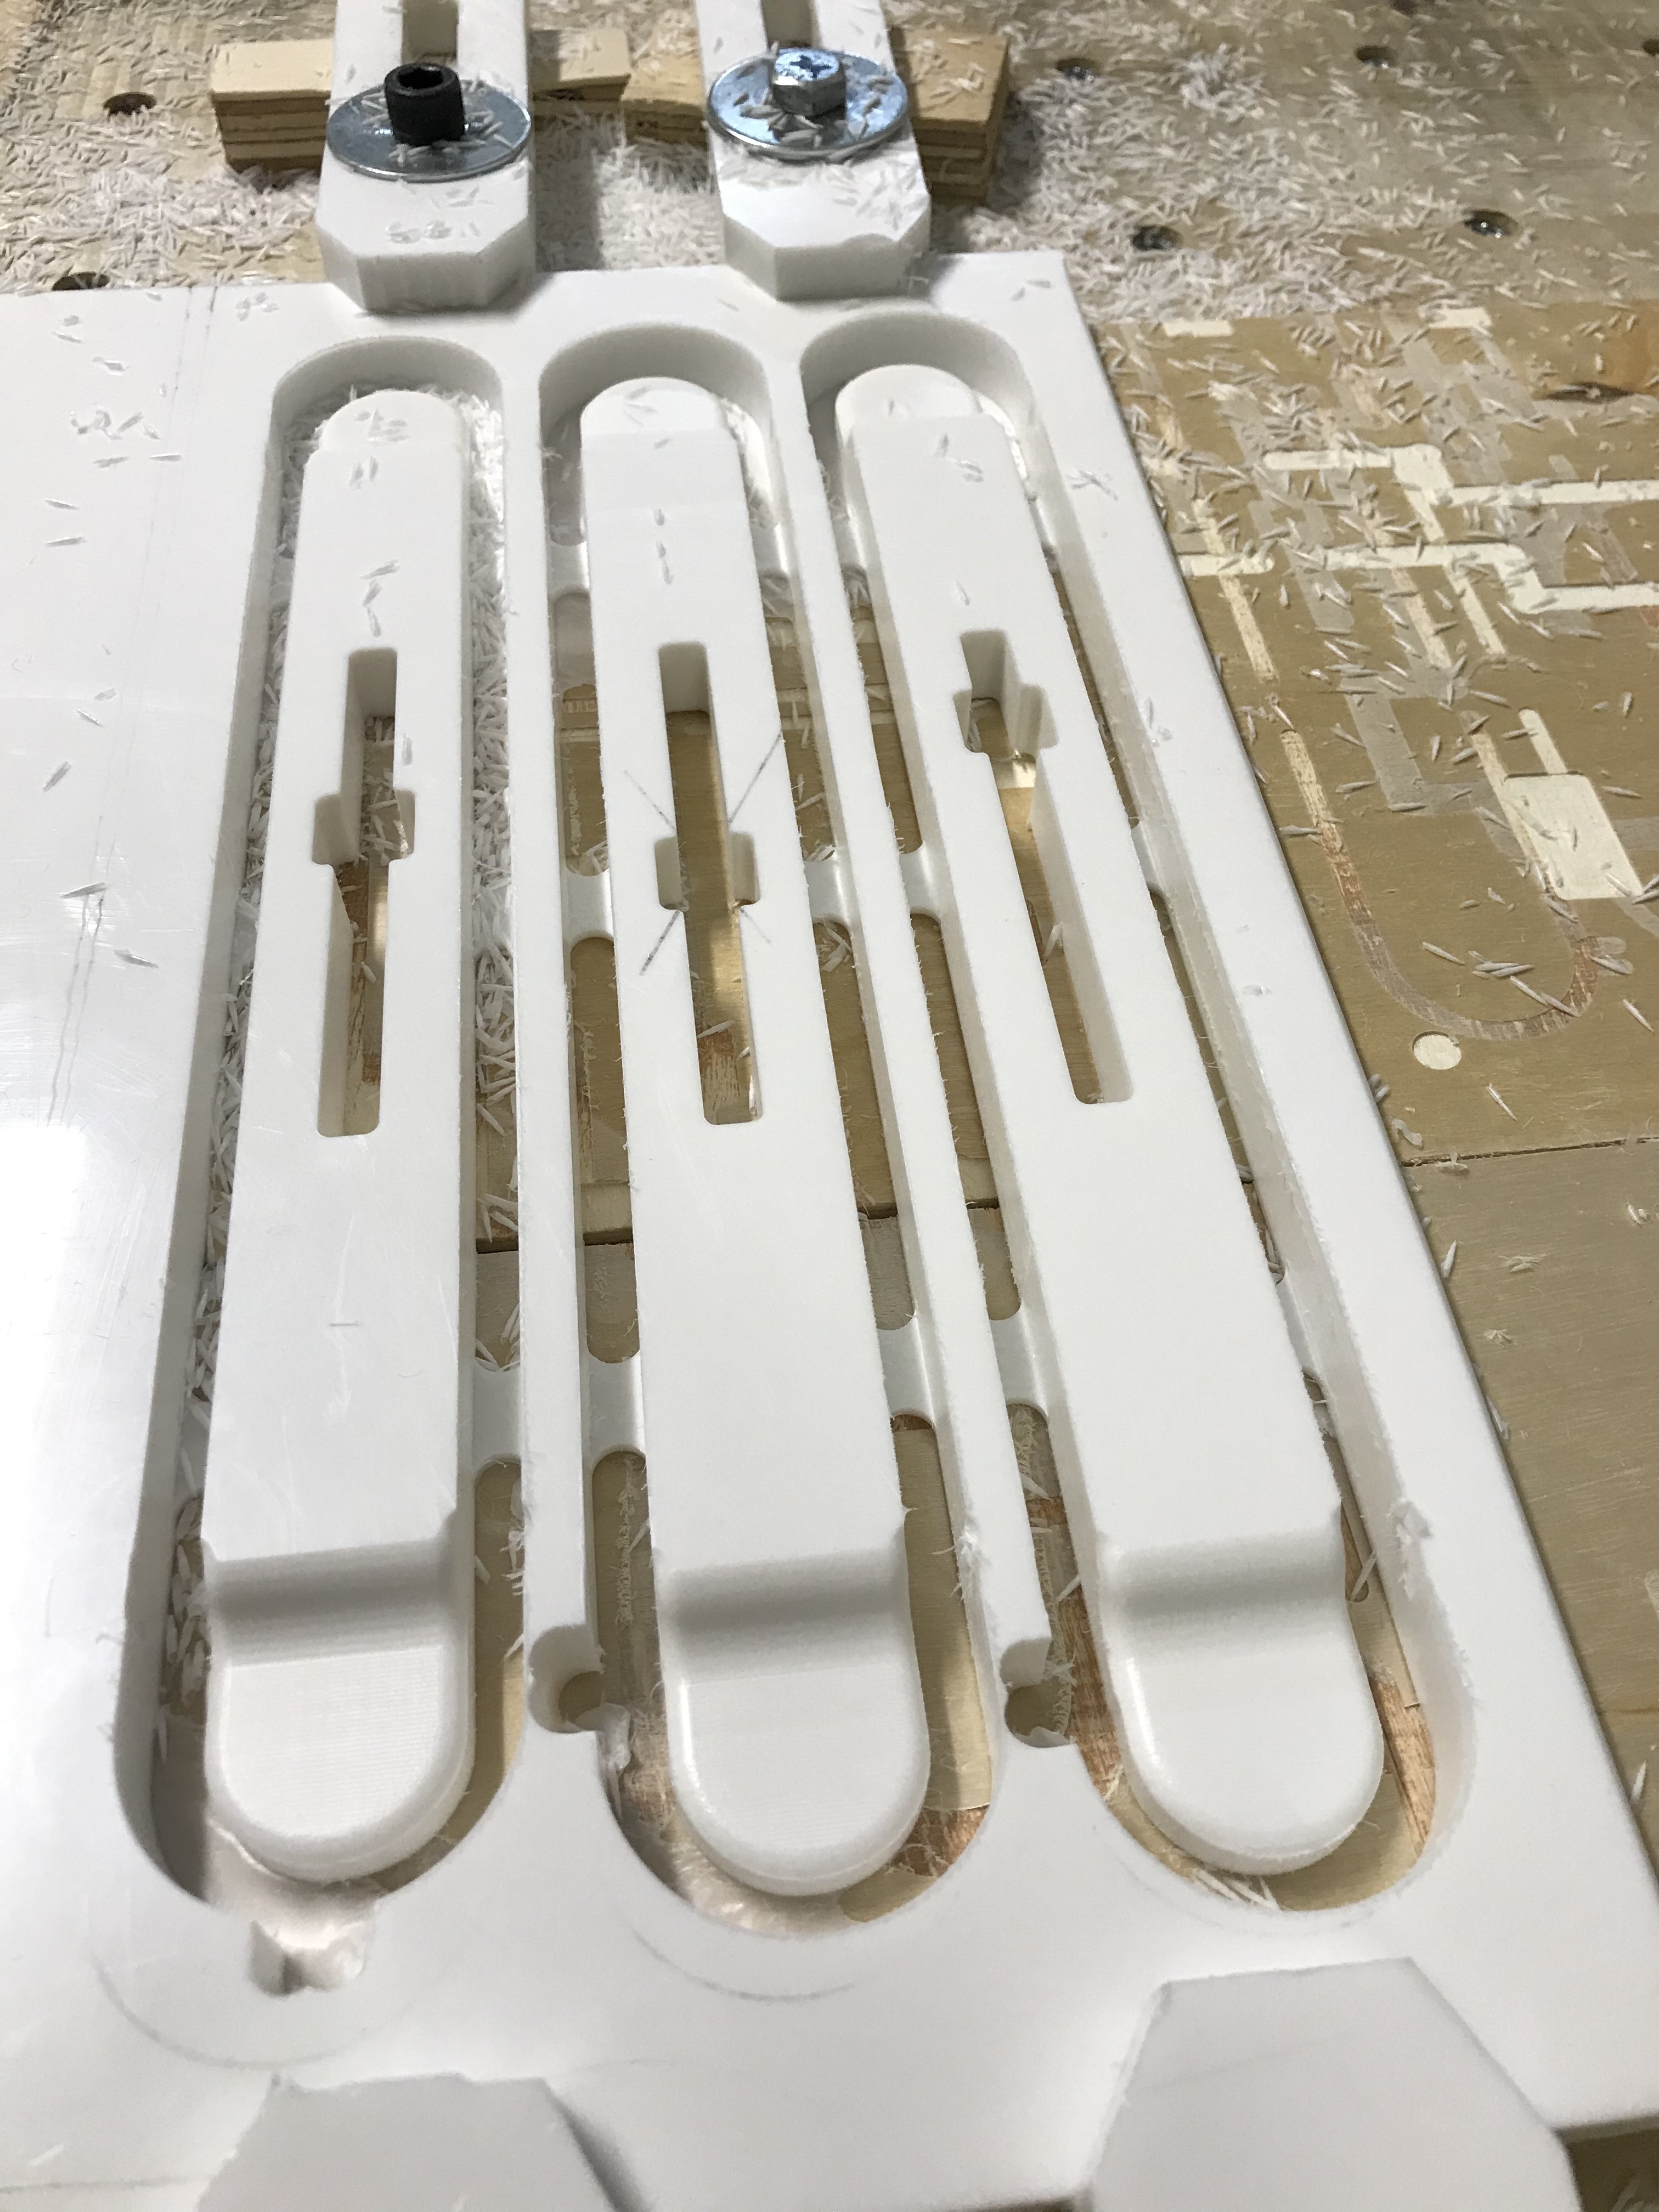
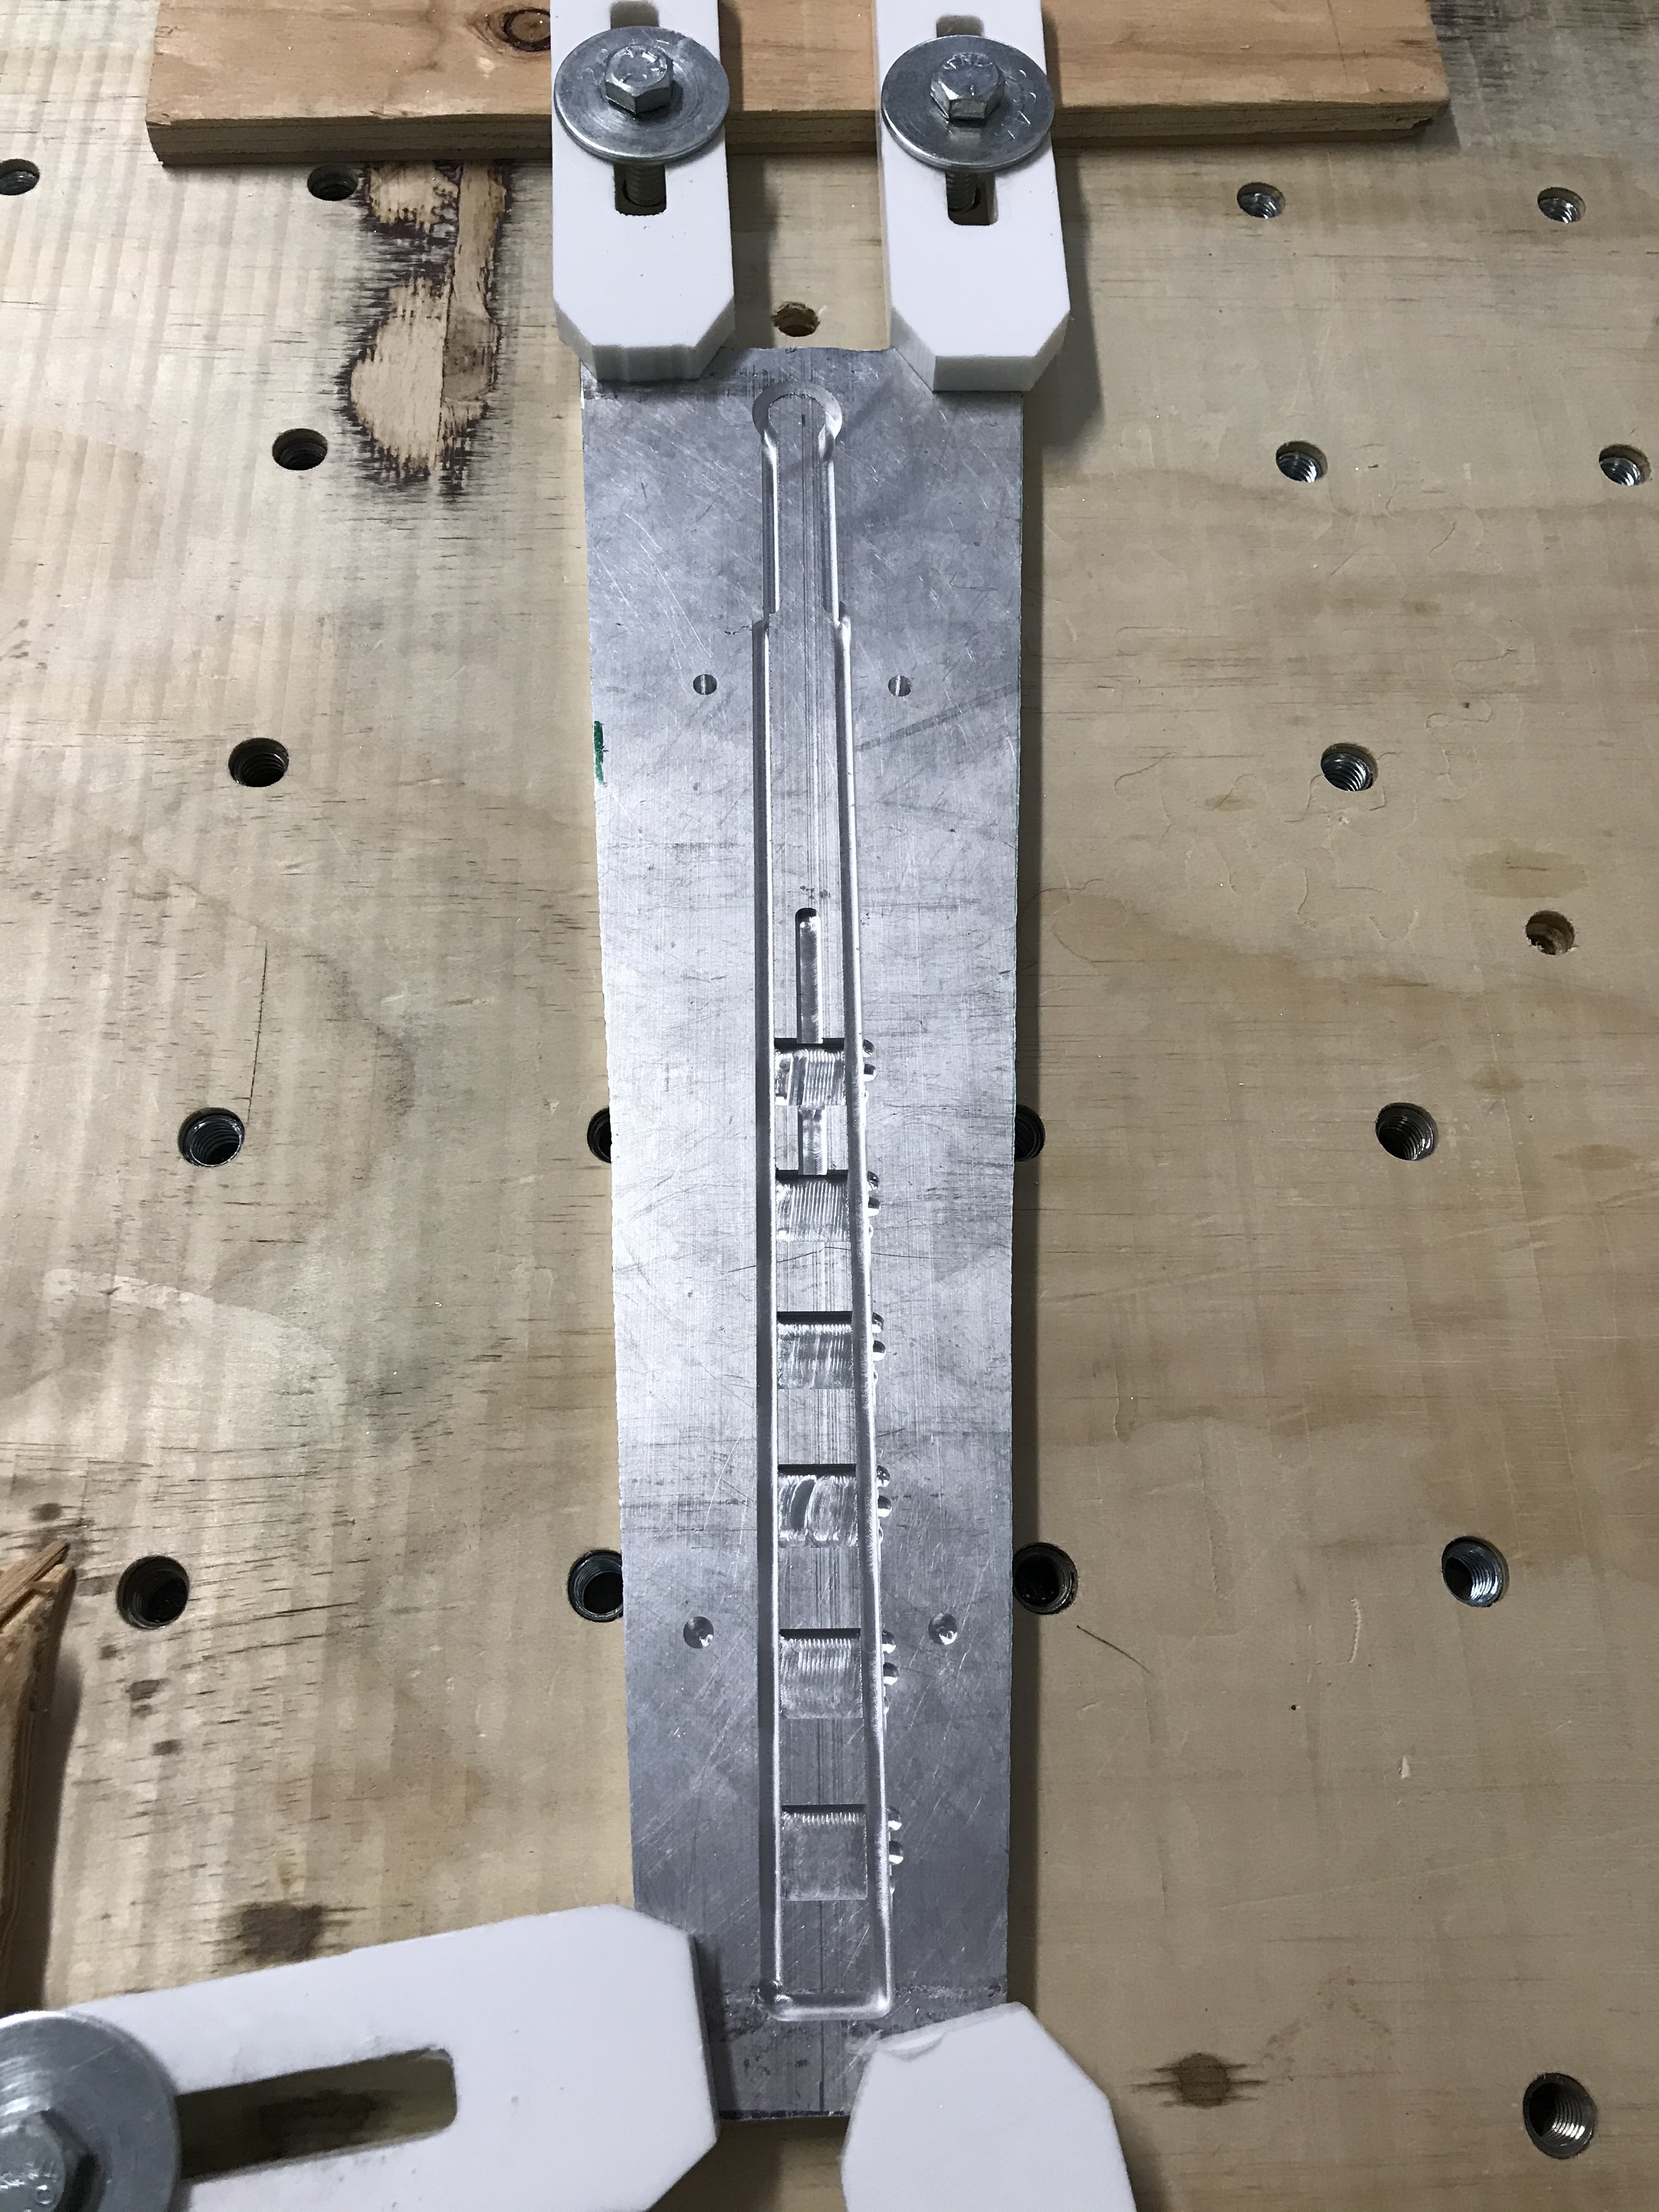
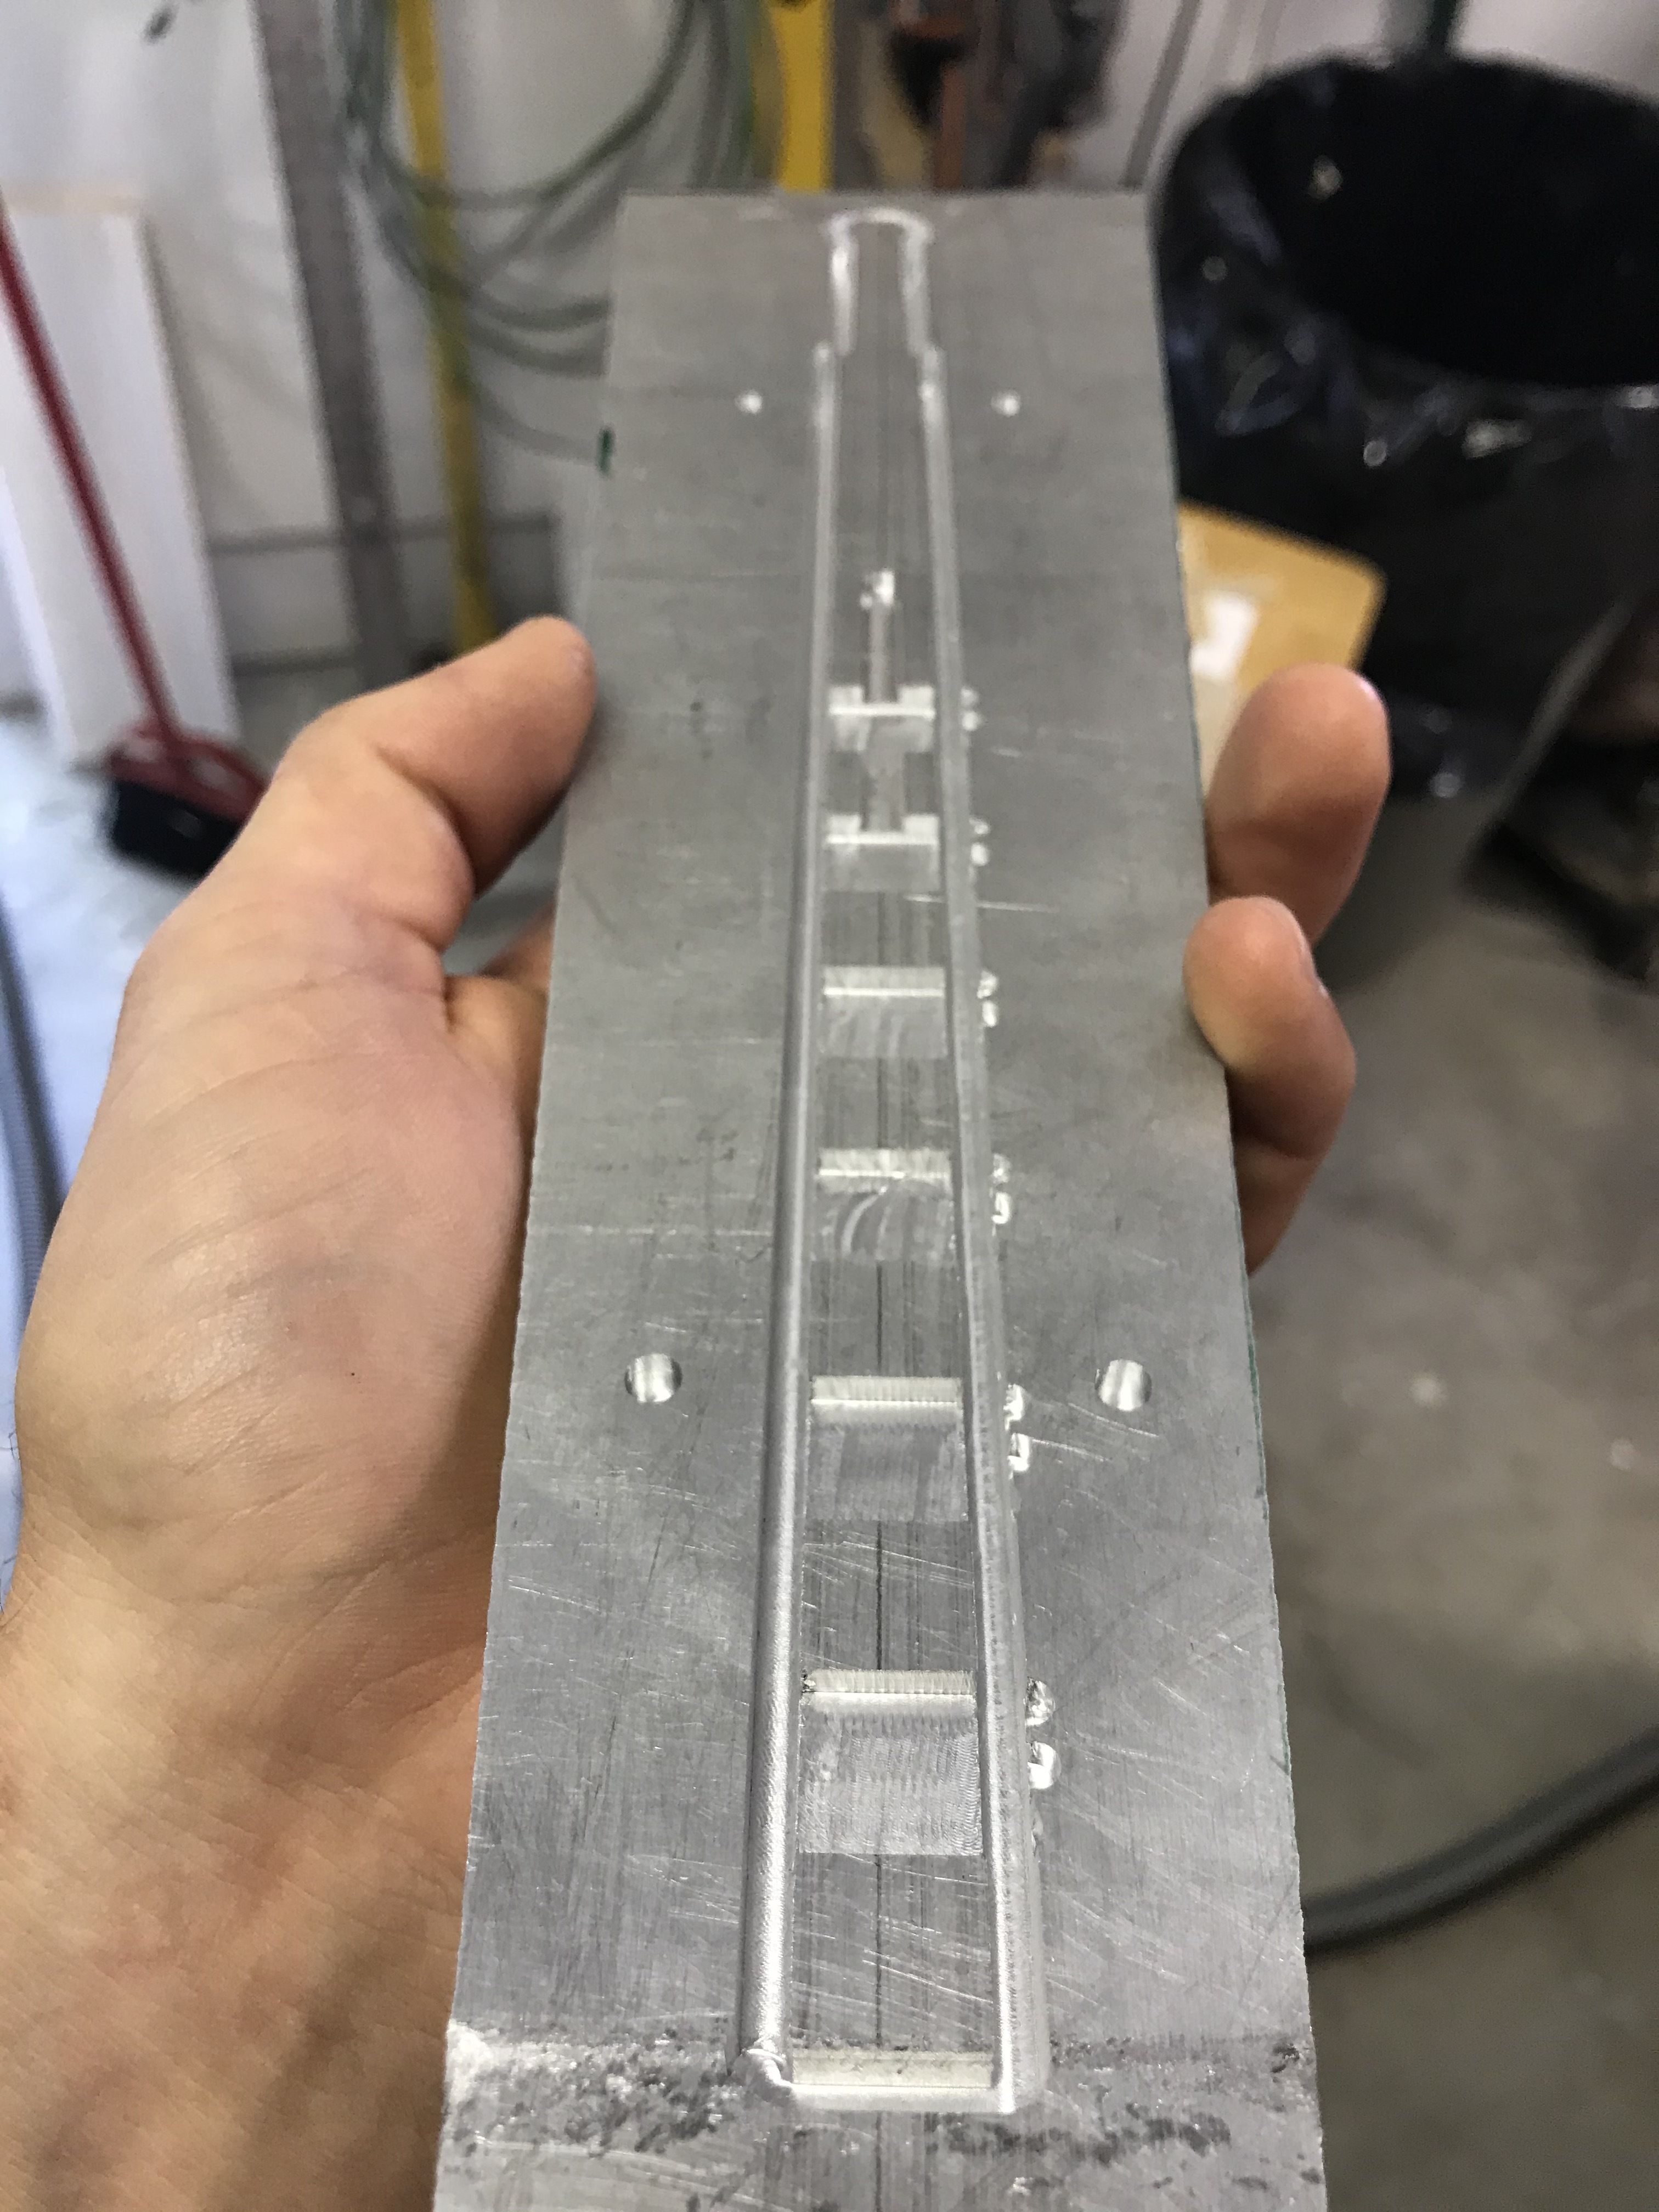
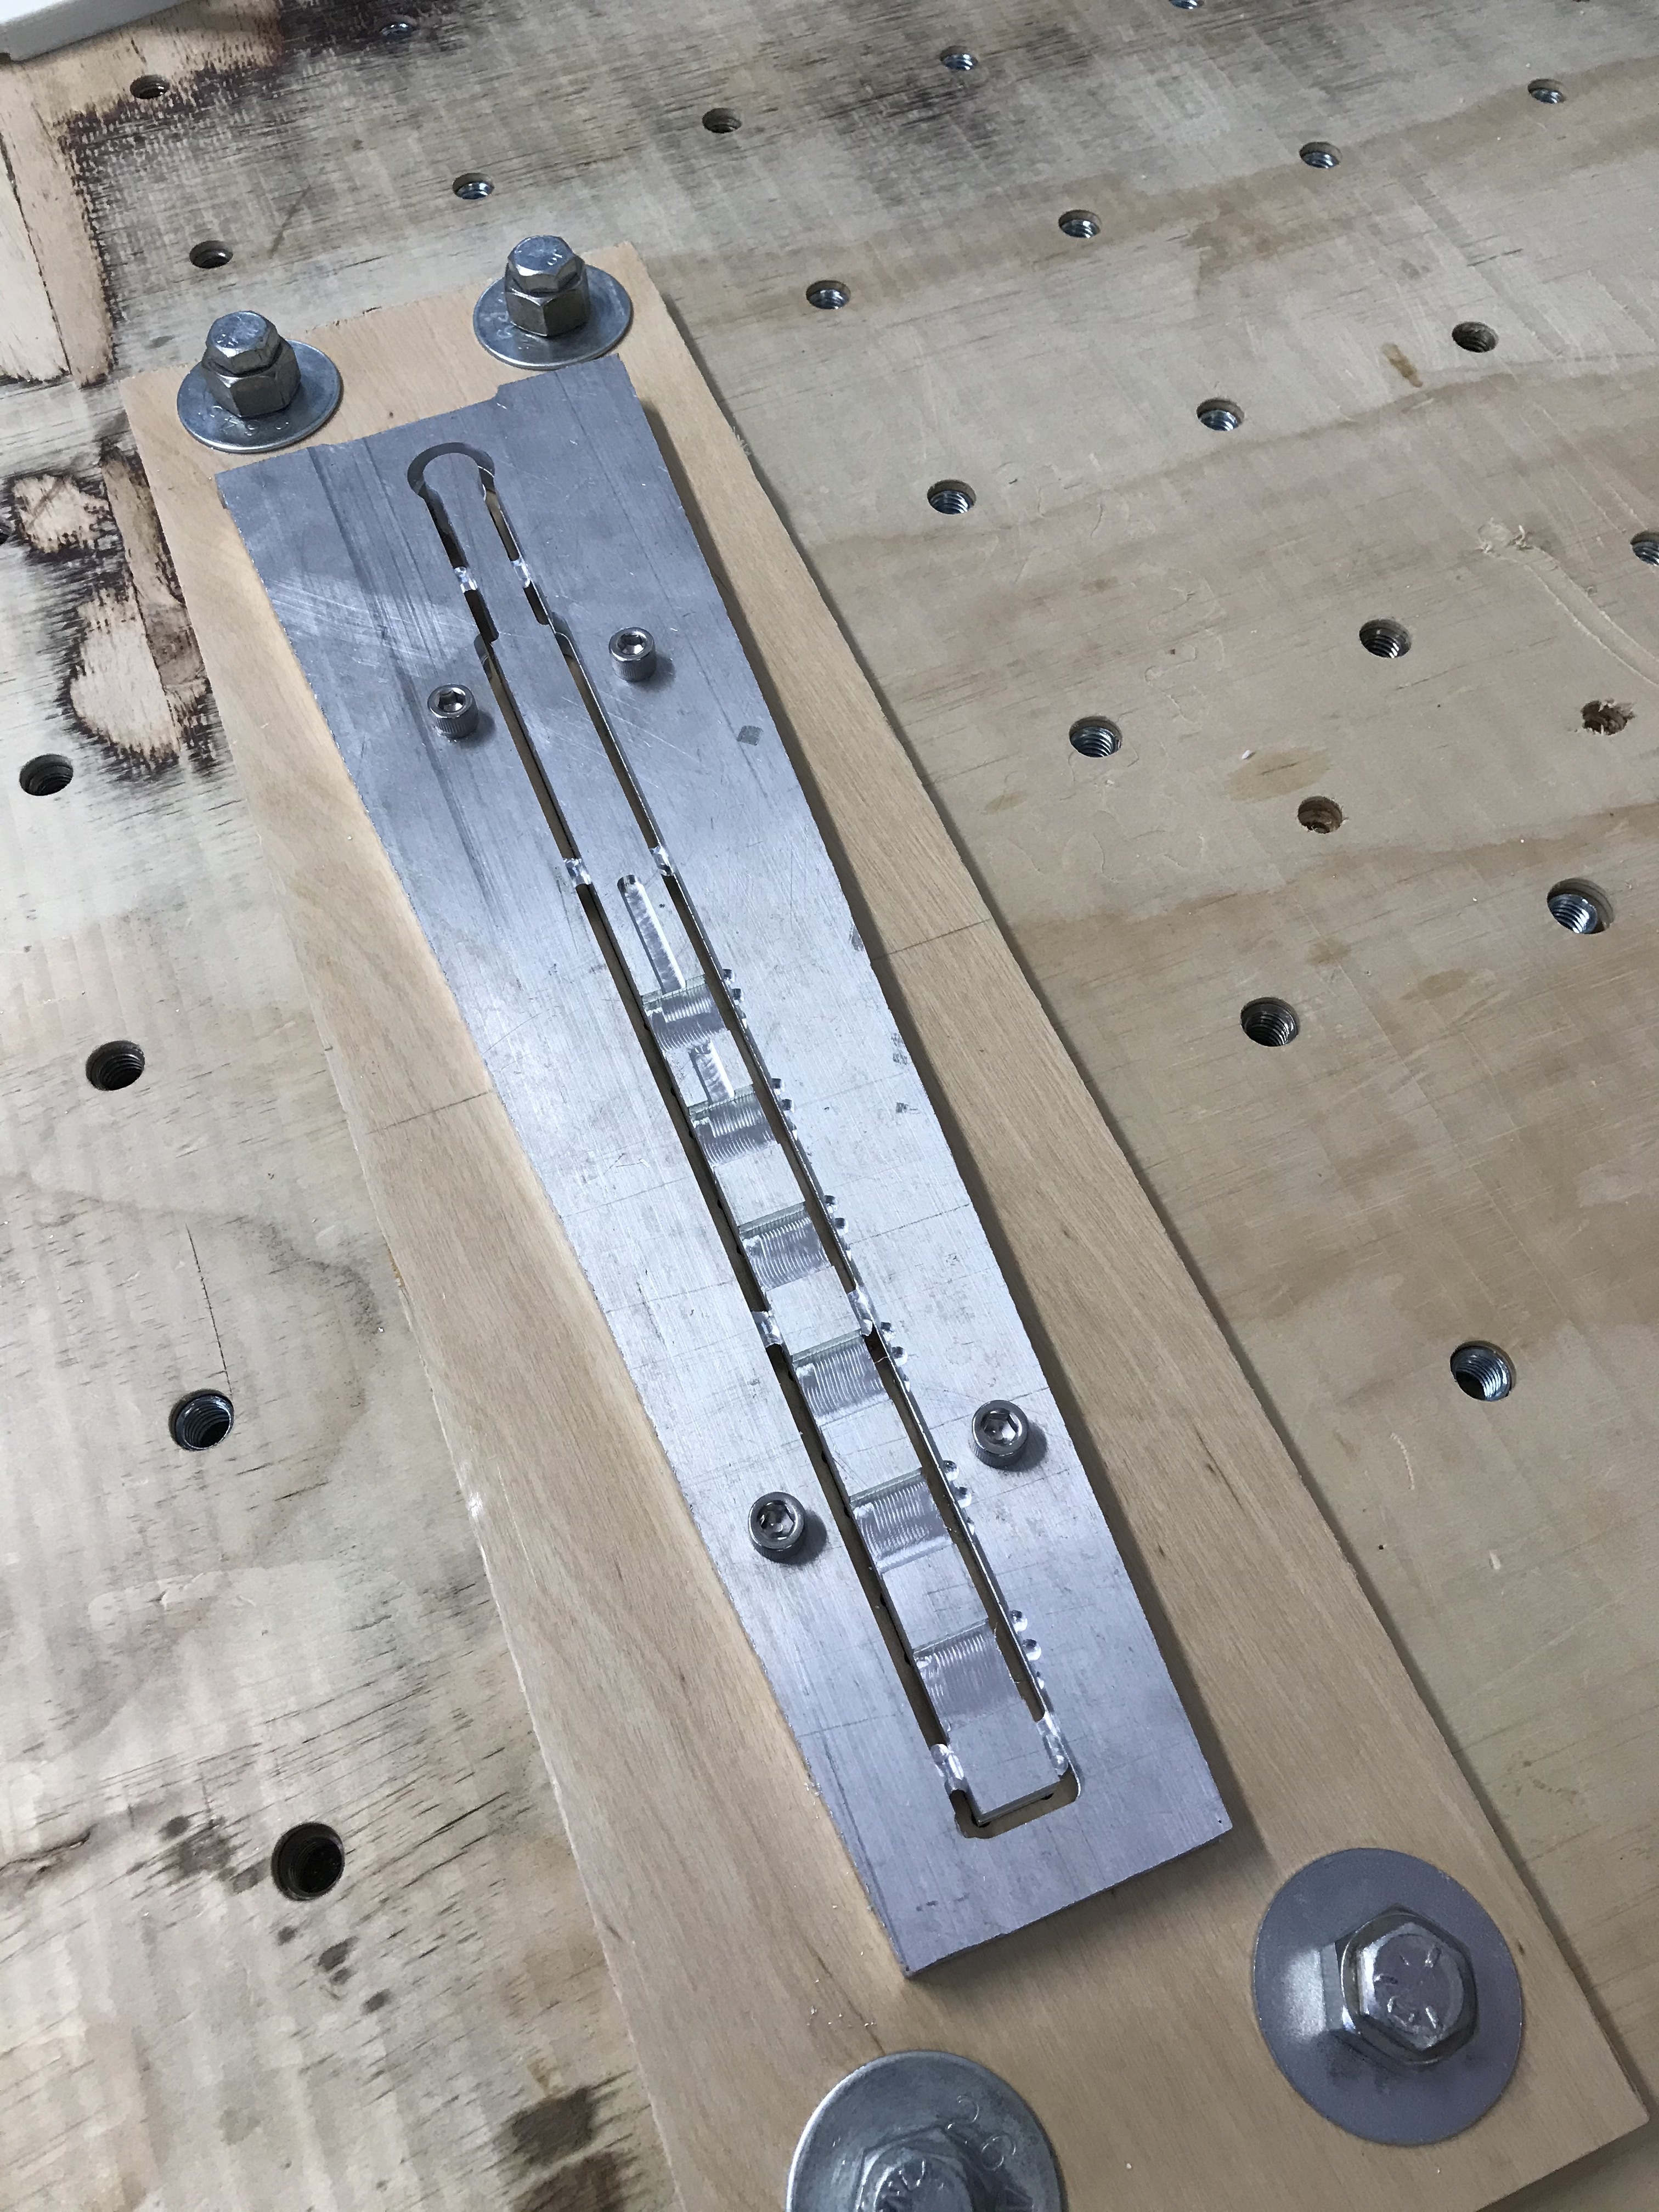
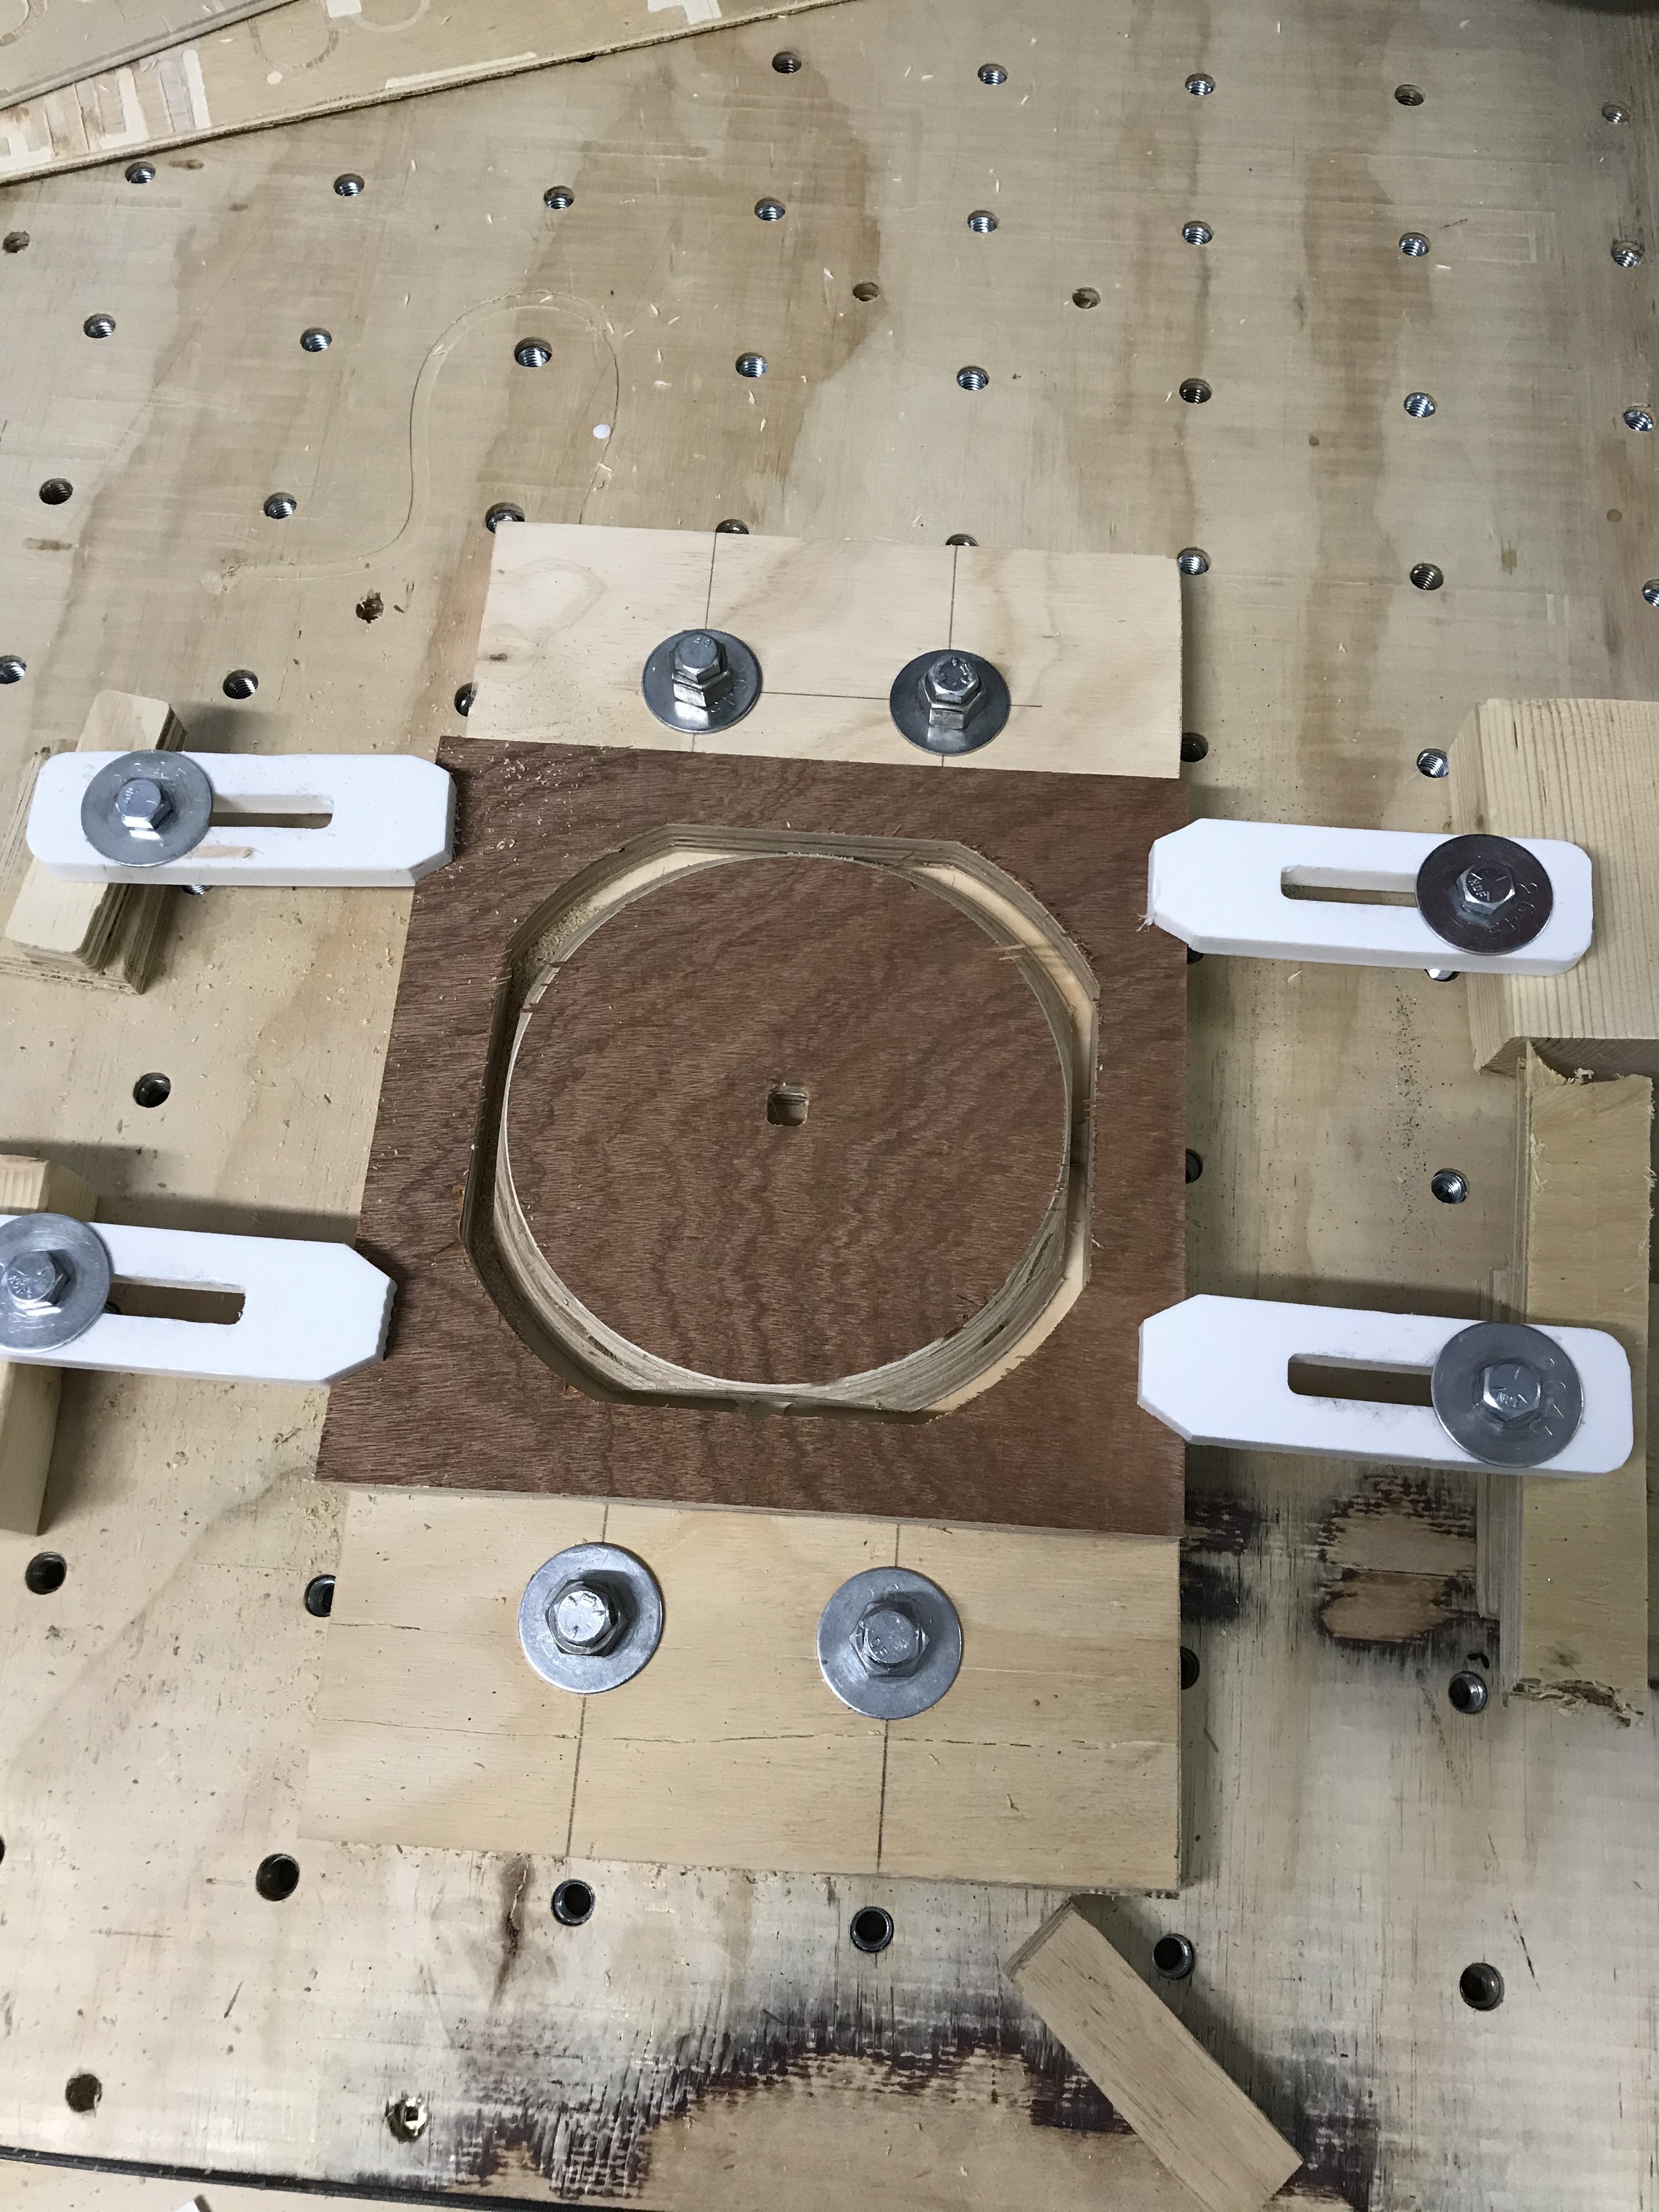
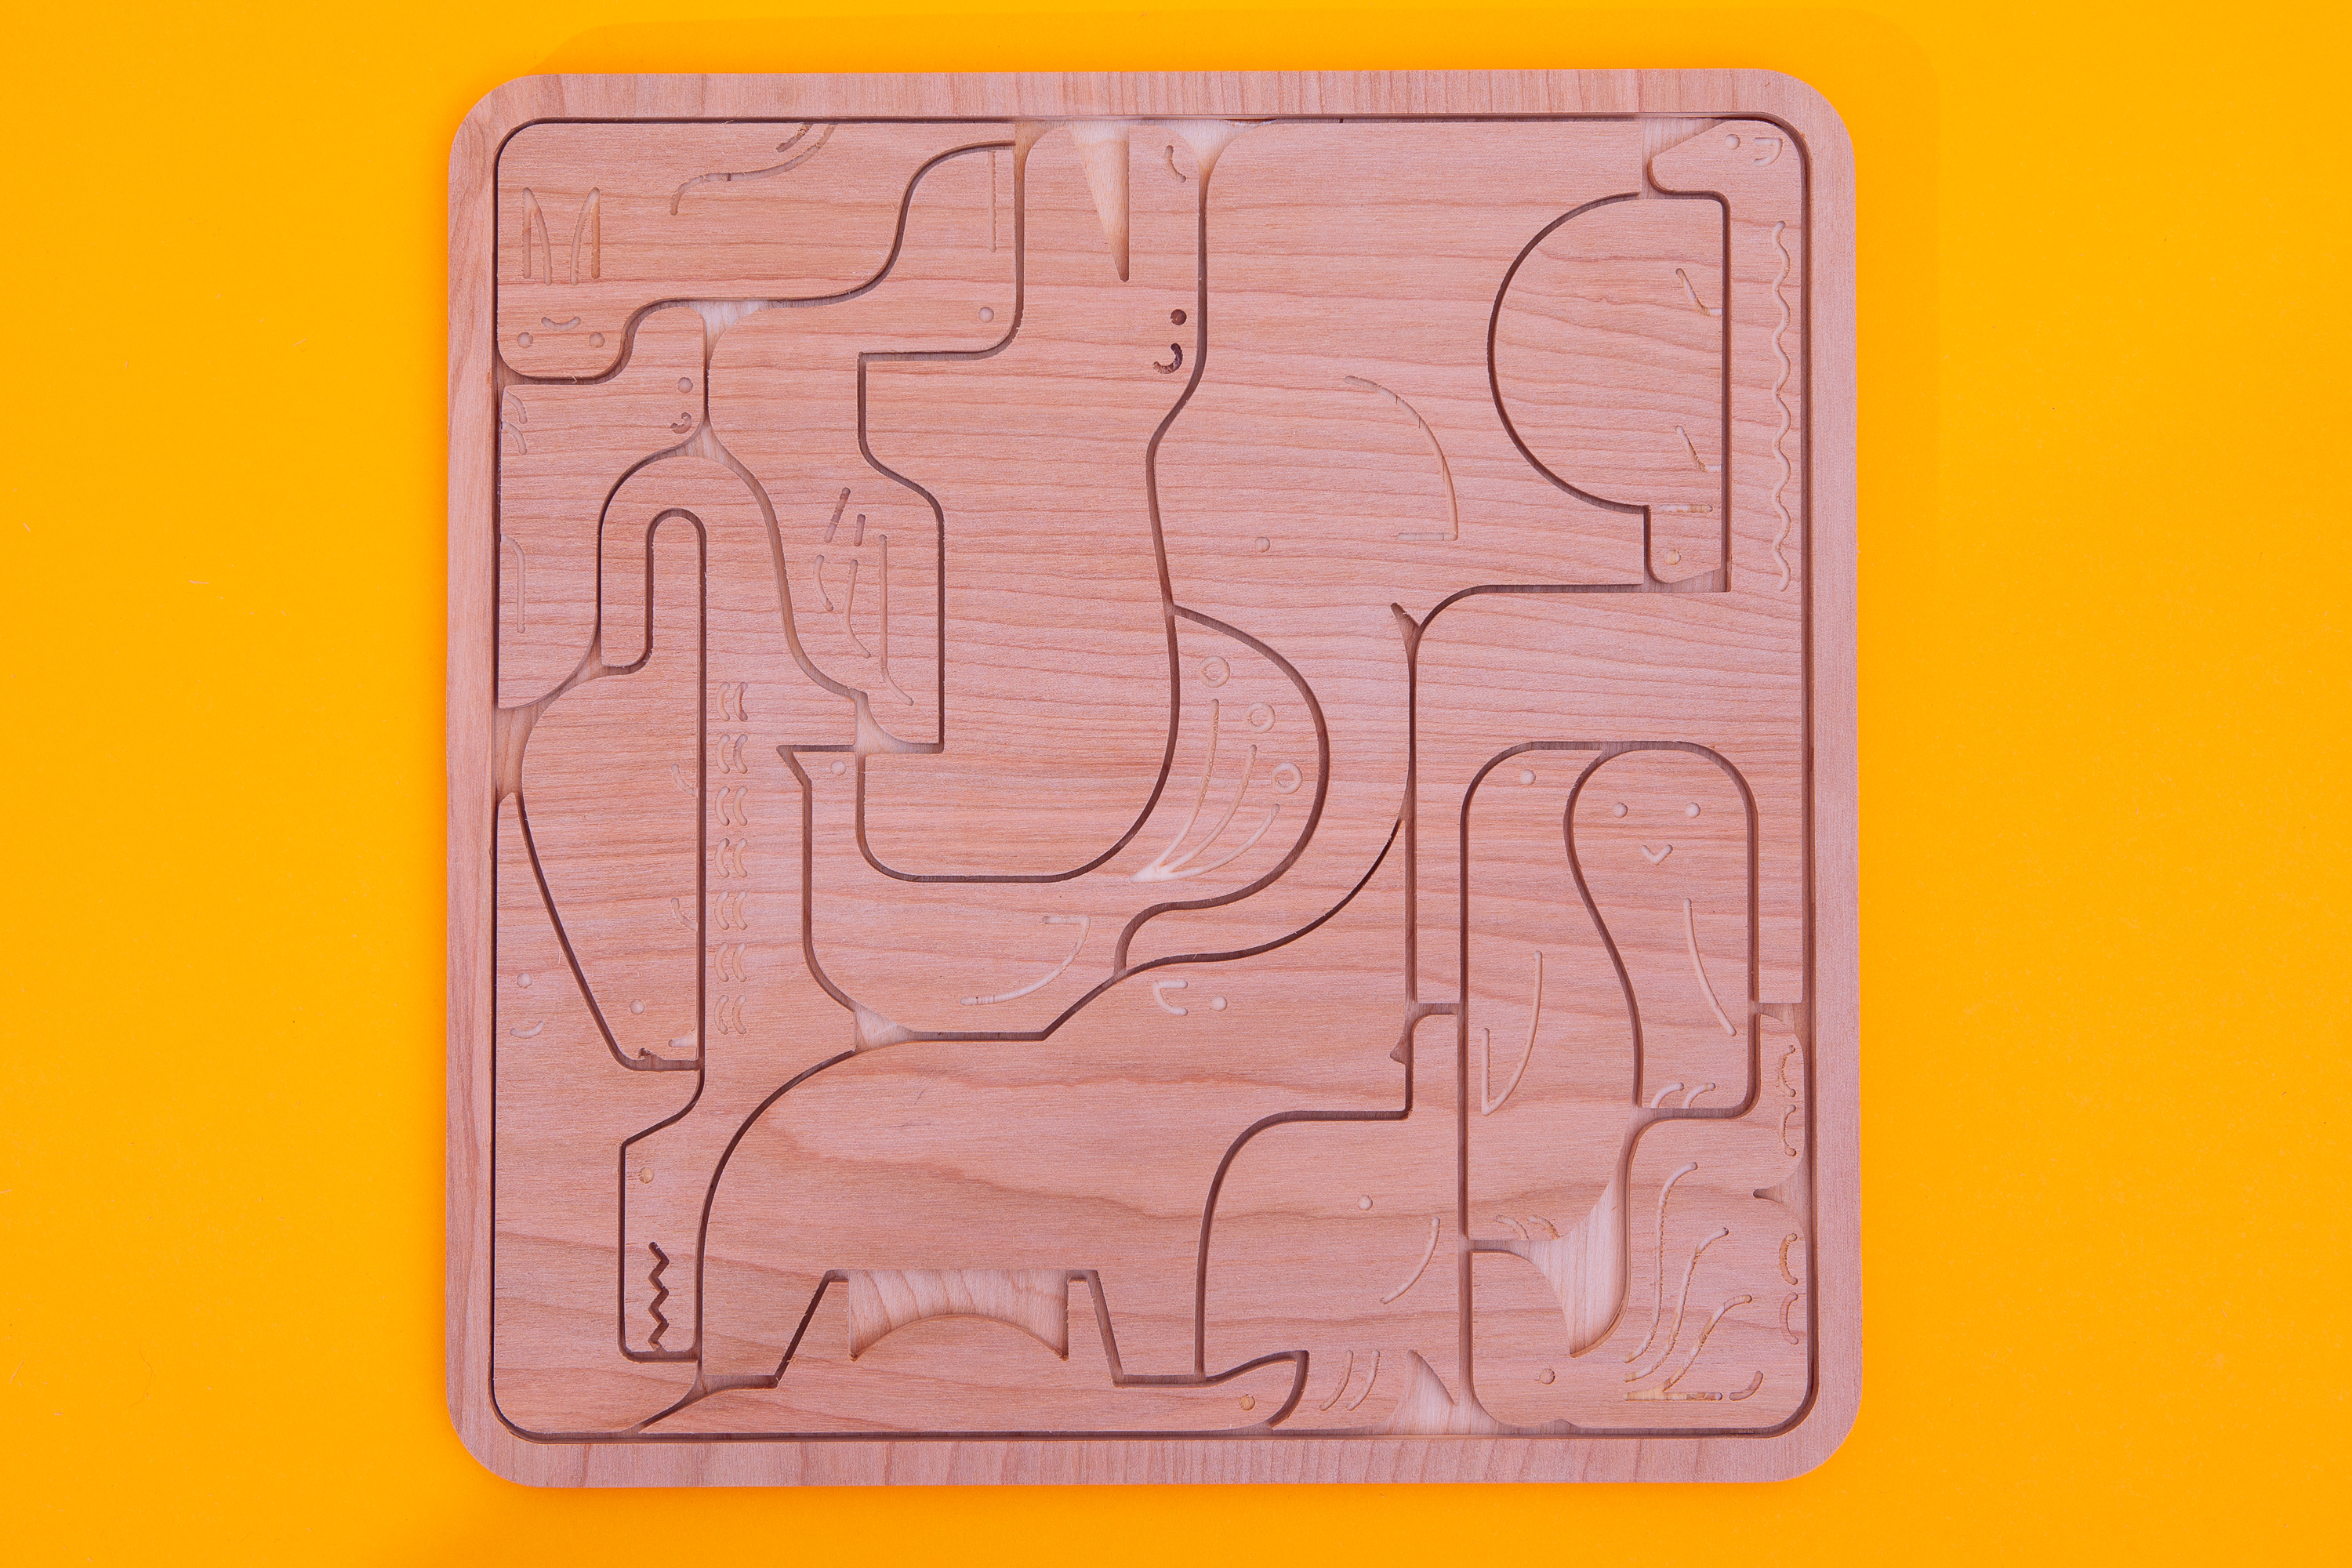
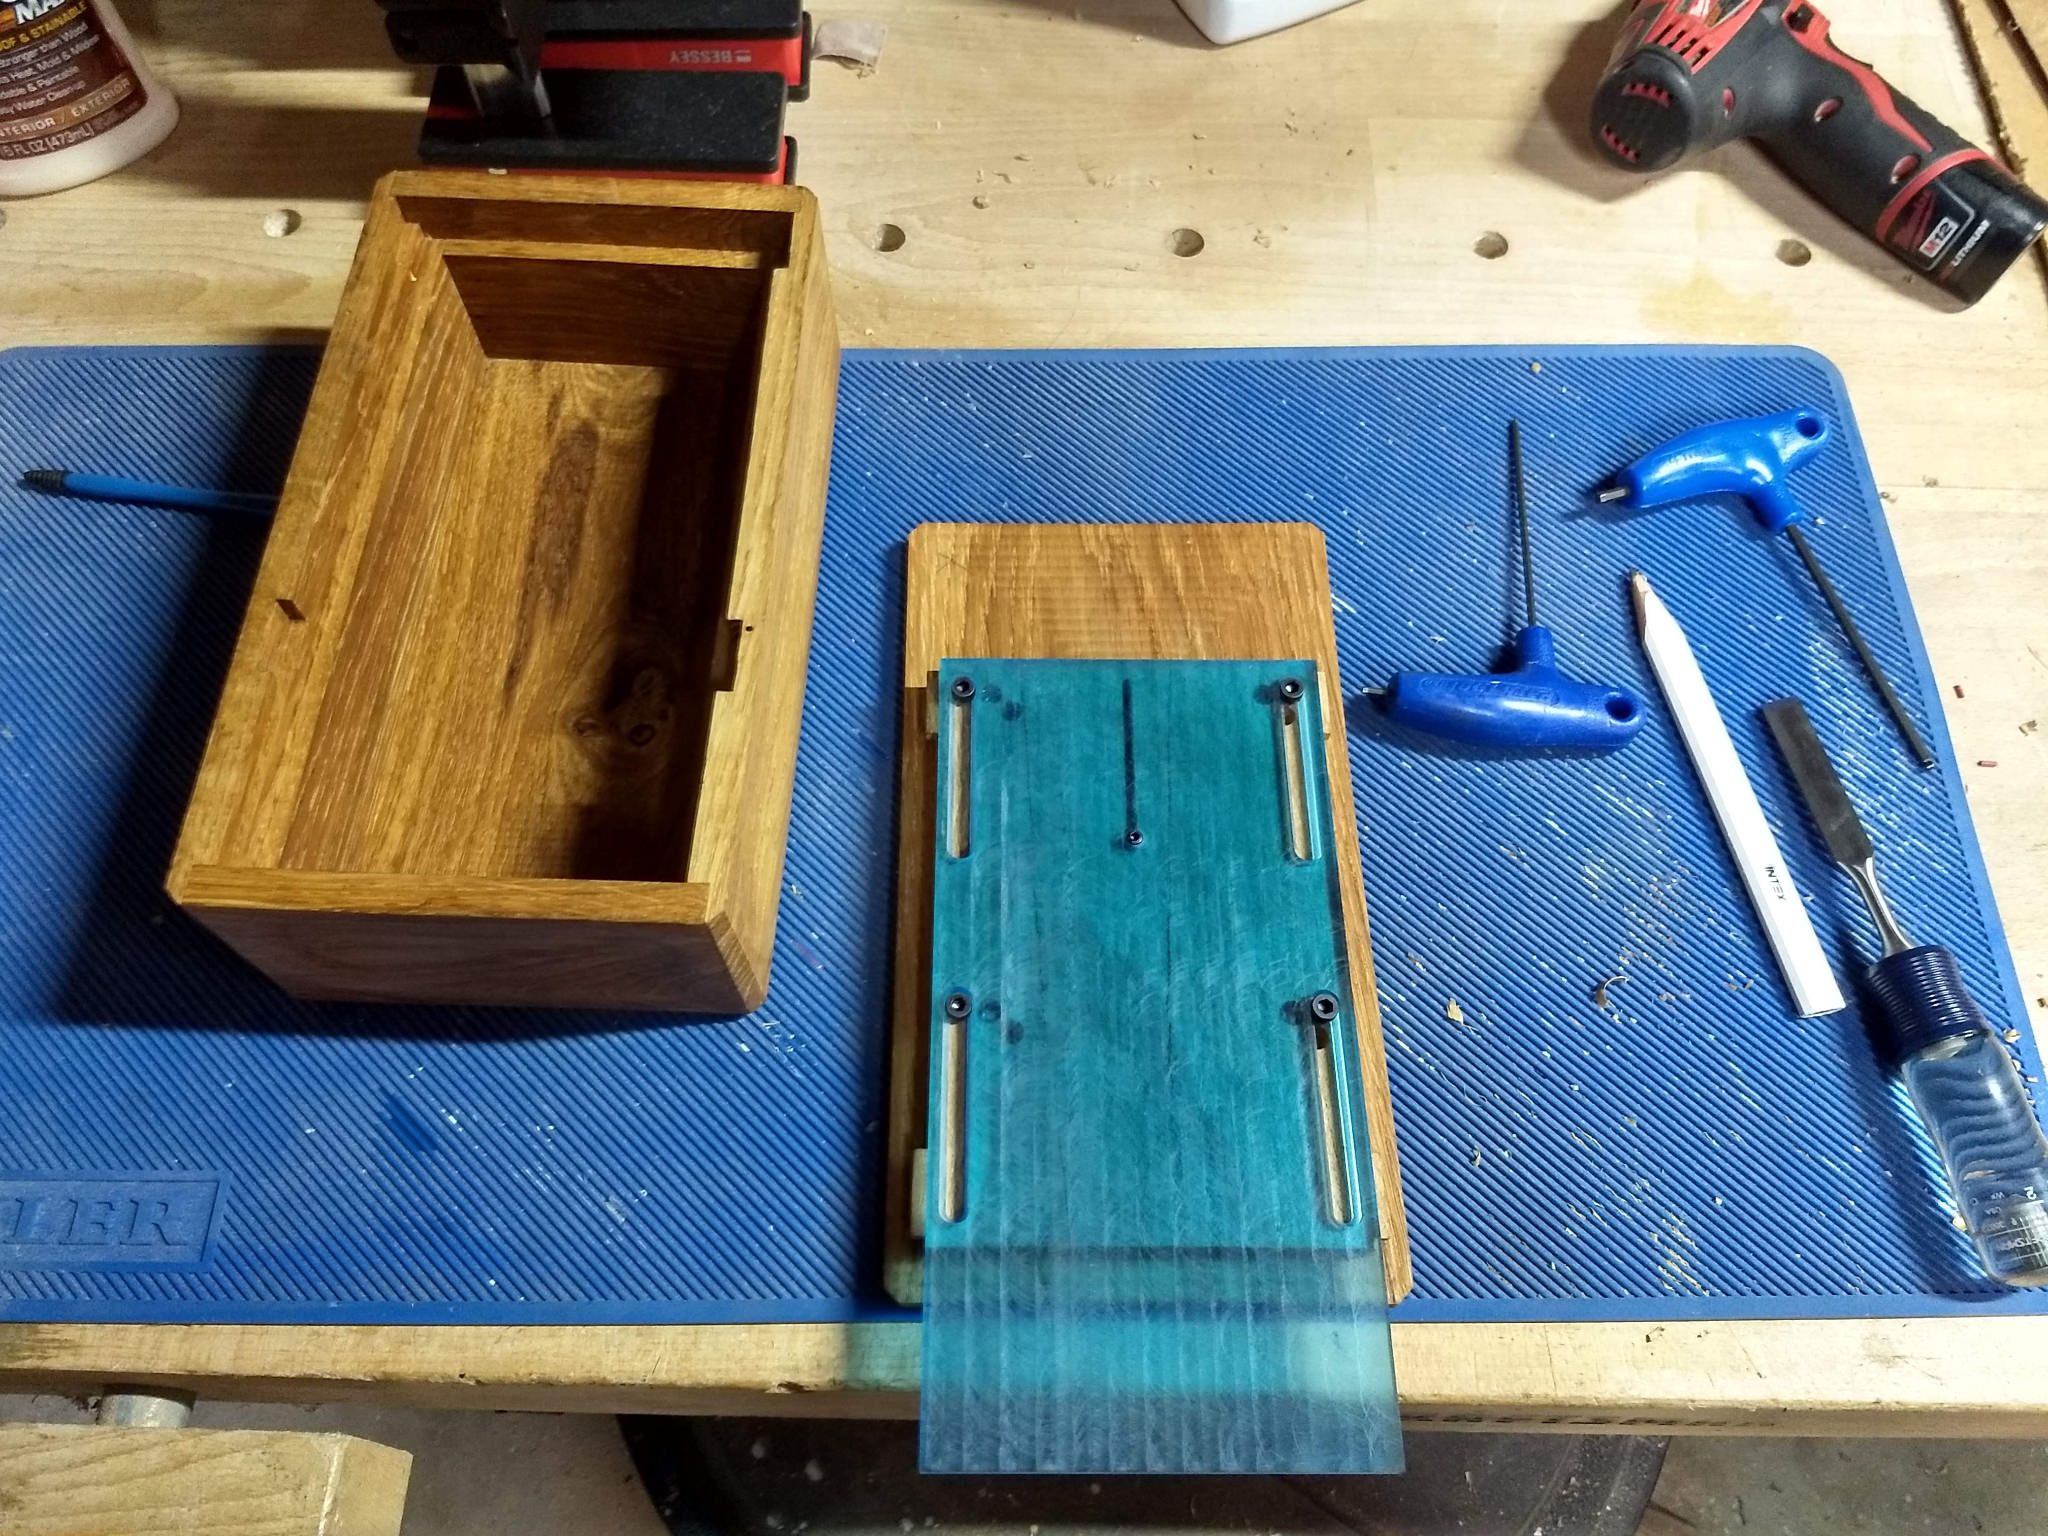
The main section of the box is pretty self explanatory. Just a box with some fillets to add some design and aid in holding it while trying to solve it. The lid is really where all the magic is. To progress towards the center of the puzzle, the lid slides off to one side, and once you reach the center it can be simply lifted straight up revealing the contents.
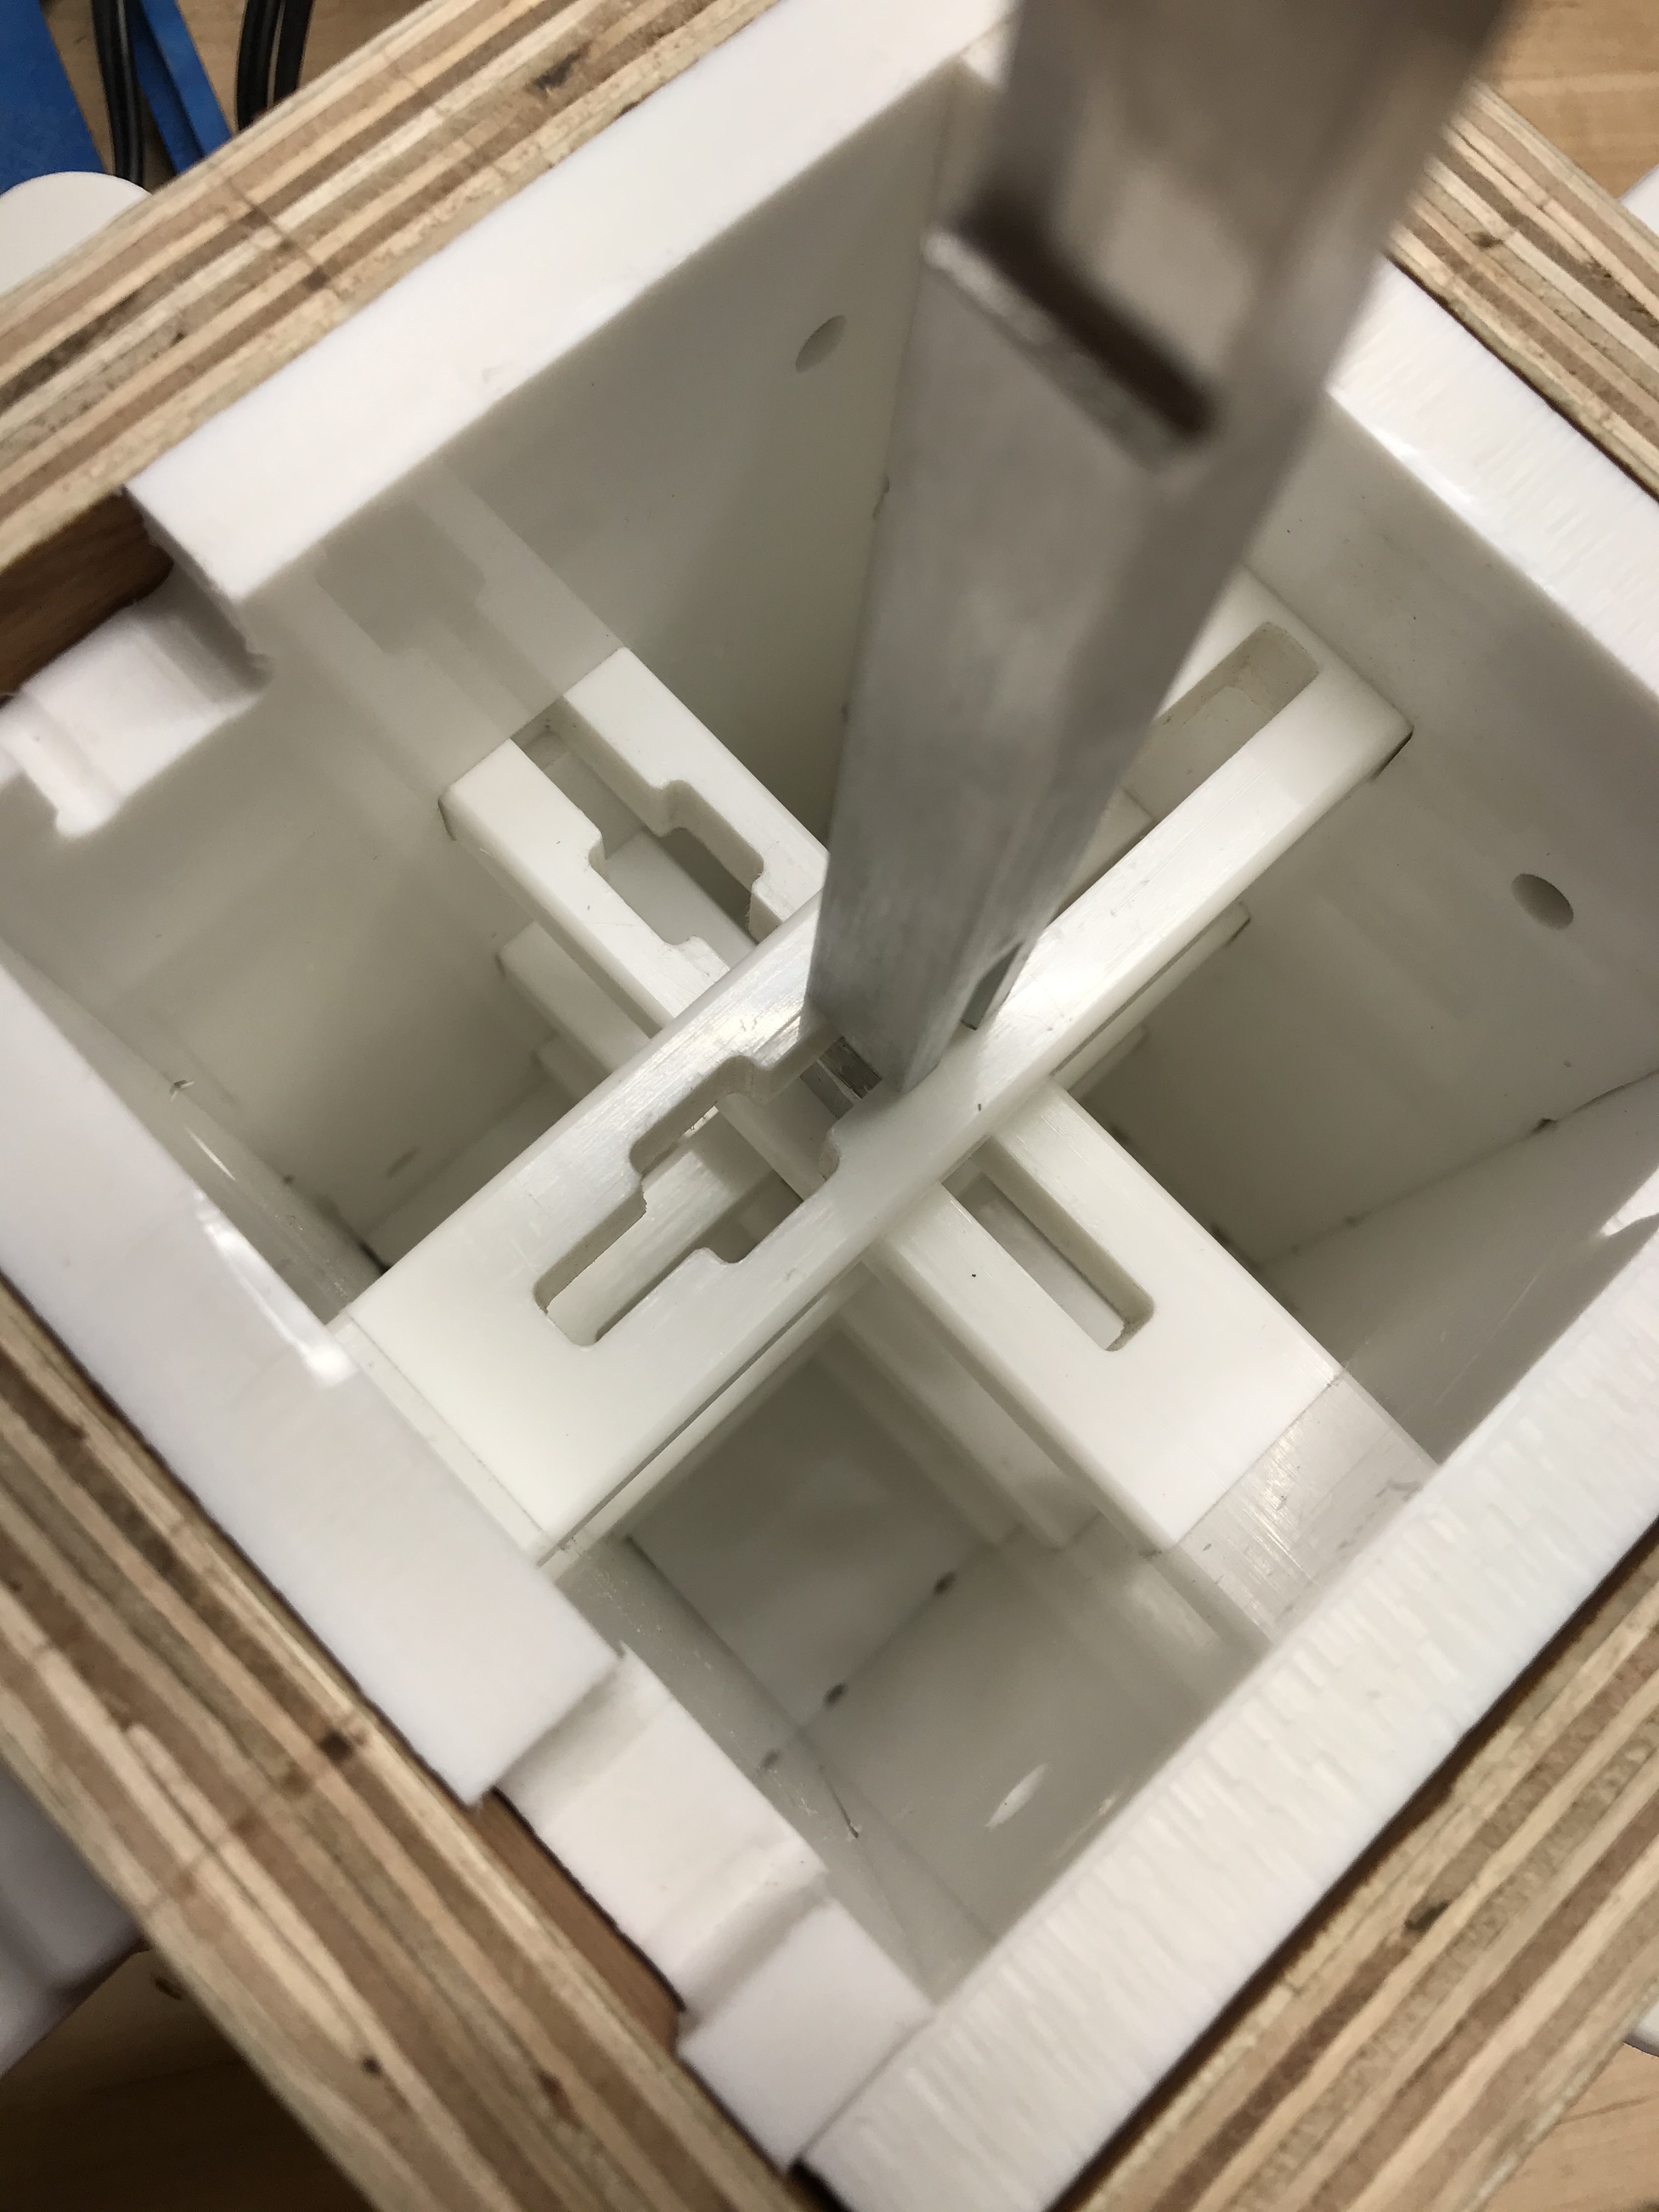
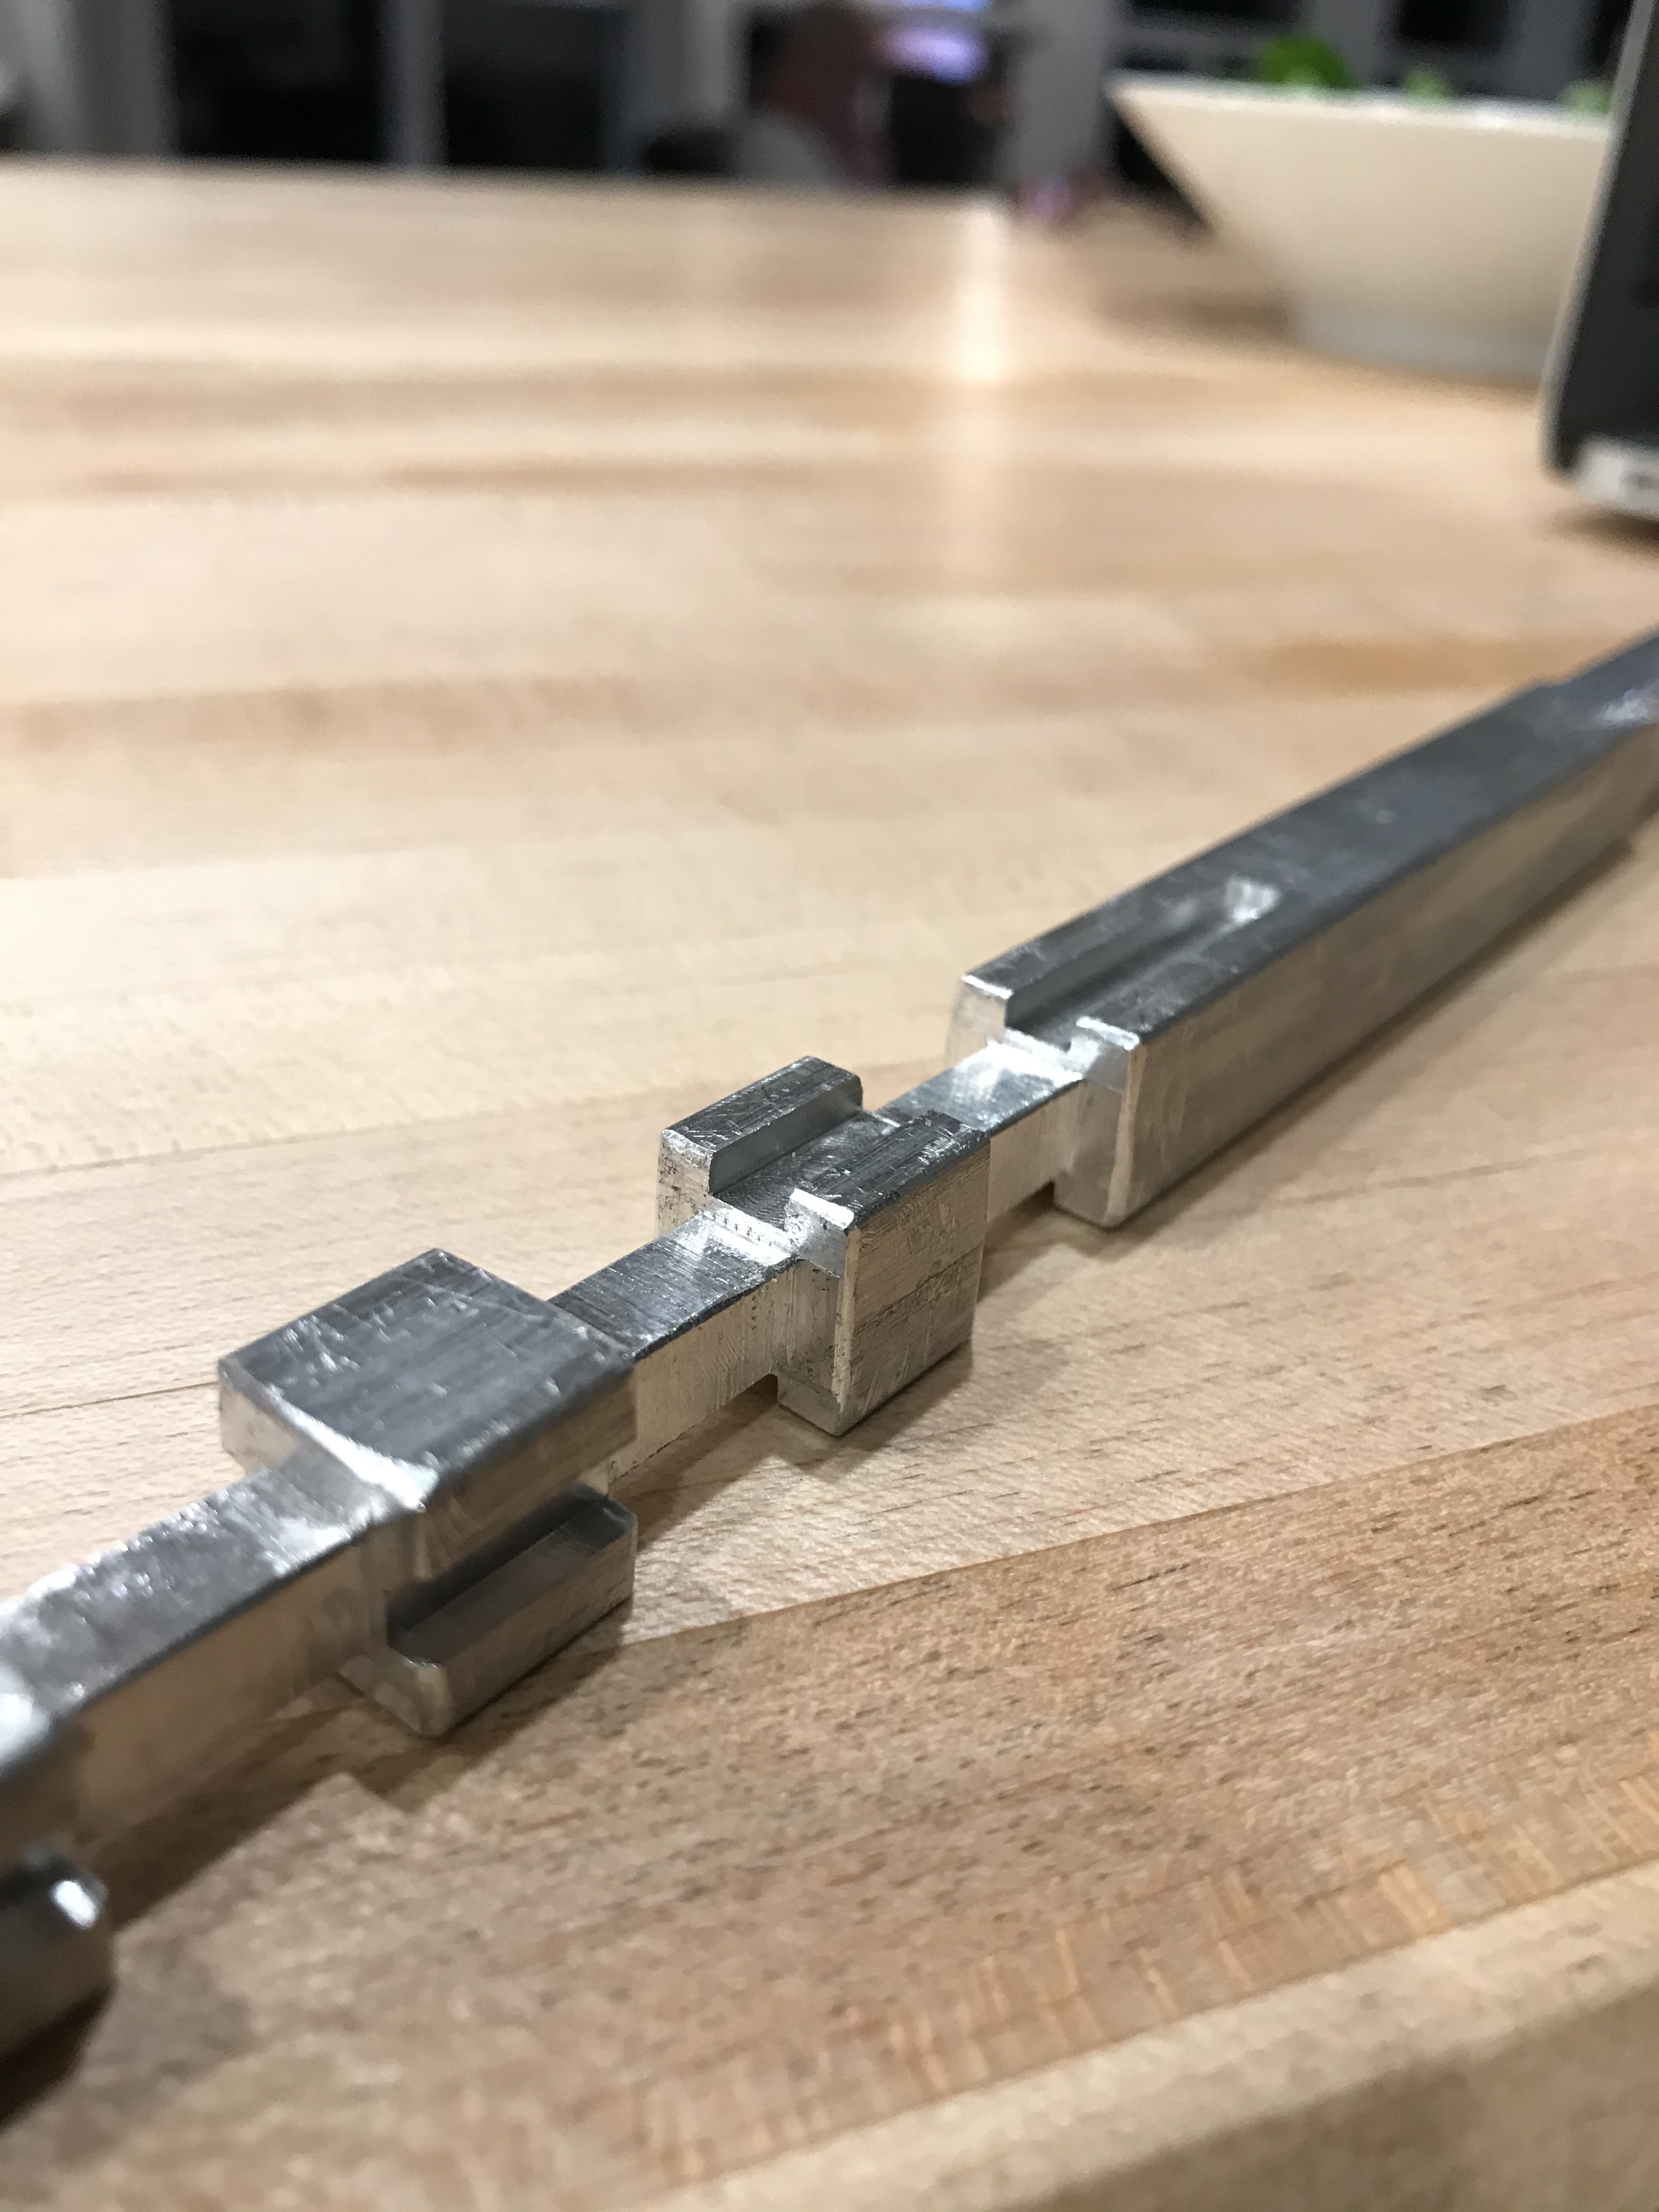
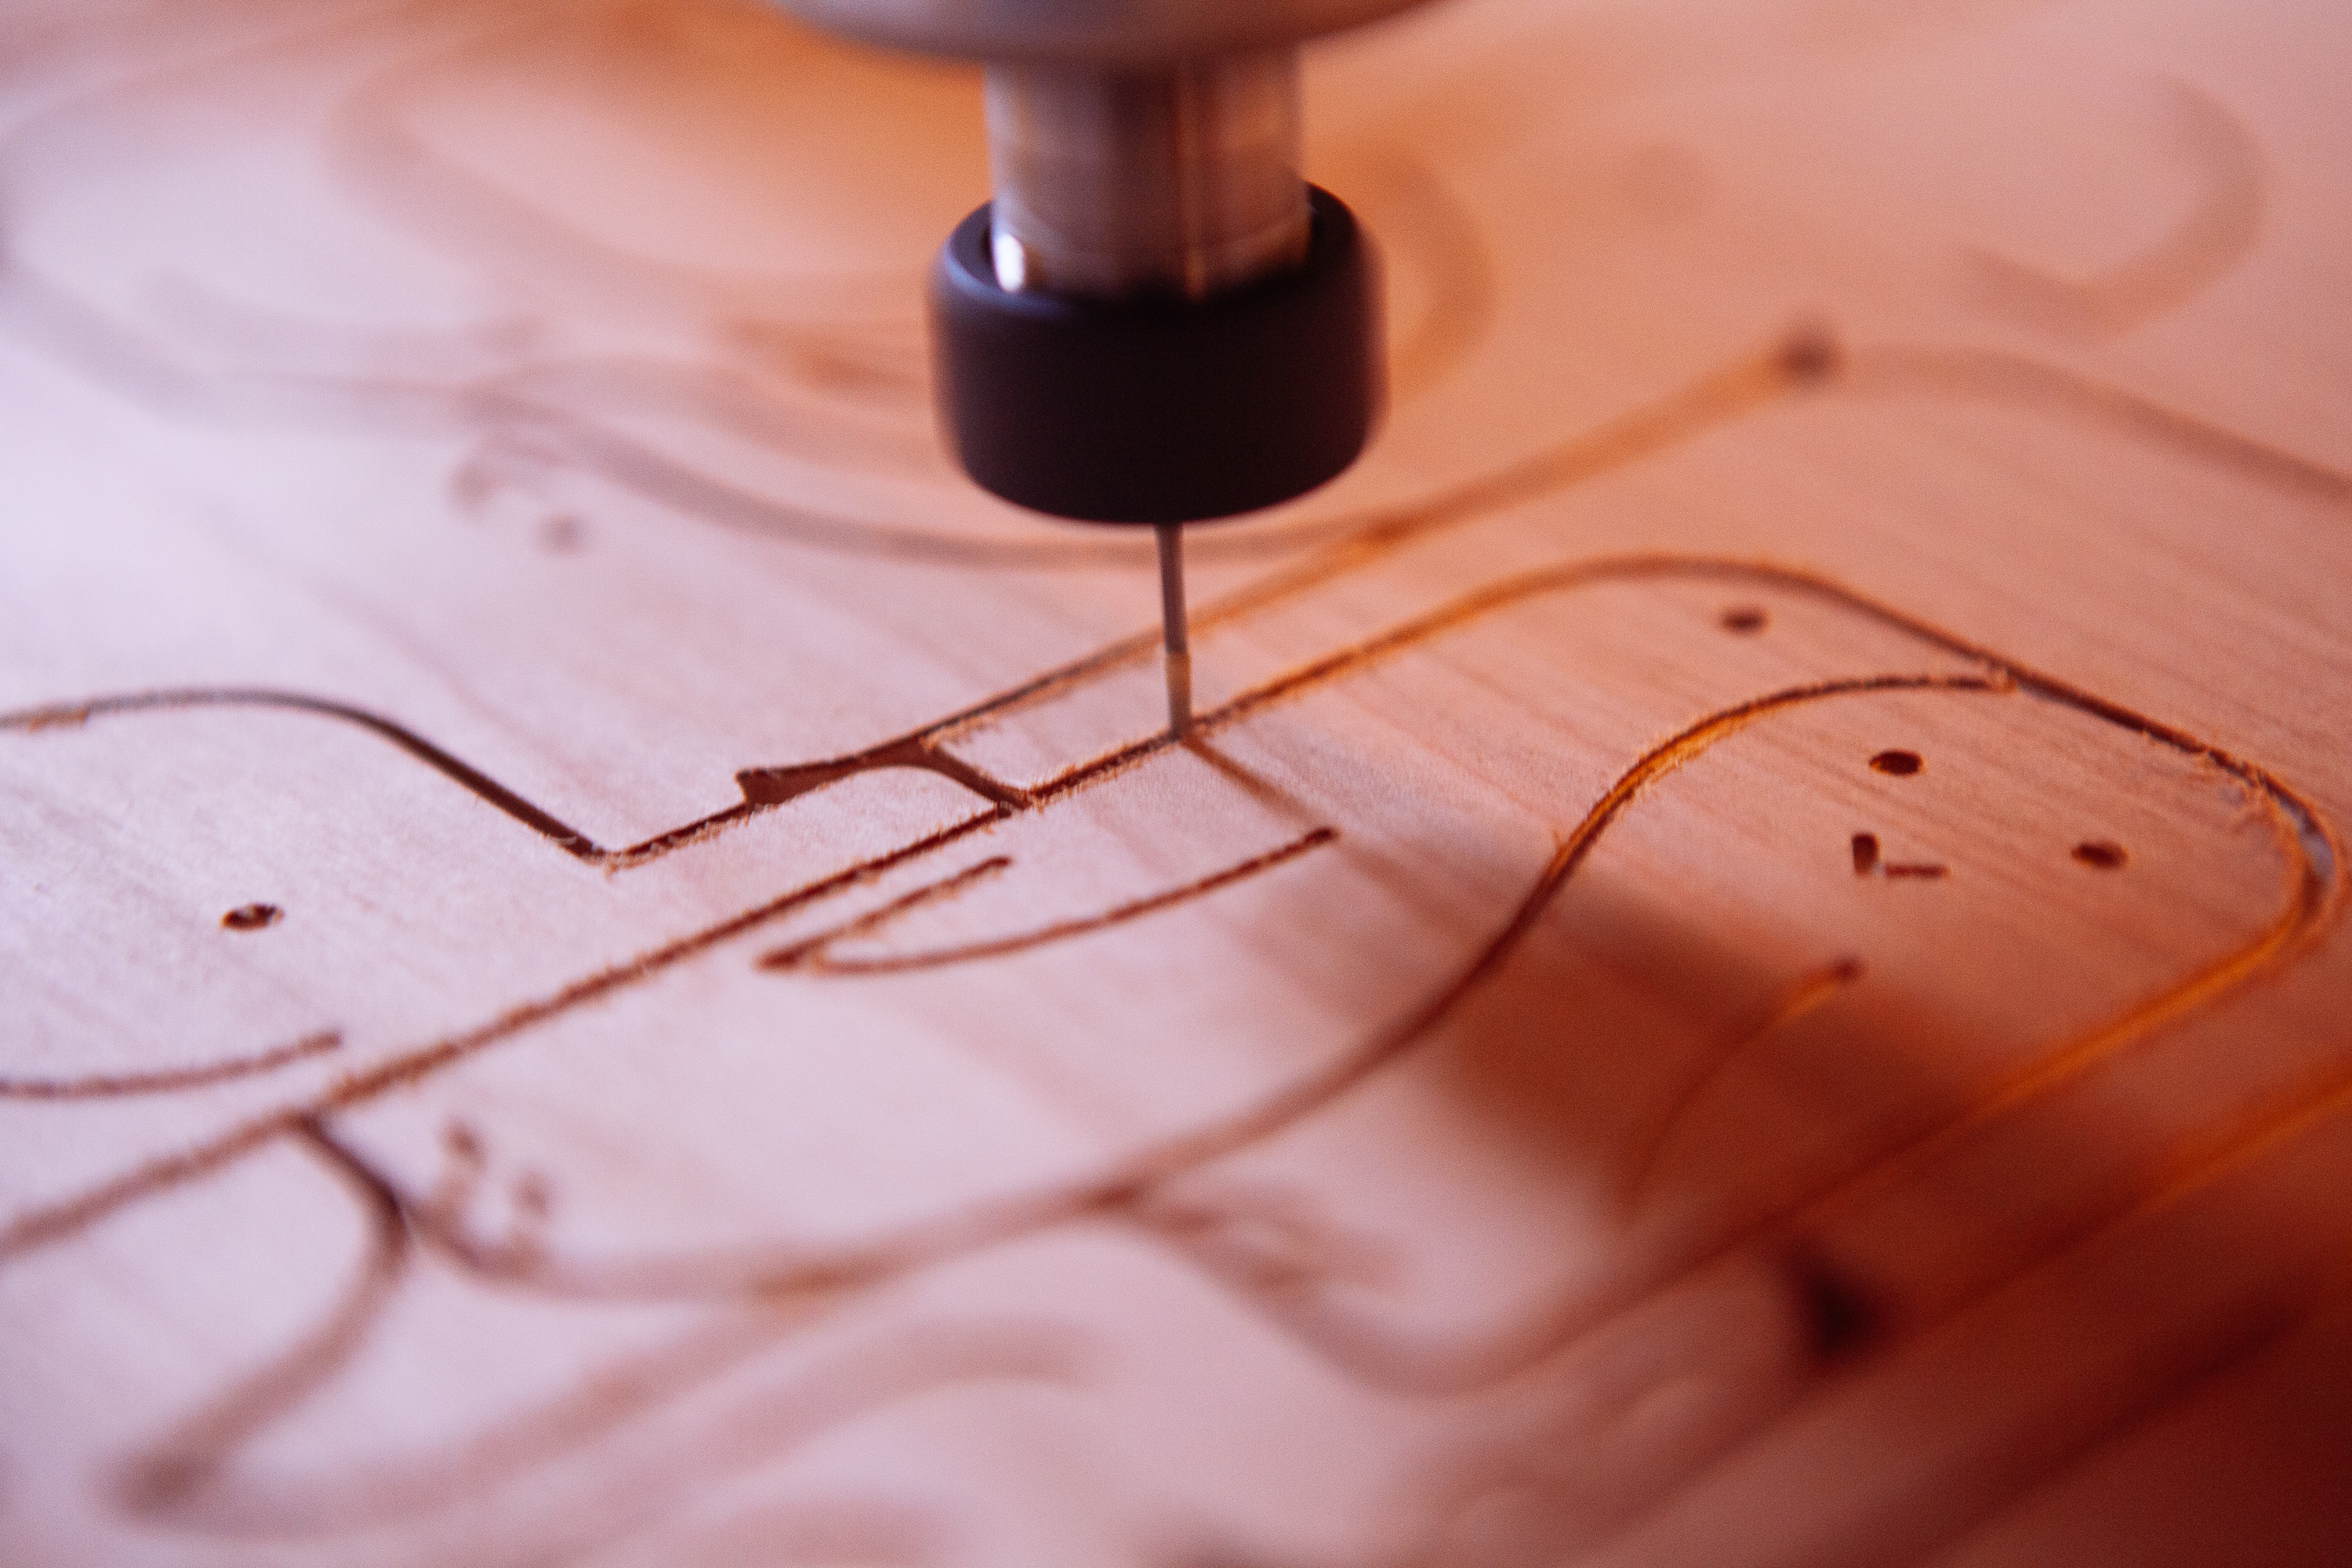
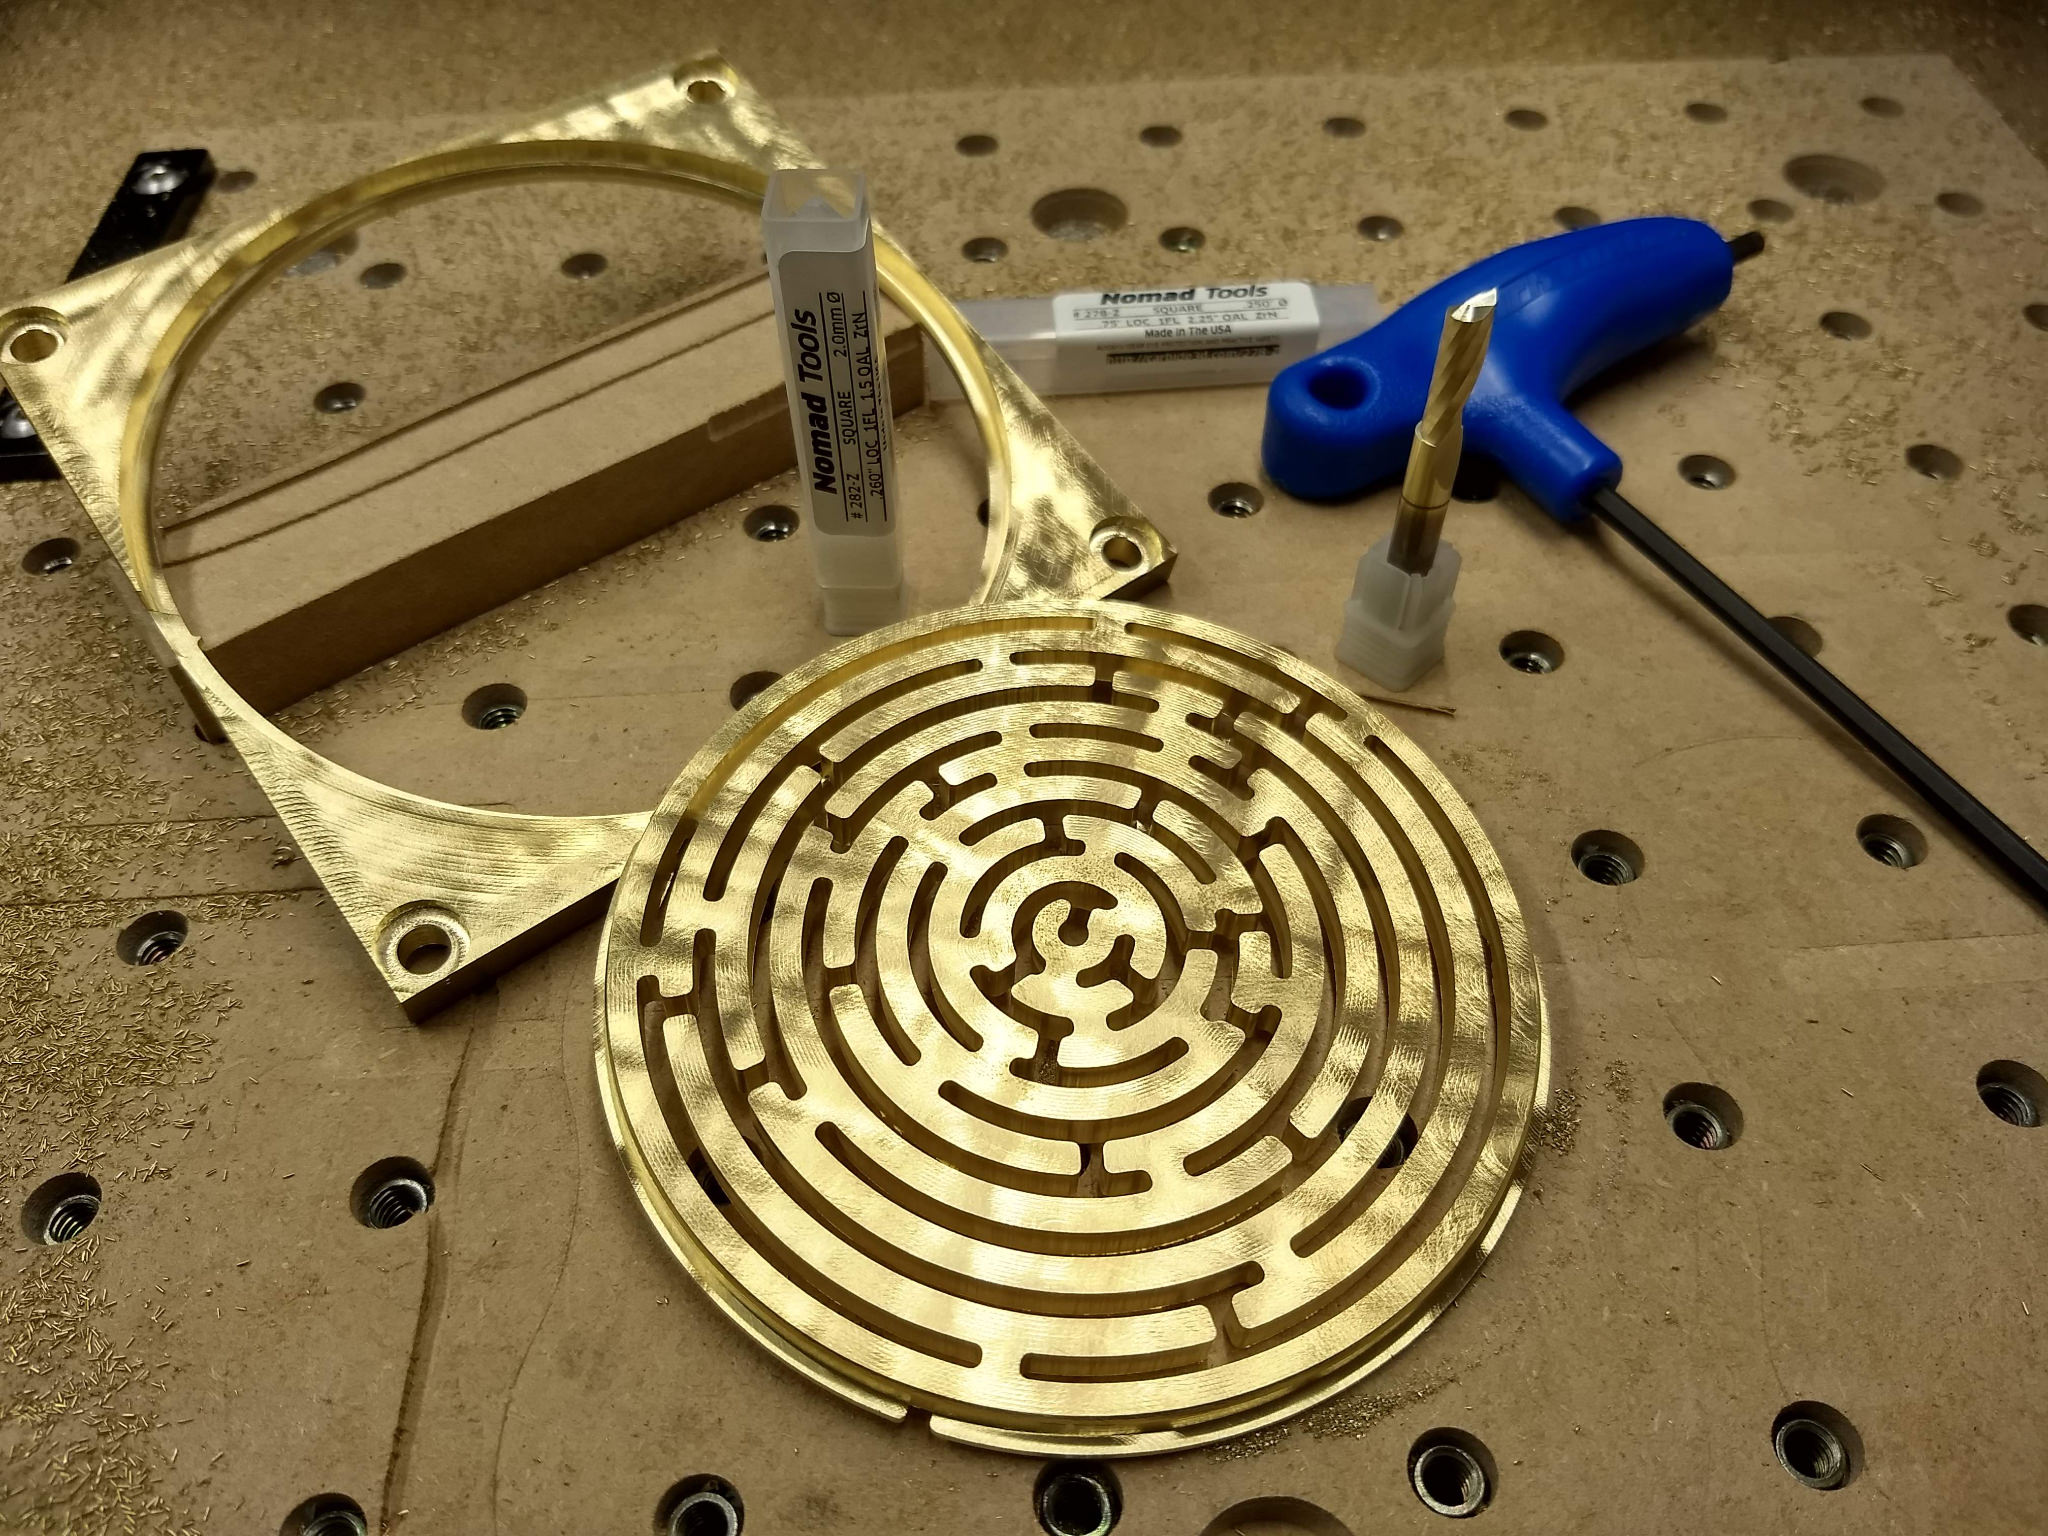
But the pin that needs to travel through the maze is hidden off to the side underneath the top lid. So knowing where and how to start shouldn’t be abundantly clear. There are also 3 different start points to the maze, one of which is a dead end. As you can probably tell pretty quickly there is no obvious path to the center of the maze. This is where that hidden path I talked about earlier comes into play. In person, it is very difficult to see that the wall isn’t actually a wall, but if u just keep turning the maze, it will slide right on through the “wall”.
Photo highlighting the fake walls and dead end trap
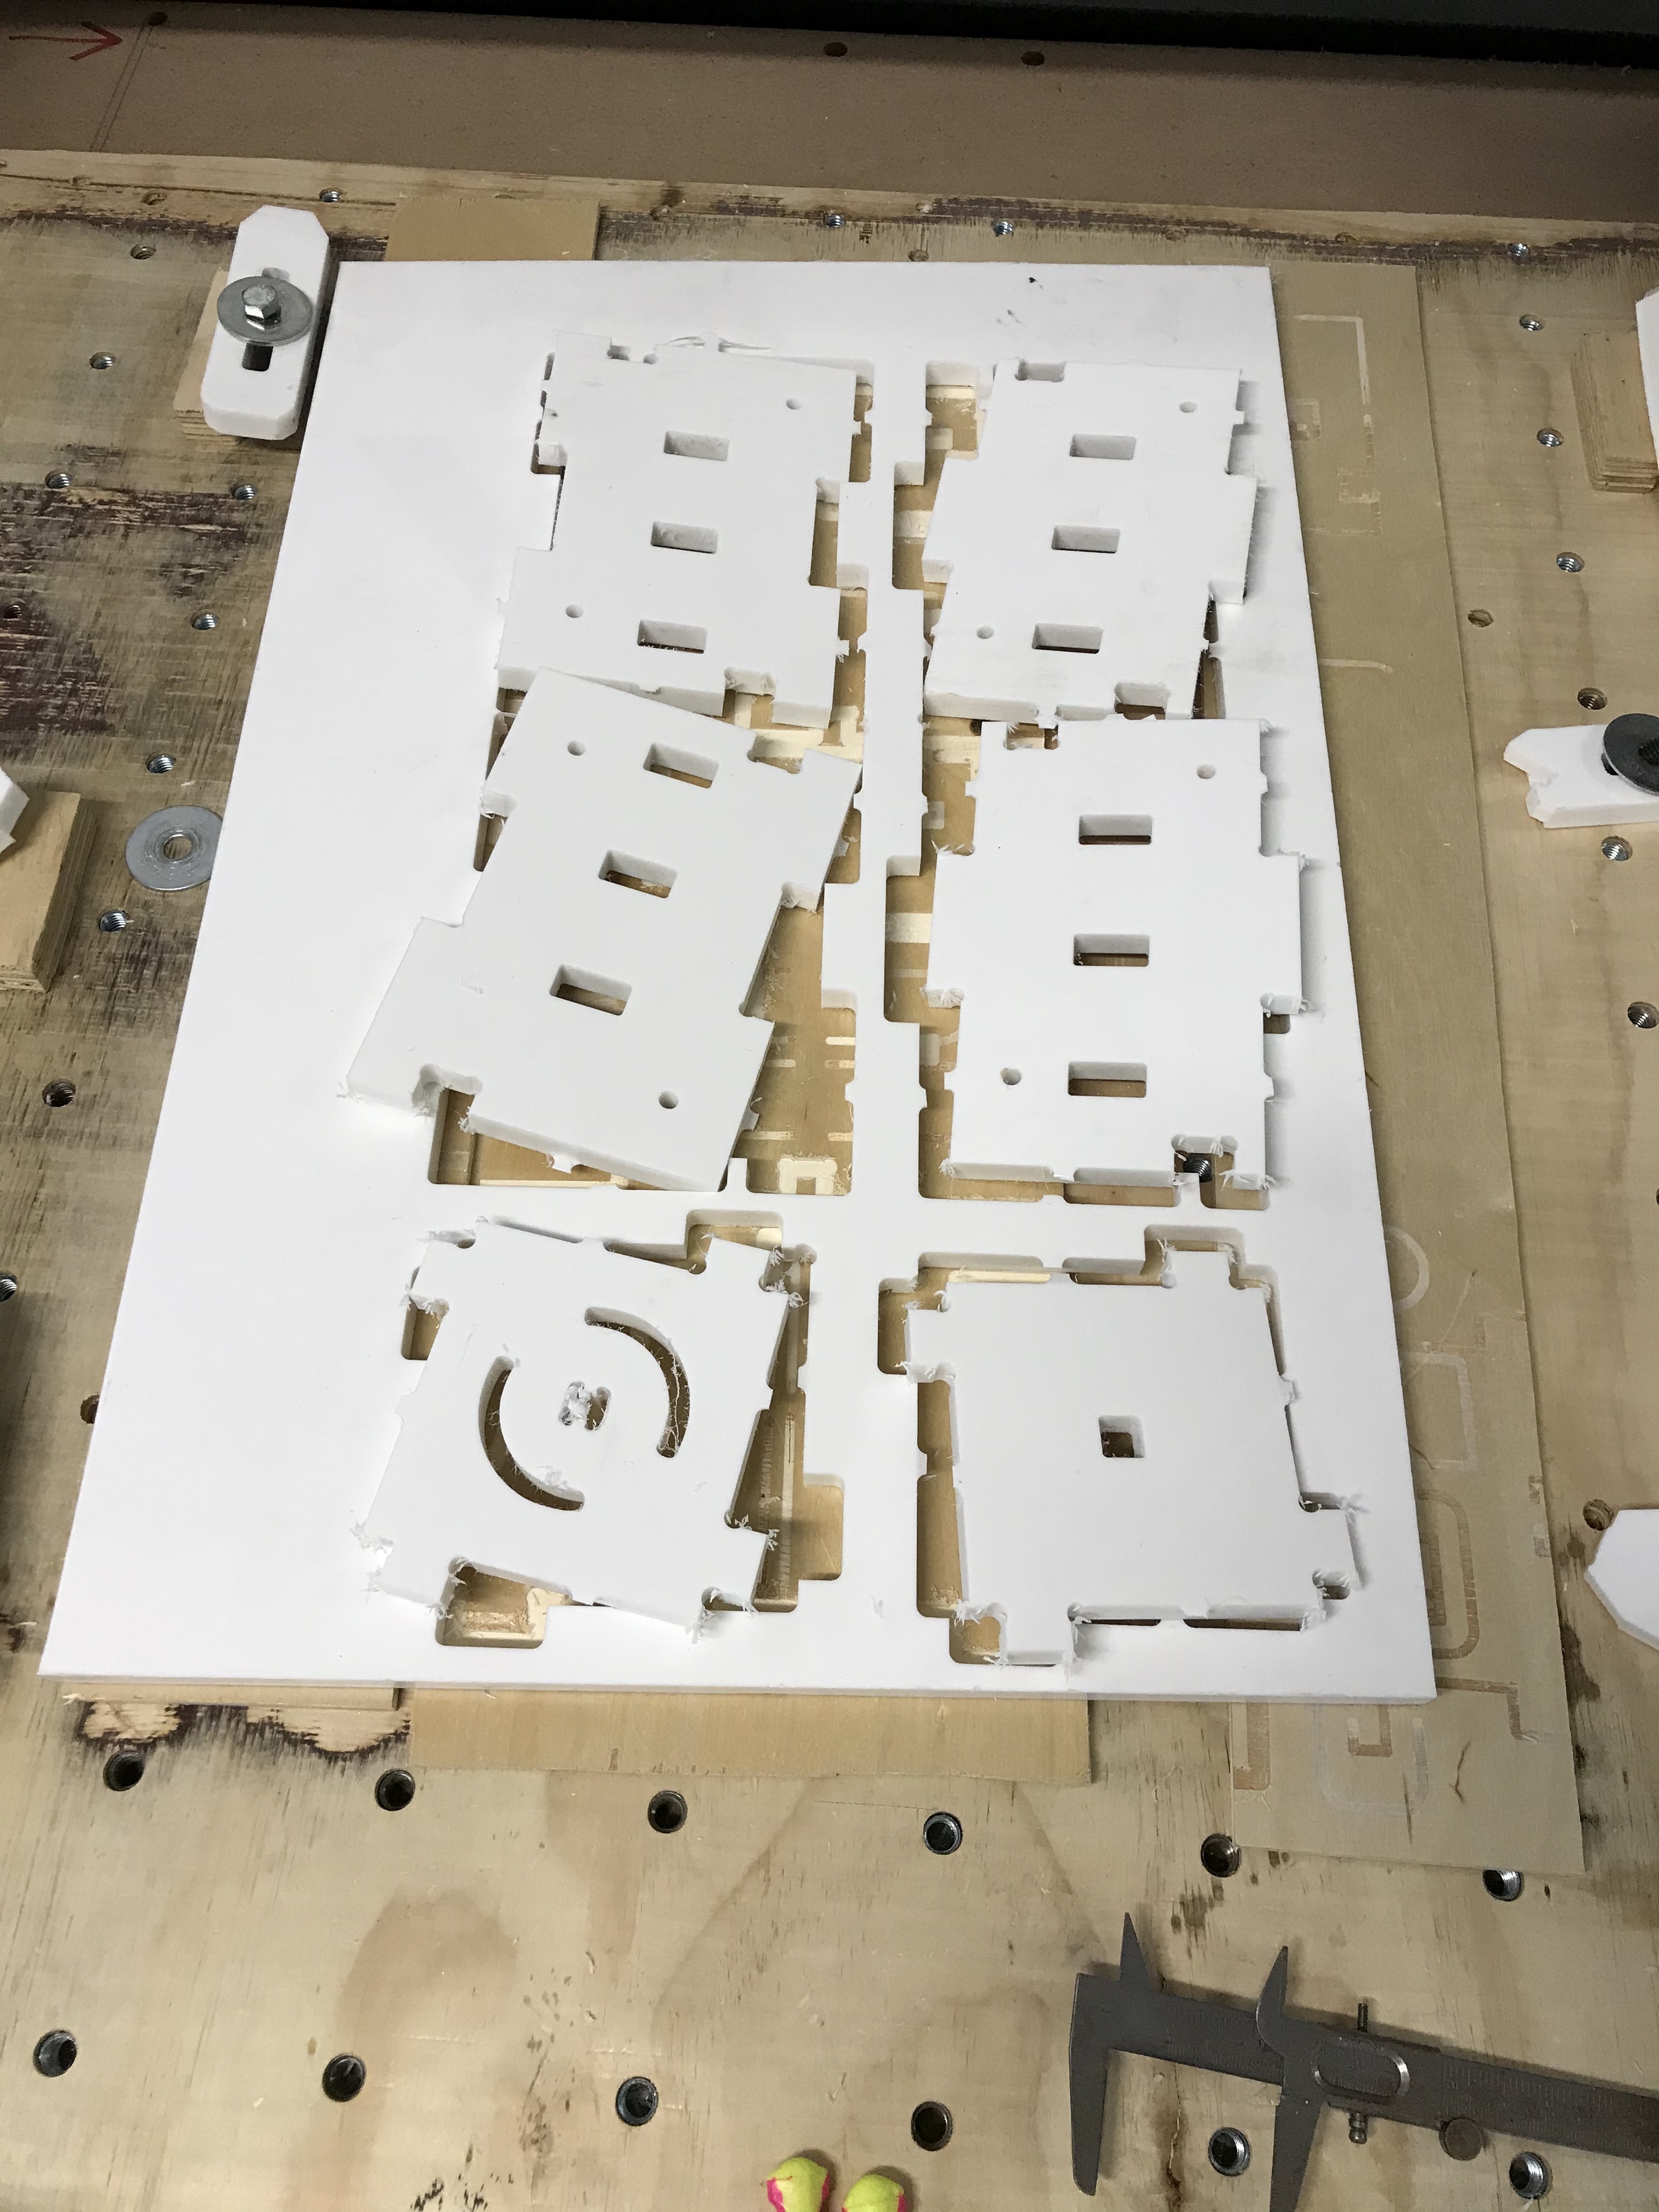
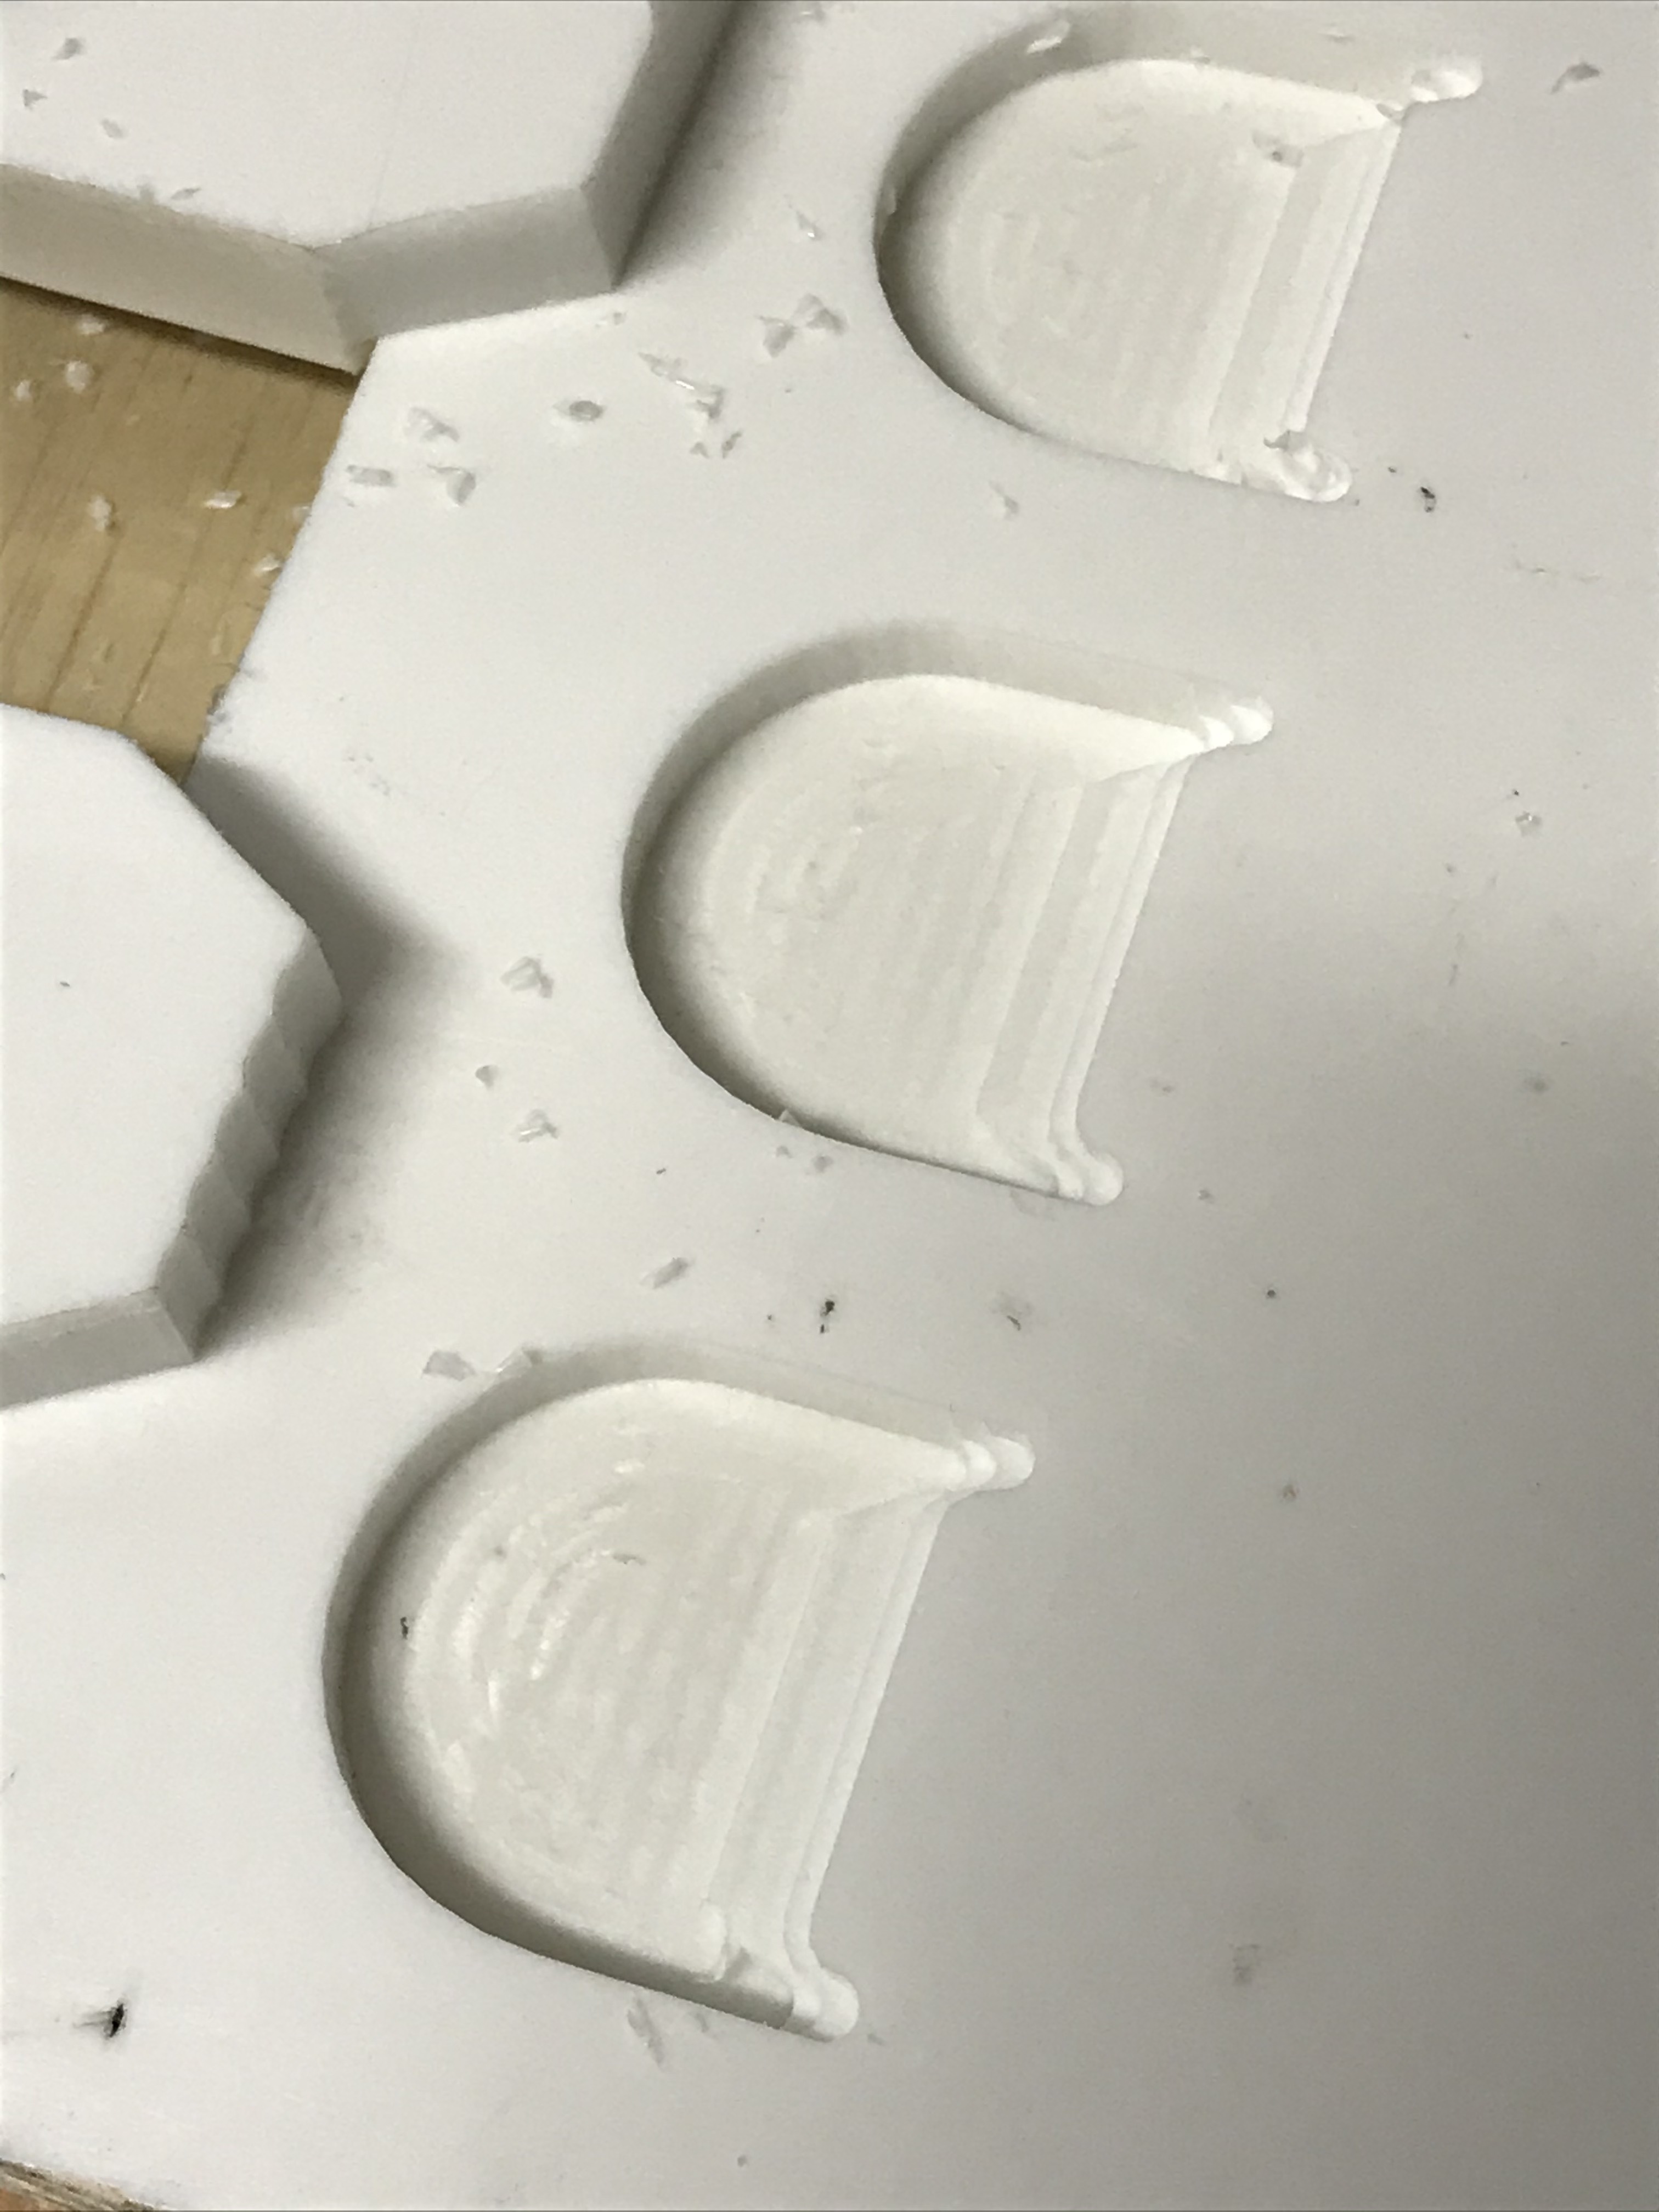
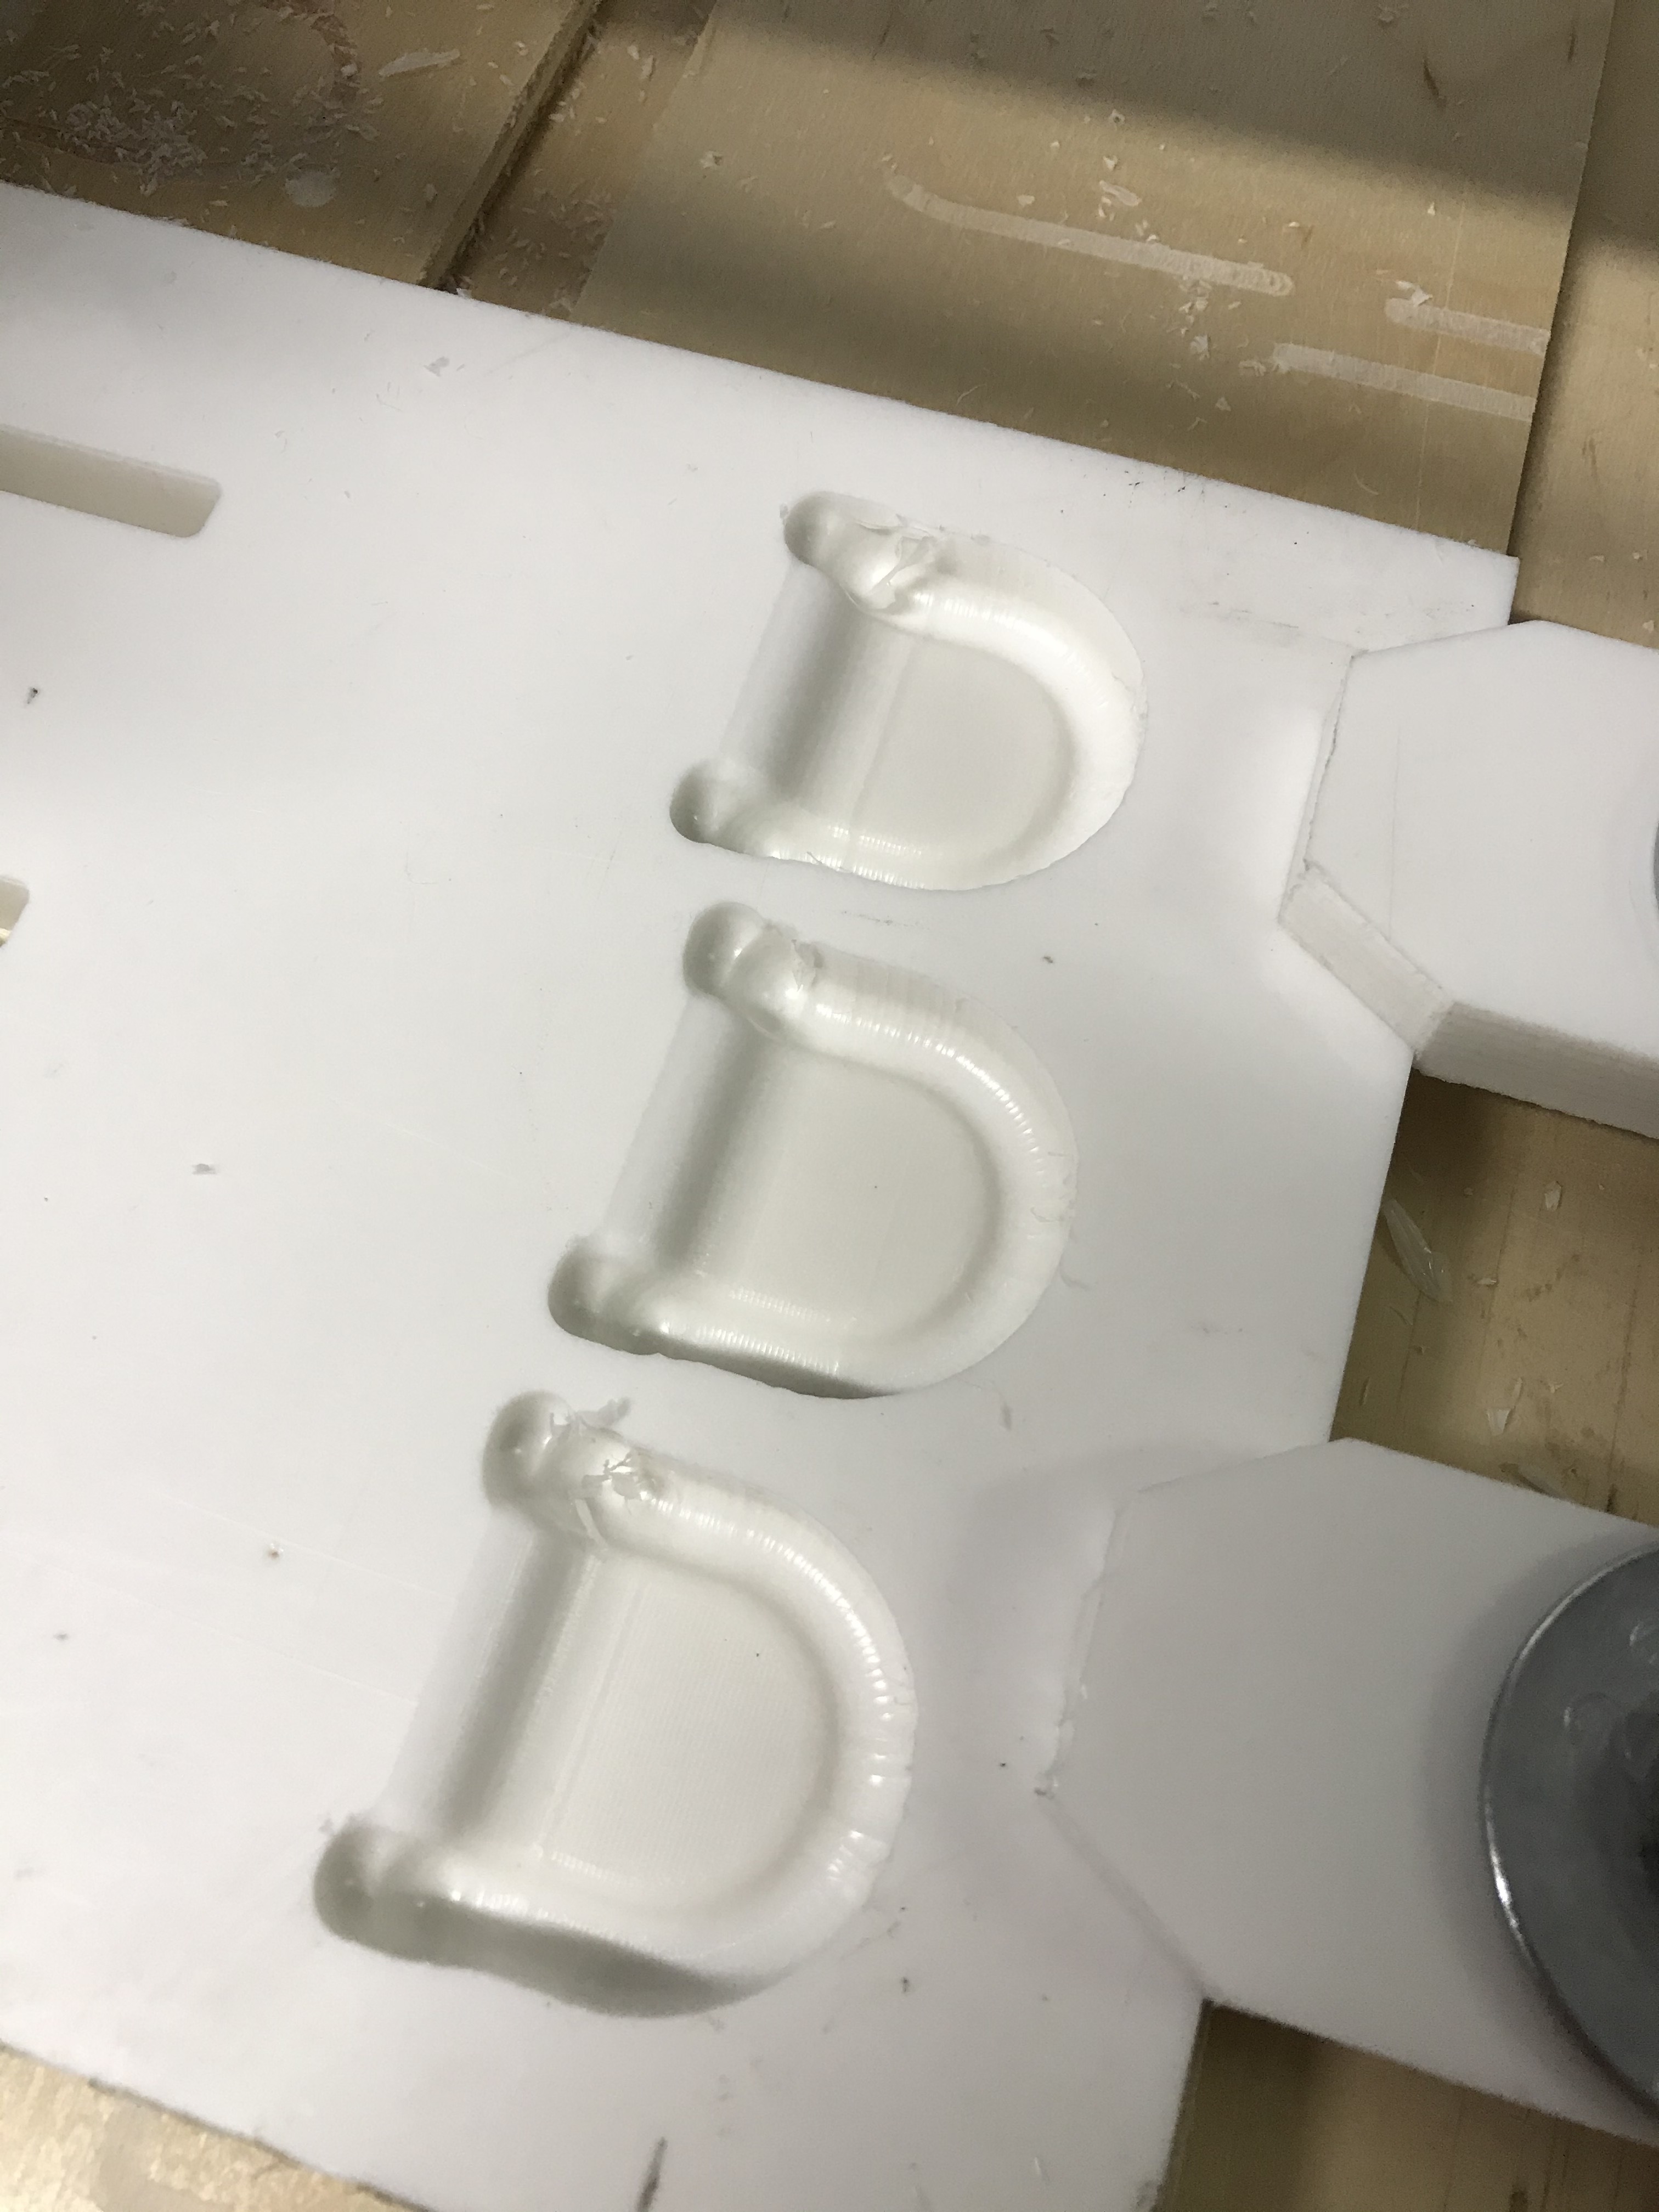
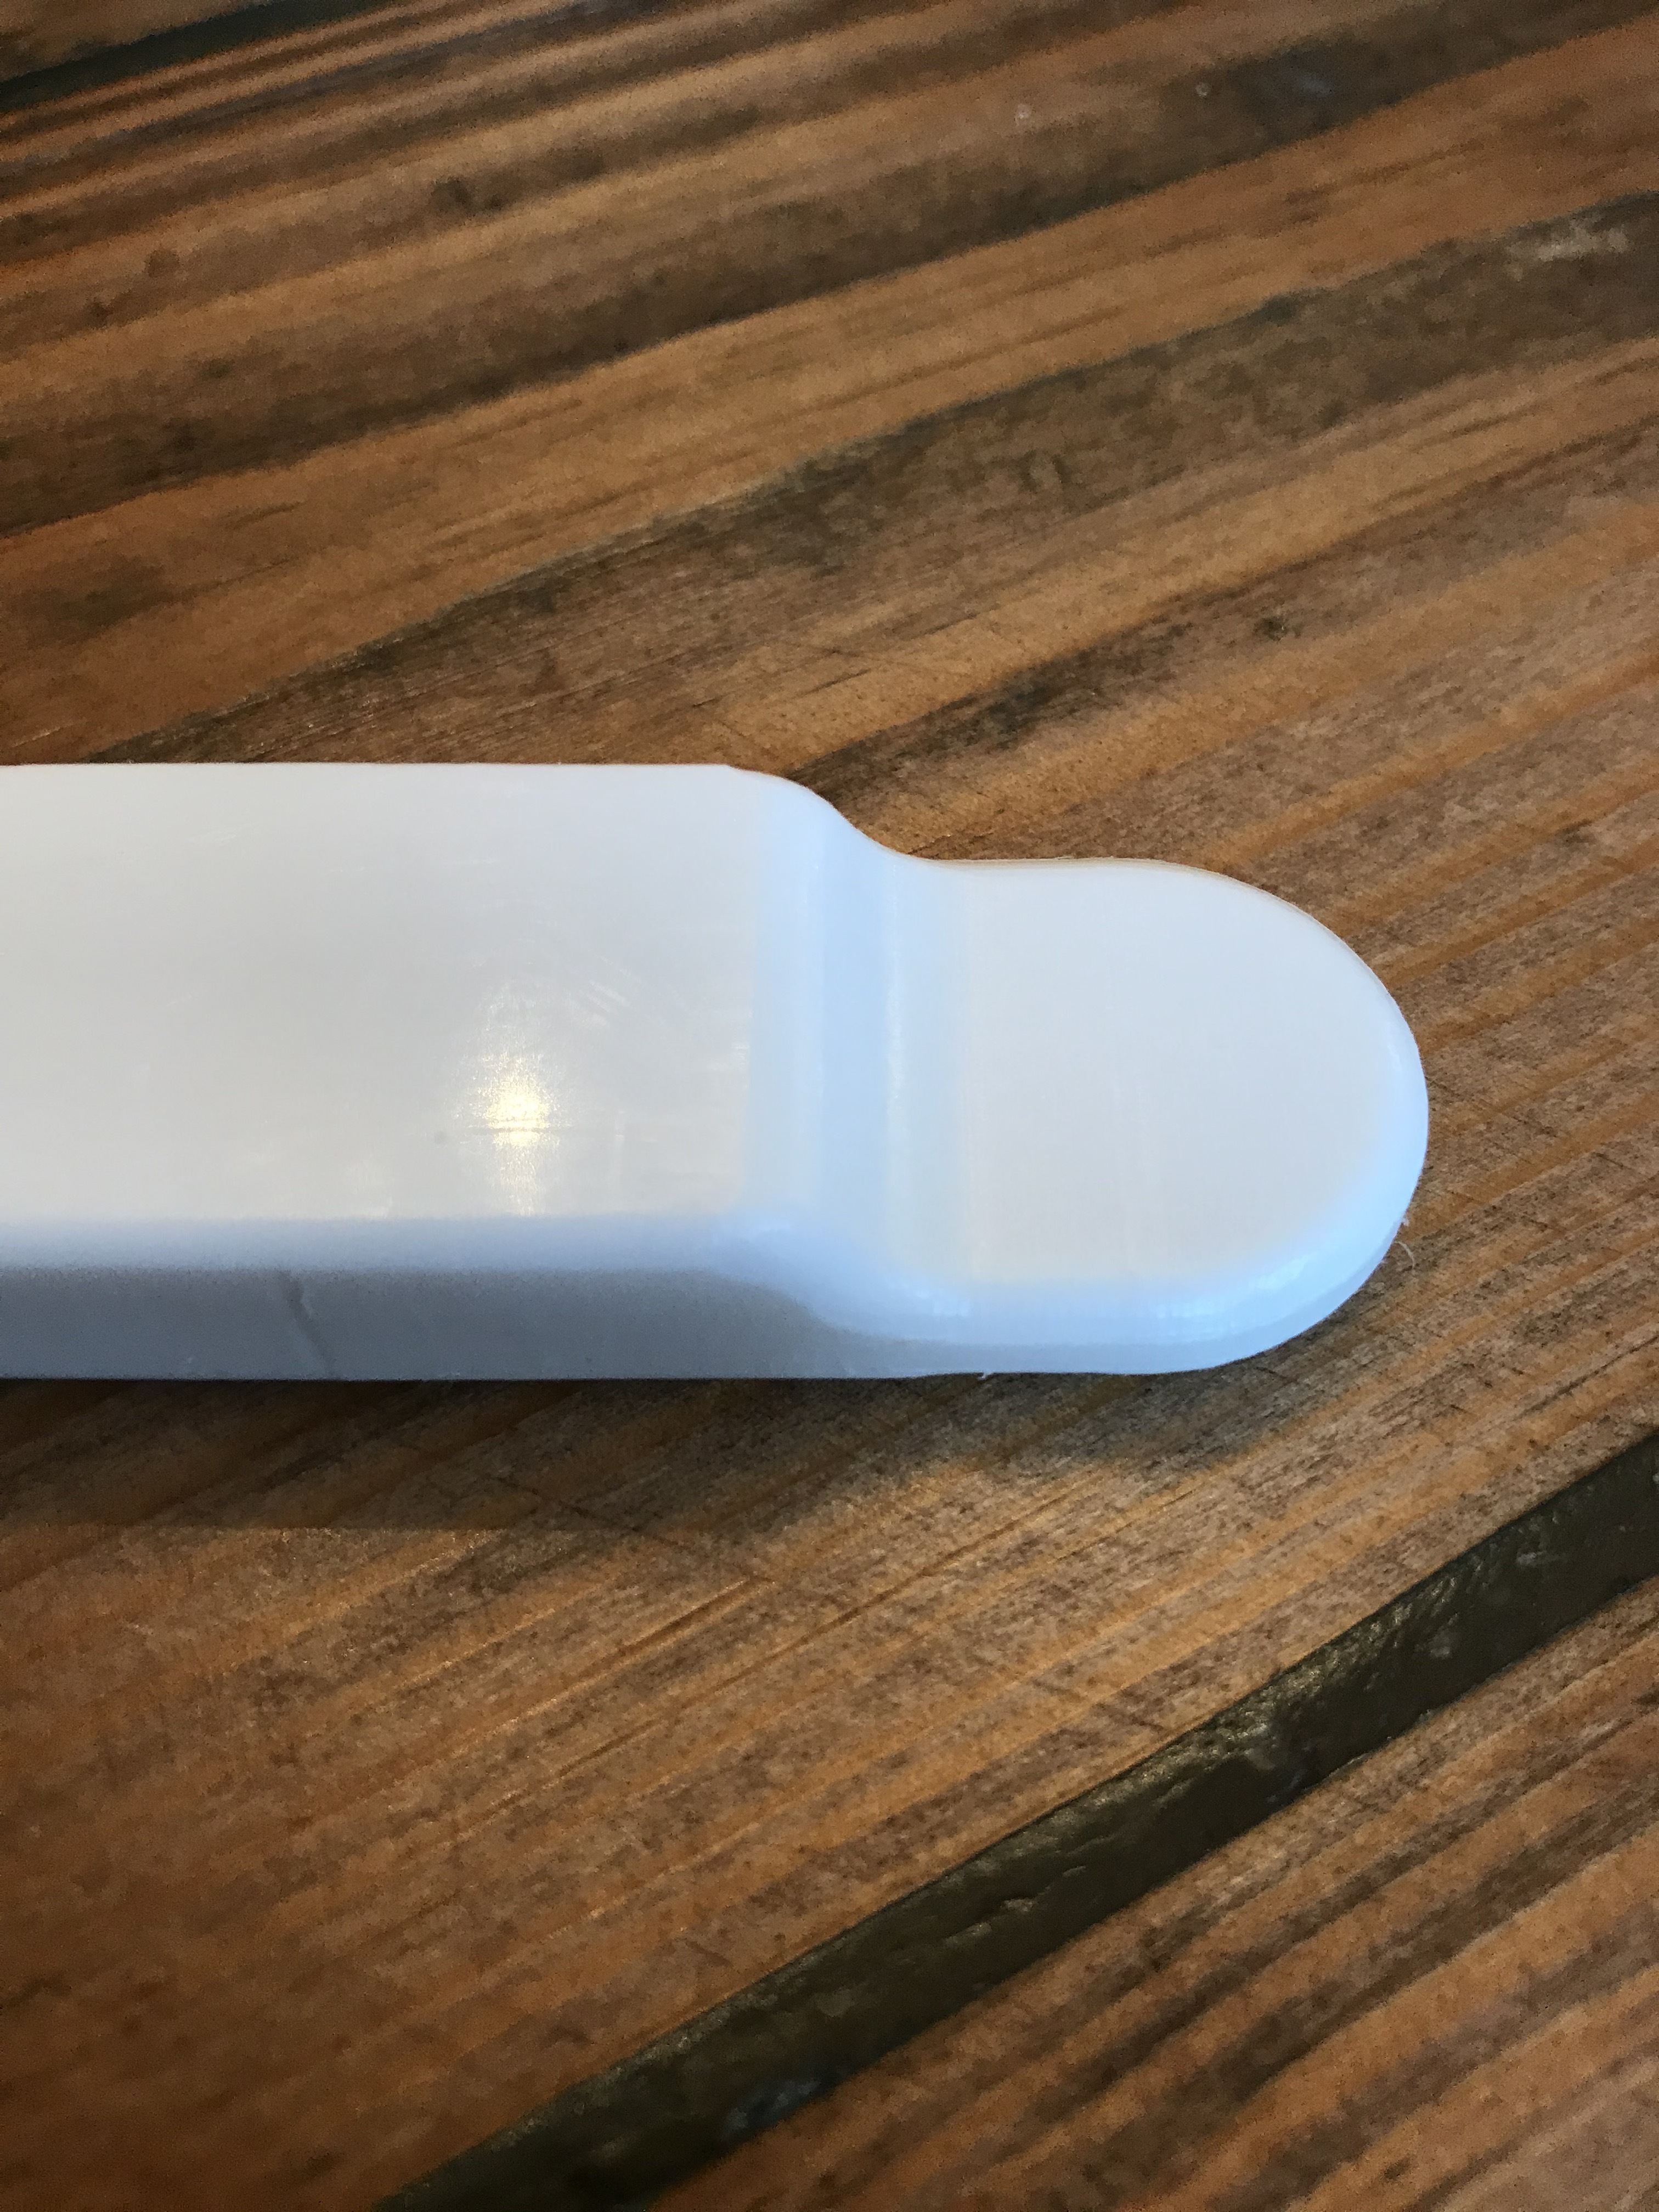
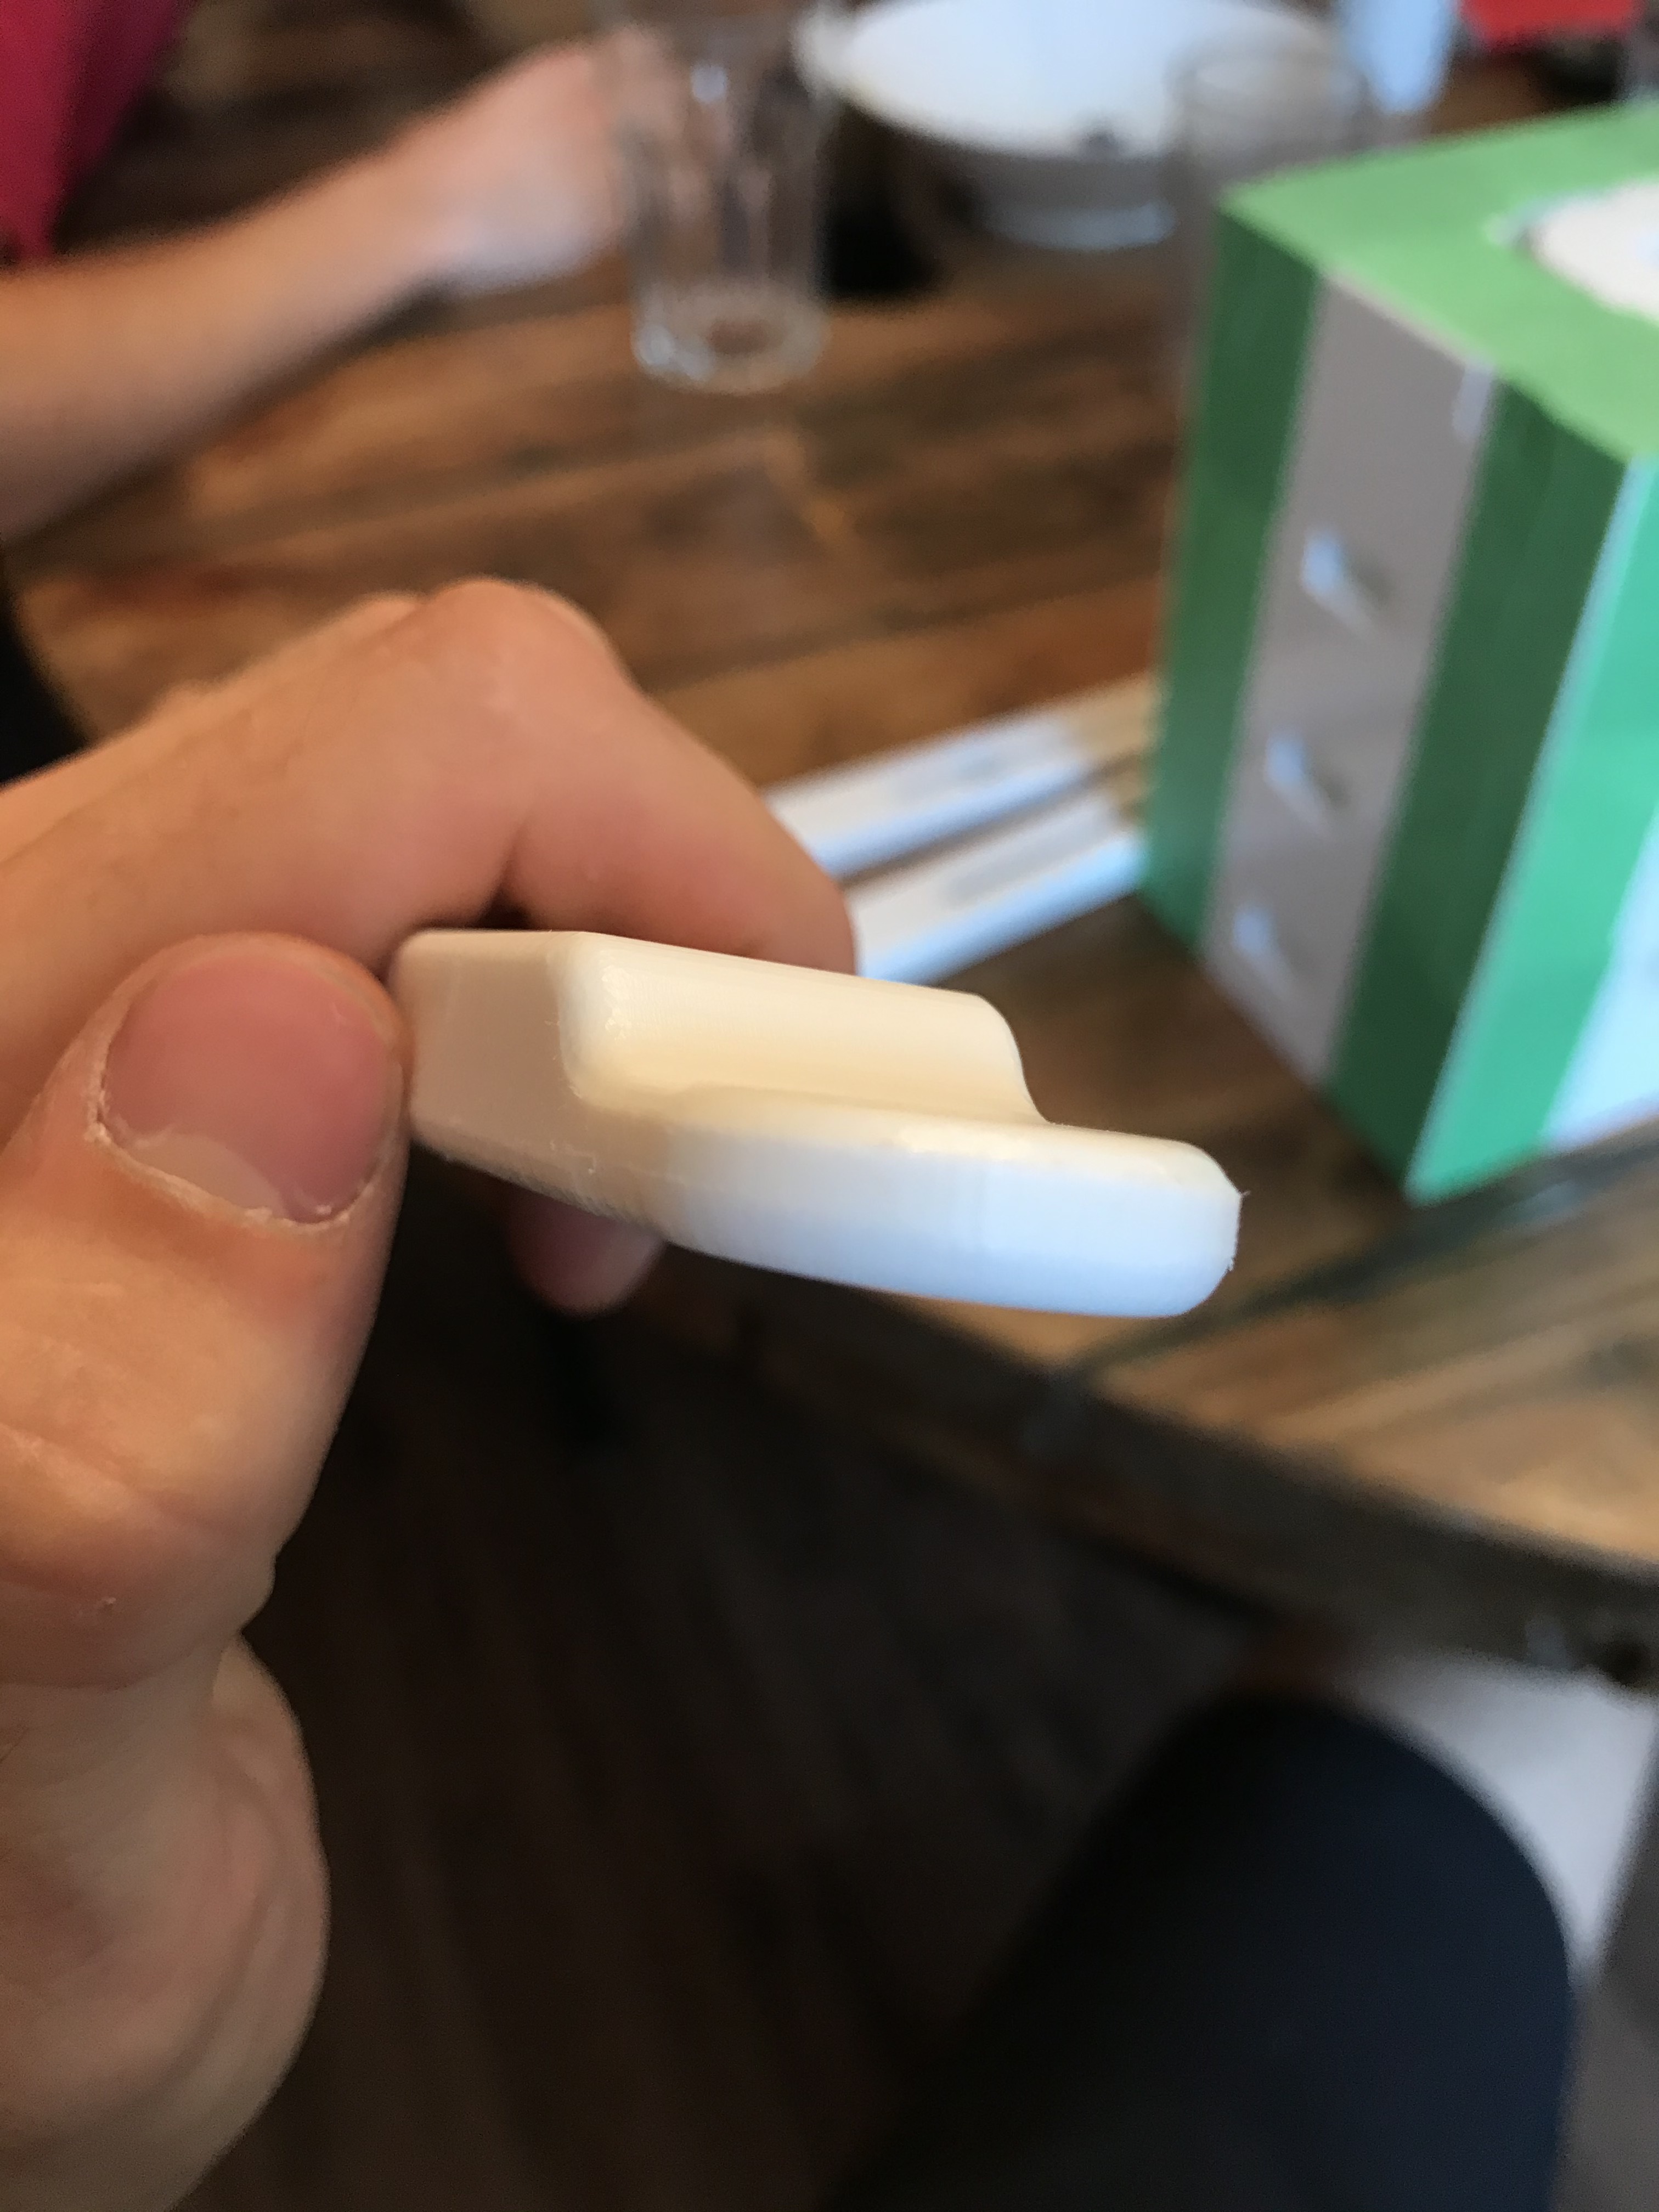
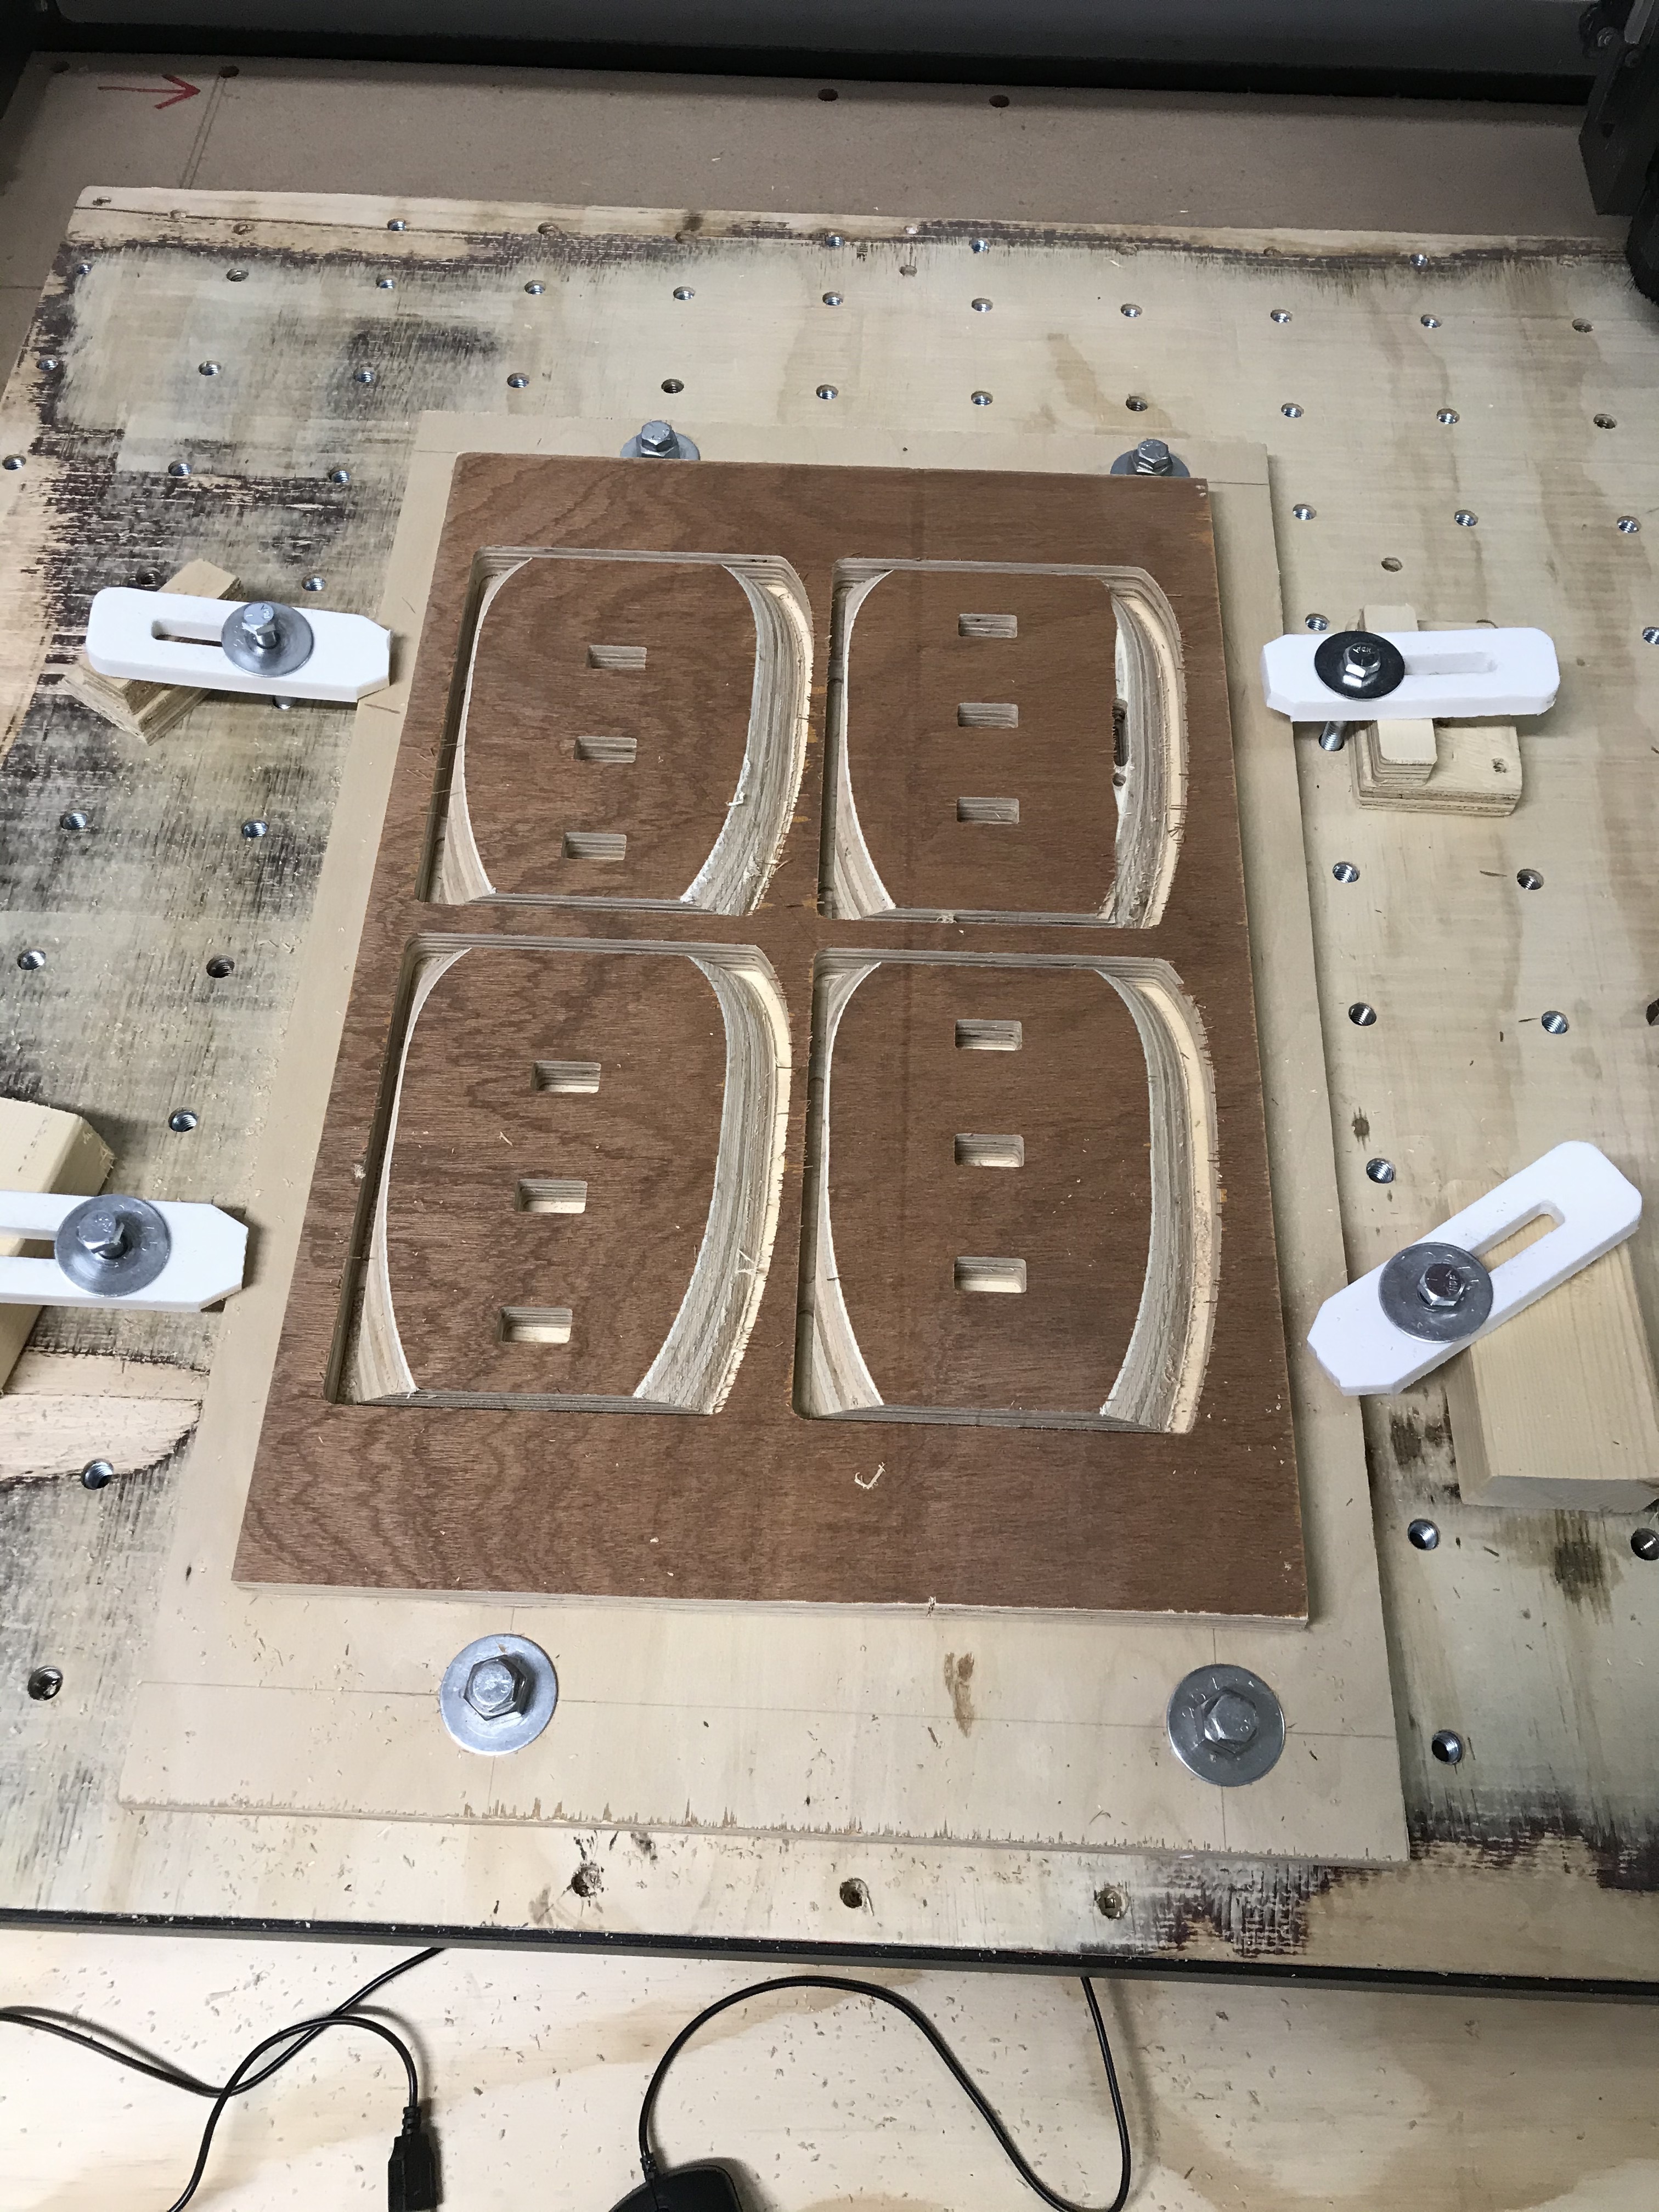
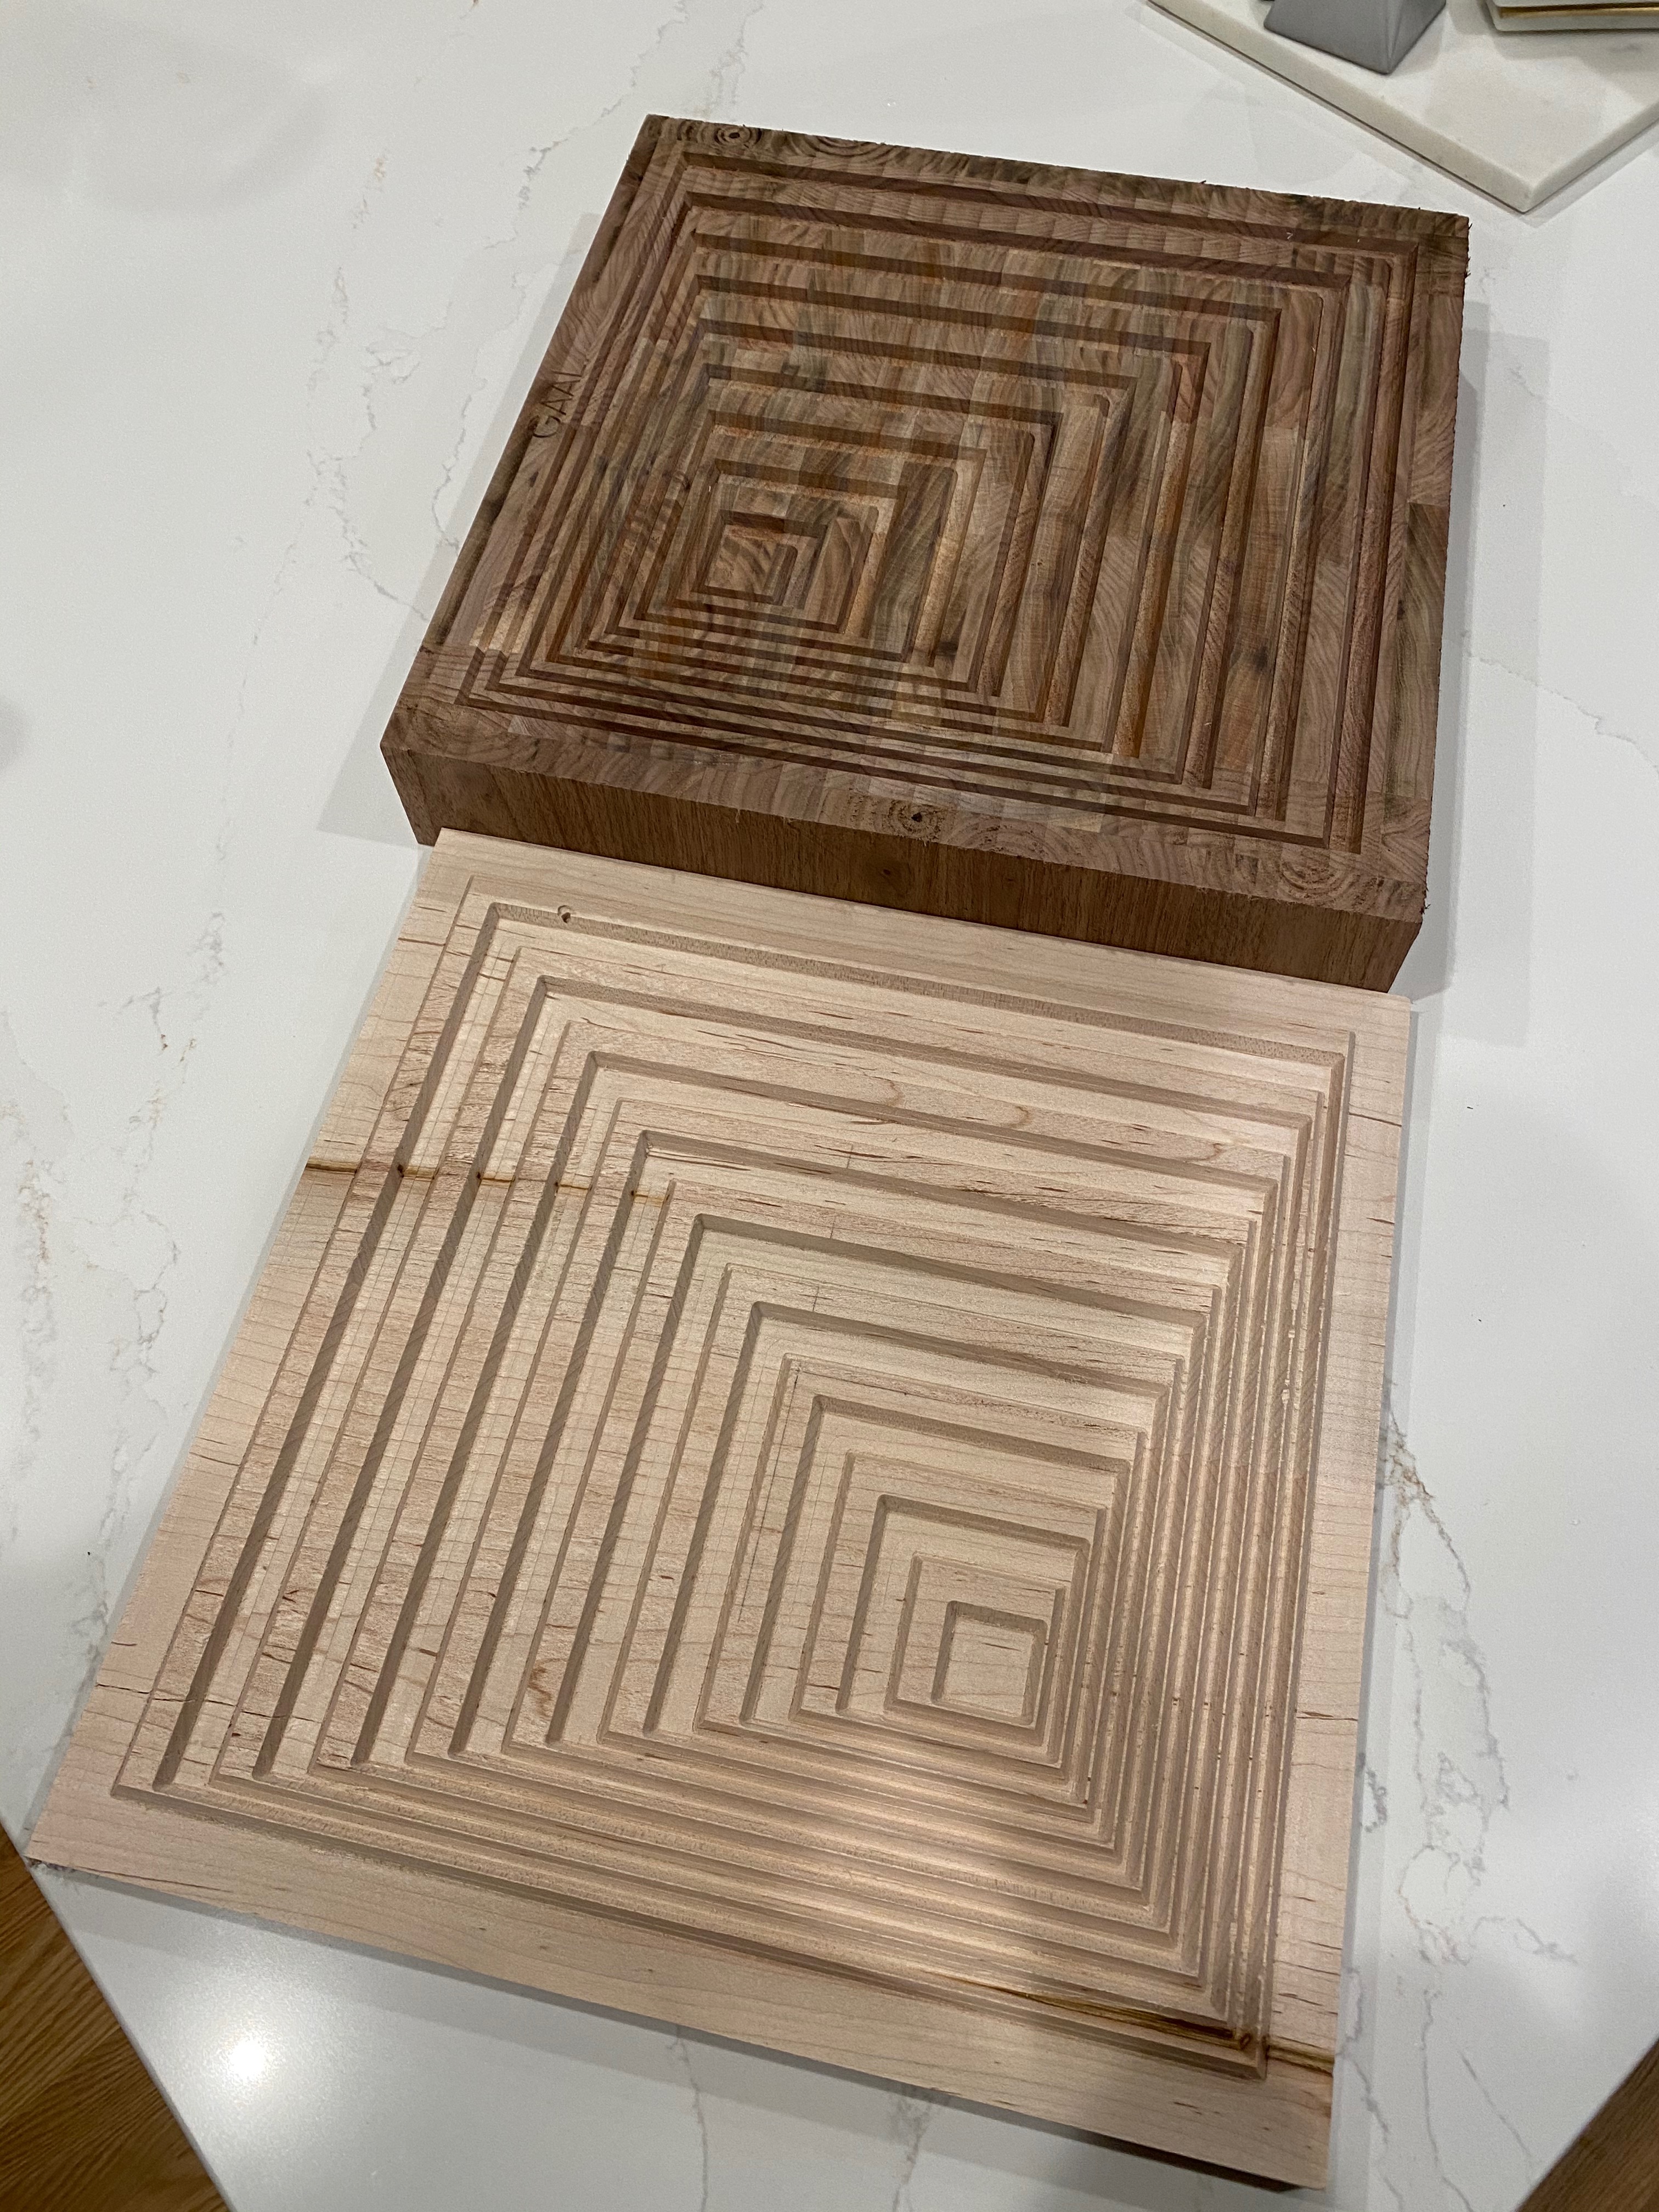
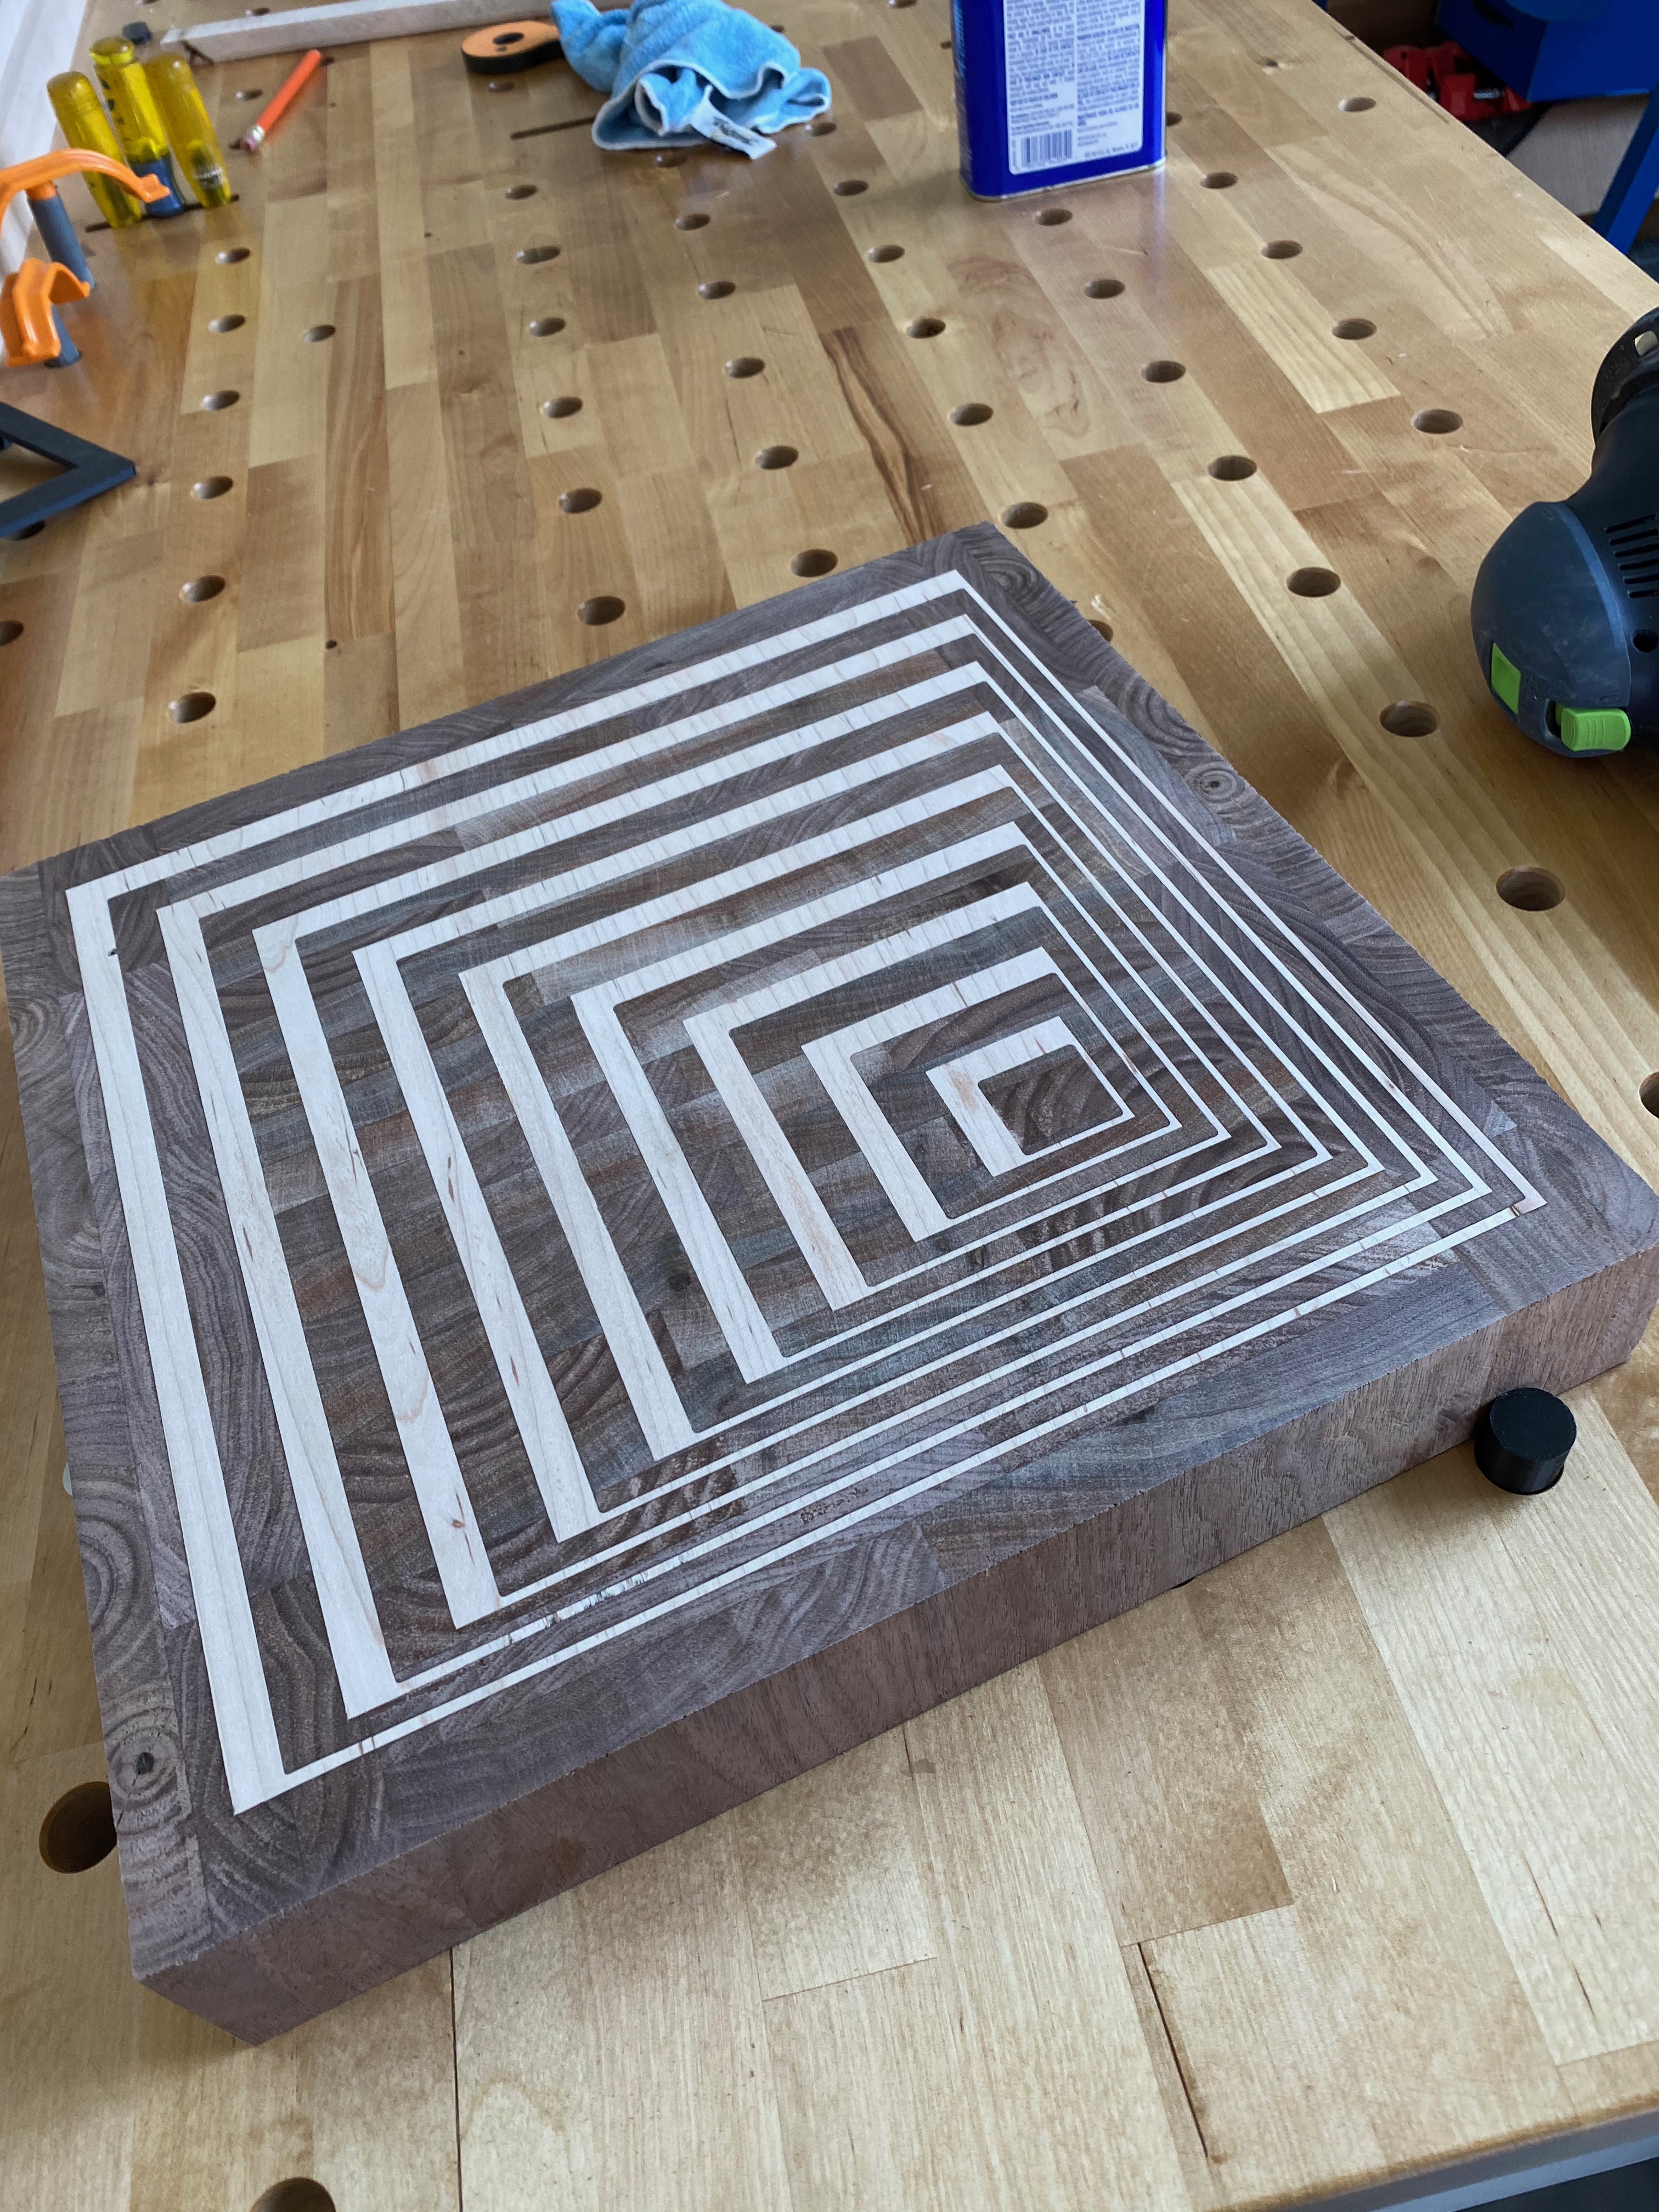
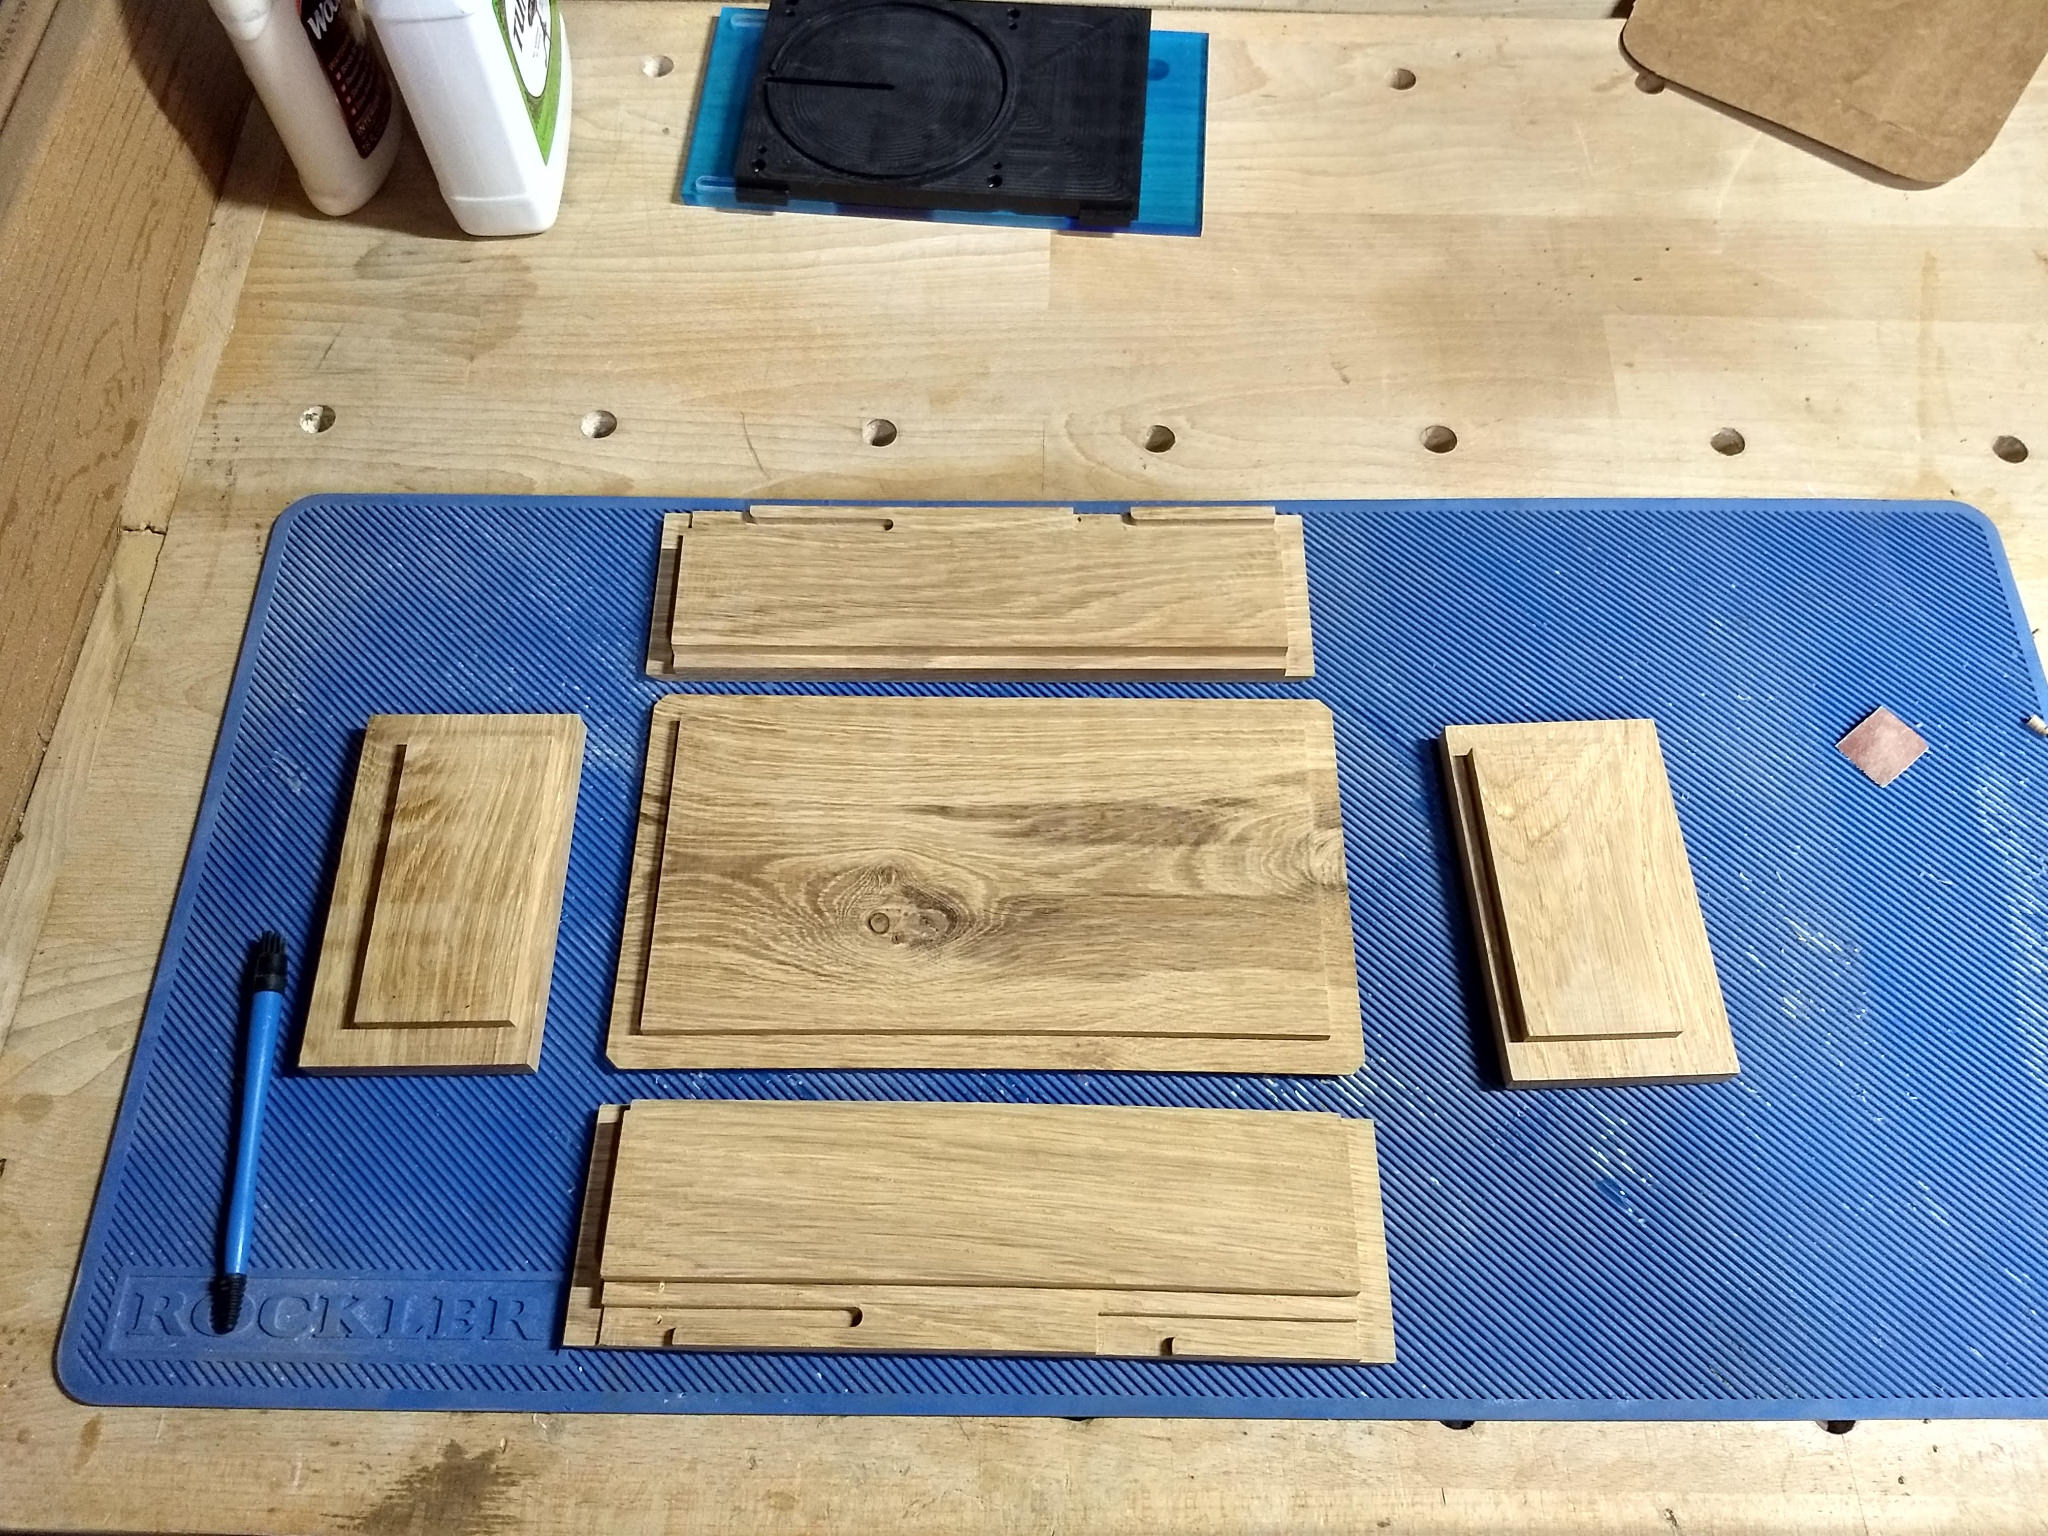
Now the whole process of making the individual parts didn’t go perfectly, I had to make a few versions/copies of a couple pieces because of tolerances and or slight design changes to make everything function better. The wooden lid for example, when making the initial design the wood chipped out because there was such a thin feature. Which warranted the slight redesign to help lower the chances of that.
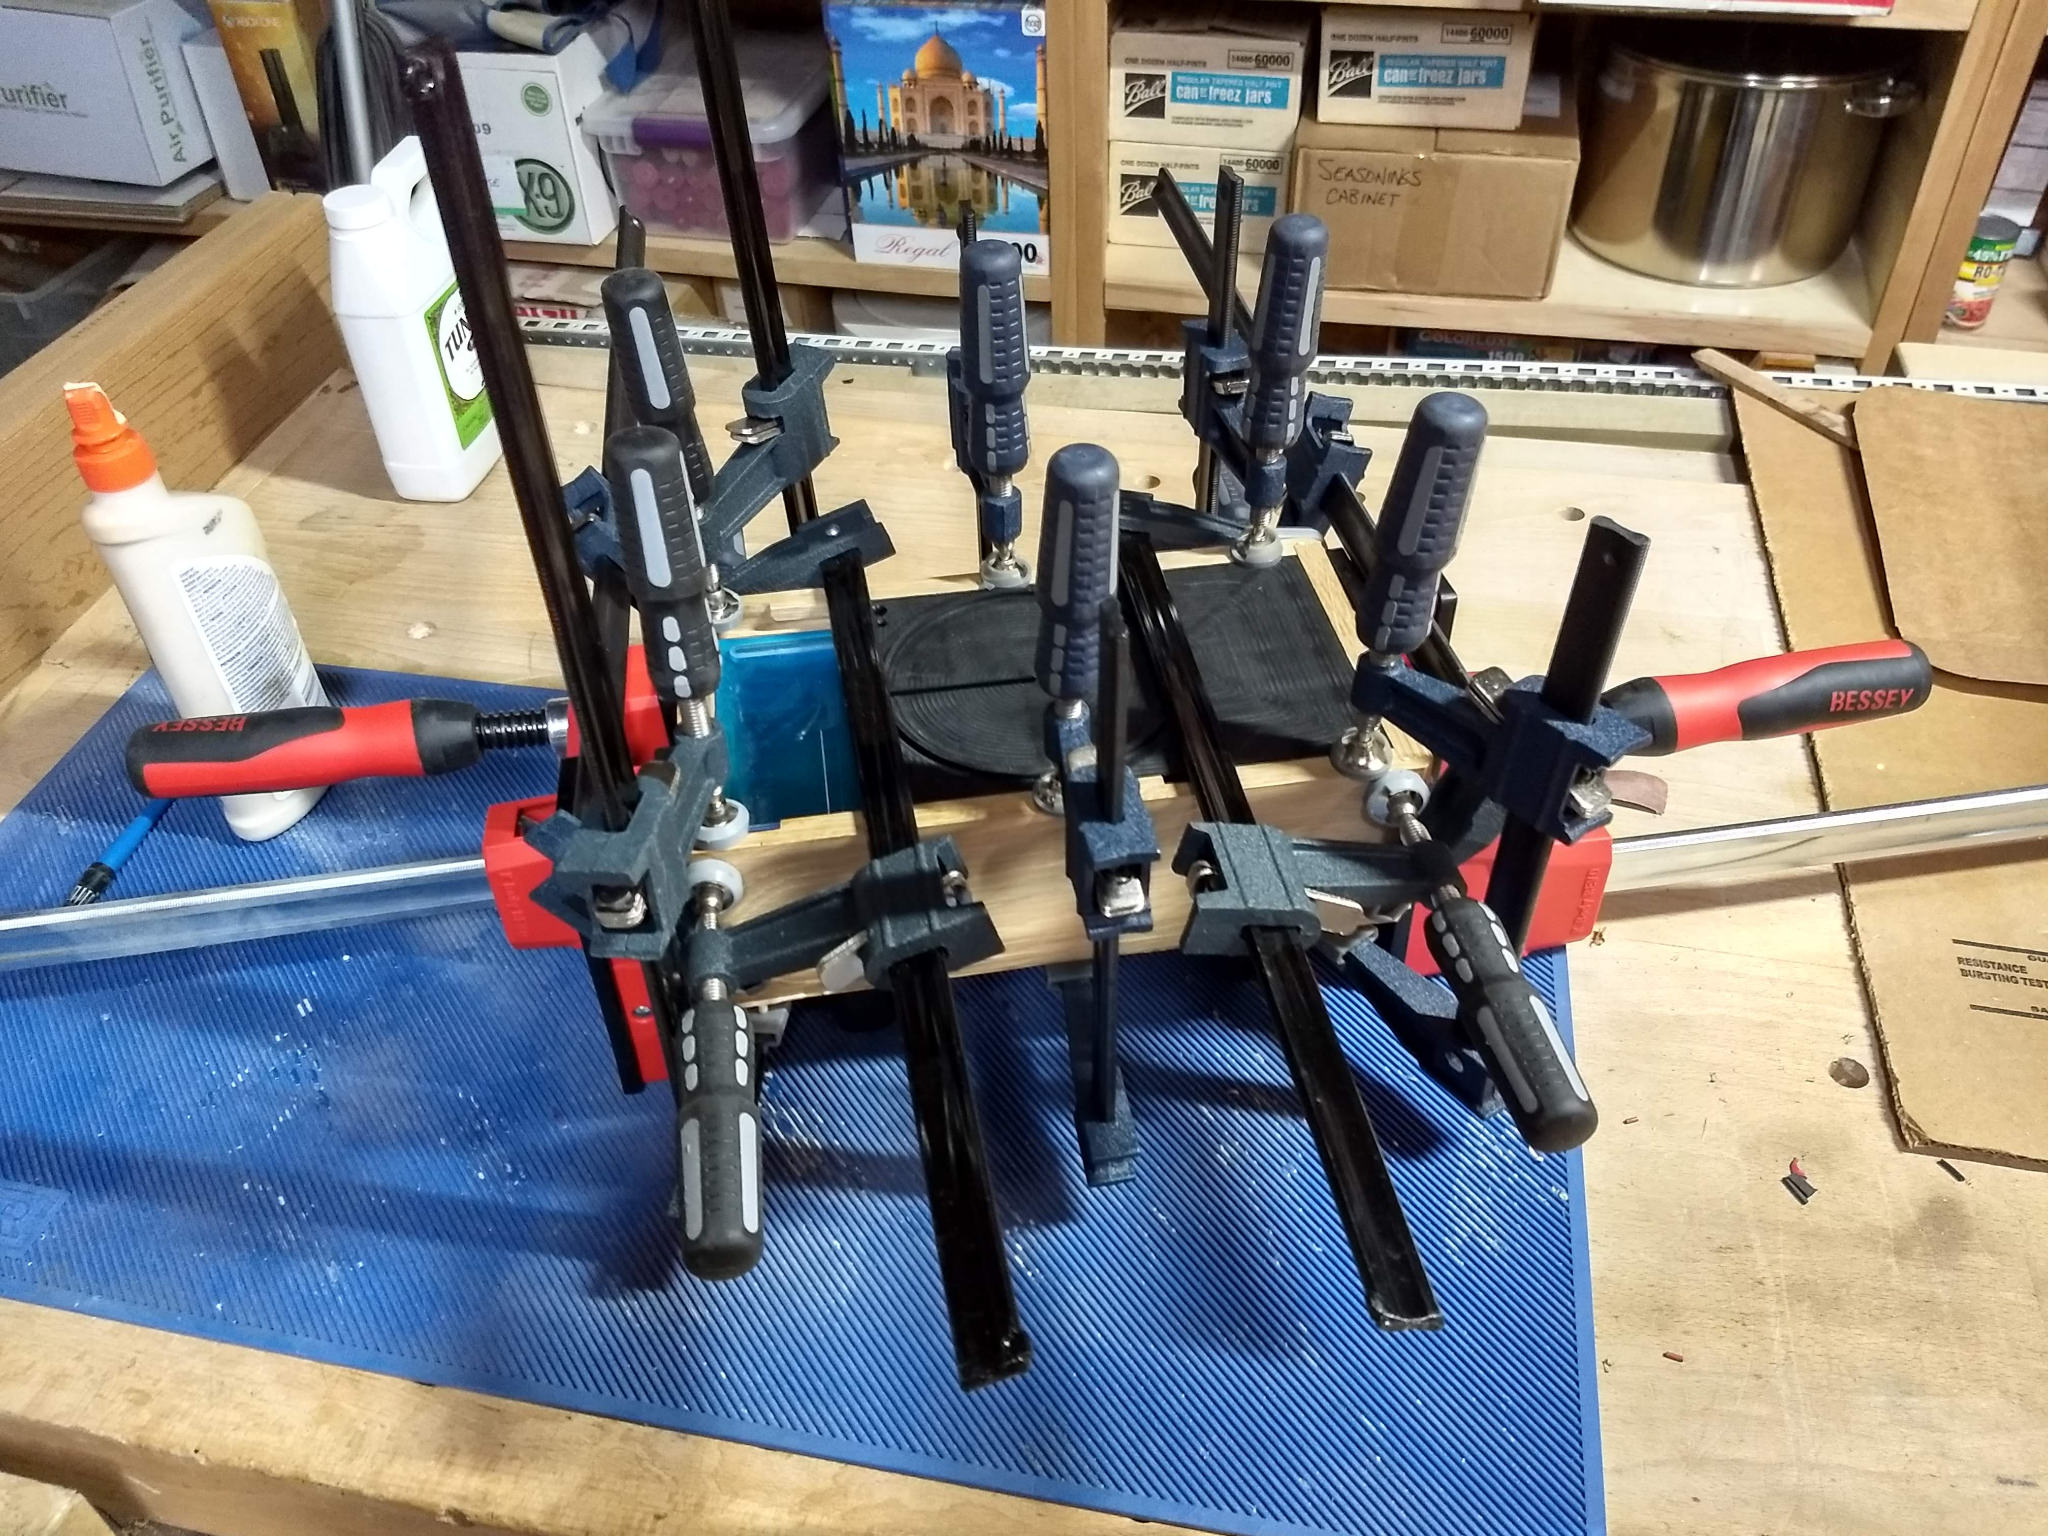
Once I was happy with how everything was dry fitting together I glued the box together and then I finished the Oak with Tung oil.
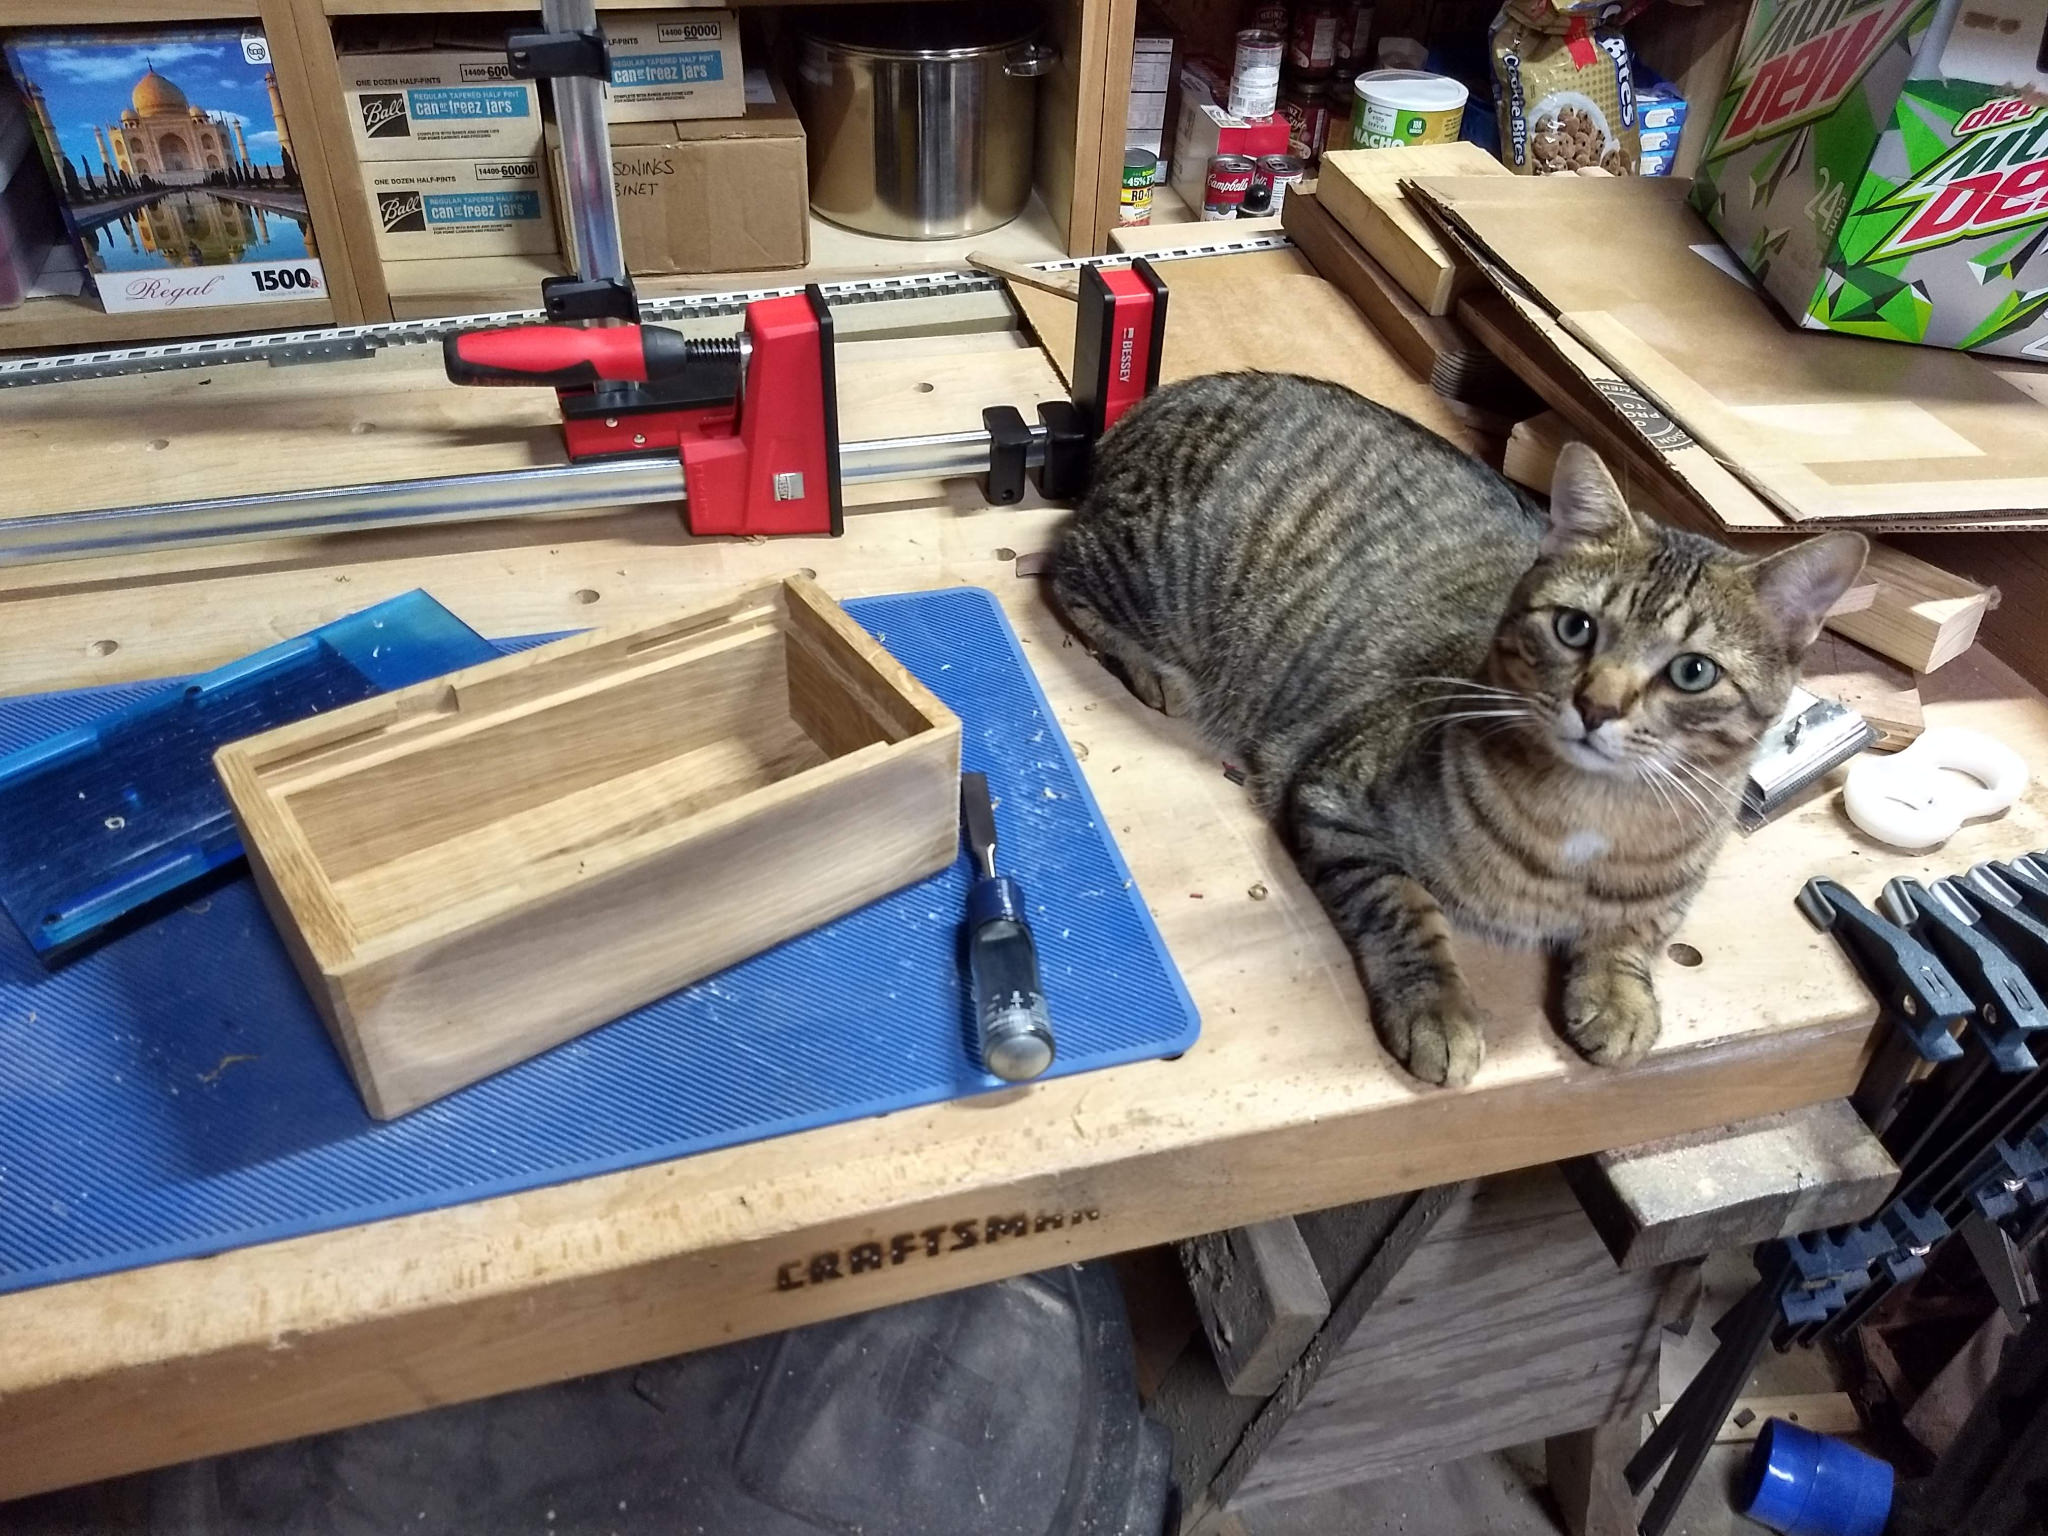
Luckily my cat was on hand to provide supervision…
Here is the box and lid assembly after it was finished with the Tung oil.
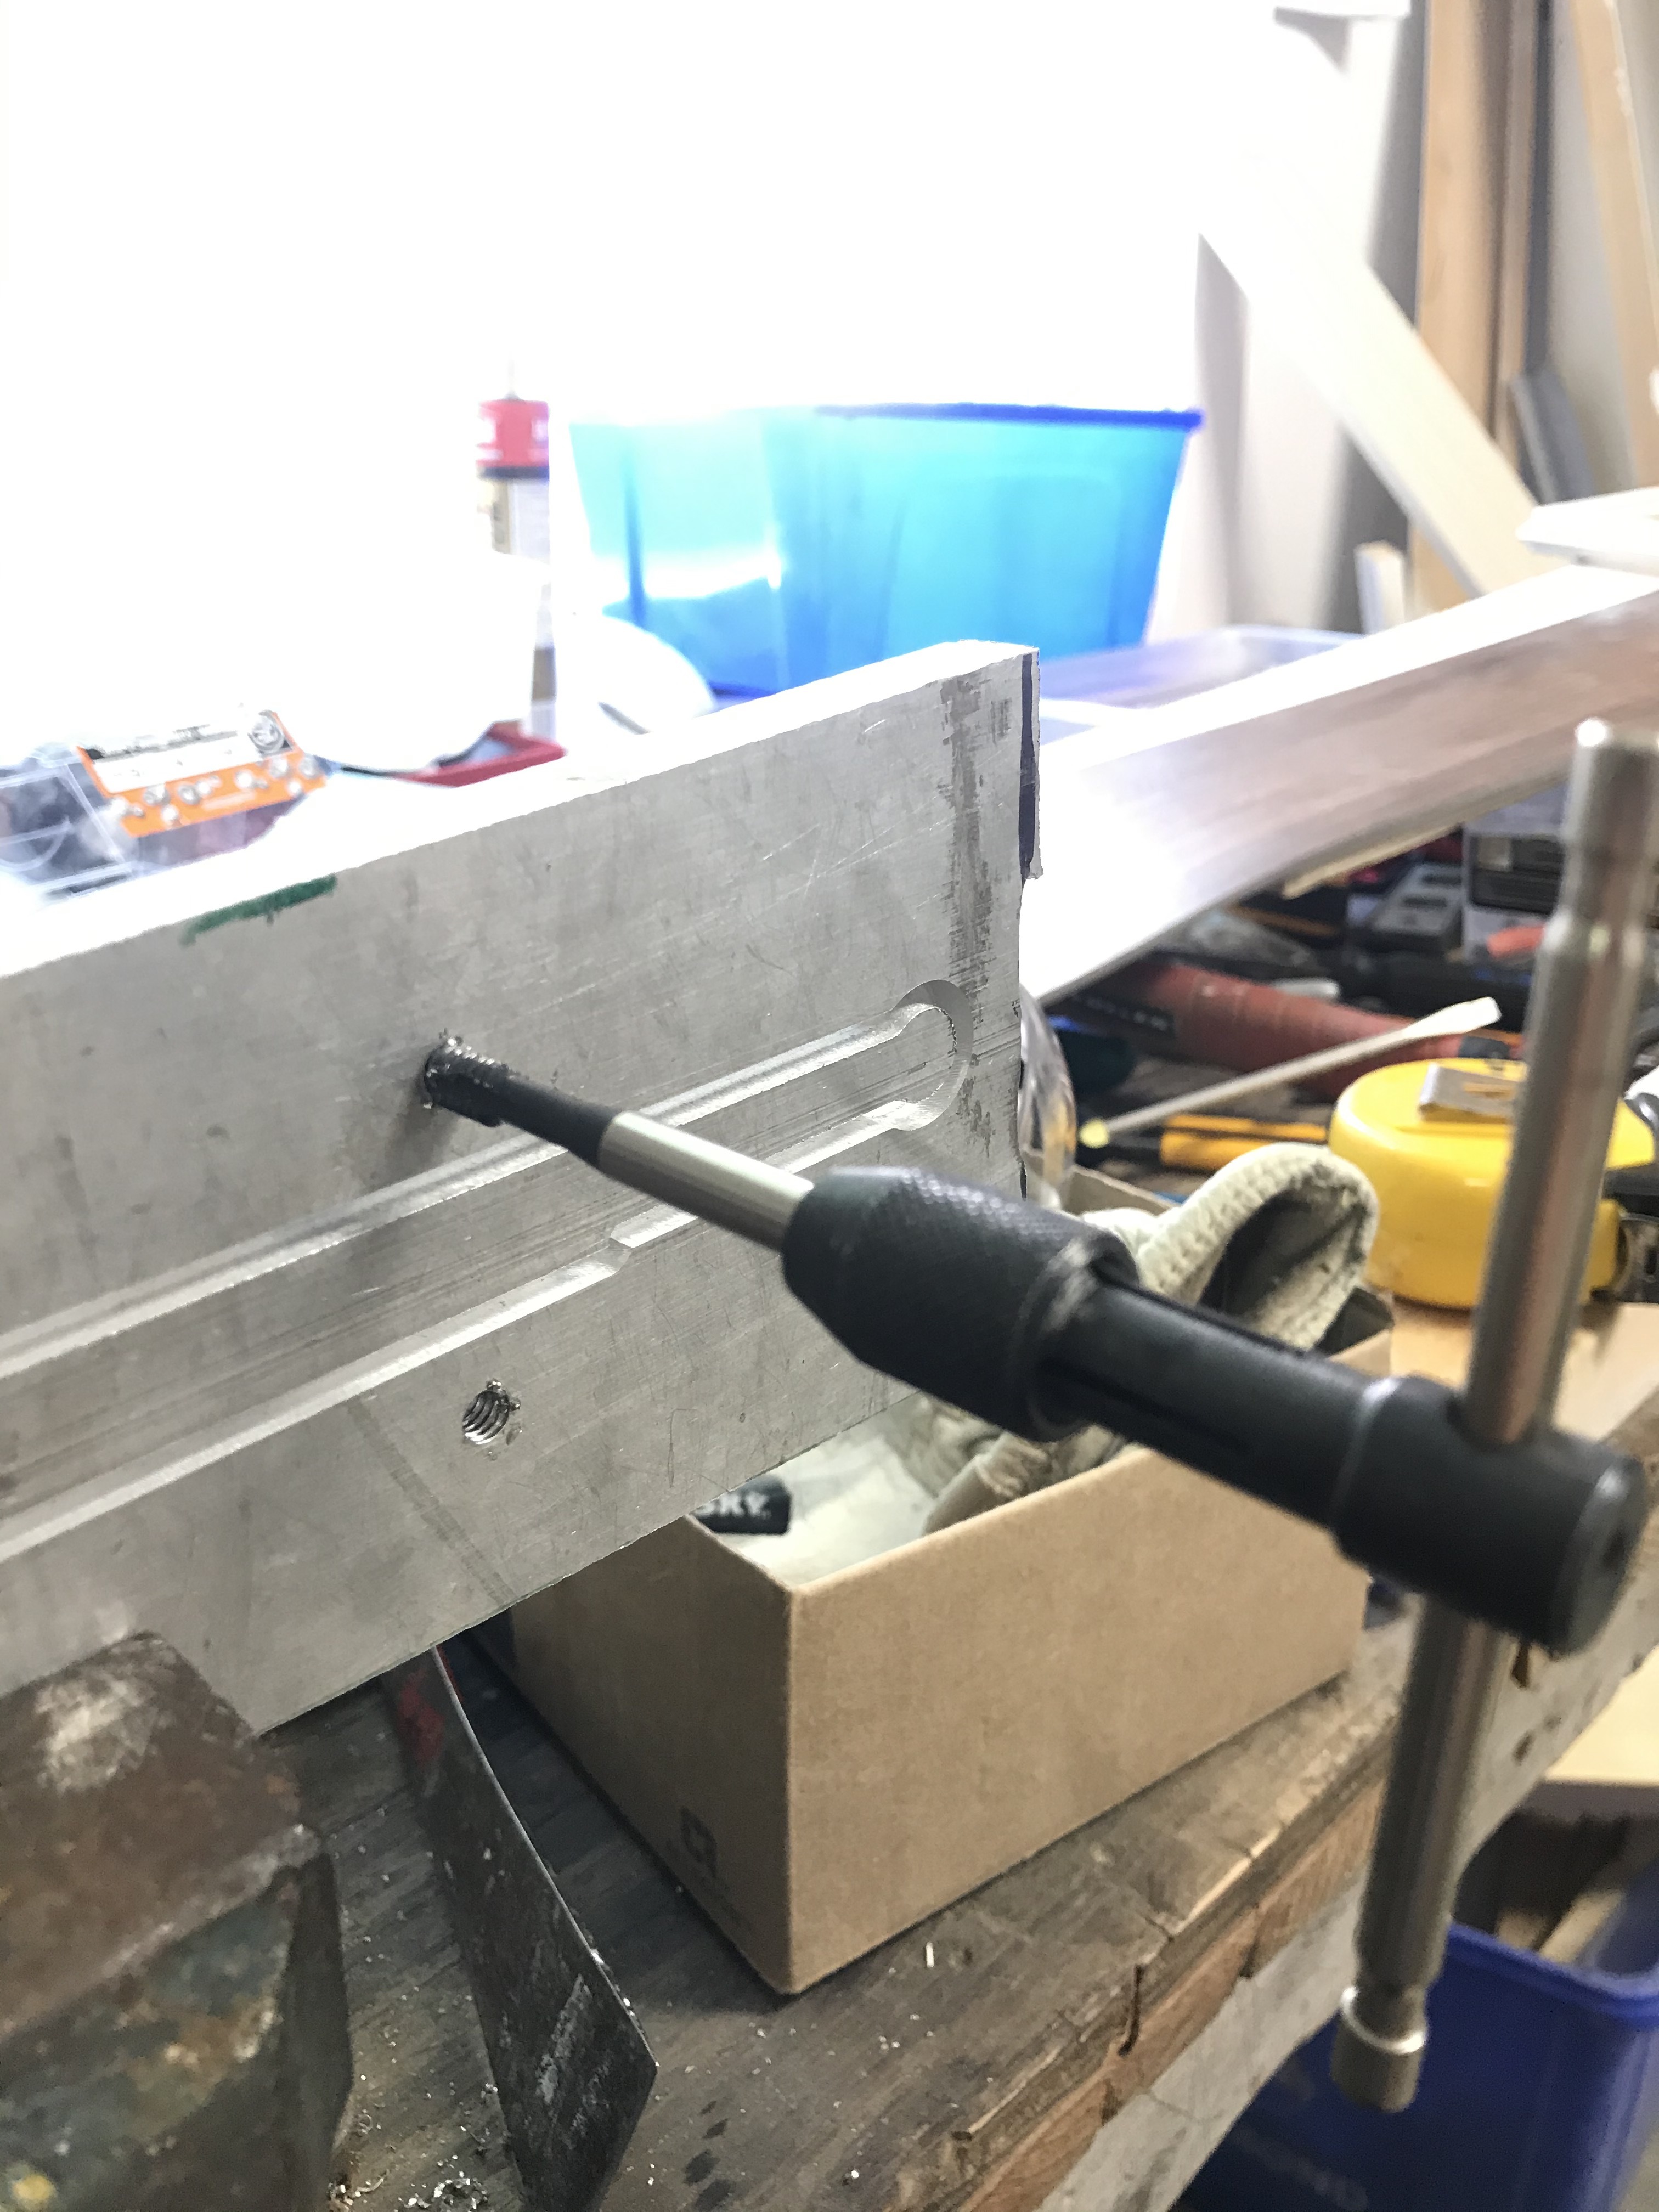
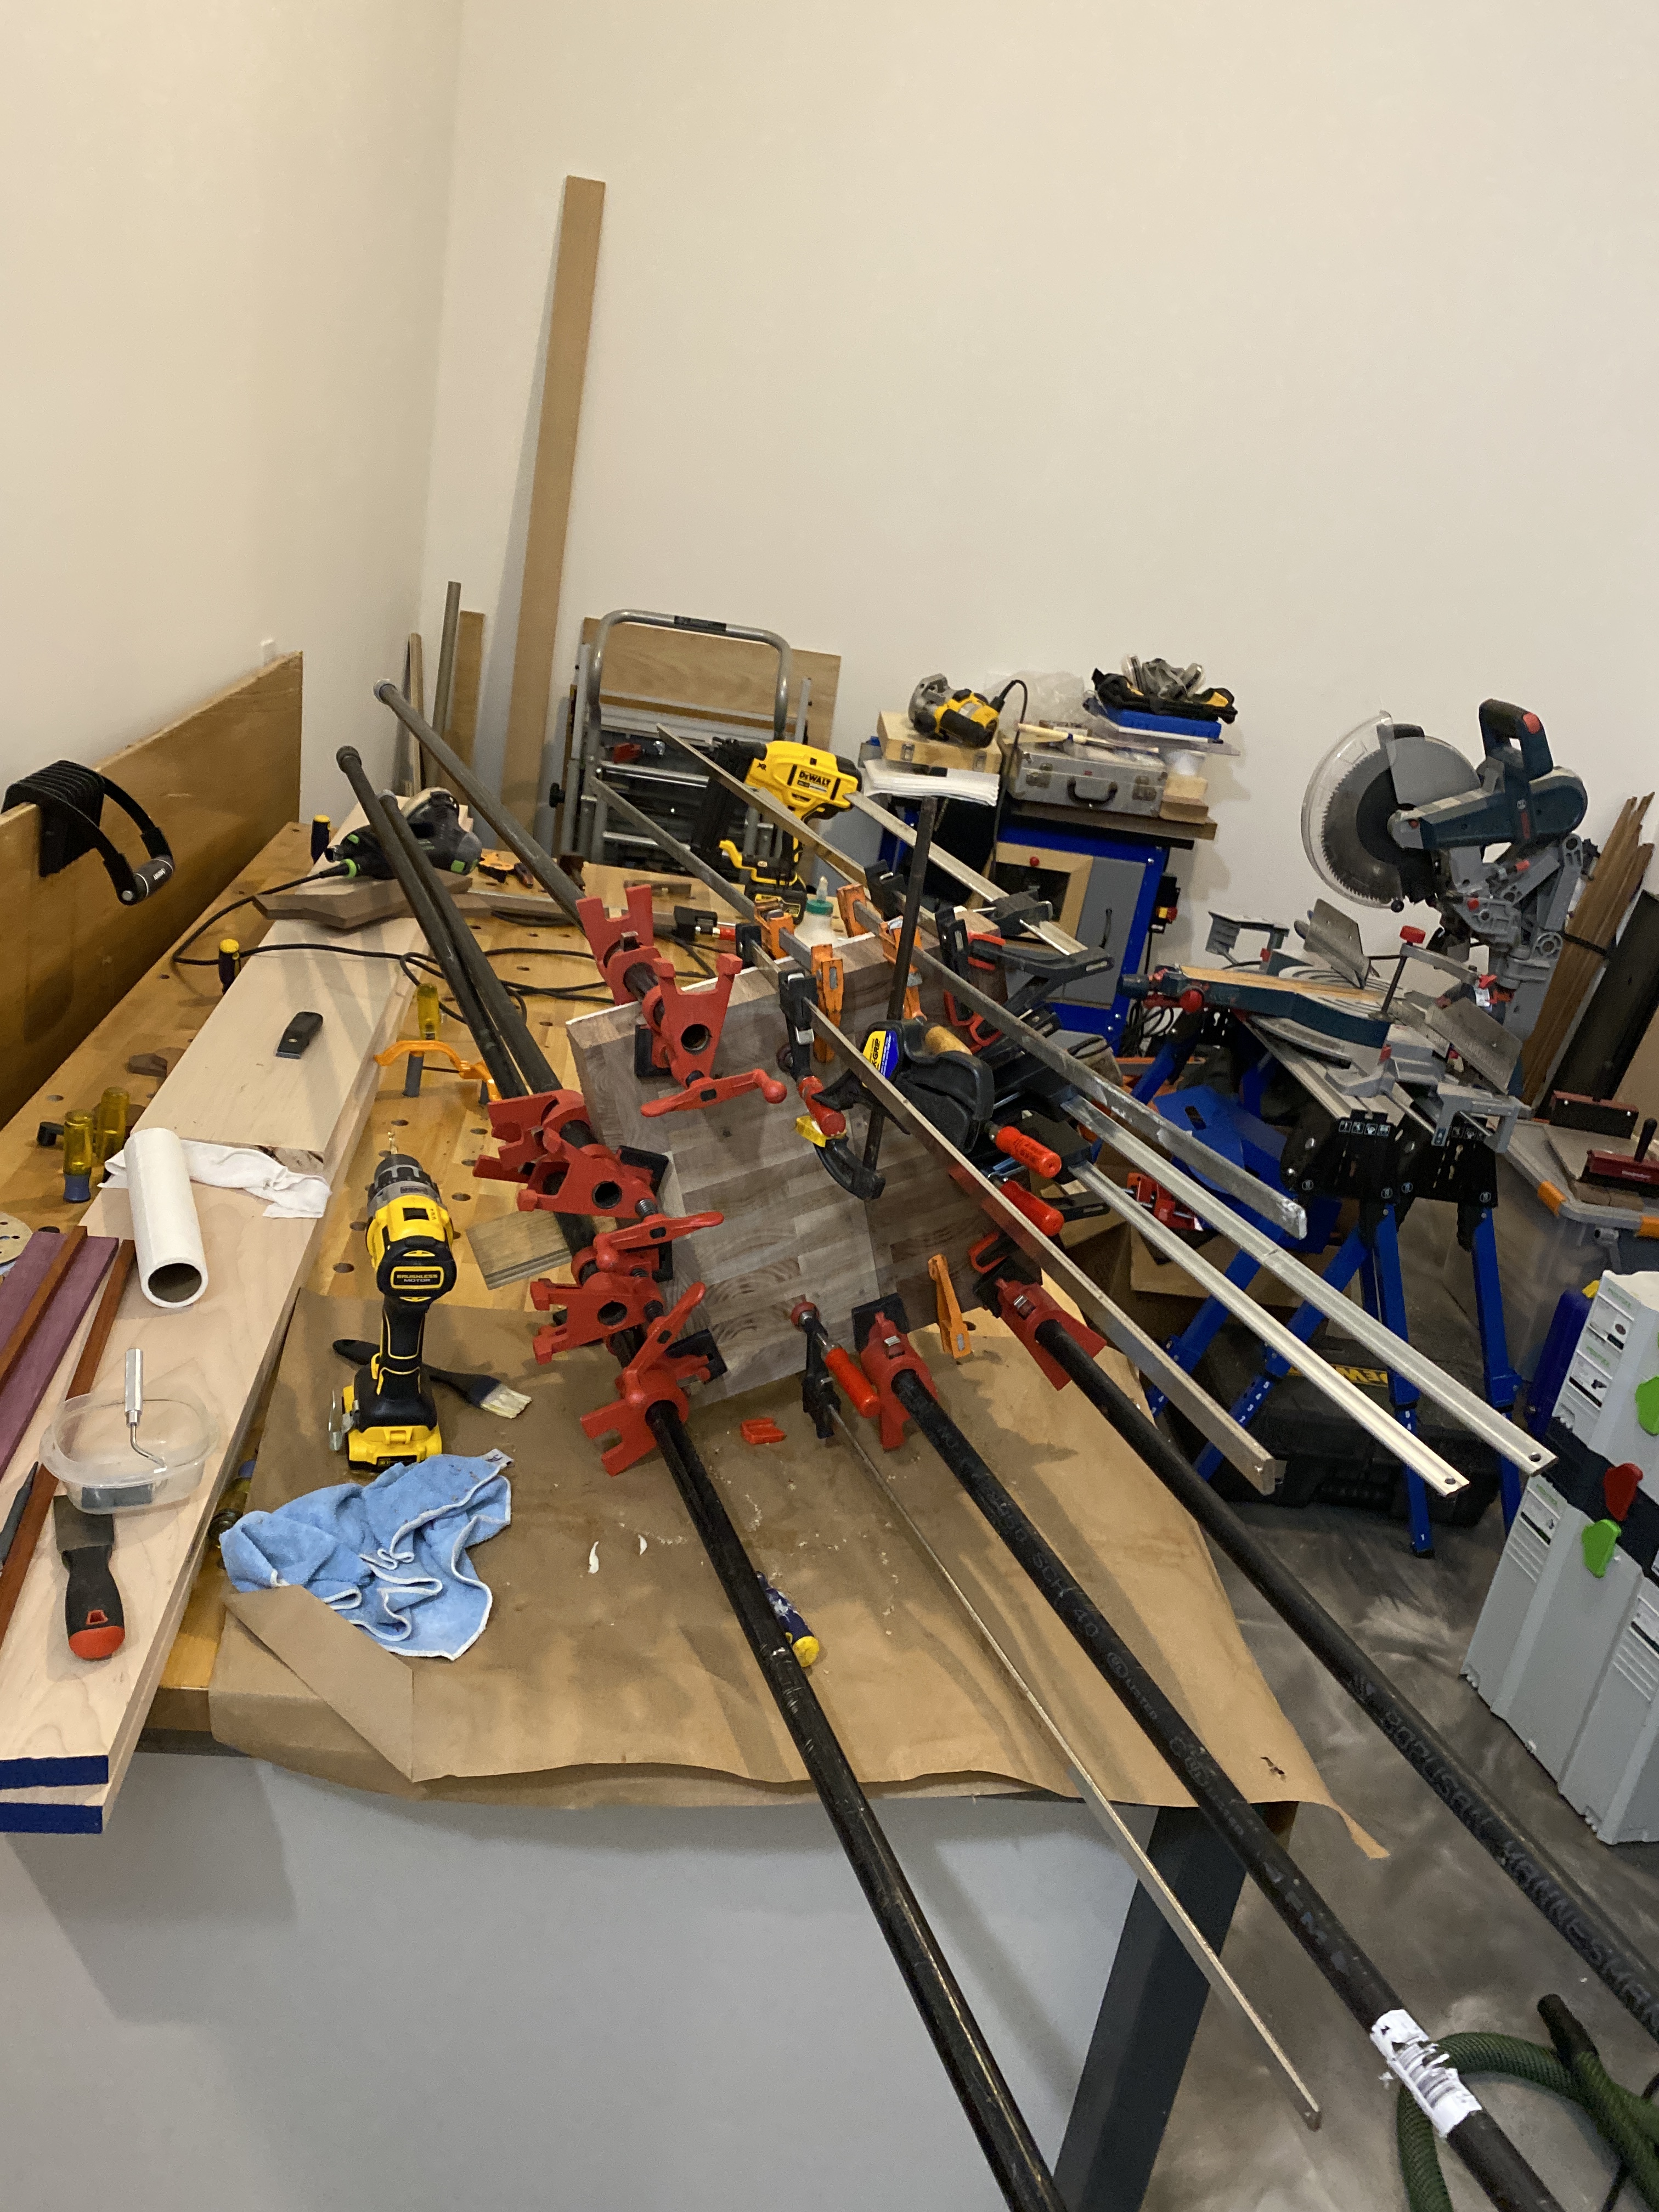
For how much I stressed out about cutting metal for the first time, I think it went quite well. Nice chips, quiet cutting, and pretty good surface finish right off the machine.
There are a couple things I may eventually fix up in a refined version.
-
The brass maze has a little more flex in the middle then I would like, this could be easily fixed by tweaking the maze construction and adding a couple more walls.
-
Change up the order of operations slightly when cutting the maze section to ensure perfect alignment when flipping the stock.
-
Clean up all the small tweaks I made after the initial design so the box can still be parametrically altered.
-
Designs other, more complex, mazes and hopefully figure out a way to program a random maze
Overall though I am very happy with the end result, now I just need to figure out what to get my wife for xmas……
I imagine I also glossed over a few things so if you have any questions, just ask away.


 !! I agree voting will be difficult.
 ) so I’m waving the white flag for my project…I’m starting to learn my lesson about procrastinating with these haha!
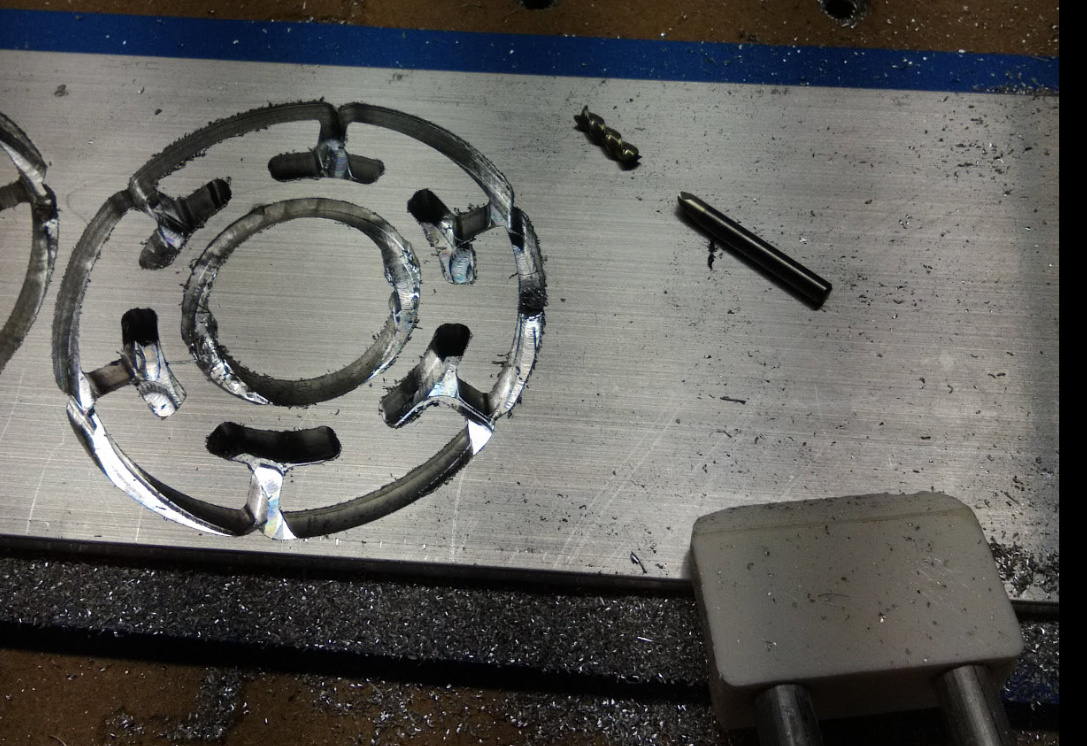
 Check this link for a video to see it in action.