Julien I have something I’ll be posting. Made them for my guys at work for Christmas last year and they love them. Look forward to sharing!
1 Like
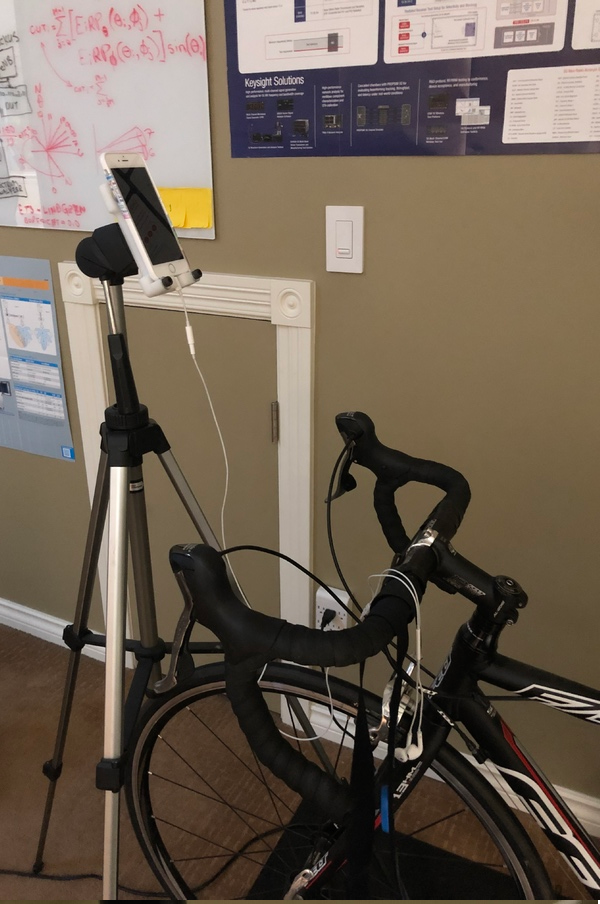
In the “Making something that fills a business need” category I had to quickly put something together that would hold my phone for video conferencing while in front of the white board for the next day. I already had a tripod about and with some light Fusion360, a block of HDPE, some Nomad action, washers and screws the tripod phone mount was born. Turns out it now also doubles as a phone and ipad stand for taking conference calls while on the bike trainer in the winter. Nomad … when you quickly need to make something out of (almost) nothing.
Files up on CutRocket!


4 Likes
Very nice ! Simple and clean, as any overnight project should be 
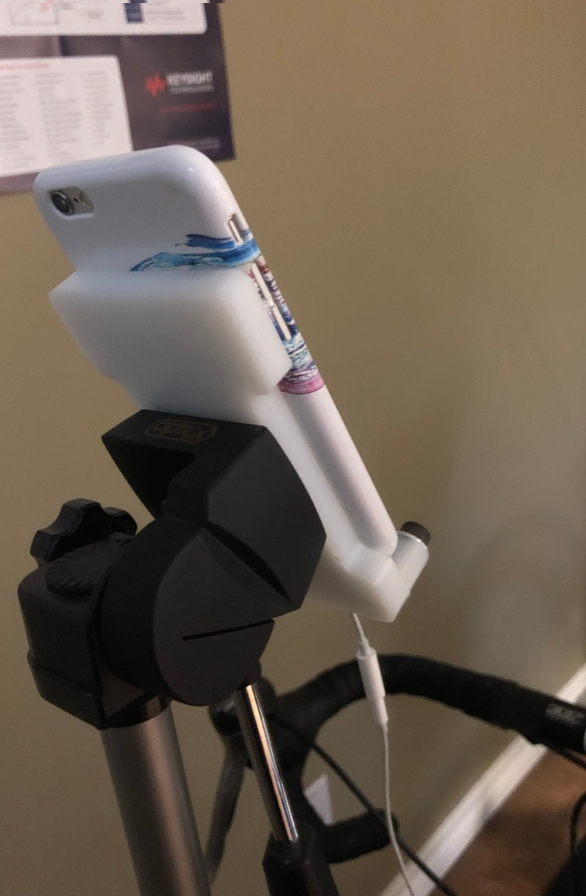
Are those three bumper pads in the first pic, so that the phone does not slip ?
What is the use of the two screws on the bottom part ?
1 Like
Julien: I like the contests, it shows member’s ingenuity and skills but I have a comment on this one for future reference. The contest is just before X-Mas (or popular holidays) and many members including myself are busy producing stuff for X-Mas and participation may not be as large for this contest as the previous.
1 Like
Yeah, in retrospect this is not the best timing I guess, but on the other hand this is an opportunity for the few people than are not busy finishing Xmas projects, to have a higher likelihood to win!
Not to worry, the series will continue in early 2020 so there will be plenty of opportunities for all of you busy elves to get to win one of the next challenges, if you are not available for this one.
3 Likes
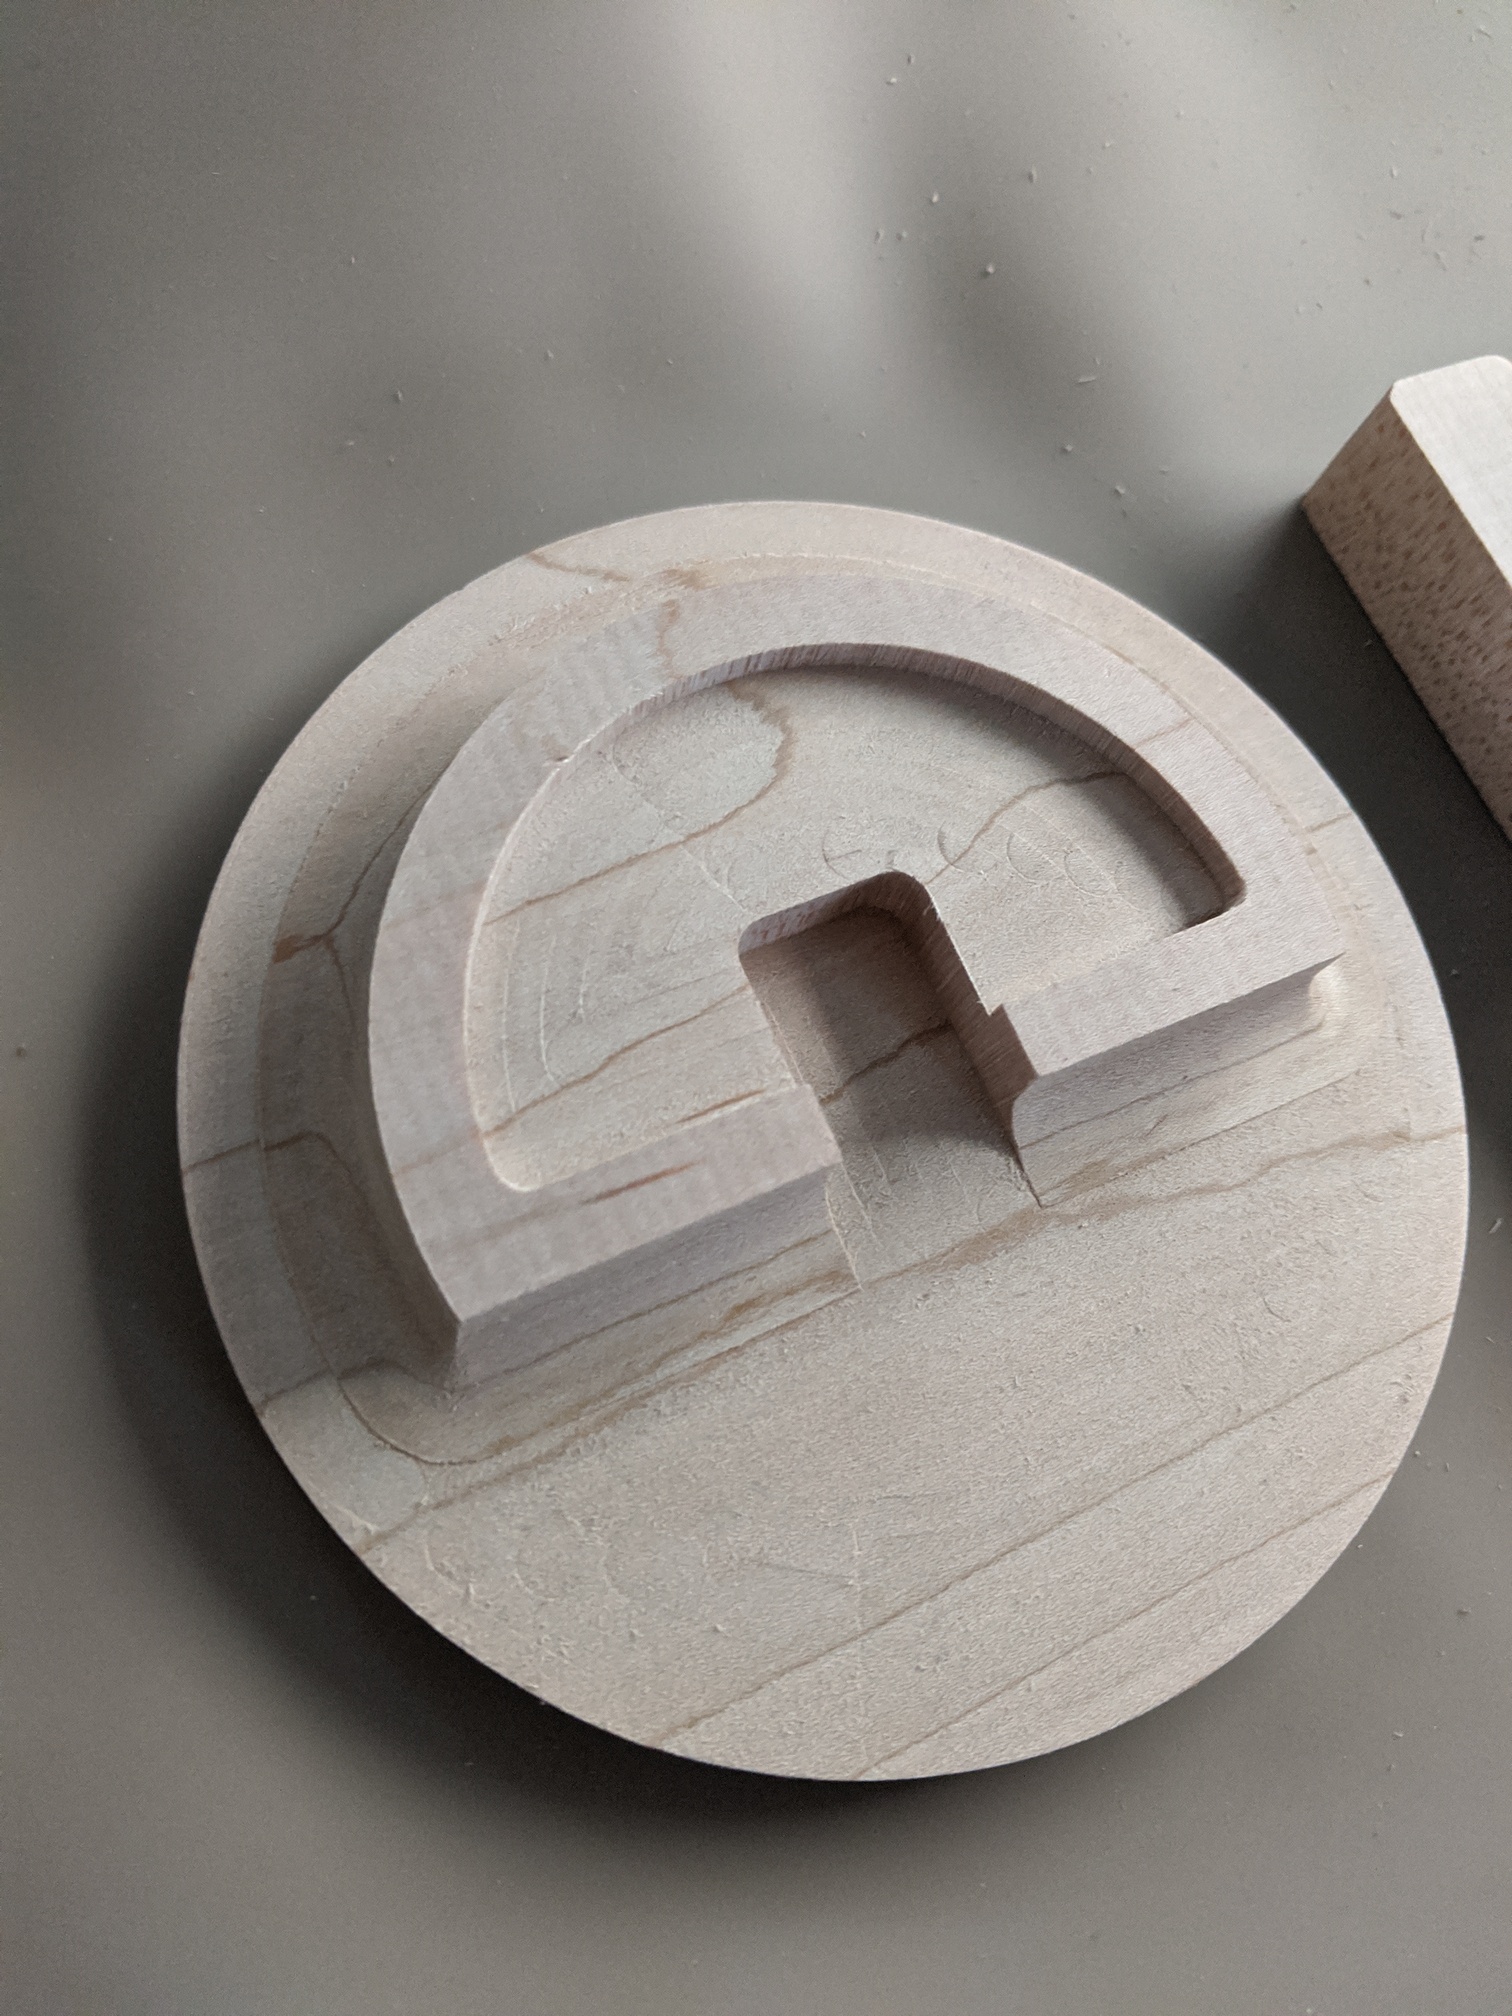
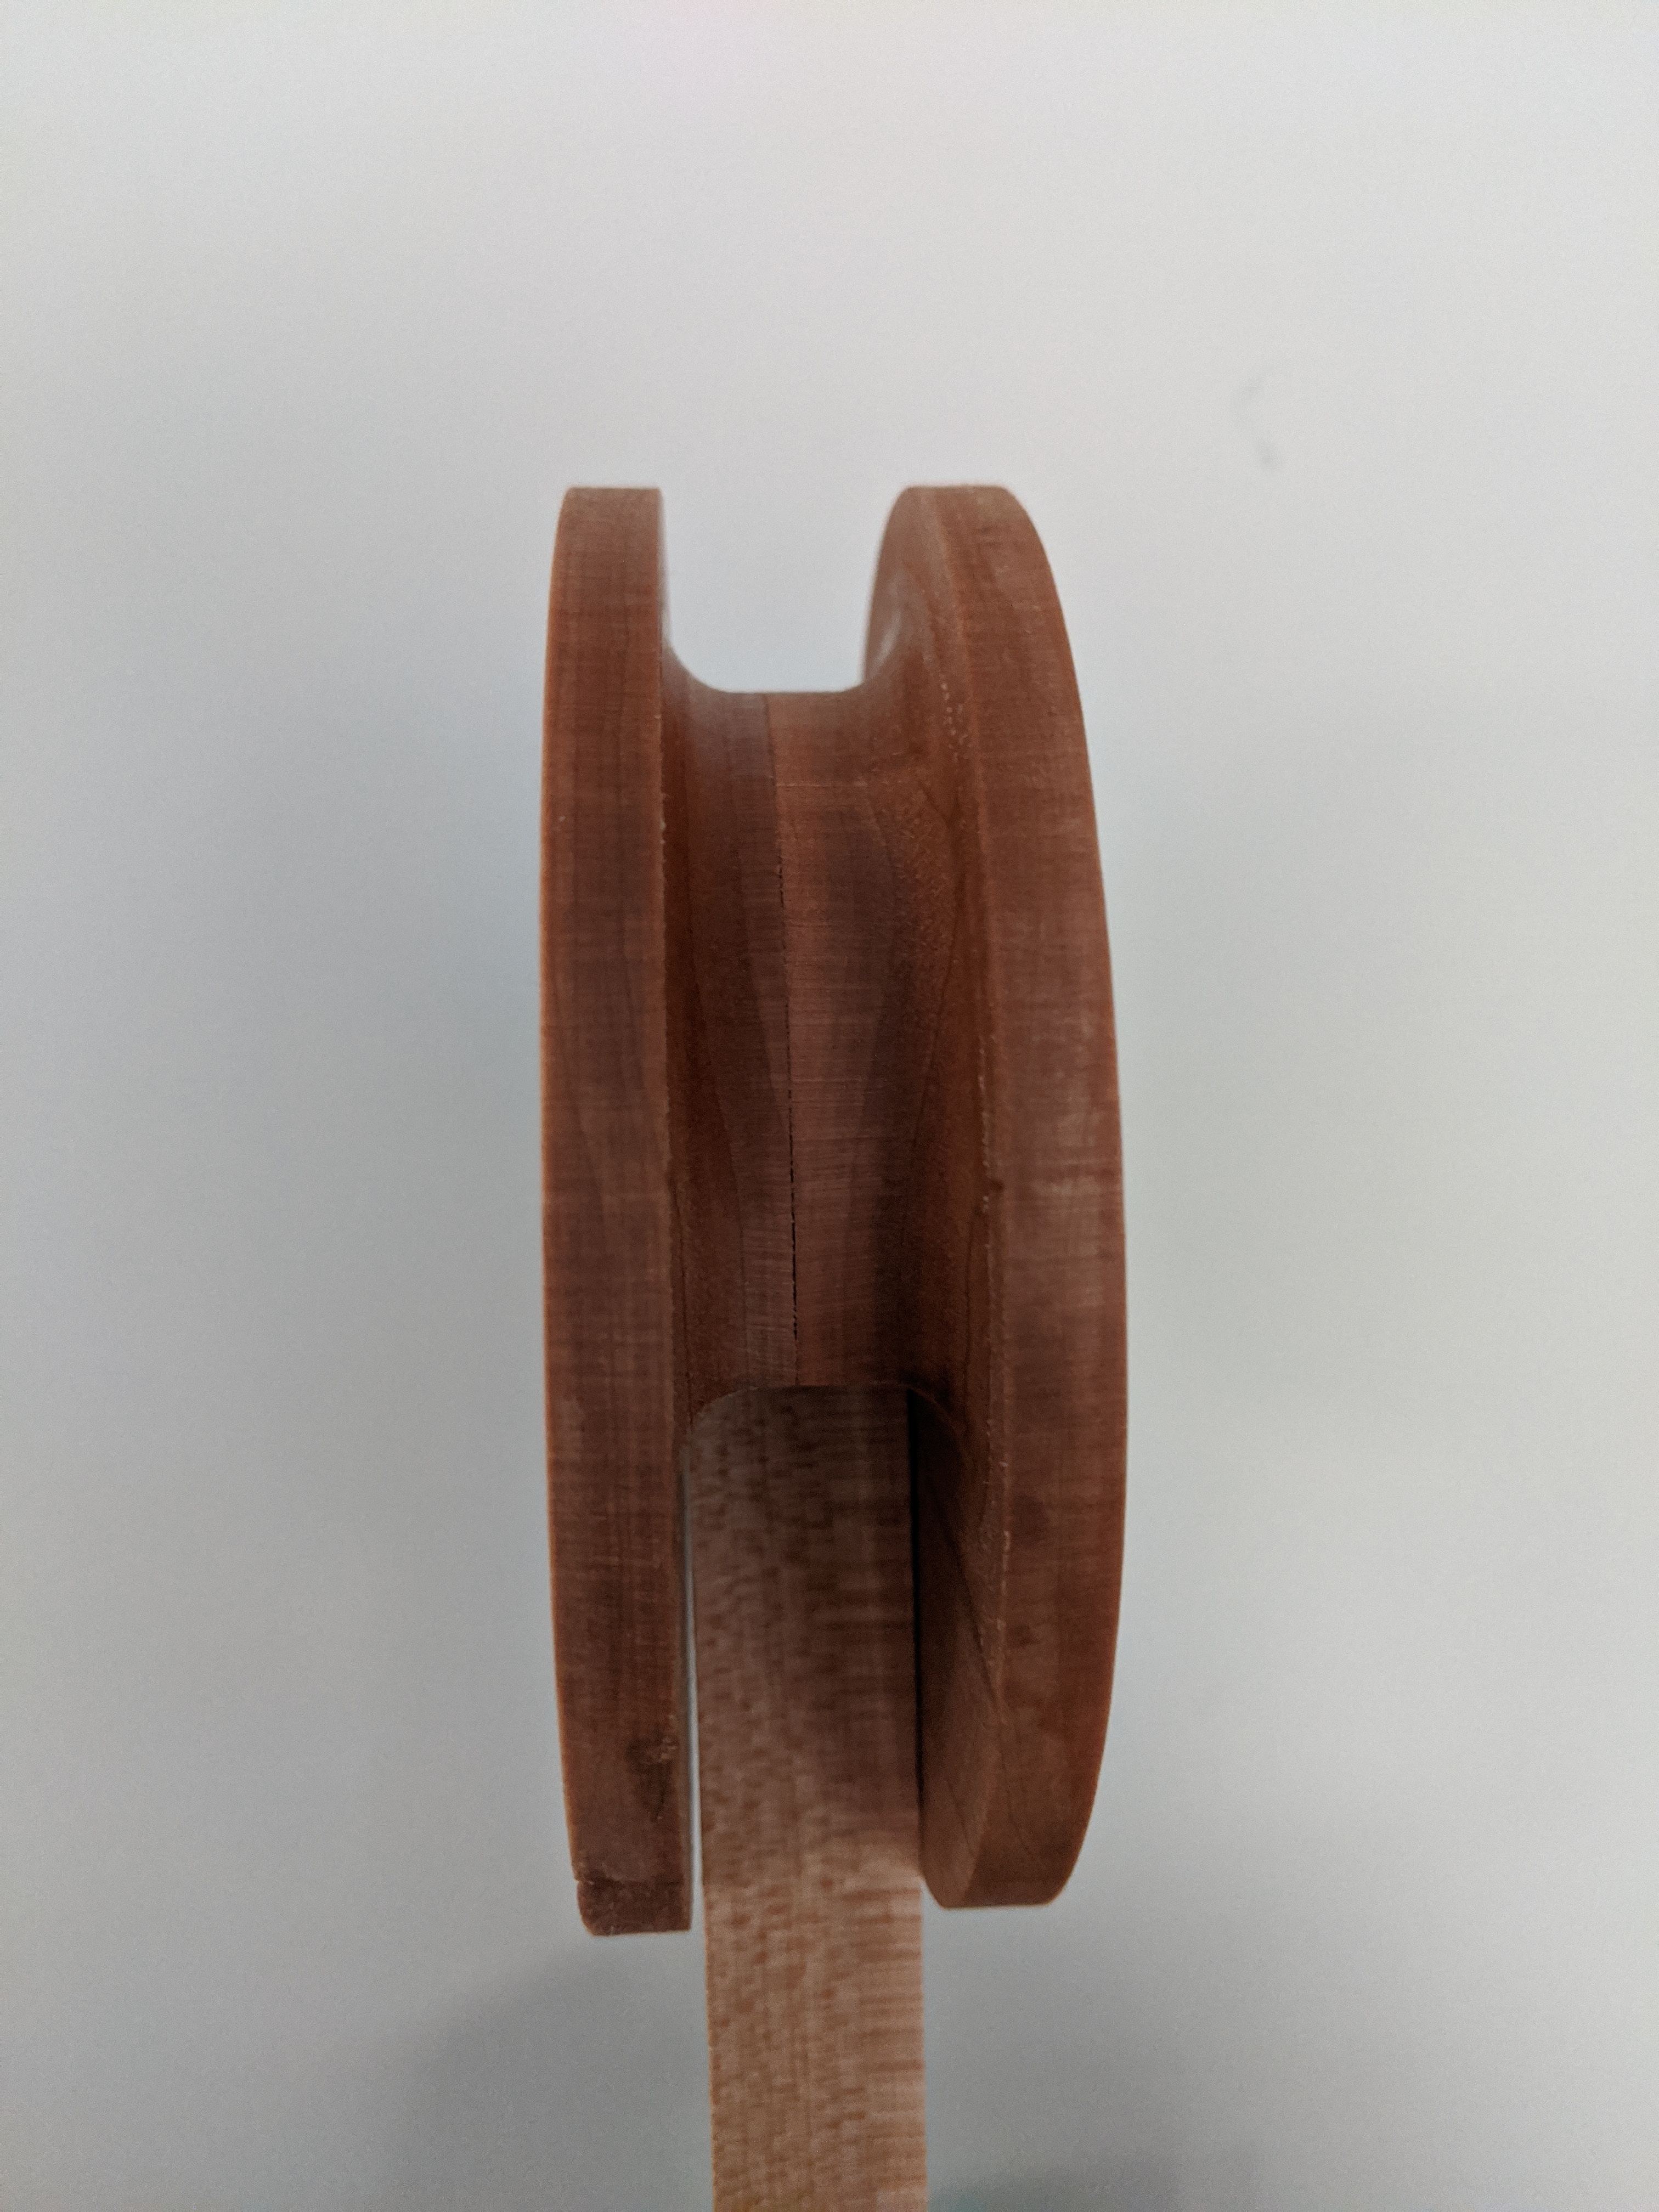
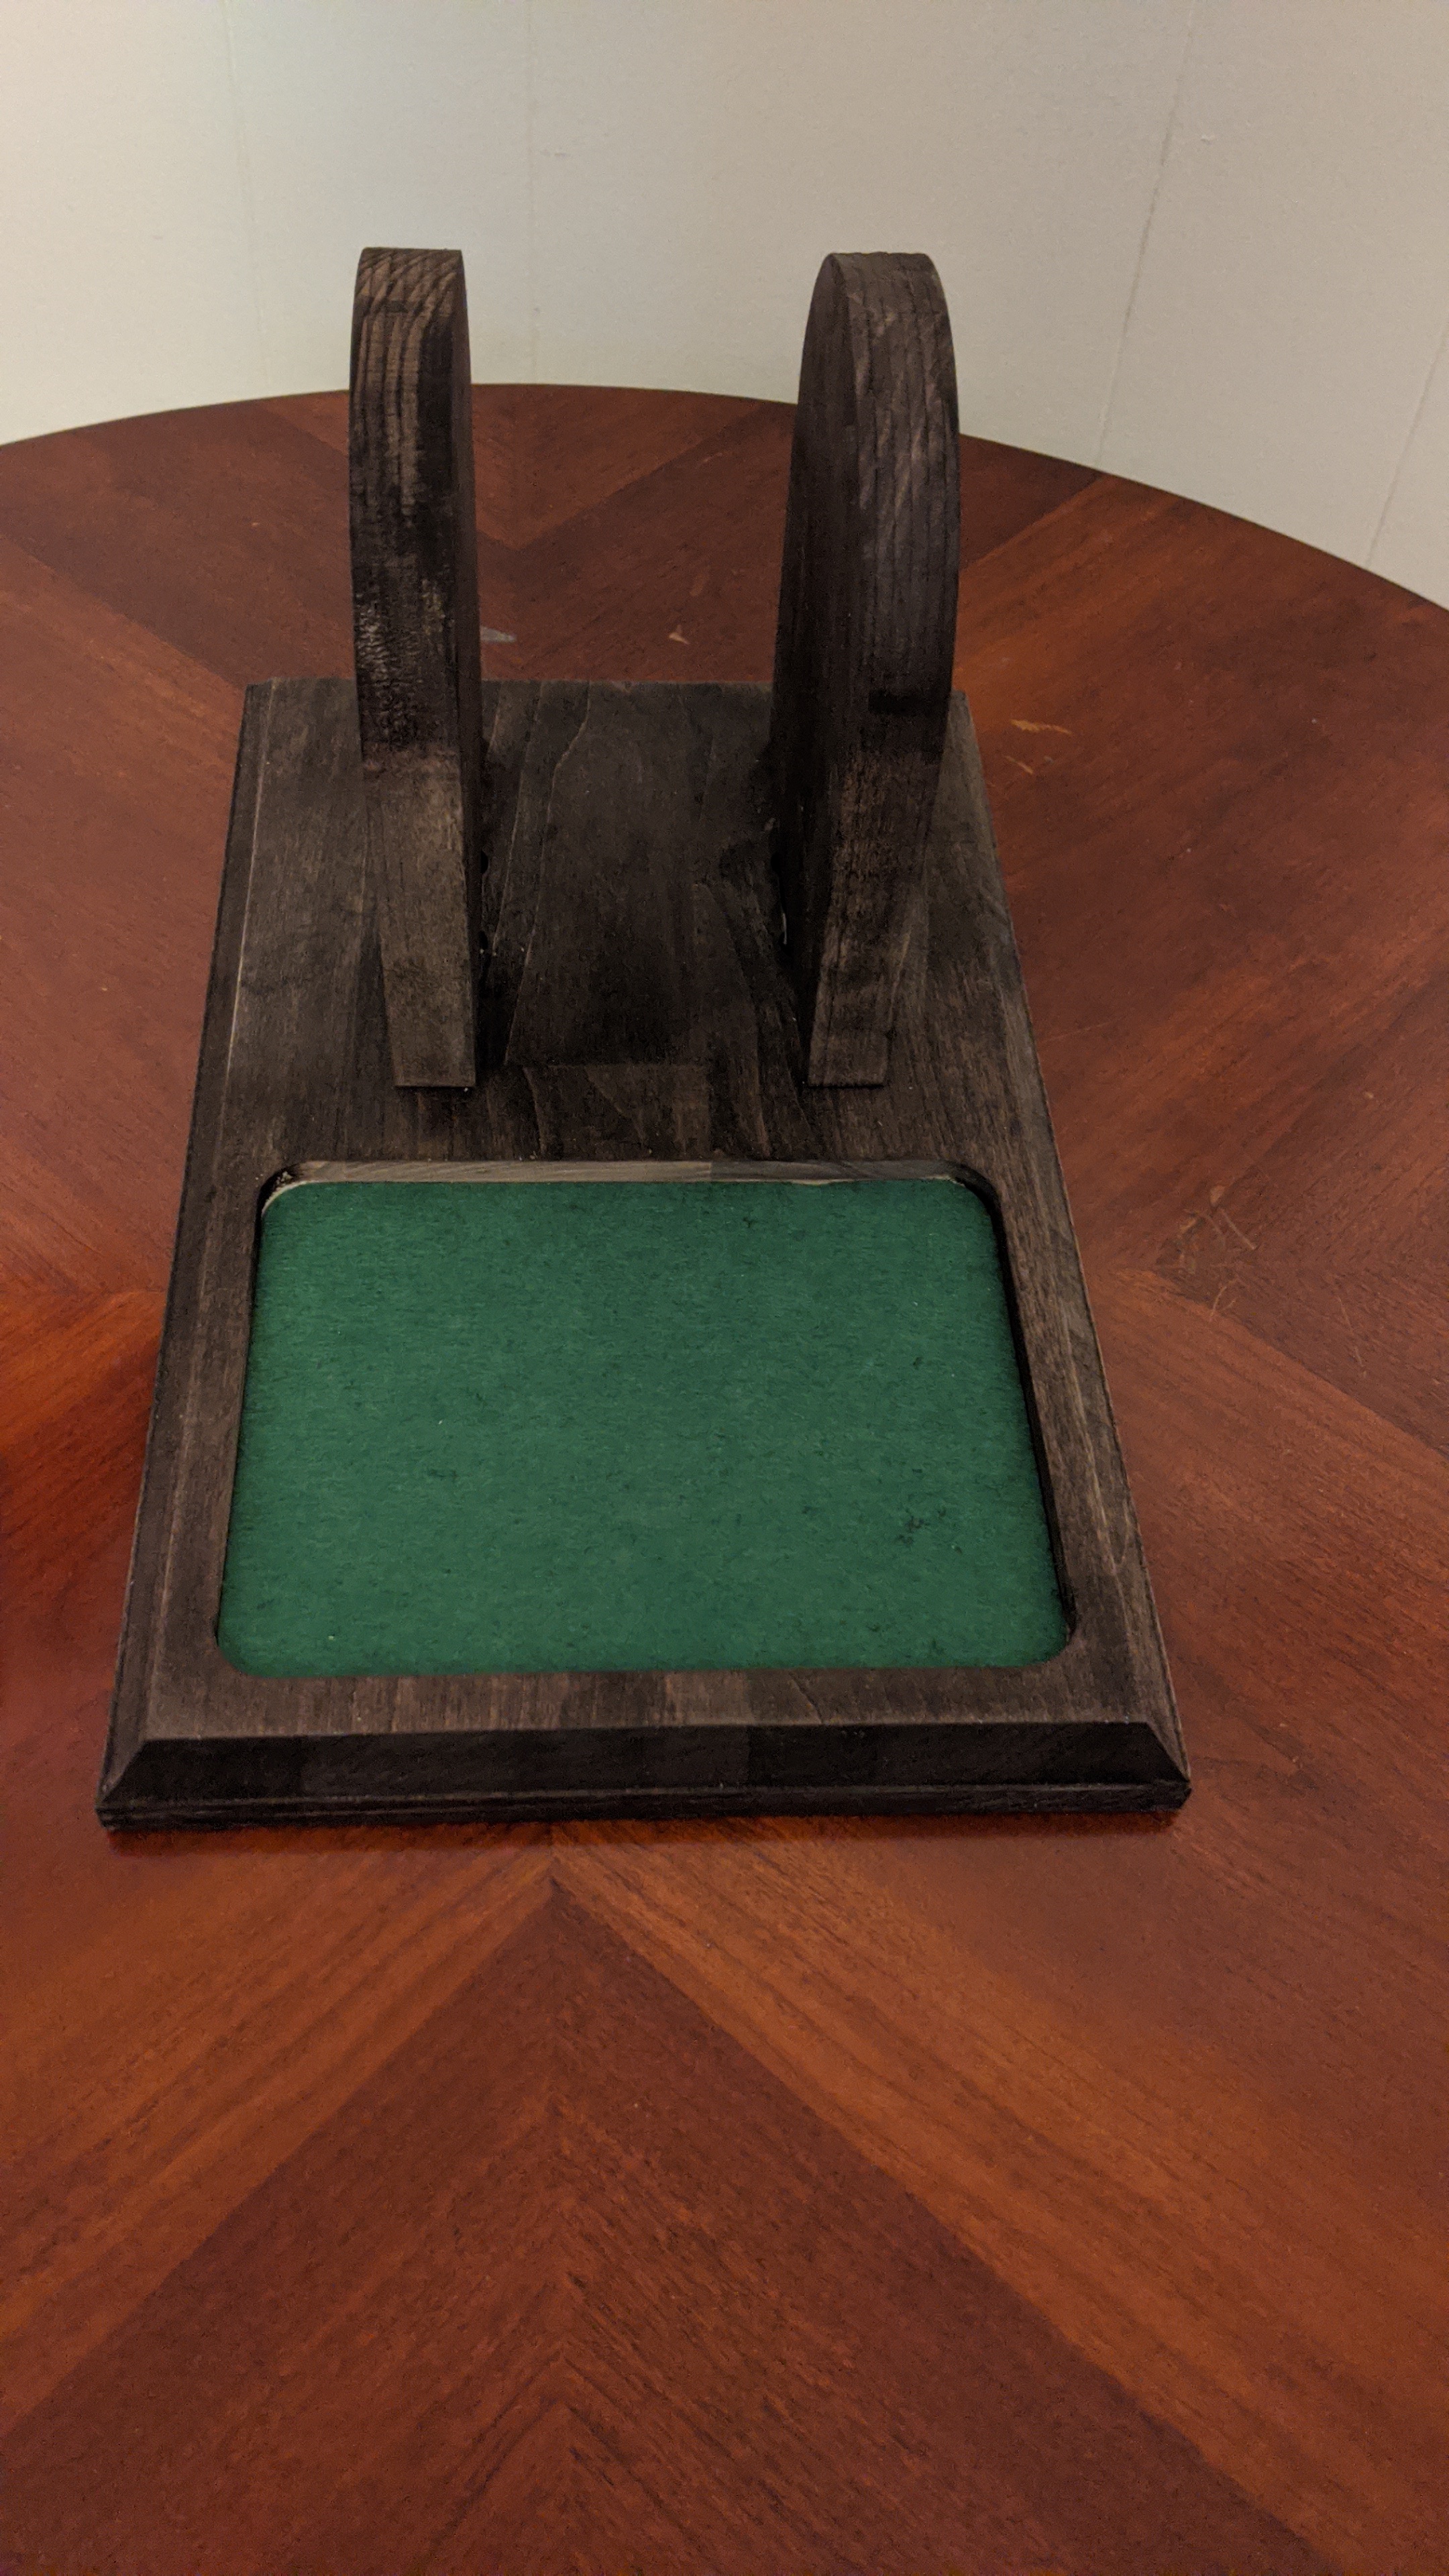
Here is a picture of the tool holder Headset stand I made for the contest.
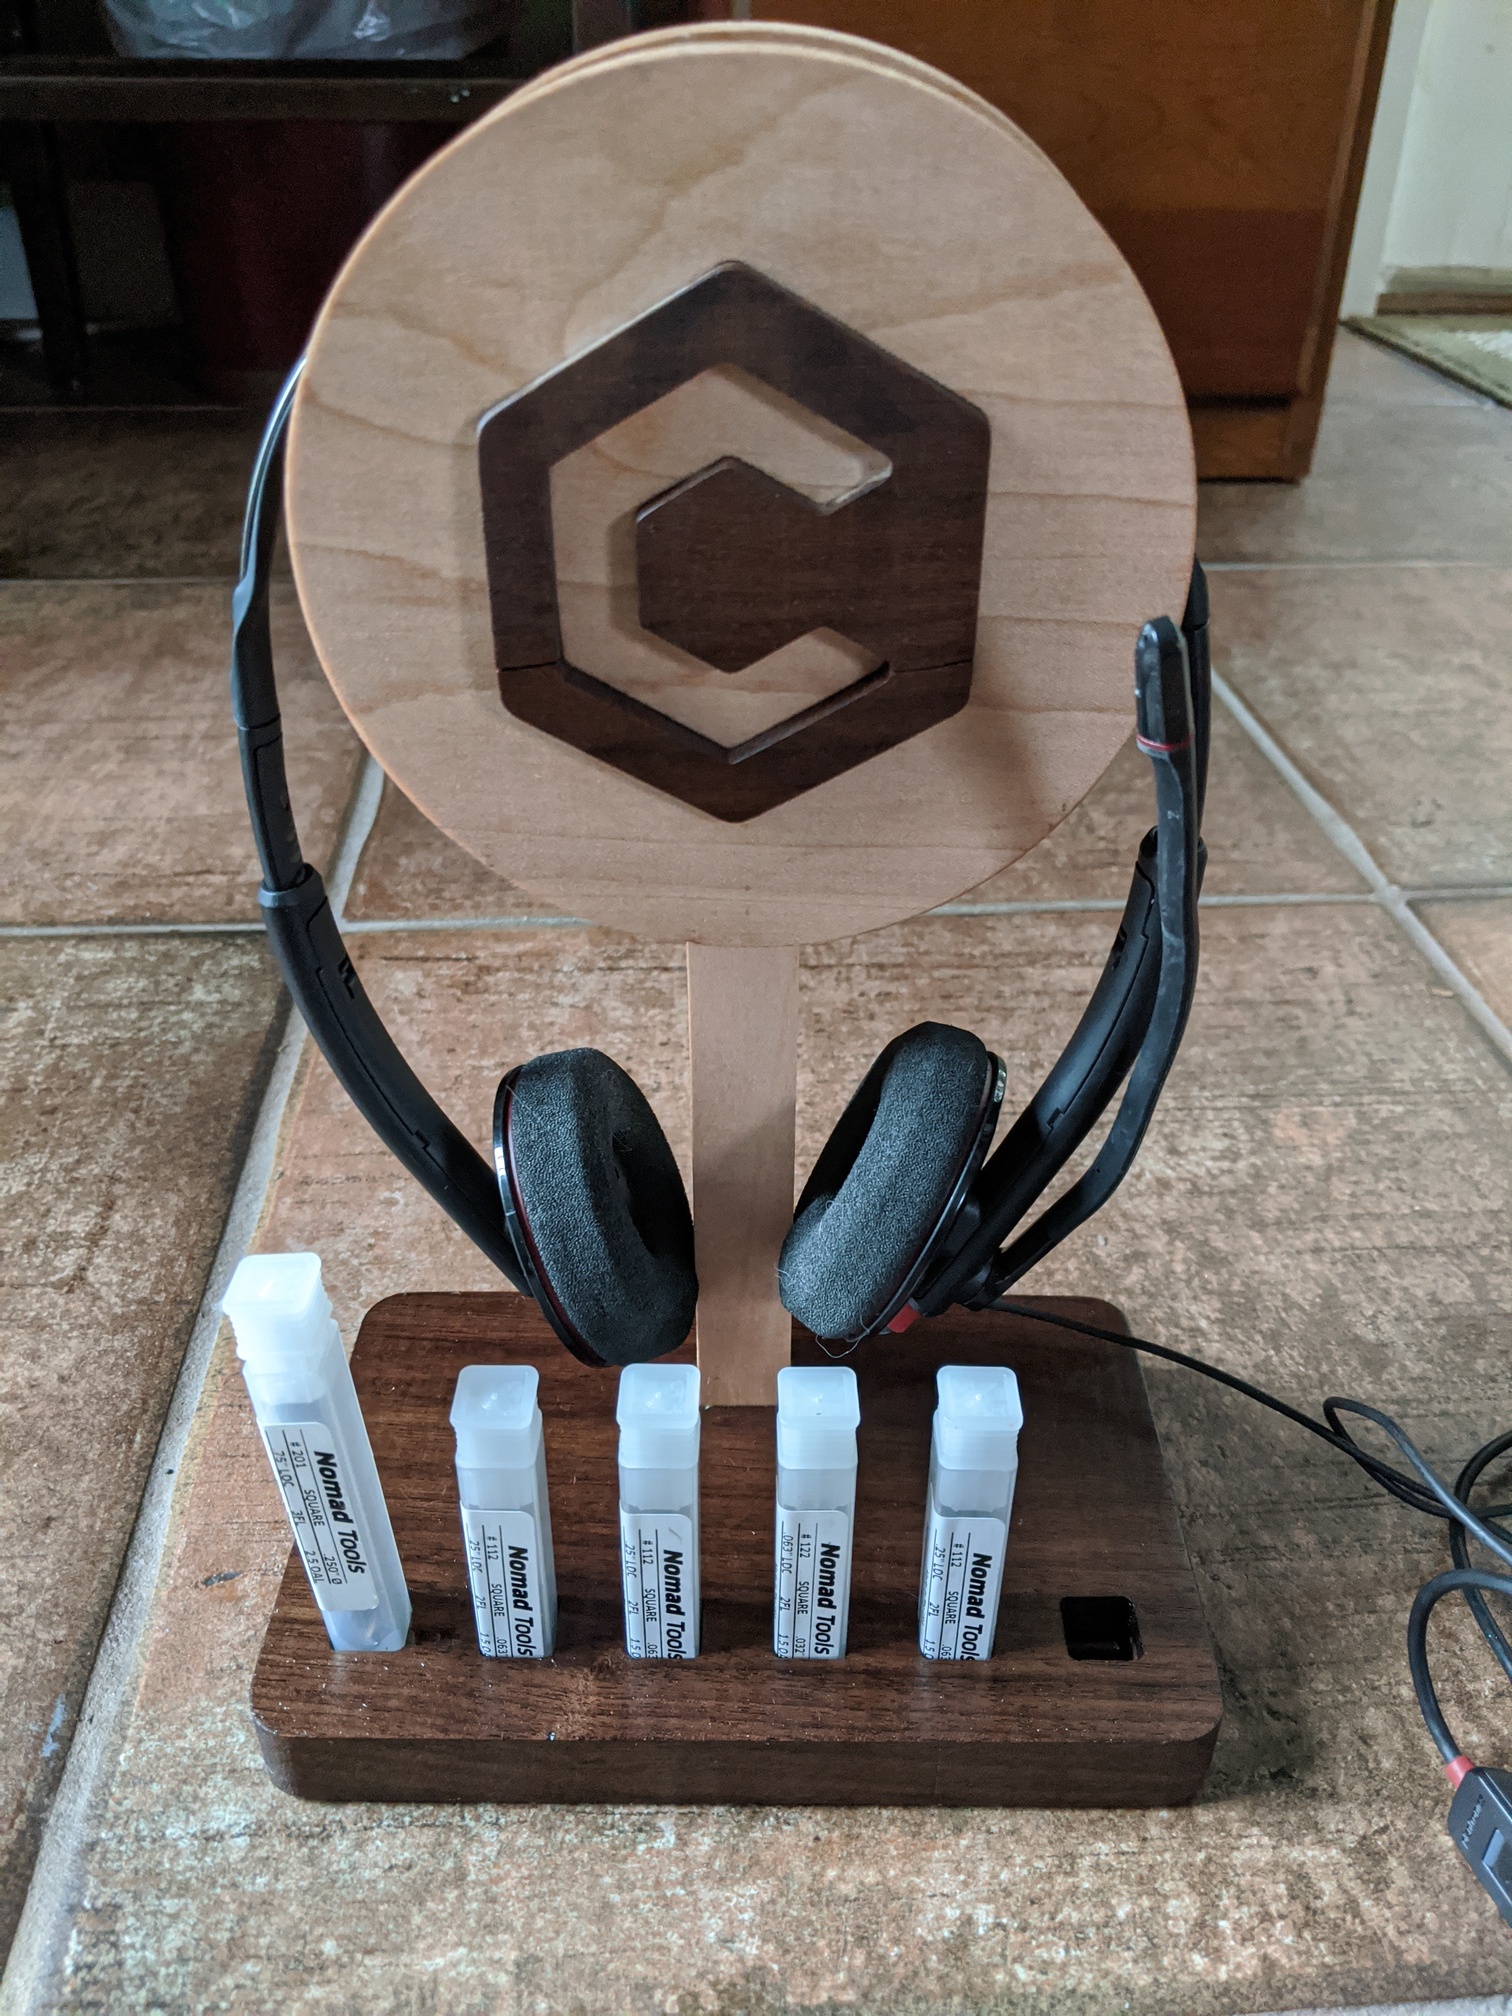
The parts are 2 halves that make up the actual headset holding unit, a “stick”, a walnut base and a walnut inlay with the carbide 3d logo.
The 2 halves that make up the main unit are inverted pairs, using bit 201 for most of the work. I also used my bowl making bit to have a nice round curve on the inside. The two pieces fit snugly and a tiny bit of woodglue sealed their fate together.
The design was done in Carbide Create in a few separate design files:
- The two halves of the main unit: headsetstand.c2d (570.4 KB)
- The stick: headsetstandstick.c2d (561.4 KB)
- The inlay: headsetinlay.c2d (99.4 KB)
- The walnut base: headsetbase.c2d (35.4 KB)
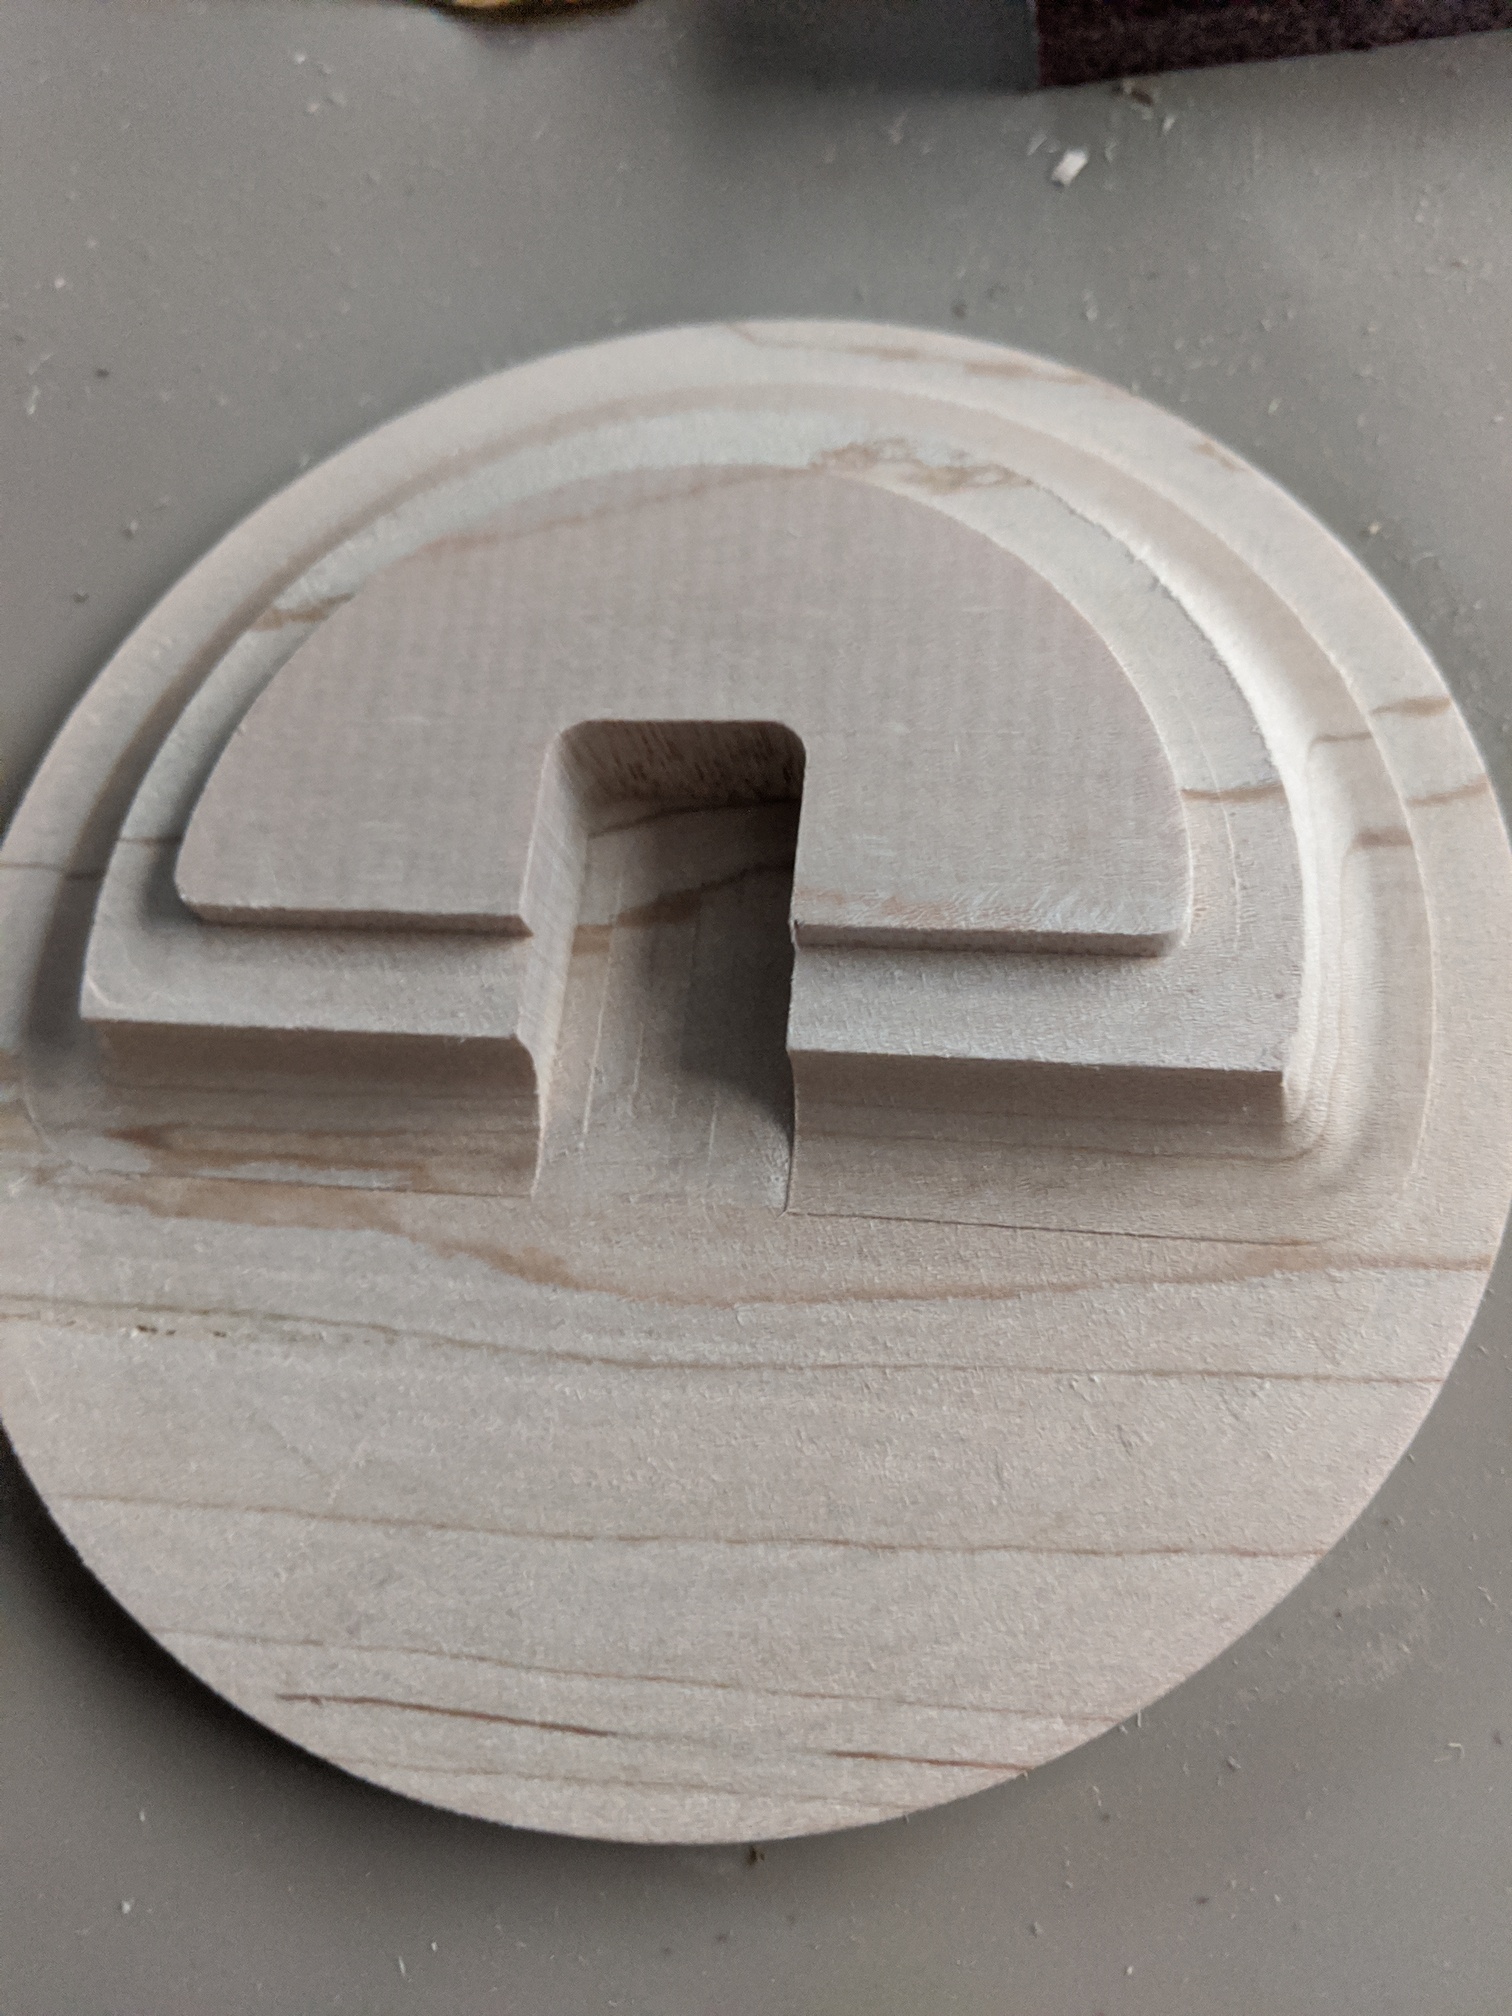
Edit: I realize that the main picture does not clearly show the hollow internal area of the top area, so here’s a side angle picture:
8 Likes
So for my project, I had a couple of design constraints I needed to deal with:
I wanted a “charging station” on my nightstand, but I also didn’t want to give up any room on the nightstand, since it isn’t very big.
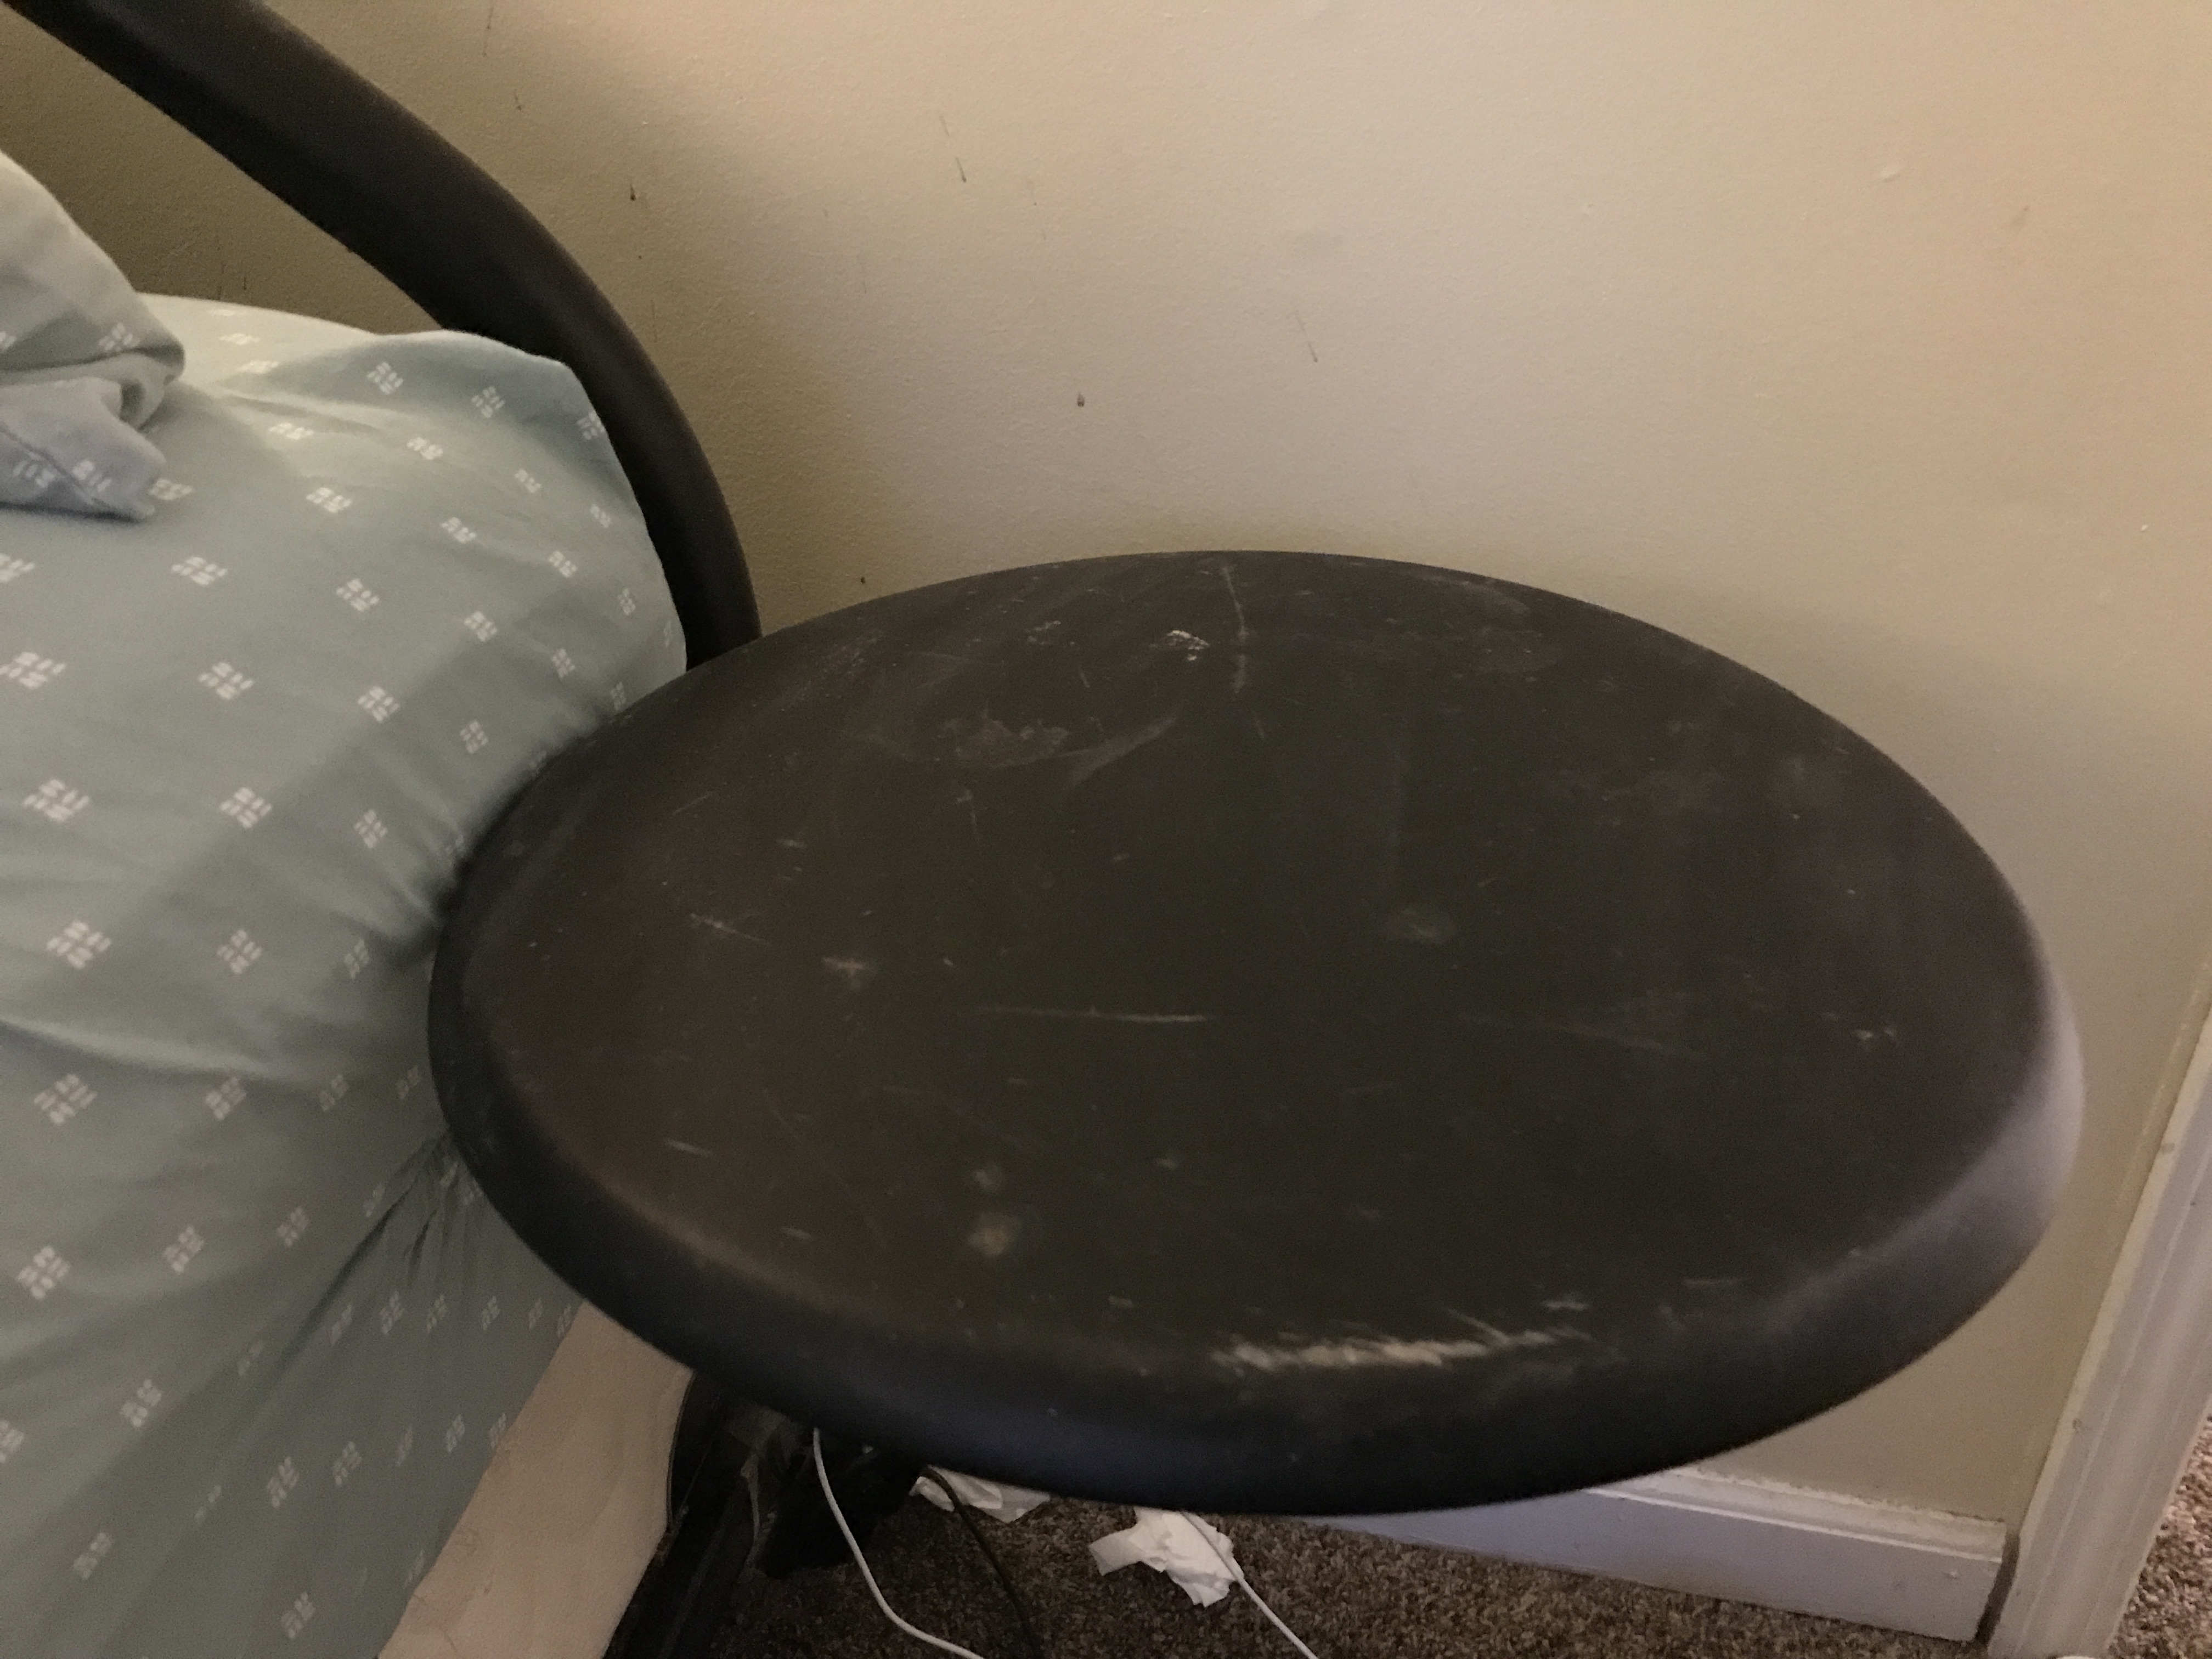
I wanted the charger to be part of the station (not another thing on my floor).
I have cats. (This is only relevant to other cat owners, who know of the not so secret feline desire to knock everything onto the floor). I would prefer this didn’t happen to delicate electronics.
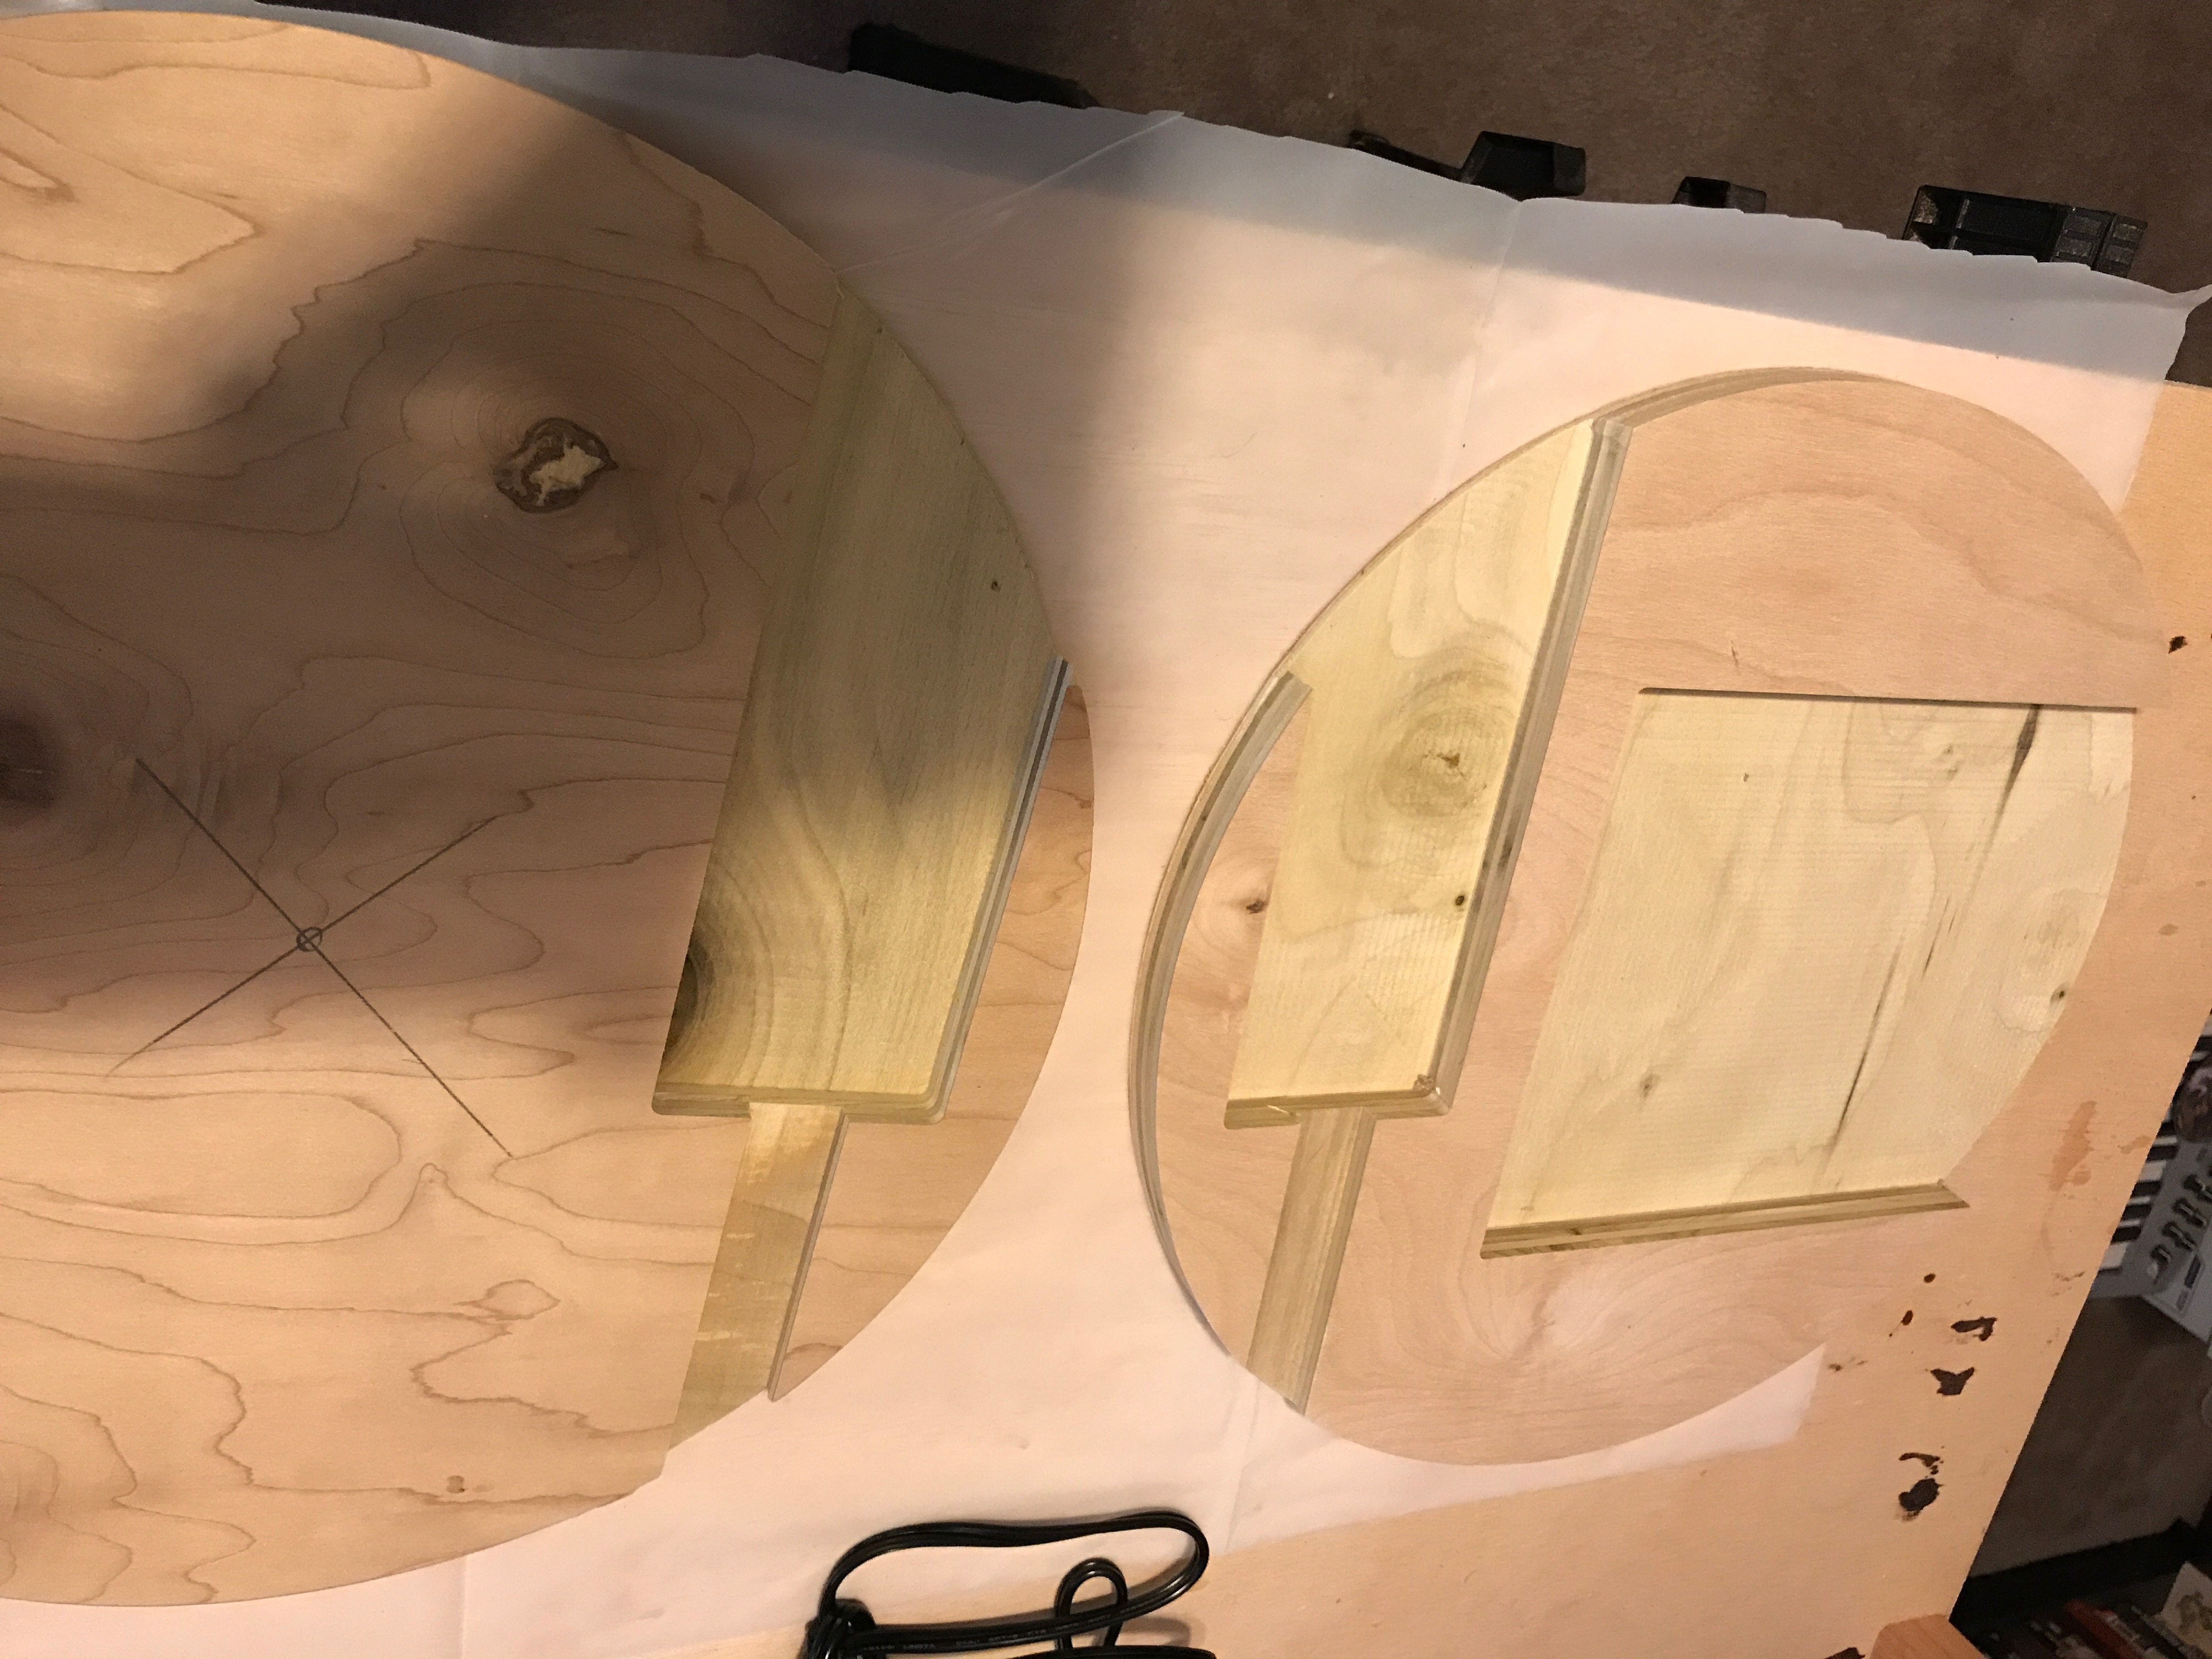
The circular charging station I designed fits over the entire top of the nightstand and is about 2 inches thick. It consists of 2 layers of 3/4 plywood, sandwiched between 2 1/4 pieces of plywood. The 3/4 pieces have sections carved out to accept the charger, 3 phones, an iPad and a Kindle fire. Since this is a flat piece, I still have plenty of room to place items on the top (which the cats can then knock over).
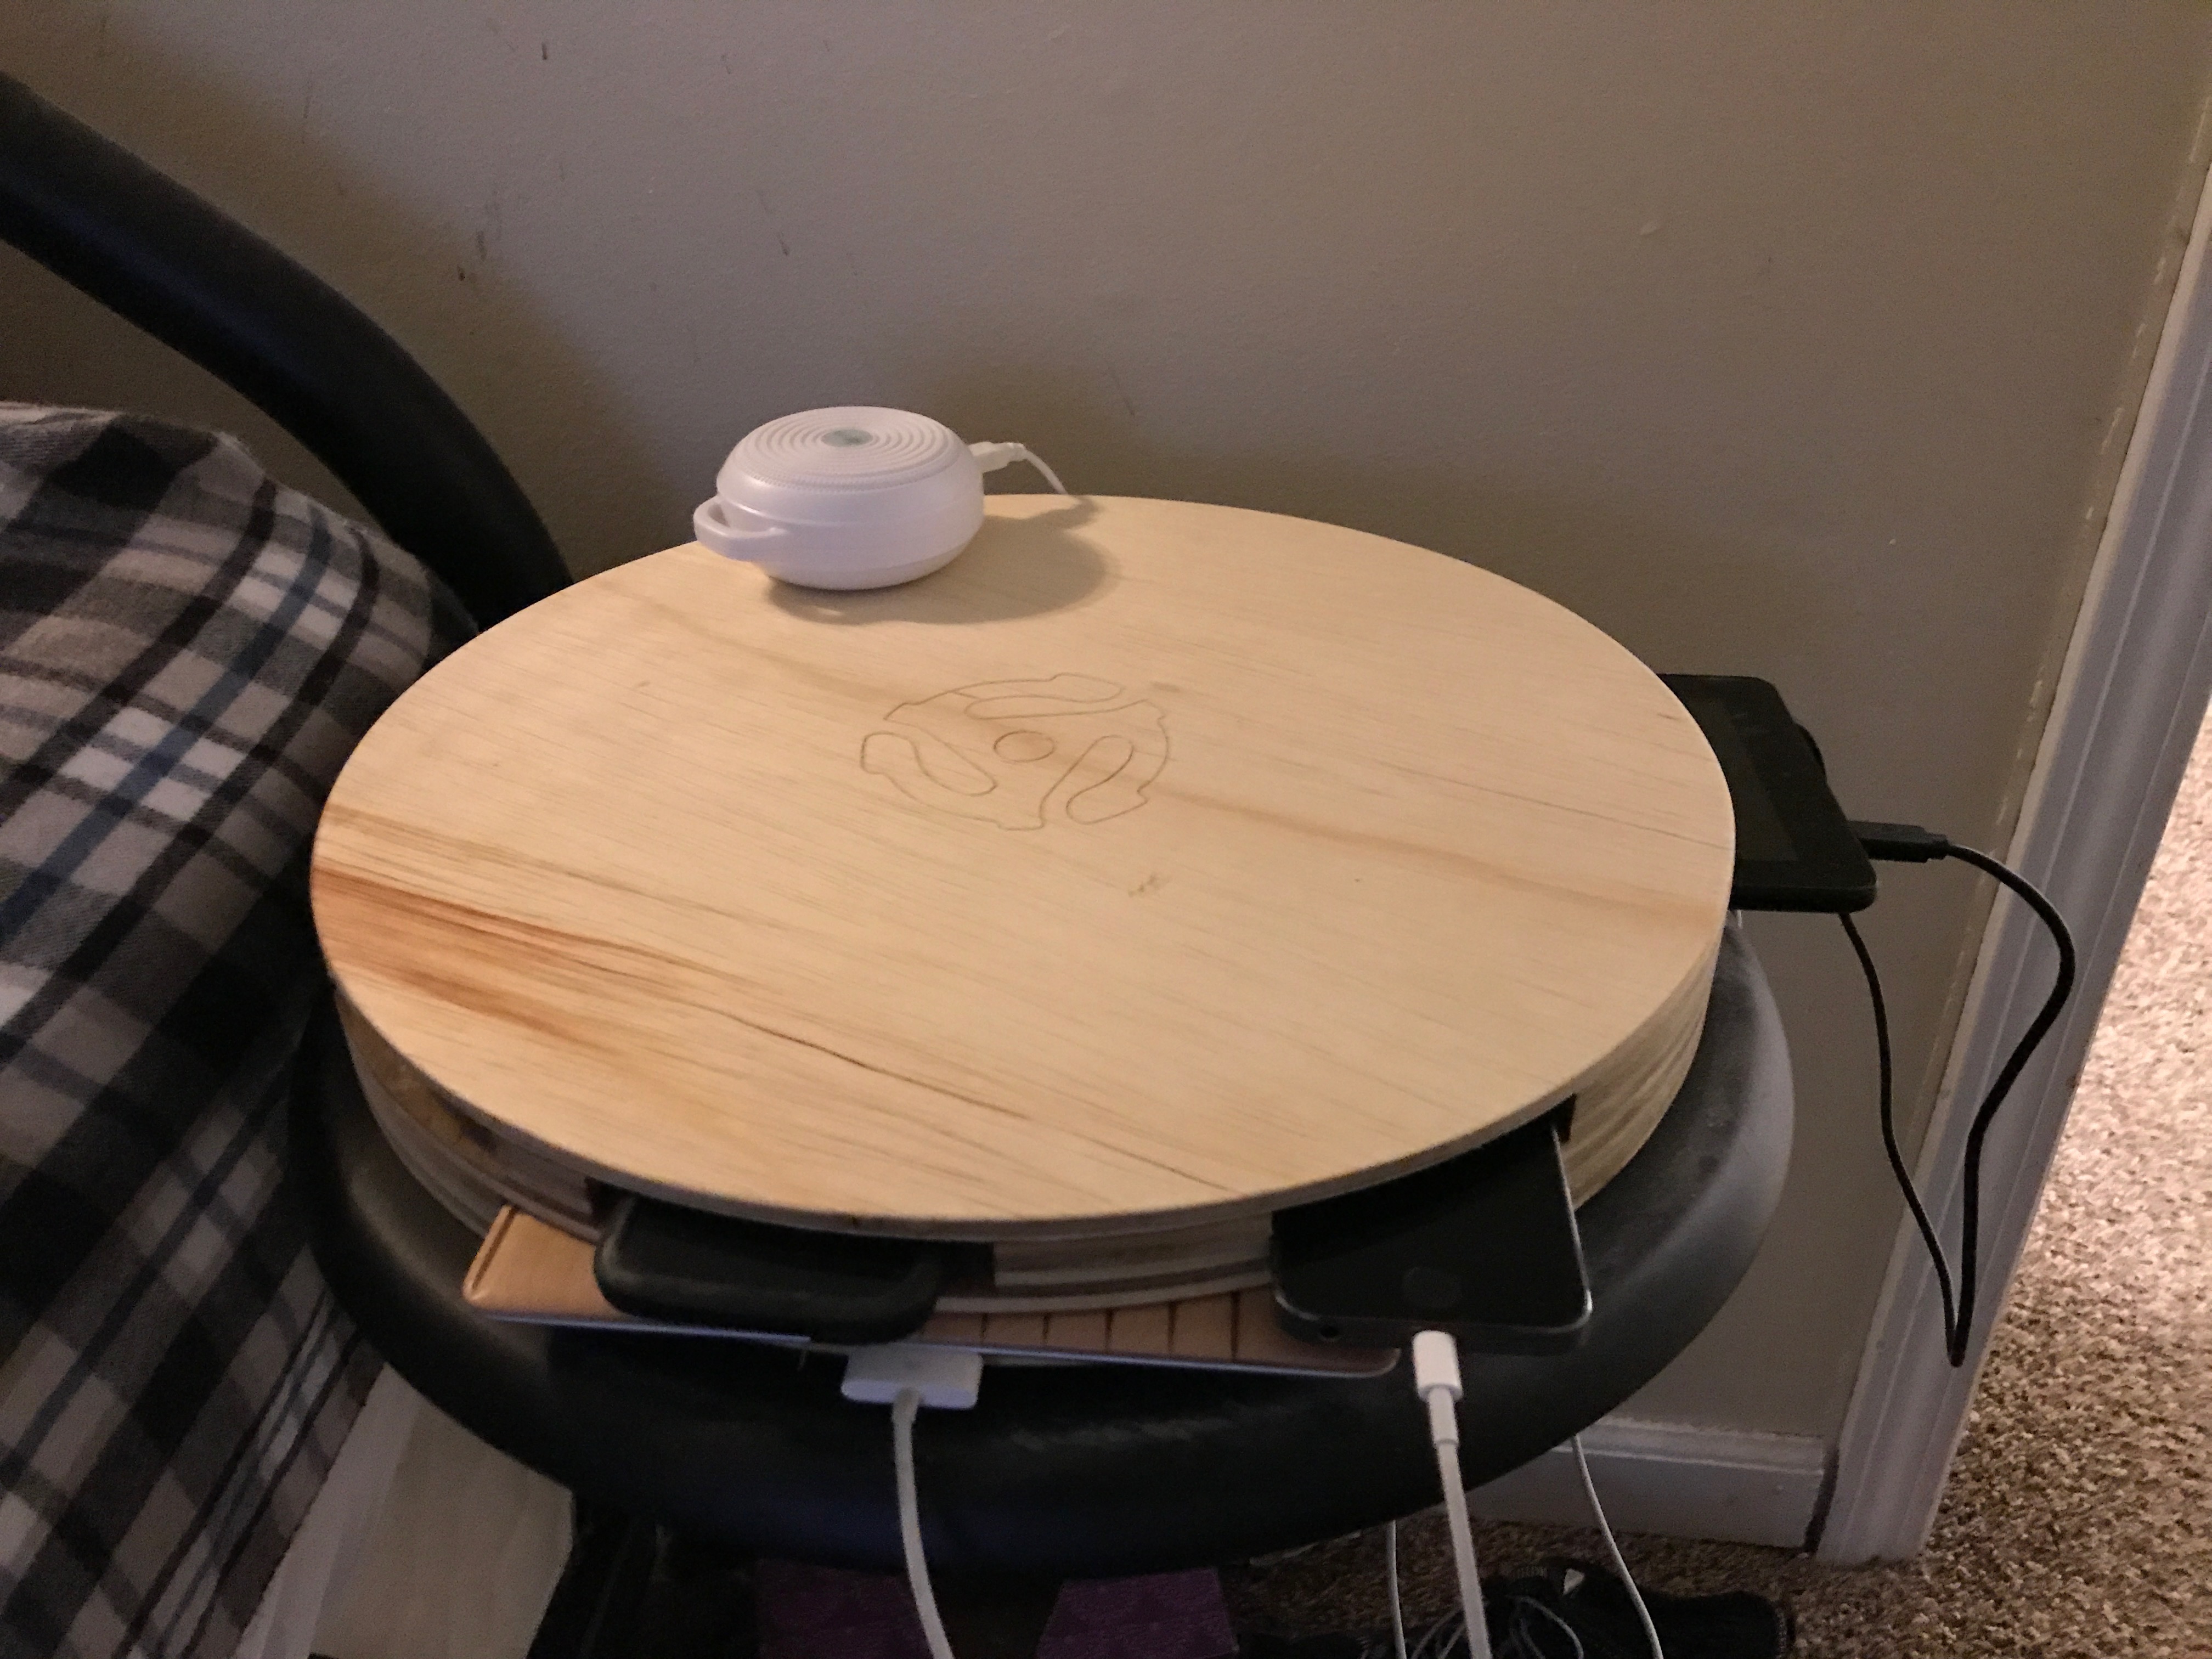
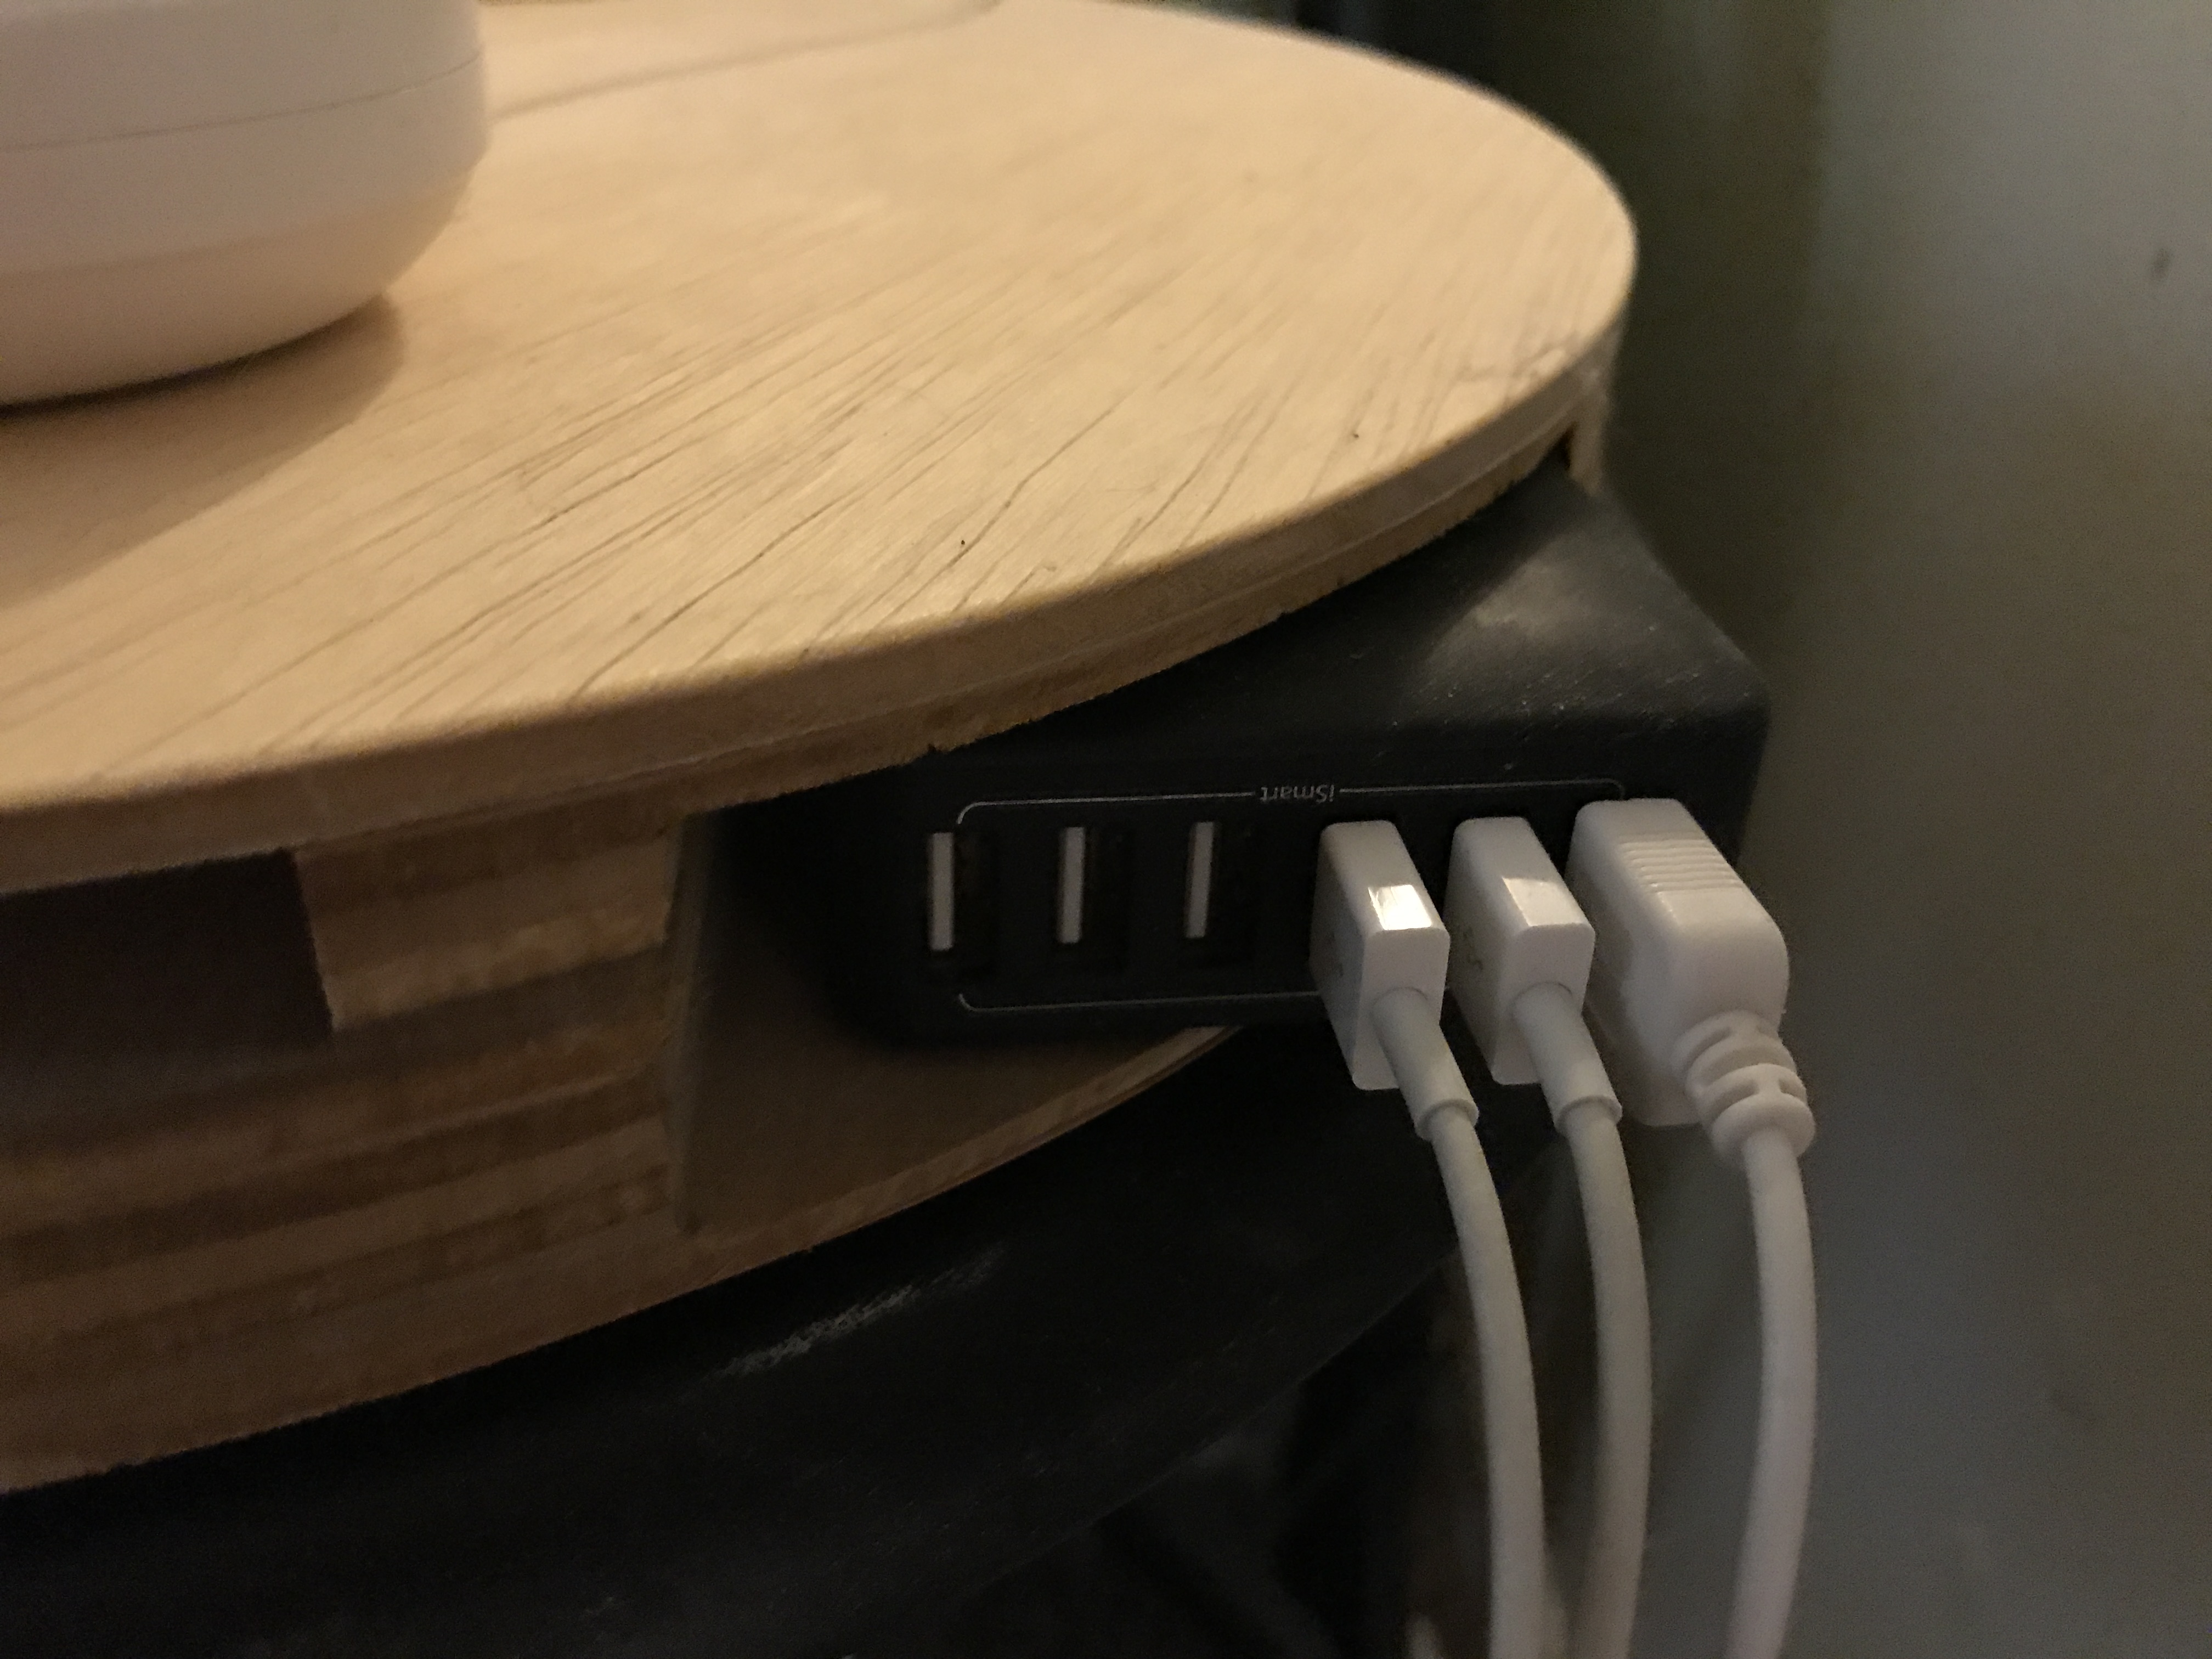
The slots for the various devices were pretty simple to design. It’s just a rectangle a little larger than the device you want to store. The charger was a bit more tricky since it was thicker than 3/4, which meant I had to line up and carve a pocket in the top of the first 3/4 board and then a matching pocket in the back of the second 3/4 board. I also cut a channel for the power cable that was big enough to feed the cable through (so the charger would not be a permanent part of the charging station).
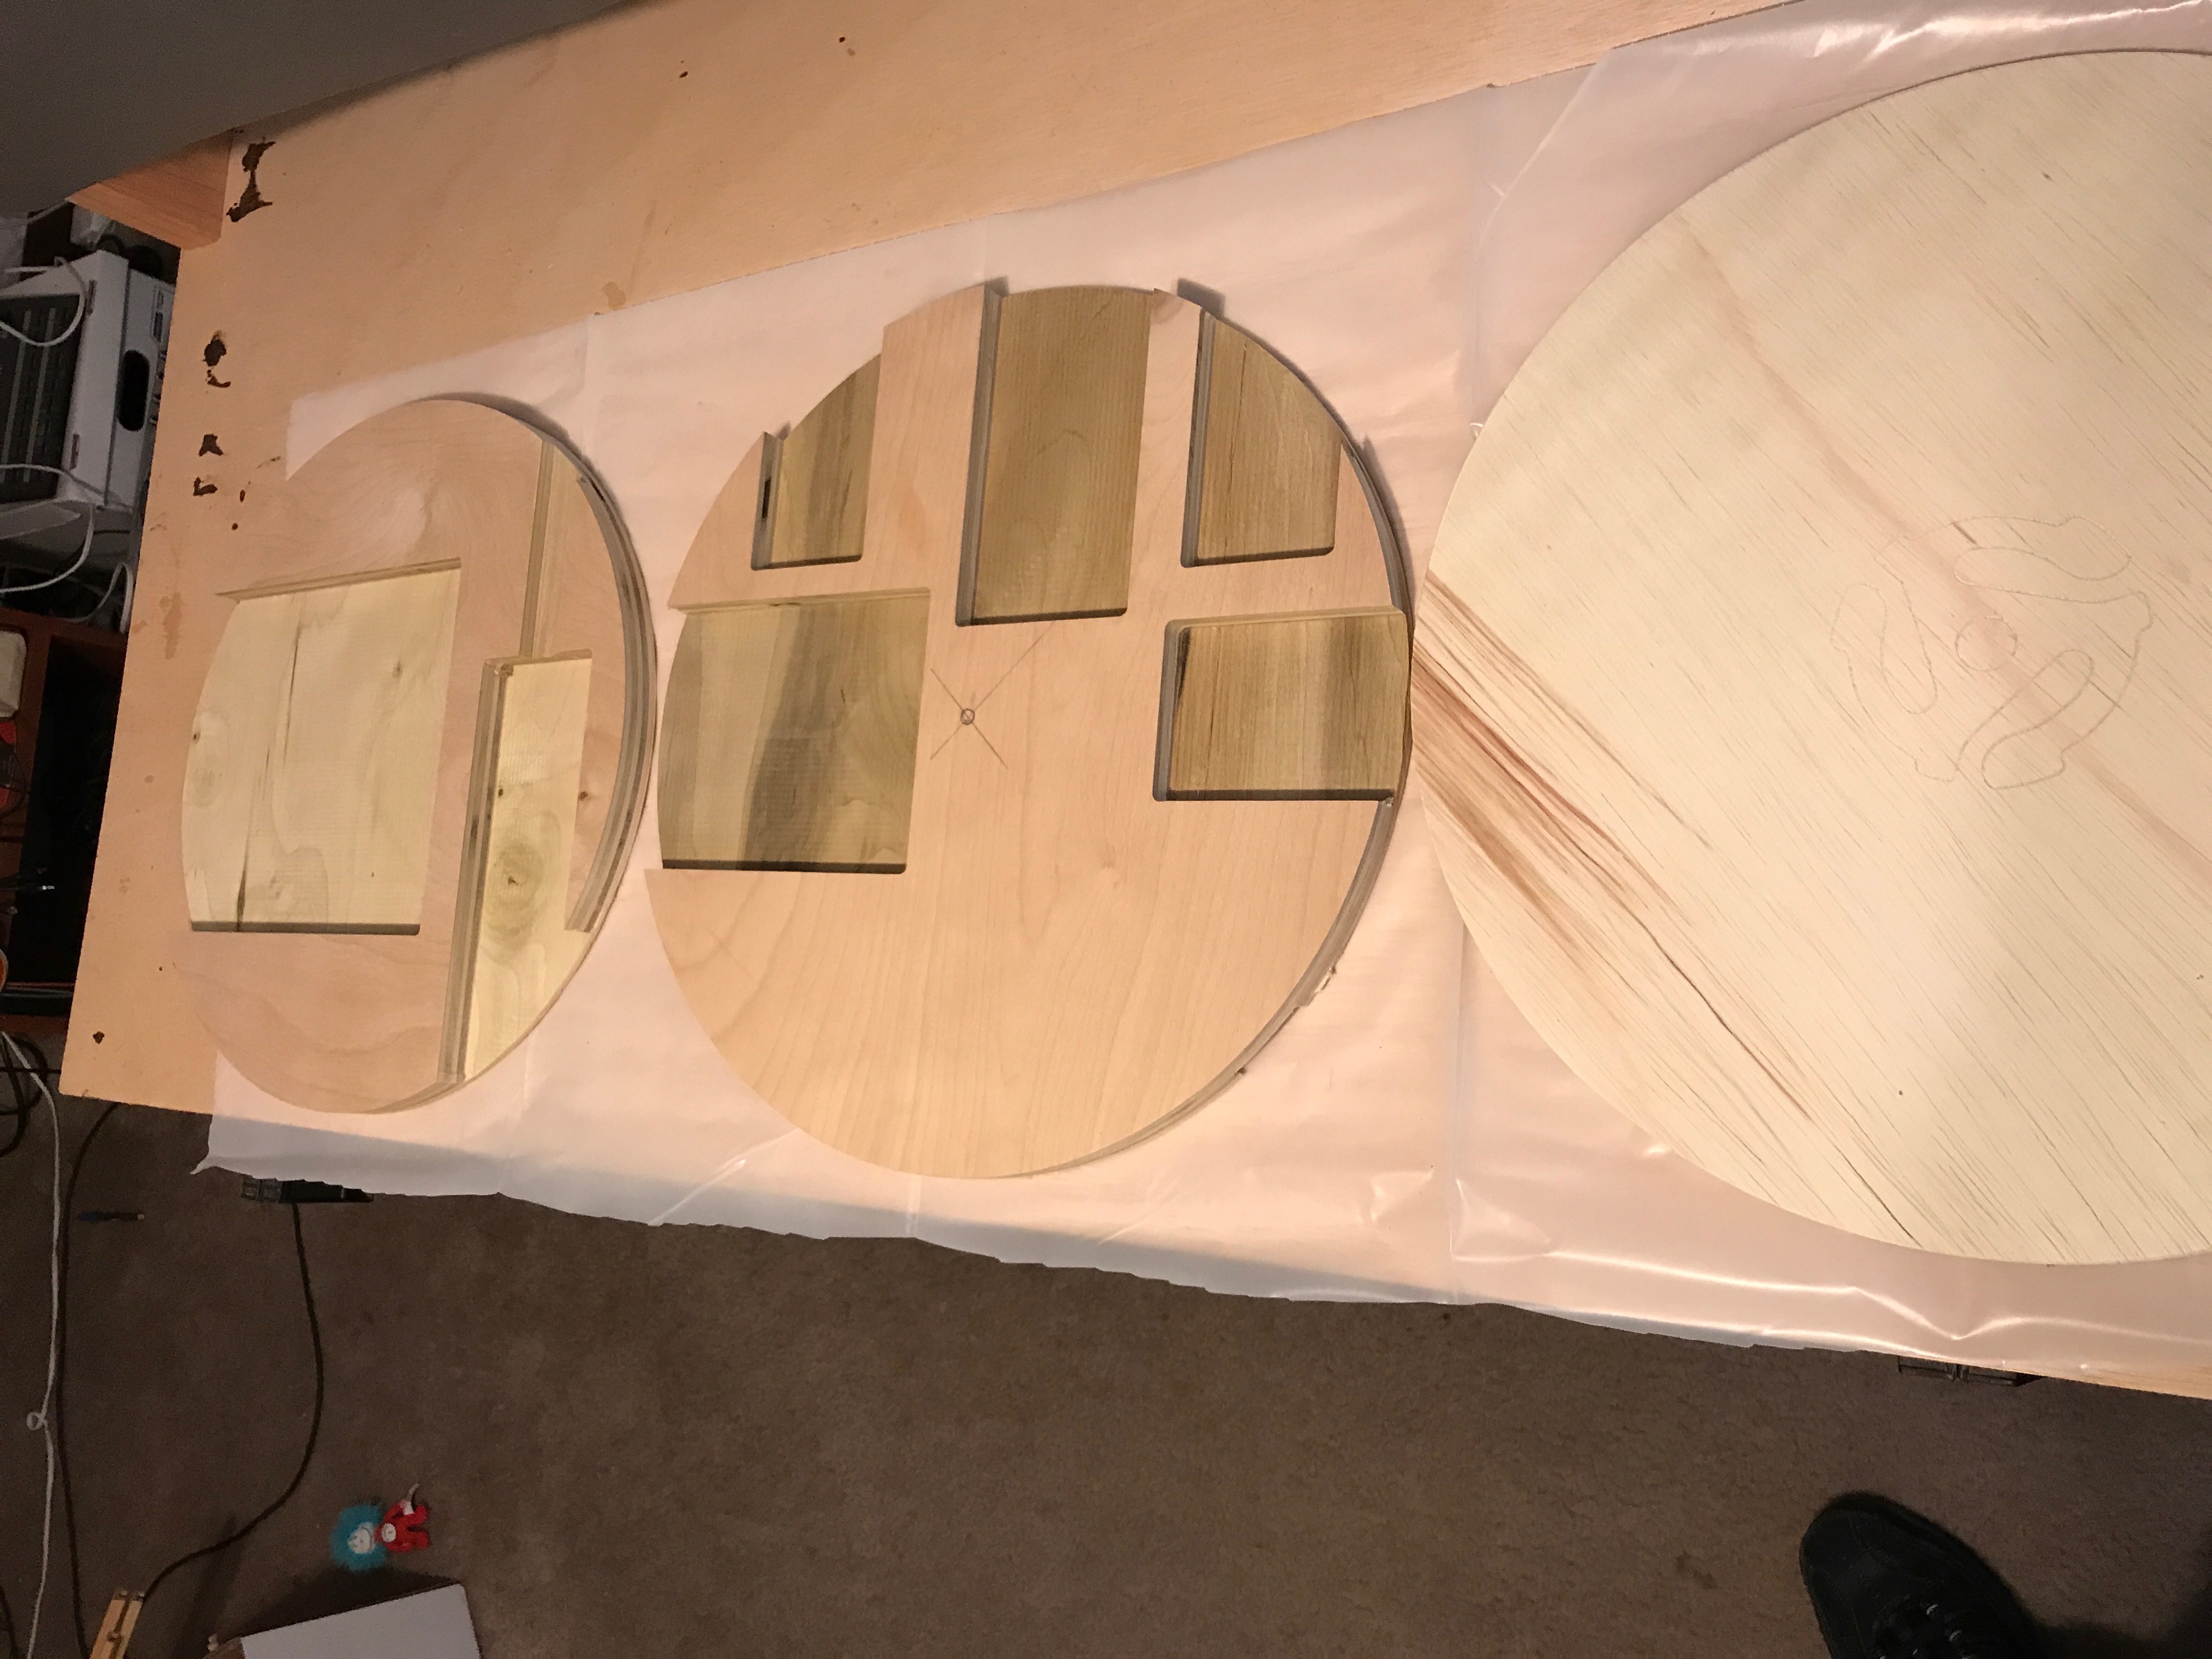
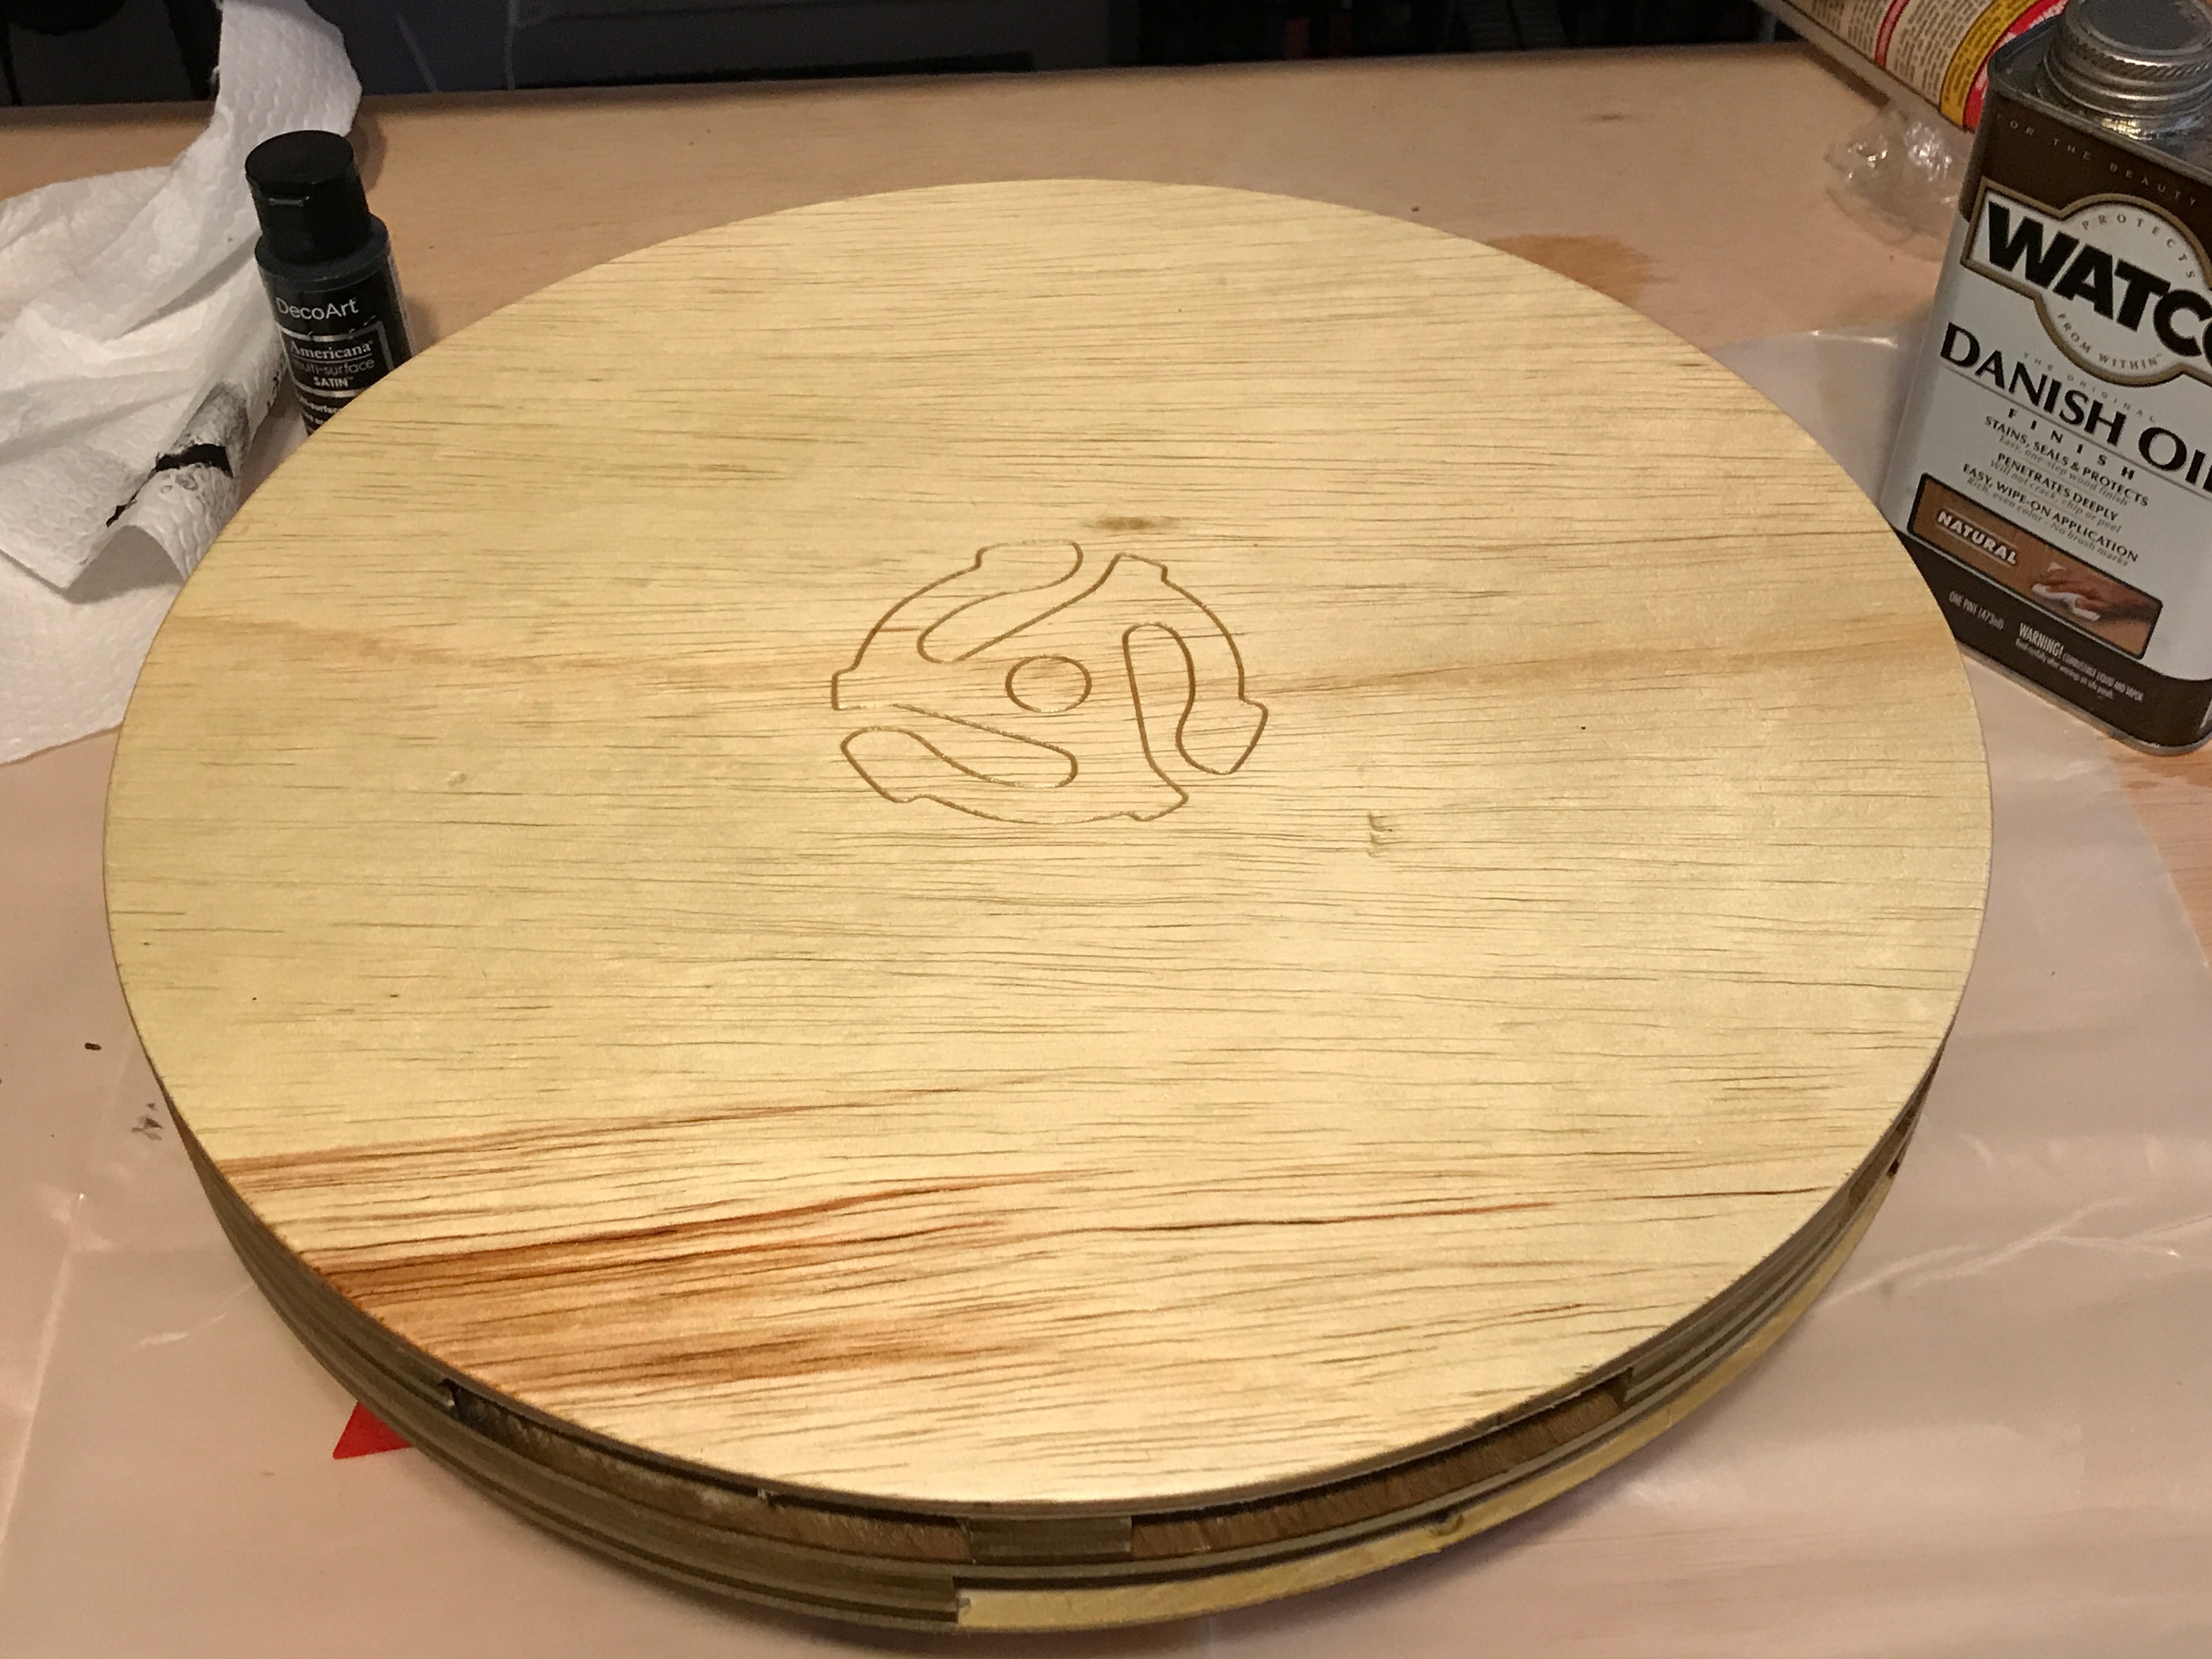
I then flipped the second board over and carved the next pockets for the phones and the Kindle. Lastly, I carved a design in the top, strictly for decoration.
This kind of design can be adapted to any shape and is useful when space is at a premium. I think my next version would also route the wires internally for esthetics.
Tabletop holder.zip (56.0 KB)
10 Likes
We now have a trainer-bike-friendly phone mount, CNC headphones, and a cat-resistant charging station. What’s not to love about this machine and this community!
2 Likes
I know what that graphic in the center is!!! Yes, I’m old. 
4 Likes
Glad to see the entries coming in! My last minute phone mount seemed rather scrappy compared to the artistry displayed in the previous contest!
I will note that for whatever reason this contest doesn’t show up in my mobile browser when new comments are added on for some reason - which seems odd - perhaps it is not getting the views it should.
The three bumper pads fit into recesses in the hdpe holder - hdpe itself is rather slippery so the soft rubber bumpers make sure the phone doesn’t slide off it knocked. The screws were originally going to be used for a clamping system if needed, but so far so good!
1 Like
Weird. The only thing special about this thread is that it has been “pinned”, but it would be strange that this would result in what you (don’t) see on your mobile browser…
This looks like fun. I’ve been meaning to make a family charging center for a while. Maybe I’ll have time to finally tackle it. I should make it portable so we have it for our upcoming trip…
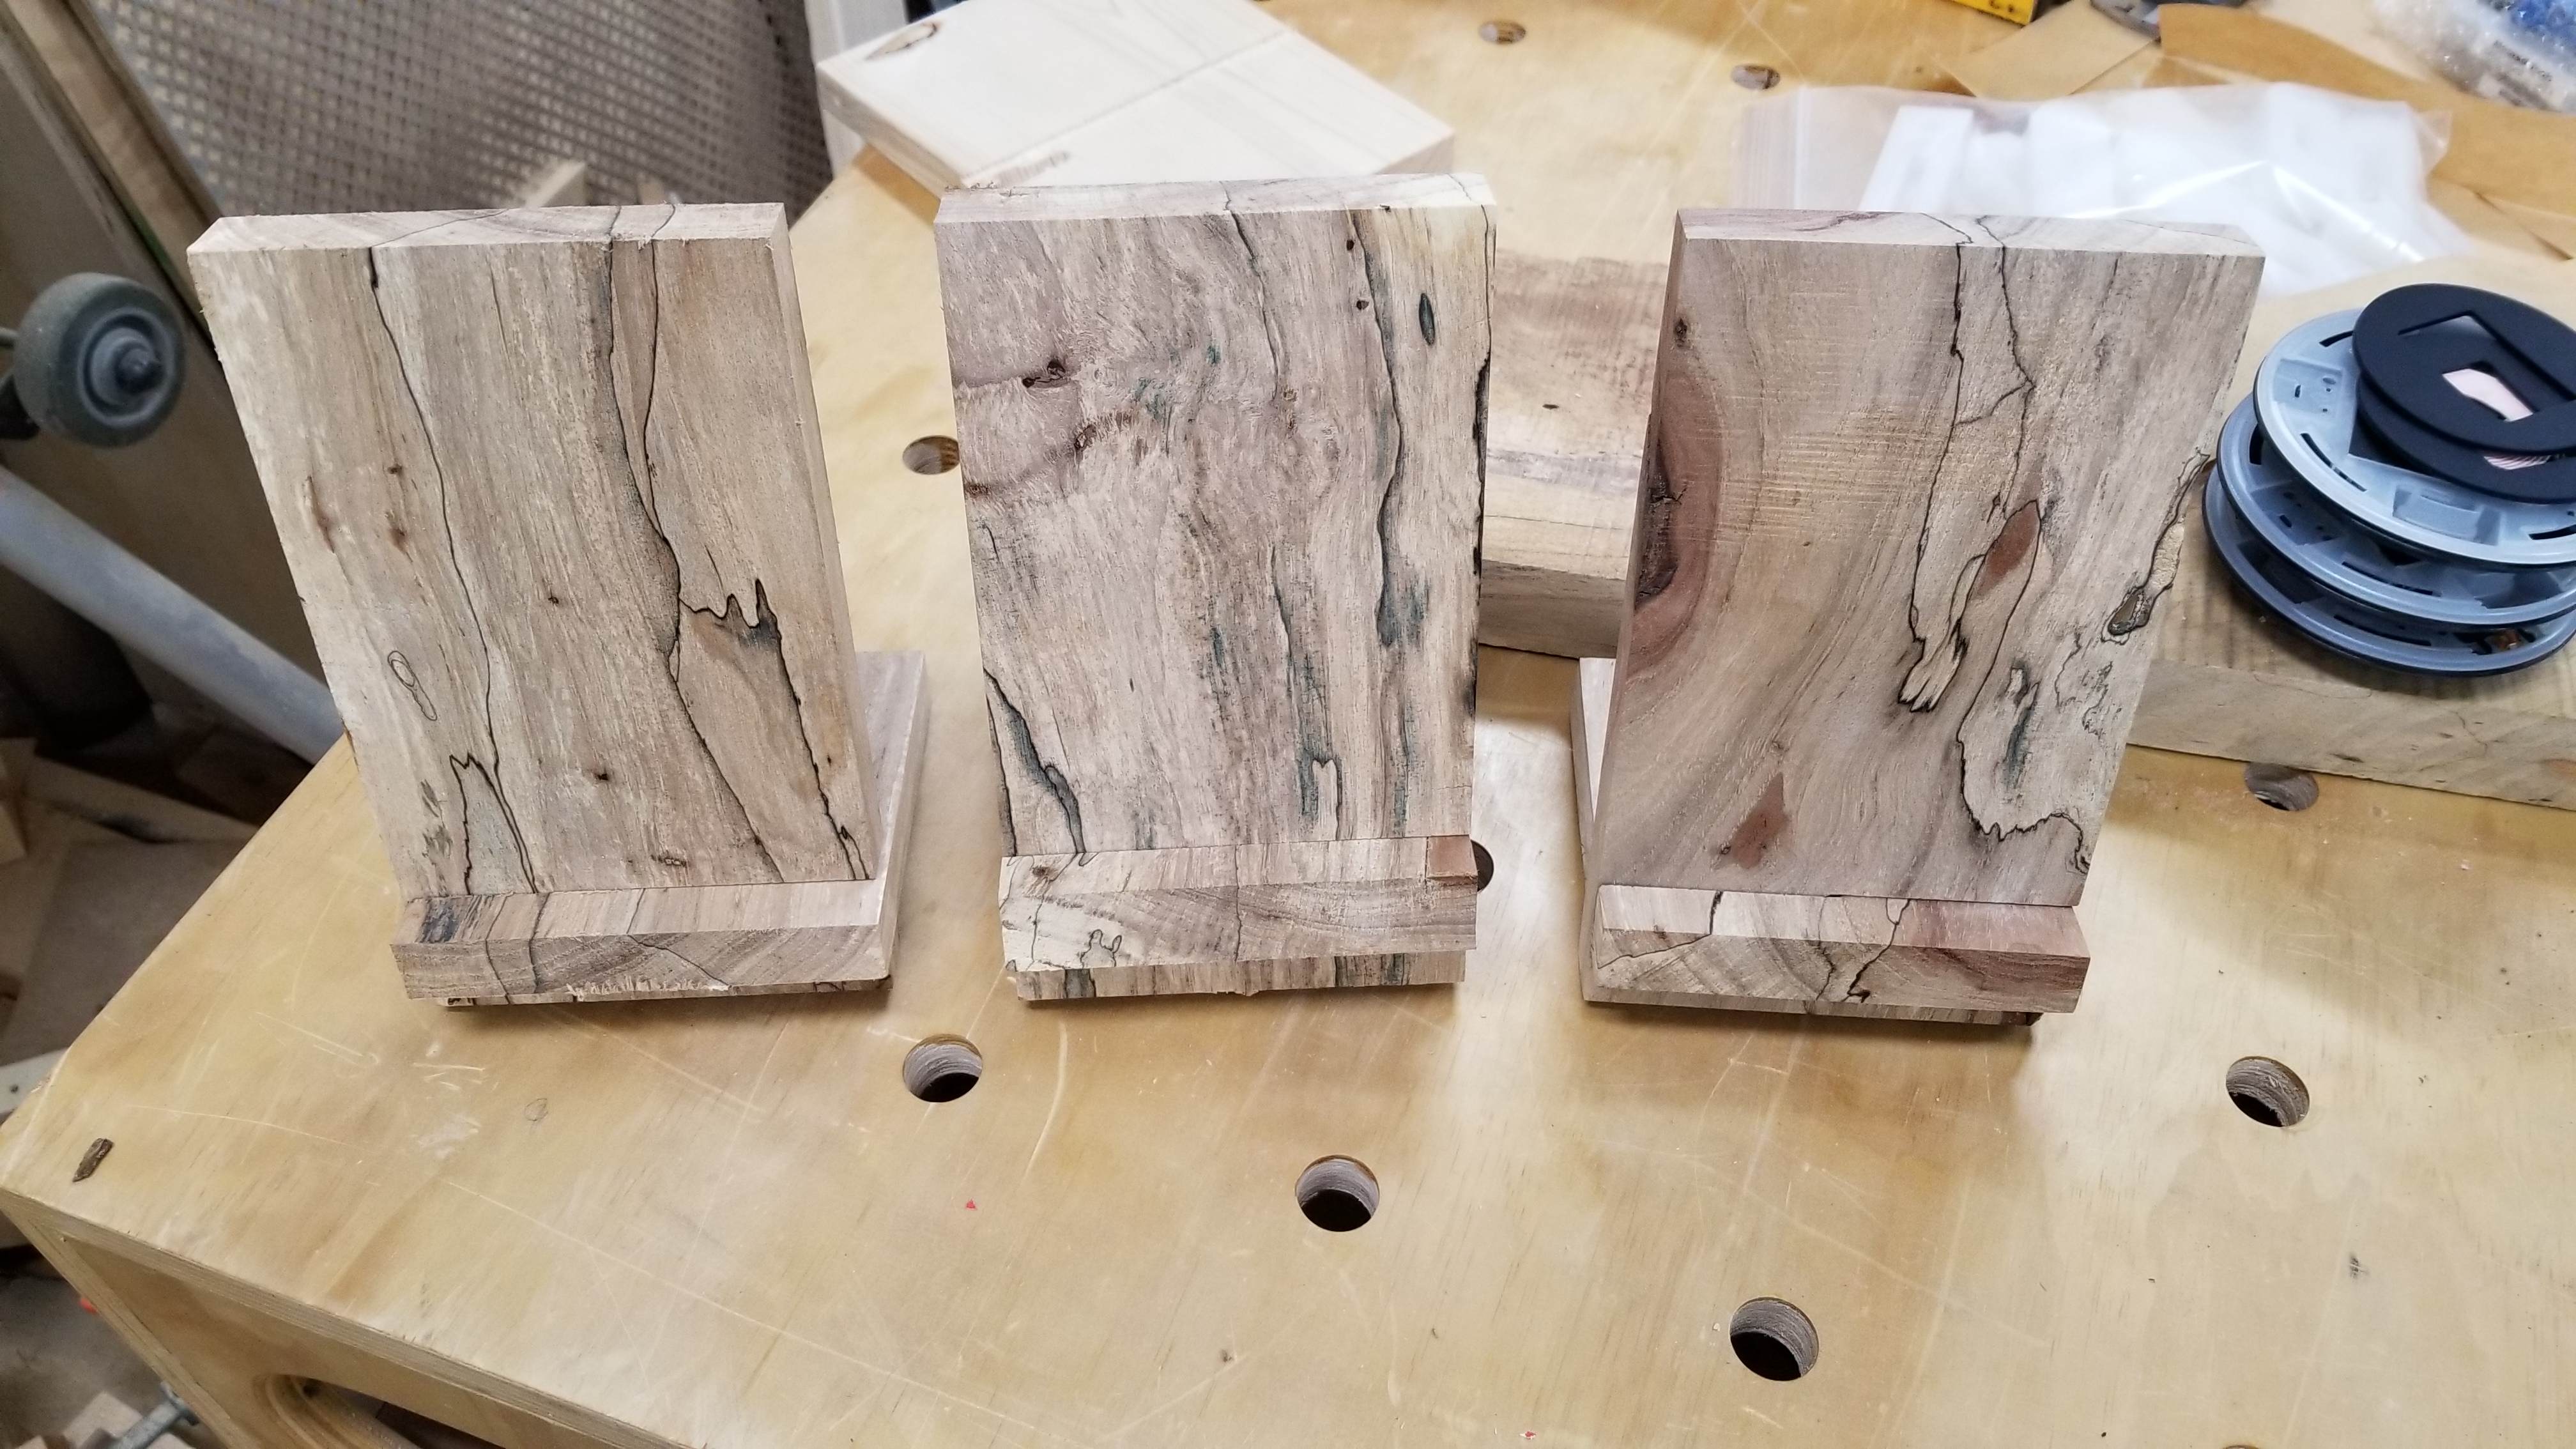
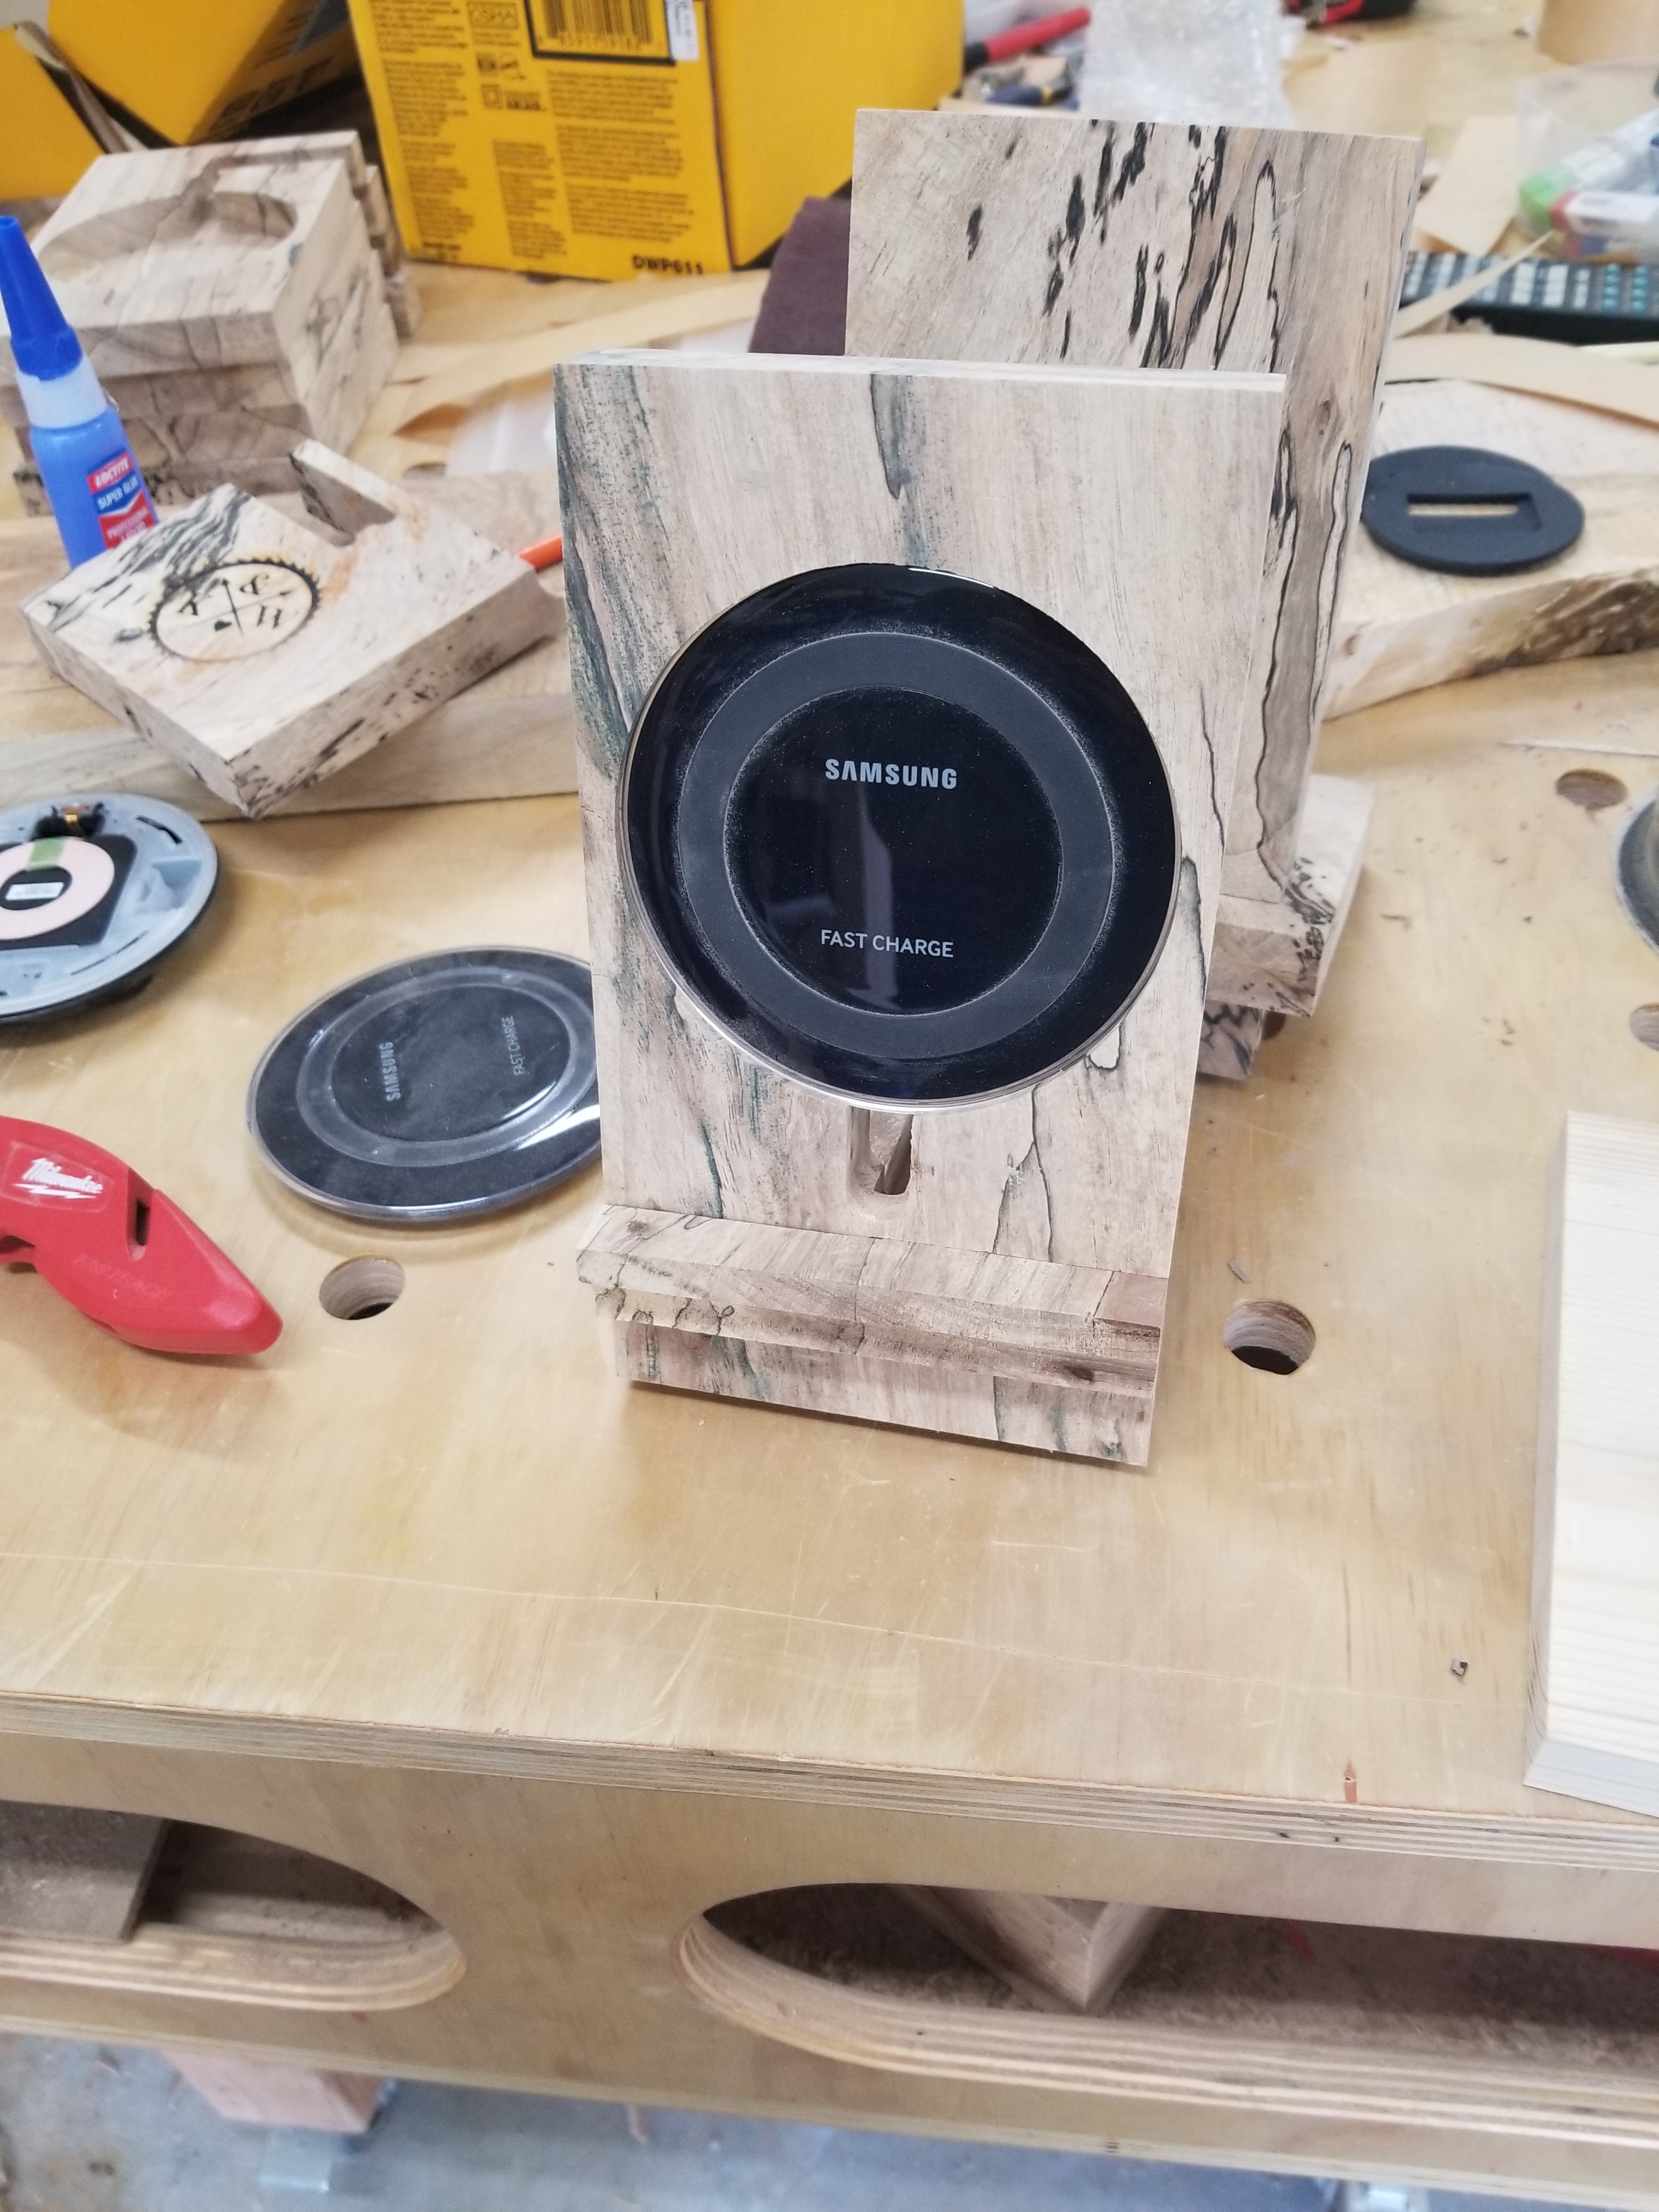
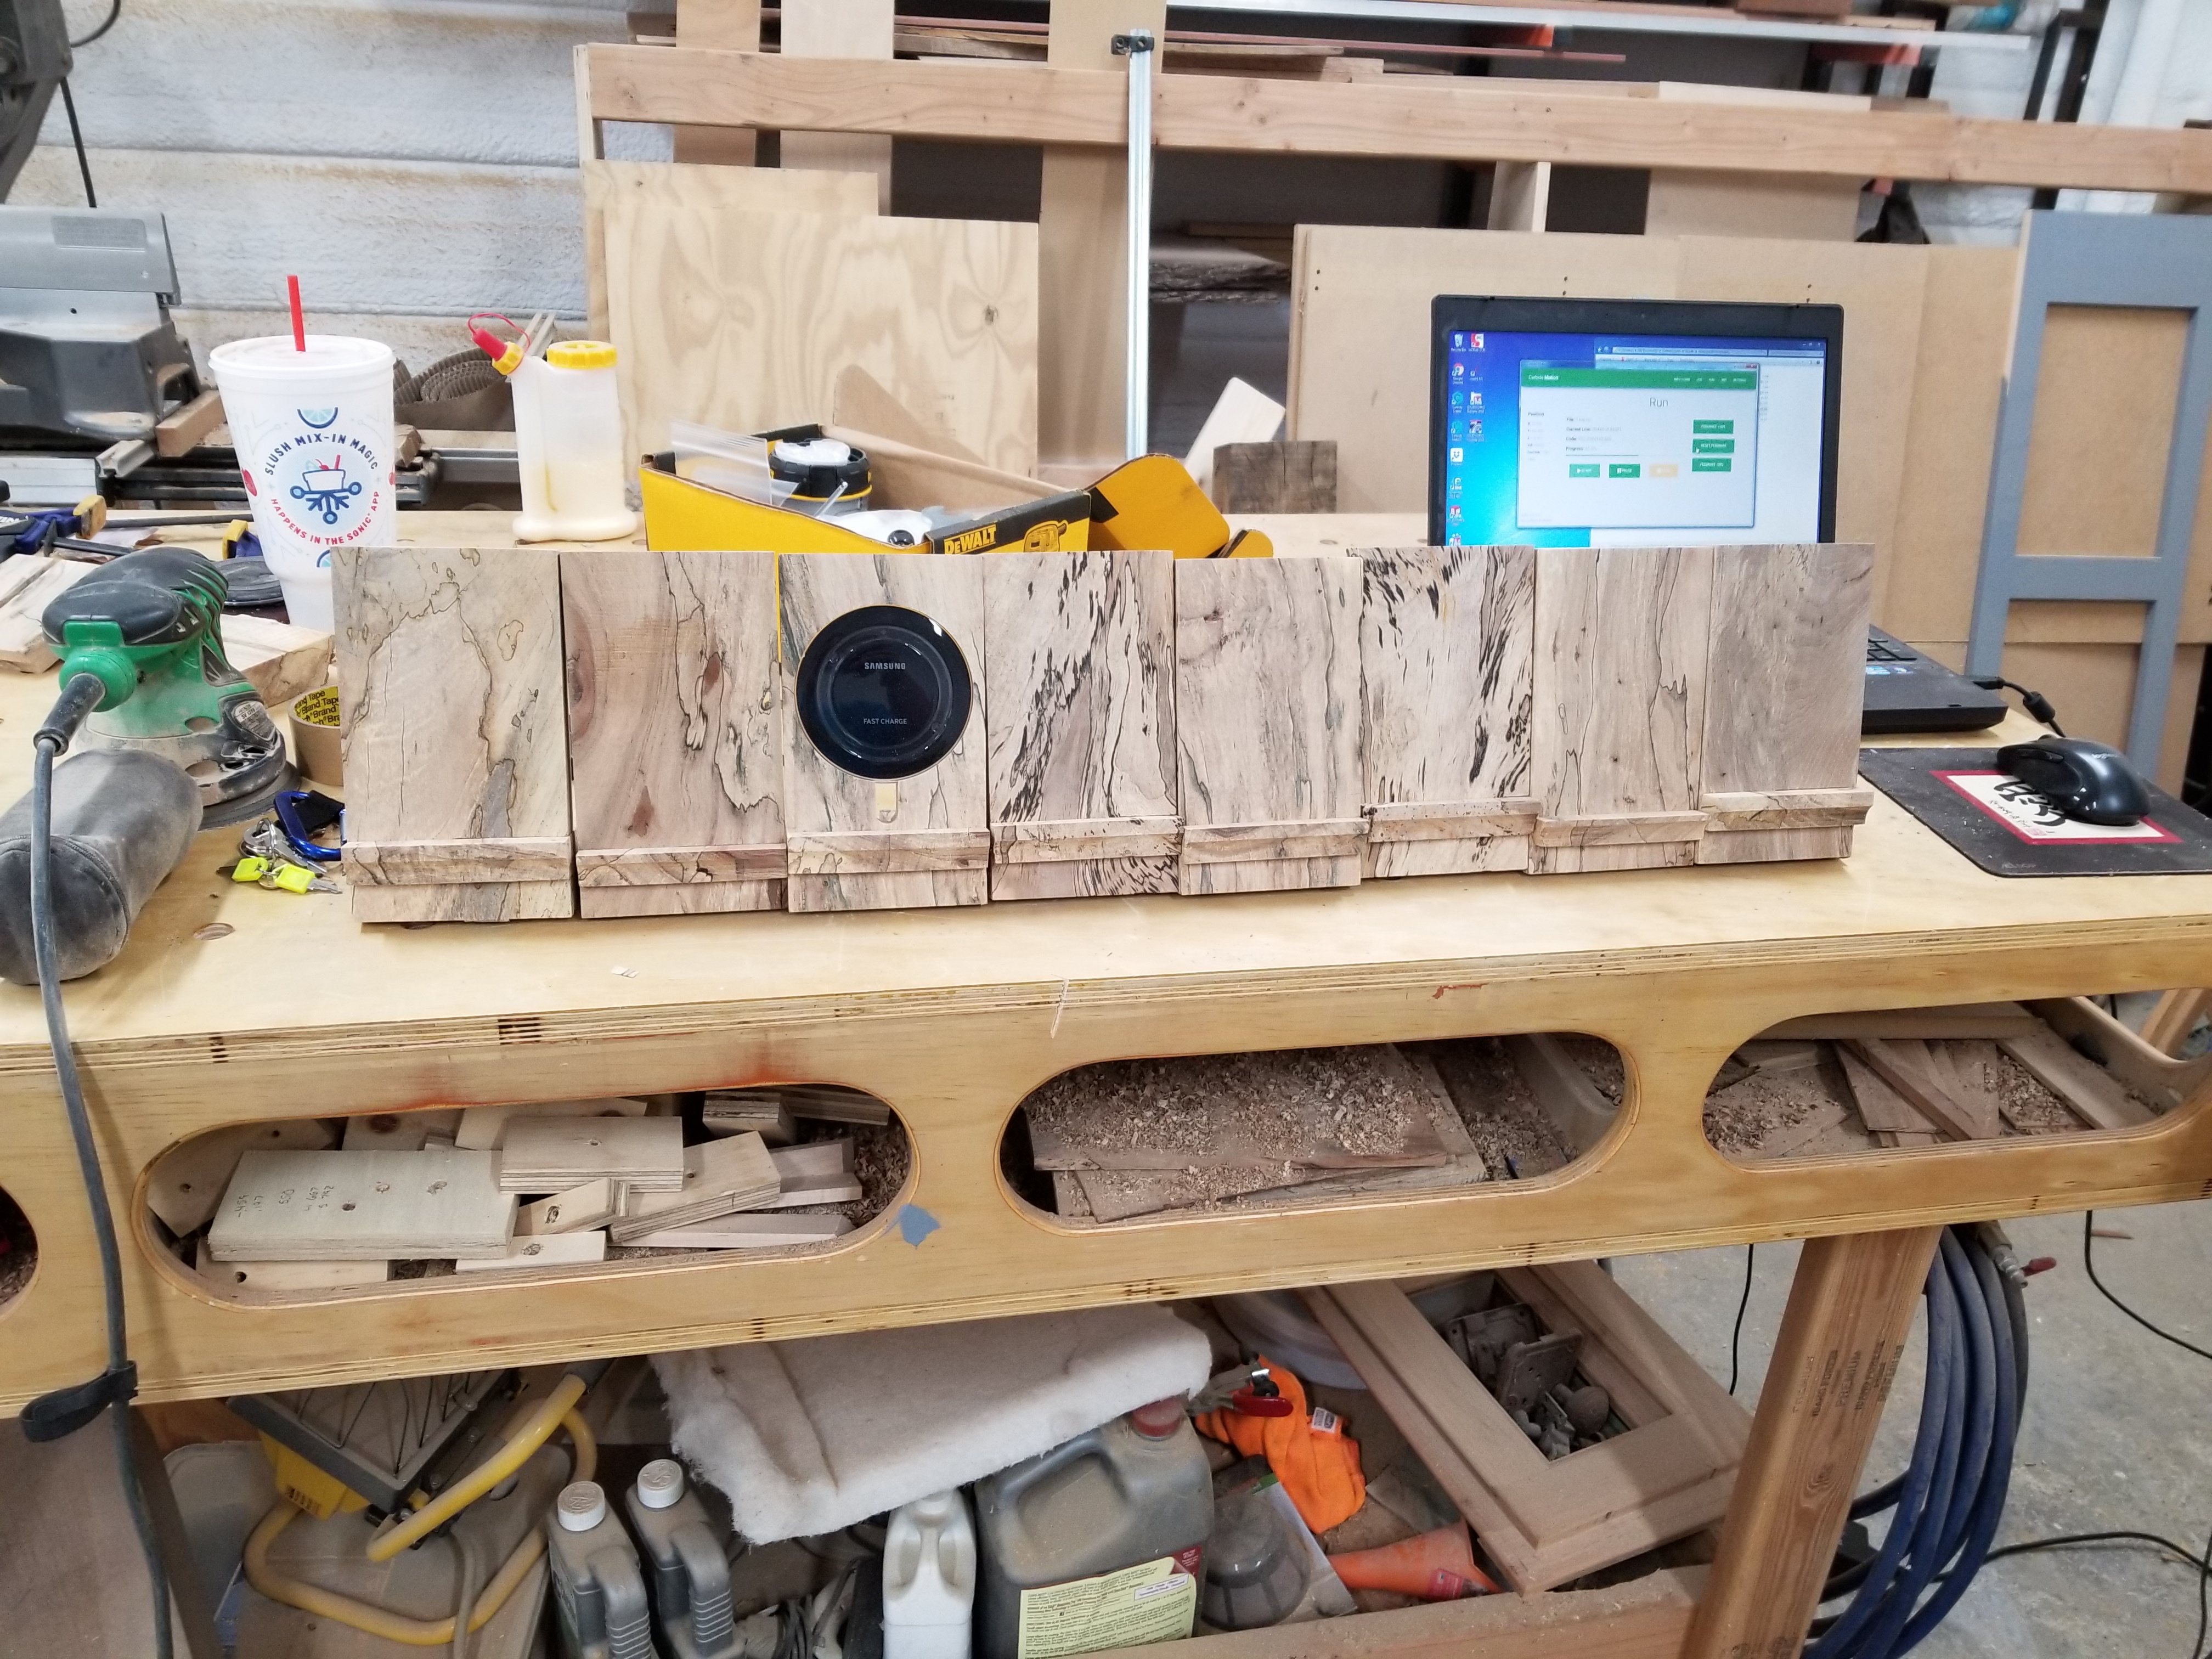
I made a wireless charging stand for my phone at work and so many people asked me if I could make them one, I batched some out with carbide create. It was actually one of my first projects and major learning experiences of owning my machine! I used double sided tape to hold down the material with the thought of keeping my stock to minimal waste but a few times it did come loose… (I would totally use tabs if I were to make them today!) I milled out a pocket on the backside allowing about a .02-.03 wall thickness for the wireless charger to sit behind and still charge the phone, I also made a few flush mount where the charger is not hidden but sits flush with the back of the phone.
Samsung Wireless Charger .875.c2d (149.9 KB)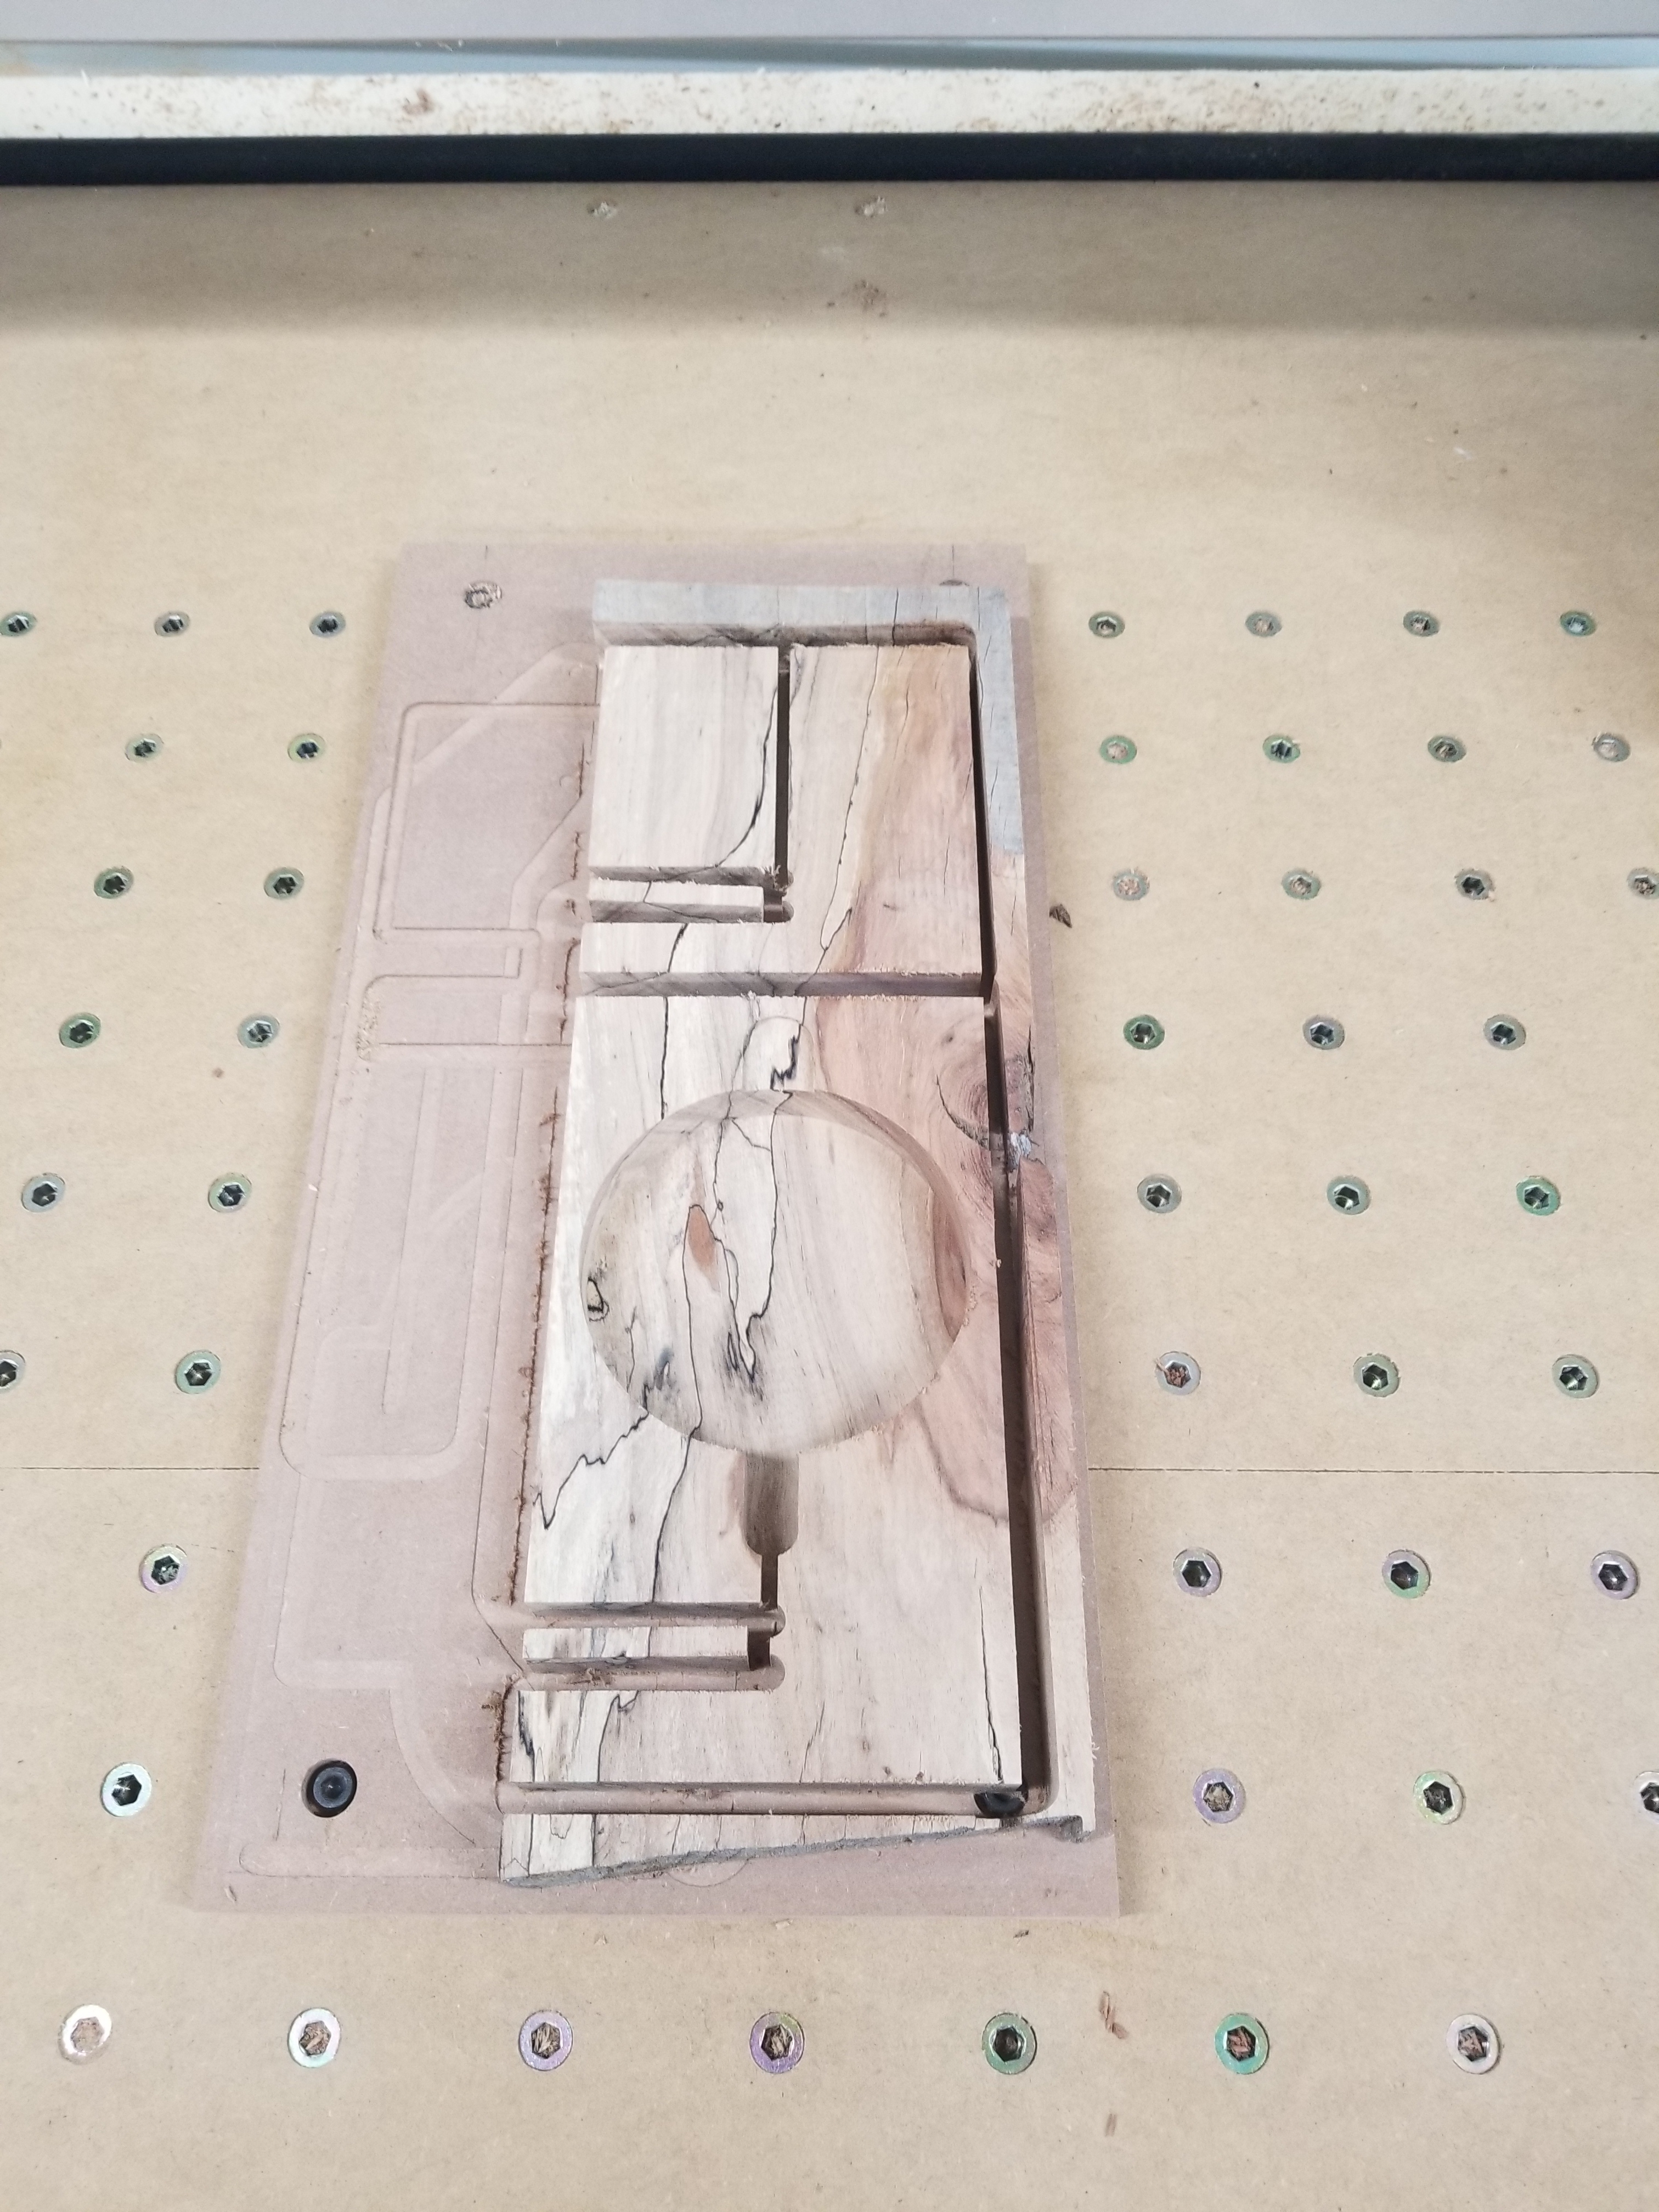
7 Likes

Thank you! Its spalted pecan wood 
2 Likes
Merry Xmas everyone, today is the deadline, I will open the voting poll tomorrow morning !
3 Likes
I would absolutely have entered if I’d been in the same state as my beloved Shapeoko!
Awesome entries 
4 Likes
I am working on a submission, I hope to have it finished by this evening.
Merry Christmas!
3 Likes
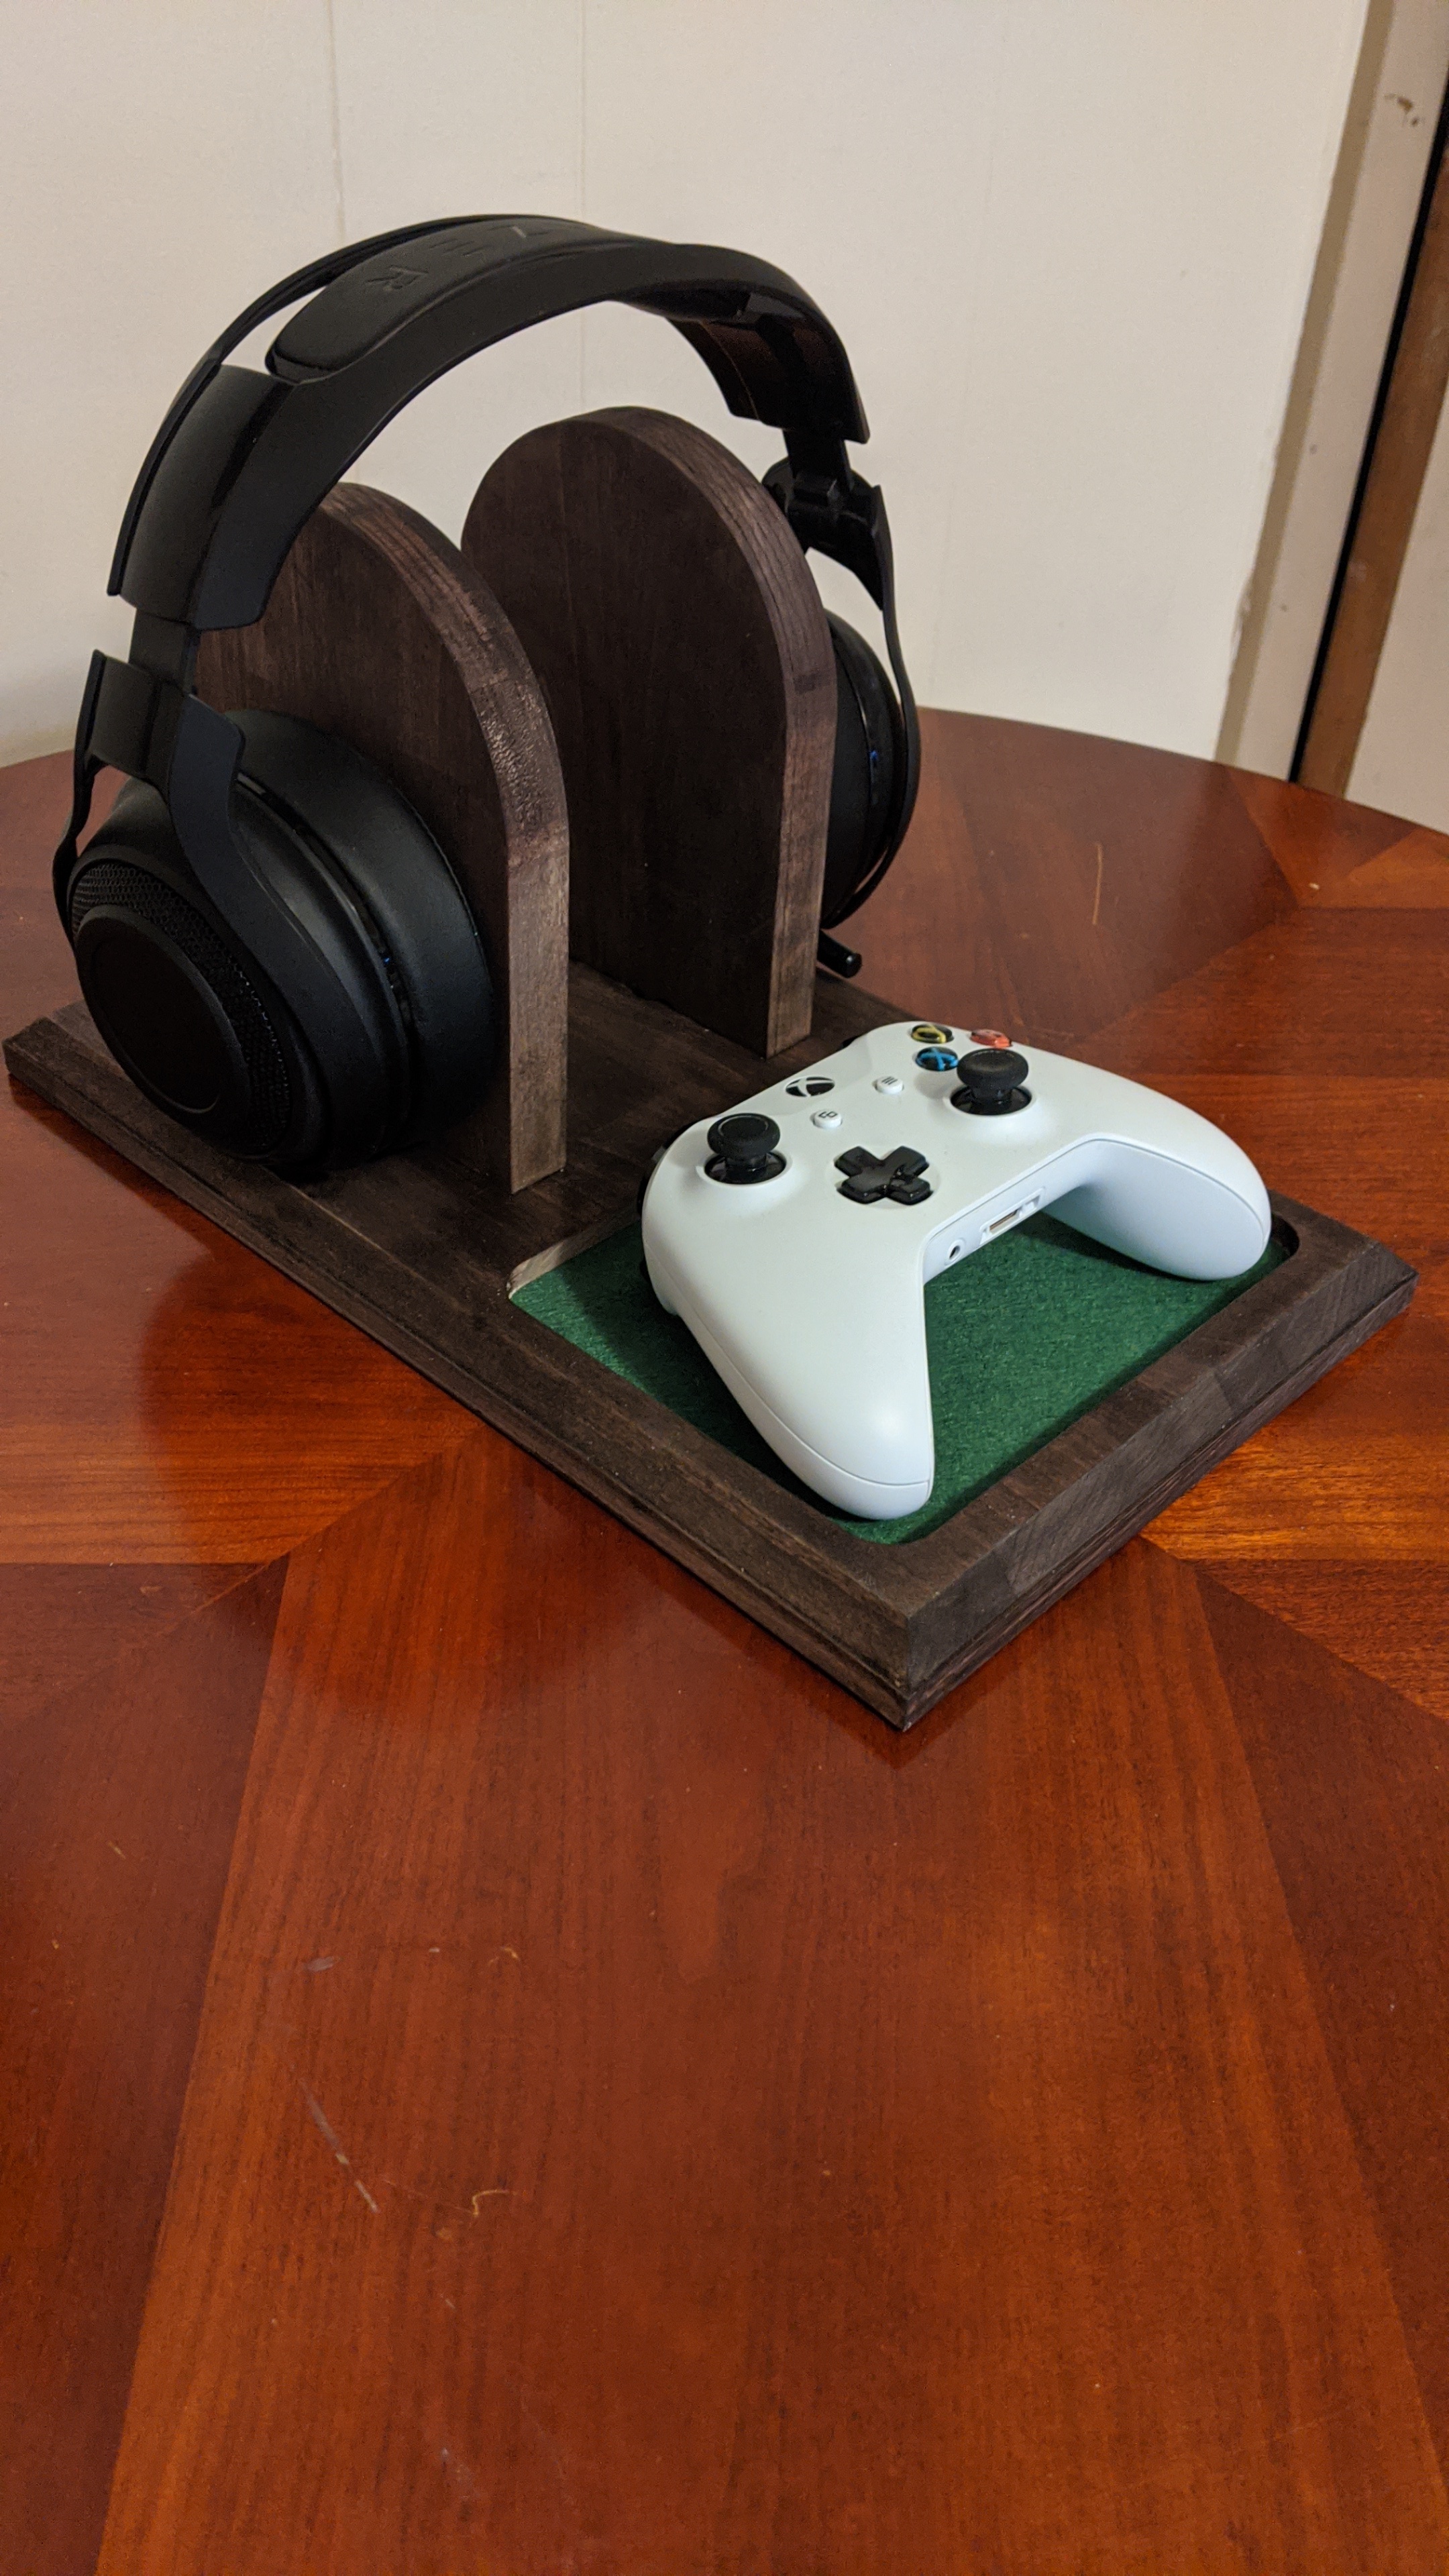
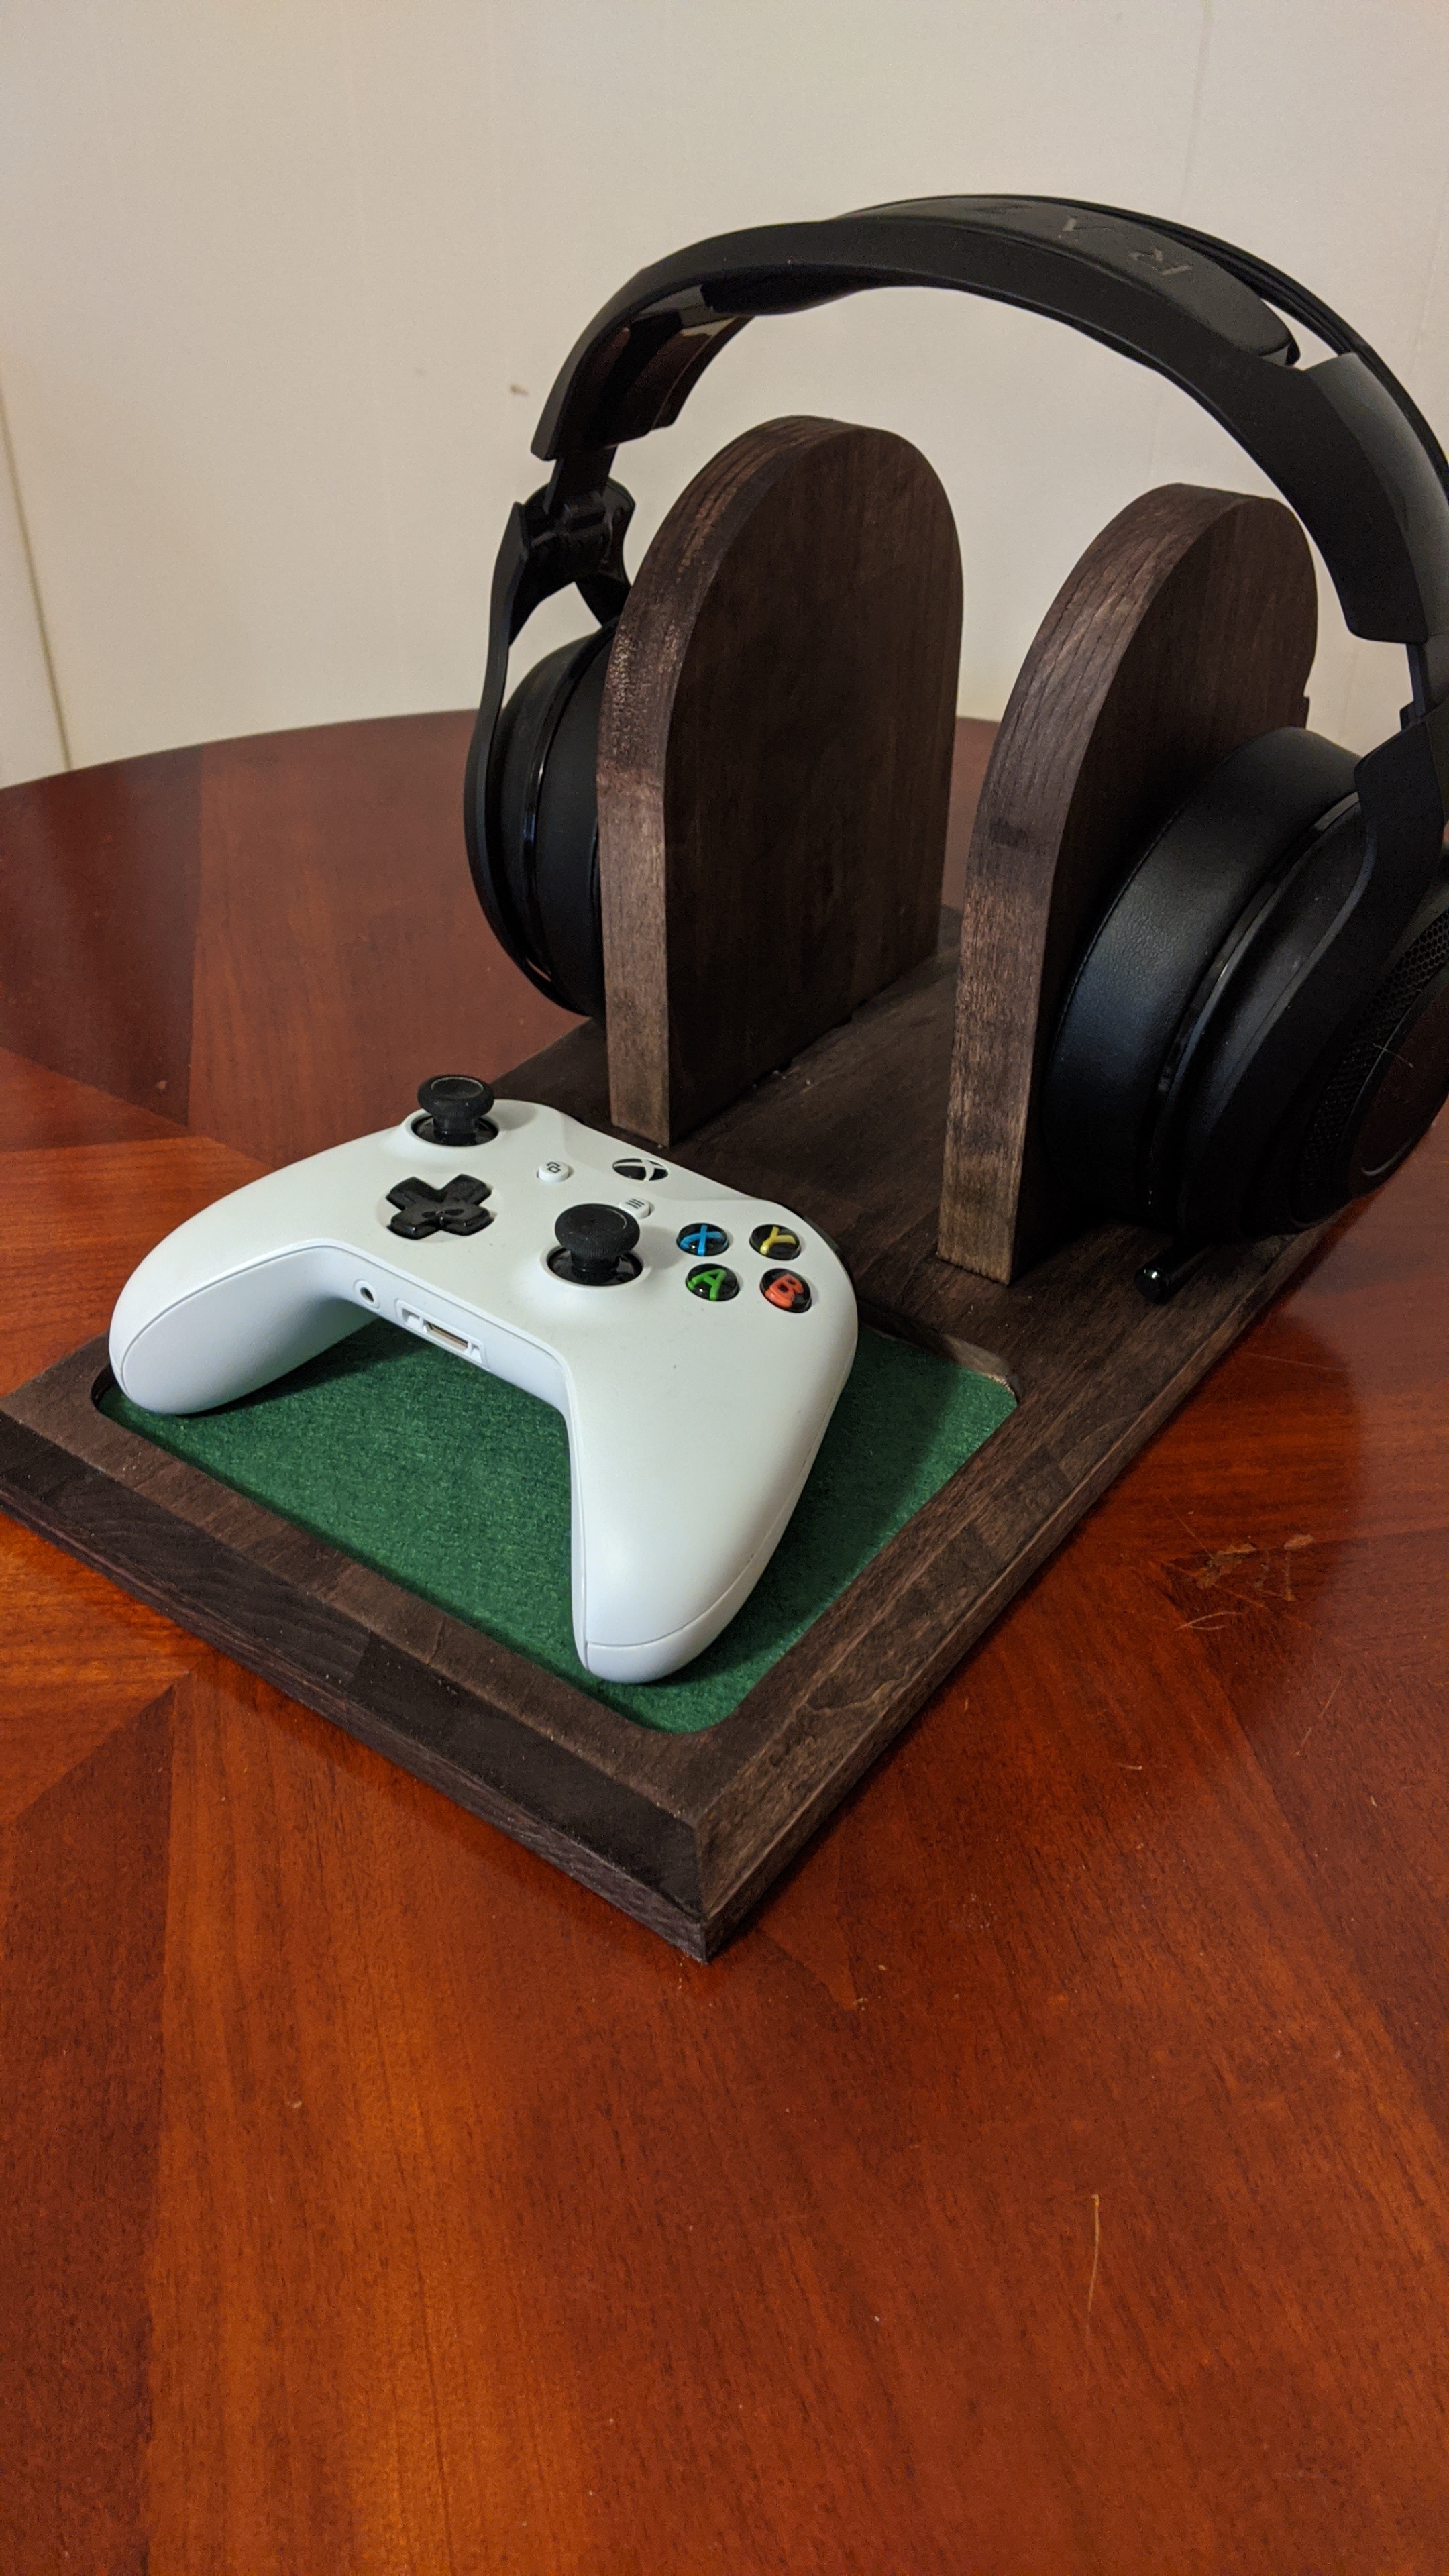
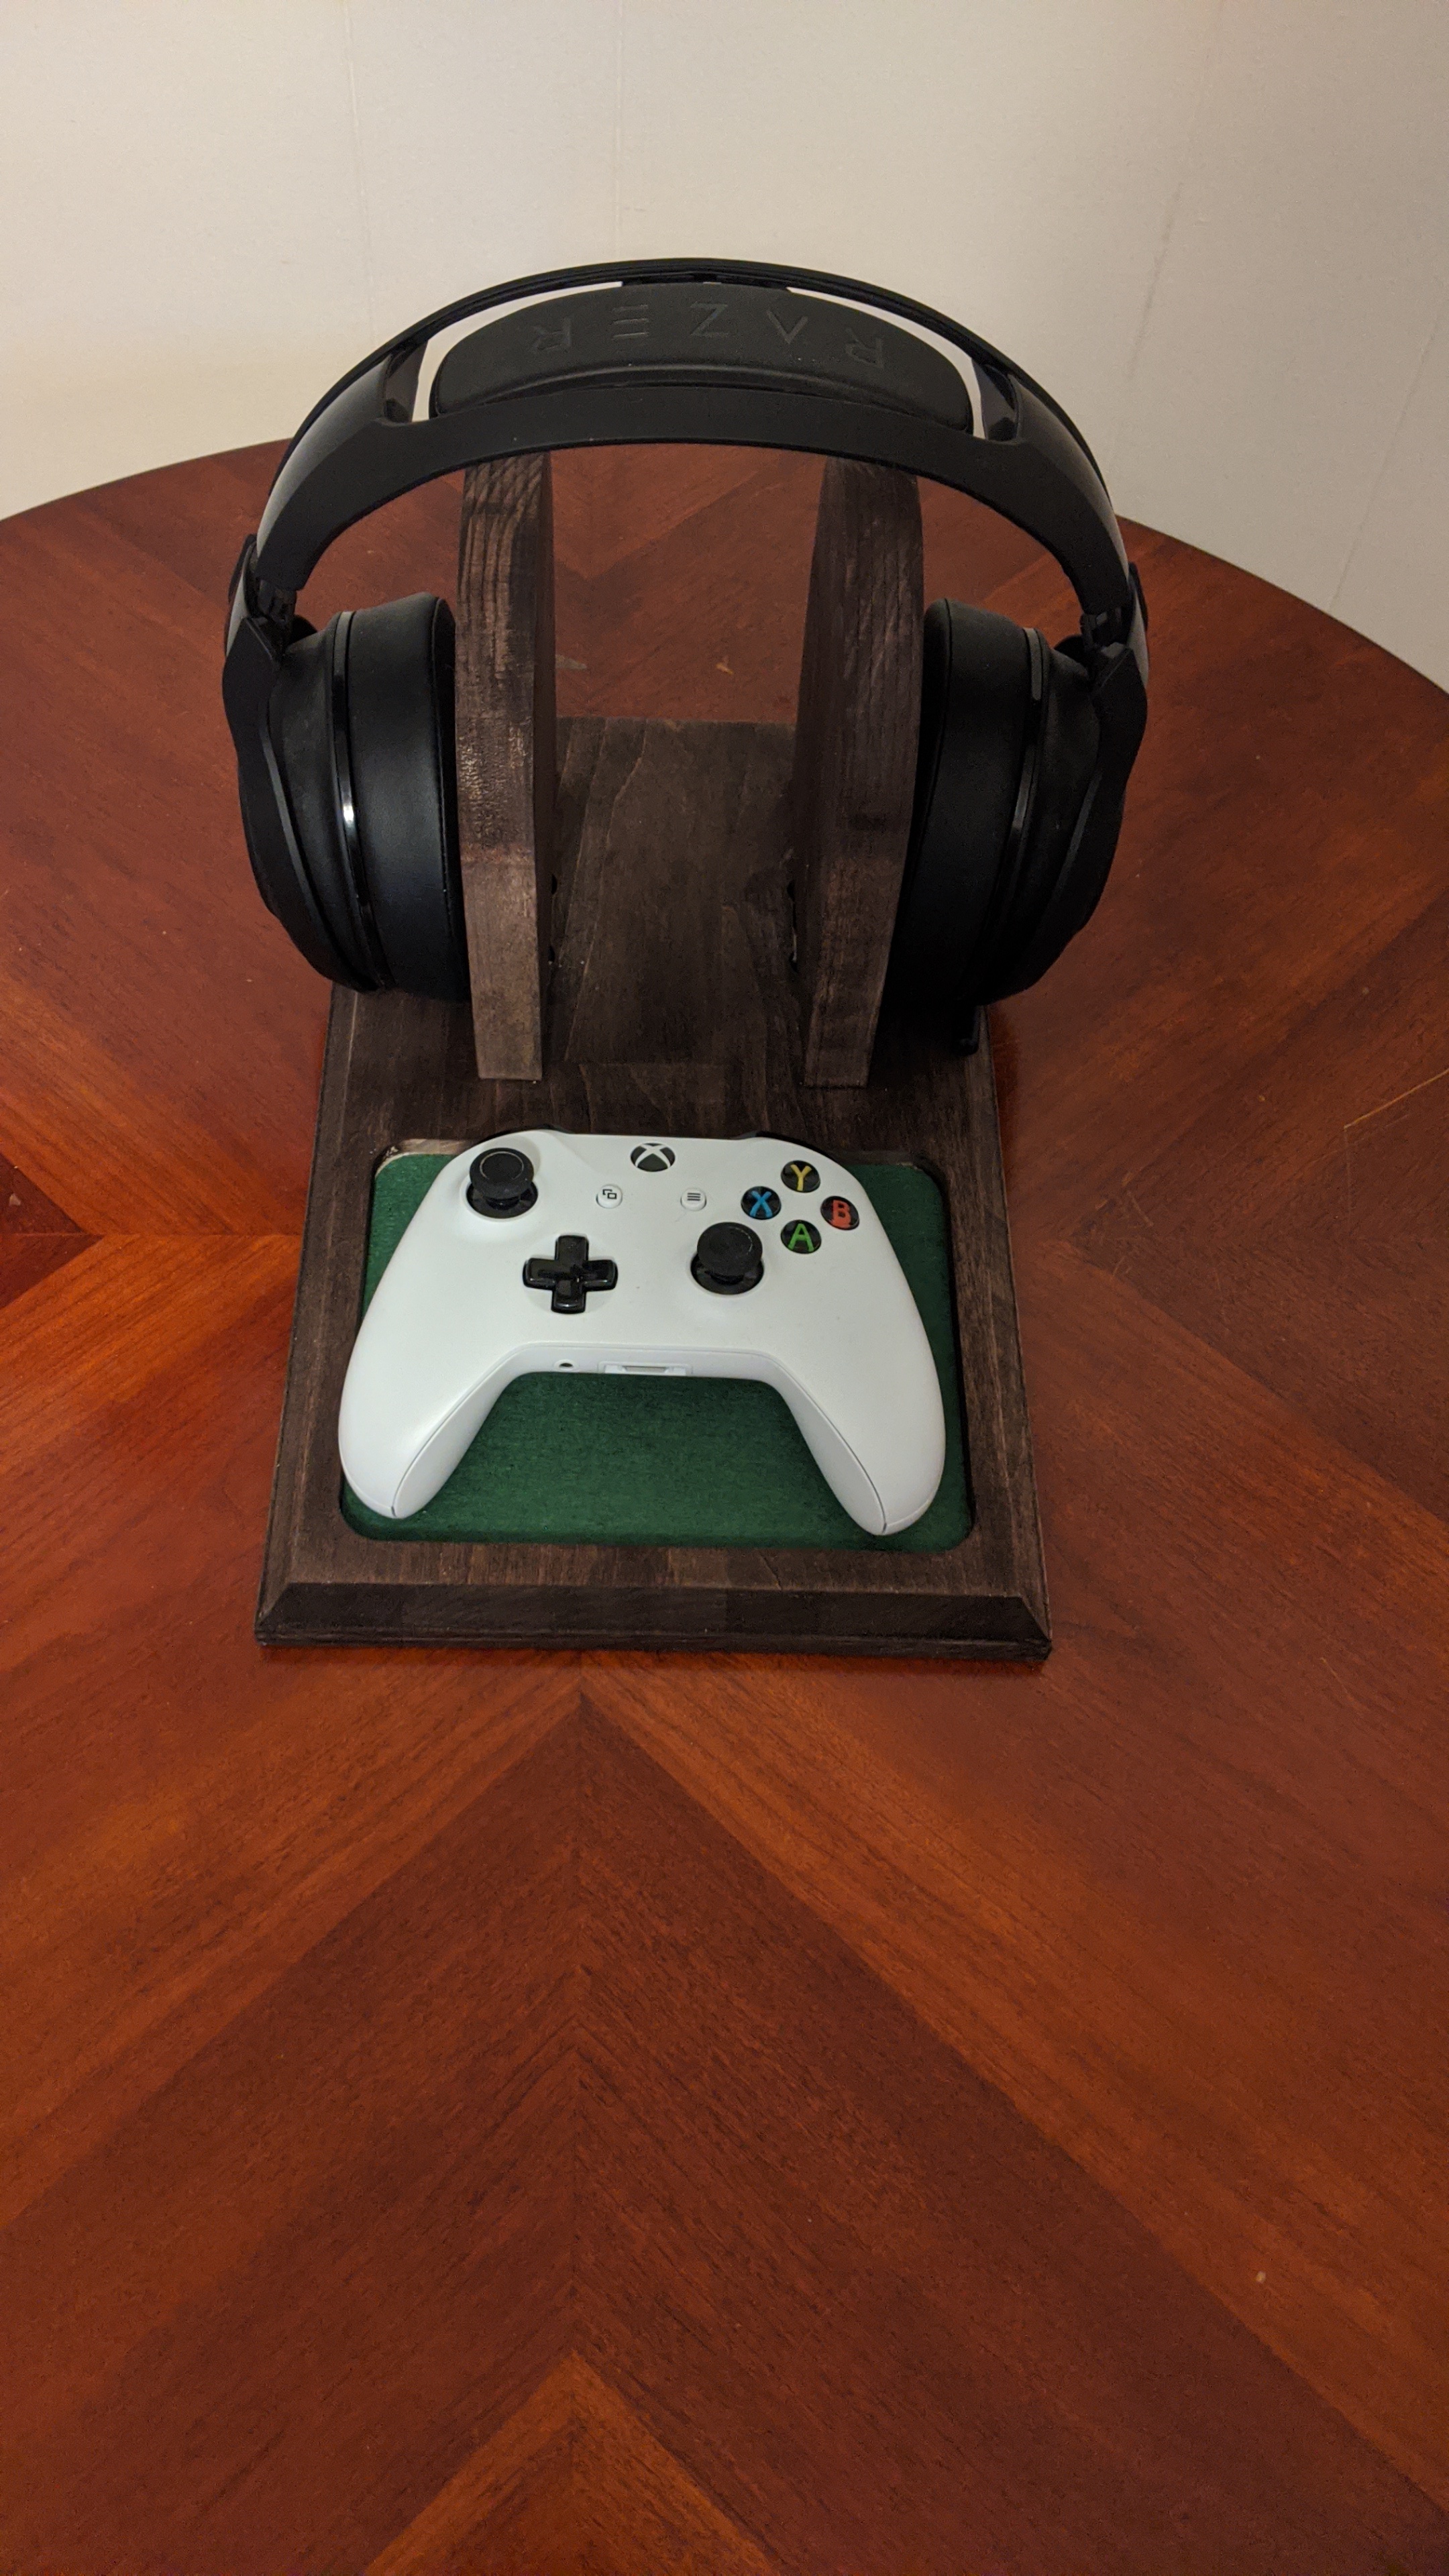
Saw this post this morning while drinking some coffee. Thought I would toss my hat in to the ring and give it a shot. So, Here is my submission.
I had an .75" thick piece of Aspen board in shop. Cut this out using .25 upcut. Used same endmill for the pocket where the xbox controller sits.Added dogbone fillets for the inserts. Ran a chamfer around the edge then applied some Espresso wood stain and glued it up. I have attached my Aspire file in a zip Merry Christmas all!
EDIT: updated to put ASPIRE file here with all pics in a single post.
Carbide Holiday (headset holder).zip (95.1 KB)
2 Likes