Until the mystery around challenge #19 unfolds, let’s move on to a new challenge.
The theme for challenge #20 is: Draw/paint something with your machine!
After all, this is where we all started when we ran the Hello World with the sharpie. I thought it would be fun to see what folks could come up with, from intricate mandalas drawn with a Nomad, to a huge XXL-sized drawing. It’s doable by seasoned CNCers and newbies alike, yet there is still the challenge of drawing precisely over a large area (spring-loaded pen holder anyone?), using multiple colors, etc…
Rules for this 20th challenge:
submit your entry in this thread (you can post multiple entries if you want)
the drawing must be made on a Shapeoko or Nomad. No endmills, vbits, or any kind of engraving tools allowed. Think pen, pencil, felt-tip, crayola, brushes, anything you would use for manually drawing (or painting) things.
you must post pictures of
(at least one of) your setup / how you attached the pen to the machine
(at least one of) the drawing in progress
(at least one of) the final result.
no handicap system this time.
Timeline:
Deadline is set to May 9th 2021, midnight PST
there will then be 7 days for voting.
voting will be open to legit community members only, and the jury reserves the right to remove votes from “outsiders”, and will also break any tie.
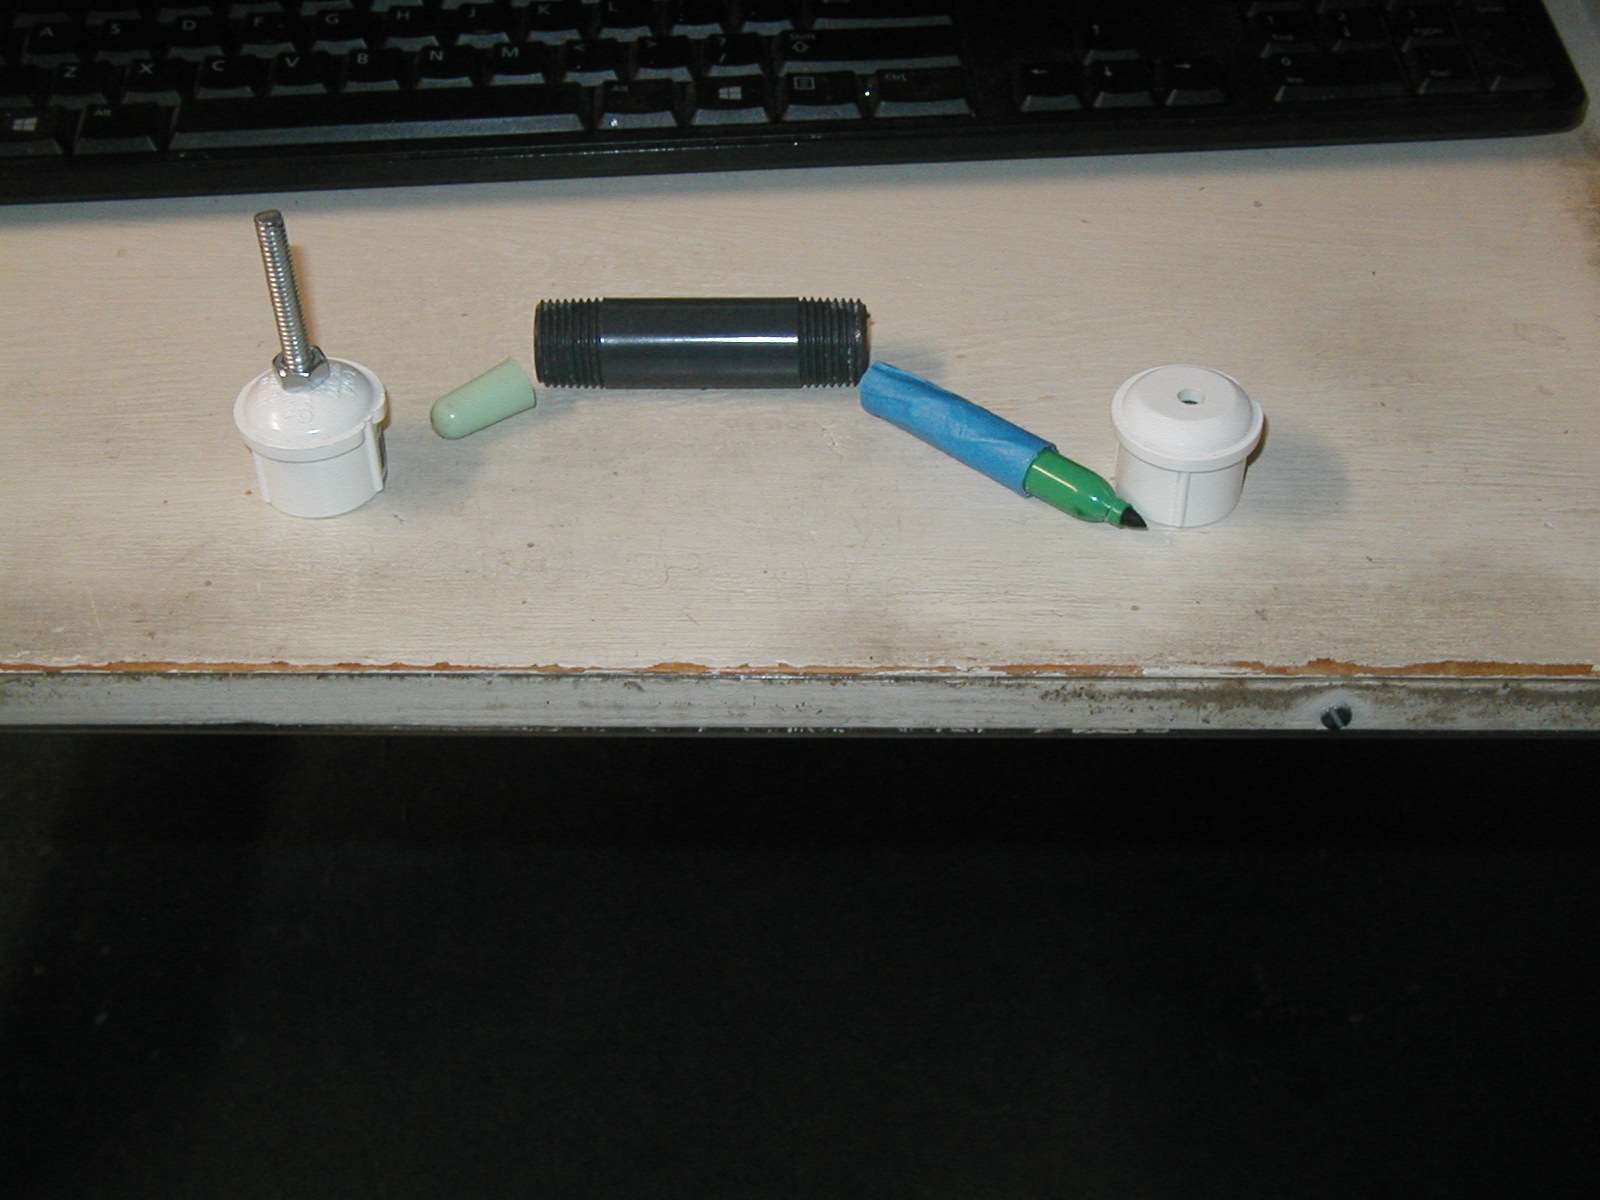
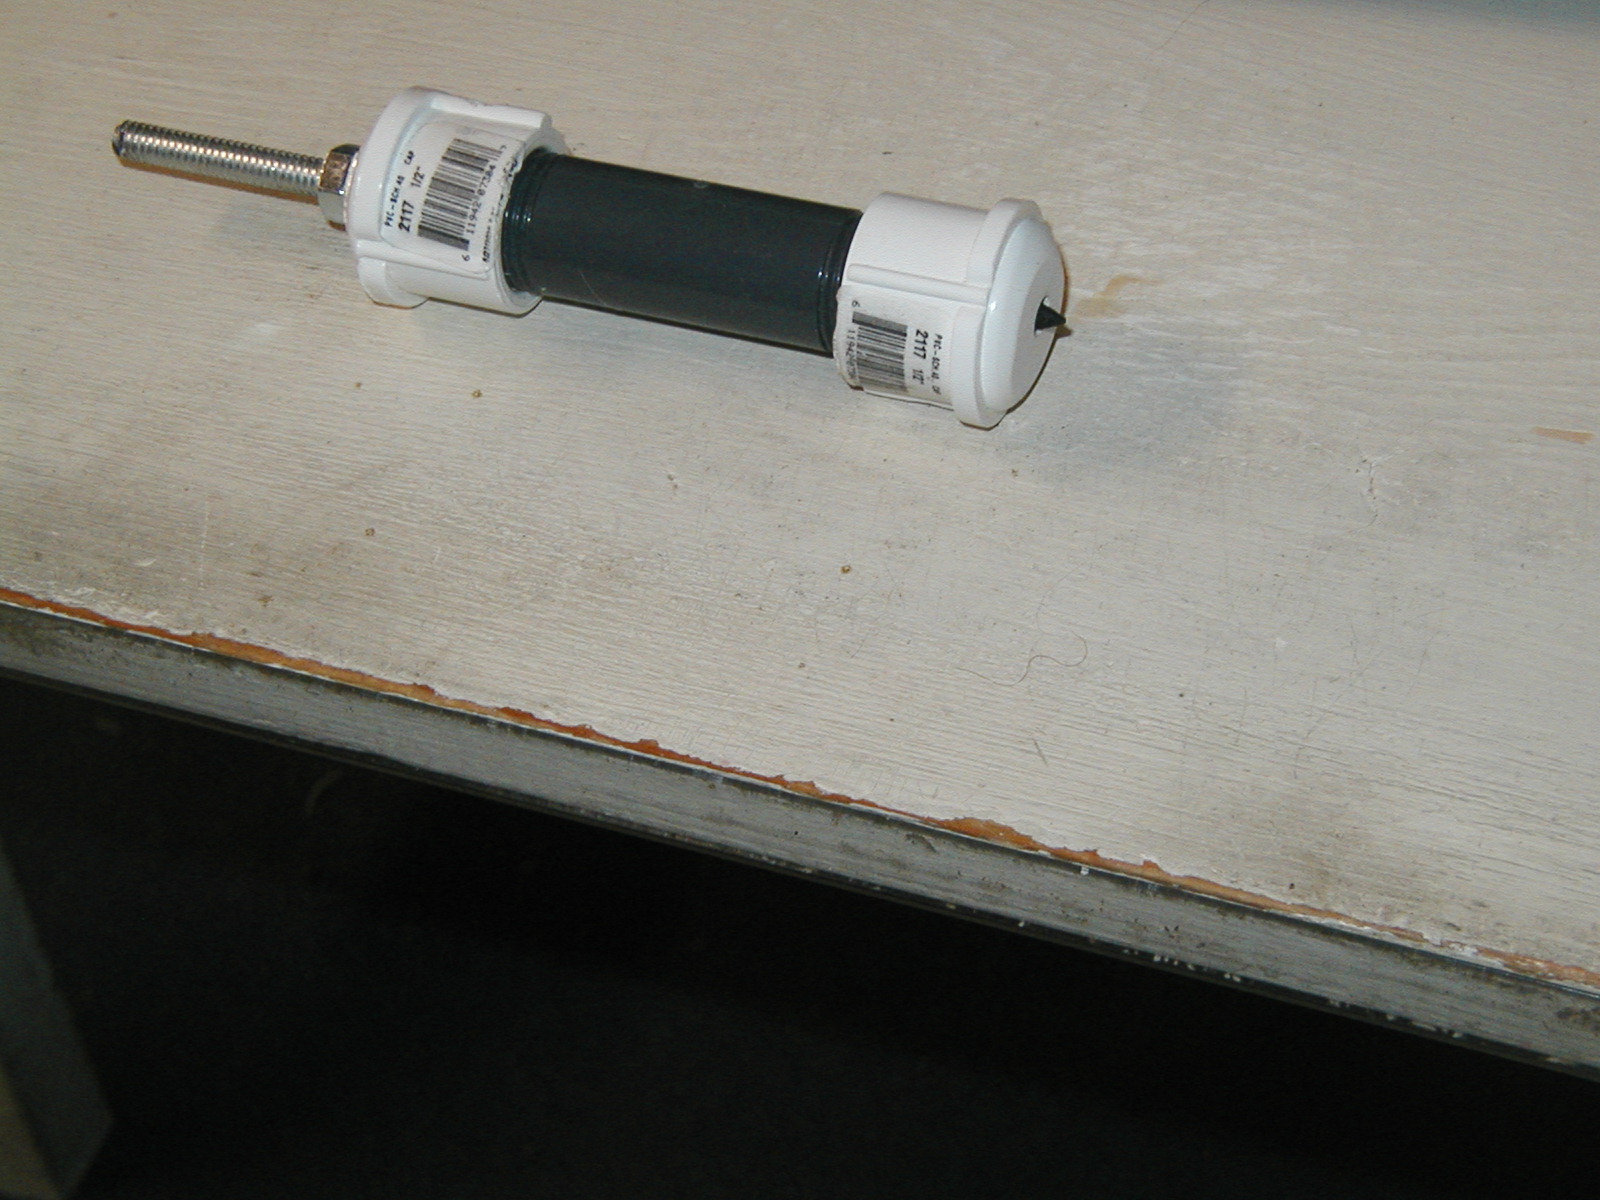
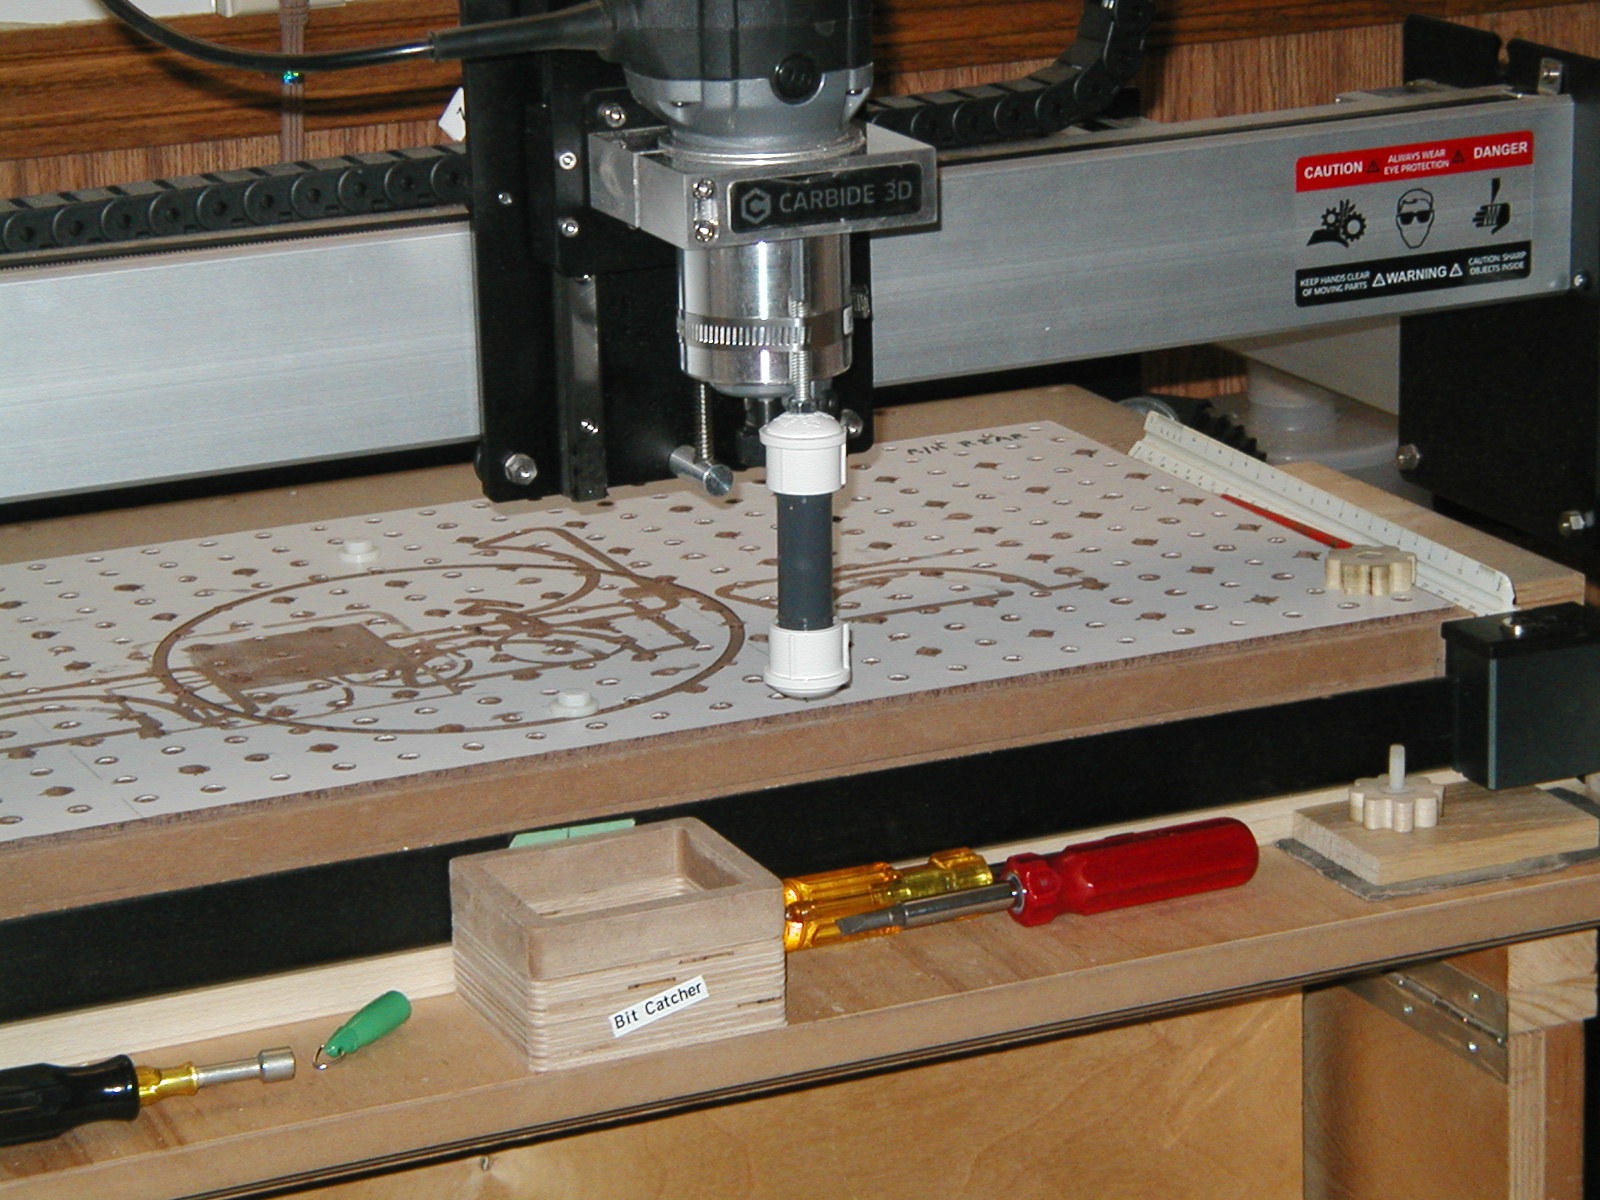
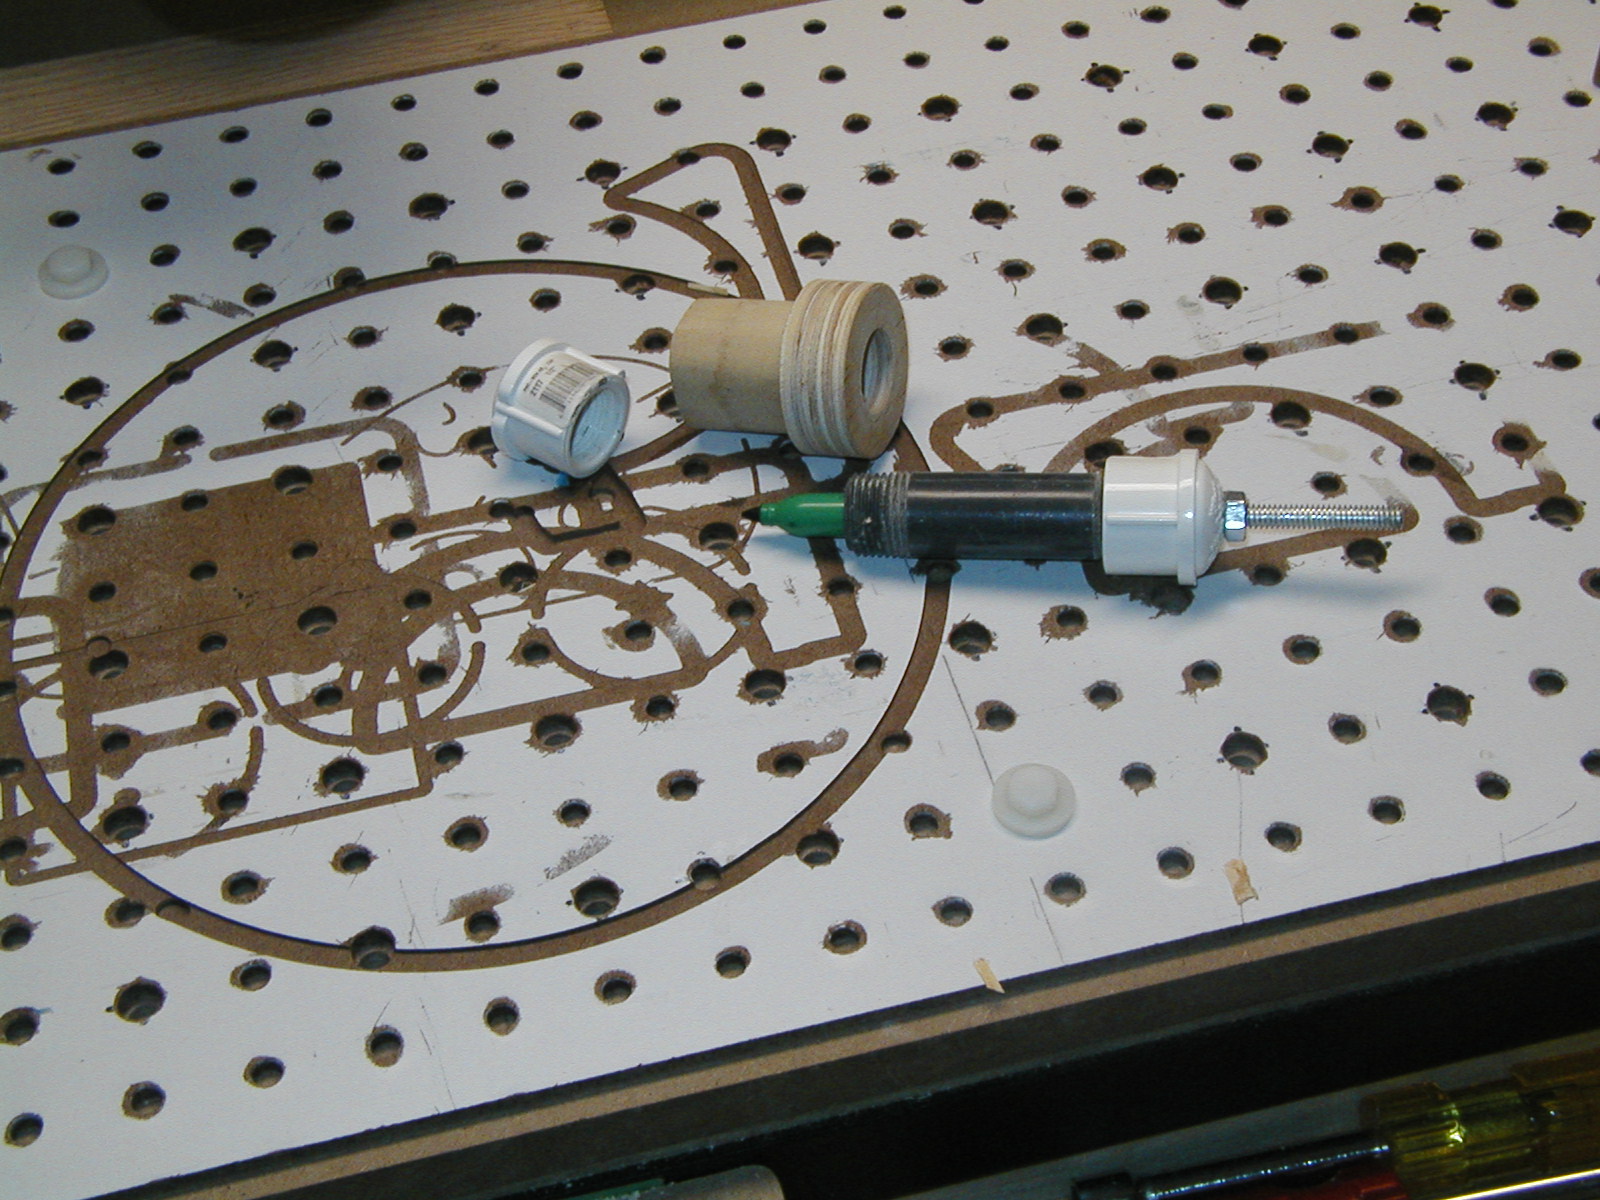
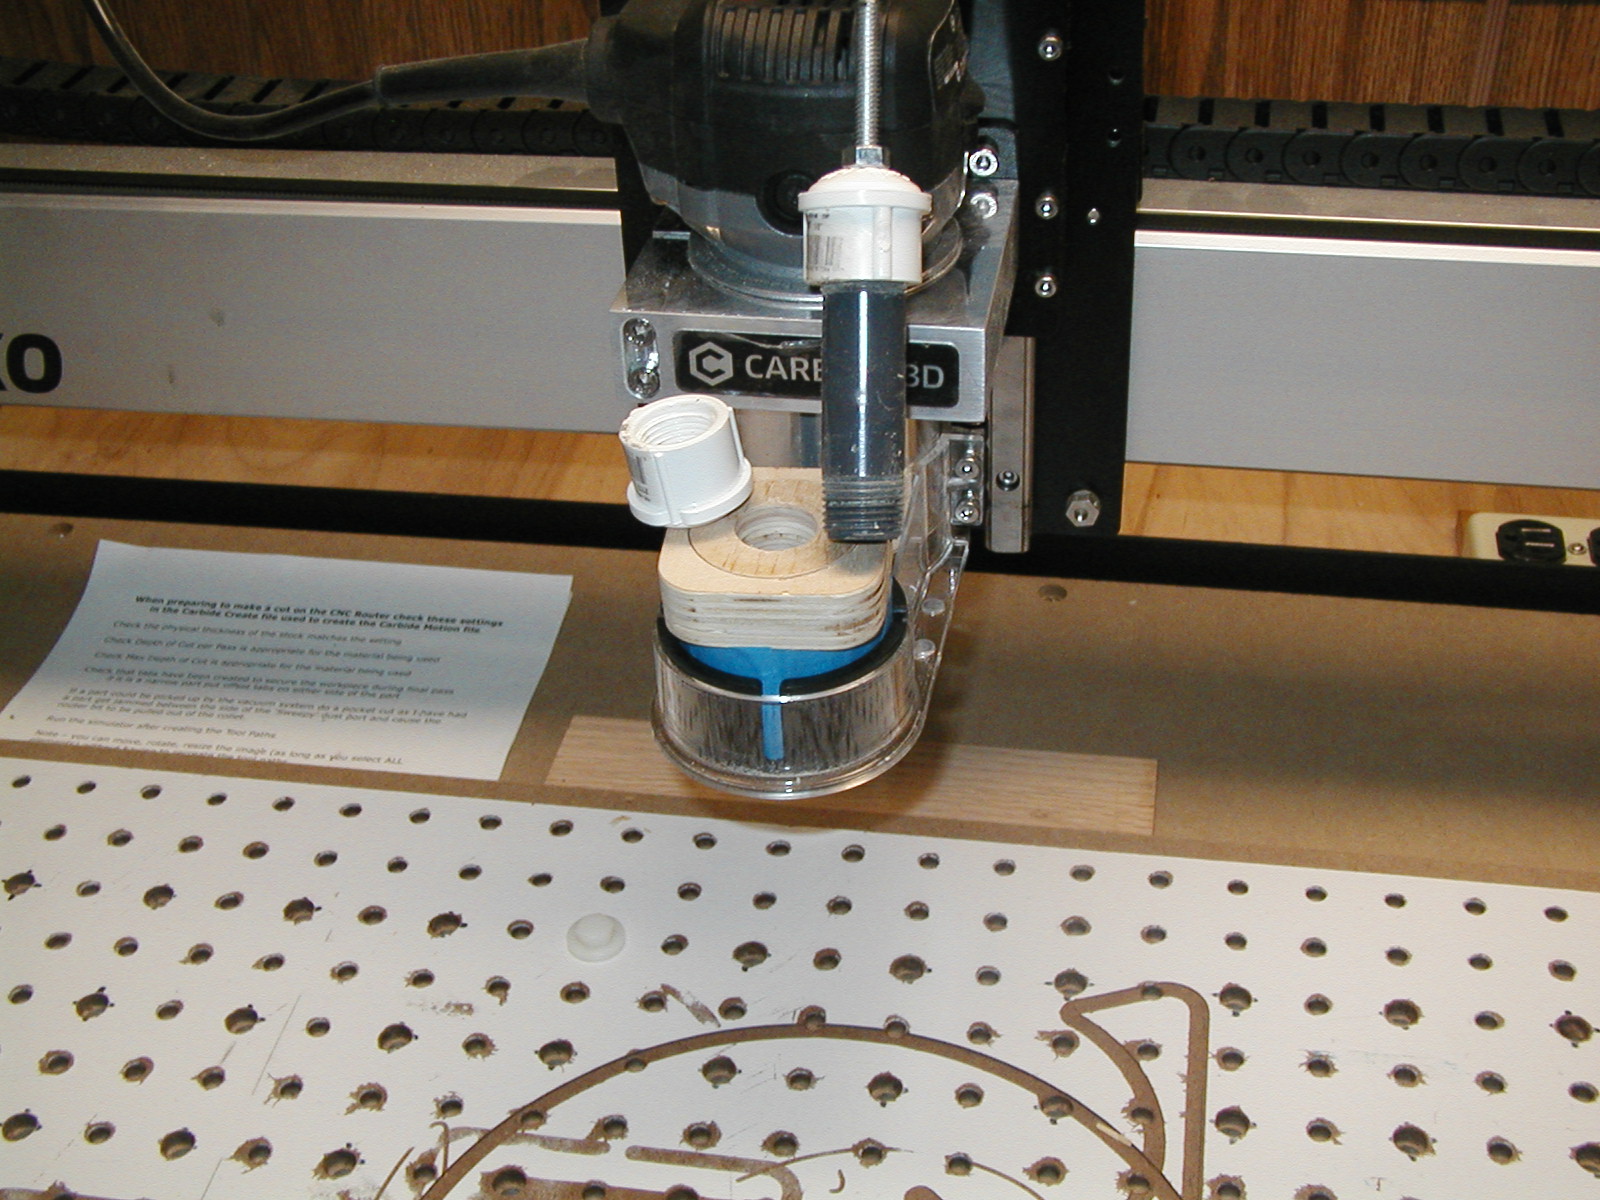
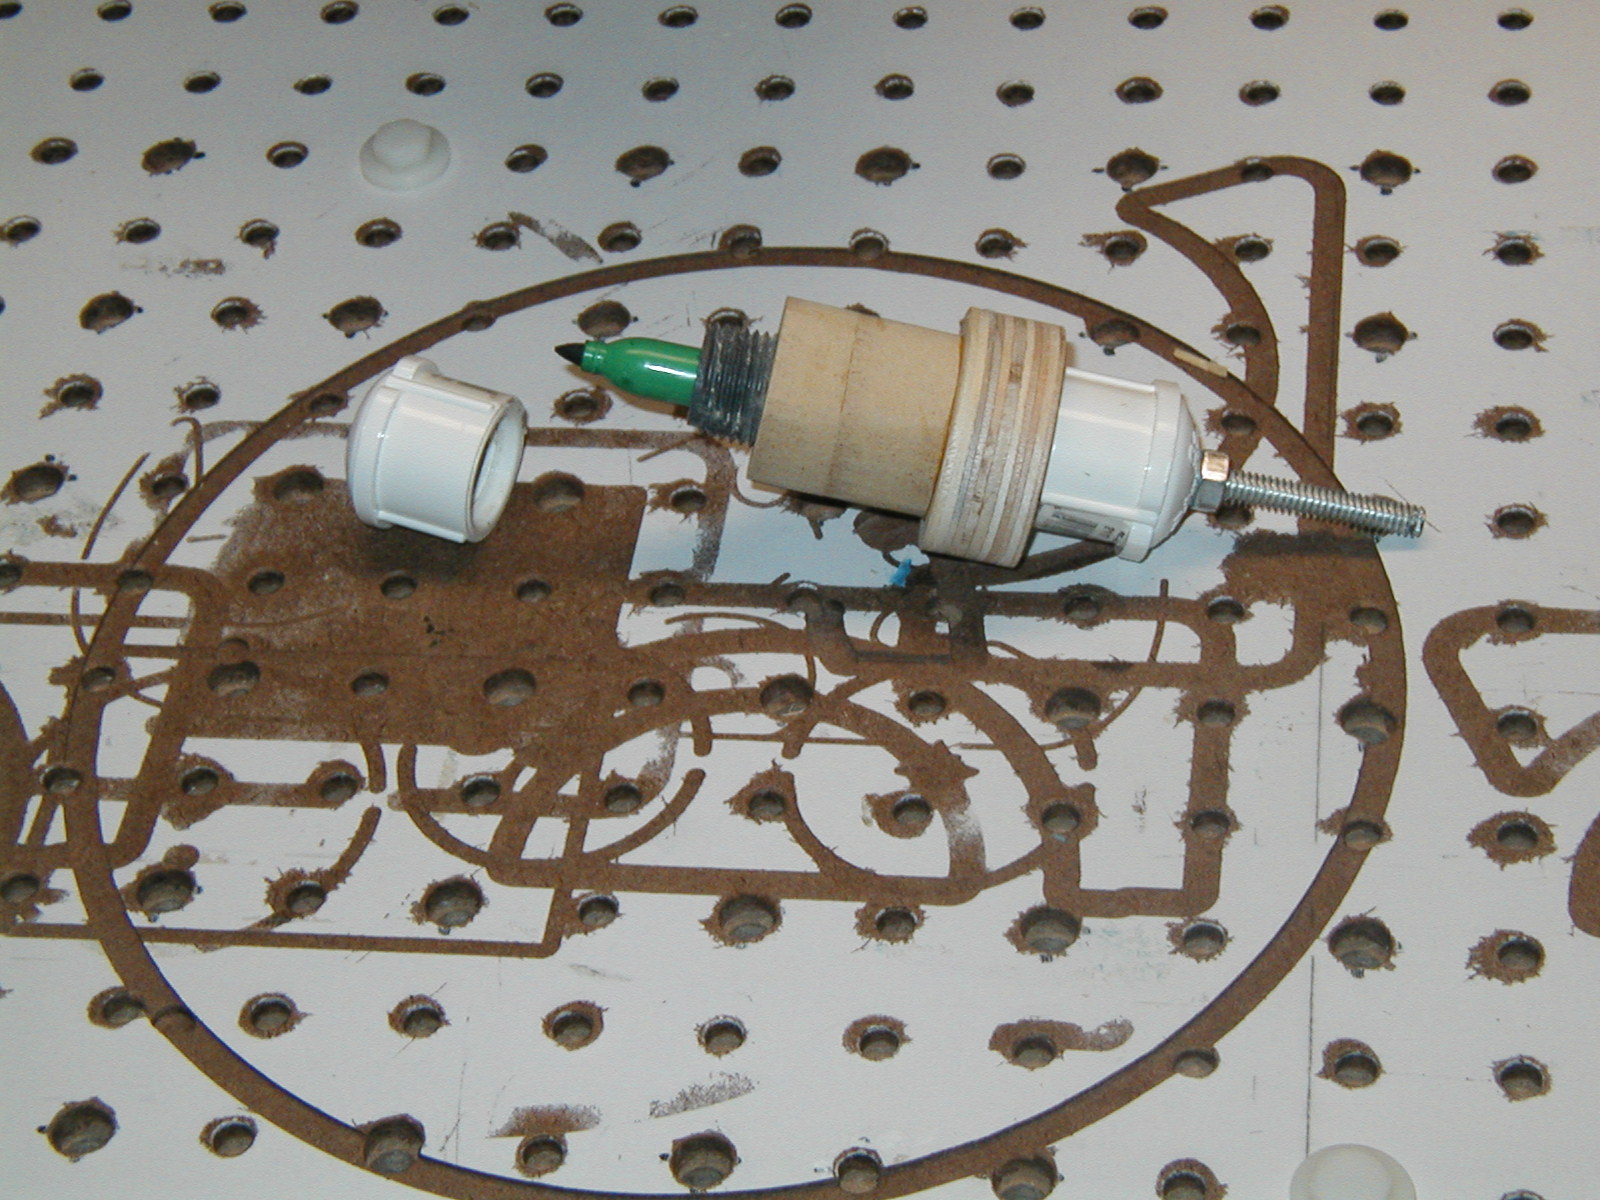
I used parts sourced from my local hardware store in the central U.S. They include a 3" x 1/2" section of PVC threaded on each end and a pair of PVC caps. I used a 1/4" bolt and pair of nuts for the mandrel.
Photos show assembly and mounting with a hose clamp to the side of the router.
The shaft would fit in the collet but then I would have to raise the router in the adapter which I would just as soon not do. Certainly an option.
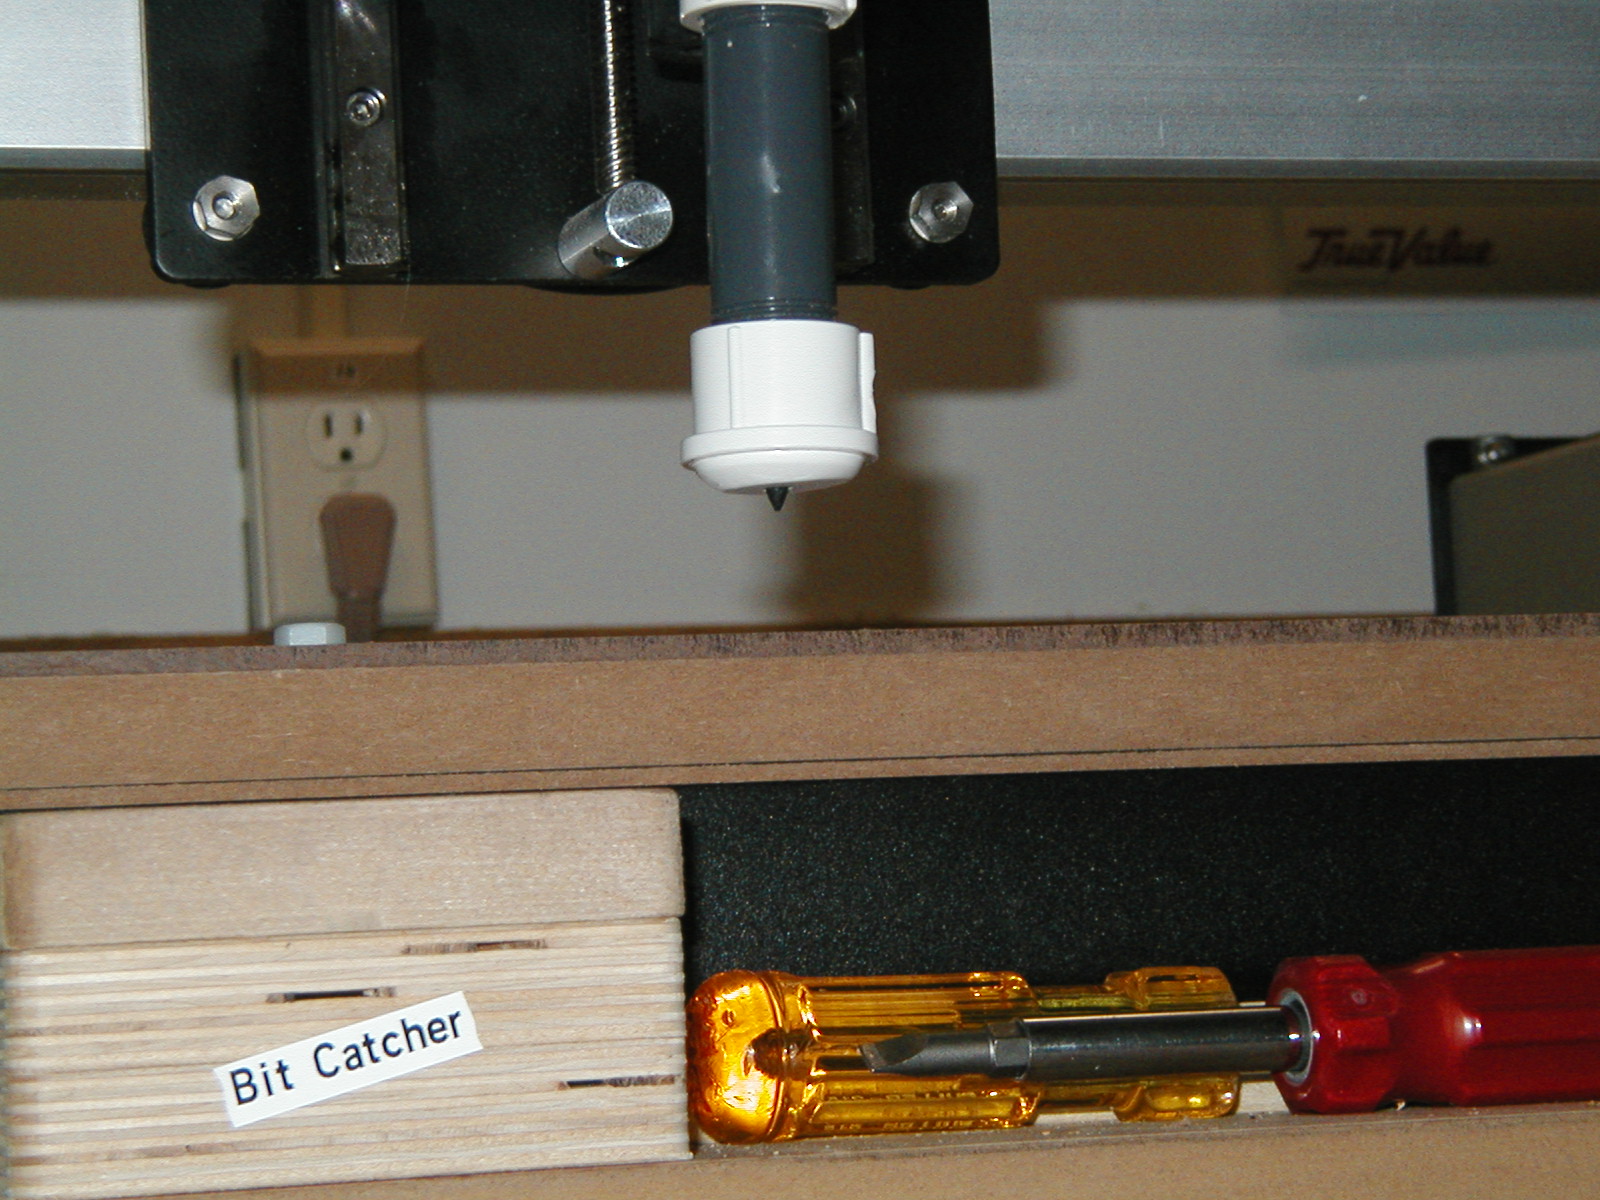
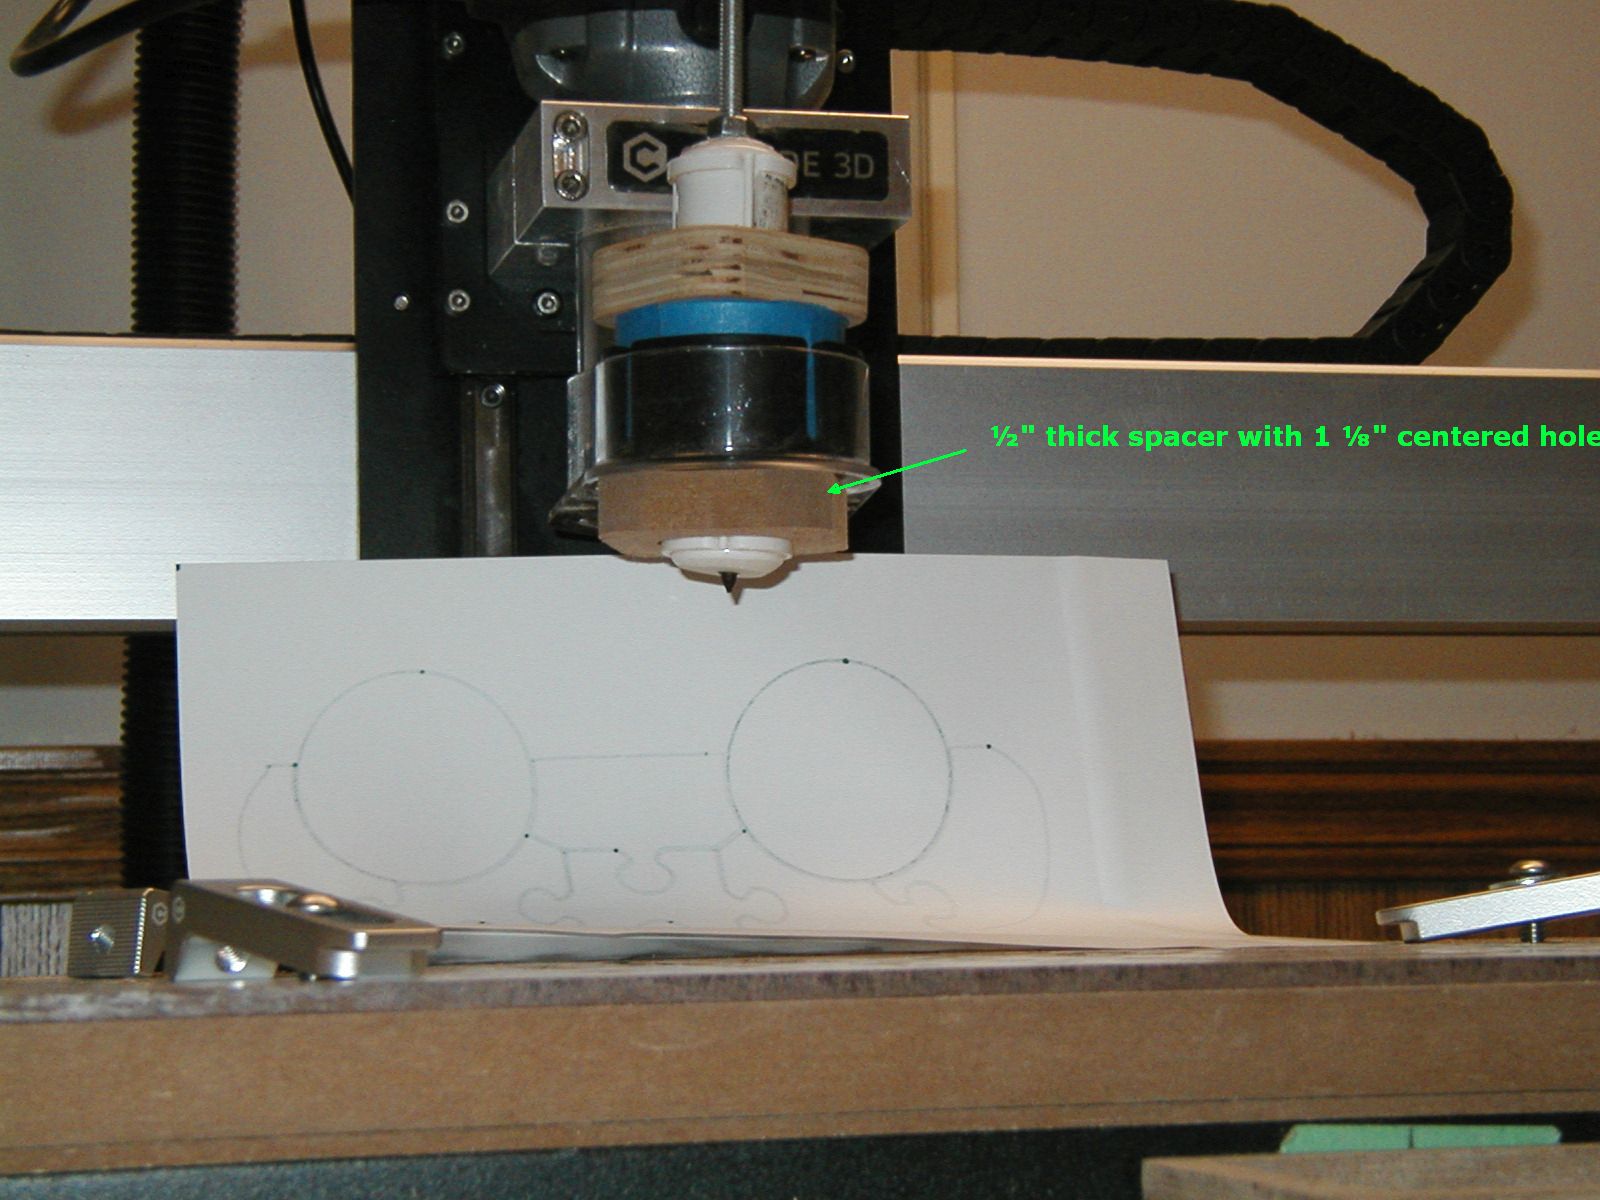
I use an adapter I made for the Sweepy Dust shoe which works well. I do lose about 4" of travel but I can rotate the Sweepy for best fit to my workpiece. The adapter locks tightly to the Sweepy by tightening the lower PVC cap.
I also have another - little more involved to build holder - that will accept a wider variety of drawing instruments. ie. Sharpies, pens, pencils, crayons, charcoal It clamps to the router body.
Not sure how often it would be used but it would be nice if the carbide router had a detachable power cord at the router end so it can easily be removed to either use some other type of tool or even for router maintenance without needing to mess with the drag chains to free the router. I have a router that has a 3 prong outlet with a lock to secure the cable in place kind of like this.
Like this contest it would be interesting to see what else people would use their Shapeoko for besides using a spindle/router.
Please note that we no longer suggest zip-tieing the trim router power cord to the drag chains EDIT: for folks w/ Shapeoko 3s — instead, run it along the vacuum hose — I run mine up to bungie cords which are looped into the ceiling.
EDIT: naturally folks w/ Pros should use the provided second drag chain which is intended for the power cord.
Let me preface this by I’m completely new to this CNC craft and I have not even made any chips to date as I’m waiting on finishing my enclosure. That said as this challenge is dust free I decided to give it a shot and to be honest for newcomers it’s actually not bad to learn the tools/software and some basics as it seems like not much can go wrong.
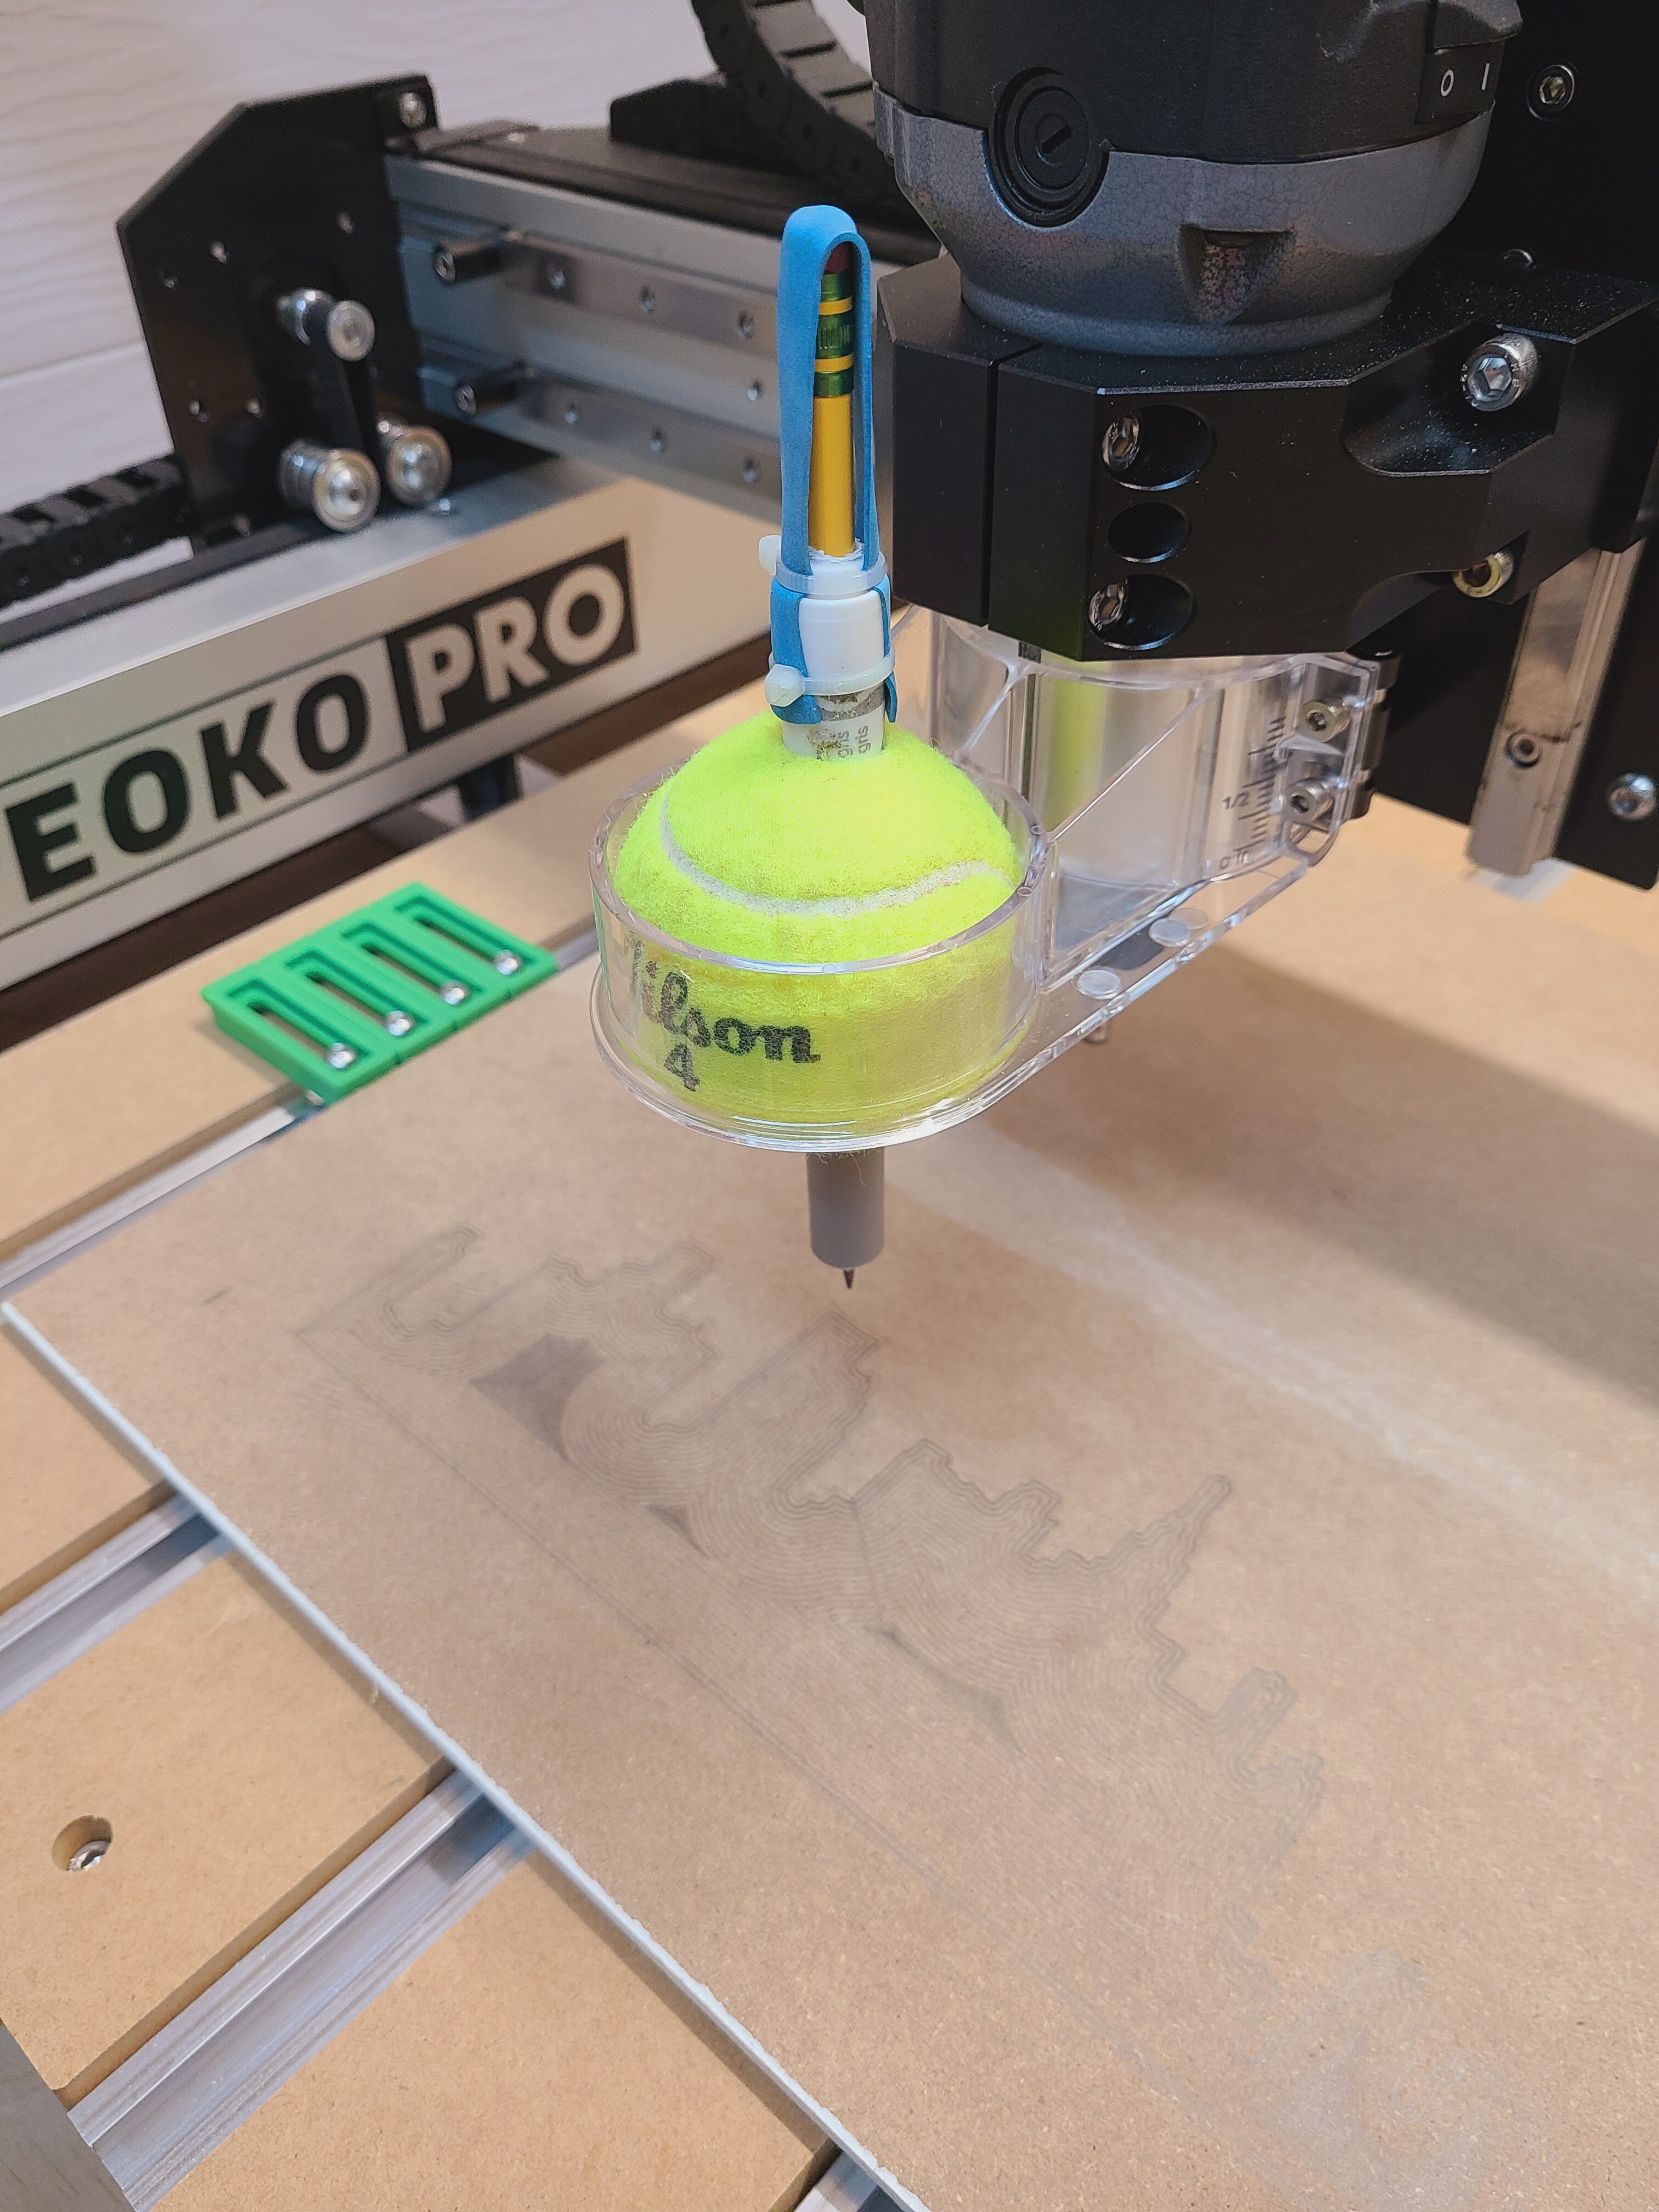
Now let me introduce the tool I used, it’s a “Wilson drawing kit #4” with interchangeable inserts (lead and coloring pencils).
So yes that is a kids marker which I hollowed out and drilled through both ends permitting for quick tool changes by simply sliding over the elastic to swap out for different pencils (lead or color). On the back side I zip tied a rubber band and adjusted the tension so upon initial contact it applies a normal amount of pressure against the worksurface. I’m thinking of trying 3D carving as the intent is the rubber band will apply more pressure the deeper the tool goes into the worksurface so might be able to reproduce grayscale pencil art. Then to hold this contraption I’ve opted to drill through a Wislon 4 tennis ball (hence the kit name above) as it fits just snug enough into the sweepy to hold everything in place. (EDIT: I can confirm there is some deflection but I didn’t bother measuring it)
And finally my first artistic attempt at toolpath art with this odd tool on a piece of scrap.
@72begin and @Caffein8ted, thank you for sharing those pretty clever solutions! (I wish I could control my tendency to over-engineer things and come up with simple yet efficient solutions like those)
This challenge is off to a great start, I can’t wait to see the final drawing you submit to illustrate what those setups can do!
So my first attempt was going to take over 3 hours because the feeds and speeds where the defaults for tools in Carbide Create and this is the areas with the darker shading. However I decided to build a custom library called Wilson 4 custom tools and started playing with new tool settings but mainly stepover and feed rate to try and cut down time. That said obviously there’s little force exerted on the tool itself and the forces are basically the inertia of the machine itself and sudden changes in direction so what would be a safe max feed rate to go with and not end up damaging something? I had it going at 2000mm/min and then bumped it up in Carbide Motion but thought I should maybe ask before I get carried away.
Can you imagine that support call and would this be covered under Carbide’s the first 30 days mistakes are on us policy?:
Carbide Support: “Can you explain what happened to damage the shaft on your stepper motors”
Me: “Well I was participating in the Community Challenge #20 contest and had a tool running at a feed rate of 7500mm/min…”
If you run your machine at 10.000mm/min and somehow end up calling support, you could always argue that “@wmoy made me do it”
Granted, that’s the rapid feedrate and NOT intended to be used as a cutting feedrate, but sliding the tip of a pen over a sheet or paper is somewhere between the two (and closer to rapid-ing, I would say).
My official stance is to not go that fast and I’ll deny recommending it (but would like to see the effect of, on the quality of the drawing)
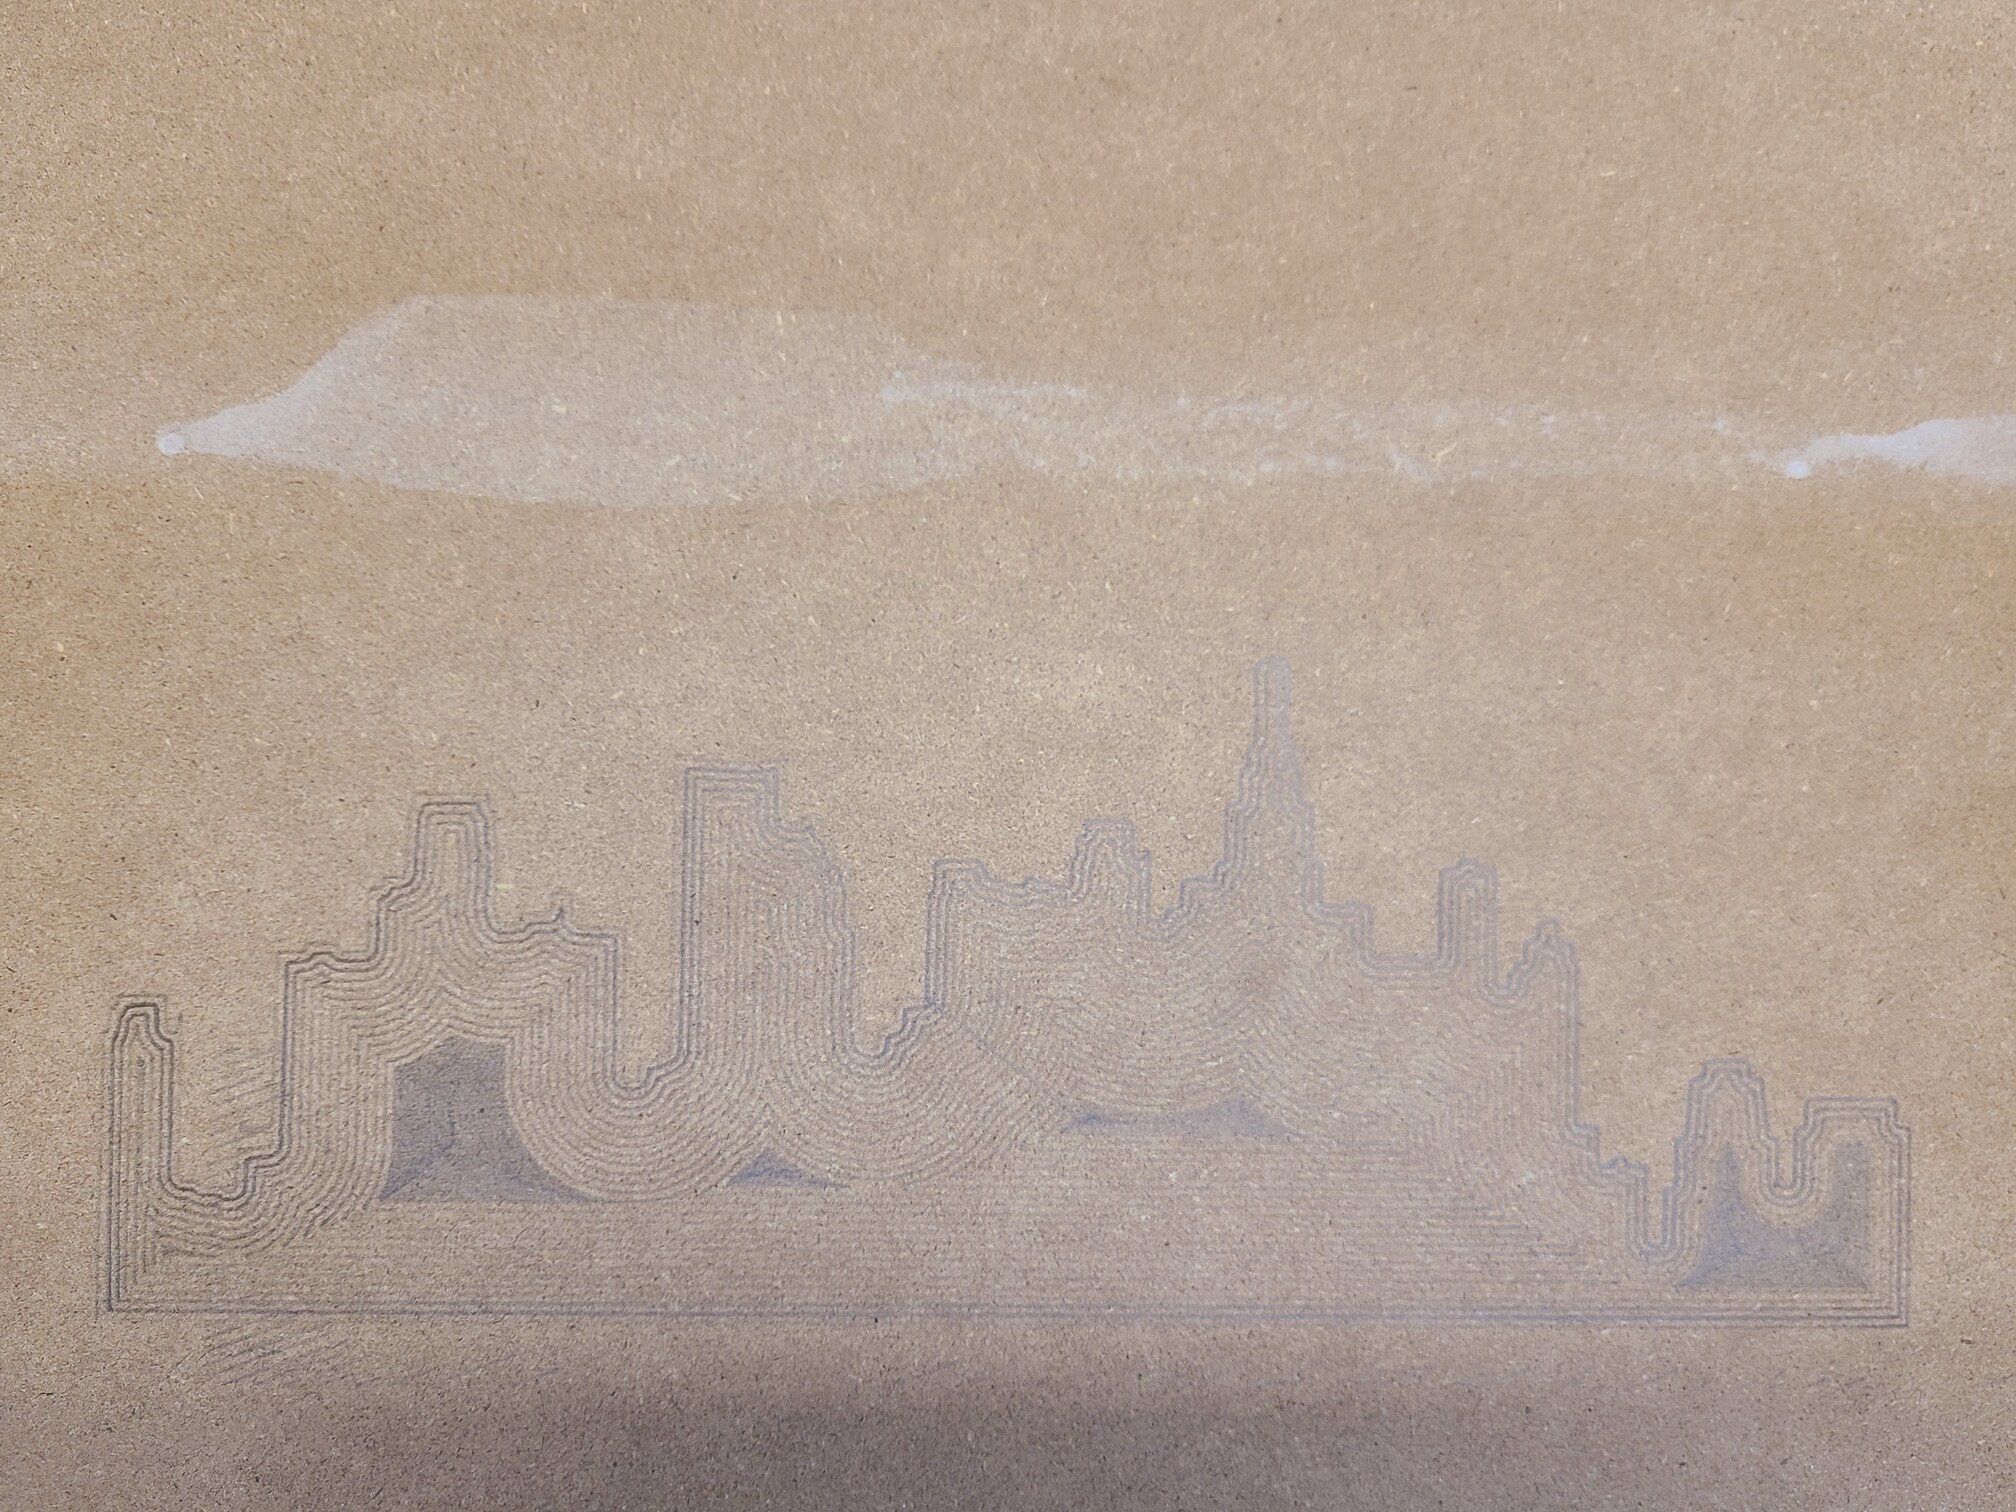
A quick update to my cityscape entry. I cursed the tool change as the coloring pencils I used was much harder then the pencil used for the contour, actually is was probably pointier meaning also longer but it ended up piercing the foamboard and caused some issues later in the job. That said I’ll probably have to attempt this again either without the tool change or never mind the foam board and just use a wood panel. In either case here’s my second attempt at toolpath art using the “Wilson drawing kit #4”.
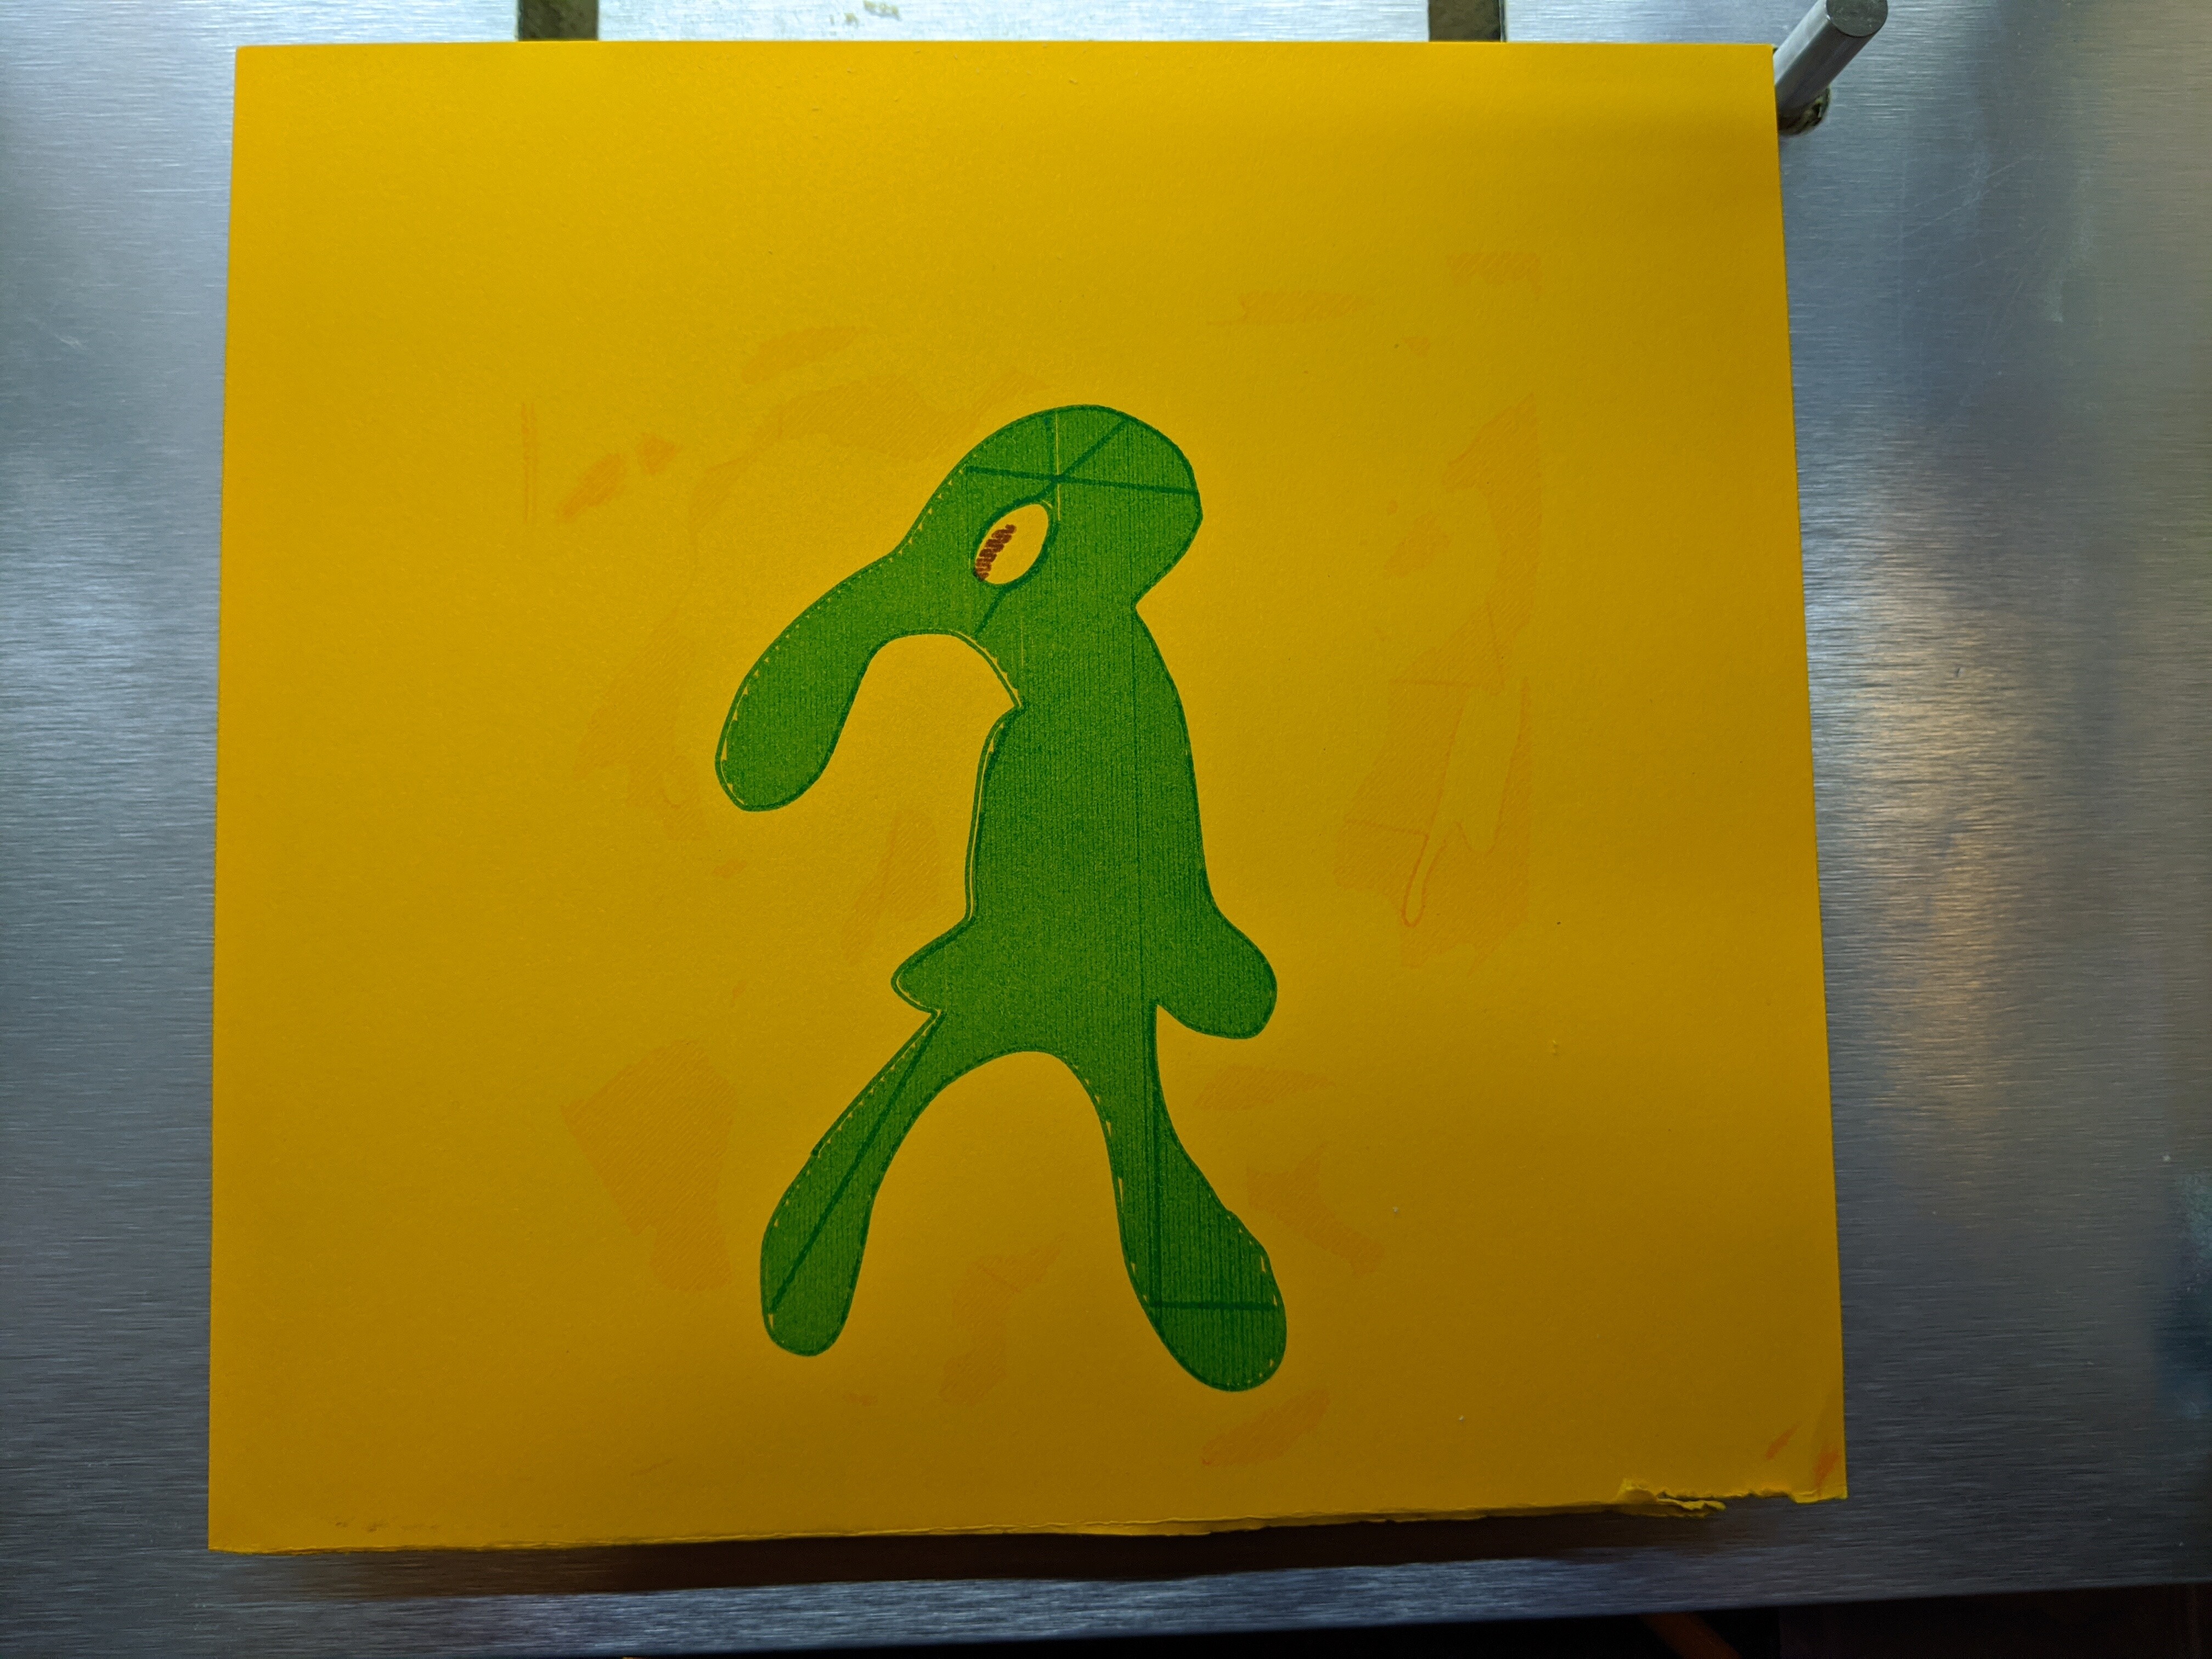
Working with the limited Z height on the Nomad 3, I designed and 3d printed a mount based off of the chip fan that comes included with the machine. I wanted it to keep it simple and make it easy to swap out the markers.
To keep the paper down I used a glue stick and stuck it directly to the MDF. I couldn’t get the paper flat enough to the MDF using tape.
Here are pictures of the mount and an action shot. I’m unable to post more than one picture because I’m a new user
Thanks for your entry and welcome to the community @BDR_Manufacturing
I’m intrigued by the shiny/jelly look of the green part, is this just an optical effect or a special marker?