Thanks! I’ll have to try that next time
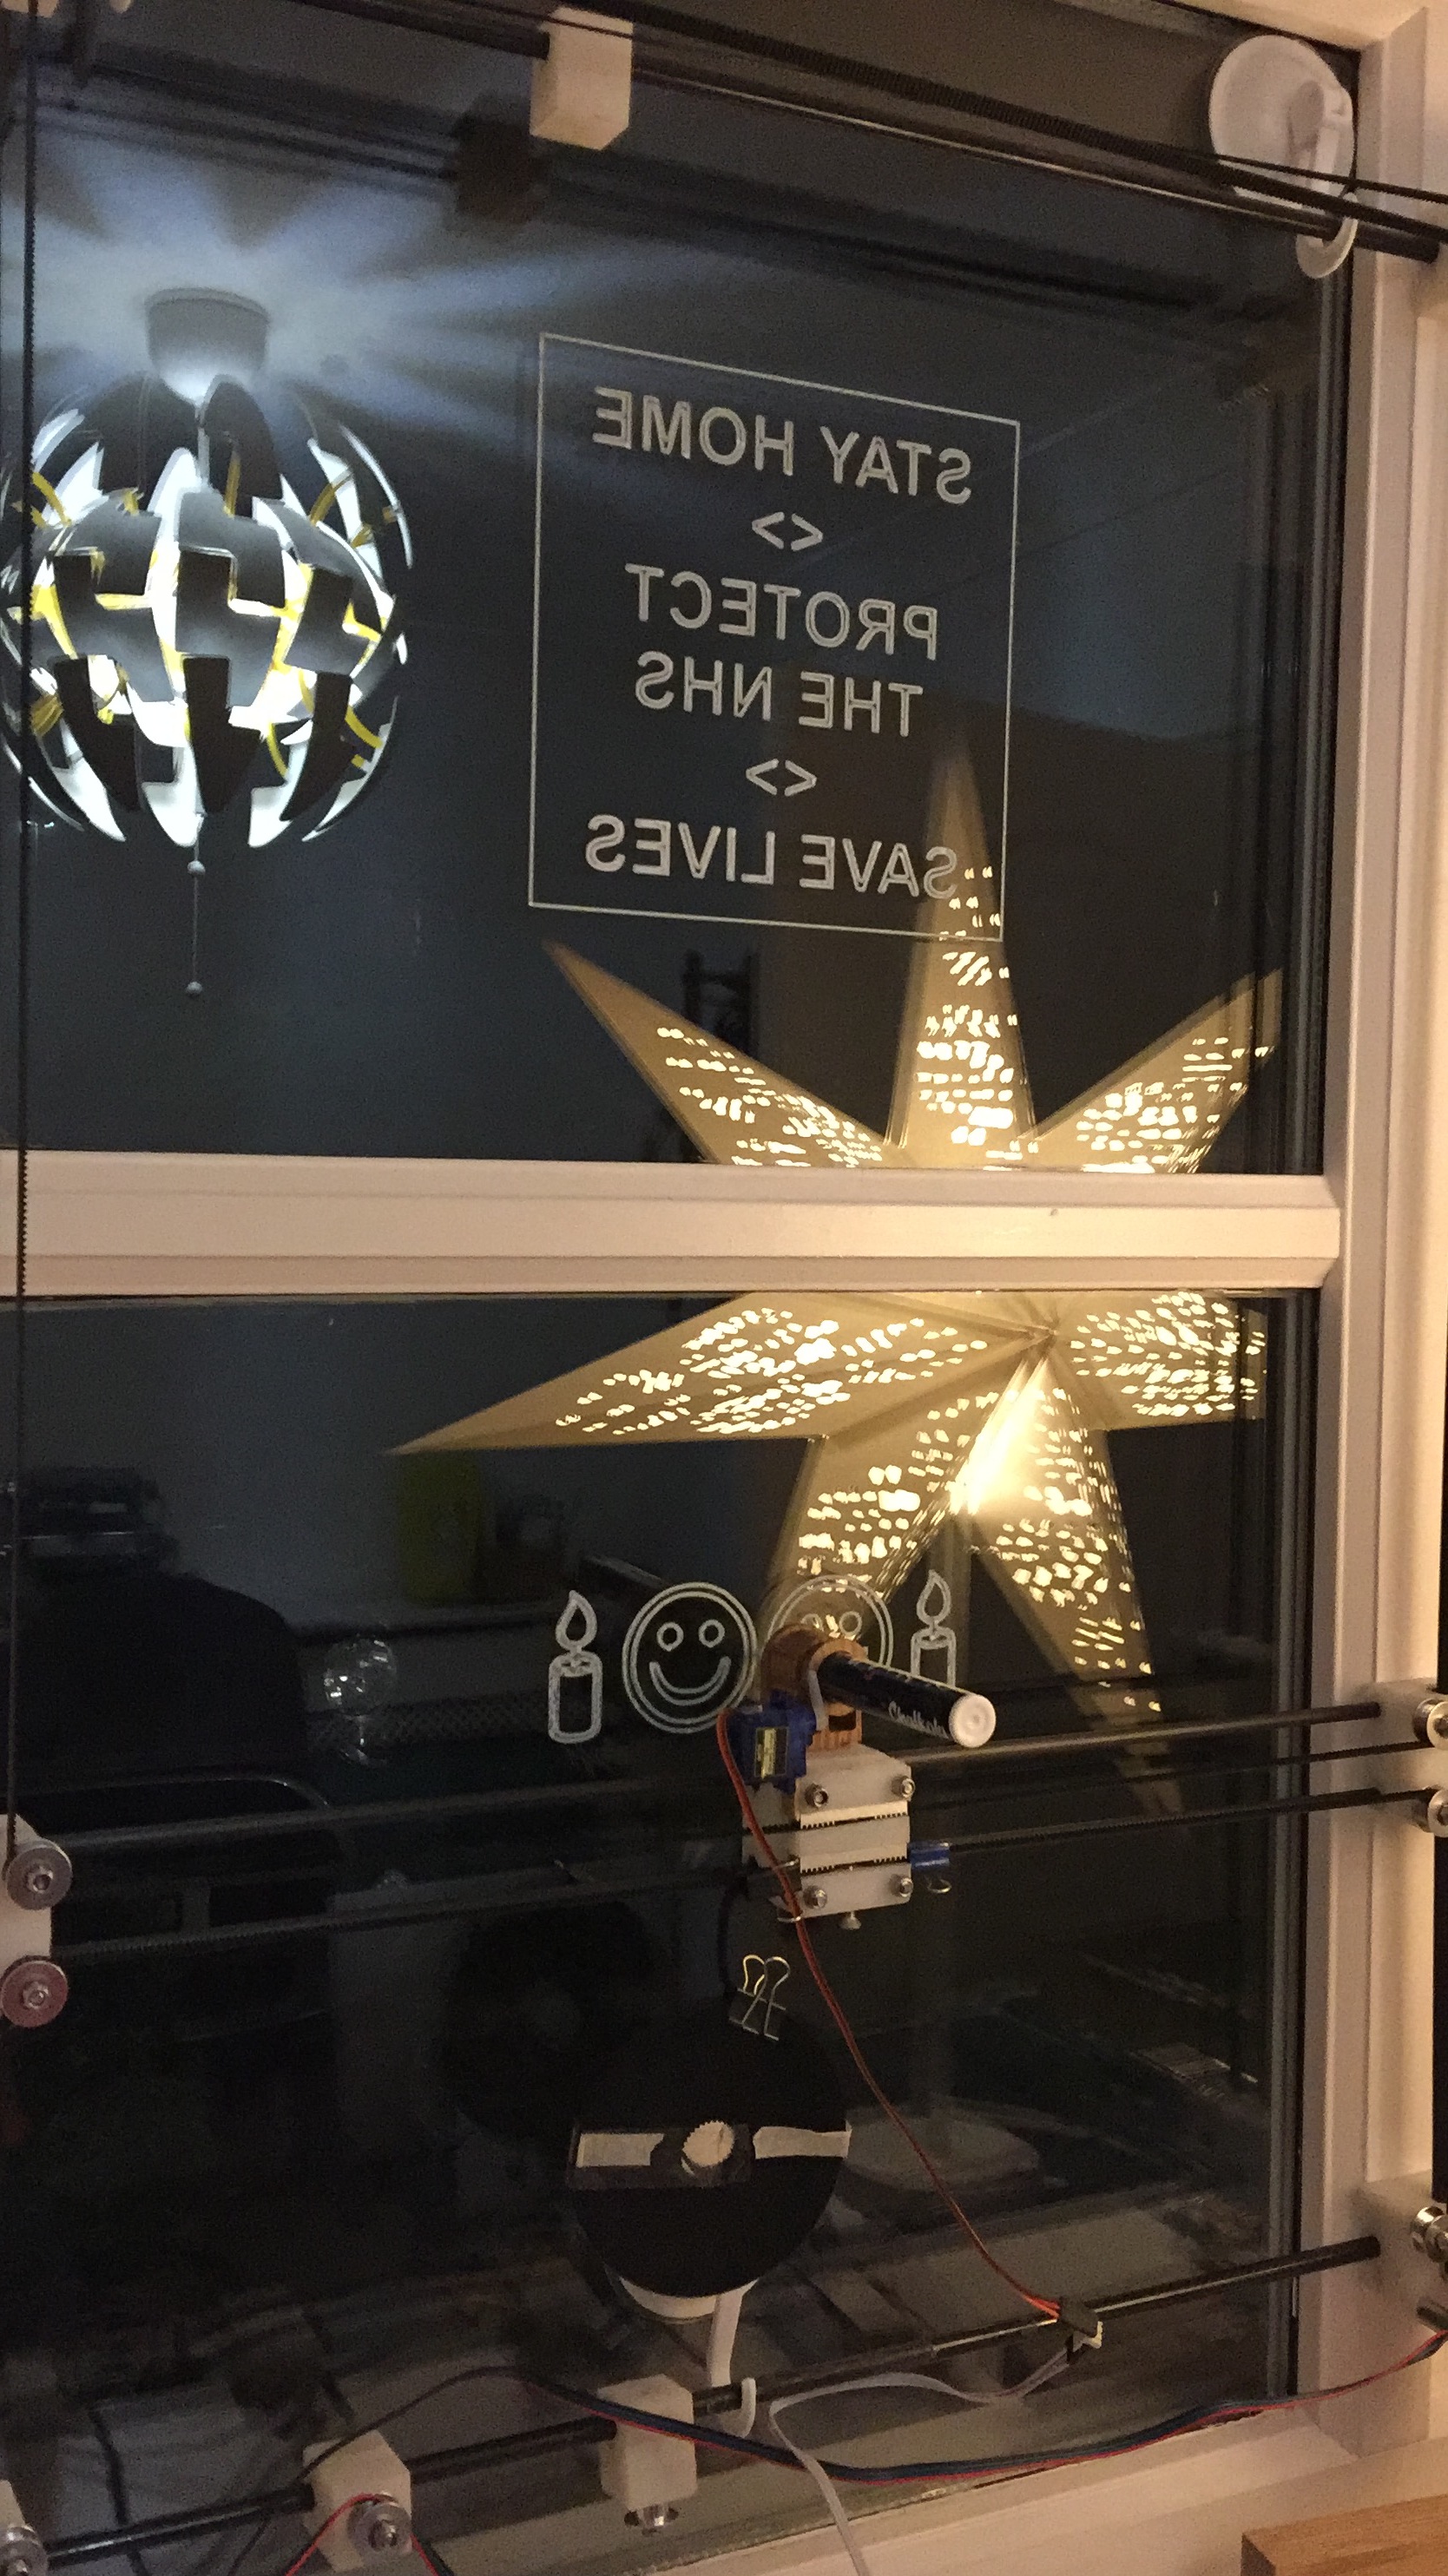
I drew the following on Glass with my ShapeOKO, or actually more precisely I drew the following on glass using a drawing machine created entirely using my ShapeOKO and liquid chalk pens or Sharpies.
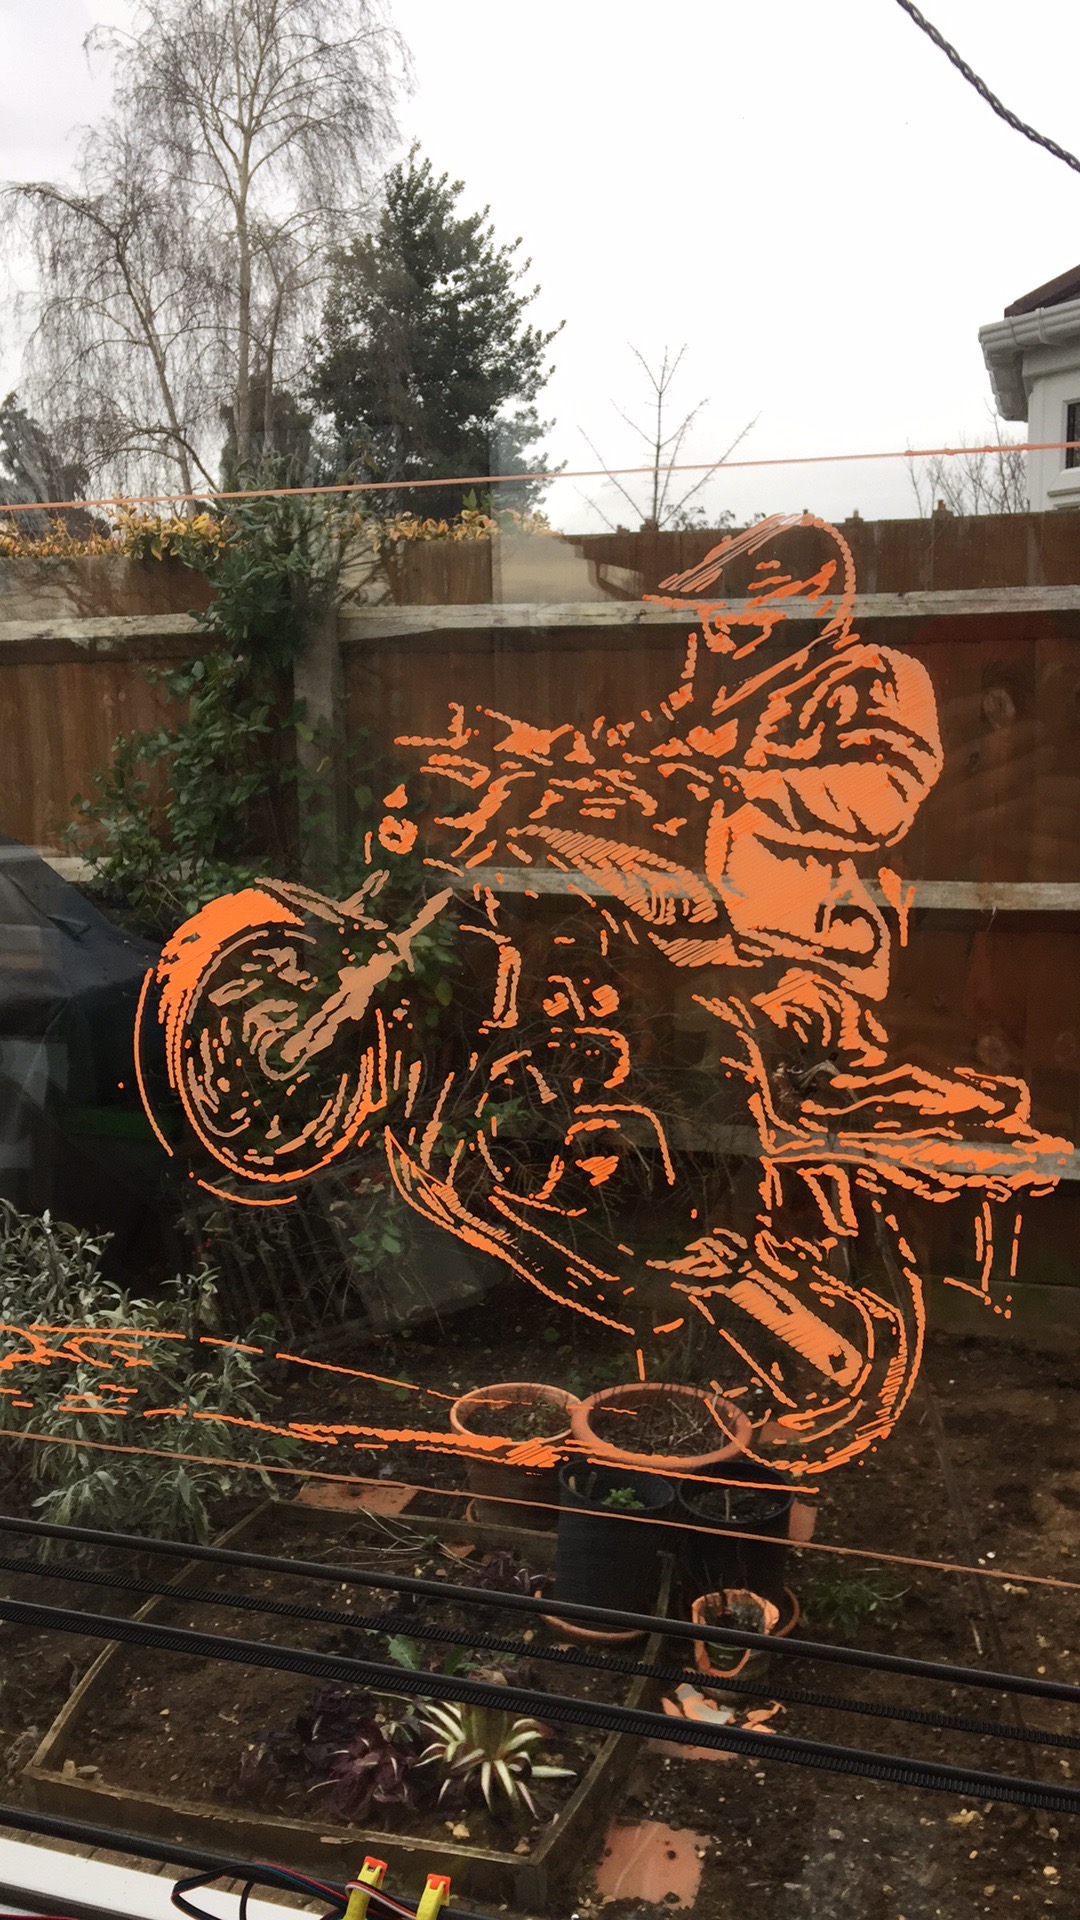
The drawing machine is a CoreXY idea using a Arduino/GRBL controller to drive two stepper motors (A and B - analogies for X and Y), and a model aircraft servo motor for Z. Hook it up and ‘treat it like a ShapeOKO’ and it draws. Output .GCODE files from whatever software you have, and provided the Z axis is organised to be ‘above 0 = up’ and ‘below 0 = down’ then it works.
The brief was to create a fun machine that is portable, could be ‘stuck’ onto a window with suckers and draw pretty much any artwork wanted, provided it can be presented as GCODE. The design should be adjustable in size, lightweight and credibly accurate. Where did the brief come from? Wanting something to do during lockdown weekends, and wanting to understand GCODE/GRBL in more depth.
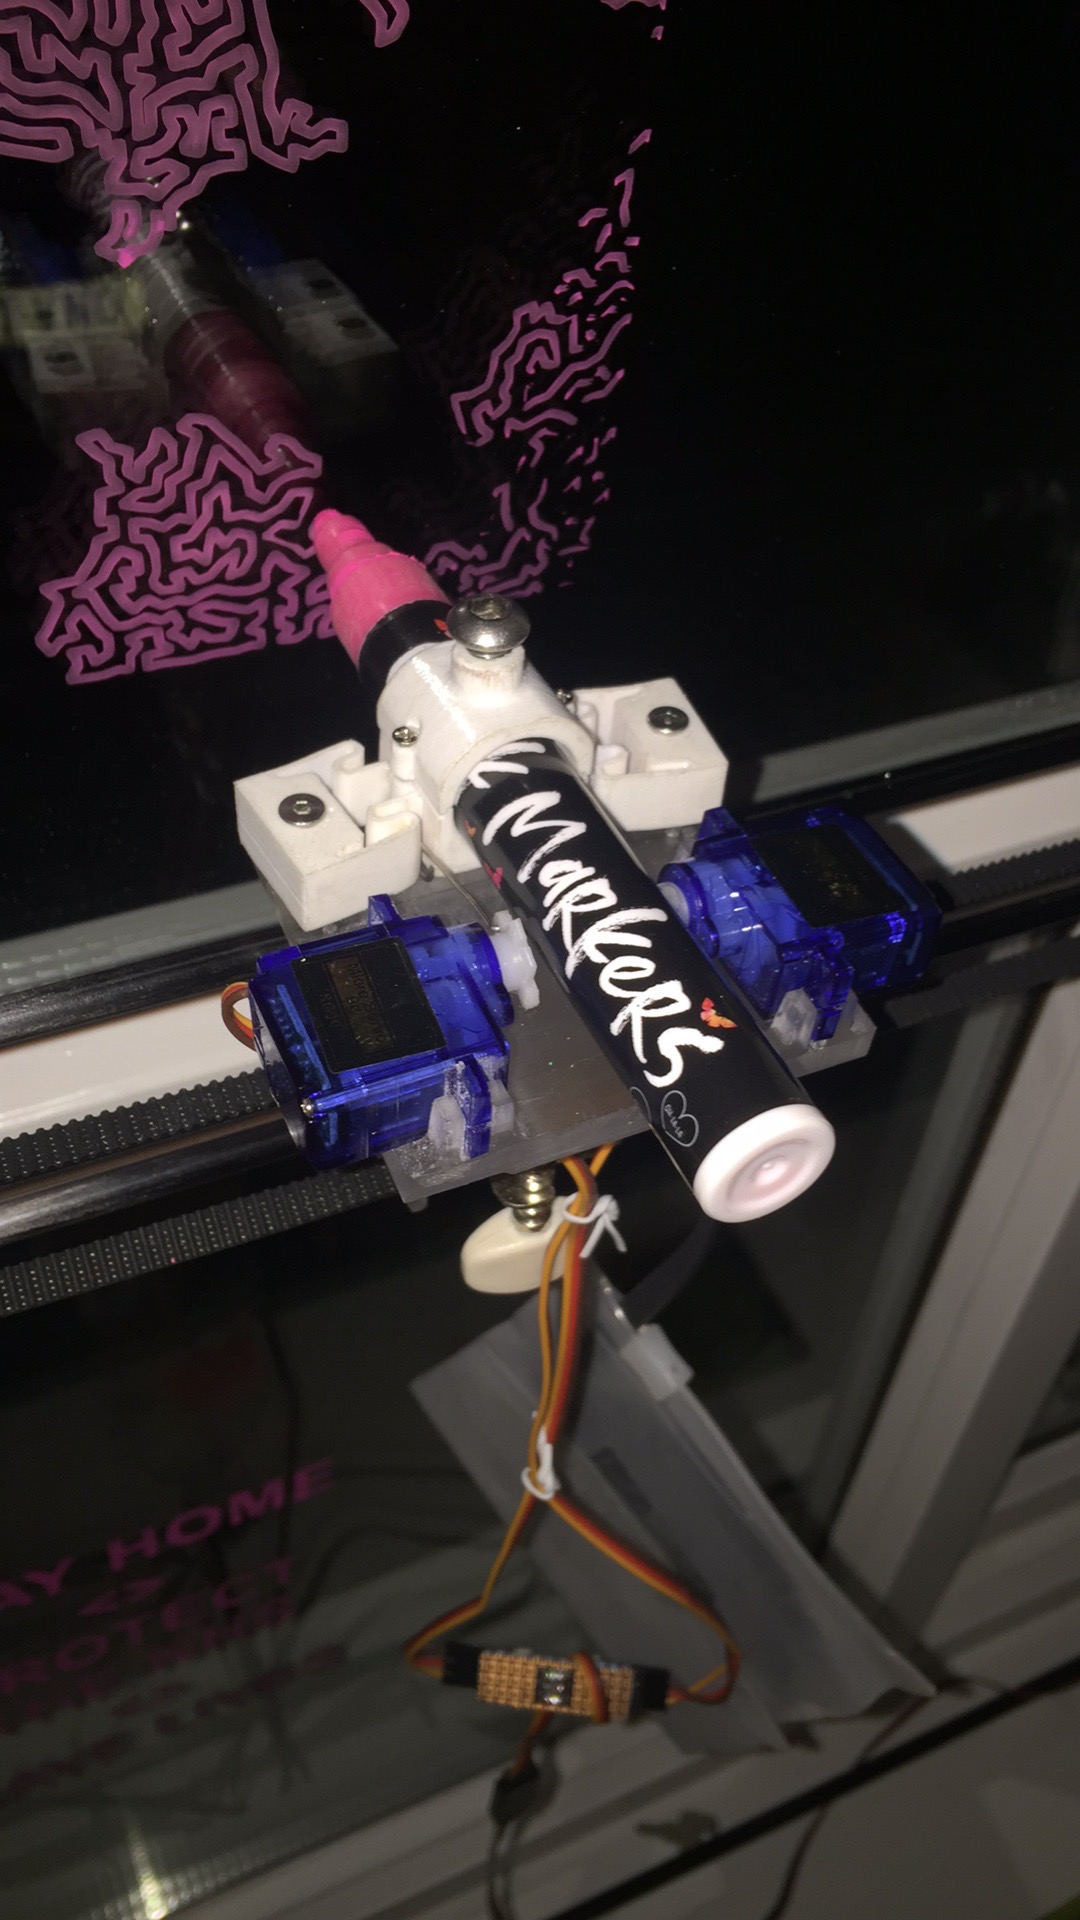
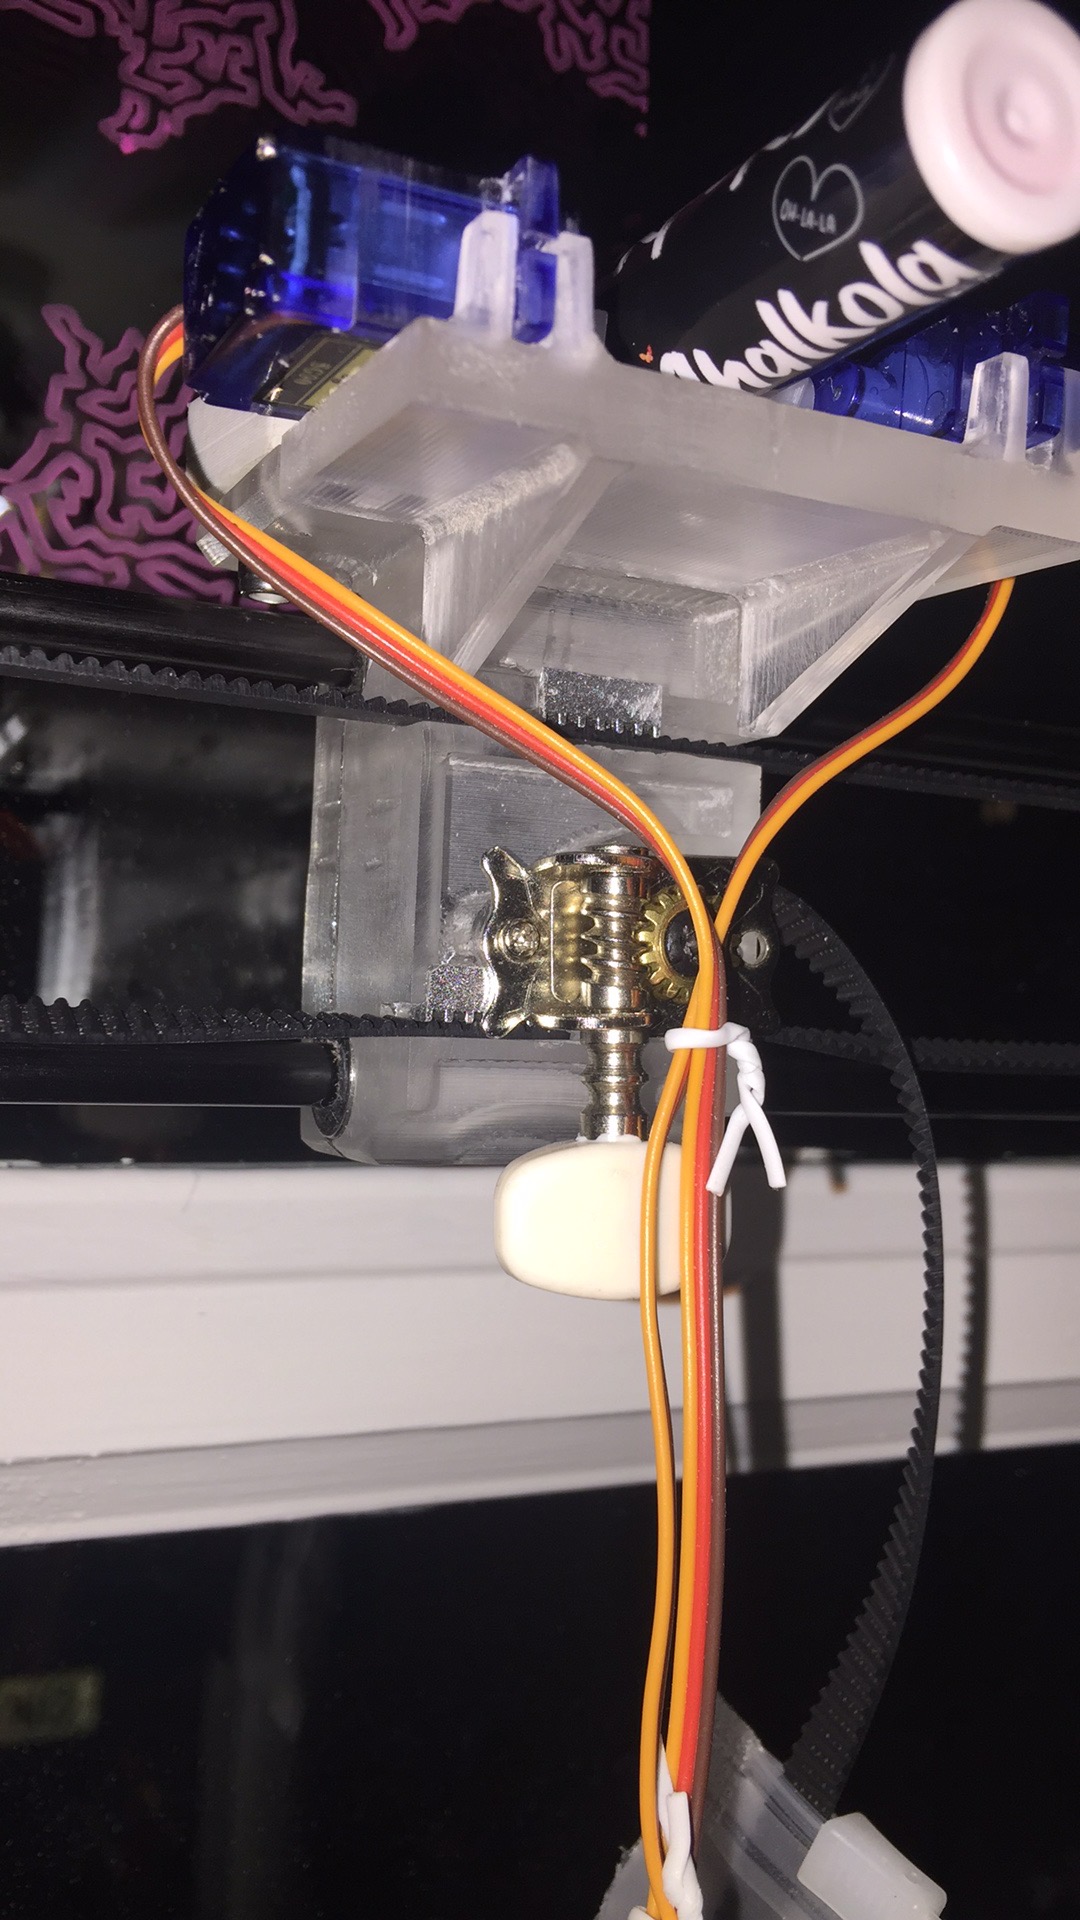
Four carbon fibre rods (8mm OD) form the outer frame, held in corner blocks that hold them true but allow for loosening and size adjustment. The pen carriage runs on a pair of 6mm carbon rods that form the X axis and carries the servo motors for pen control. The belt is long, running around the entire perimeter of the machine in two loops, and tensioned on the pen carriage using a guitar string tensioner modified to turn a Gates GT2 toothed pulley.
I modelled up each piece as double-sided 2.5D parts, and cut them all out of two slabs of cast perspex. The amount of material removal results in a surprising amount of chips - and the need to improve earthing along the dust extraction hose to reduce static generation!
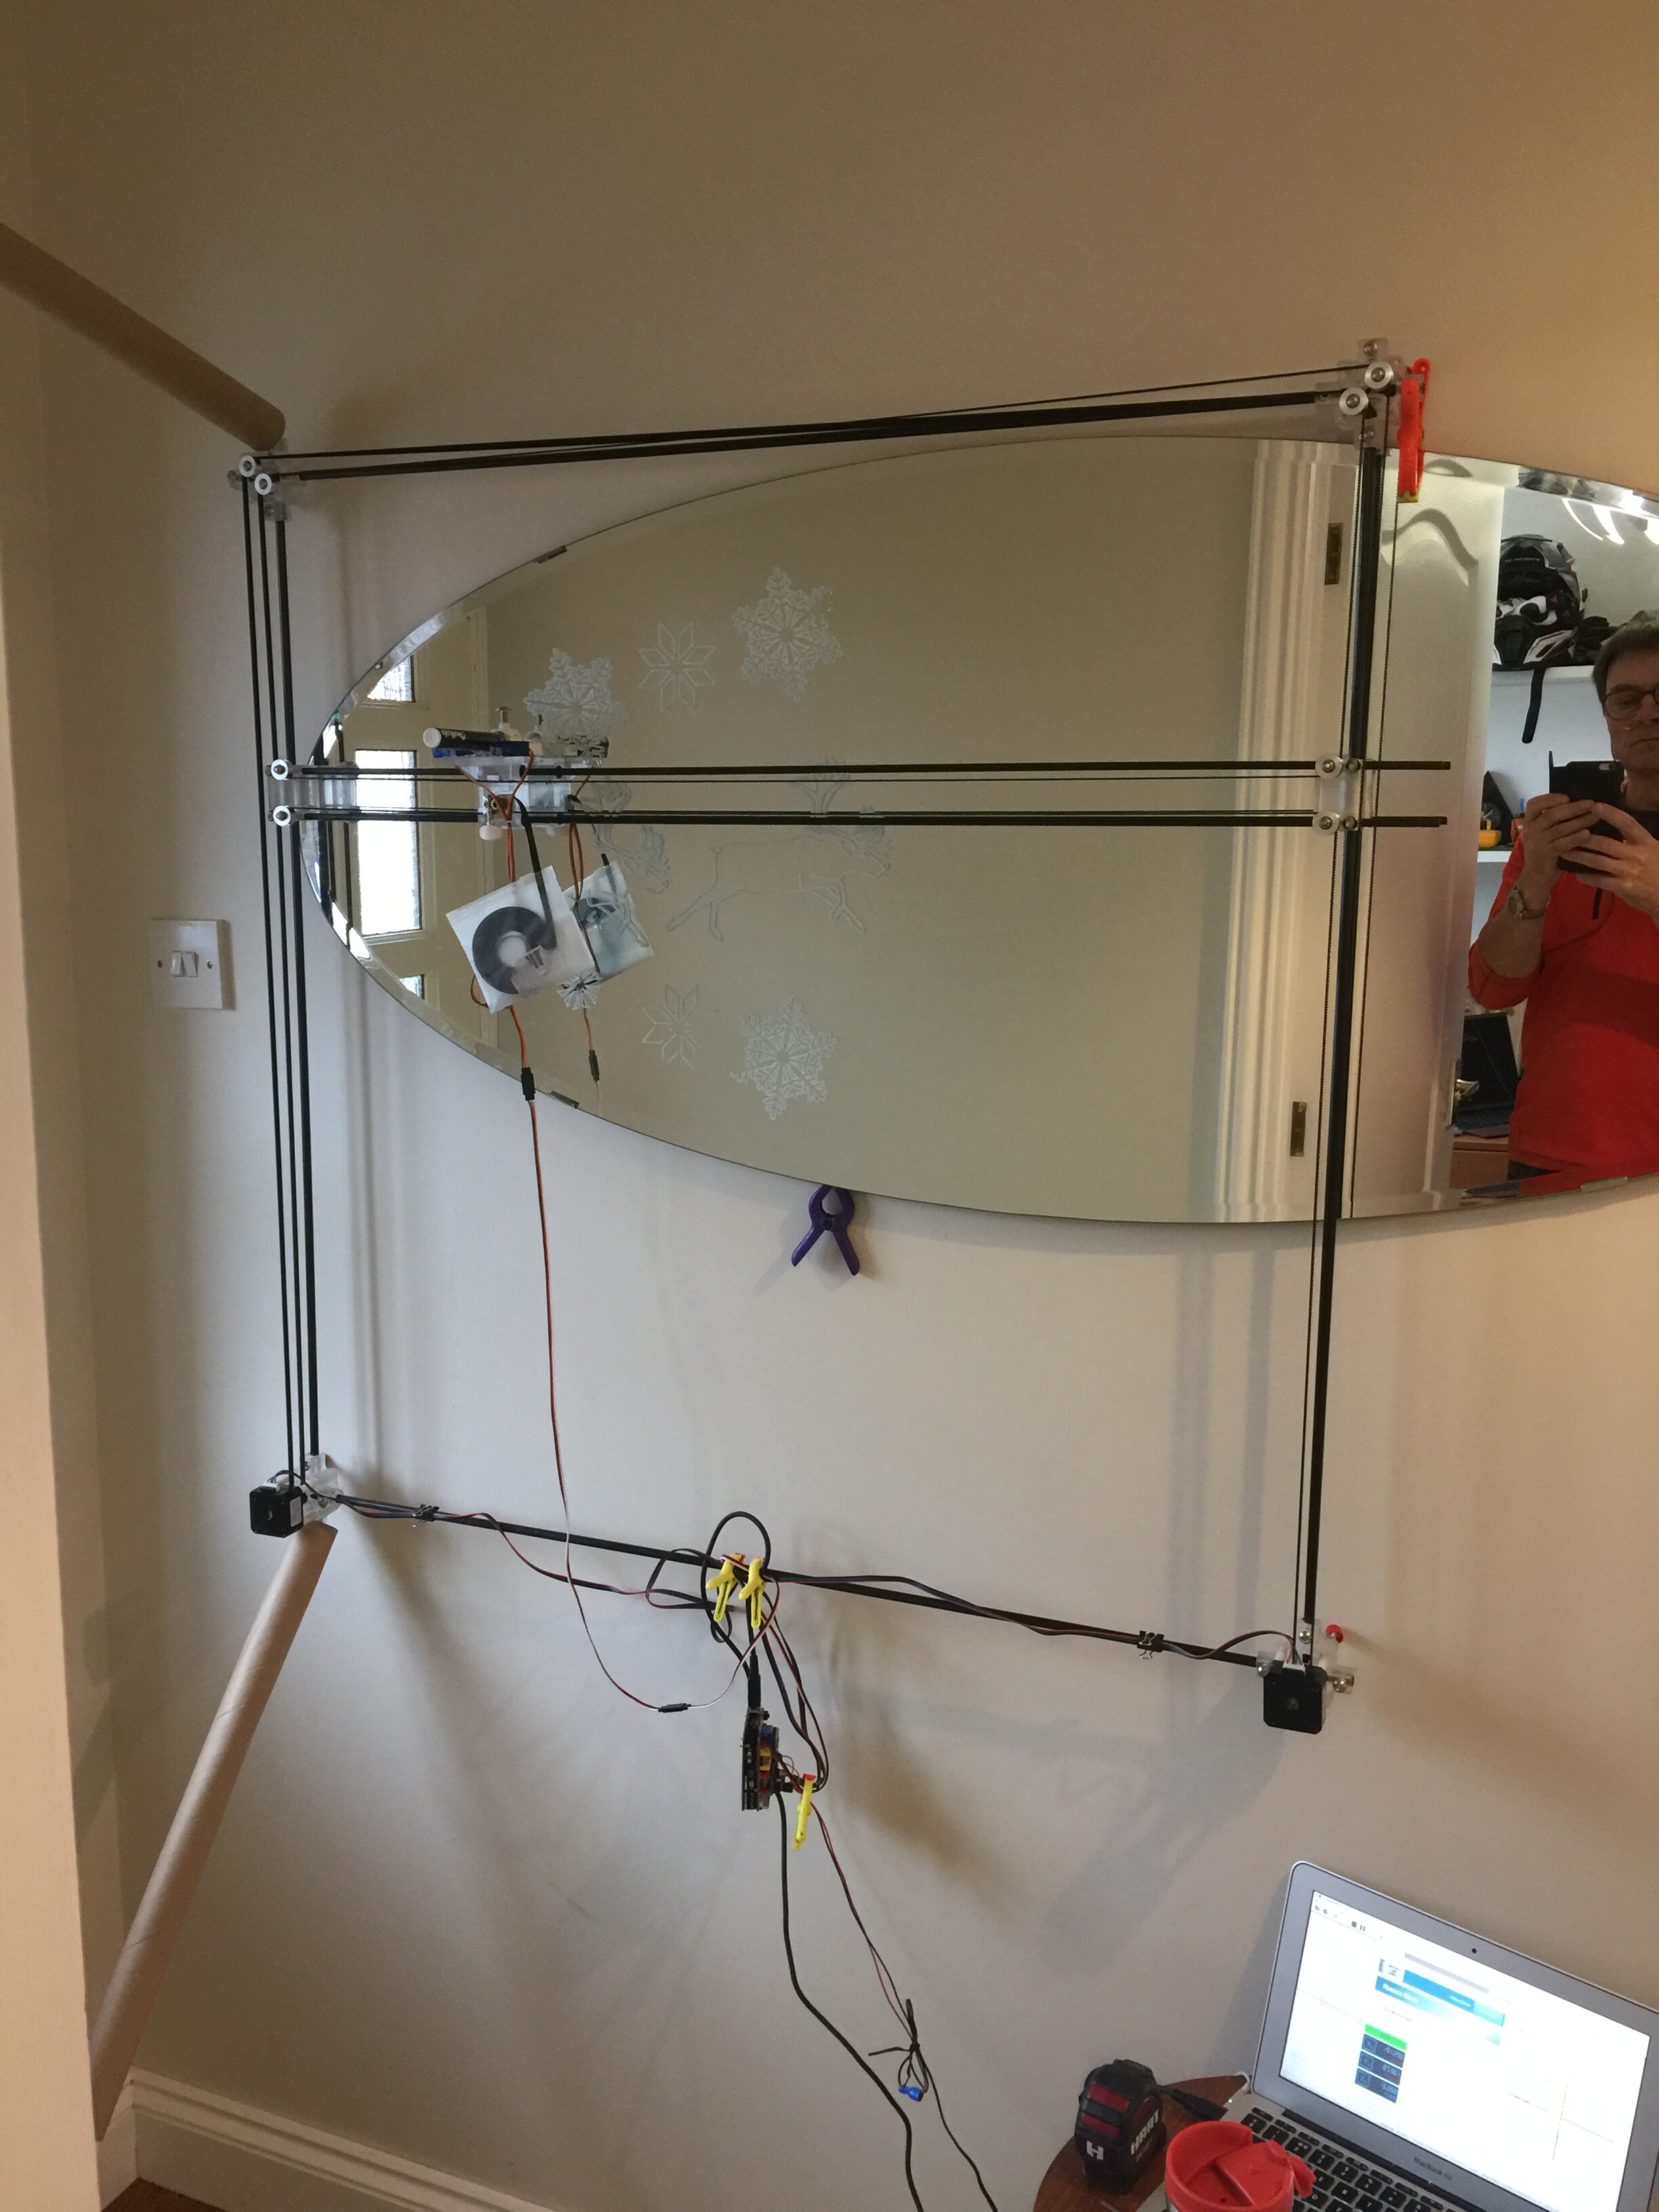
The above is the ‘machine’ crudely held against a mirror to test it out. I will tidy up the wiring and make an enclosure for the Arduino and Shield PCB that holds the stepper motor drivers.
I took the standard GRBL source code (1.1x on Arduino 328) and modified the Z axis control to operate PWM driven servo motors, which took some doing as the GRBL software uses almost every resource on the 328 chip, made some small adjustments to the CoreXY algorithms, adapted how tool-changes were received to stop needless errors, and it fits in the memory footprint - just. And it works!! Not bad for a first venture into tinkering with micro-controllers.
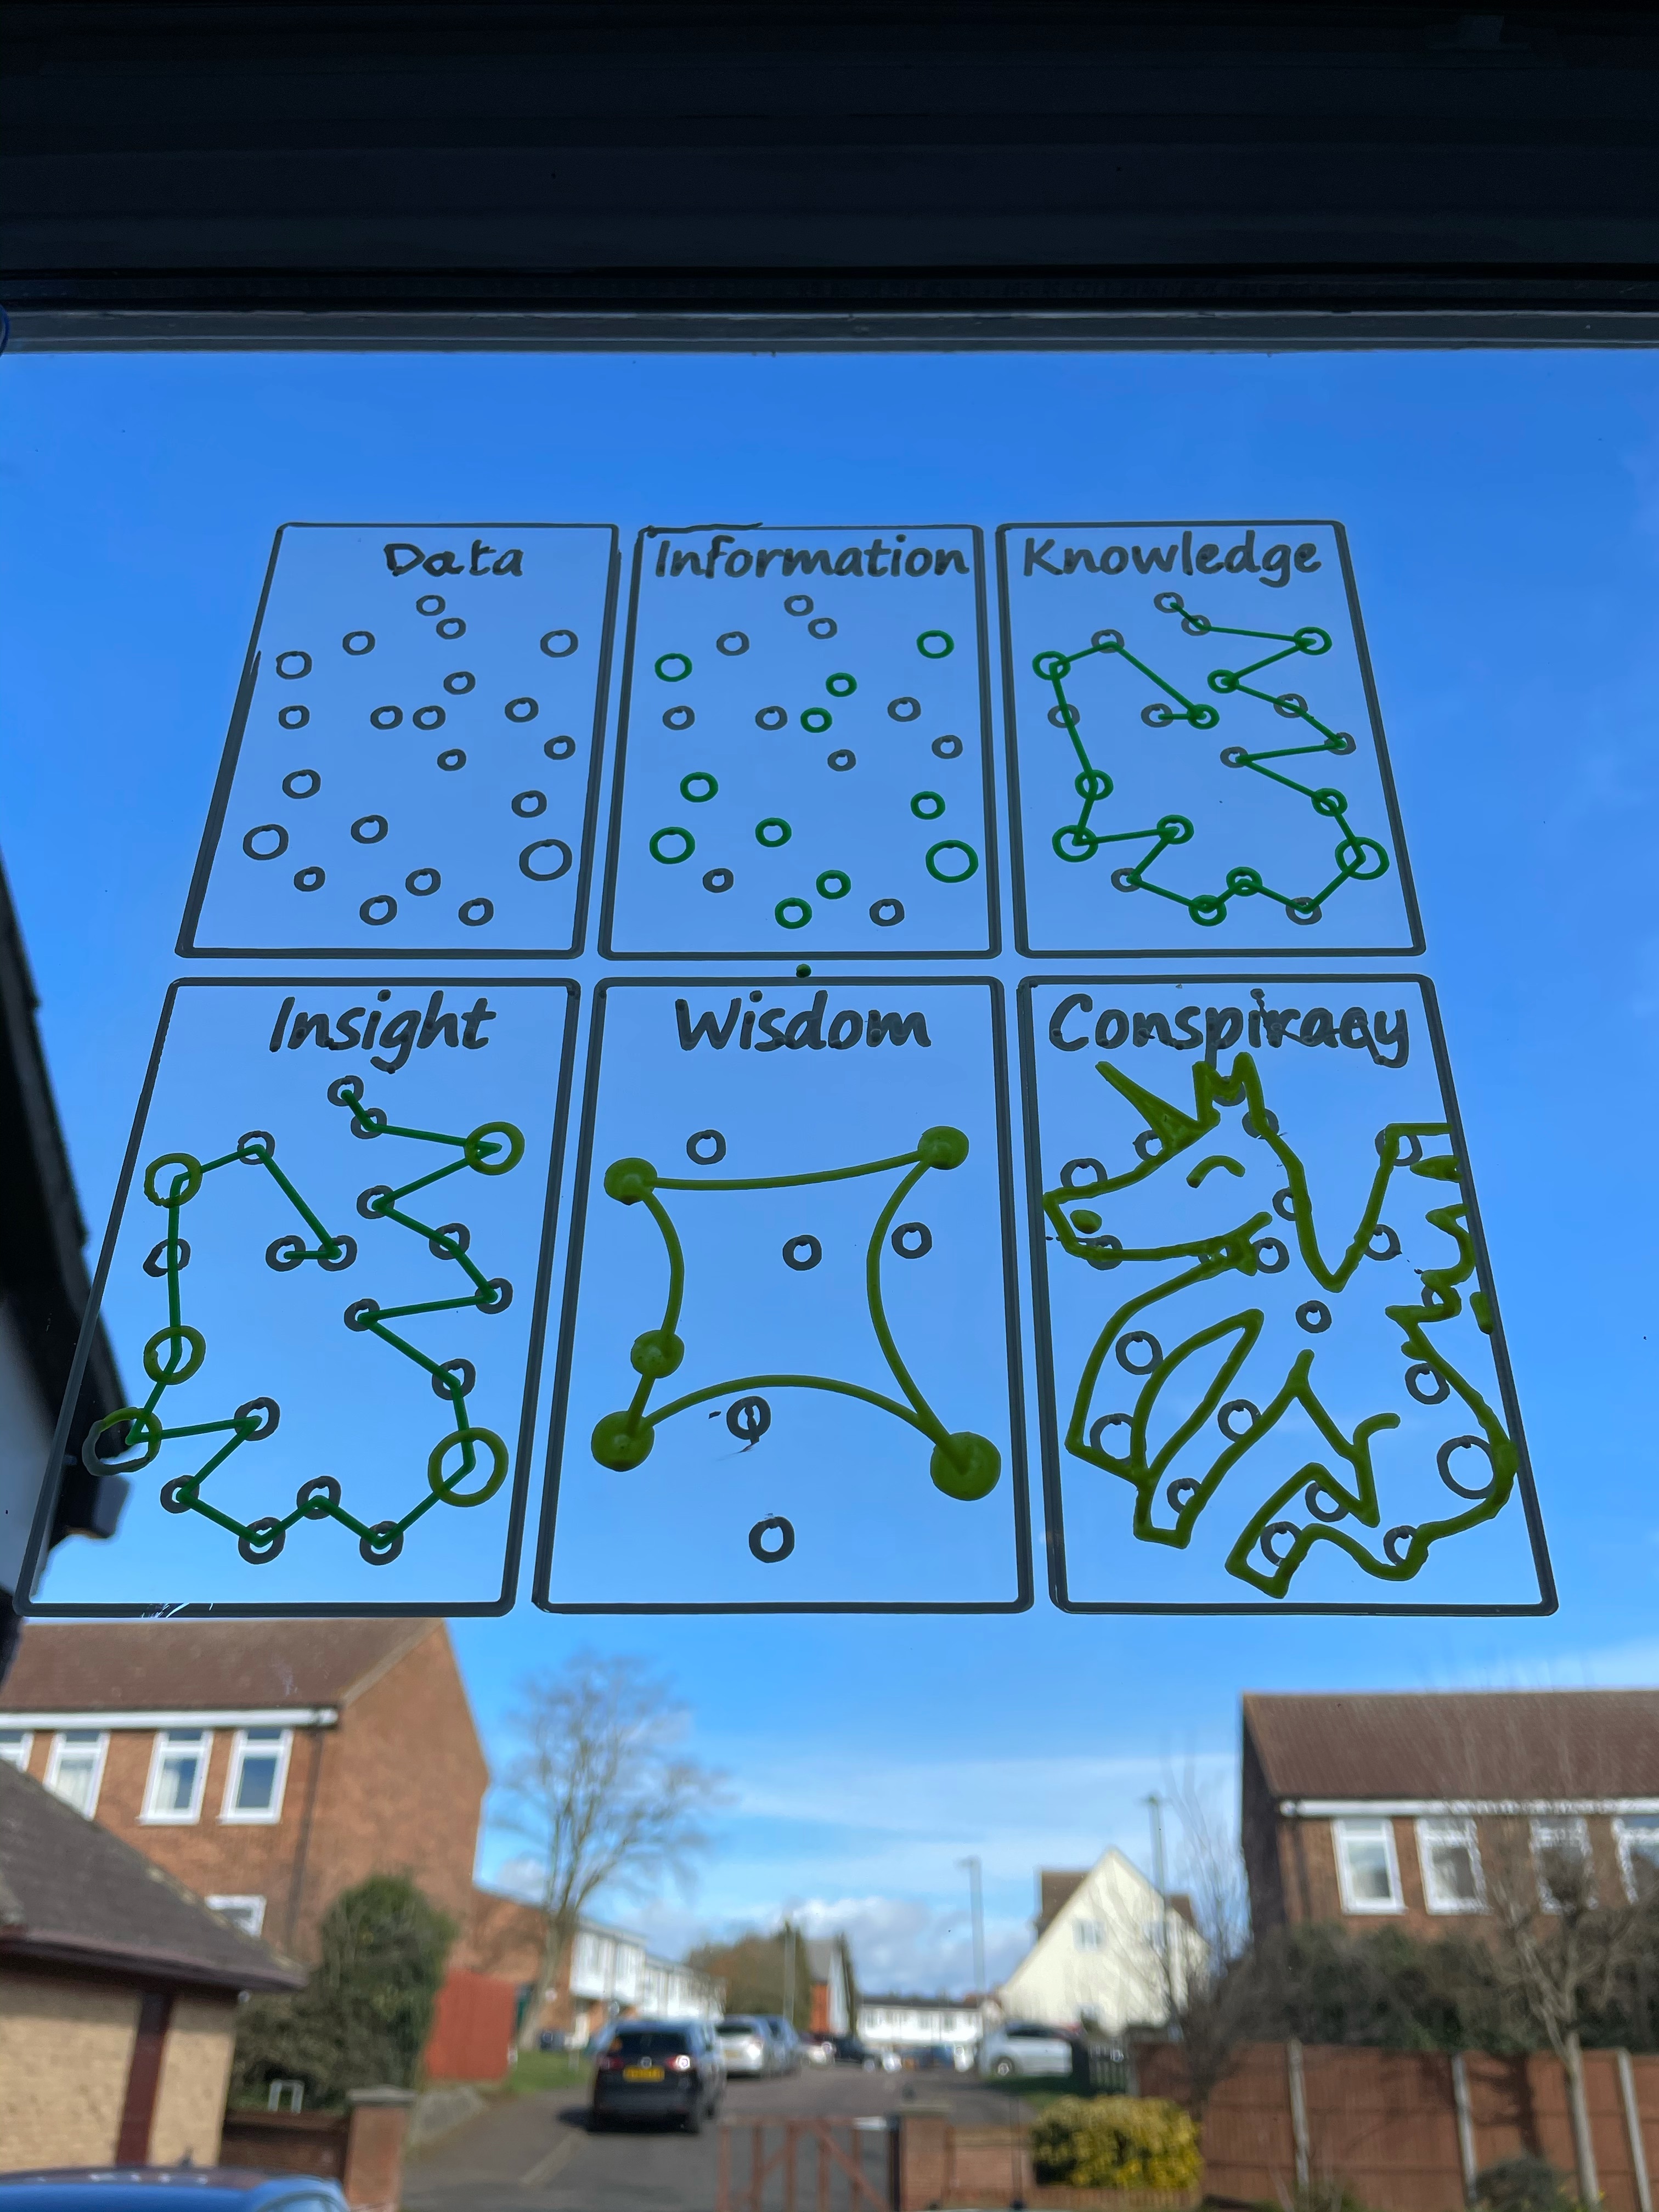
I found a very neat app on iPAD (Vector-Q) that does a very good job of converting any image to pastel artwork, or SVG line-art, as a compliment to CC or VC tracing where the actual business of producing the GCODE files happens. One thing I discovered about Chalkola liquid chalk pens is that the pens don’t like crossing ‘dried up lines’ of chalk - they clog up!! So I also experimented with creating artwork SVG line-art using the ‘travelling sales person’ idea of having a single, closed vector that never crosses itself - this is a huge rabbit-hole to get drawn into, but did serve as an interesting learning vehicle for how image conversion processing works.

Files for the mechanicals are attached. These are Vectric VCarve format. If anyone is interested, I can zip up and post the modified GRBL source code - just ask.
WP Pen Slider Cap 3D Rev-1a.crv.zip (186.4 KB)
WP Pen Slider Body 3D Rev-1a.crv.zip (371.4 KB)
WP Pen RC Platform Rev-1a.crv.zip (185.6 KB)
Window Plotter Corners Flip-Jig.crv.zip (155.7 KB)
Corner Bracket Scallop 3D Rev-1e.crv.zip (31.7 KB)
Corner Bracket 3D Rev-1e.crv.zip (3.2 MB)
Maybe this ‘Glass Drawing Machine’ is stretching @Julien’s rules a bit, but I thought you might anyway enjoy the project and its outcomes.
19 Likes
WOW! I am so impressed by the minds of folks on this site. Great job.
2 Likes
Me too!
Honestly the contests are a must see for all the creativity. Both admin created themes and user created content!
1 Like
Good evening to all.
I never drew with my Shapeoko XXL before, although I often thought about it. And I had put an idea aside, which I took out again for the challenge #20.
I had this plan that I liked:
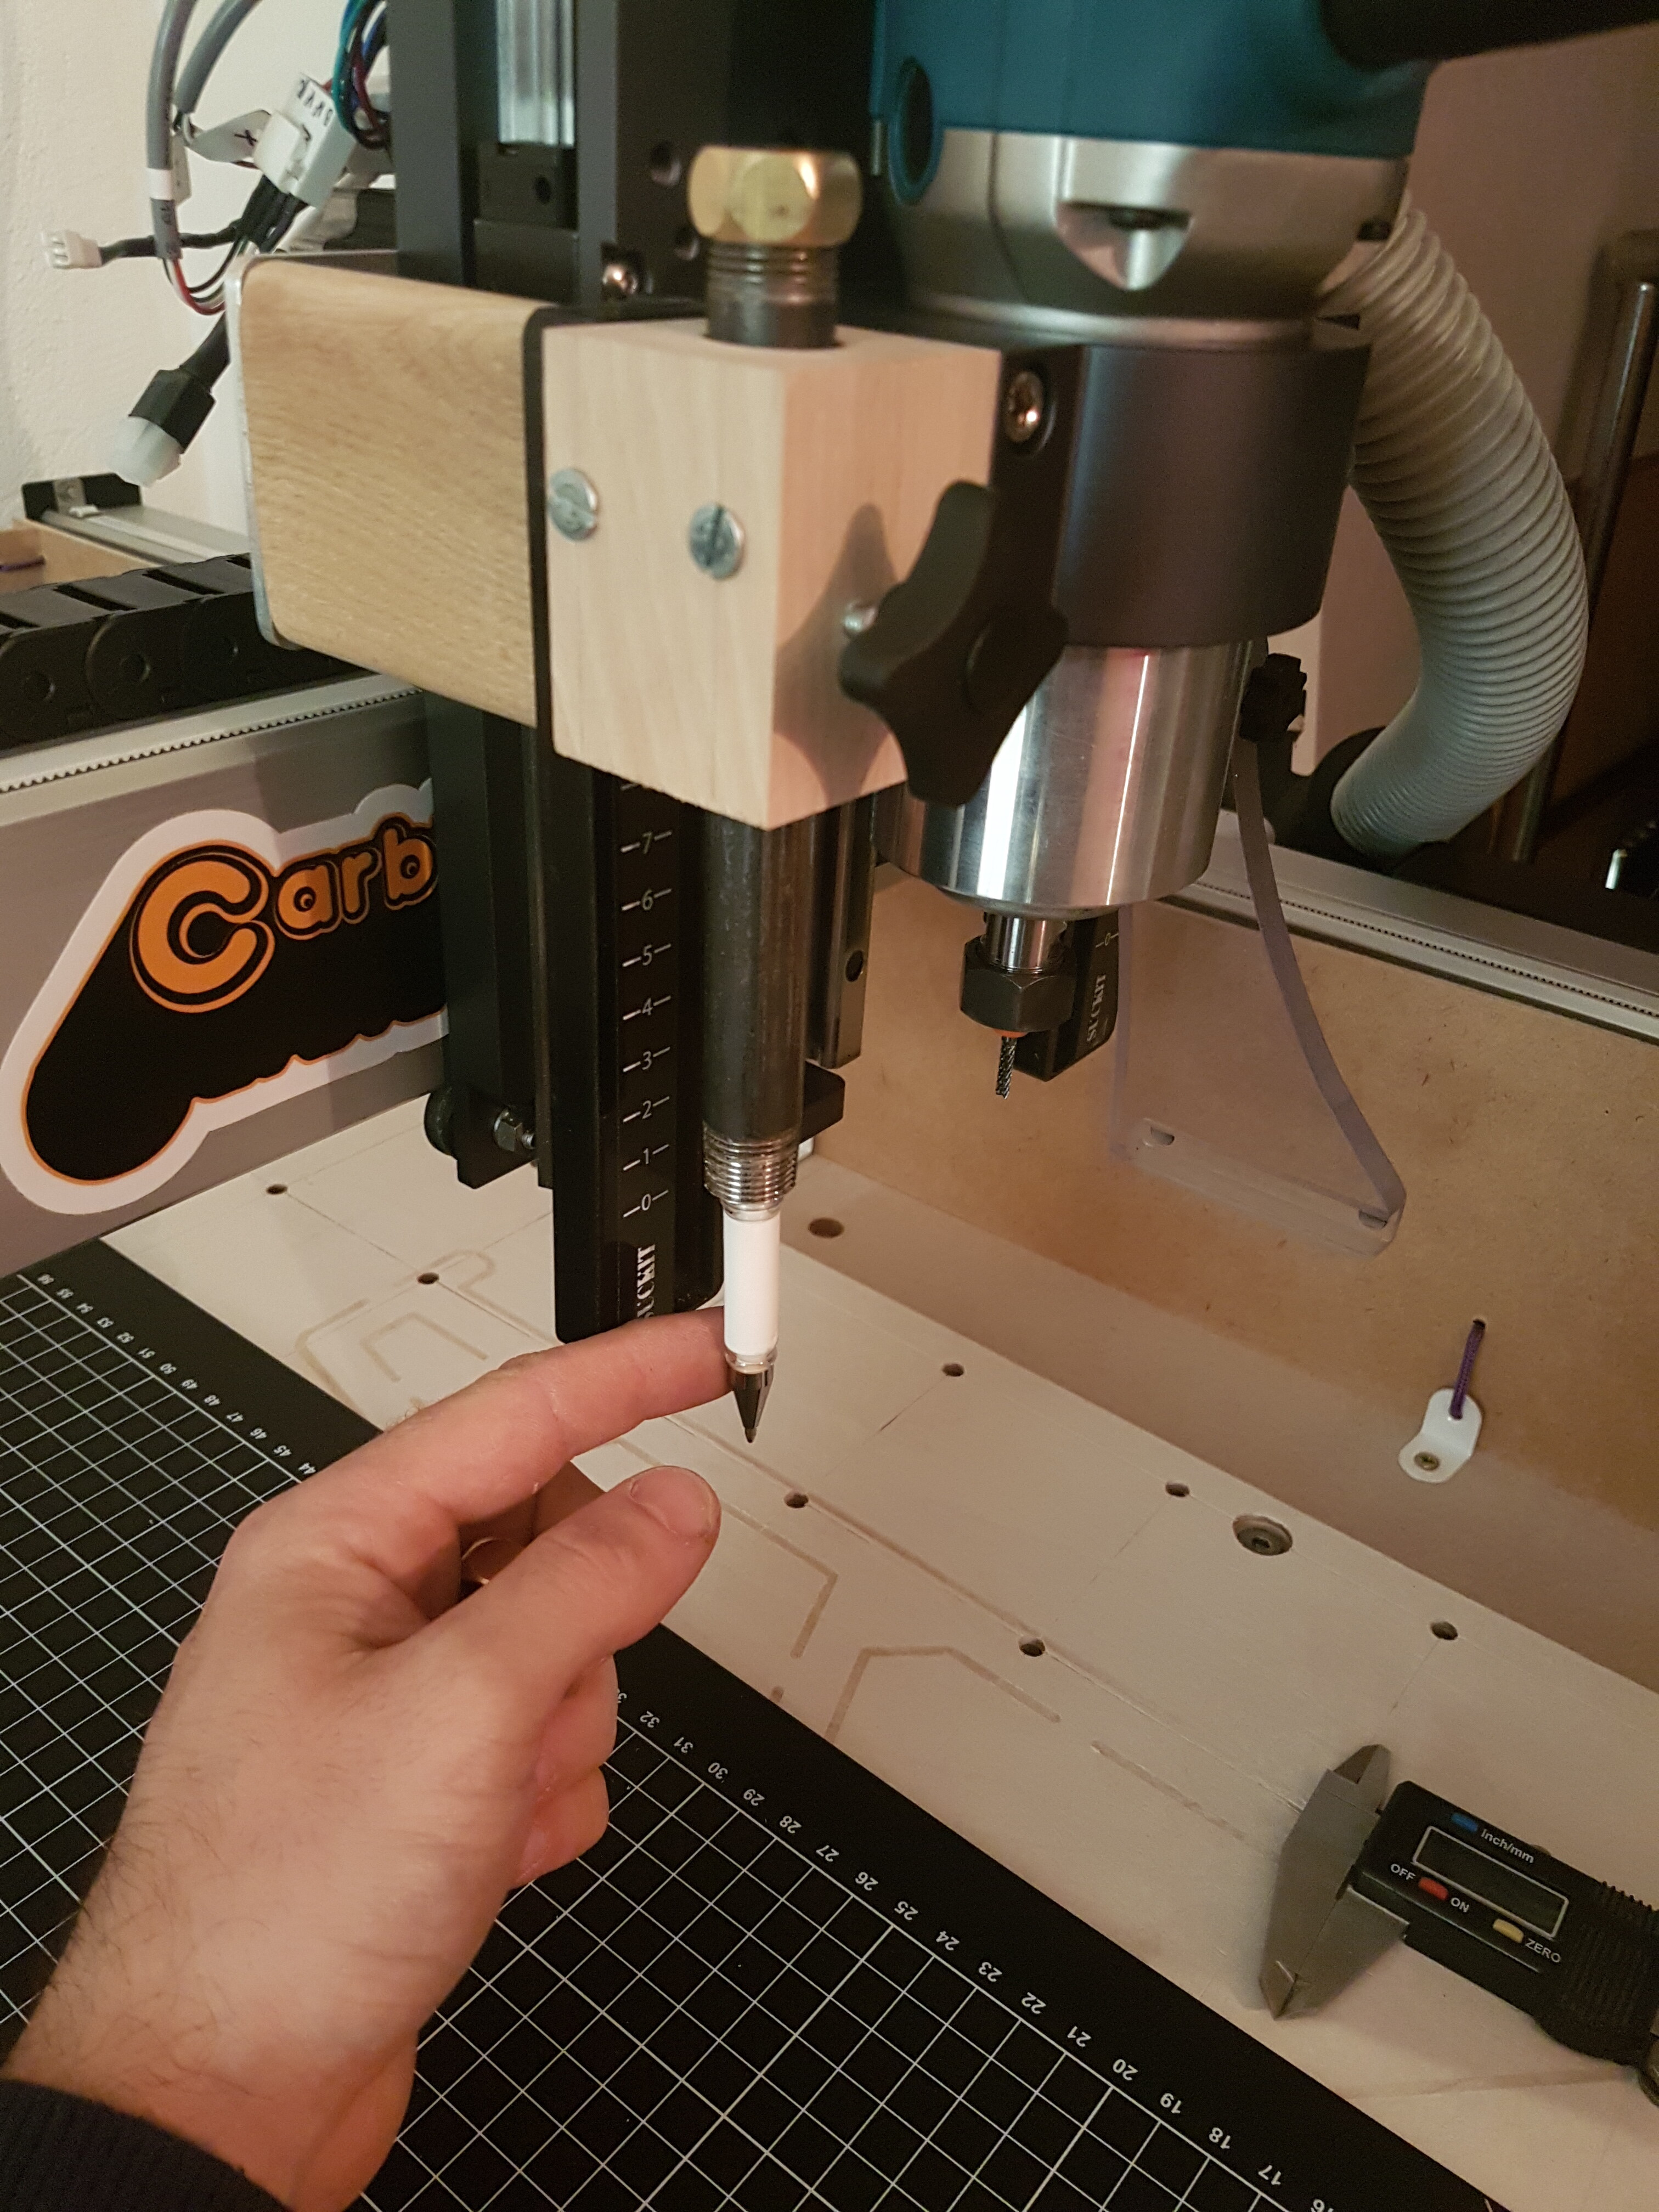
So I redrew it in polylines, and I found a solution to attach pens or markers on my cn.
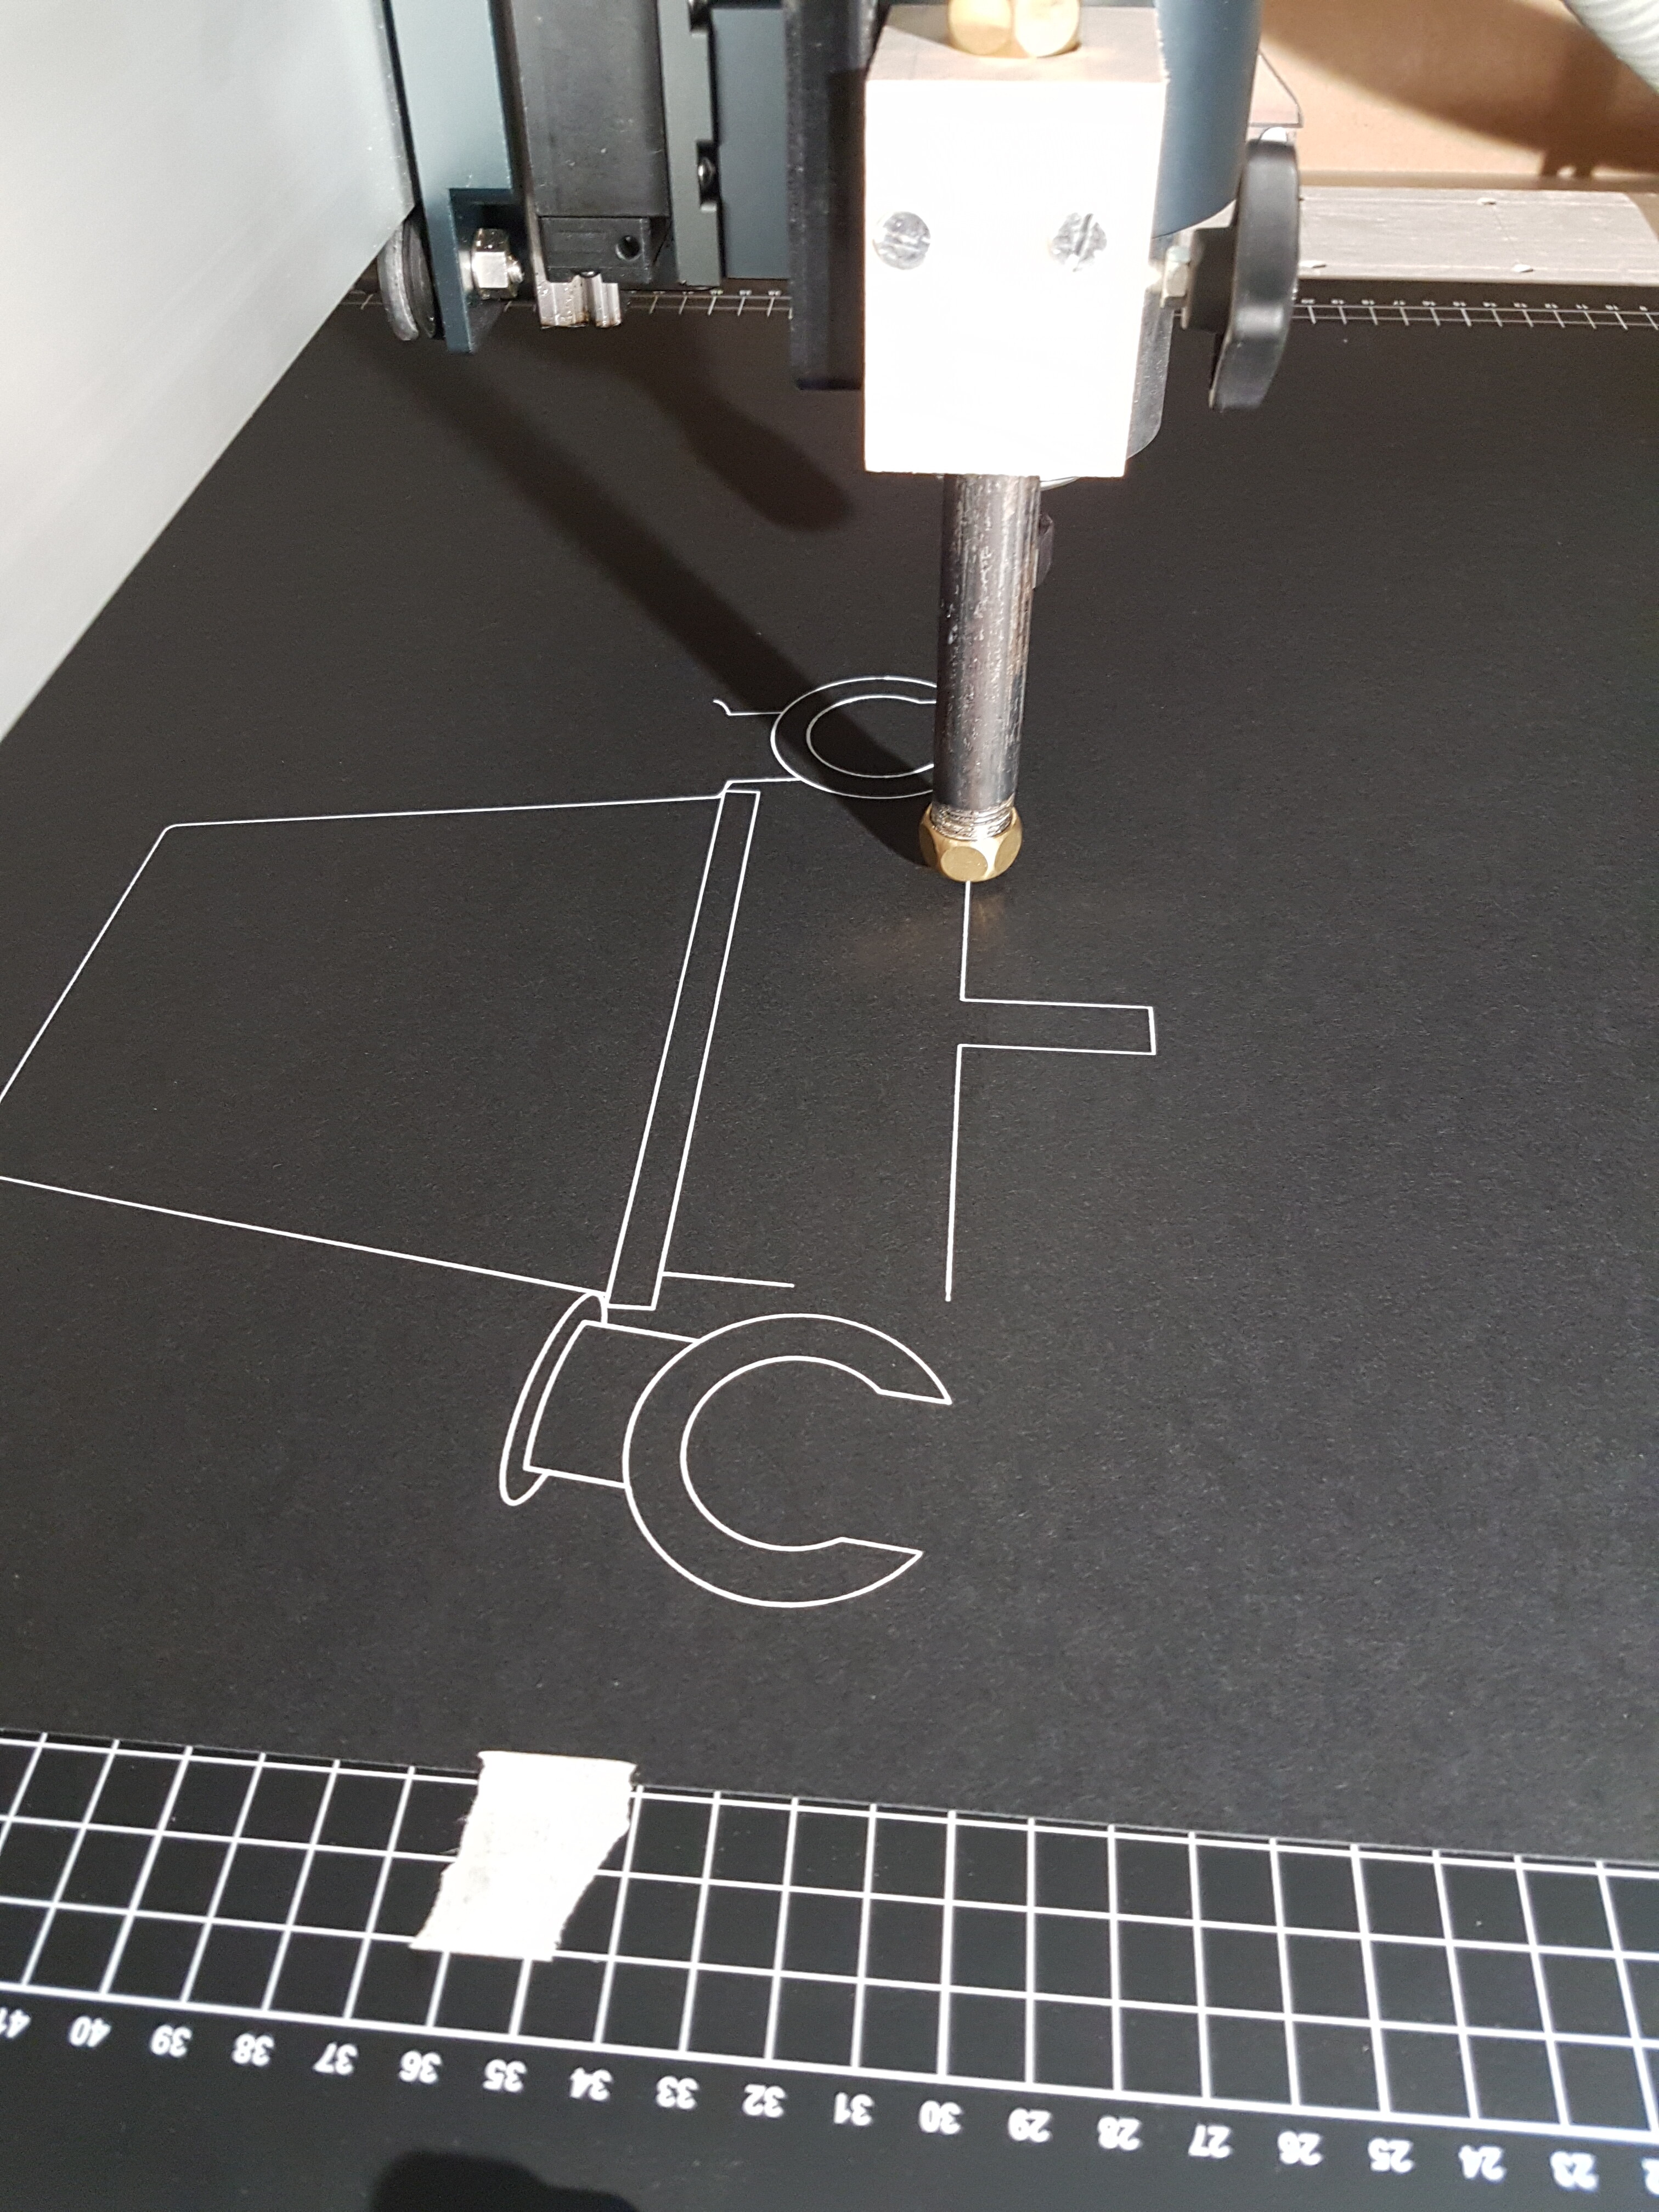
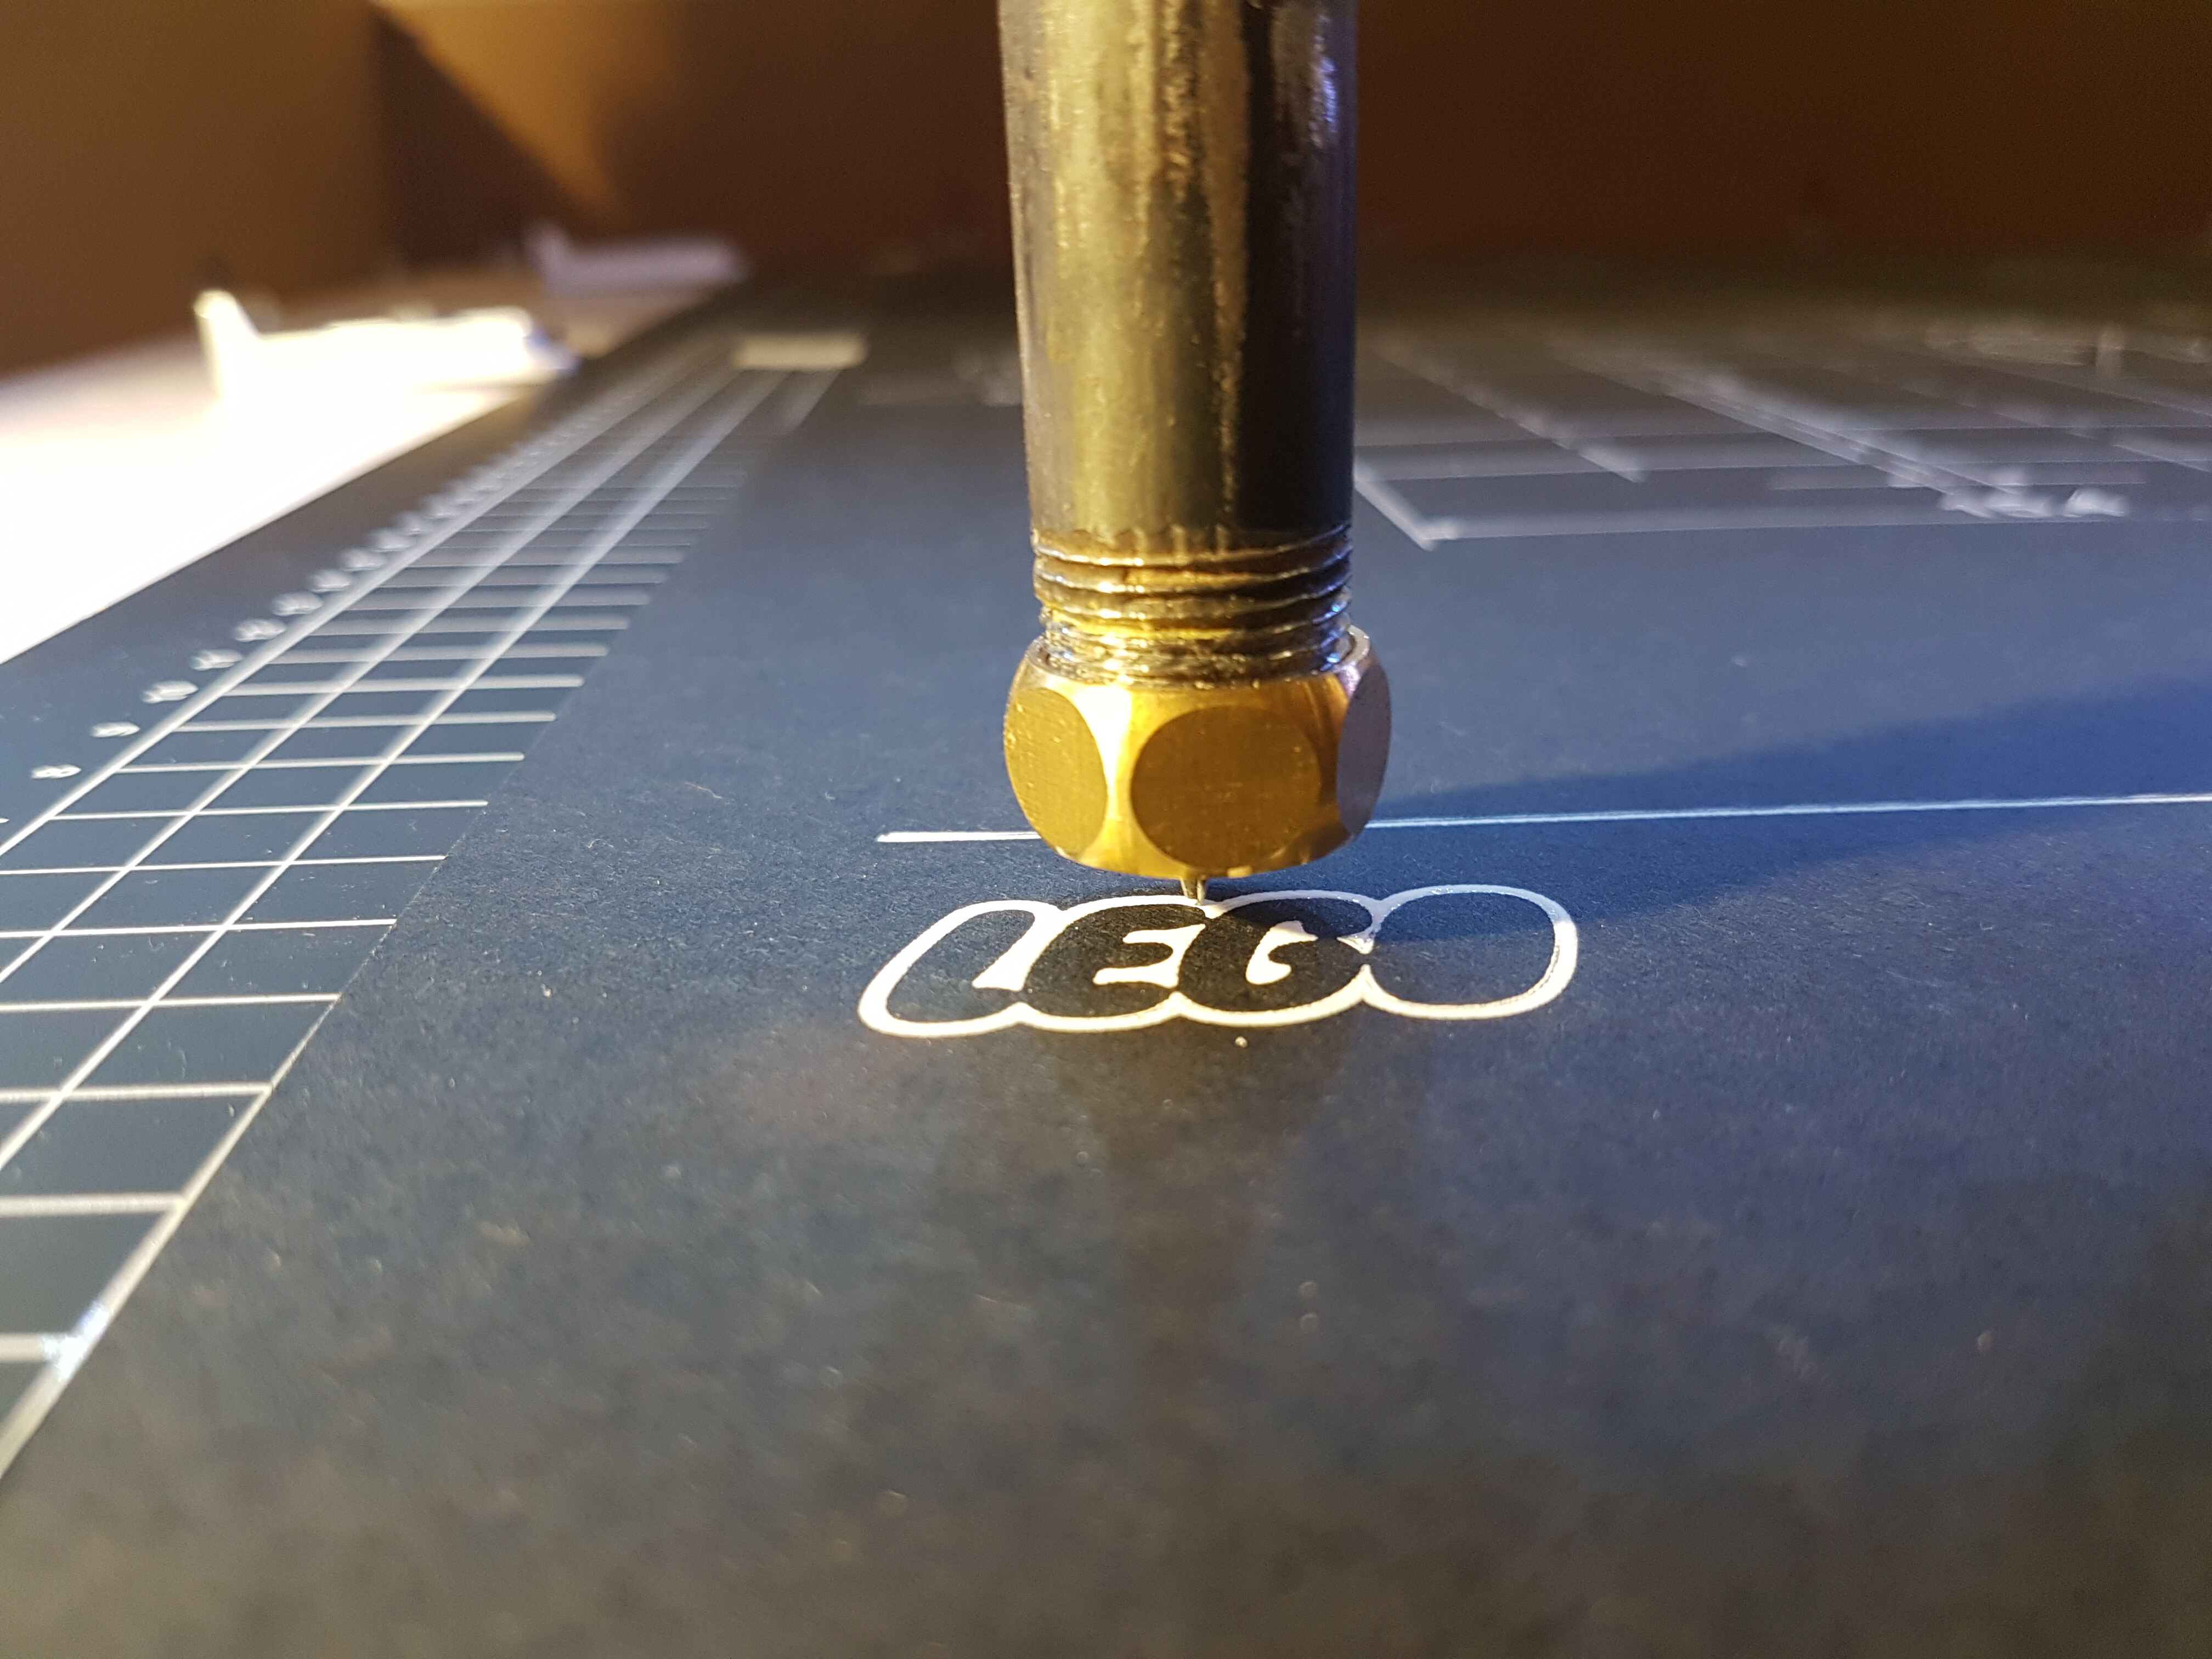
I decided to draw on a 700x500mm black sheet, with a white pen.
I set a feed speed of 700mm/min for the outlines and 500mm/min for the pockets and writing.
I’m happy with the result, the lines are super clean and regular.

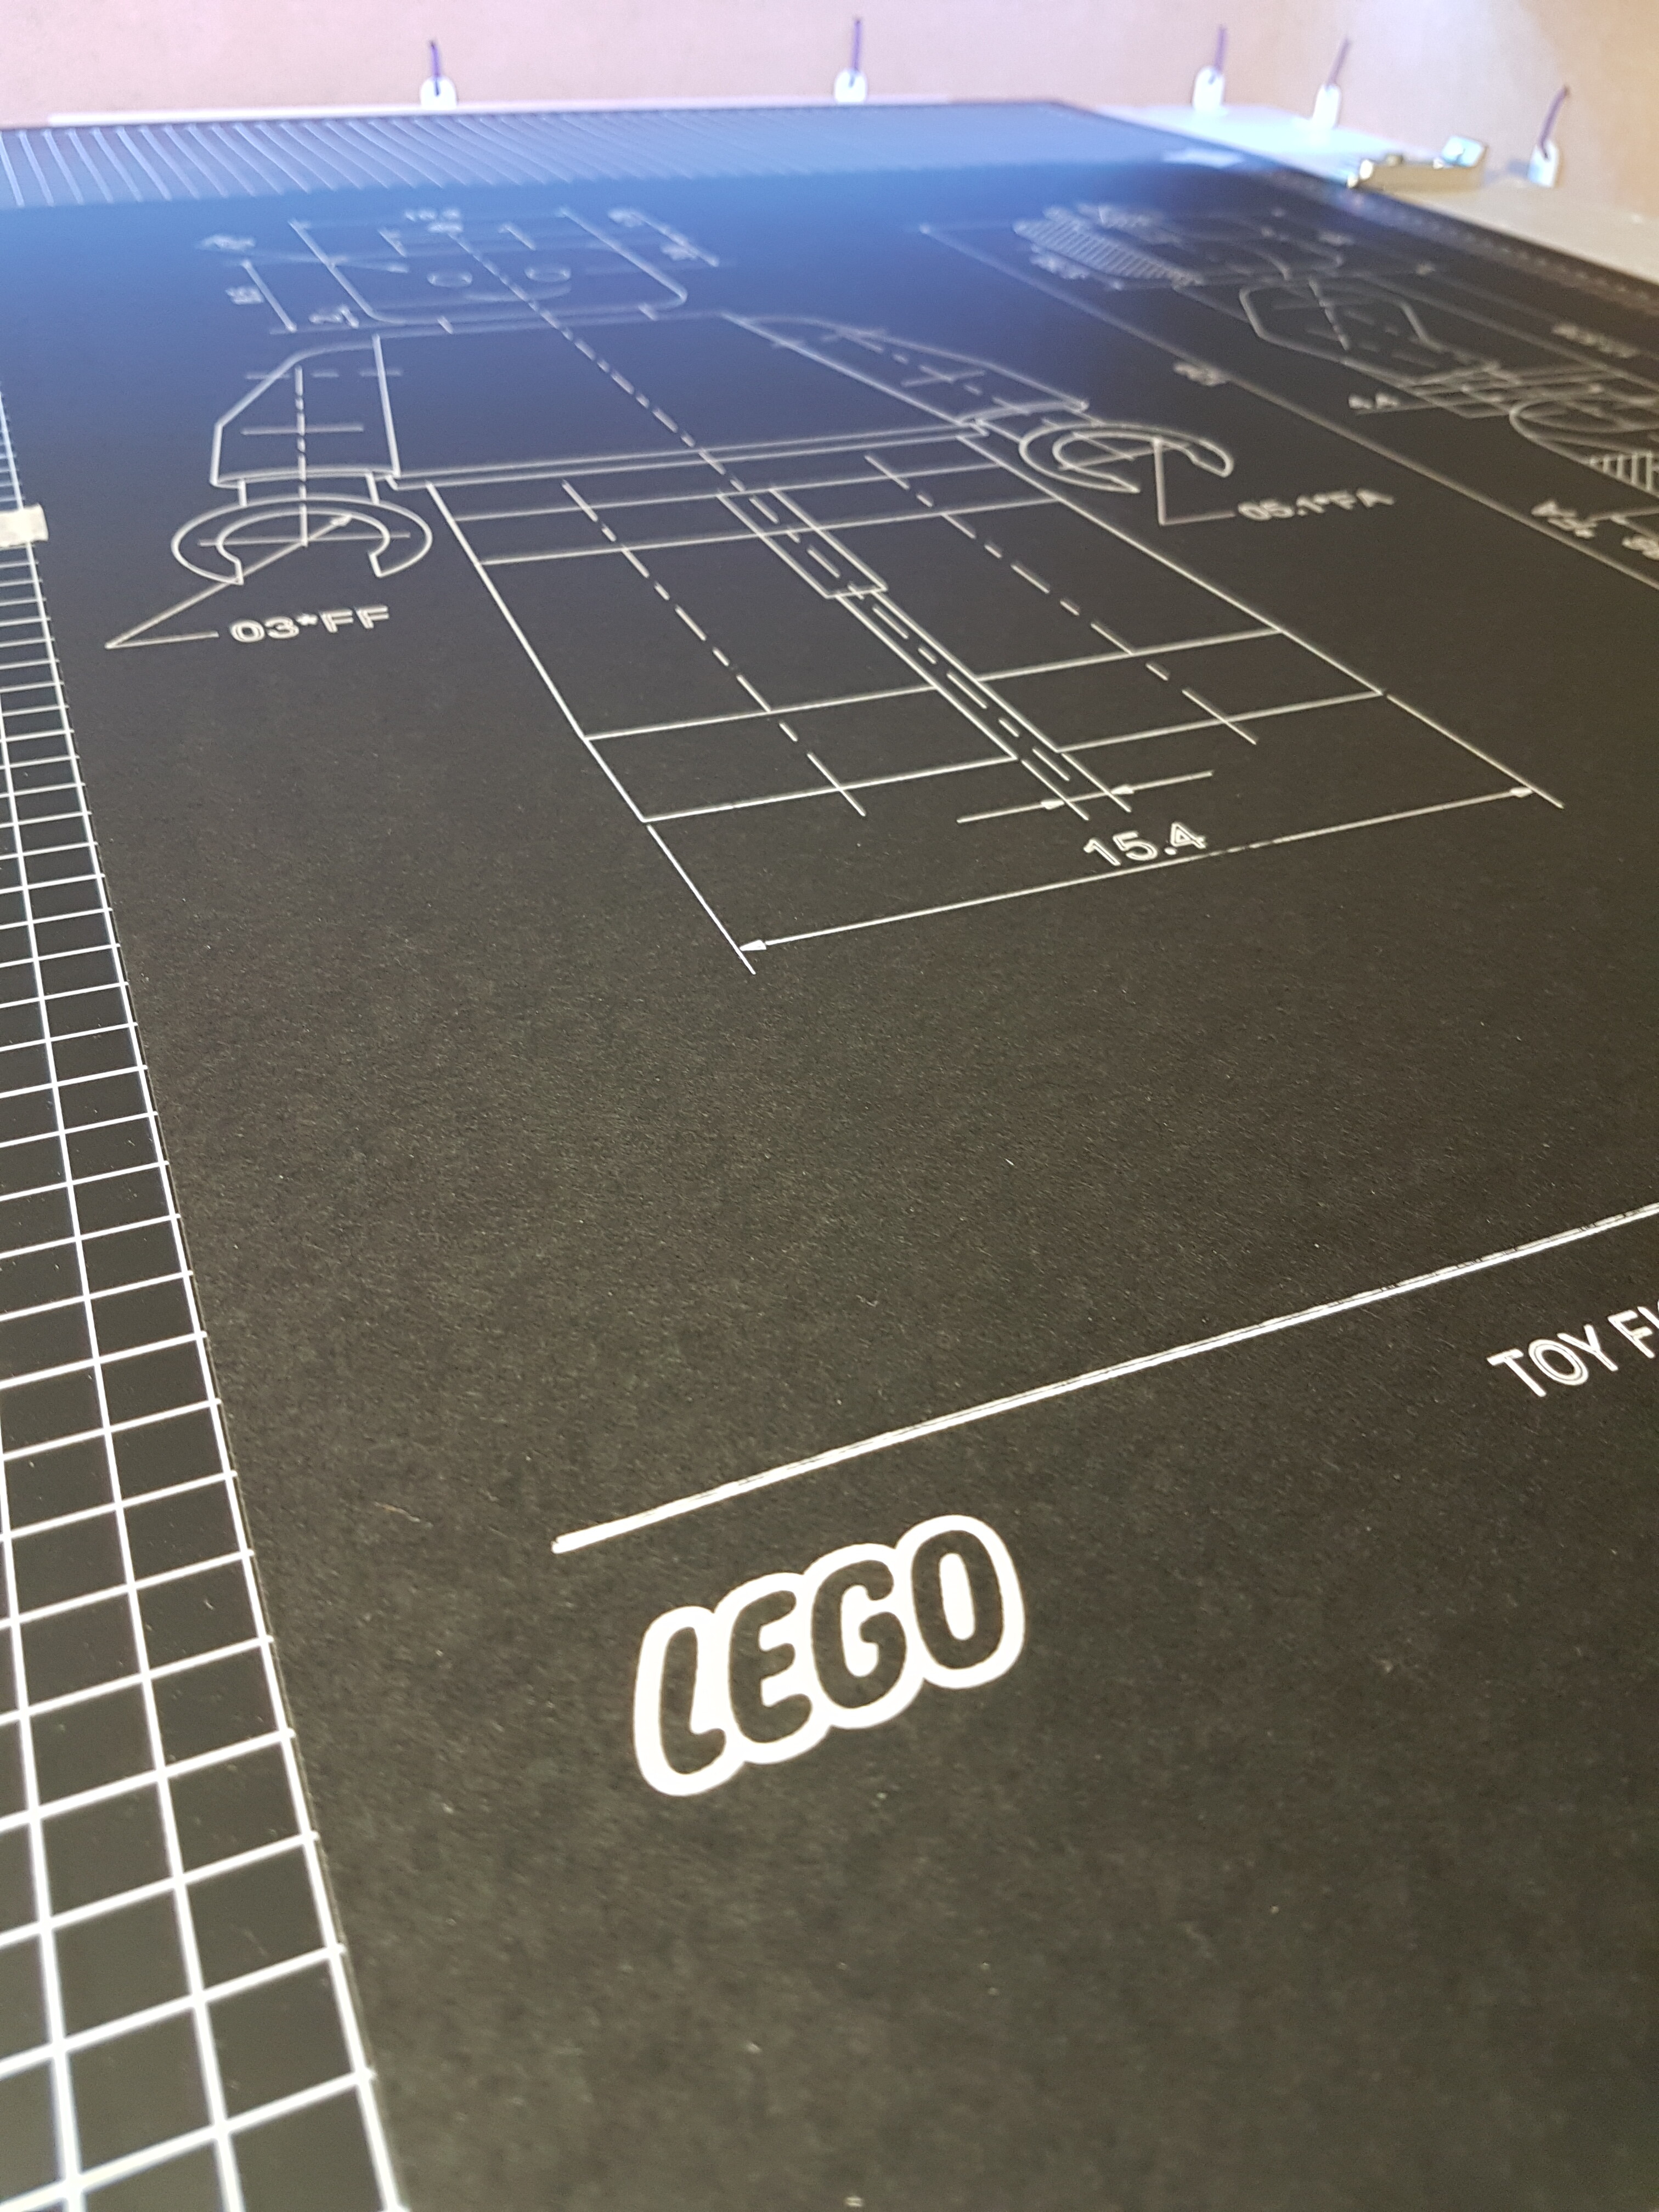

I just need to make a nice frame for it, and it will be great for decoration. 
dessin lego 700x500 ligne epaisse 1.nc (60.5 KB)
dessin lego 700x500 ligne fine 2.nc (518.4 KB)
dessin lego 700x500 poche fine 3.nc (1.3 MB)
good luck to all
vivien
28 Likes
Would you mind sharing this file?
Looks great!
2 Likes
What provides downward pressure on your marker ?
Thanks, Bill
1 Like
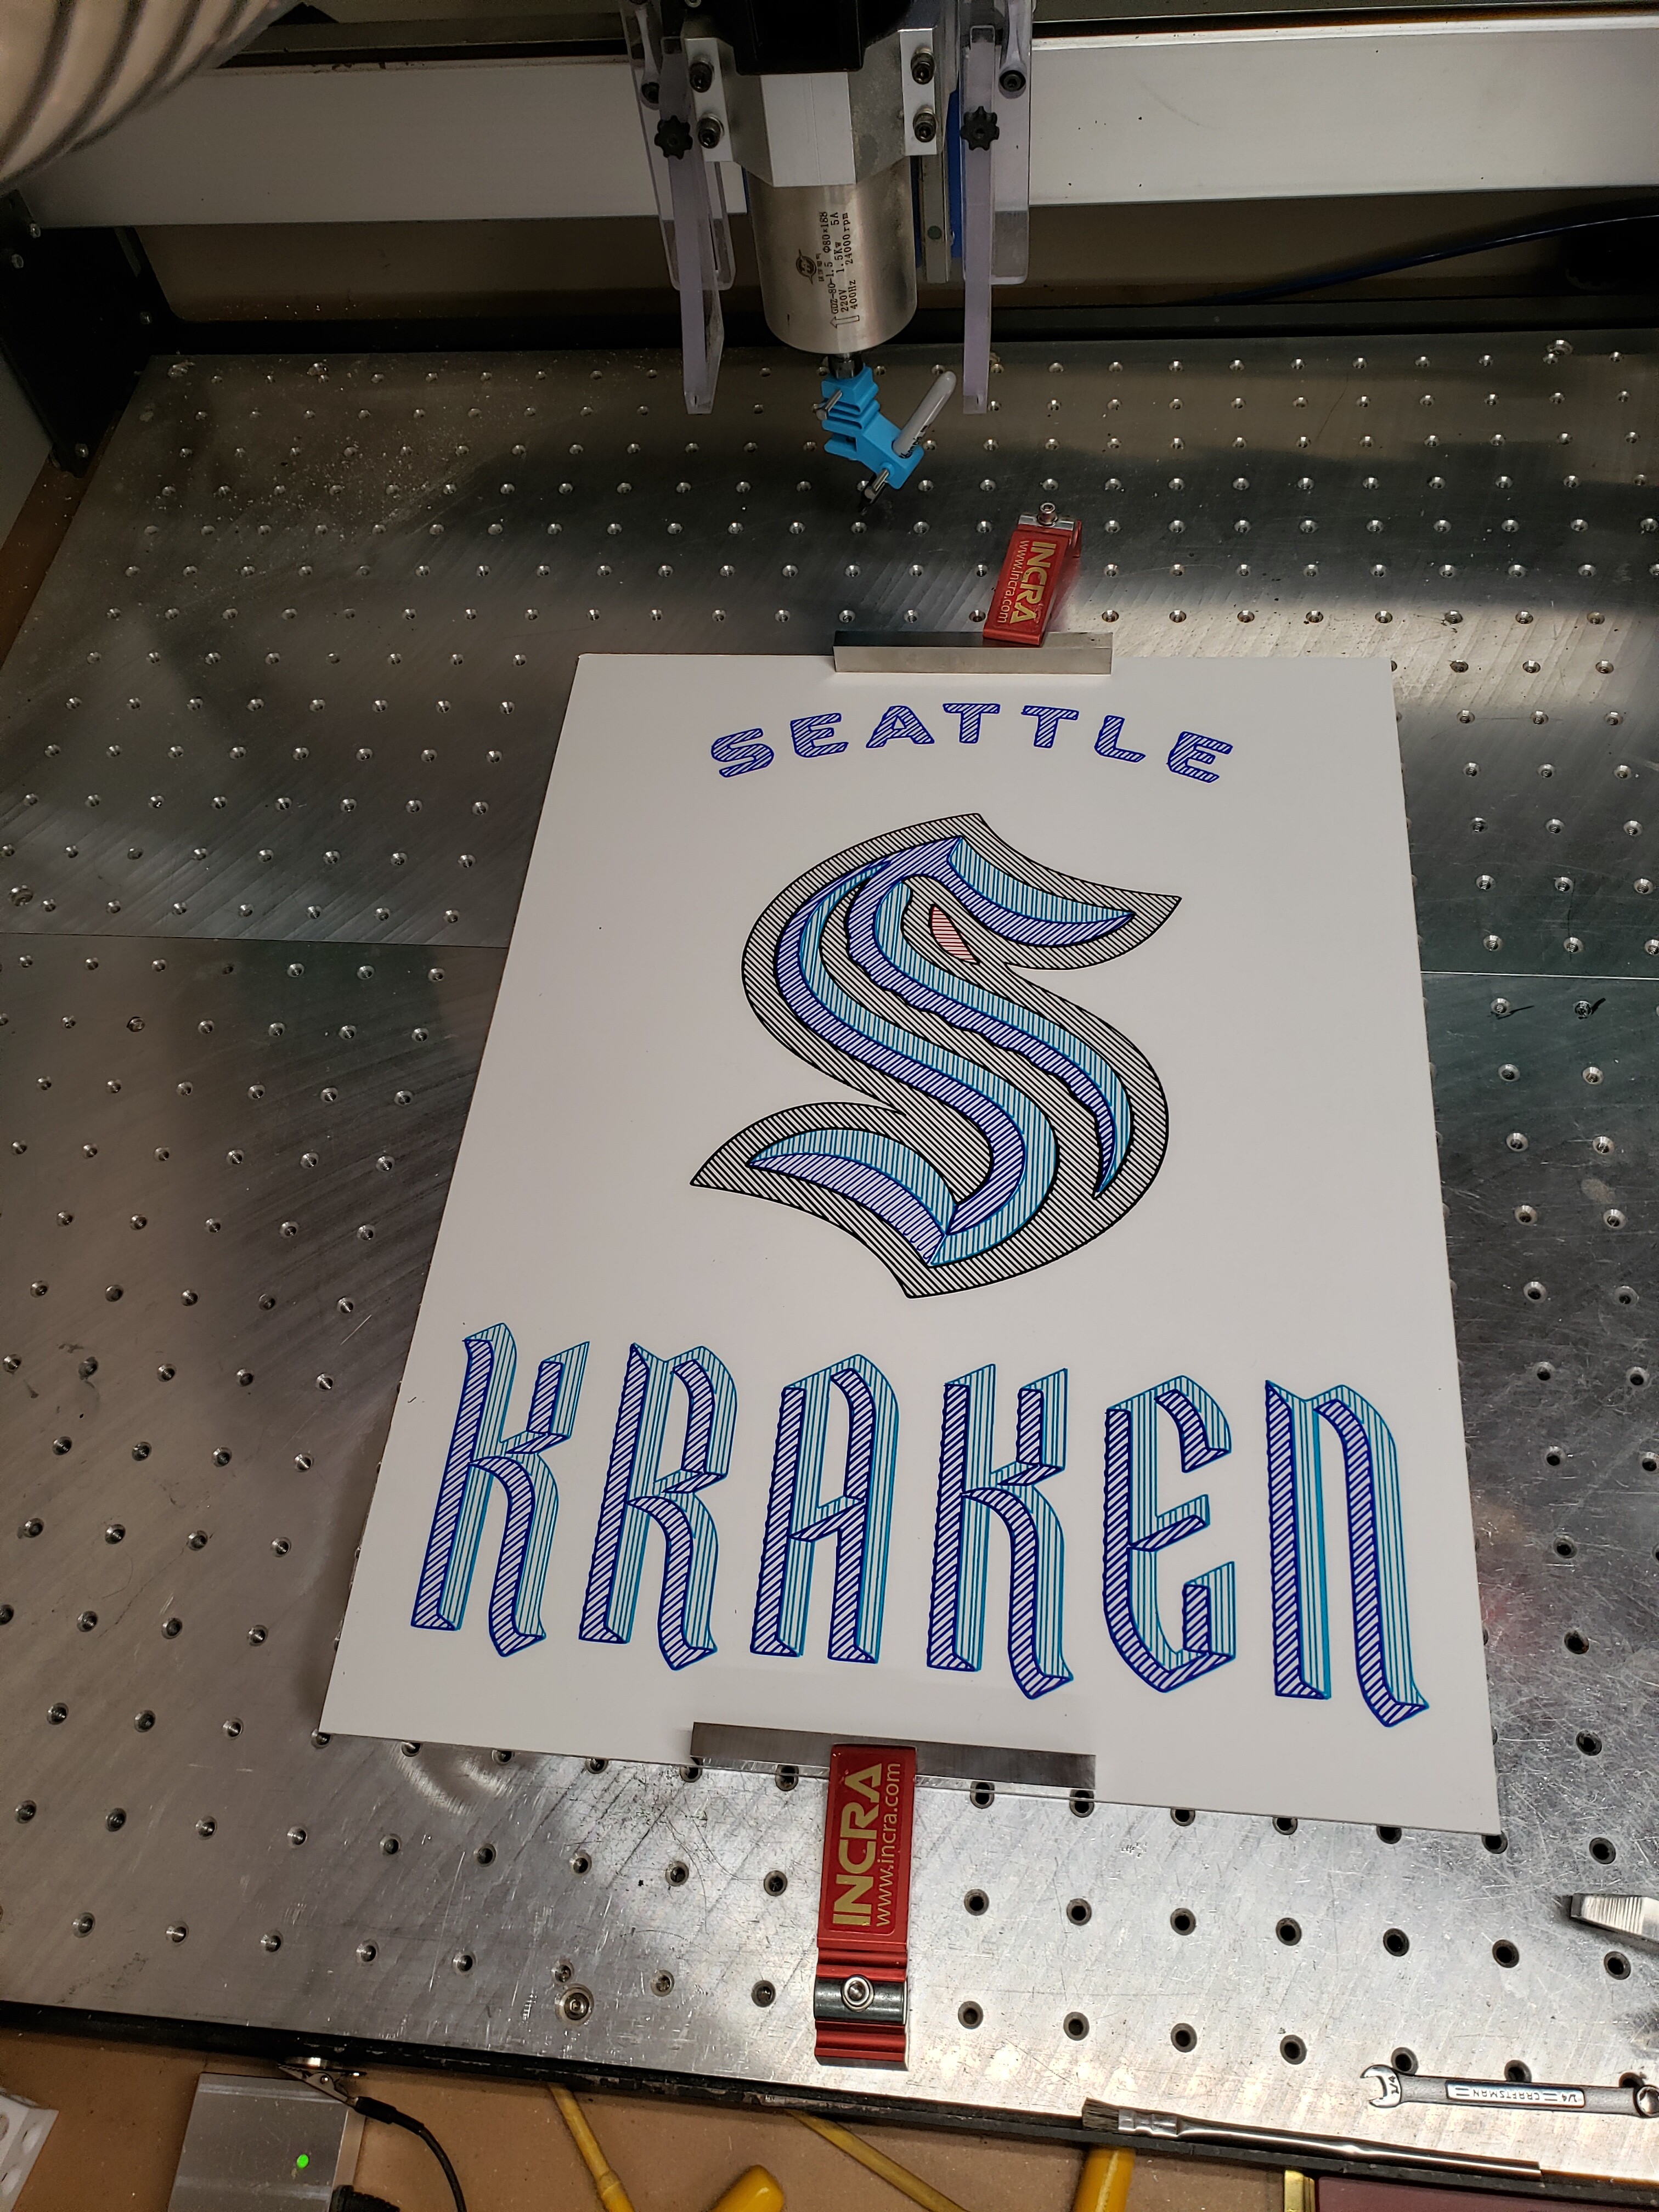
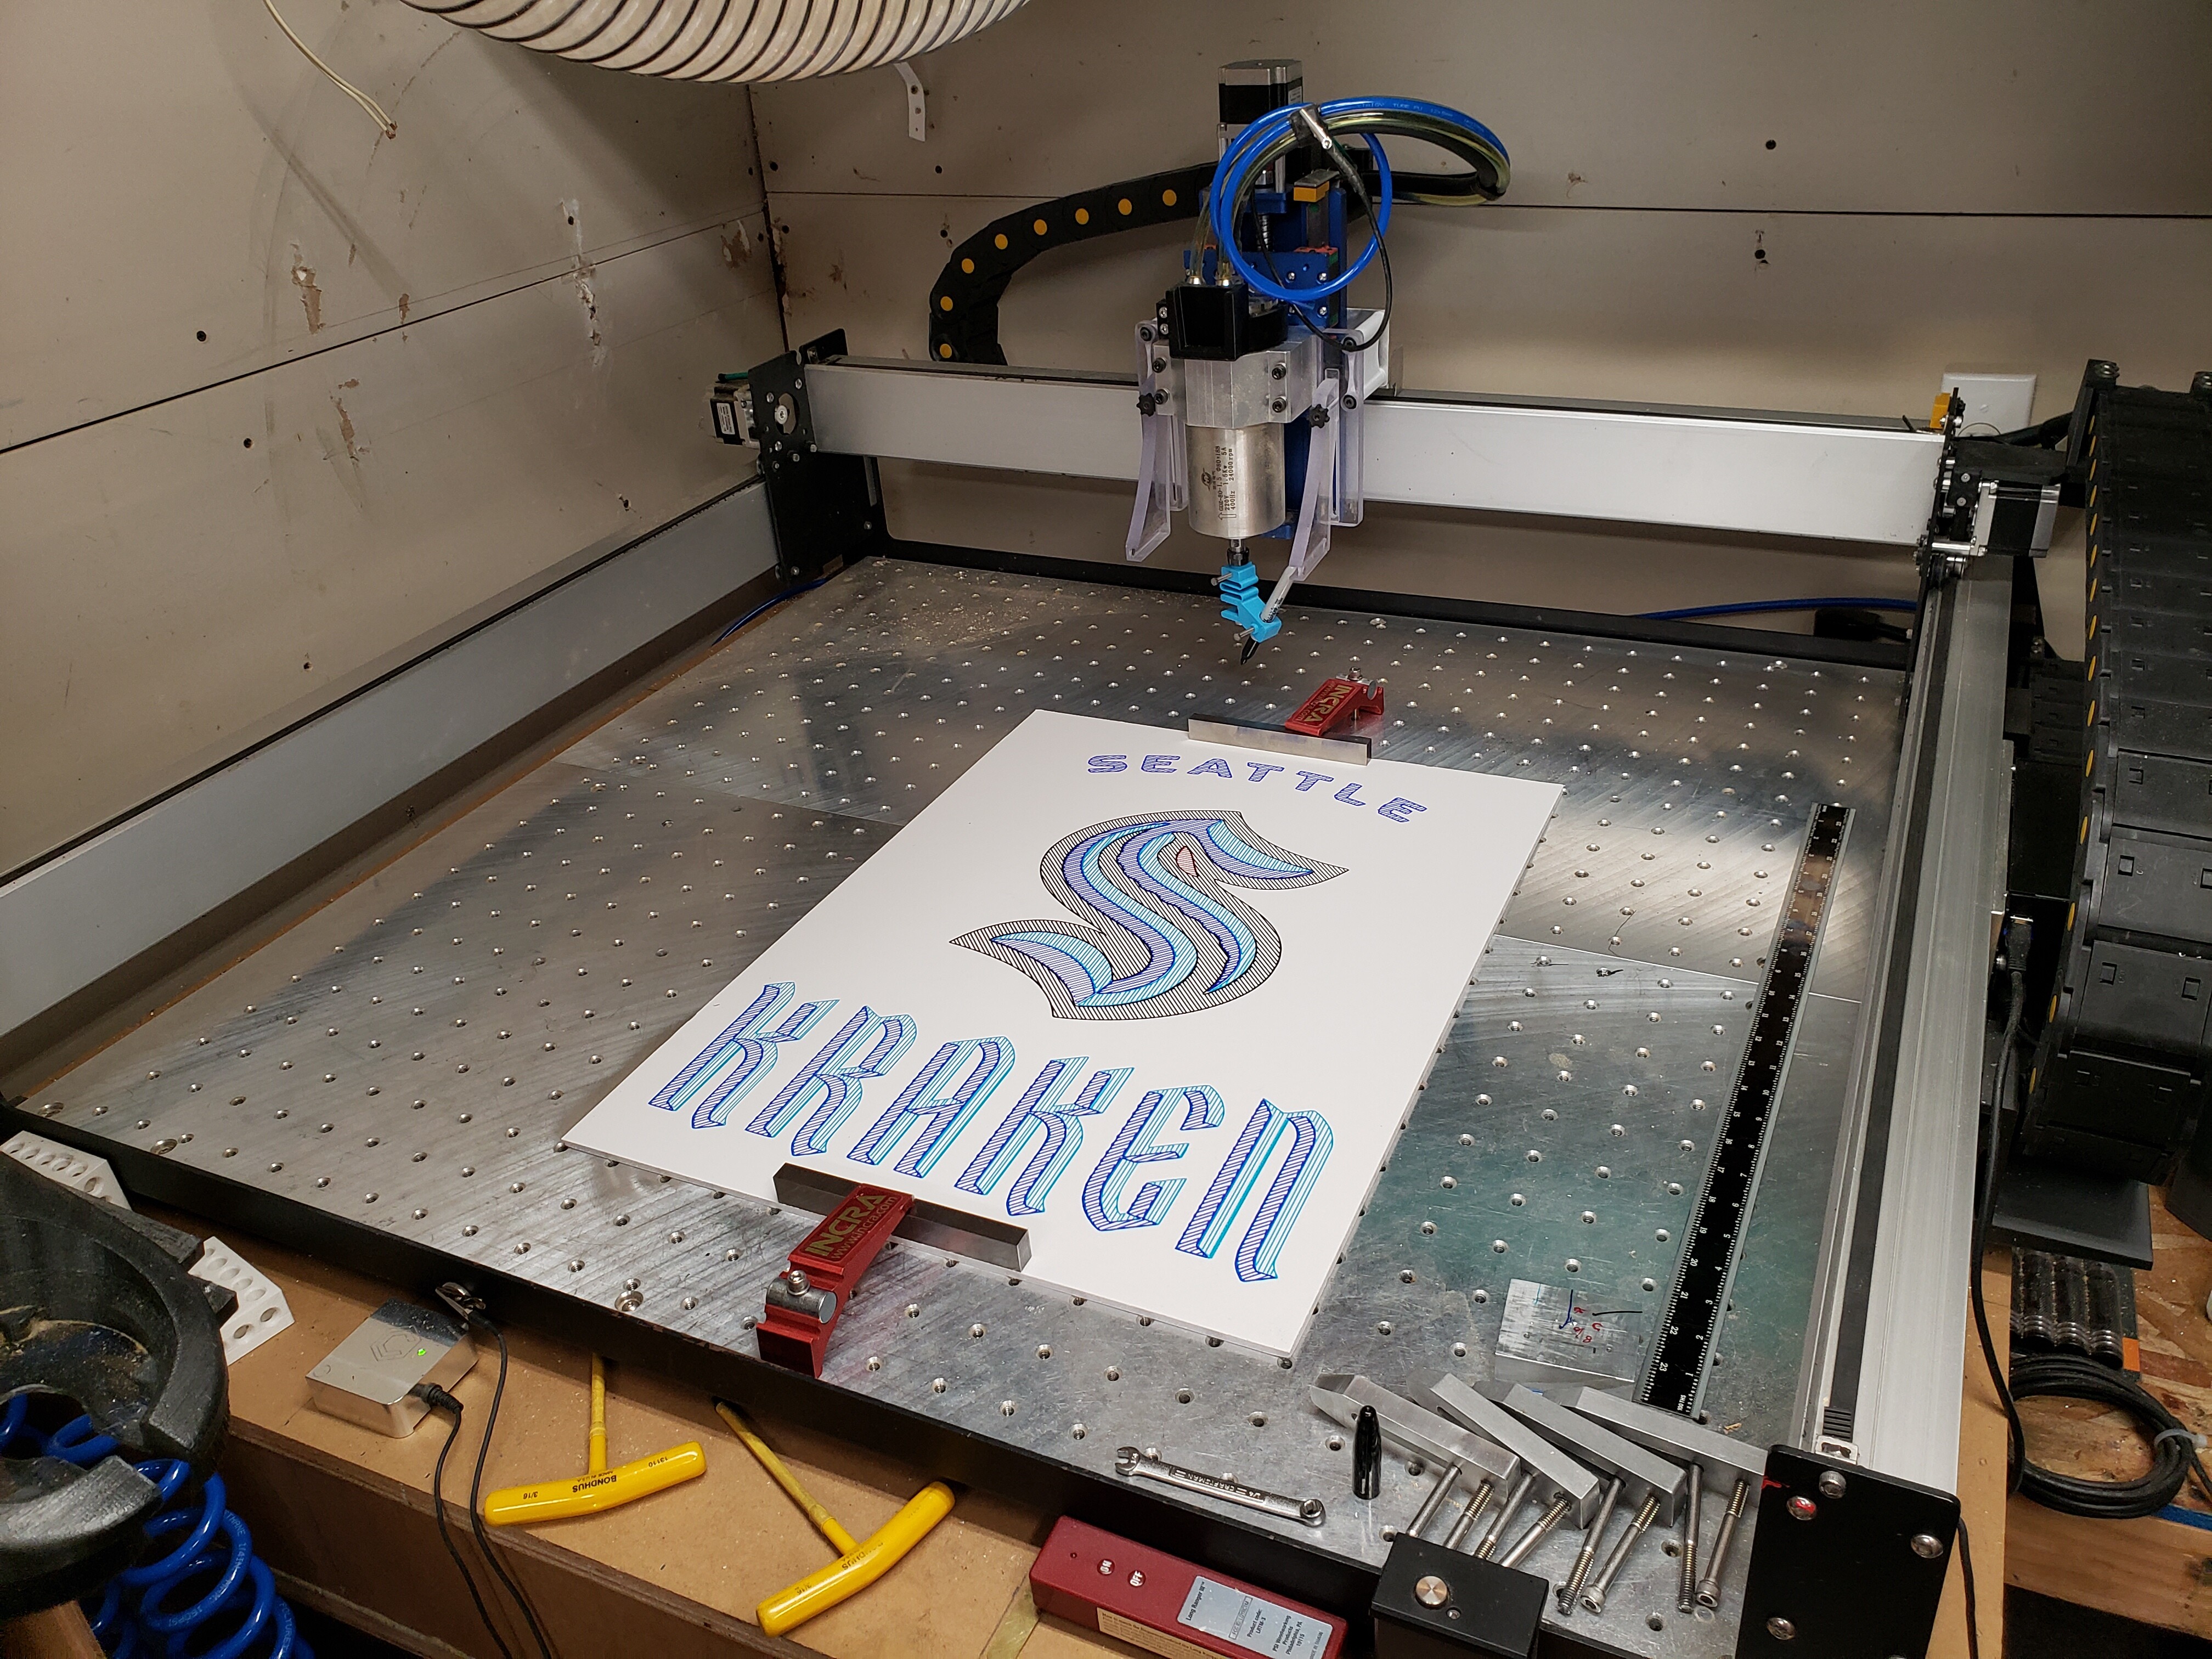
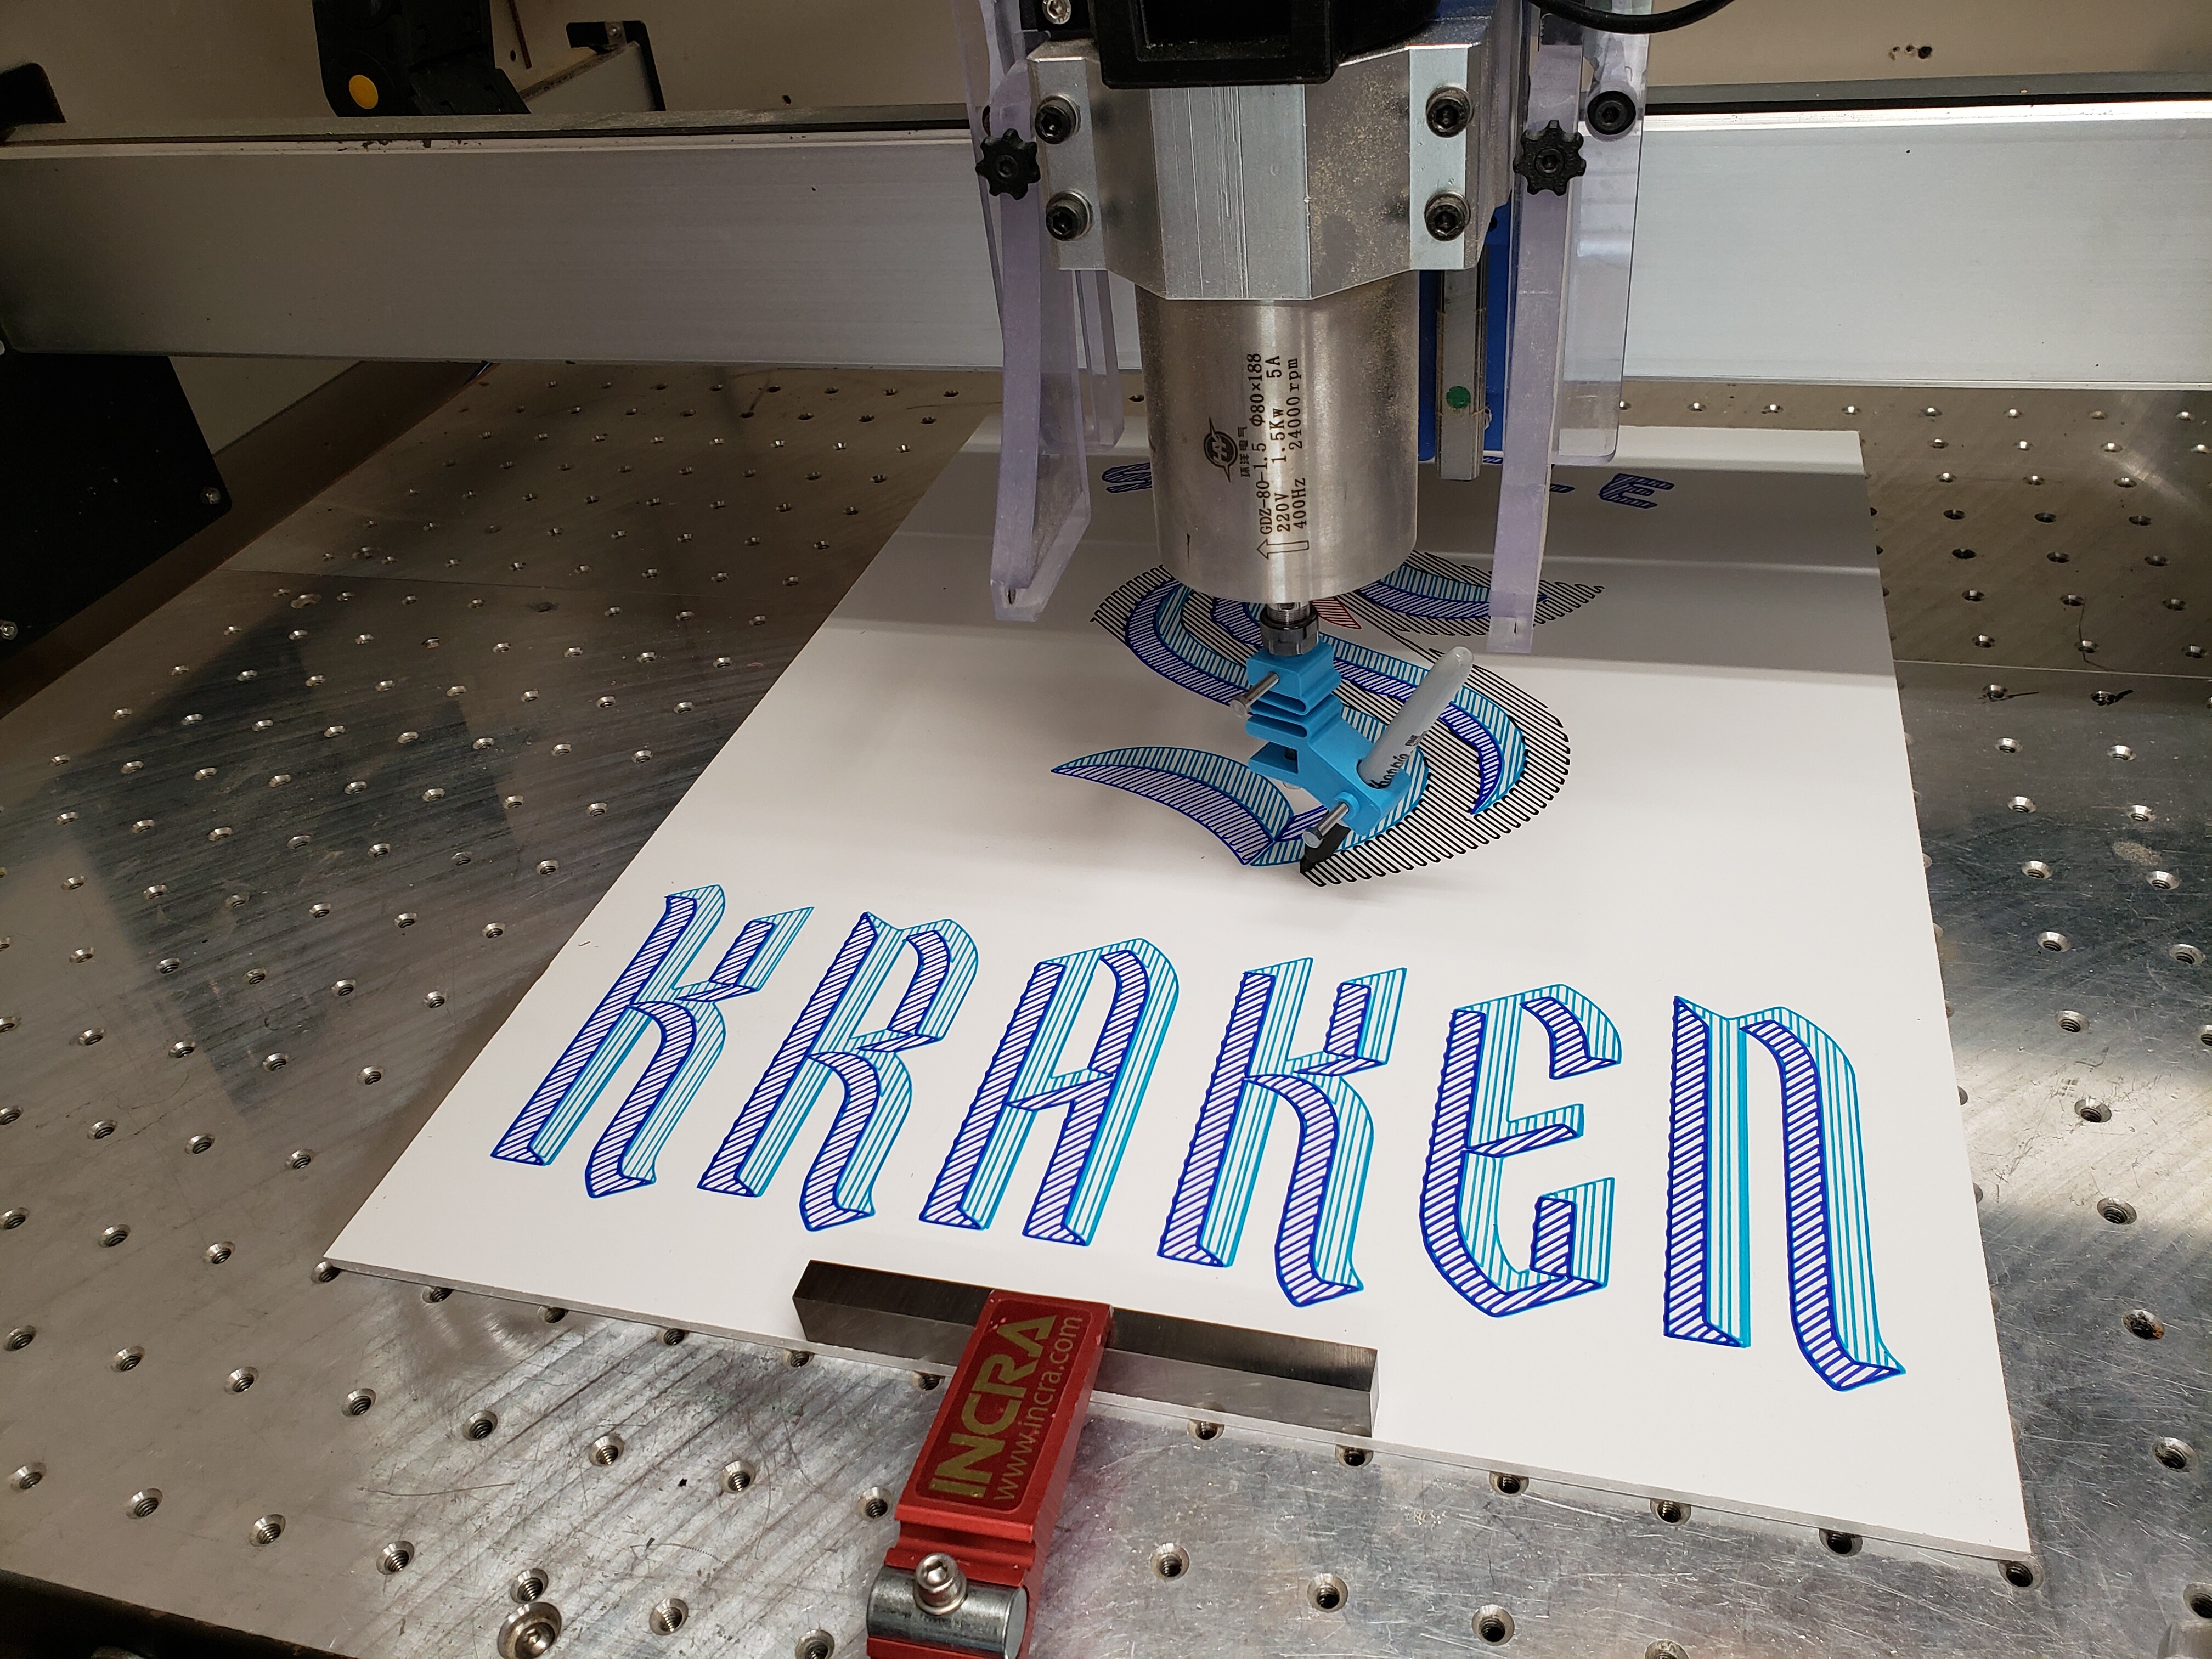
I decided to give it a shot and play with some Sharpies as well. Since Seattle now has a hockey team - officially - I thought I’d have my XXL draw up the logo.
I mean, that, and I just couldn’t think of anything else to draw… 
I took some video as well, and will throw it up on YouTube and post it here tomorrow.
I used a Sharpie holder from Thingiverse, and Vectric V-Carve quick engraving function. 0.050" deep Z-axis travel and 0.10" line spacing.
12 Likes
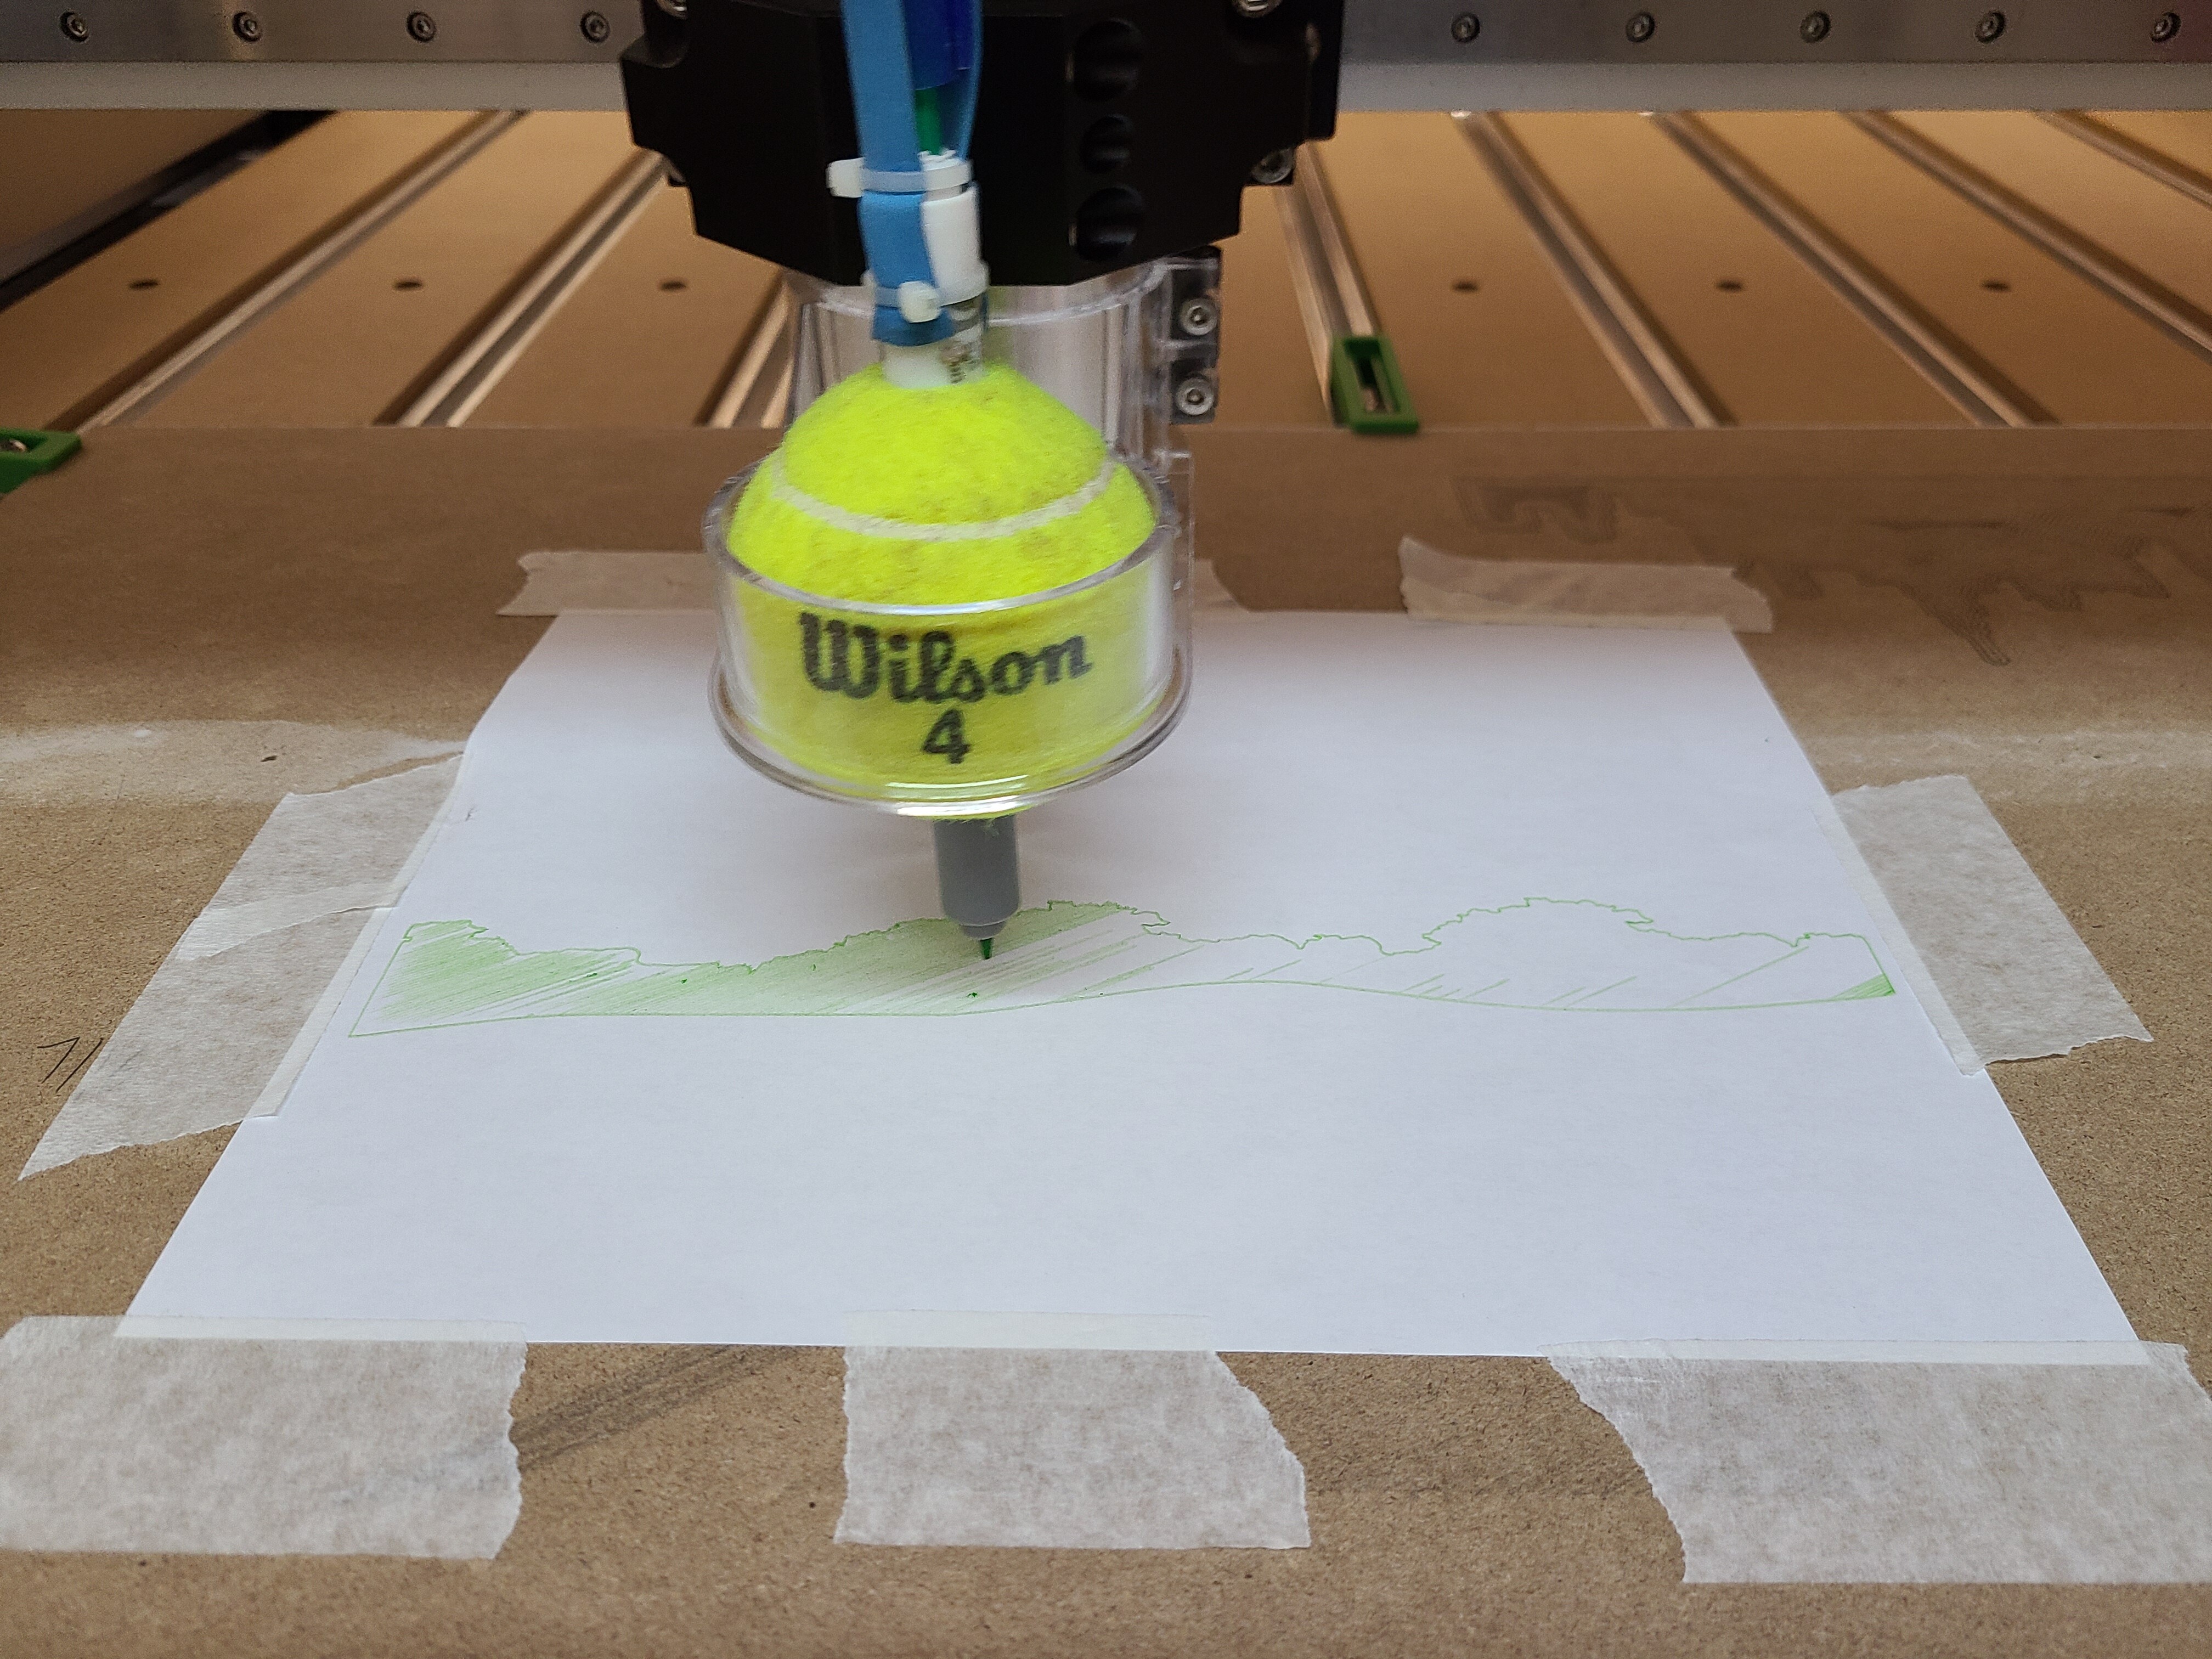
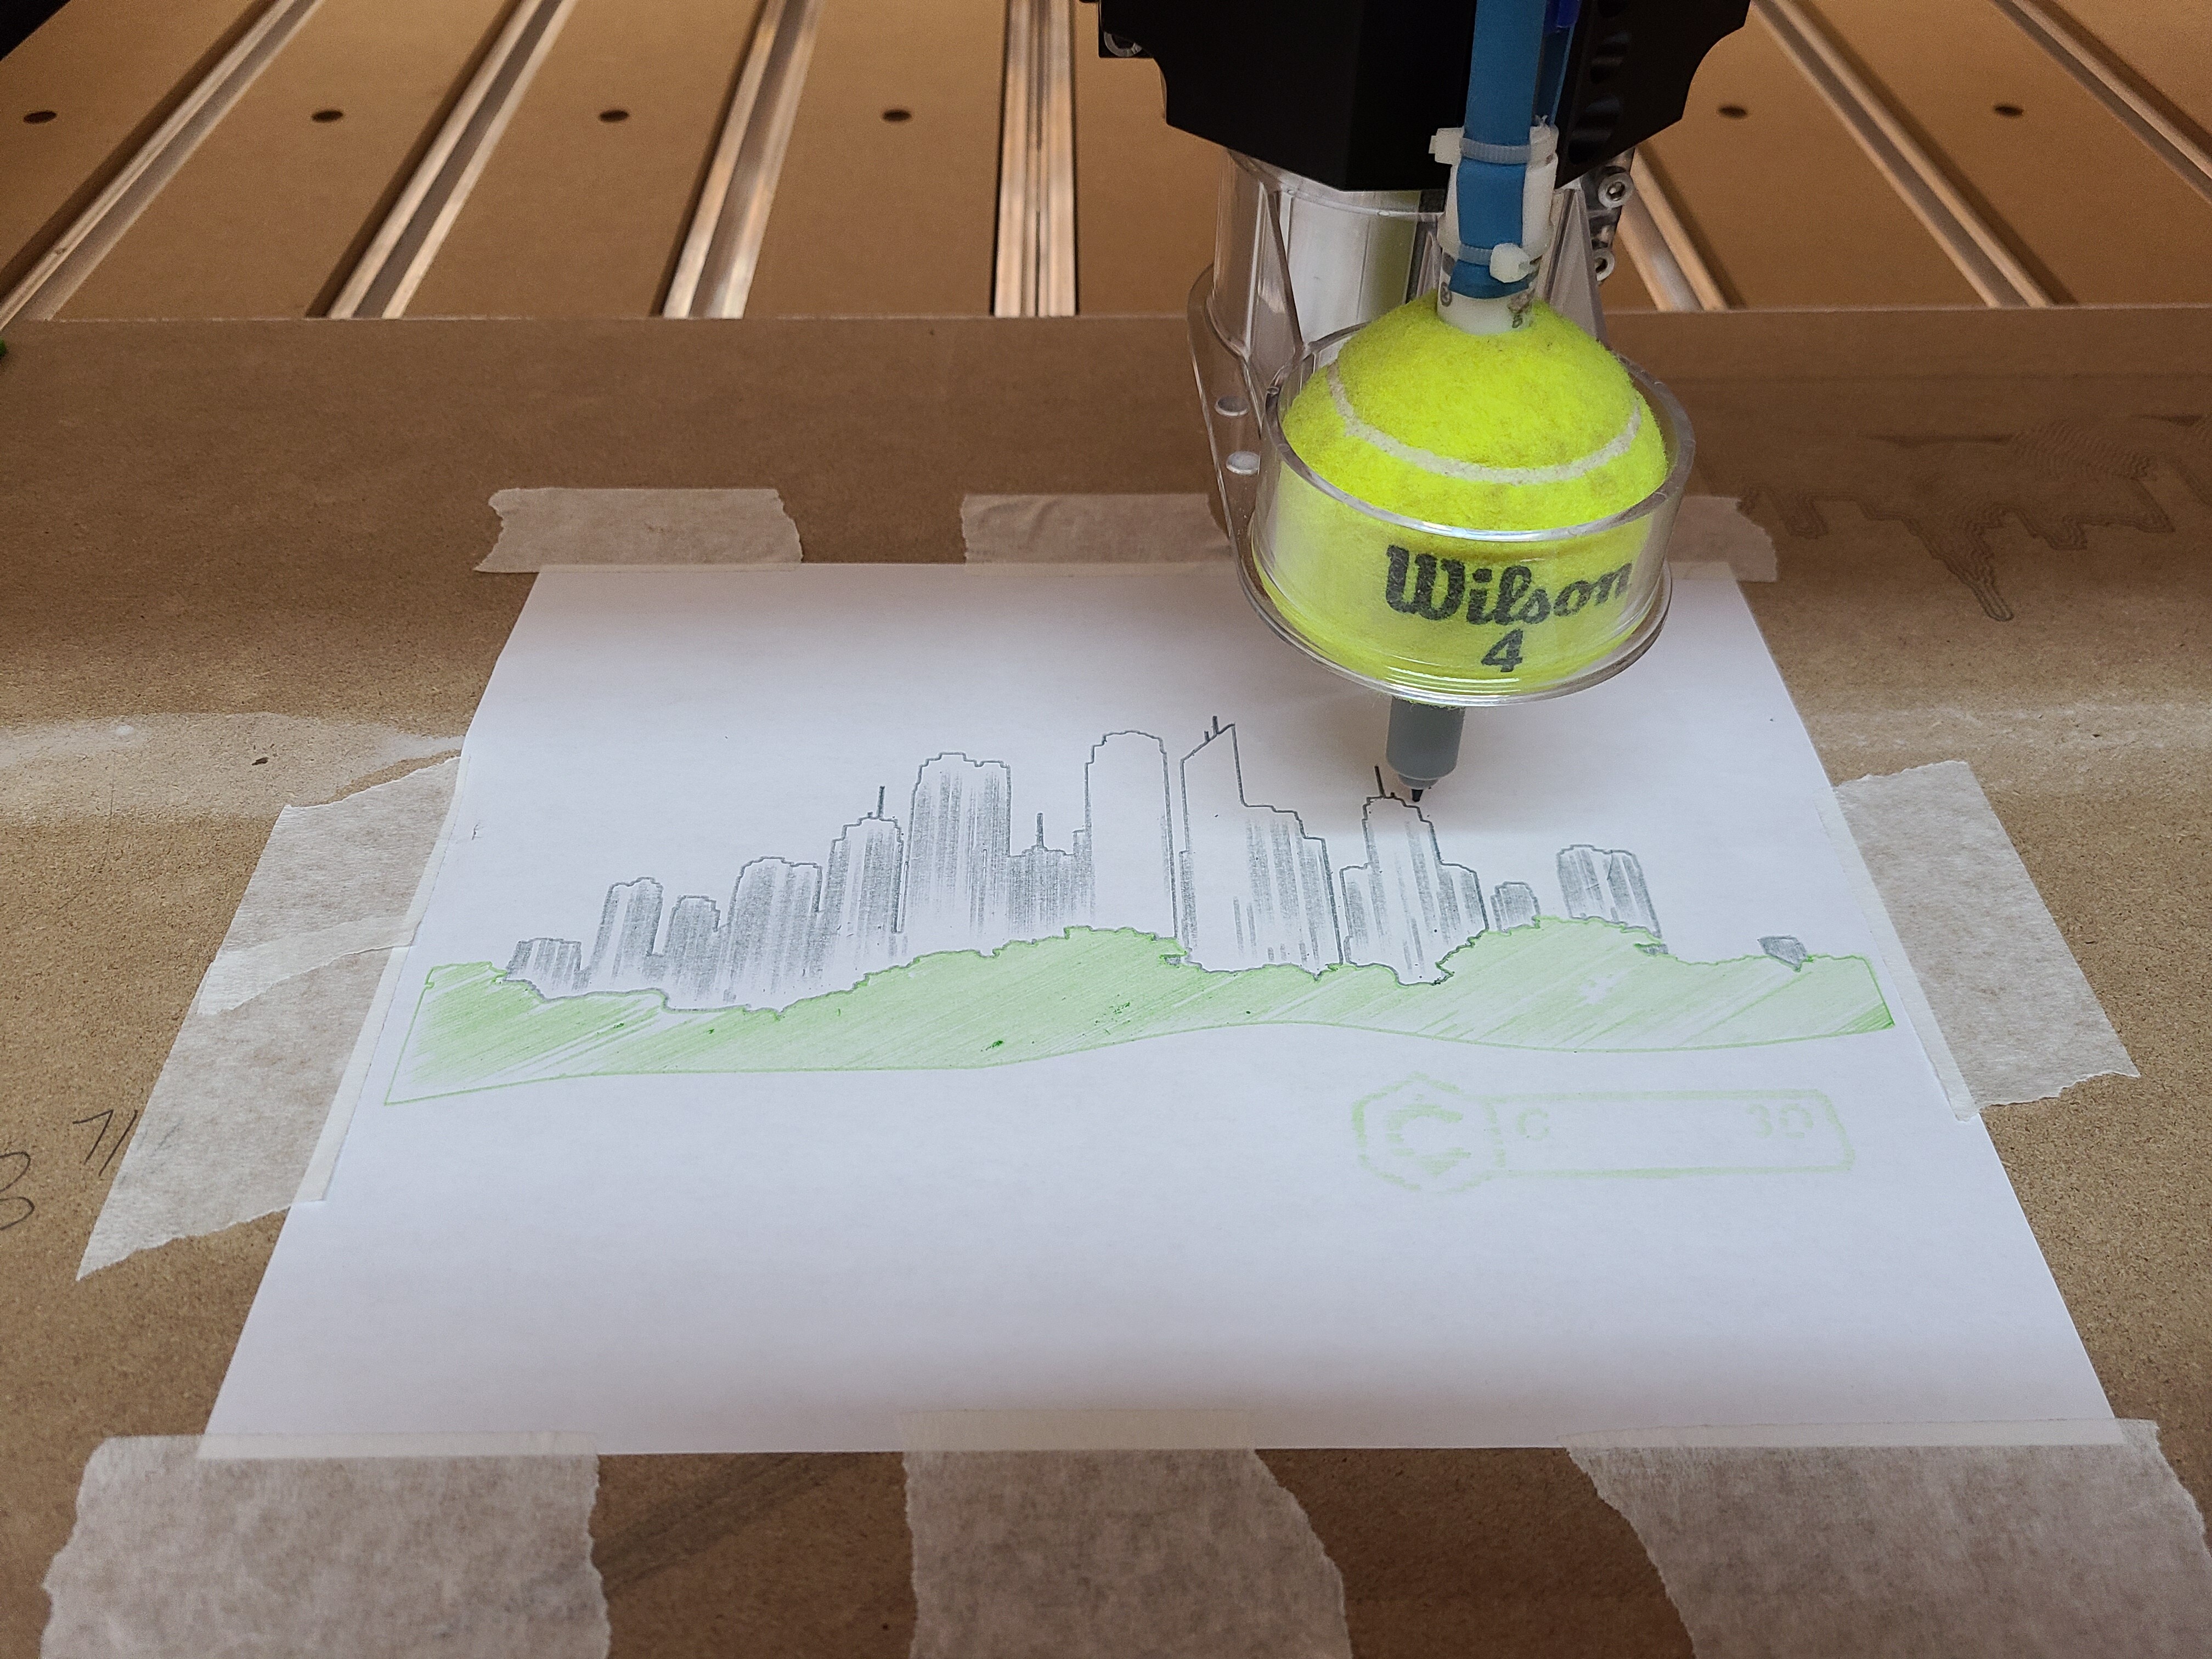
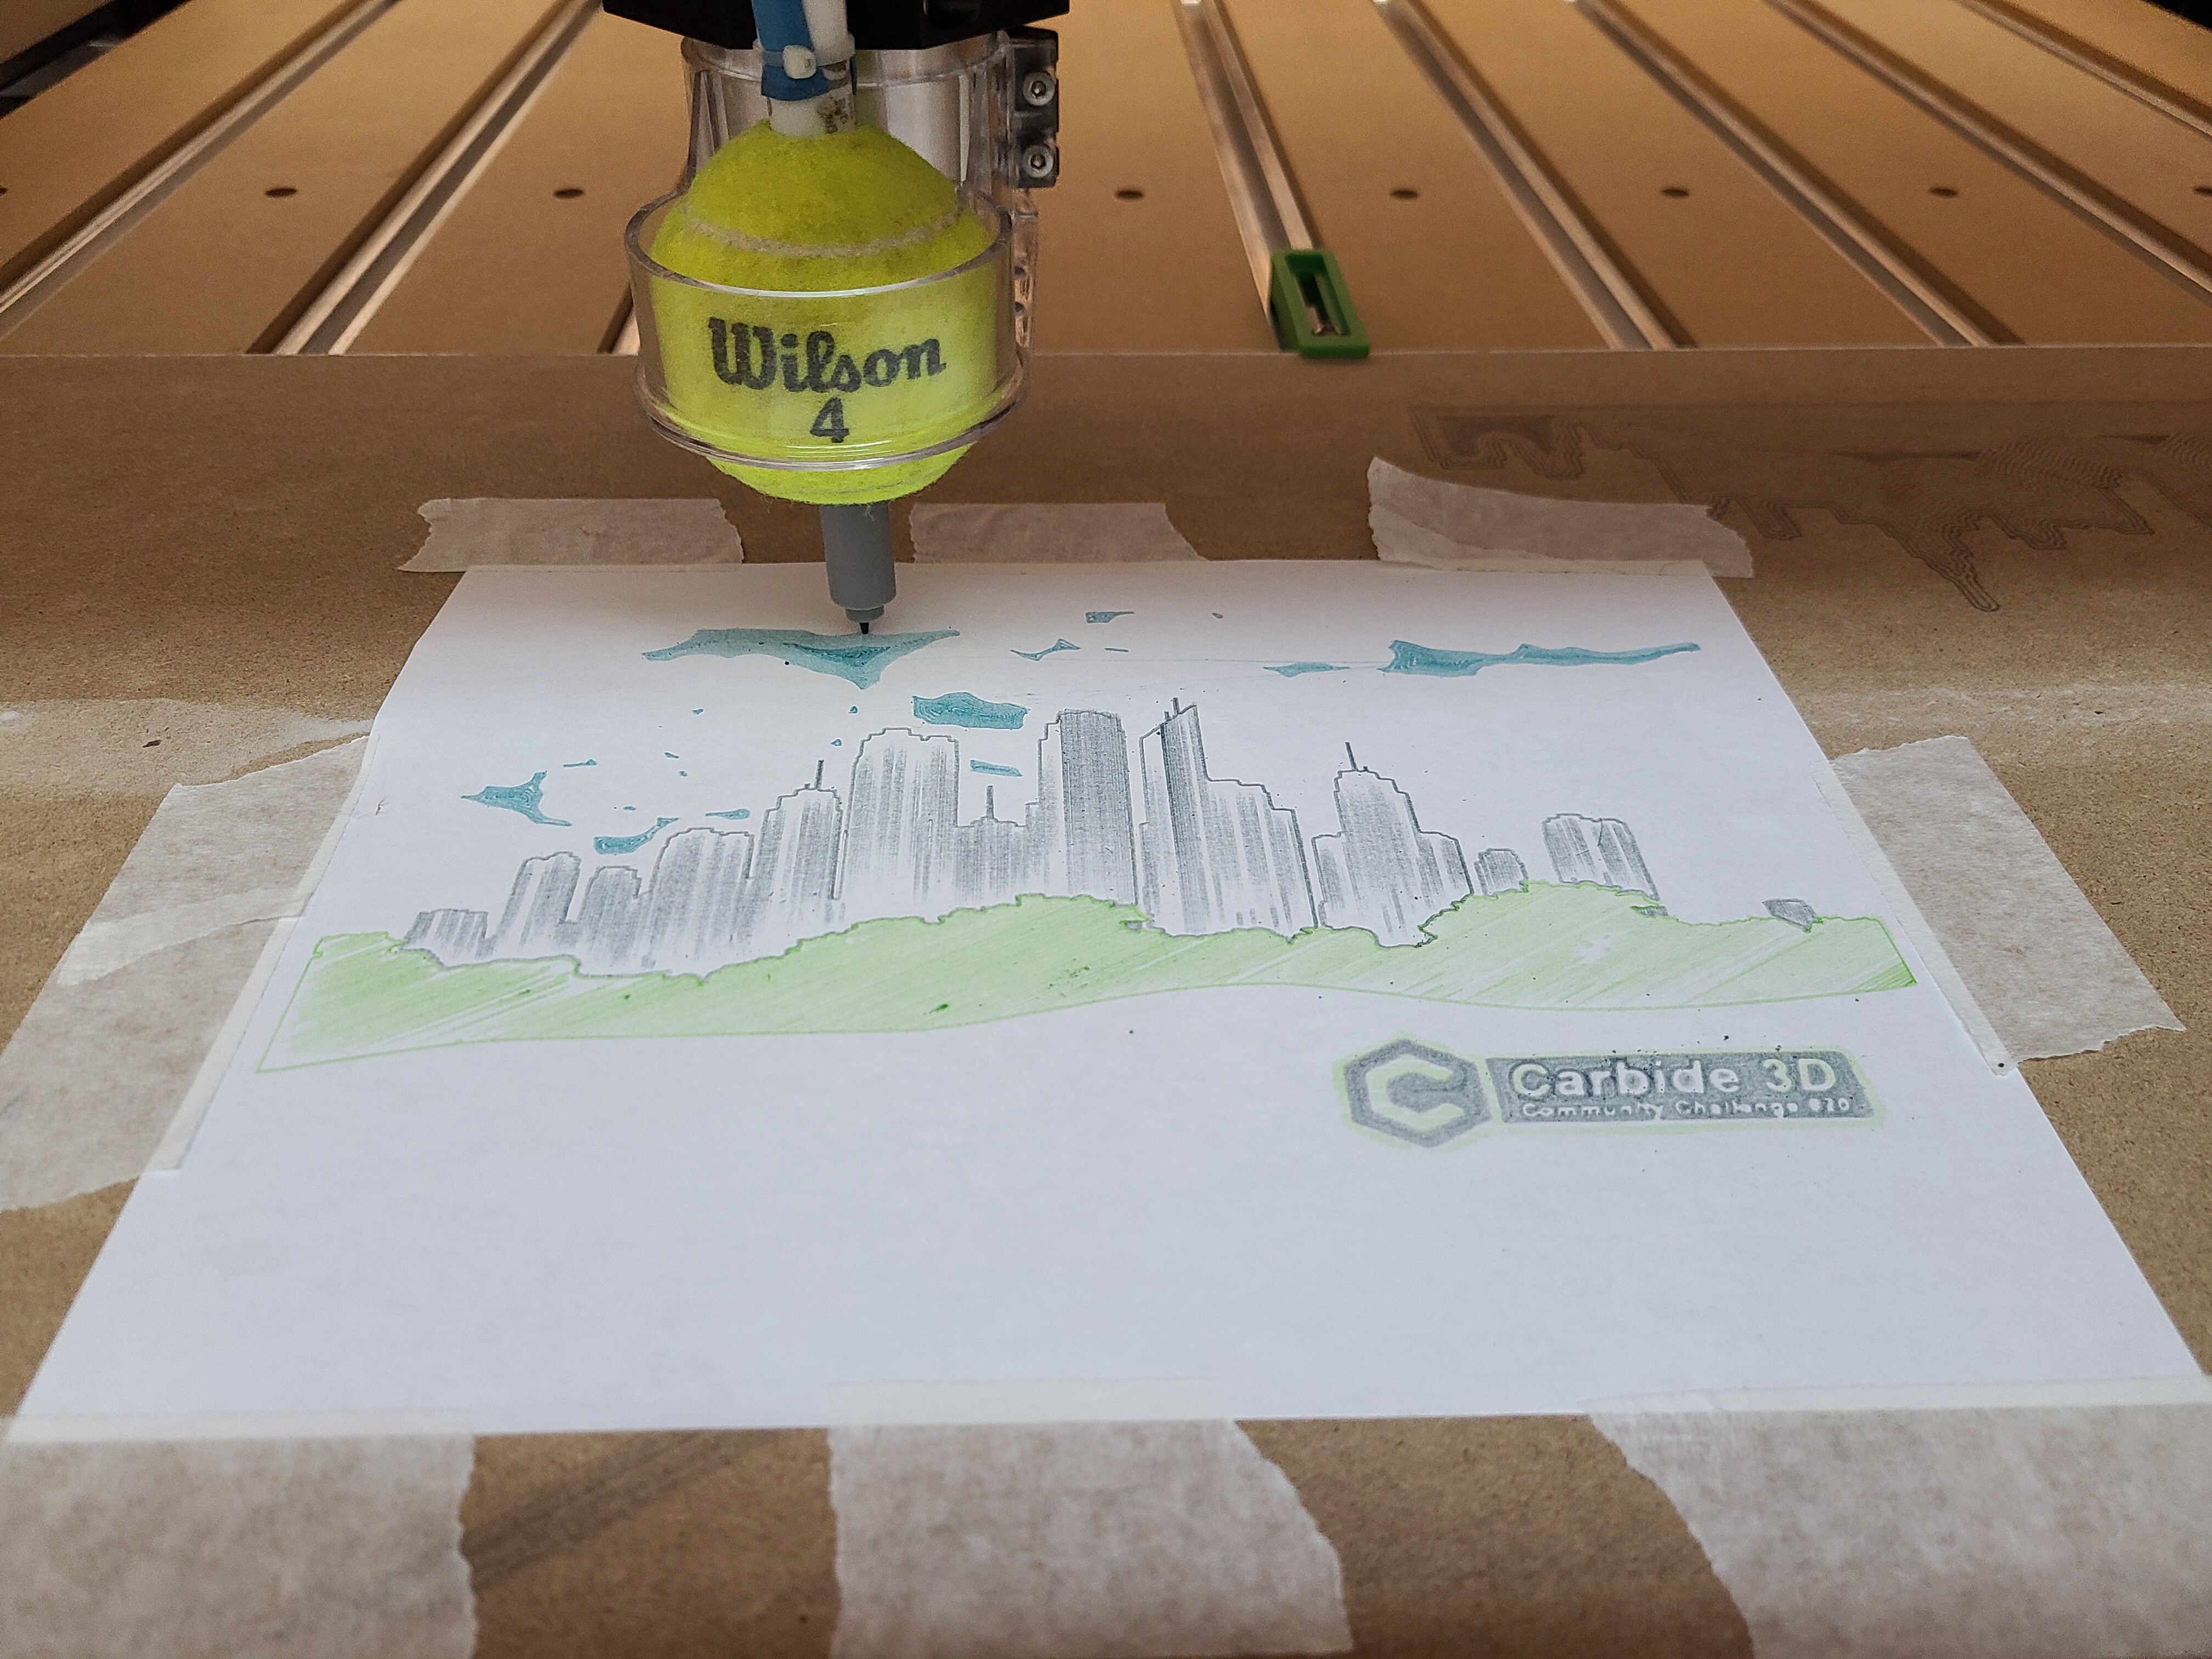
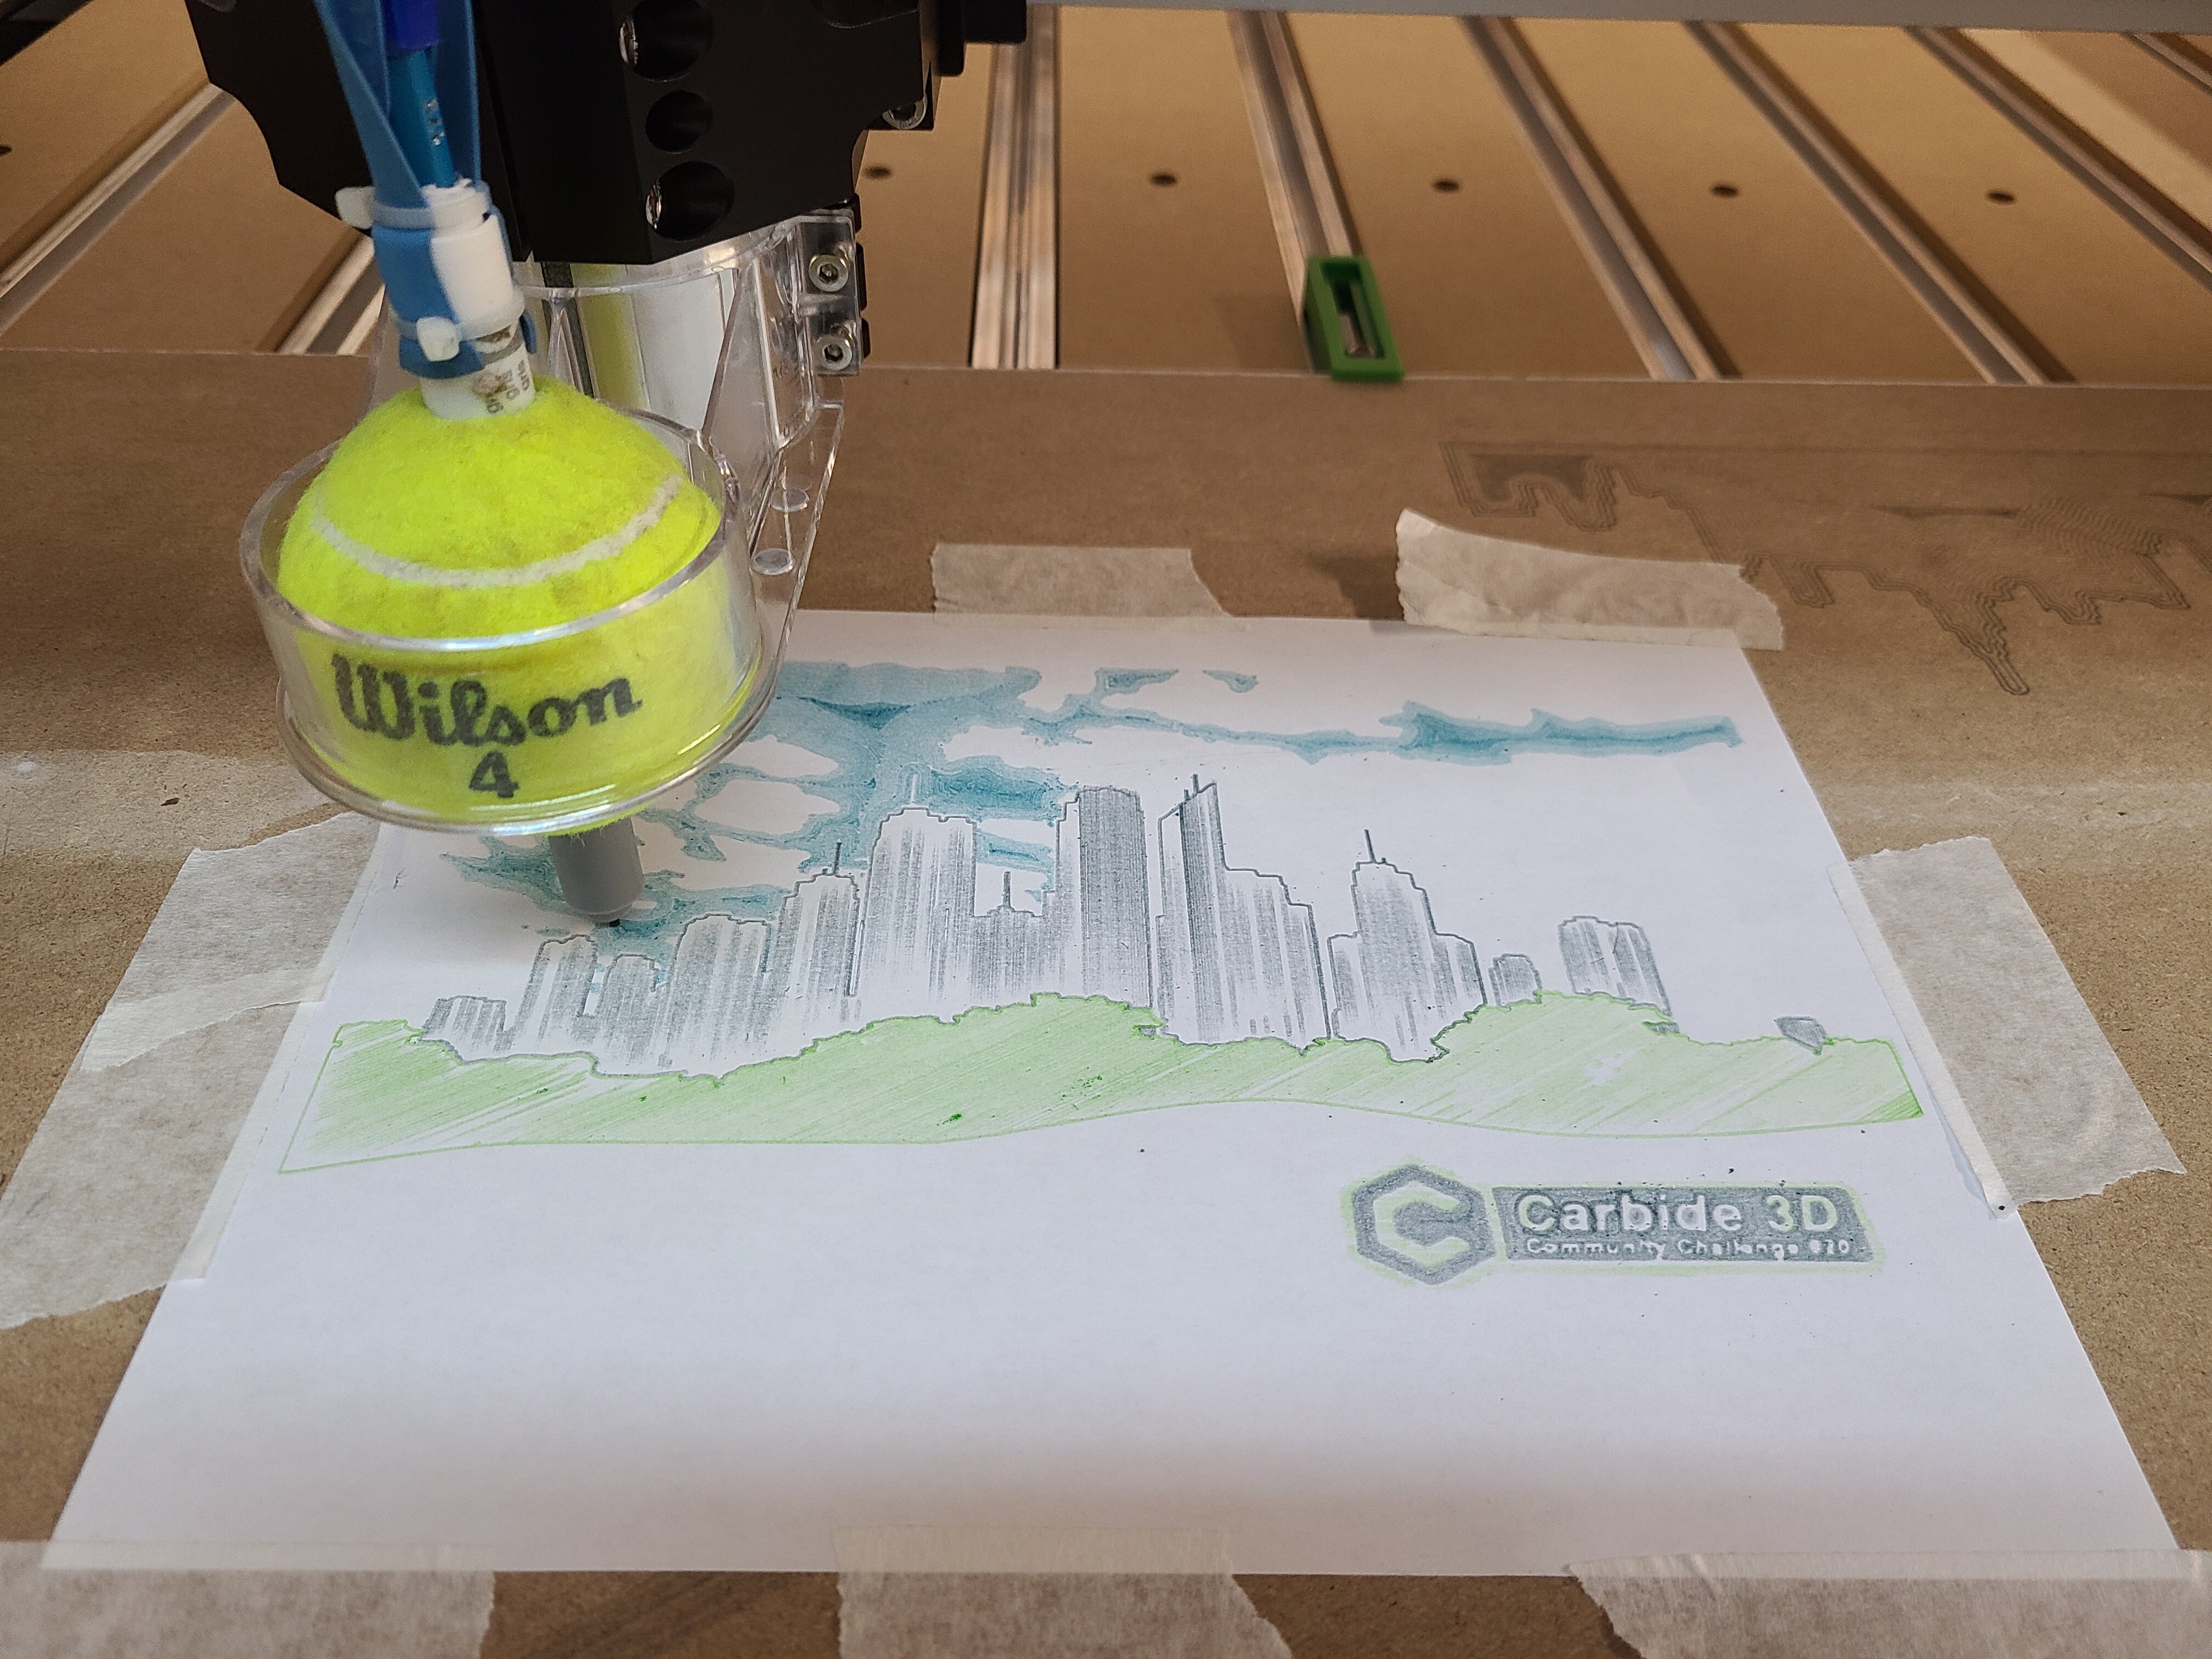
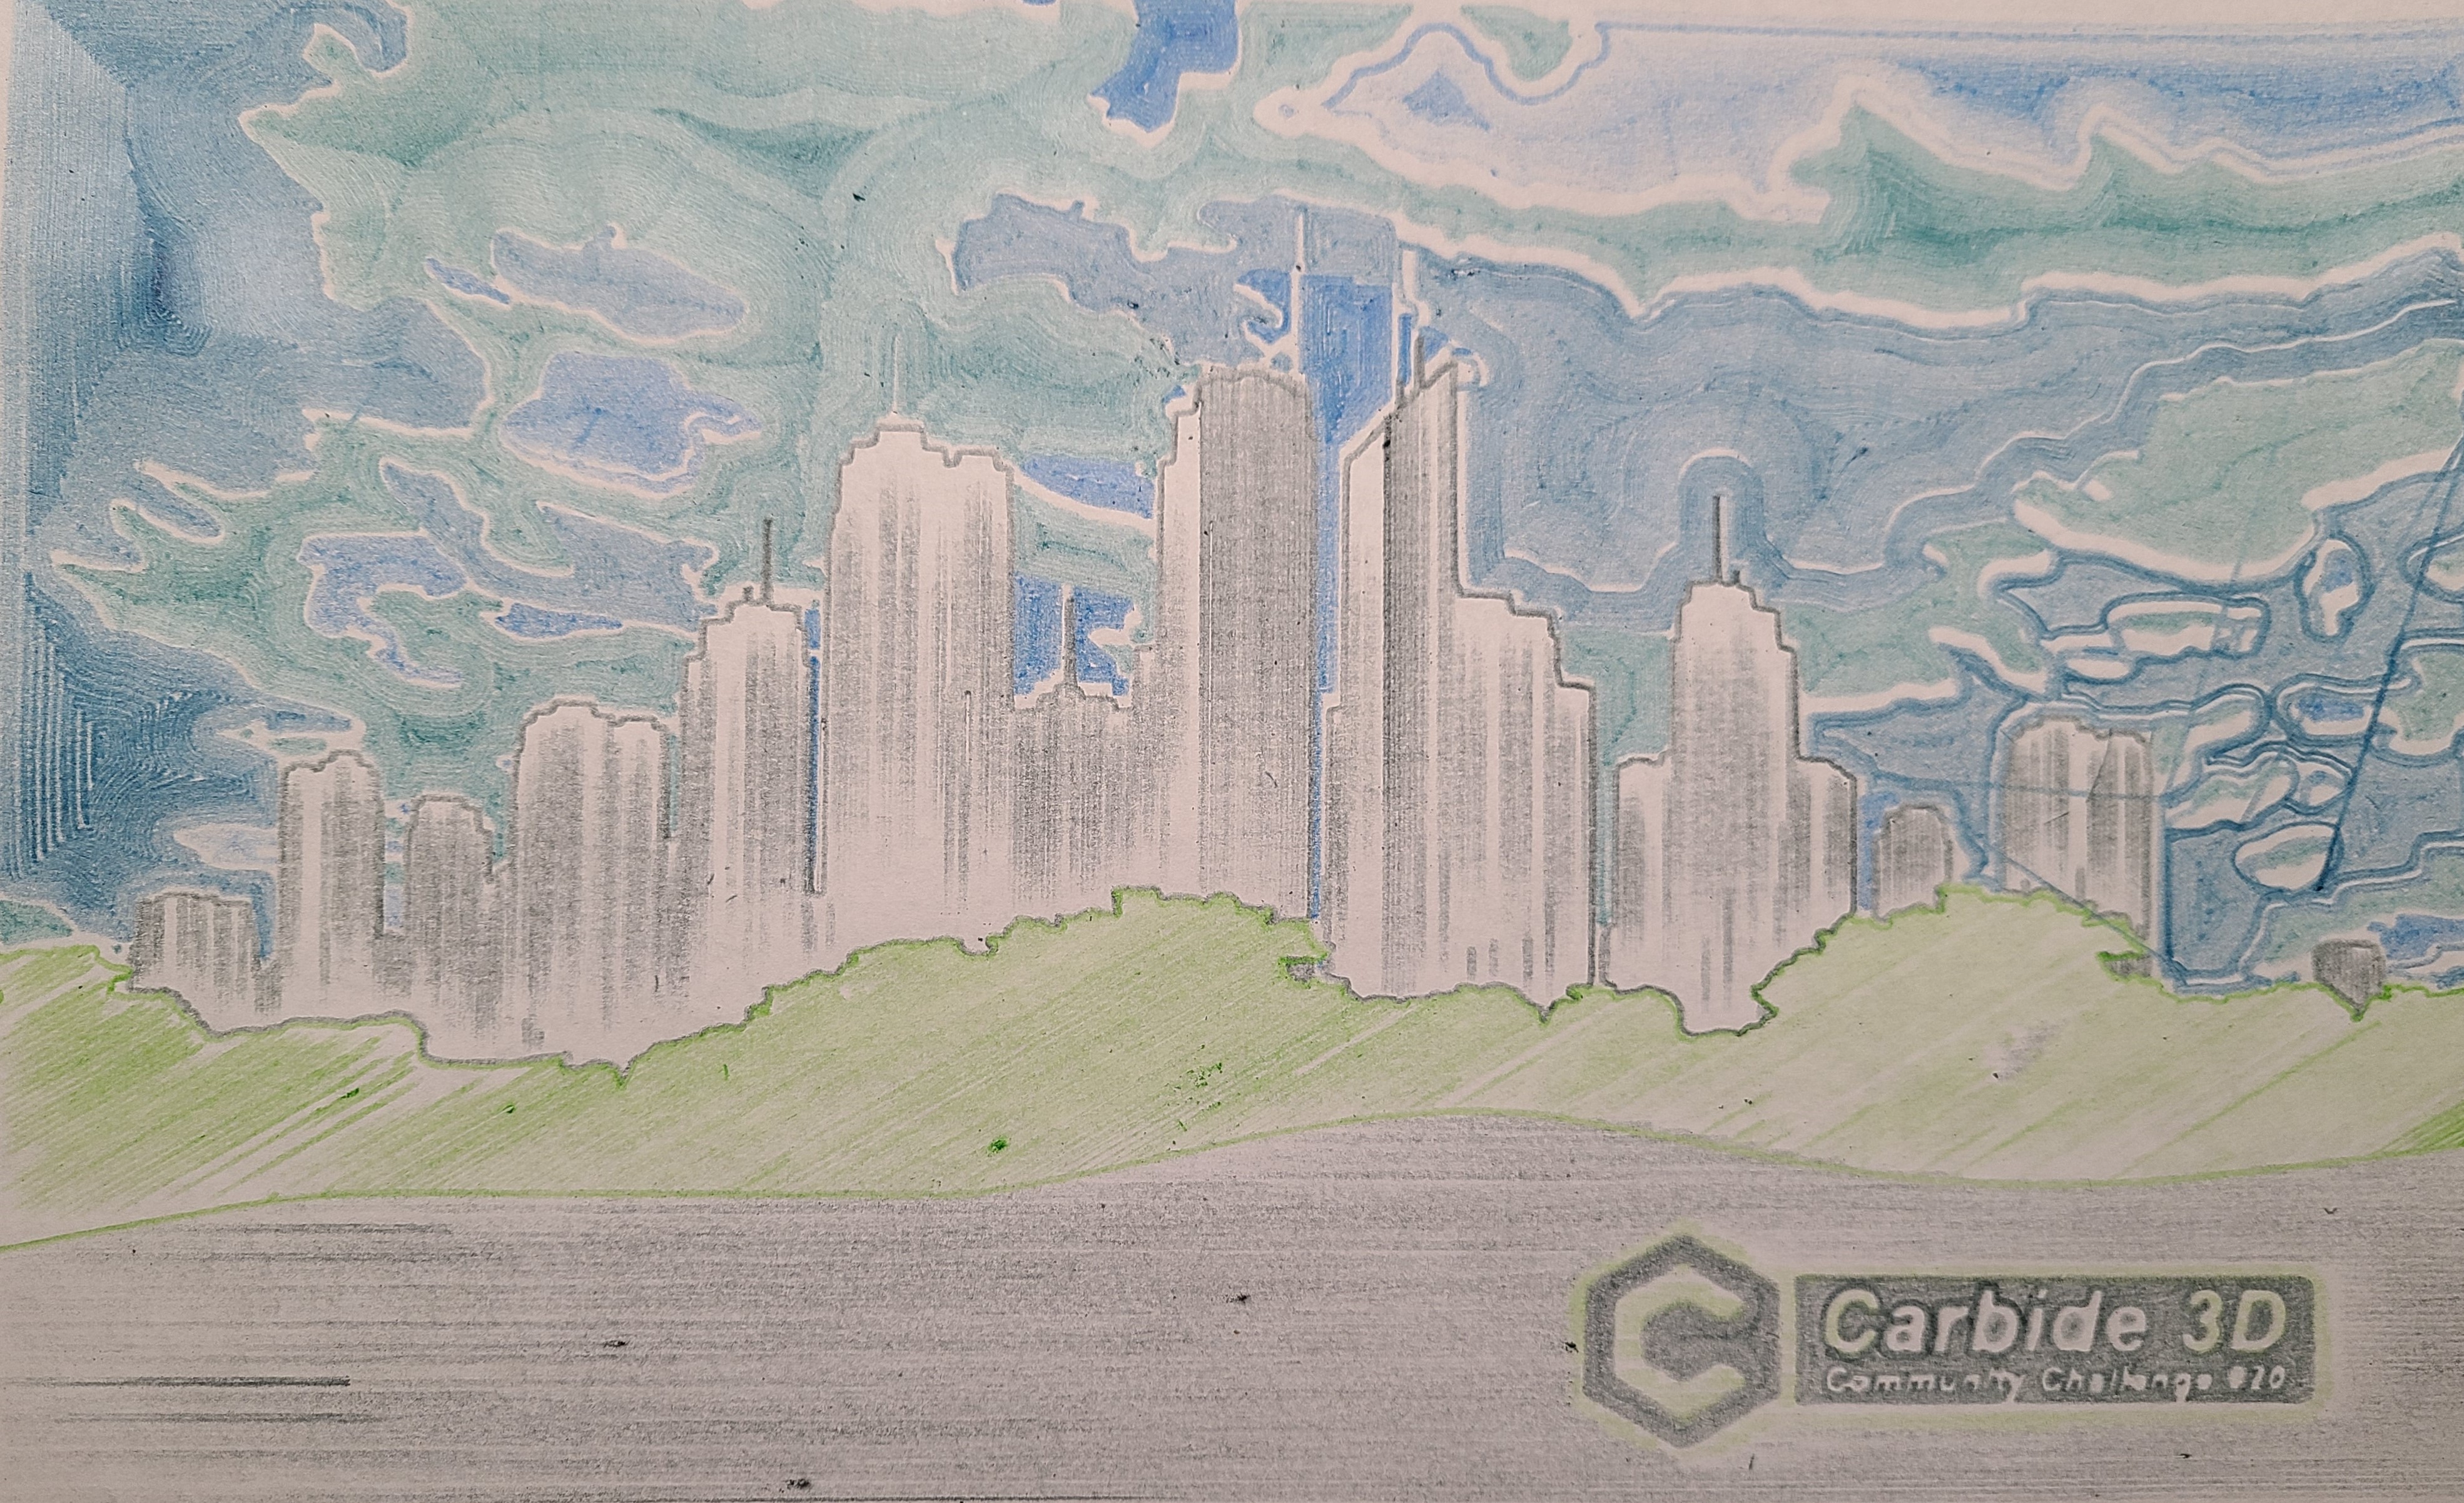
Update to my cityscape toolpath art with Wilson, there was a bit of a mishap with the tool change on the 3rd blue tool but another attempt all the same. Not sure if I’ll have time for another go before end of the challenge but I think it’s still better then my last attempt.
Edit: just to be compliant with the challenge rules here are some pictures of Wilson at work. Also @Julien do I need to add the details about Wilson in this final post or is it OK if they are split among 2 separate posts.


15 Likes
It’s fine, thanks for the updated pics!
What I love most about this challenge is that we’ve proven that we can get our Shapeokos to an advanced enough capability to rival THIS (fast forward to about 1:00 in to see the “action” taking place).
Oh…and do yourself a favor and mute your video!
Welcome to the community! You will find a great group willing to assist in all CNC questions.
Questioning my Sanity?
No offense intended. Despite the green color and looking at the photo as an ink blot… Does anyone else see a road kill bunny?
I may possibly need therapy. 
Y’all may want to schedule those therapy sessions ASAP.
1 Like
LOL, I’ll get right on it. 
yes of course, what format do you want? DXF, DWG?
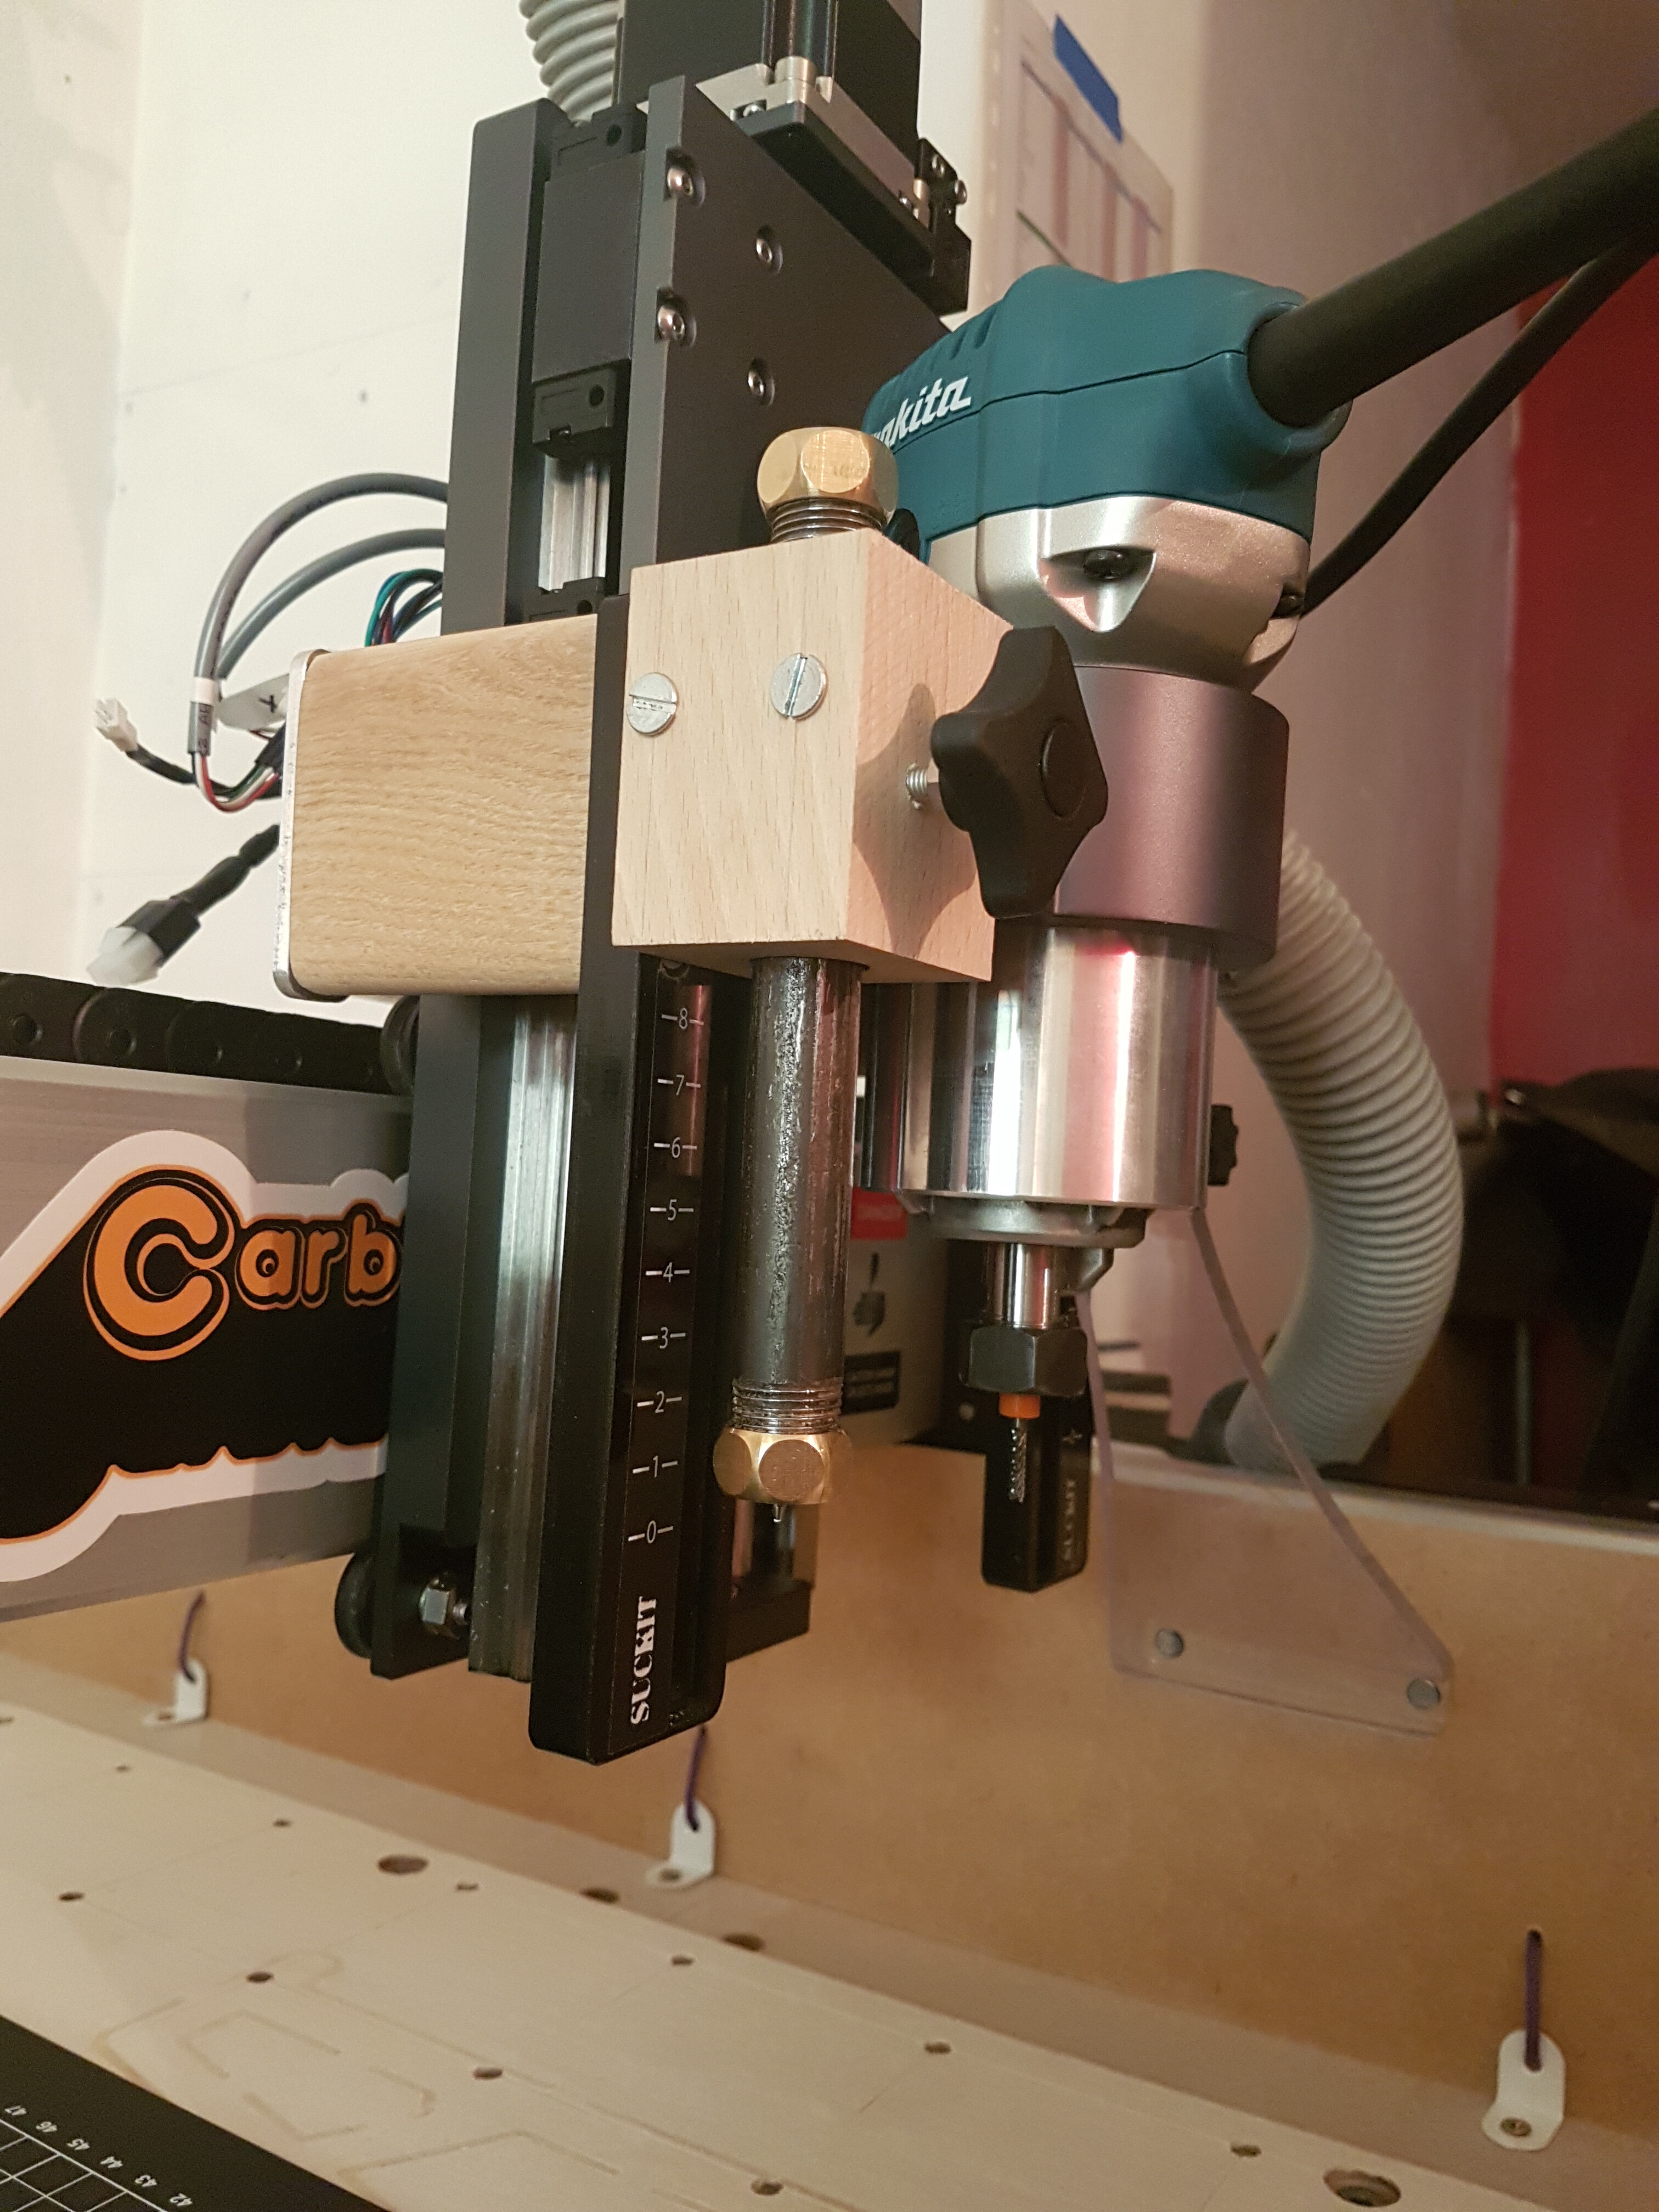
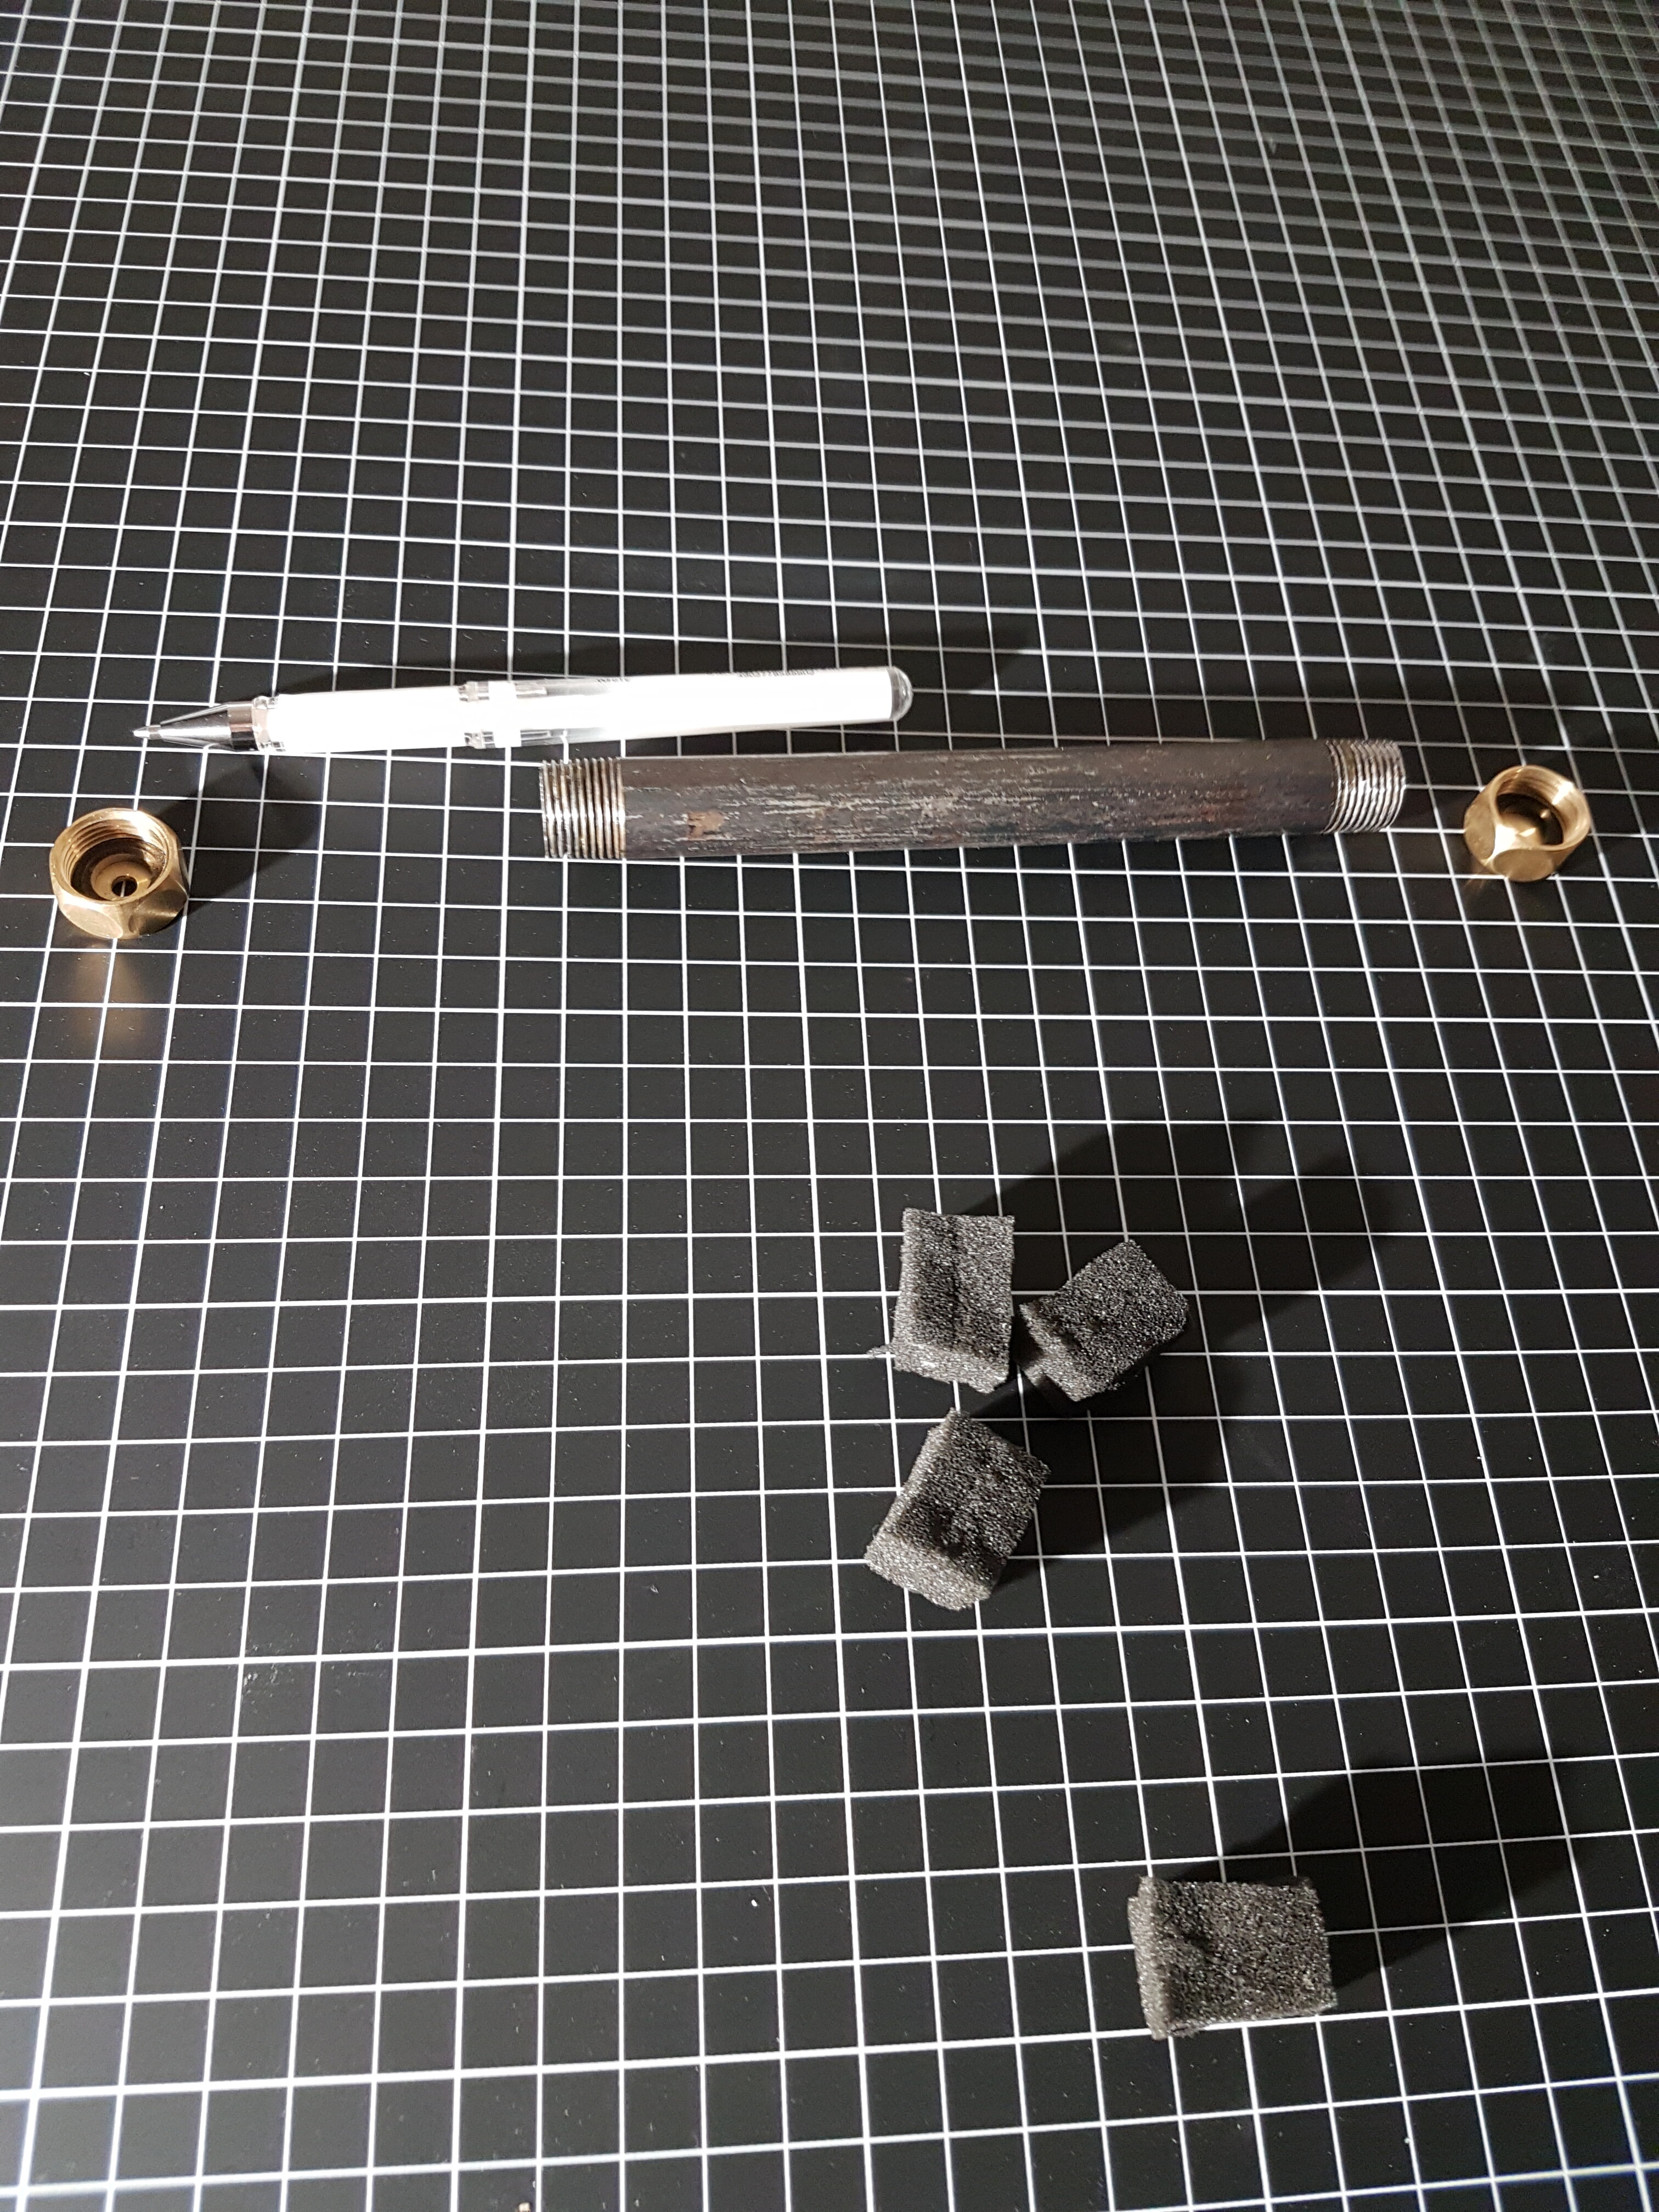
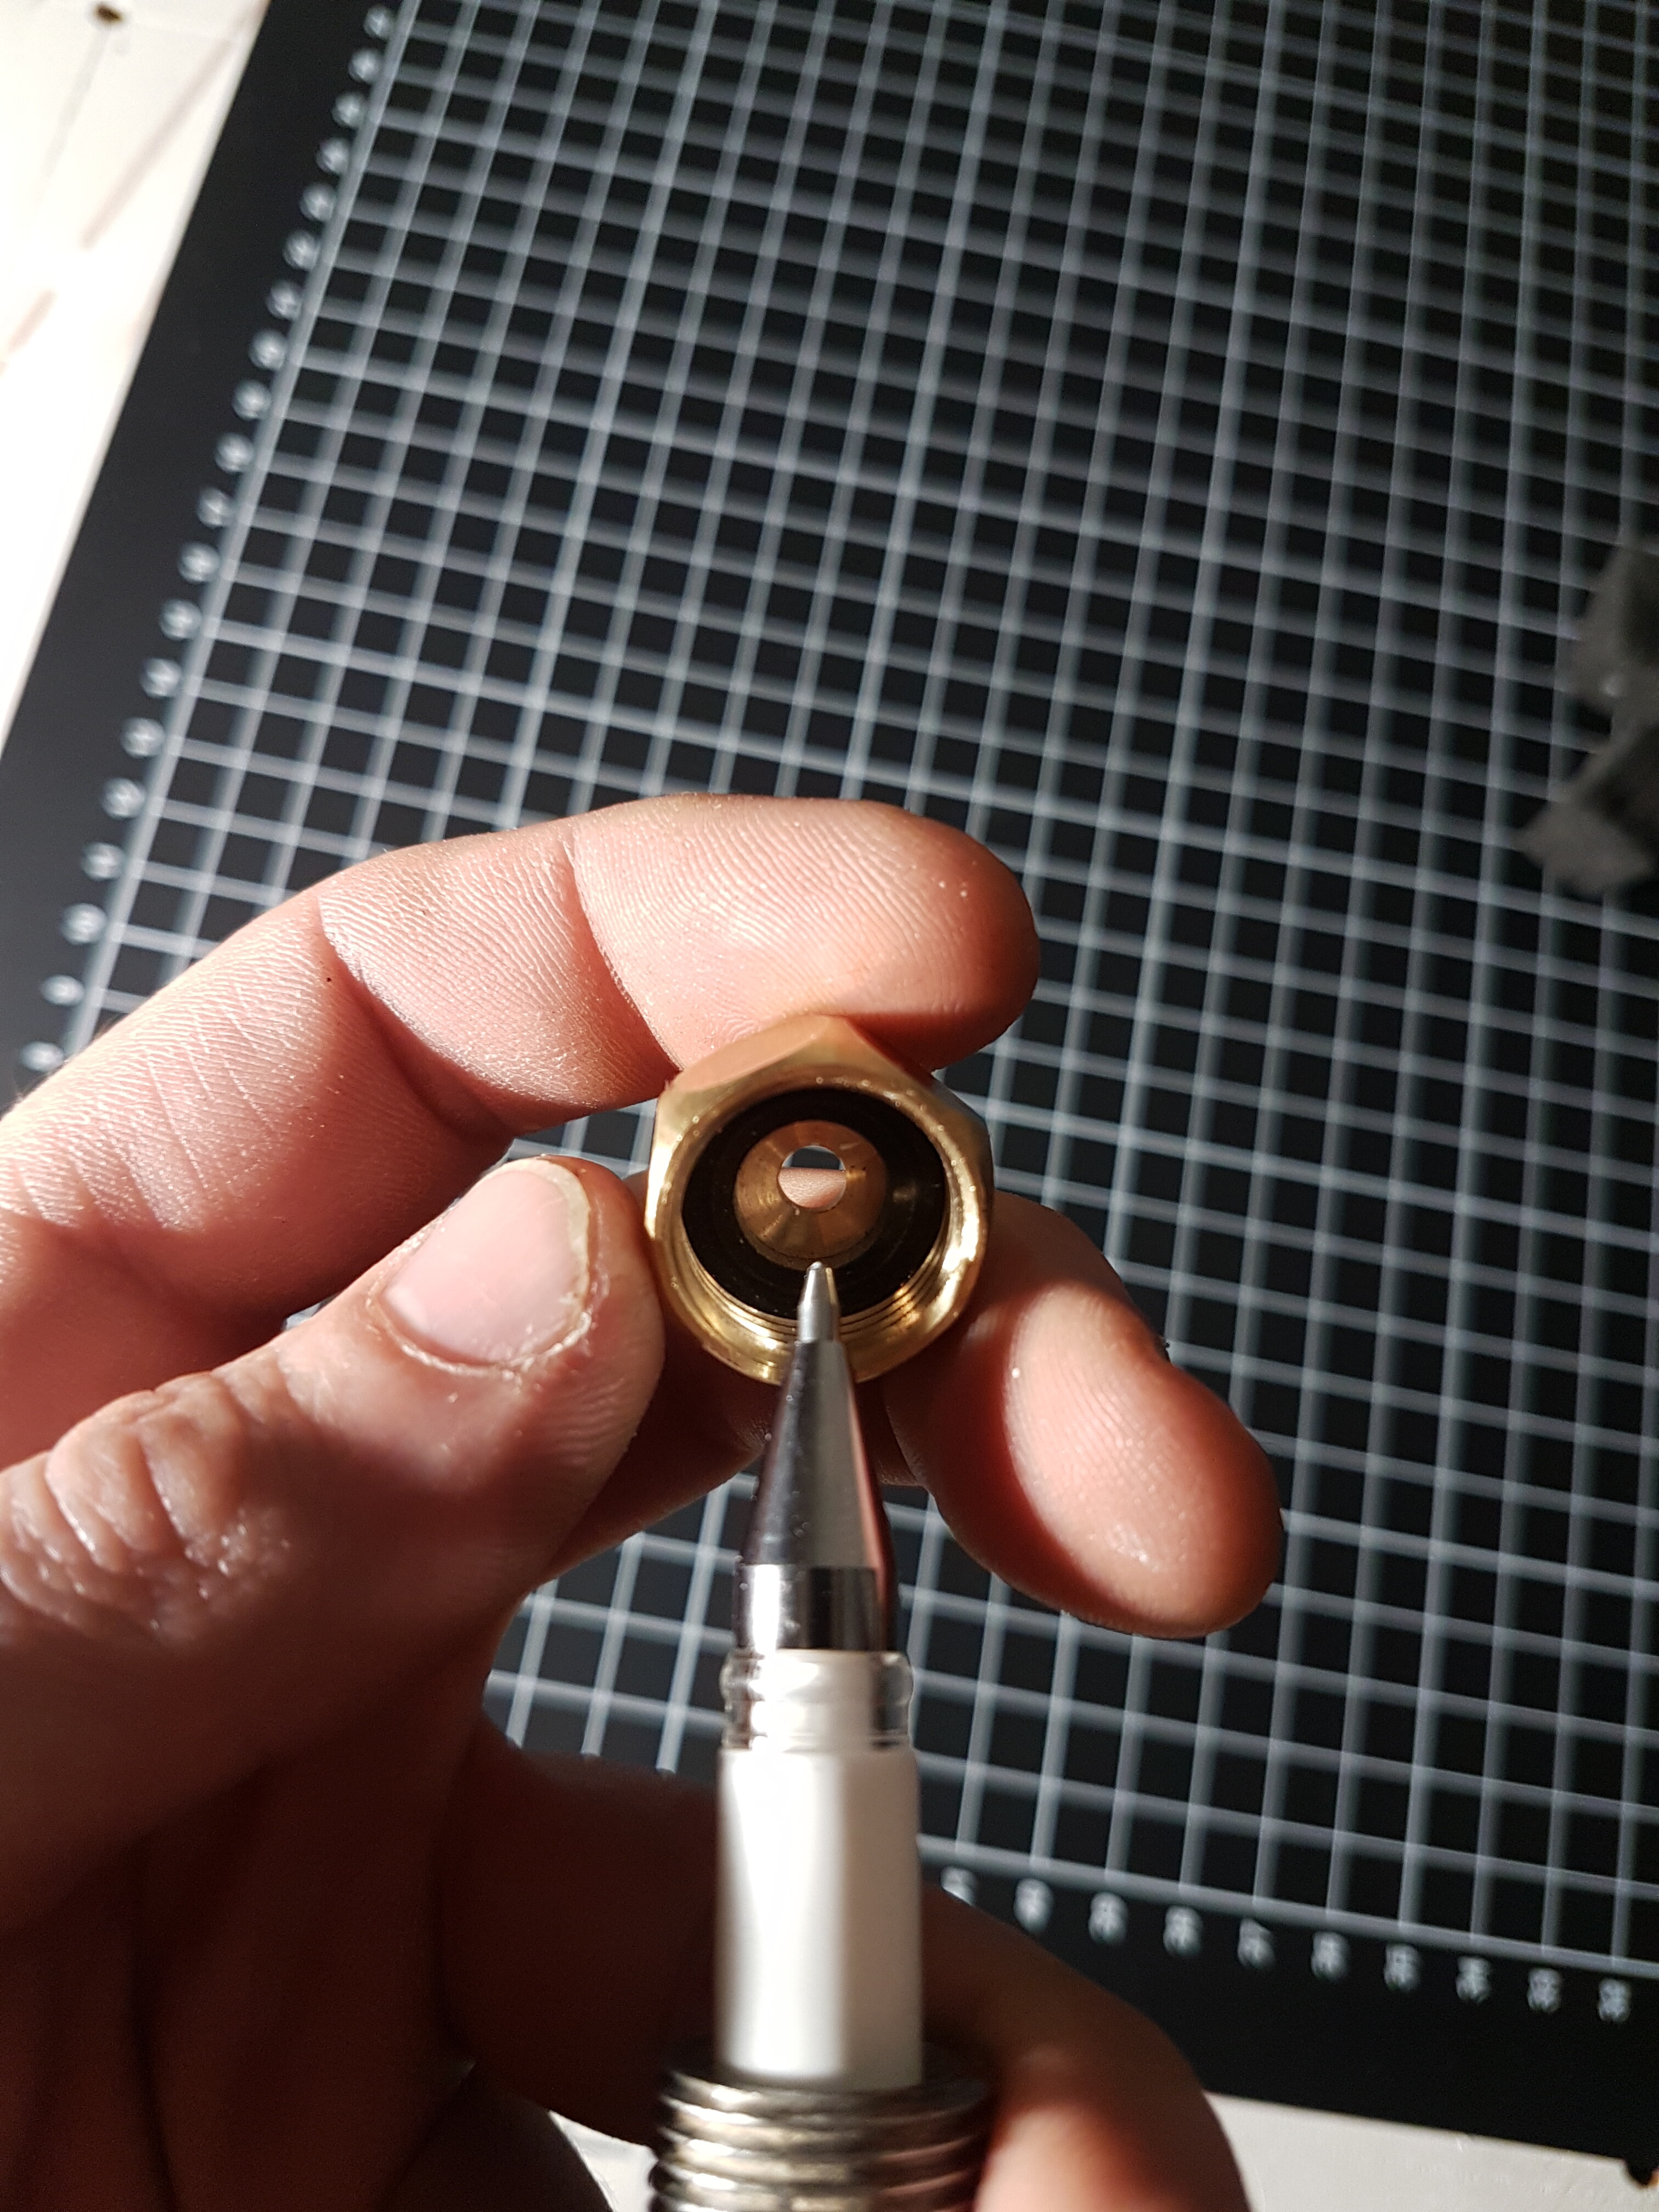
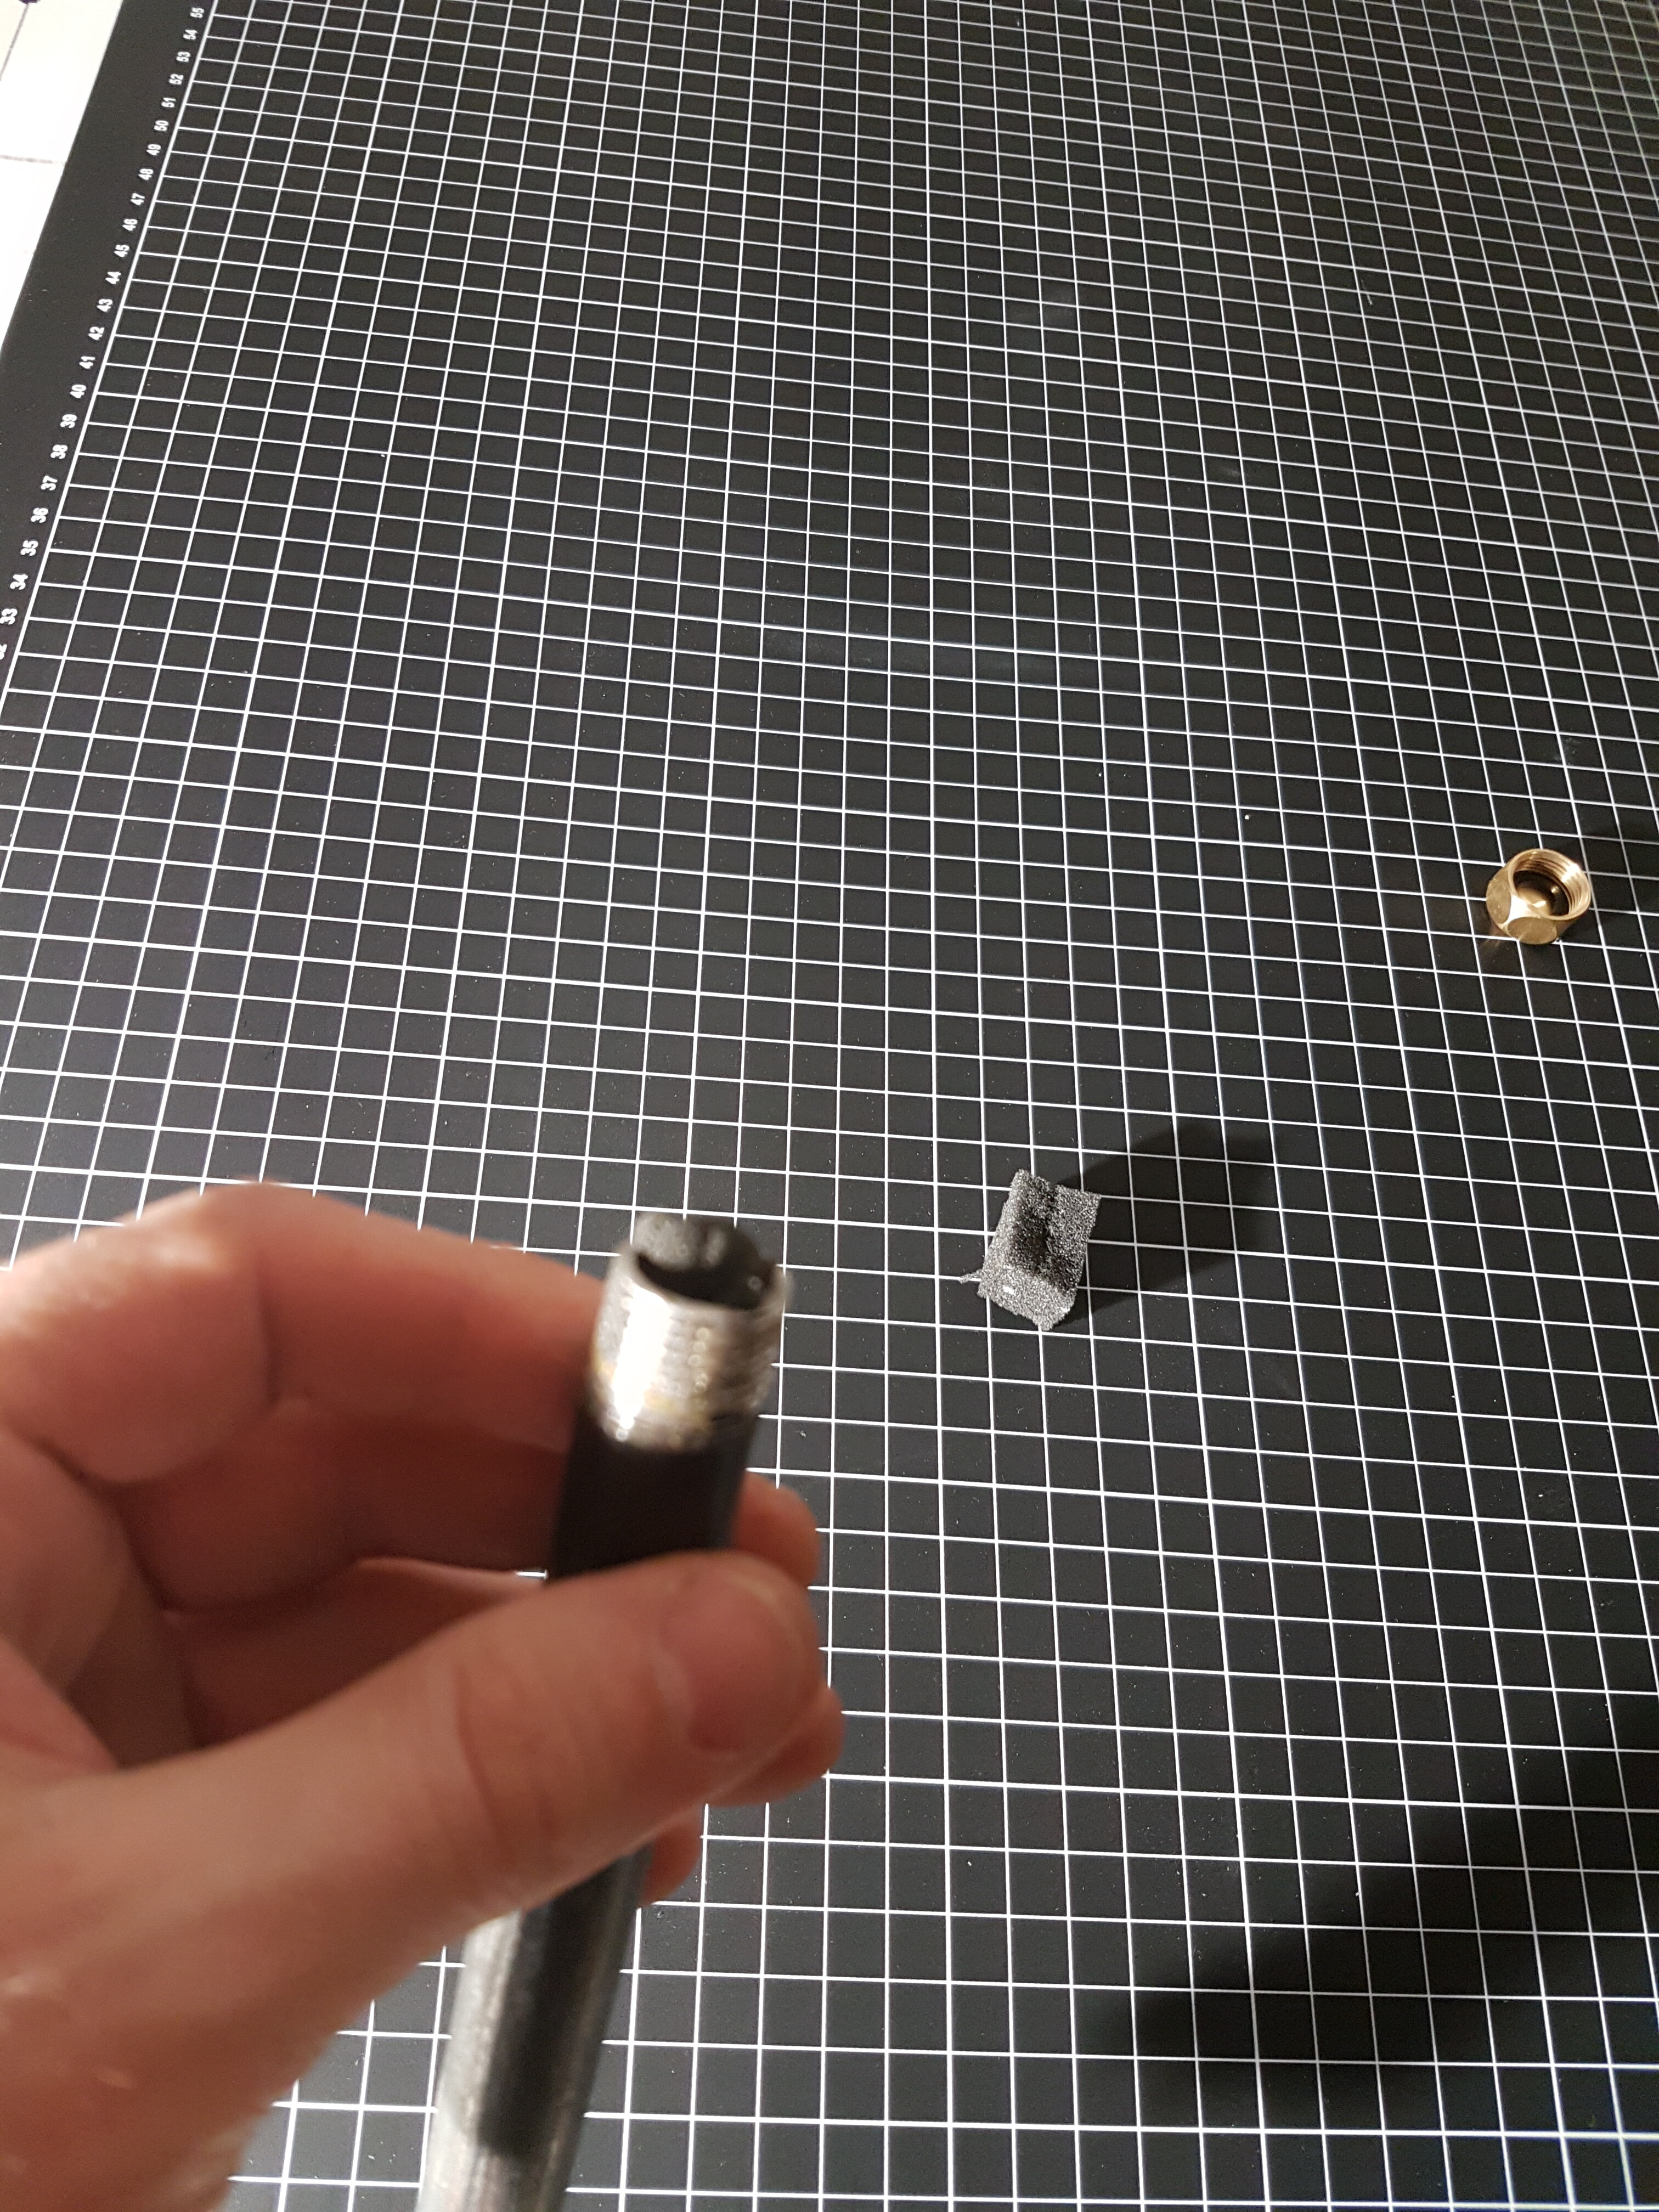
It’s a threaded tube at the end. I had some plumbing plugs, I drilled a hole for the pen lead to go through on one side. And on the other side, I put some foam to force the pen to stay down.
Depending on the length of the pen, pencil or marker, I put more or less foam.
4 Likes
Thanks! I’ll take anything you have.
1 Like
dessin lego pour export 700x500.dxf (1.0 MB)
it will be only dxf, i can’t share a dwg. but anyway it works on all software ![]()
2 Likes
That looked like something I made using an idea I found on a video from a New Zealander. I used off the shelf PVC parts.
His inspiration was to use a foam ear plug for the ‘spring’ After accidentally running the foam ear plug through the washing machine it springs back very quickly. I added the dime to keep the ear plug from deforming.
Here is the break out of my version. This only accepts mini-sharpies.

The assembled device is clamped to the router body via the threaded rod with a hose clamp.
Thanks, Bill
4 Likes
yes indeed, I forgot to tag you on my previous post, I apologize. I was inspired by your idea.
thanks to you.