Nice! Don’t hesitate to edit your post to add “behind the scenes” details of how you designed and milled it, mishaps, tips, etc… those are usually very useful to the community.
2 Likes
Very Nice!
How much fine tuning was needed after sanding each piece? Or did everything just go without issue?
No fine tuning or sanding to fit required, I made sure that the curves had no discontinuities in them. I did tune fit the outer ring around the main assembly. I machined the ID of the ring and then put the main assembly on the Shapeoko and machined it in 0.005 increments until I got a snug sliding fit. I went 0.005" under in the end to allow a bit of space for glue. My machine has always been very accurate as long as I use good bits. i.e. bits with an accurate cutting diameter.
5 Likes
It is a very Cool project. I like it a lot.
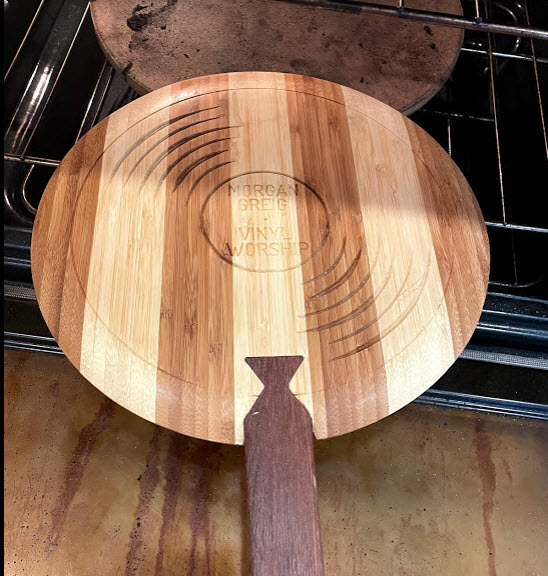
I made this record shaped pizza peel for a friend with the name of his album on it. Two sided 3d carve done on MeshCAM, Vcarve and pocket done in Carbide Create. My first successful 2 sided 3d carve. Carved on Shapeoko XXL. CAD model done in CATIA, exported as .stl for MeshCAM, and .dxf for Carbide Create.
-J
PS: I can’t seem to publish to CutRocket. Where’s the FAQ for CutRocket? Maybe it just doesn’t like my CATIA design files. Seems to be geared toward F360.
17 Likes
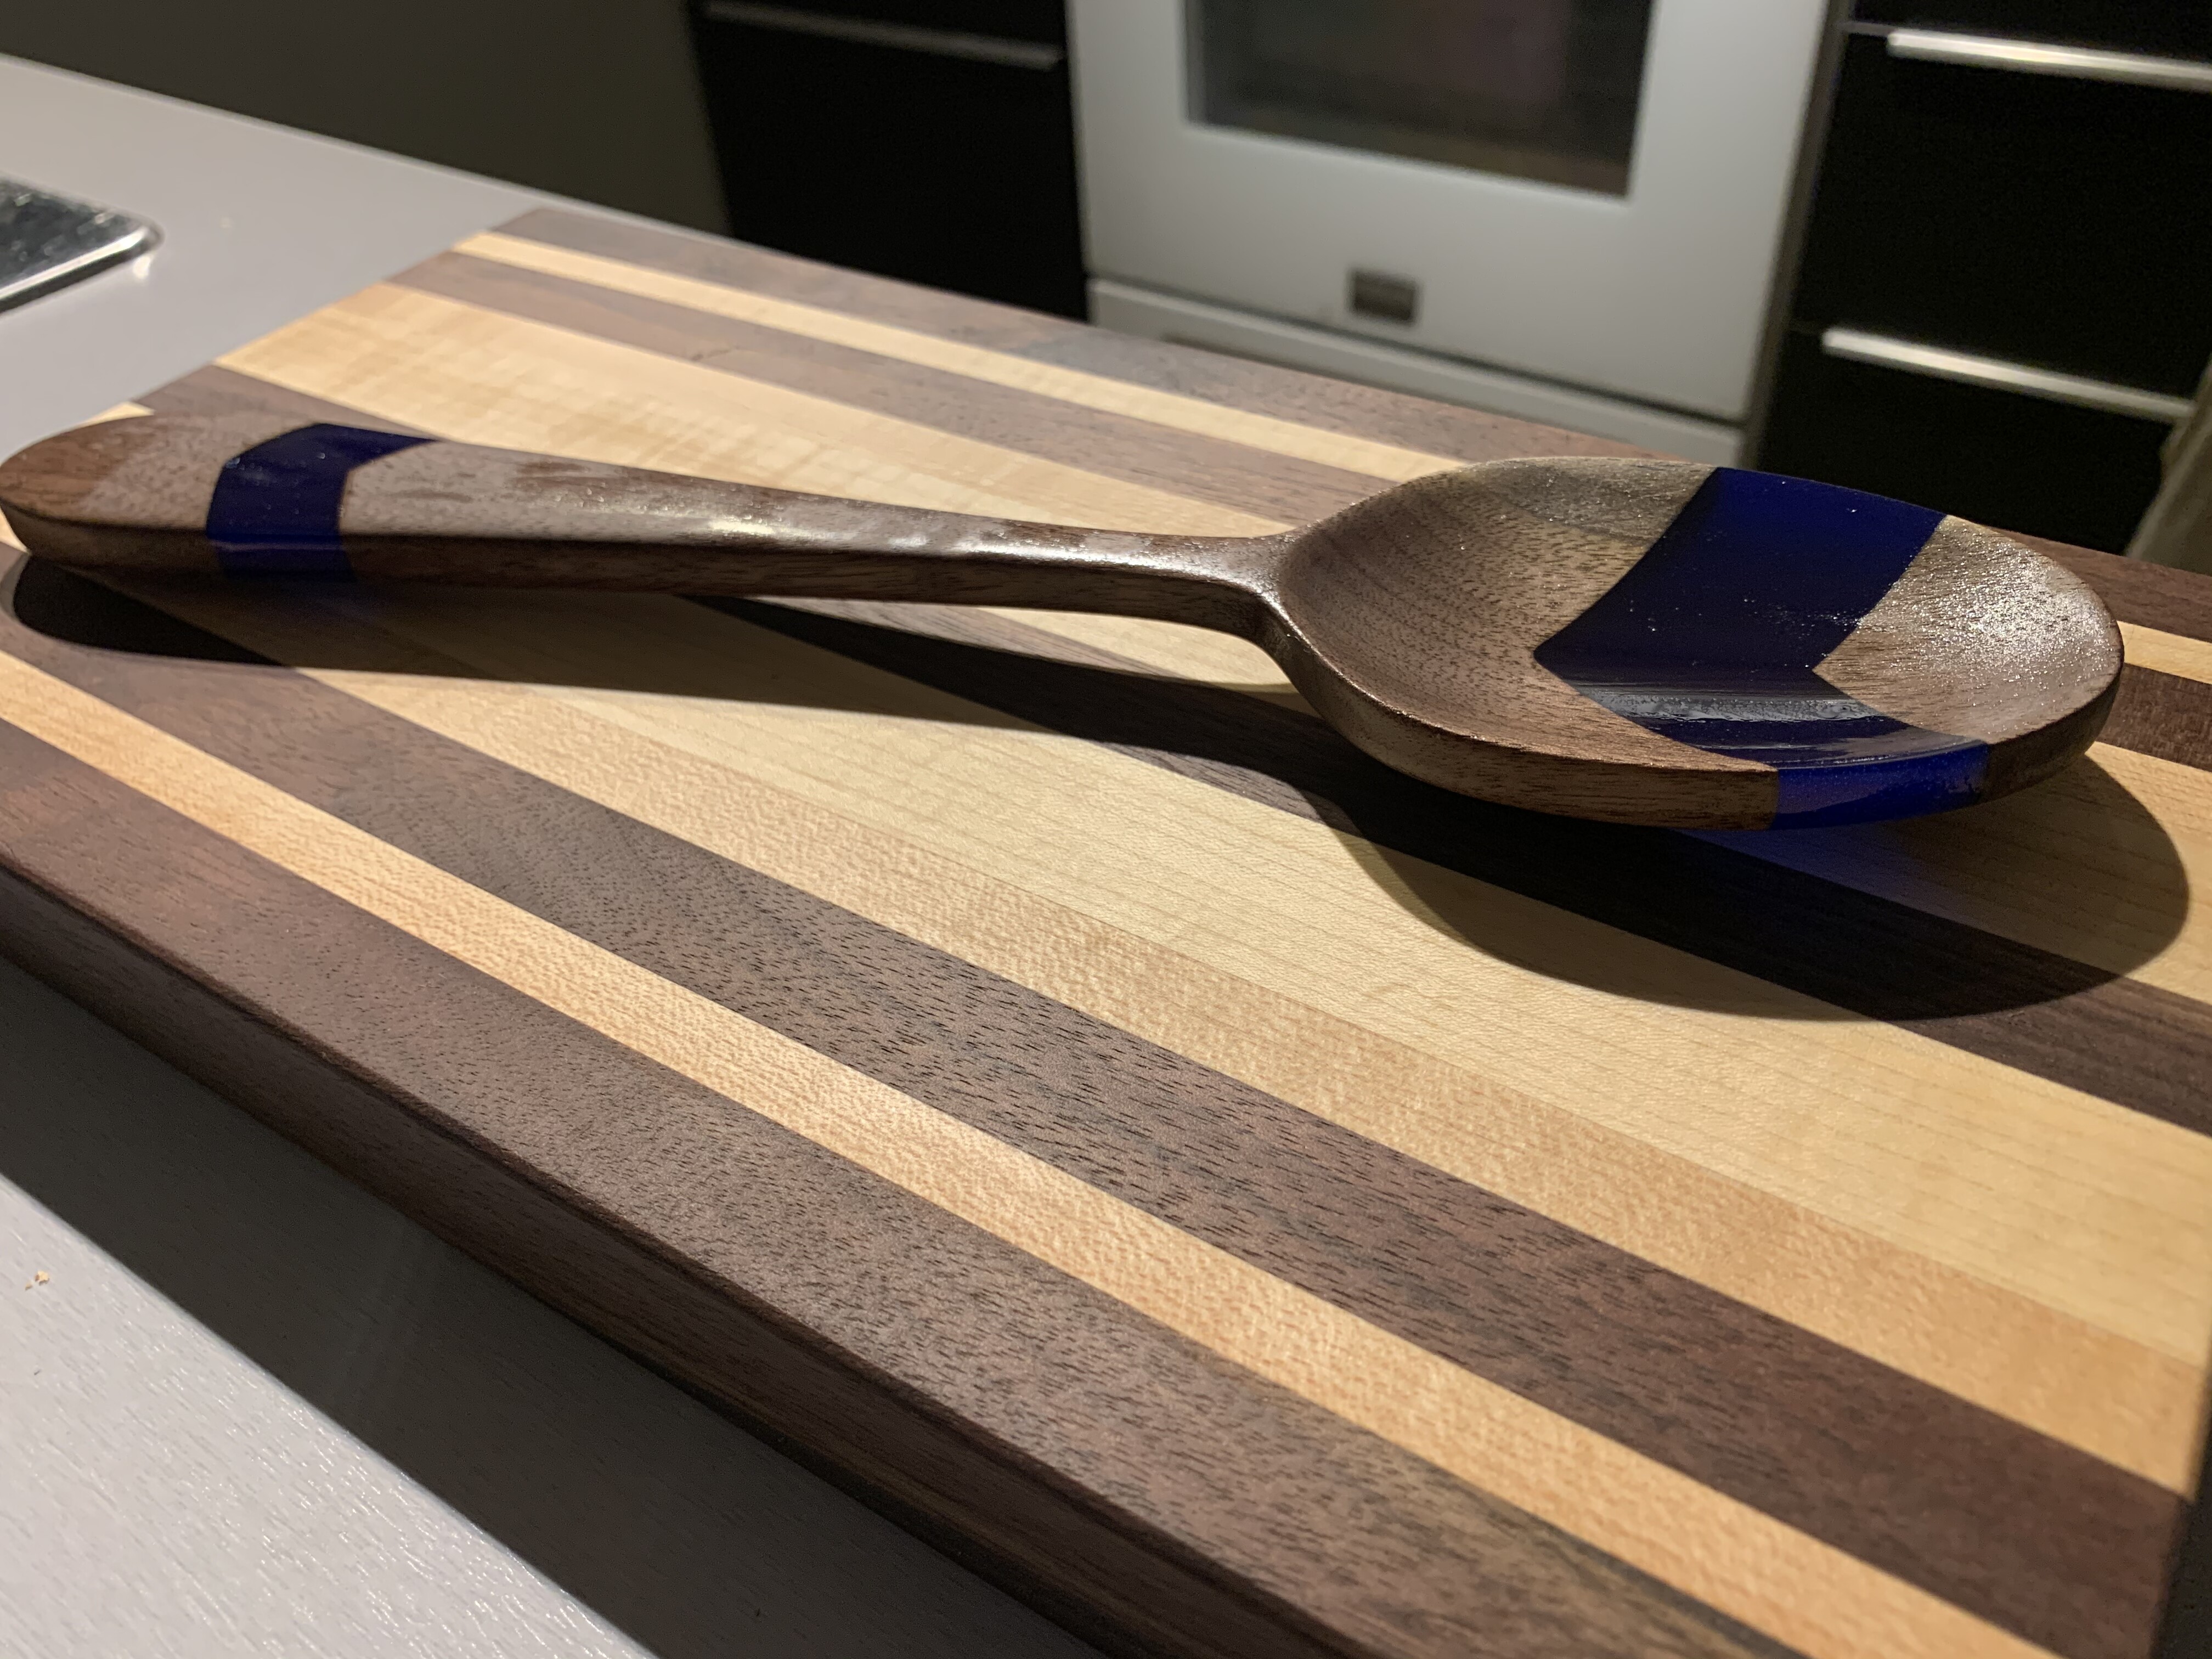
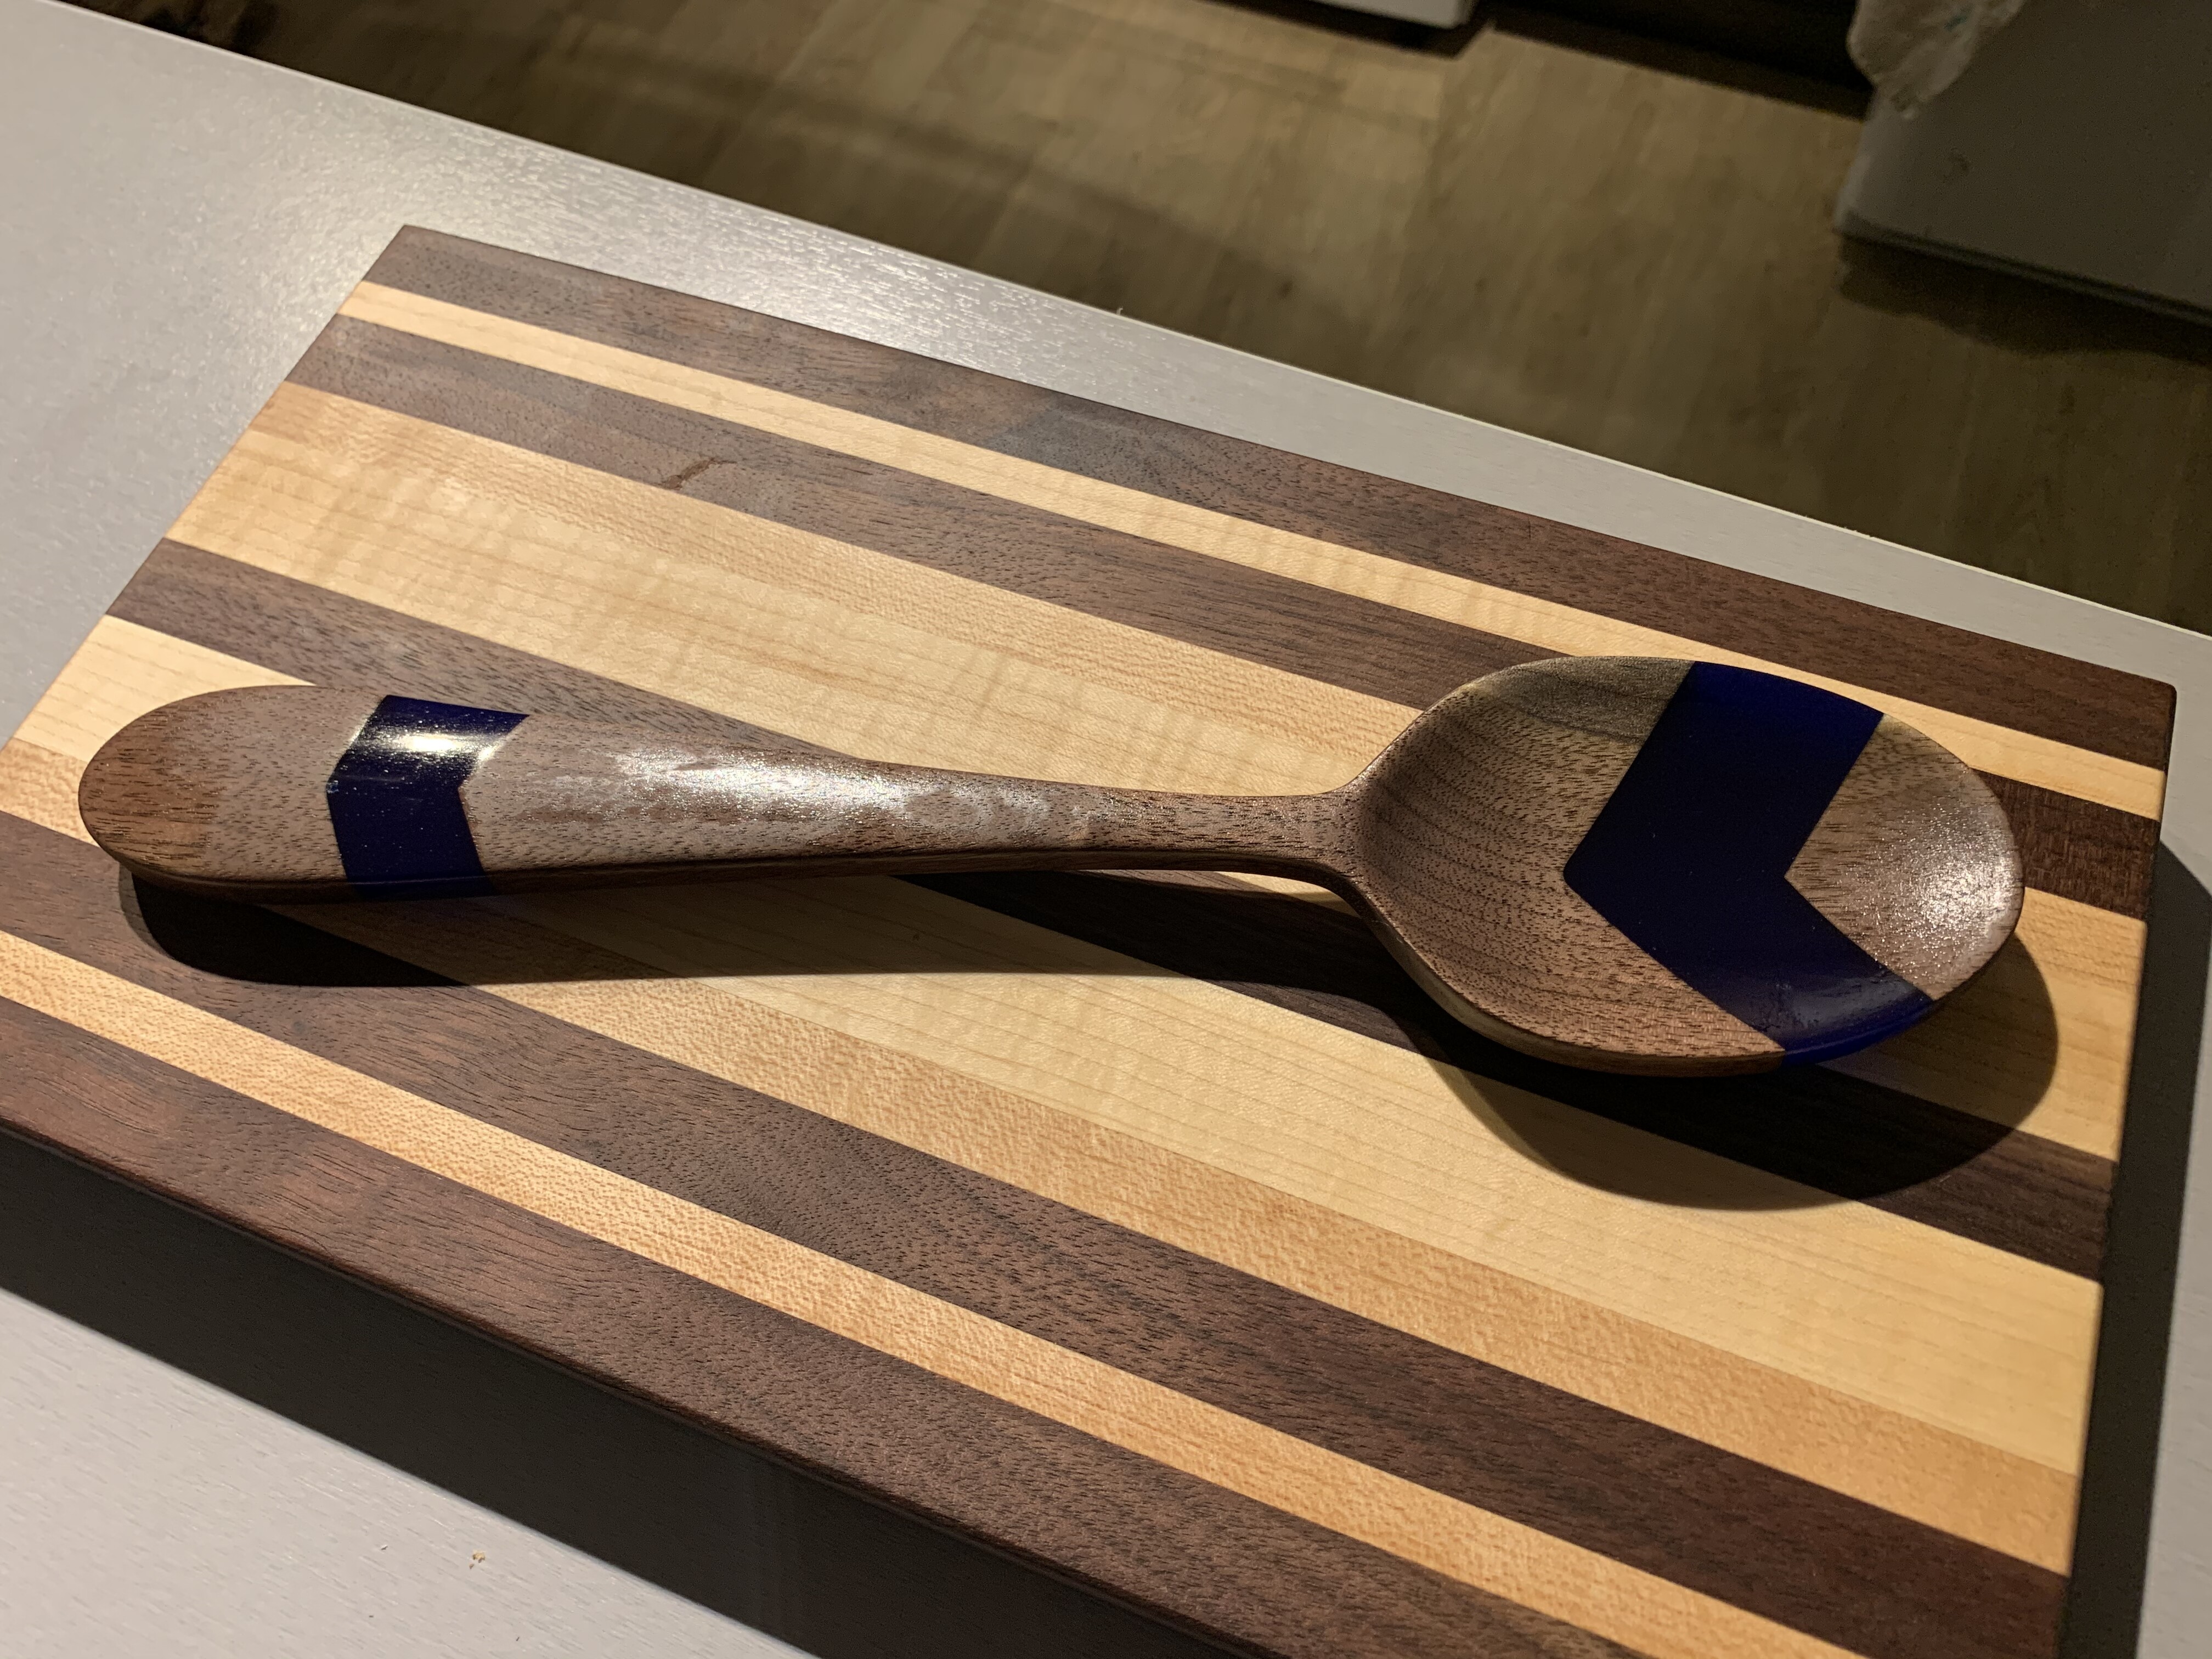
I hope I’m doing this right. First time entering one of these. Here is a spoon with epoxy. All done on my XXL with CC and CM.
Unfortunately I didn’t take any video of the machining of the epoxy spoon as it wasn’t my first attempt. So TheseVideo are the same procedure just on a non epoxy version
For the 2 sided machining, I used two bolts to locate the blank in front and took my Y zero.
For the second side I moved the bolts to the top and flipped the blank also retaking my Y on that side. This way if my the blank wasn’t exactly the size in CC things would still line up. I then moved the bolts before machining as to not hit them during the process. I took X on both OP’S

17 Likes
Yeah it currently supports c2d files and Fusion360 links. If you have a Carbide Create project where you imported a DXF, you can upload that
1 Like
Cool idea (the wood and epoxy mix for a spoon). If you have “work in progress” pictures, and a description of how you handled 2sided machining, that would be helpful, you can edit your post until the deadline to add this or any other info you feel is interesting to share
1 Like
I made a edit. I tried to upload two videos but wasn’t able to. Gave me an error.
1 Like
Yes, for videos one needs to upload them to a file/video sharing site of their choosing, and then insert a link in their post. The forum does not support direct upload of videos. If it is a small one you can zip it, since the .zip extension is accepted (but there is a small size limit)
2 Likes
Thanks. Another edit. Inserted hyperlink
1 Like
I have a YouTube account I’ll be linking to very soon.
Sometime after Tuesday.
will a drip coffee stand work as a kitchenware?
1 Like
It should!
Because it’s used in the kitchen!
1 Like
I’m not one to argue too much, do post about your drip coffee stand!
I was ways fascinated by the taste and the methods of brewing pour over coffee, recently i have bought a shapeoko pro and asked my self why not use it to fulfil my coffee addition needs by making a pour over coffee stand :). In this post i would like to share the project photos and my experience with the community summarised in the below points.
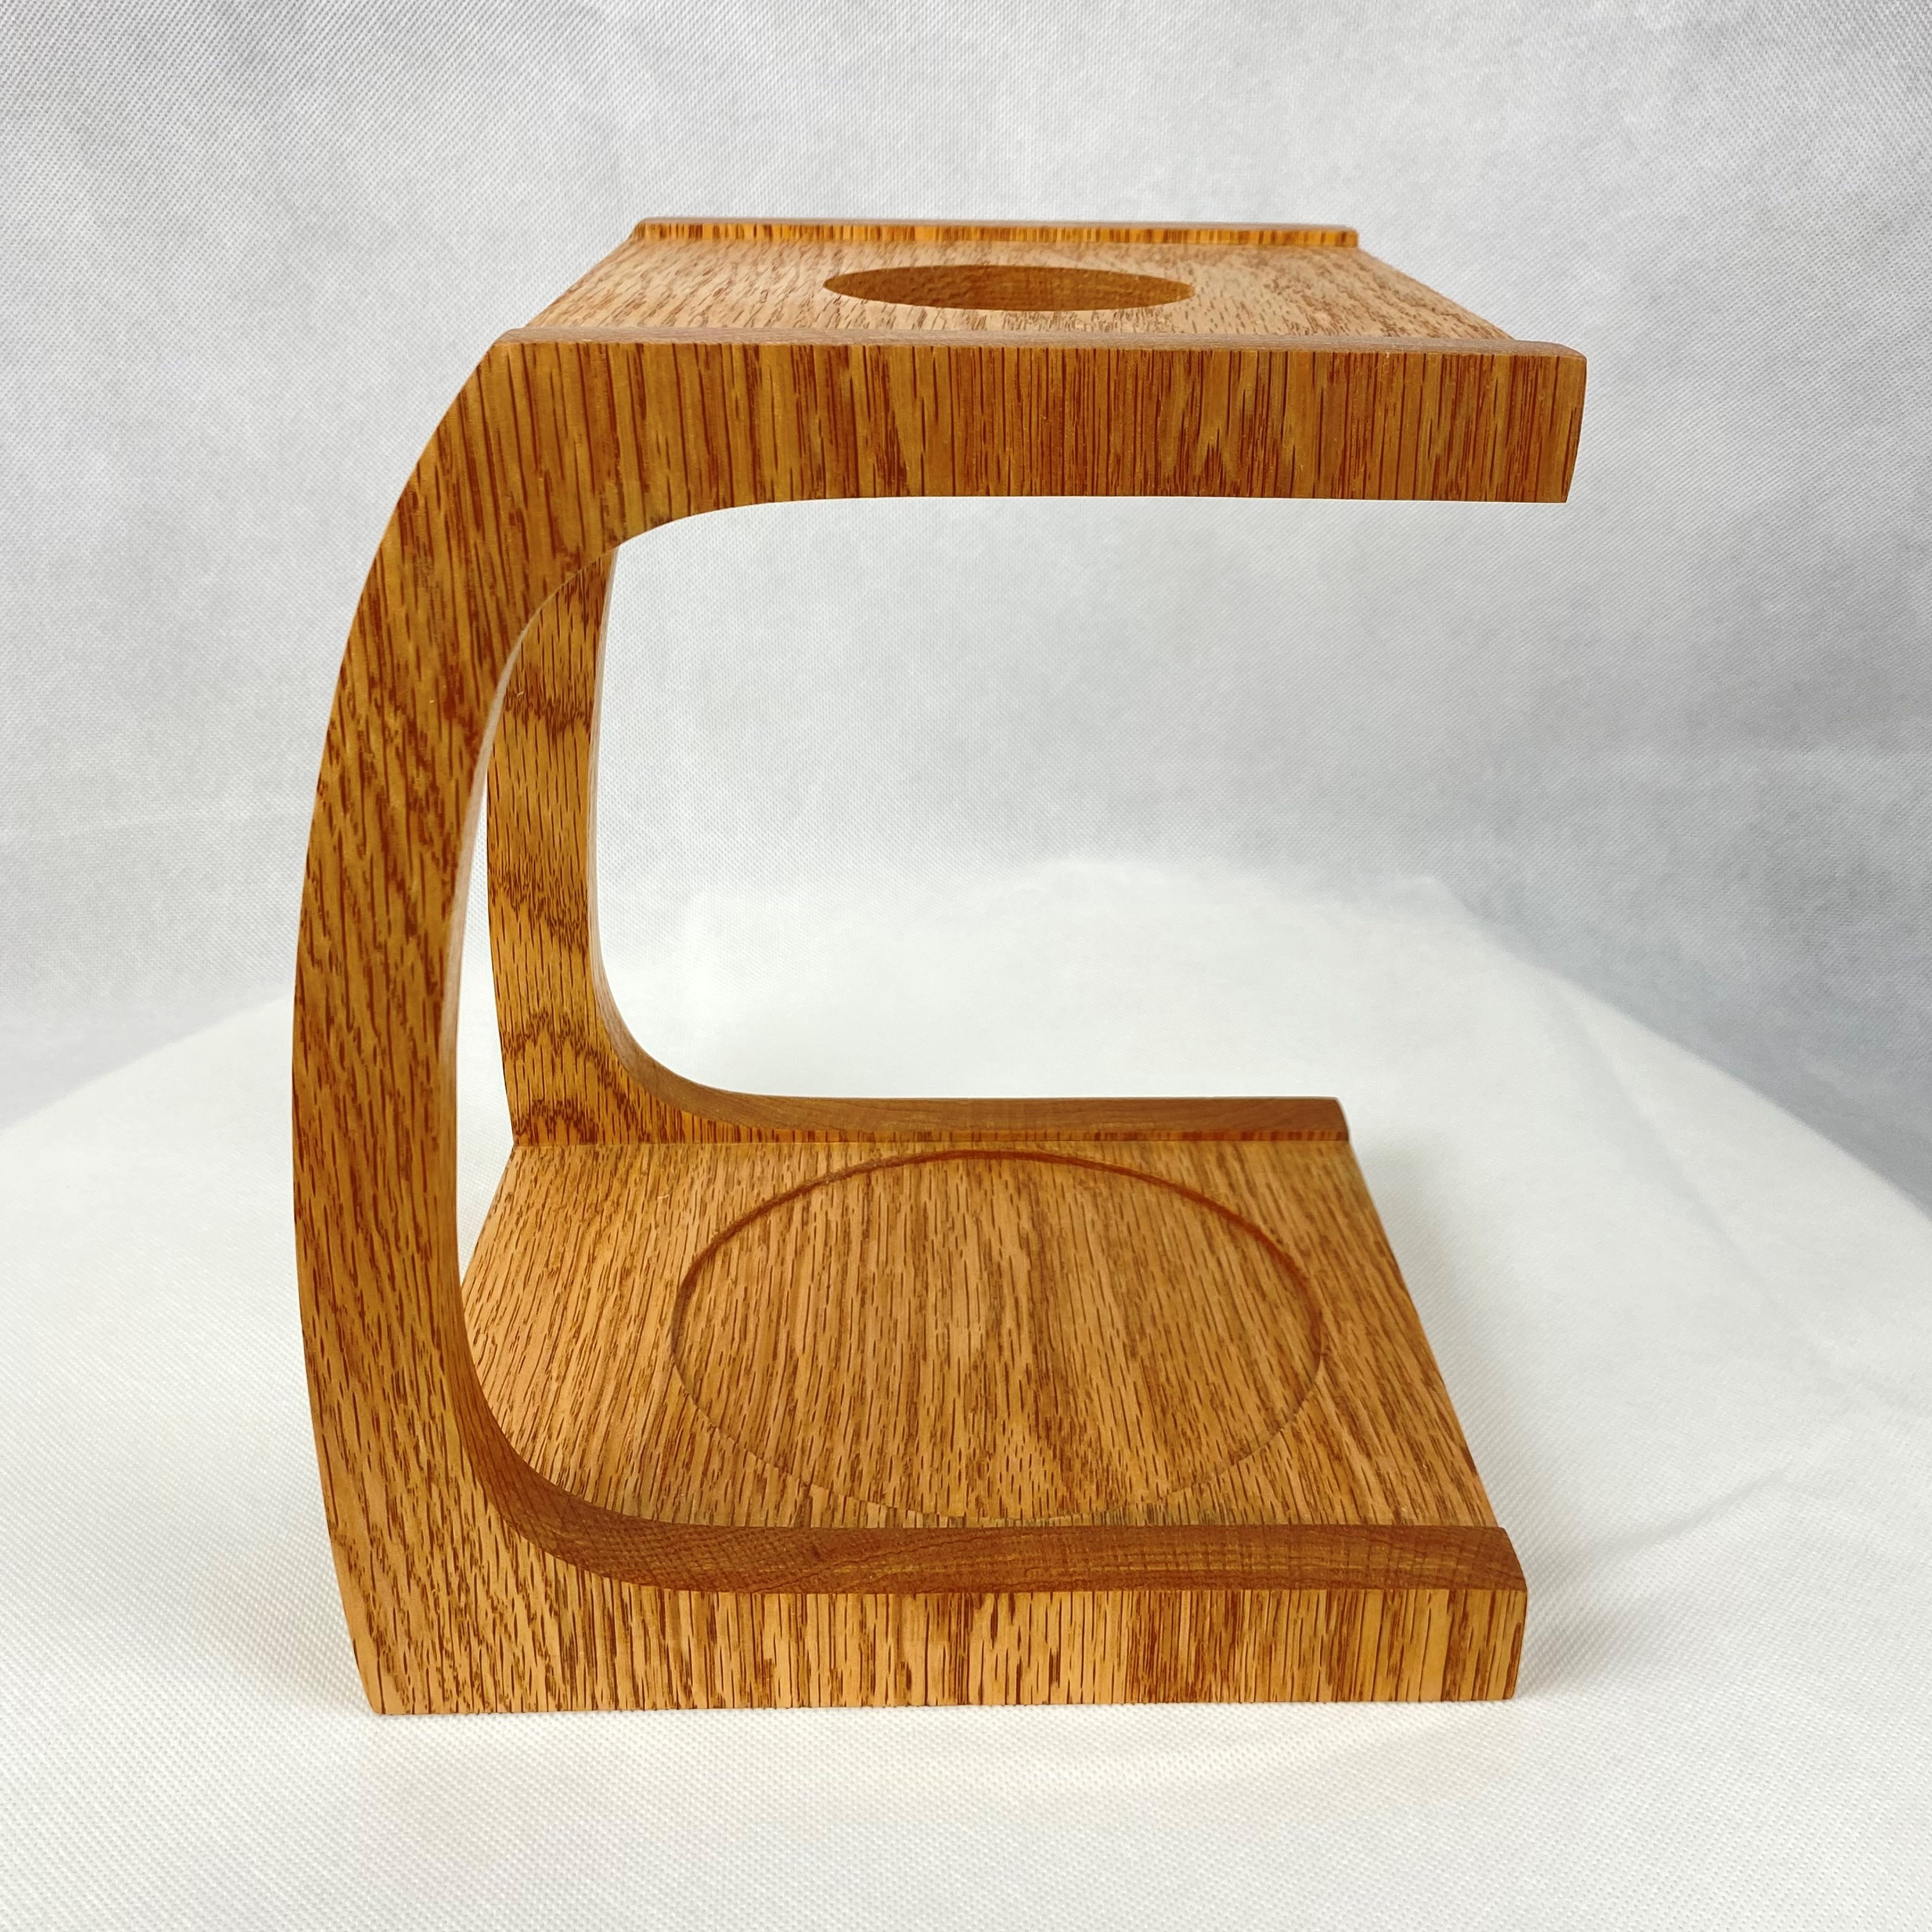
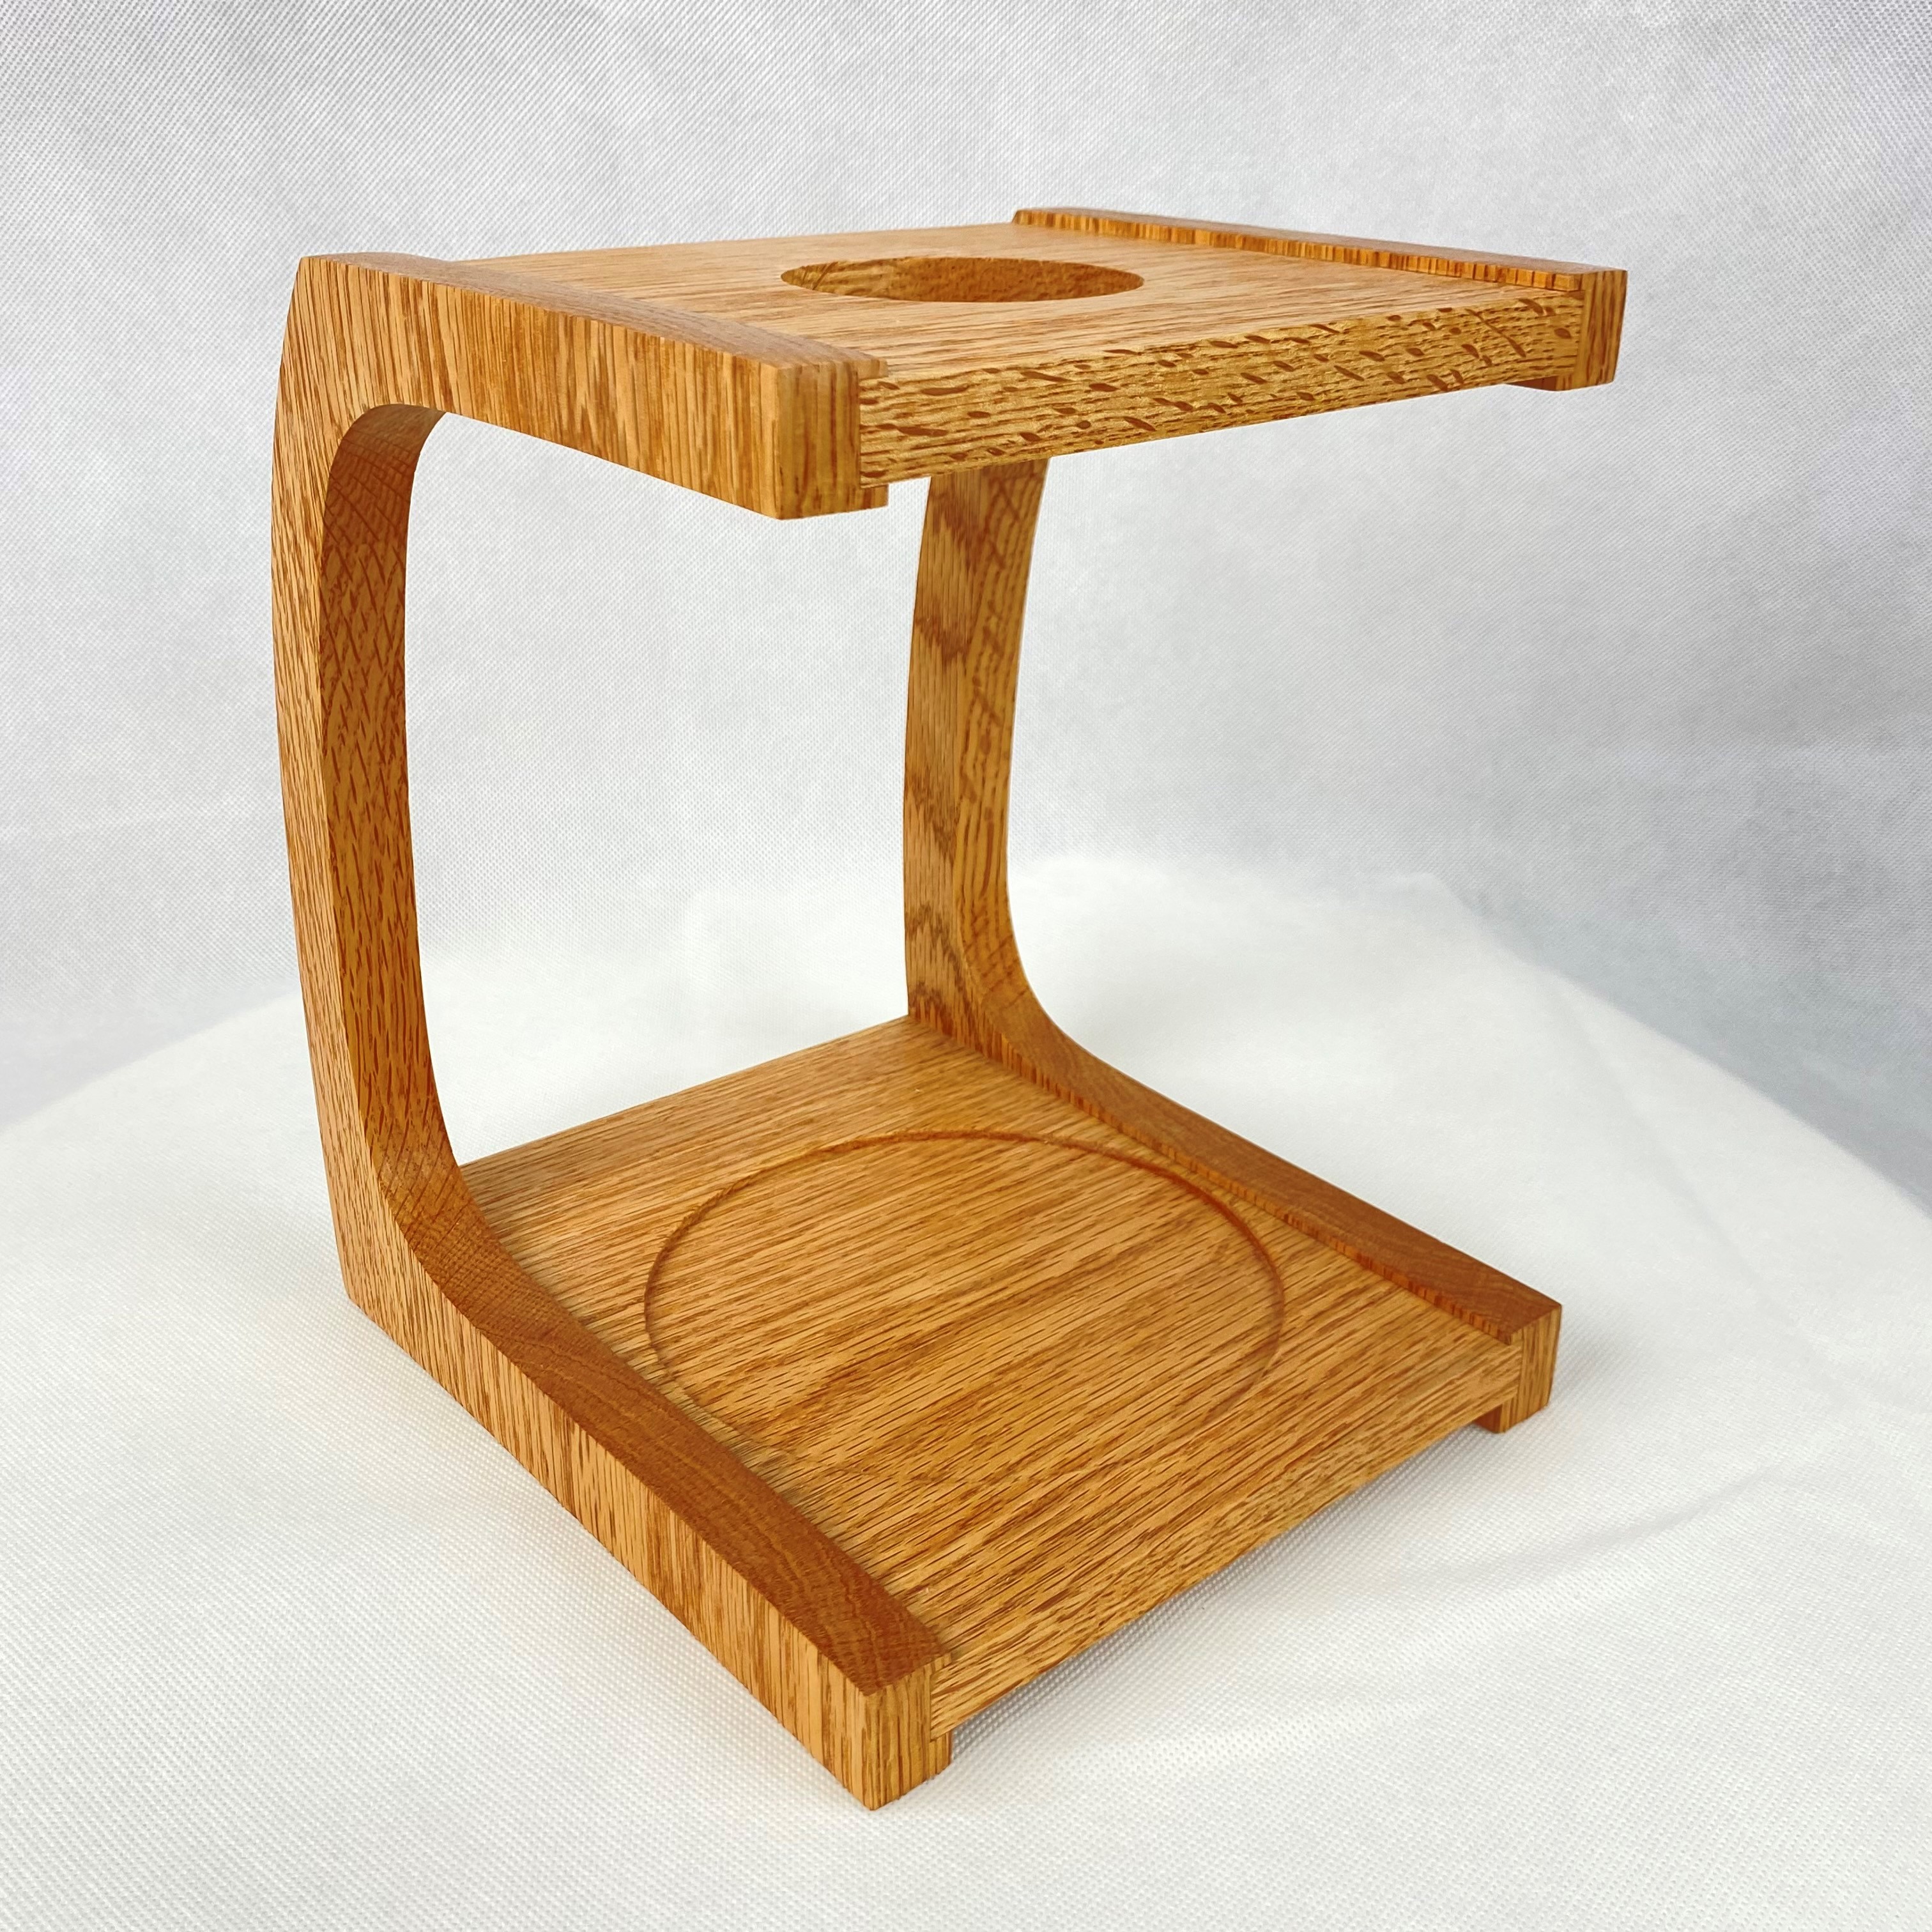
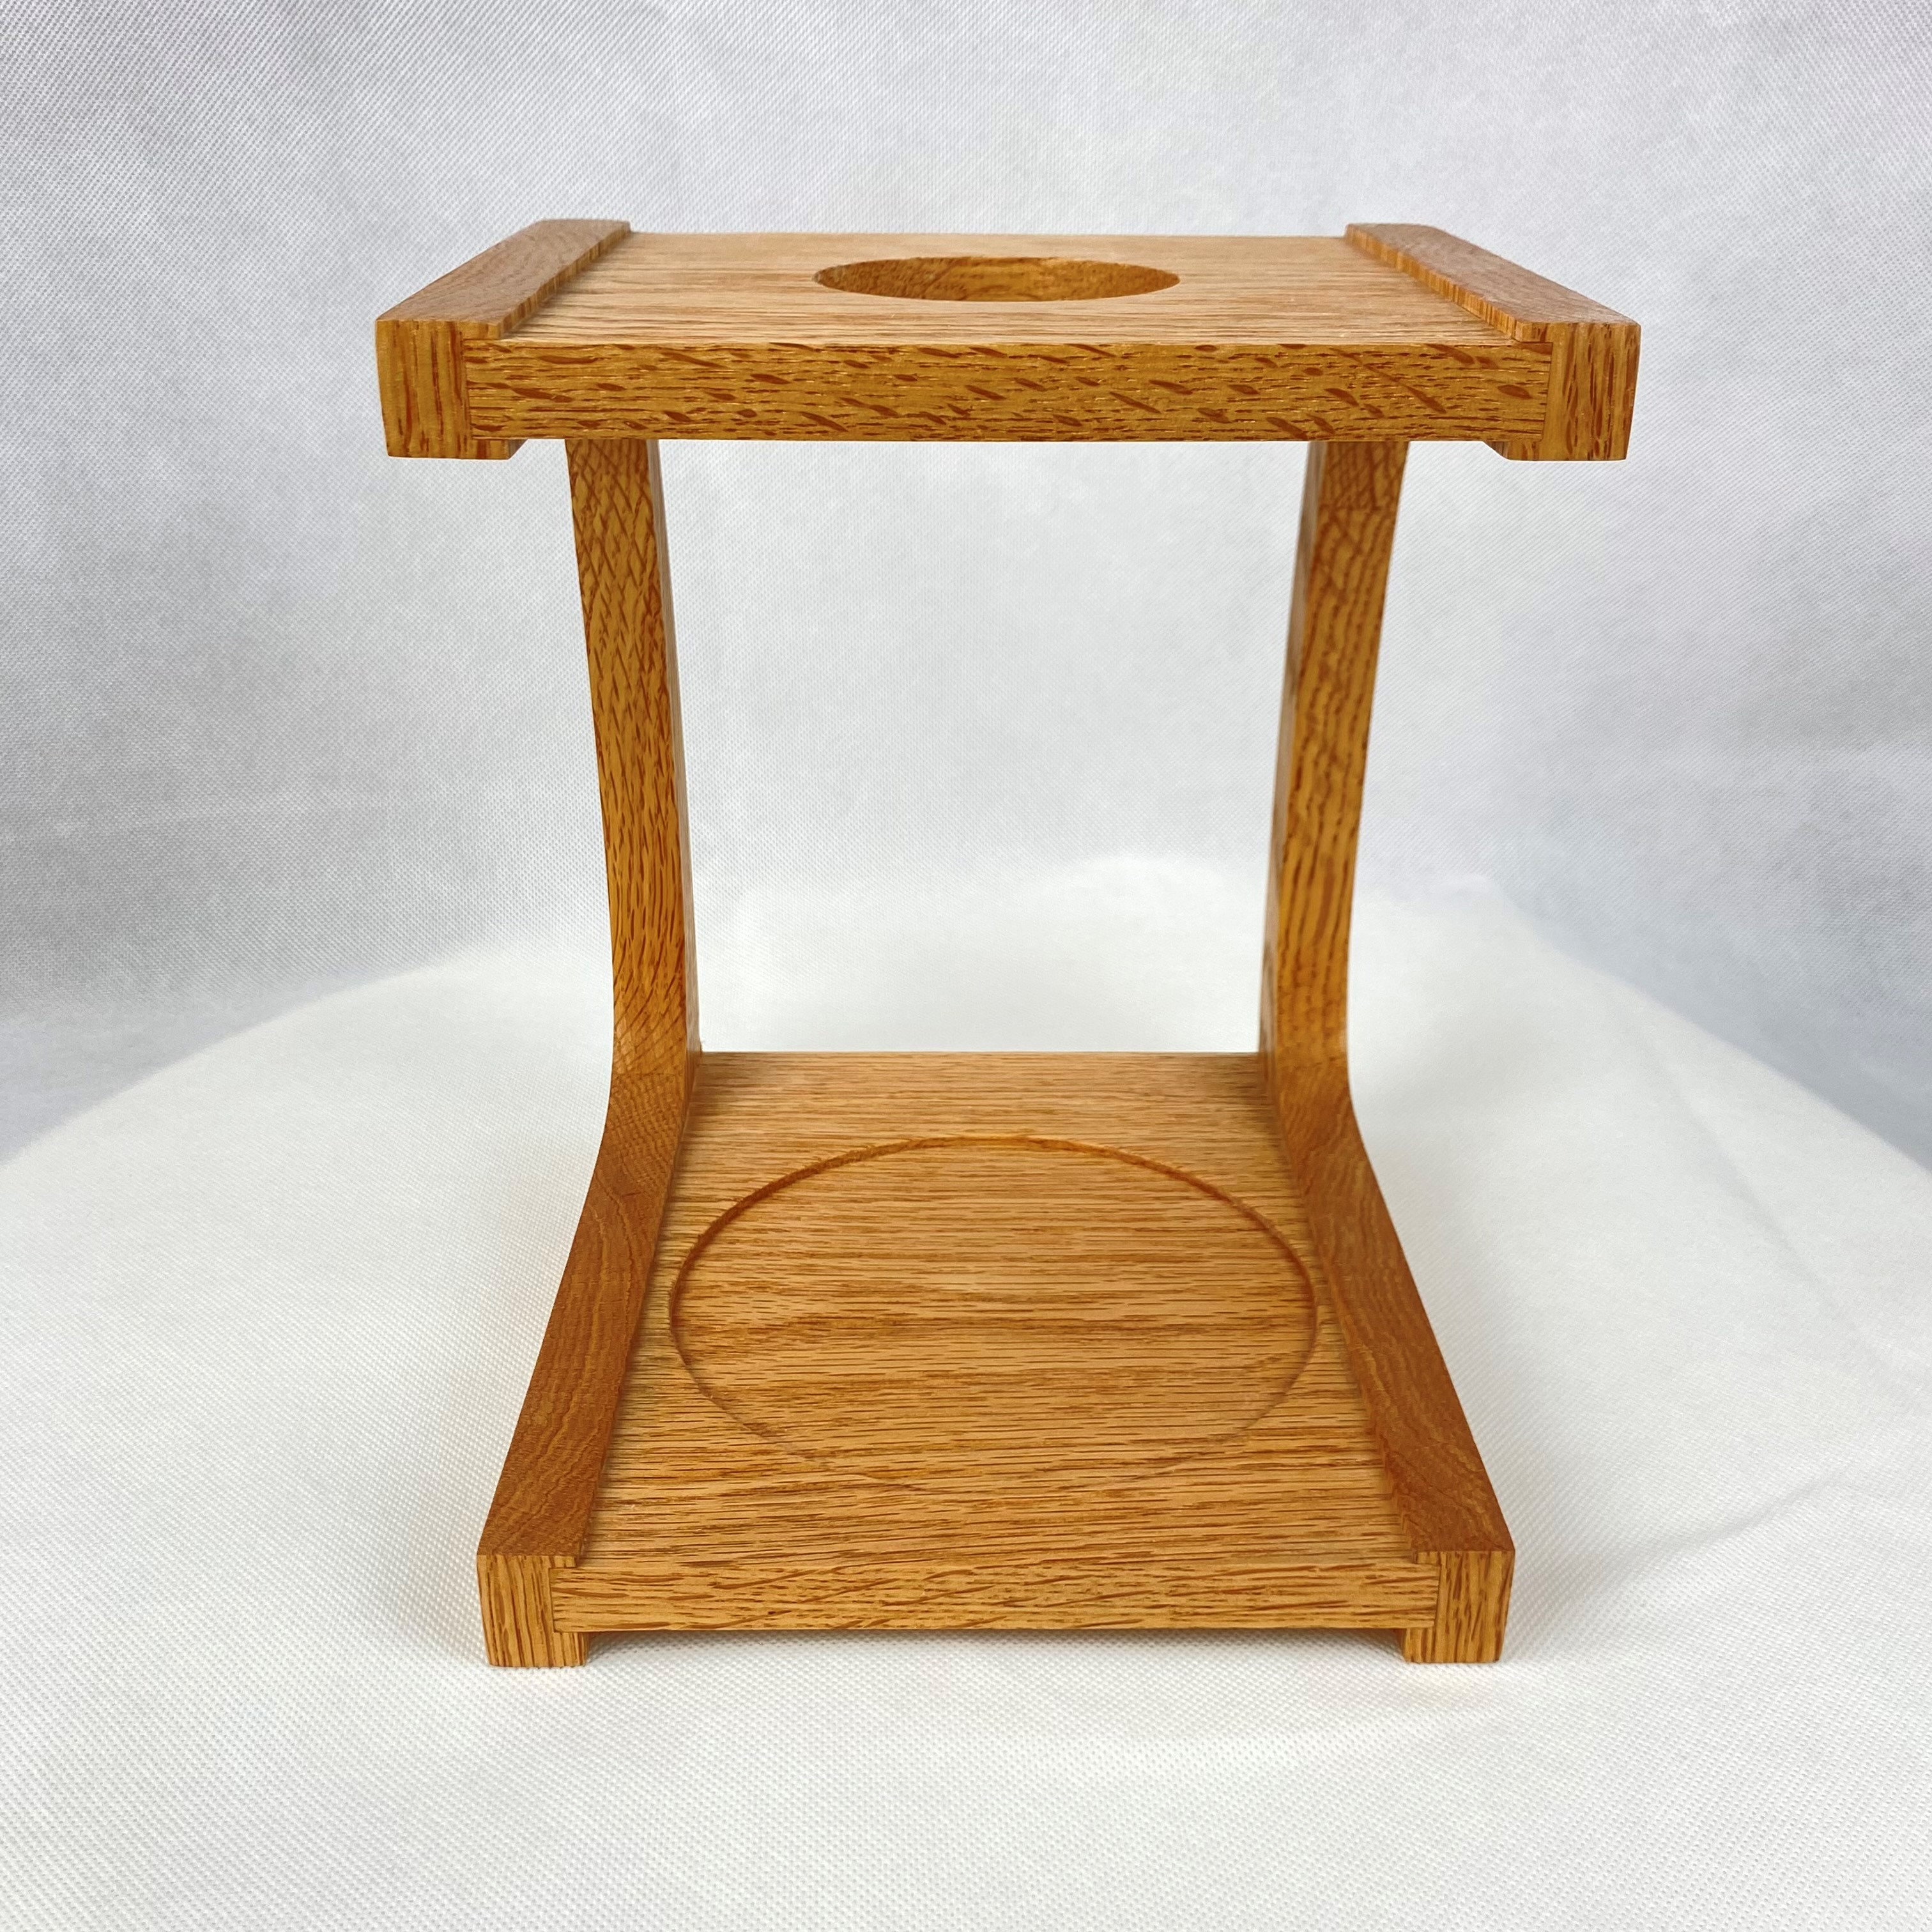

Before starting any project i usually develop a list of Design consideration and objectives, below is what i have developed for this project:
- Eliminate the use of dowels by making grooves to fit the pieces together and for better alignment during glue up
- Drip hole size to be compatible with various coffee drippers
- Make a recess to collect coffee droplets
- Able to fit a small measurement scale, to measure poured water
- Able to fit several types of coffee servers

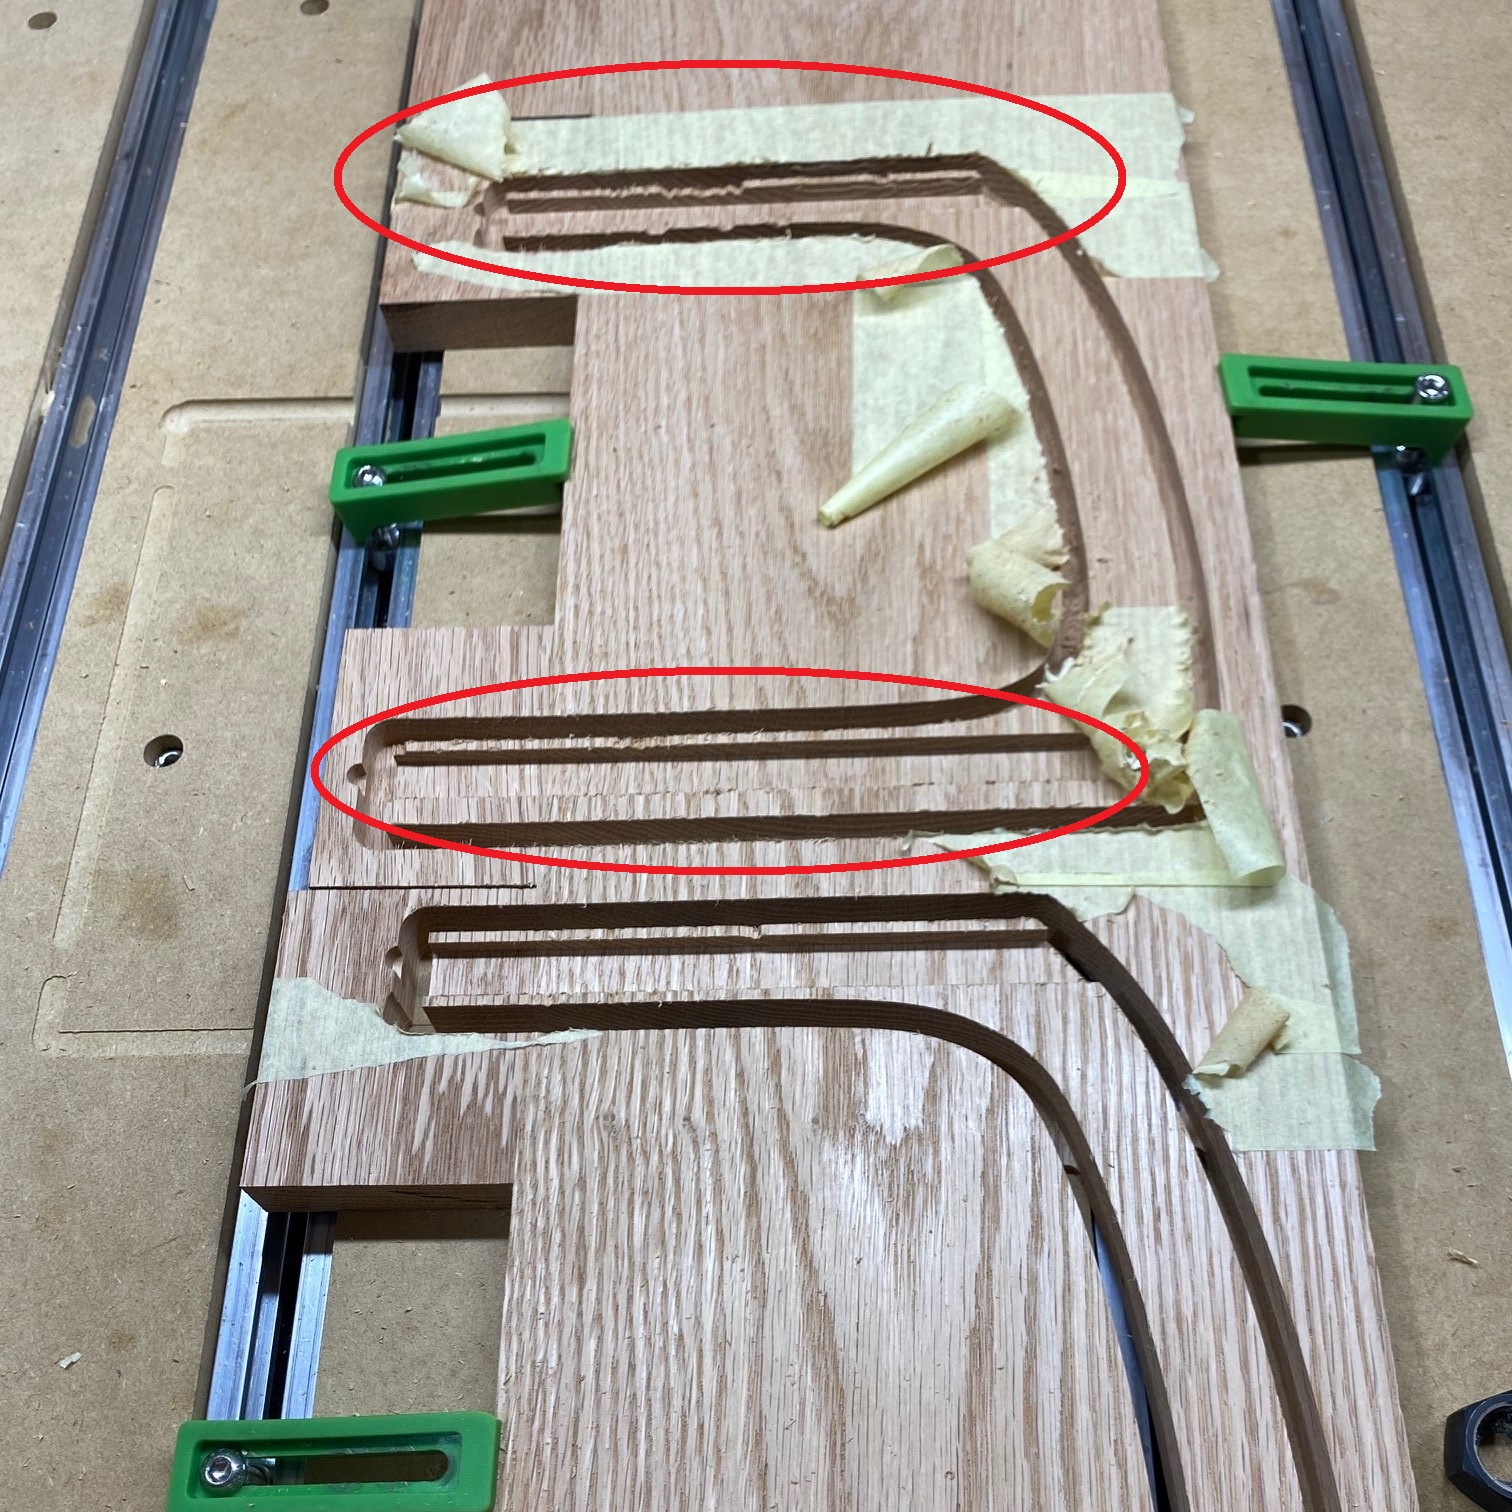
Machining considerations:
- I had few failed attempts since i was cutting across the grain in some areas with an up cut bit which splintered the edges of the wood, i had to change the upcut with a downcut bit which solved the issue.
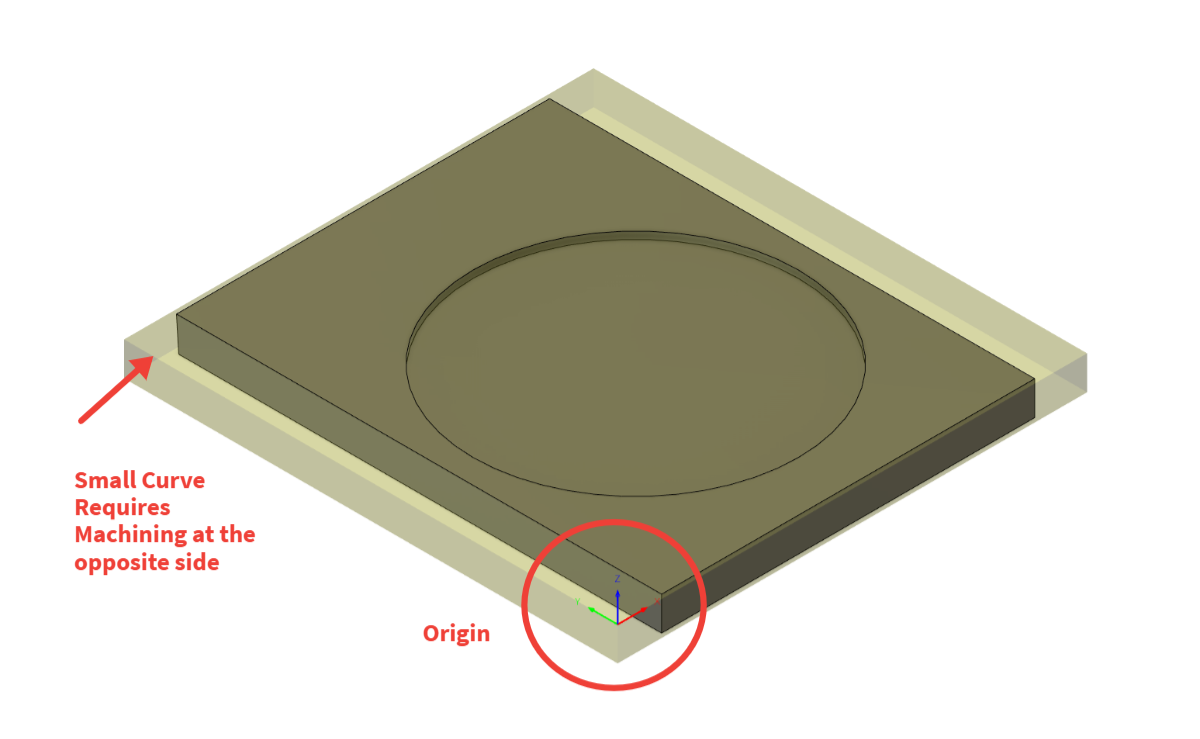
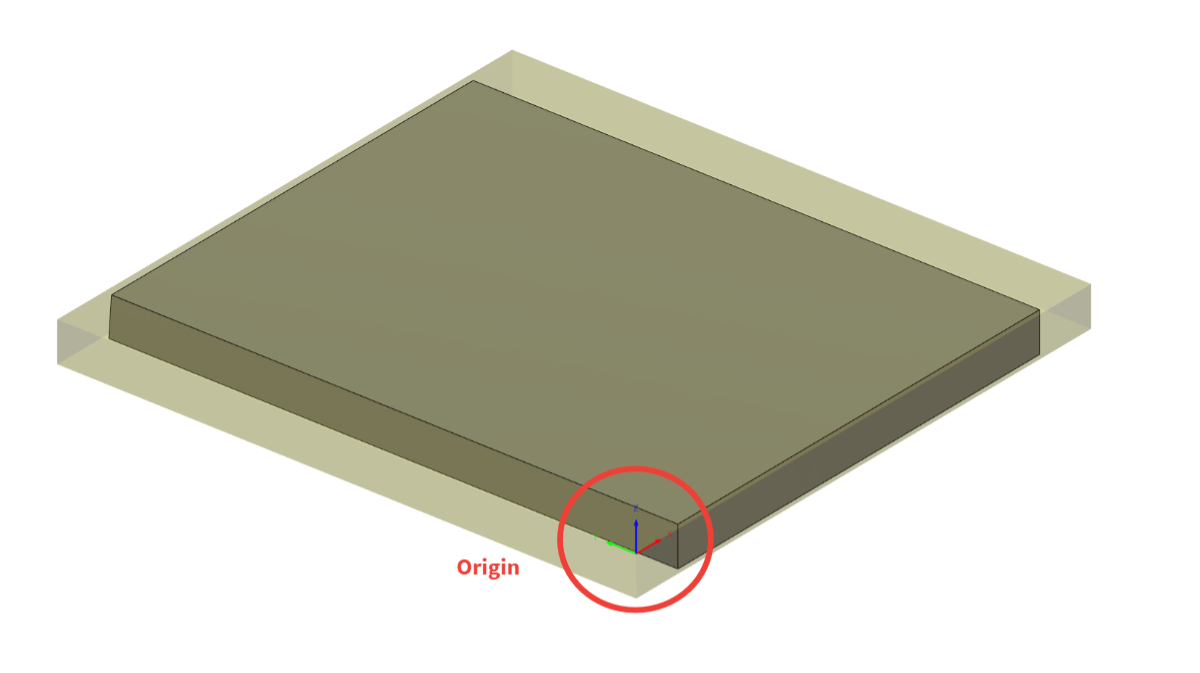
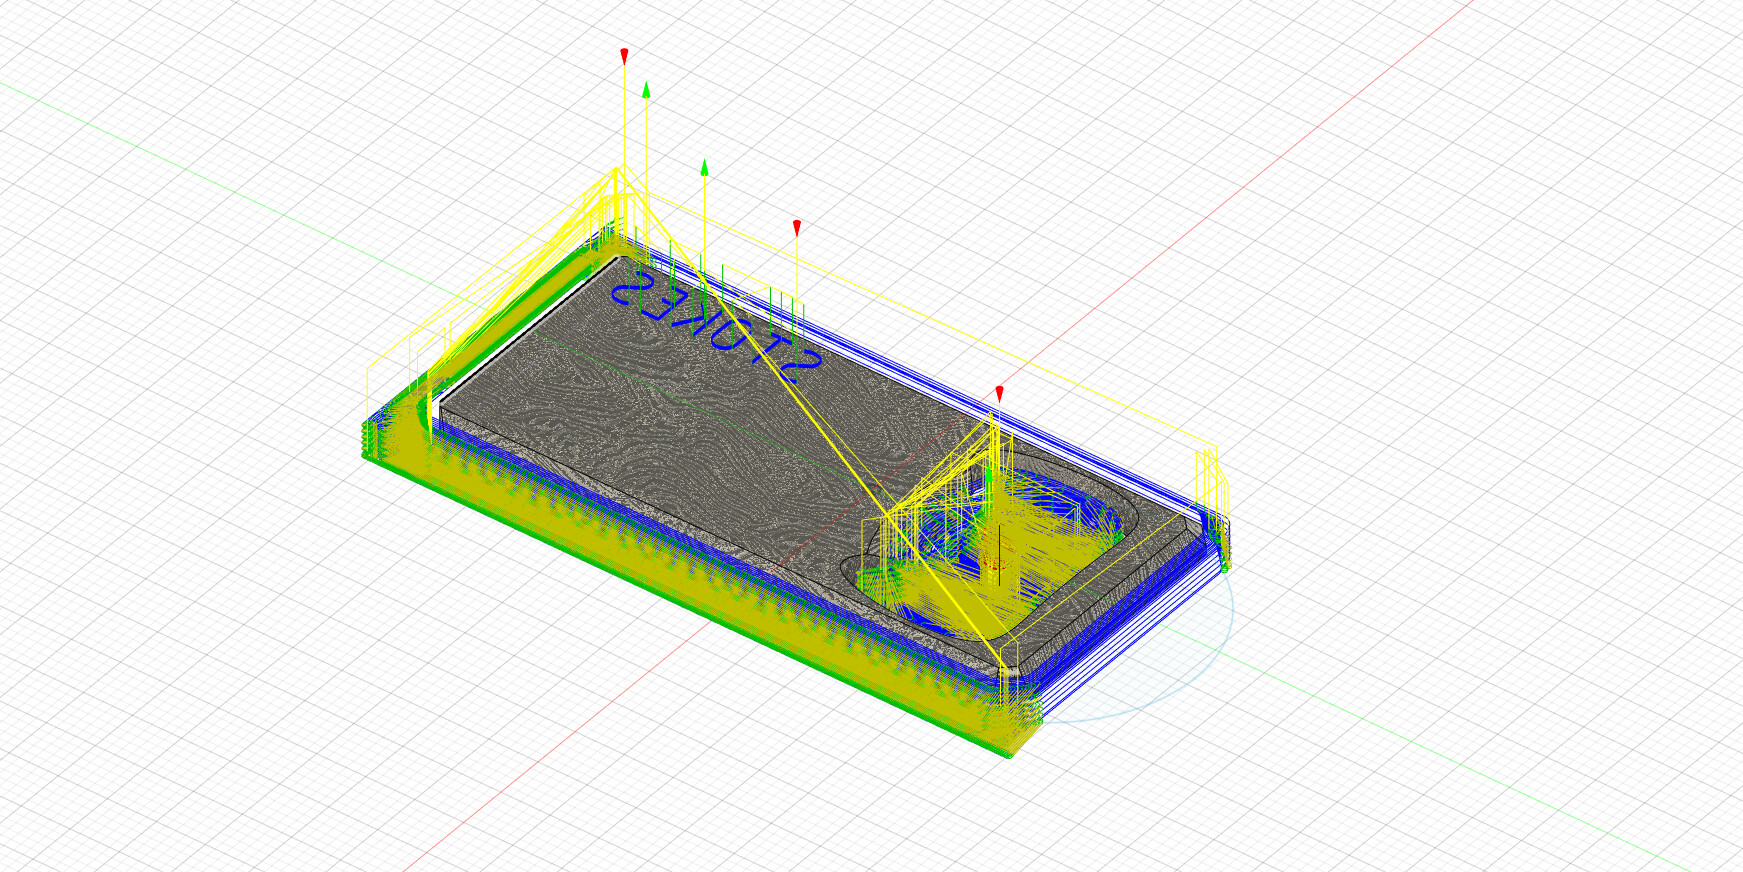
- Since some parts such as the lower plate required two side machining due to a curve at the edge. Therefore. I had to create two G-Codes in fusion 360 one for the upper face and one for the lower face. For this to work you need the origin point to be at the same location while maintaining a Z Axis perpendicular to the face that you will machine see below photos. After that all you need to do is to flip your stock before running the second G-Code.
- Parts were cut in two operations a roughing pass and a finishing pass to maximise the precision of cut parts, i left about 0.5 to 1 mm stock in the roughing pass to be cleared in the finishing pass.

Feeds & Speeds:
-
Majority of the parts were cut with a 1/4 inch flat up cut end mill, used a feed rate of 65 in/min at 18000 RPM. (Bit #201 supplied by Carbide 3D)
-
Curves were cut with 1/4 inch ball end mill, used a feed rate of 65 in/min at 18000 RPM. (Bit #202 supplied by Carbide 3D)
-
For grooves i used a down cutting end mill to minimise chipping with a feed rate of 100 in/min at 18000 RPM. (bit supplied by Amana Tool 46202-K)
Wood Finishing:
- Since i ran my stock (Red Oak) in a planer, sanding was reduced significantly. Therefore, I have used 120, 150 and 220 sanding papers consecutively. Then i have applied two coats of Danish Oil to expose the natural beauty of wood gran and for liquid resistance.
21 Likes
Nice coffee stand ! Thanks for participating. It’s also quite doable in Carbide Create so hopefully this will inspire others to make their own.
6 Likes
Very Nice Coffee Maker, Maker.
I don’t know why my mind does that?
5 Likes
I hope this qualifies as Kitchenware…
A Napkin holder.
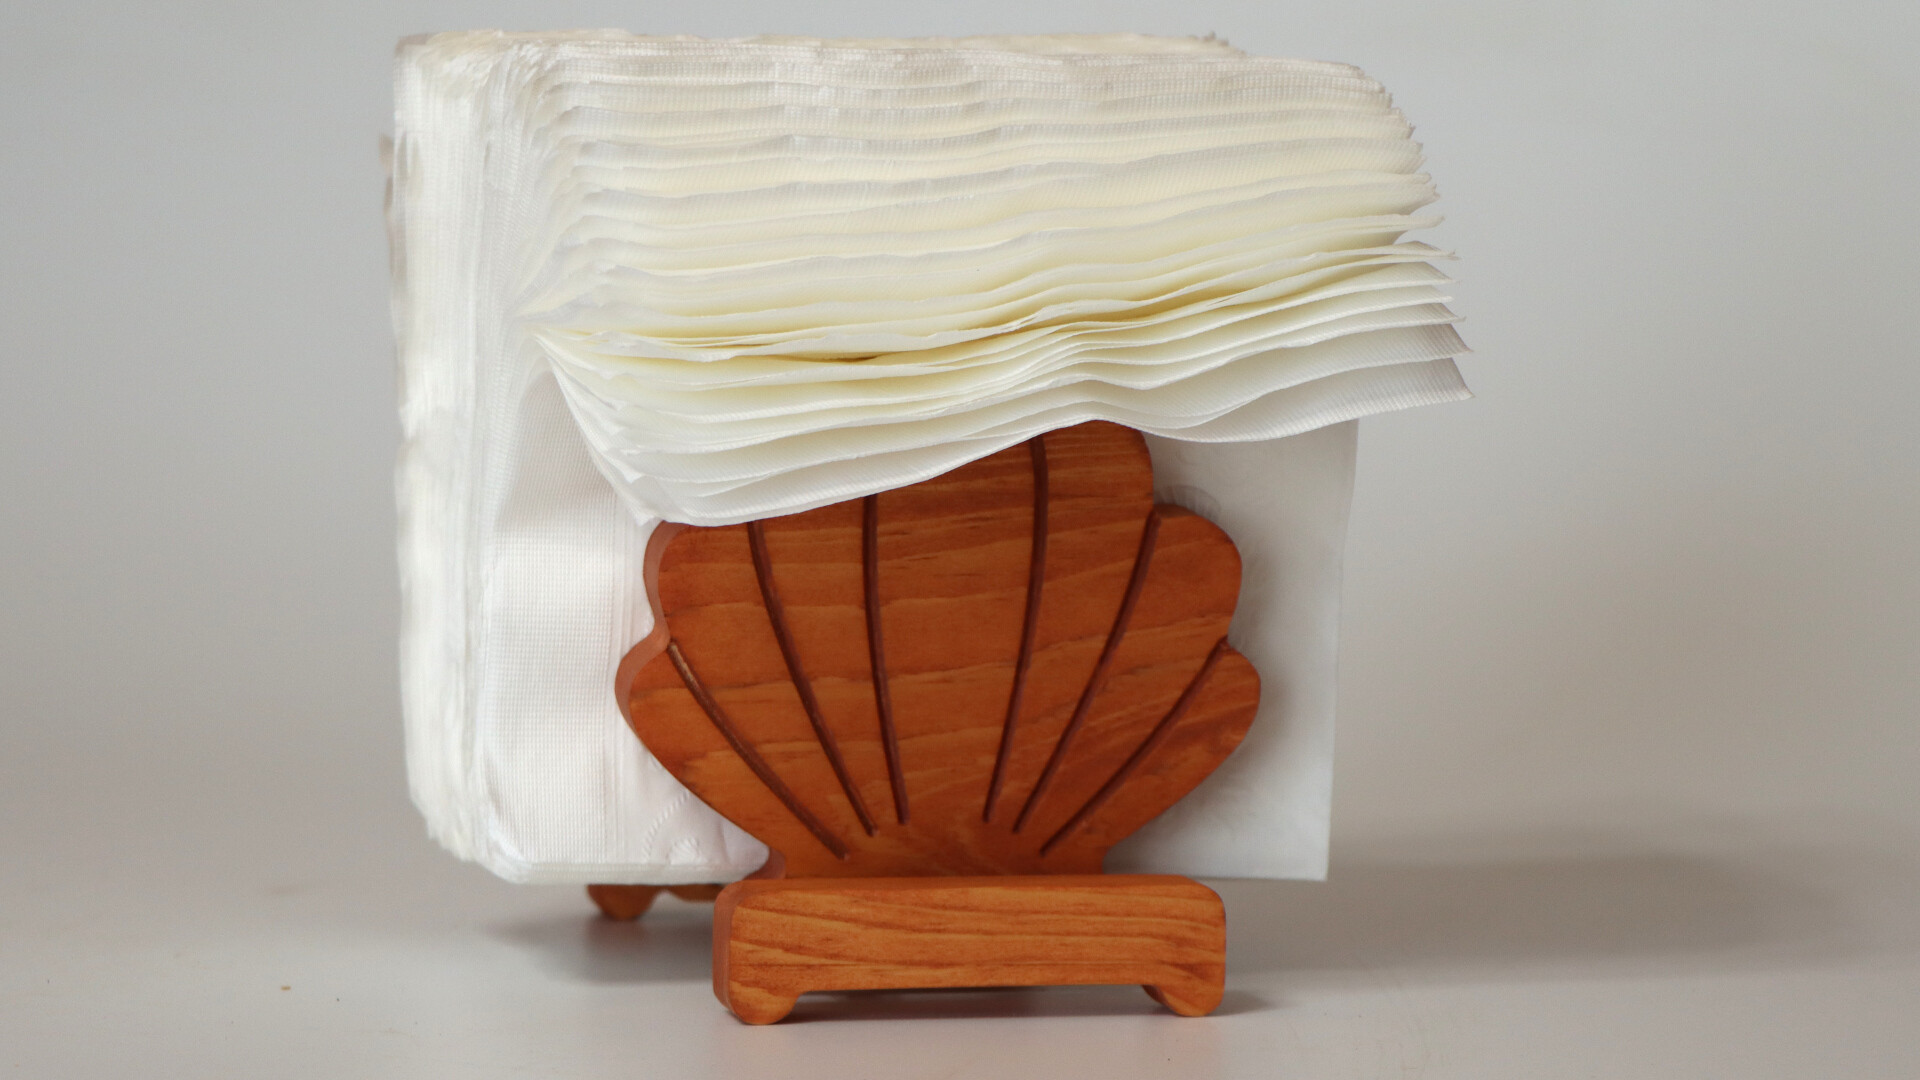
Cut out of 3/4" pine and stained with some random orange stain I had sitting around from another project.

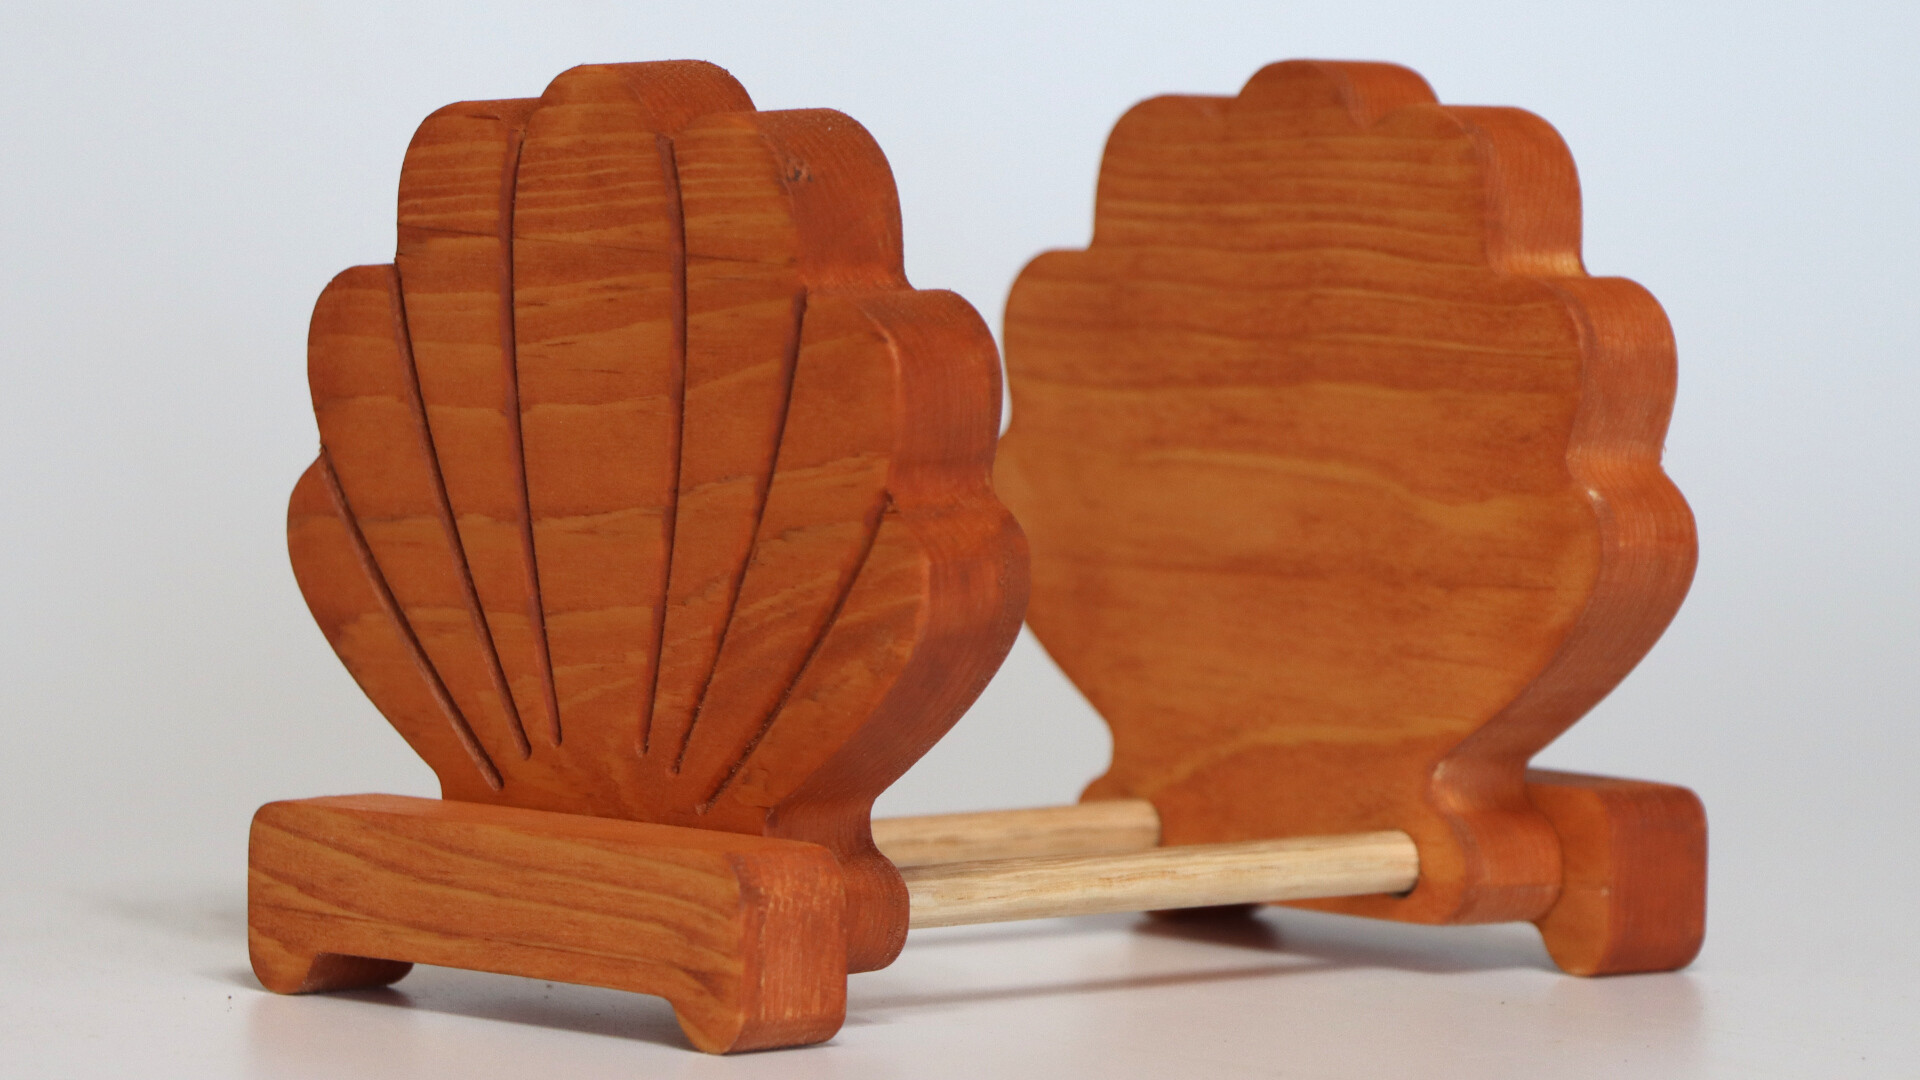
The design is super simple, the legs are both mirrored as are the shell shaped napkin ends.
Finished project stands about five inches tall, just under five inches wide and as long as you’d like. I used six inch dowels to join the parts together yielding about six and a half inches finished length.
You can download the project file on cutrocket here.
16 Likes
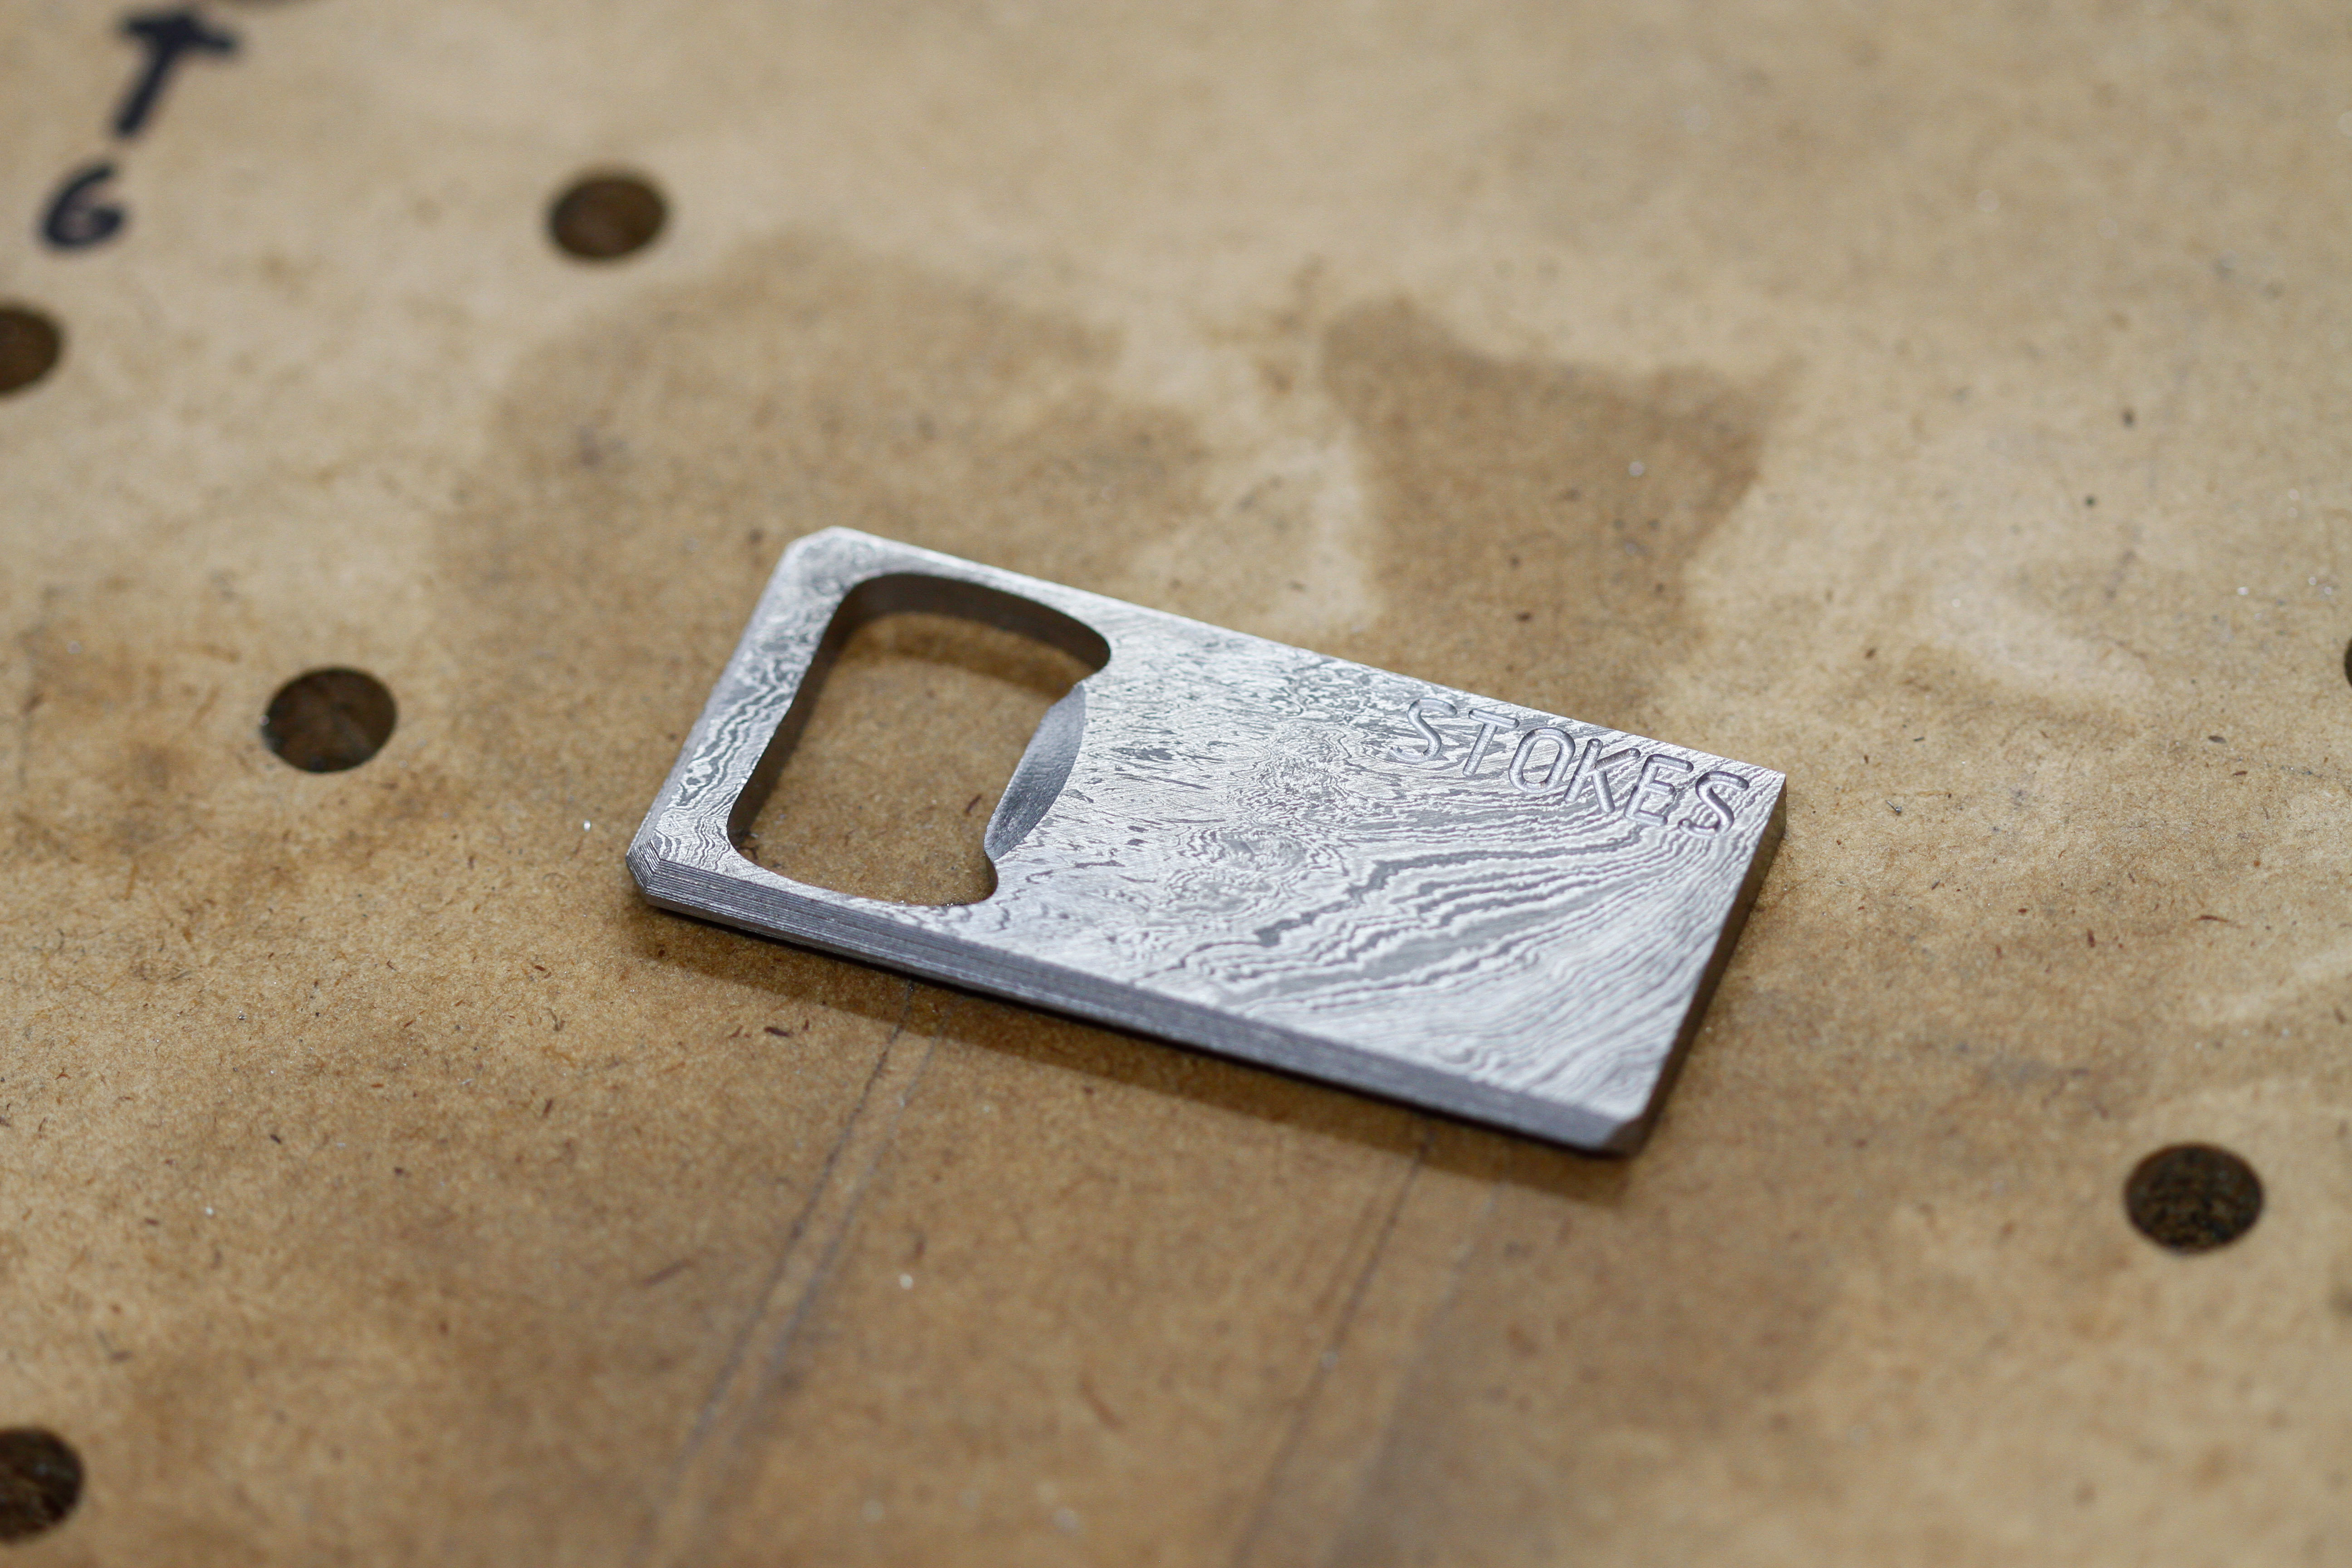
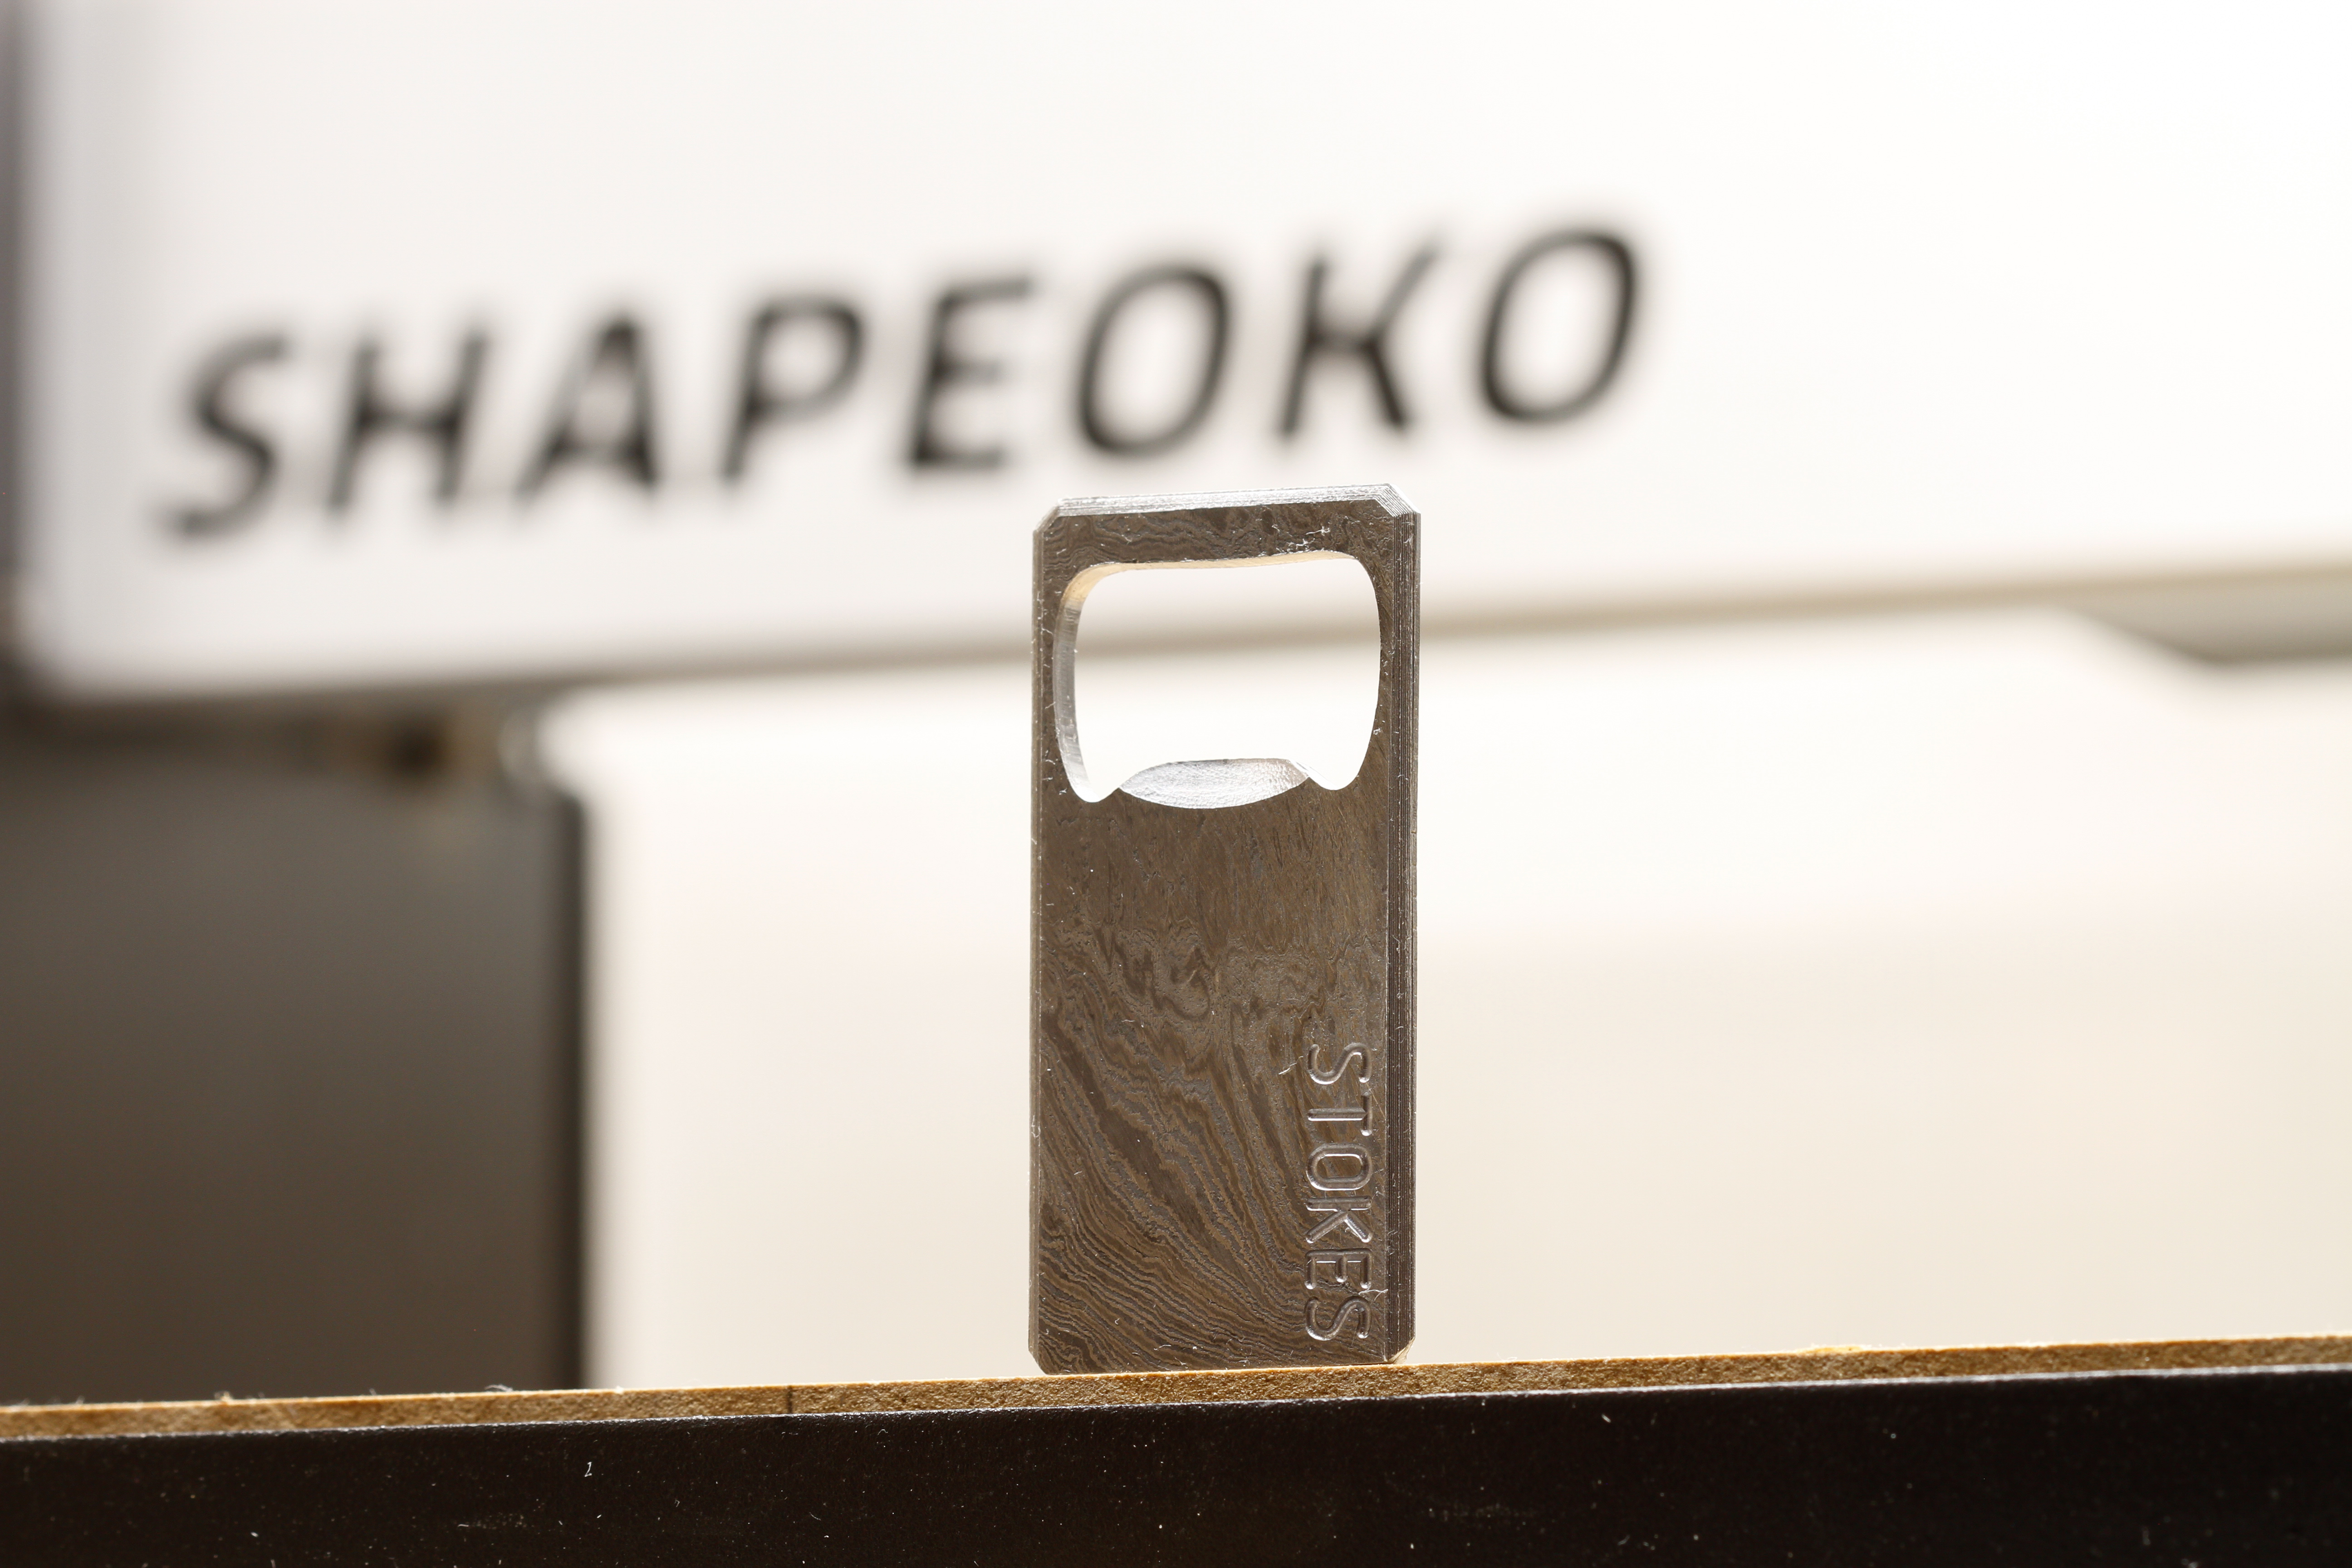
Arguably the most critical and important tool in the kitchen (maybe debatable). 
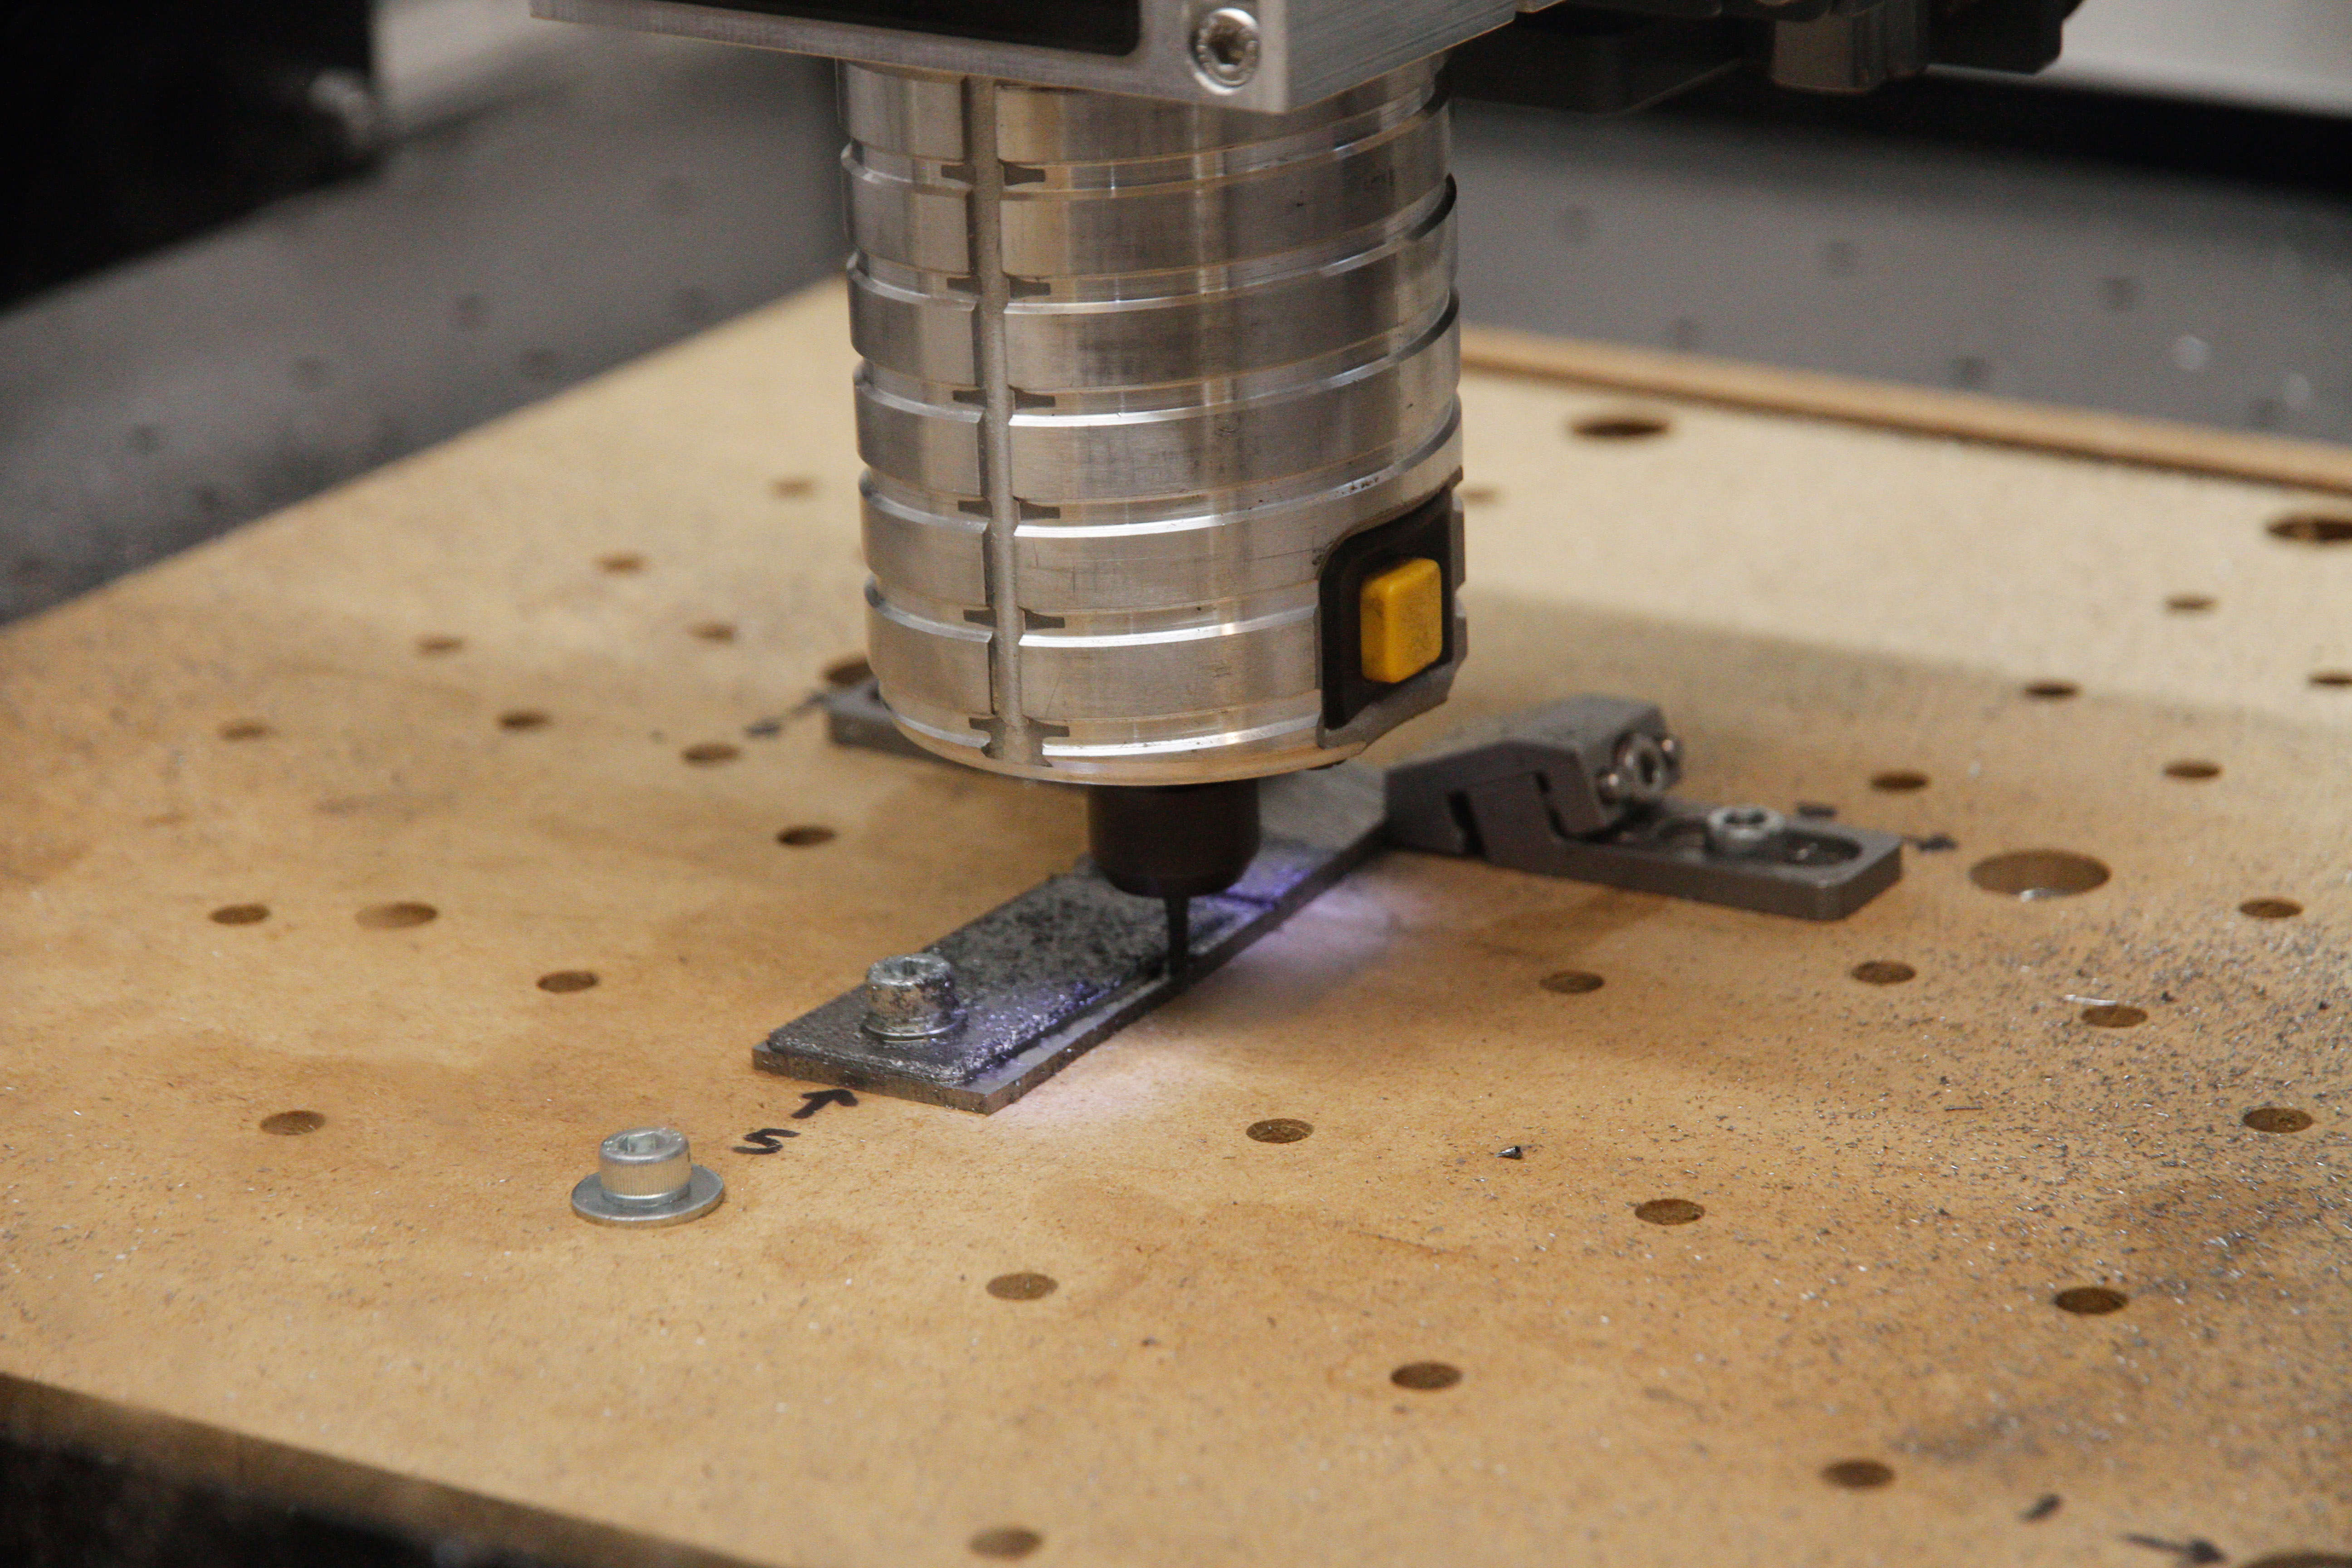
Damascus Steel Bottle Opener

First time attempting Steel, so I used a mini 2.5mm (0.1’’) TiAlN 4F End Mill, with F360 adaptive cuts. Which was slow and conservative but hey I only had one end mill.
Work holding was pretty difficult, there’s probably a better way to do it. I predrilled a rough hole where the opening would eventually go, and bolted it, with tigers to clamp the stock at the rear. In total there were four operations, two on each side.

I liked the step textured contours/chamfers so I left them in as machined.
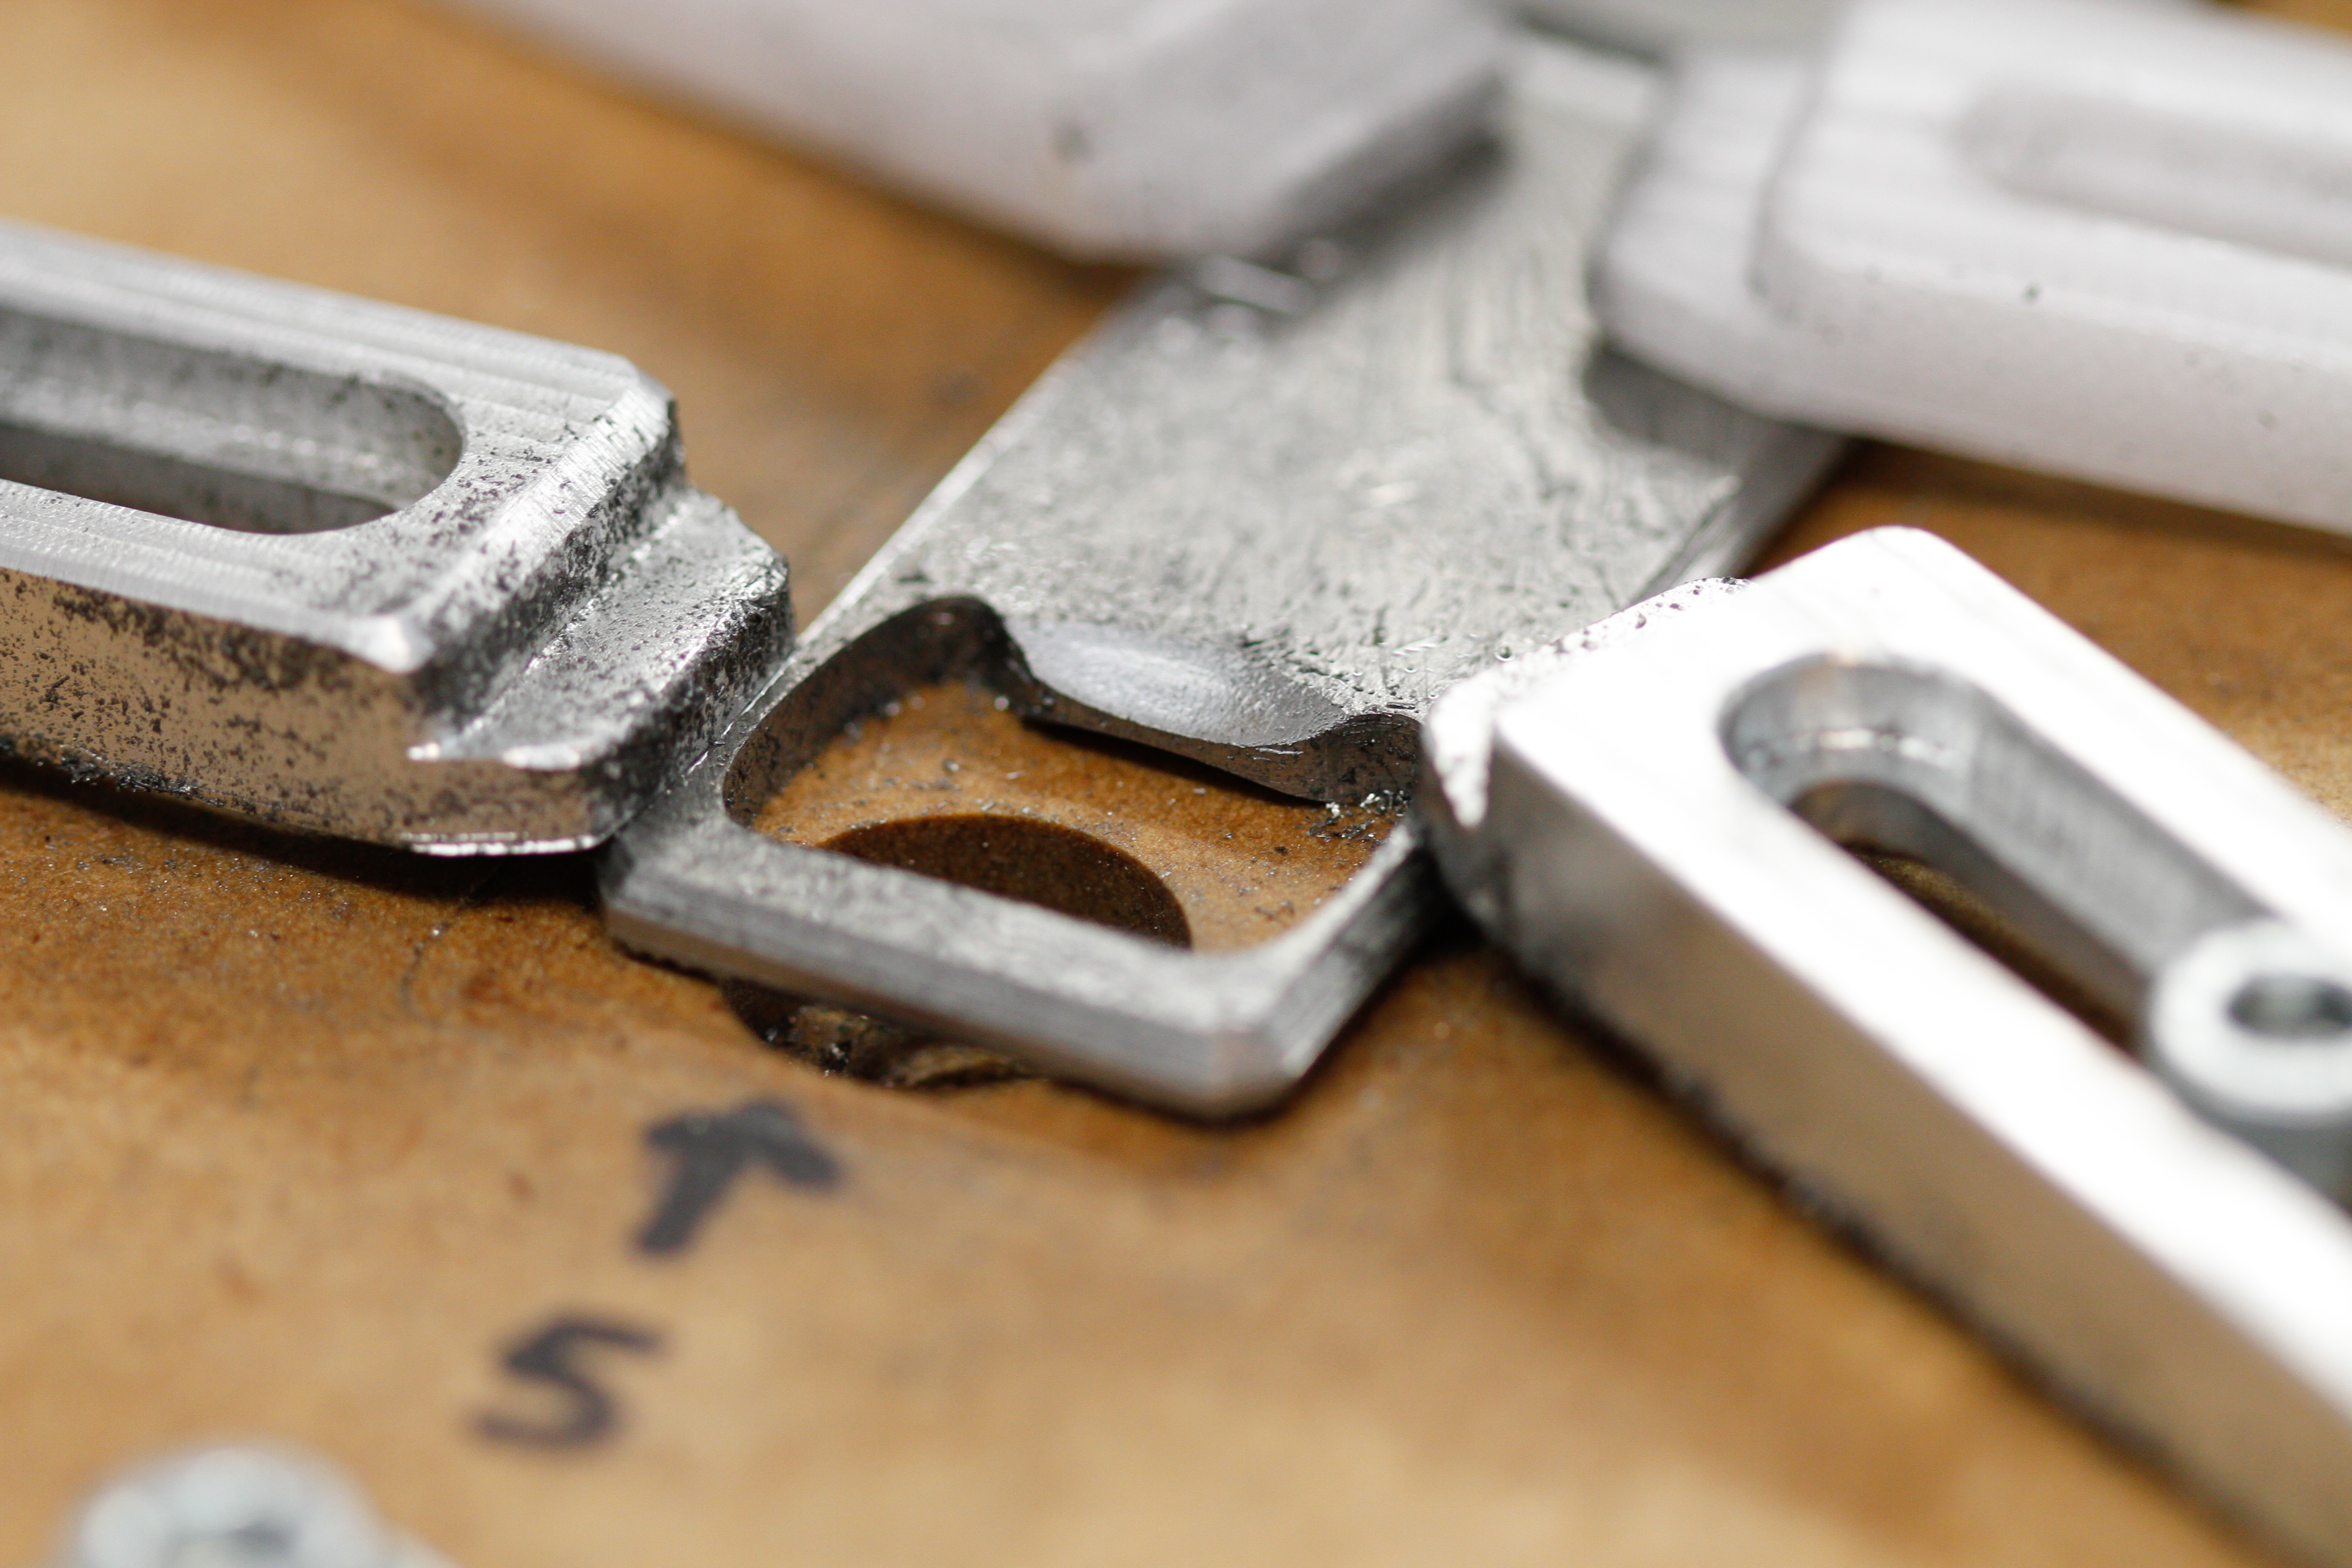
Used a ball the inner chamfered surfaces. Again a slightly janky all hands on work holding, I’m very suprised I didn’t break an endmill or a clamp 

Tab to help with work holding, which I just cut off afterwards and used as a flat surface.
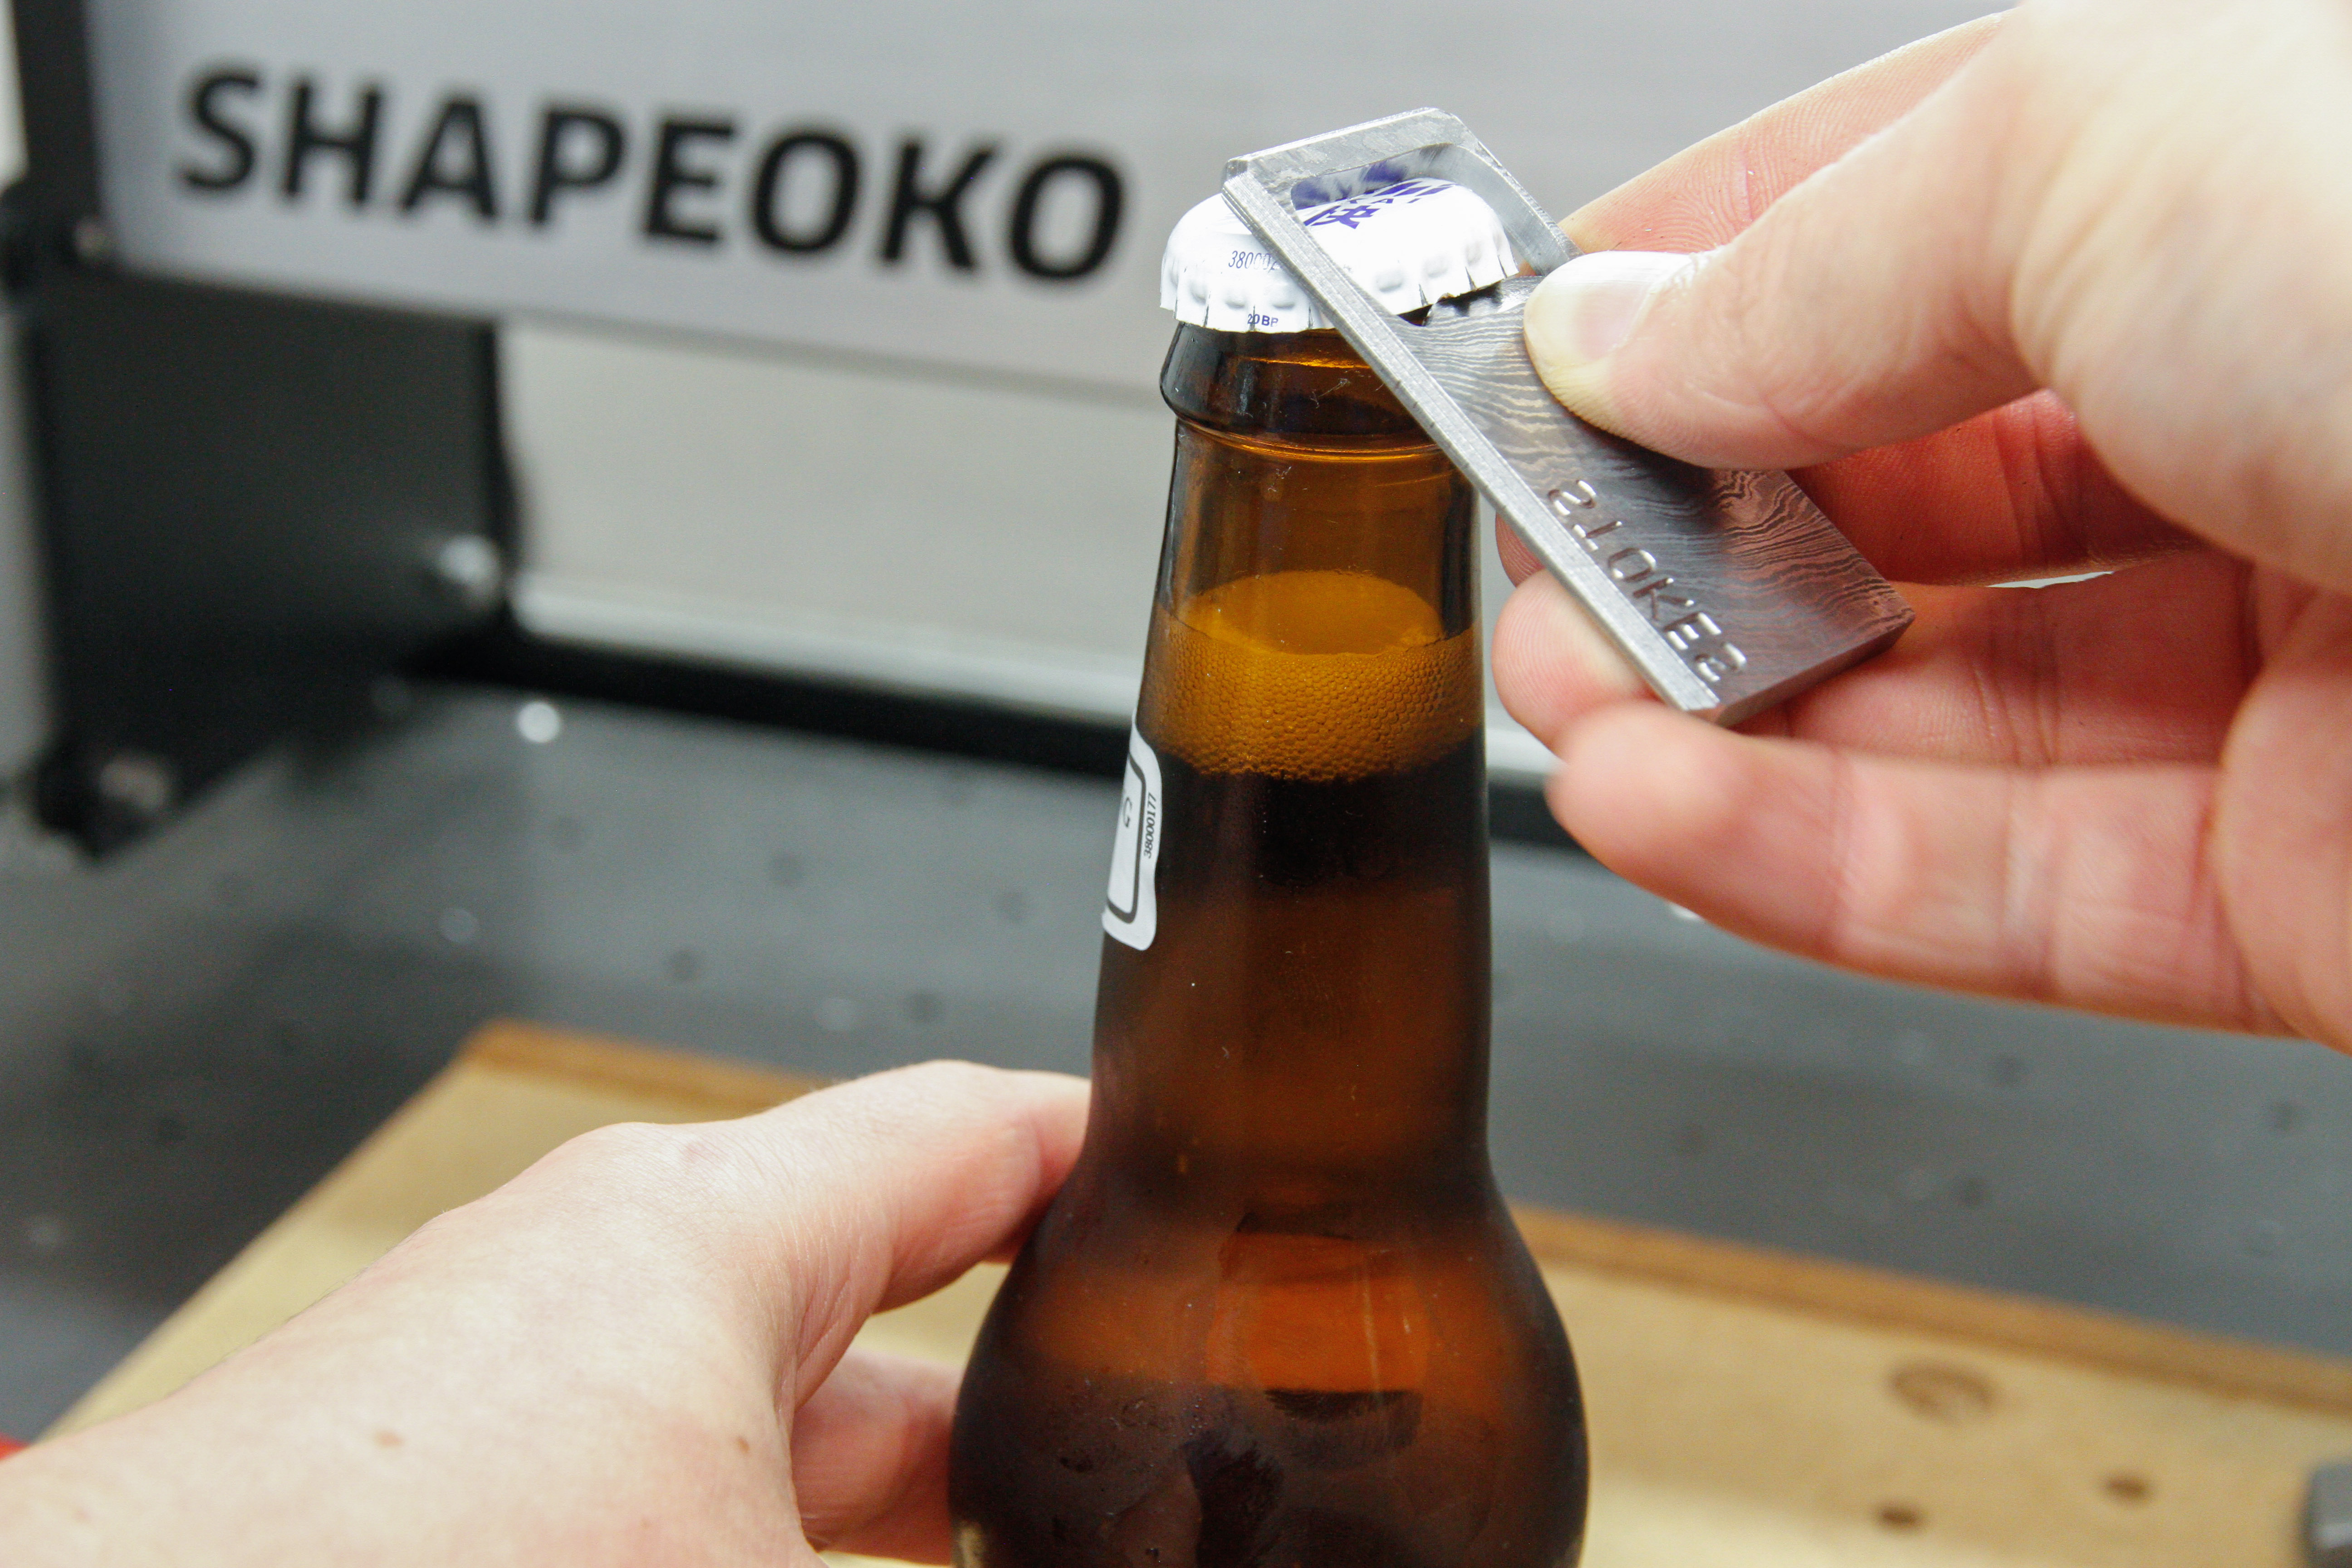
And of course, the most important test, does it work? It sure does!
28 Likes