Thanks! This is just straight off the machine. Since I knew this would be hung outside and viewed from a distance, I didn’t work very hard to make it totally smooth. 
1 Like
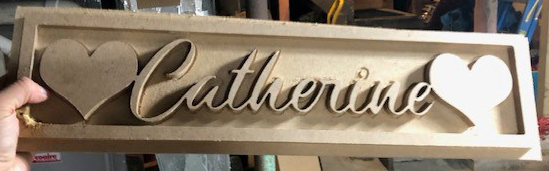
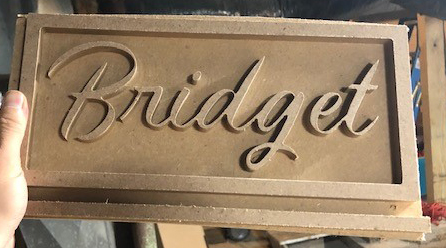
I’ll start by saying that I’ve had my Shapeoko Pro XXL for not quite a full month. With work and kids I haven’t had nearly as much time to play with it as I would like. These are signs for my daughters for their bedrooms. I told them to draw me whatever they wanted to be on them. Catherine was pretty simple with the hearts and her name. Bridget had dogs that looked like our dogs and softballs and food and a lot of other things that I was quite sure I couldn’t do… yet, so I asked her to simplify it a bit. She said just her name was fine. This is literally the 4th thing I’ve cut with it and I was pretty pleased with the results, with the exception of the bottom left corner of Catherine’s border.
I had a 3D Finish tool-path in there thinking it would make things more sharp and instead it started digging deeper into the MDF. I stopped the job, removed the tool-paths that were already complete and the 3D finish and started it again to pick up where it left off. Trying to patch the little hole will be a bit of a challenge but I’m going to let my daughters paint them whatever colors they like so I’m hoping it isn’t as noticeable when we’re done.
11 Likes
10 Likes
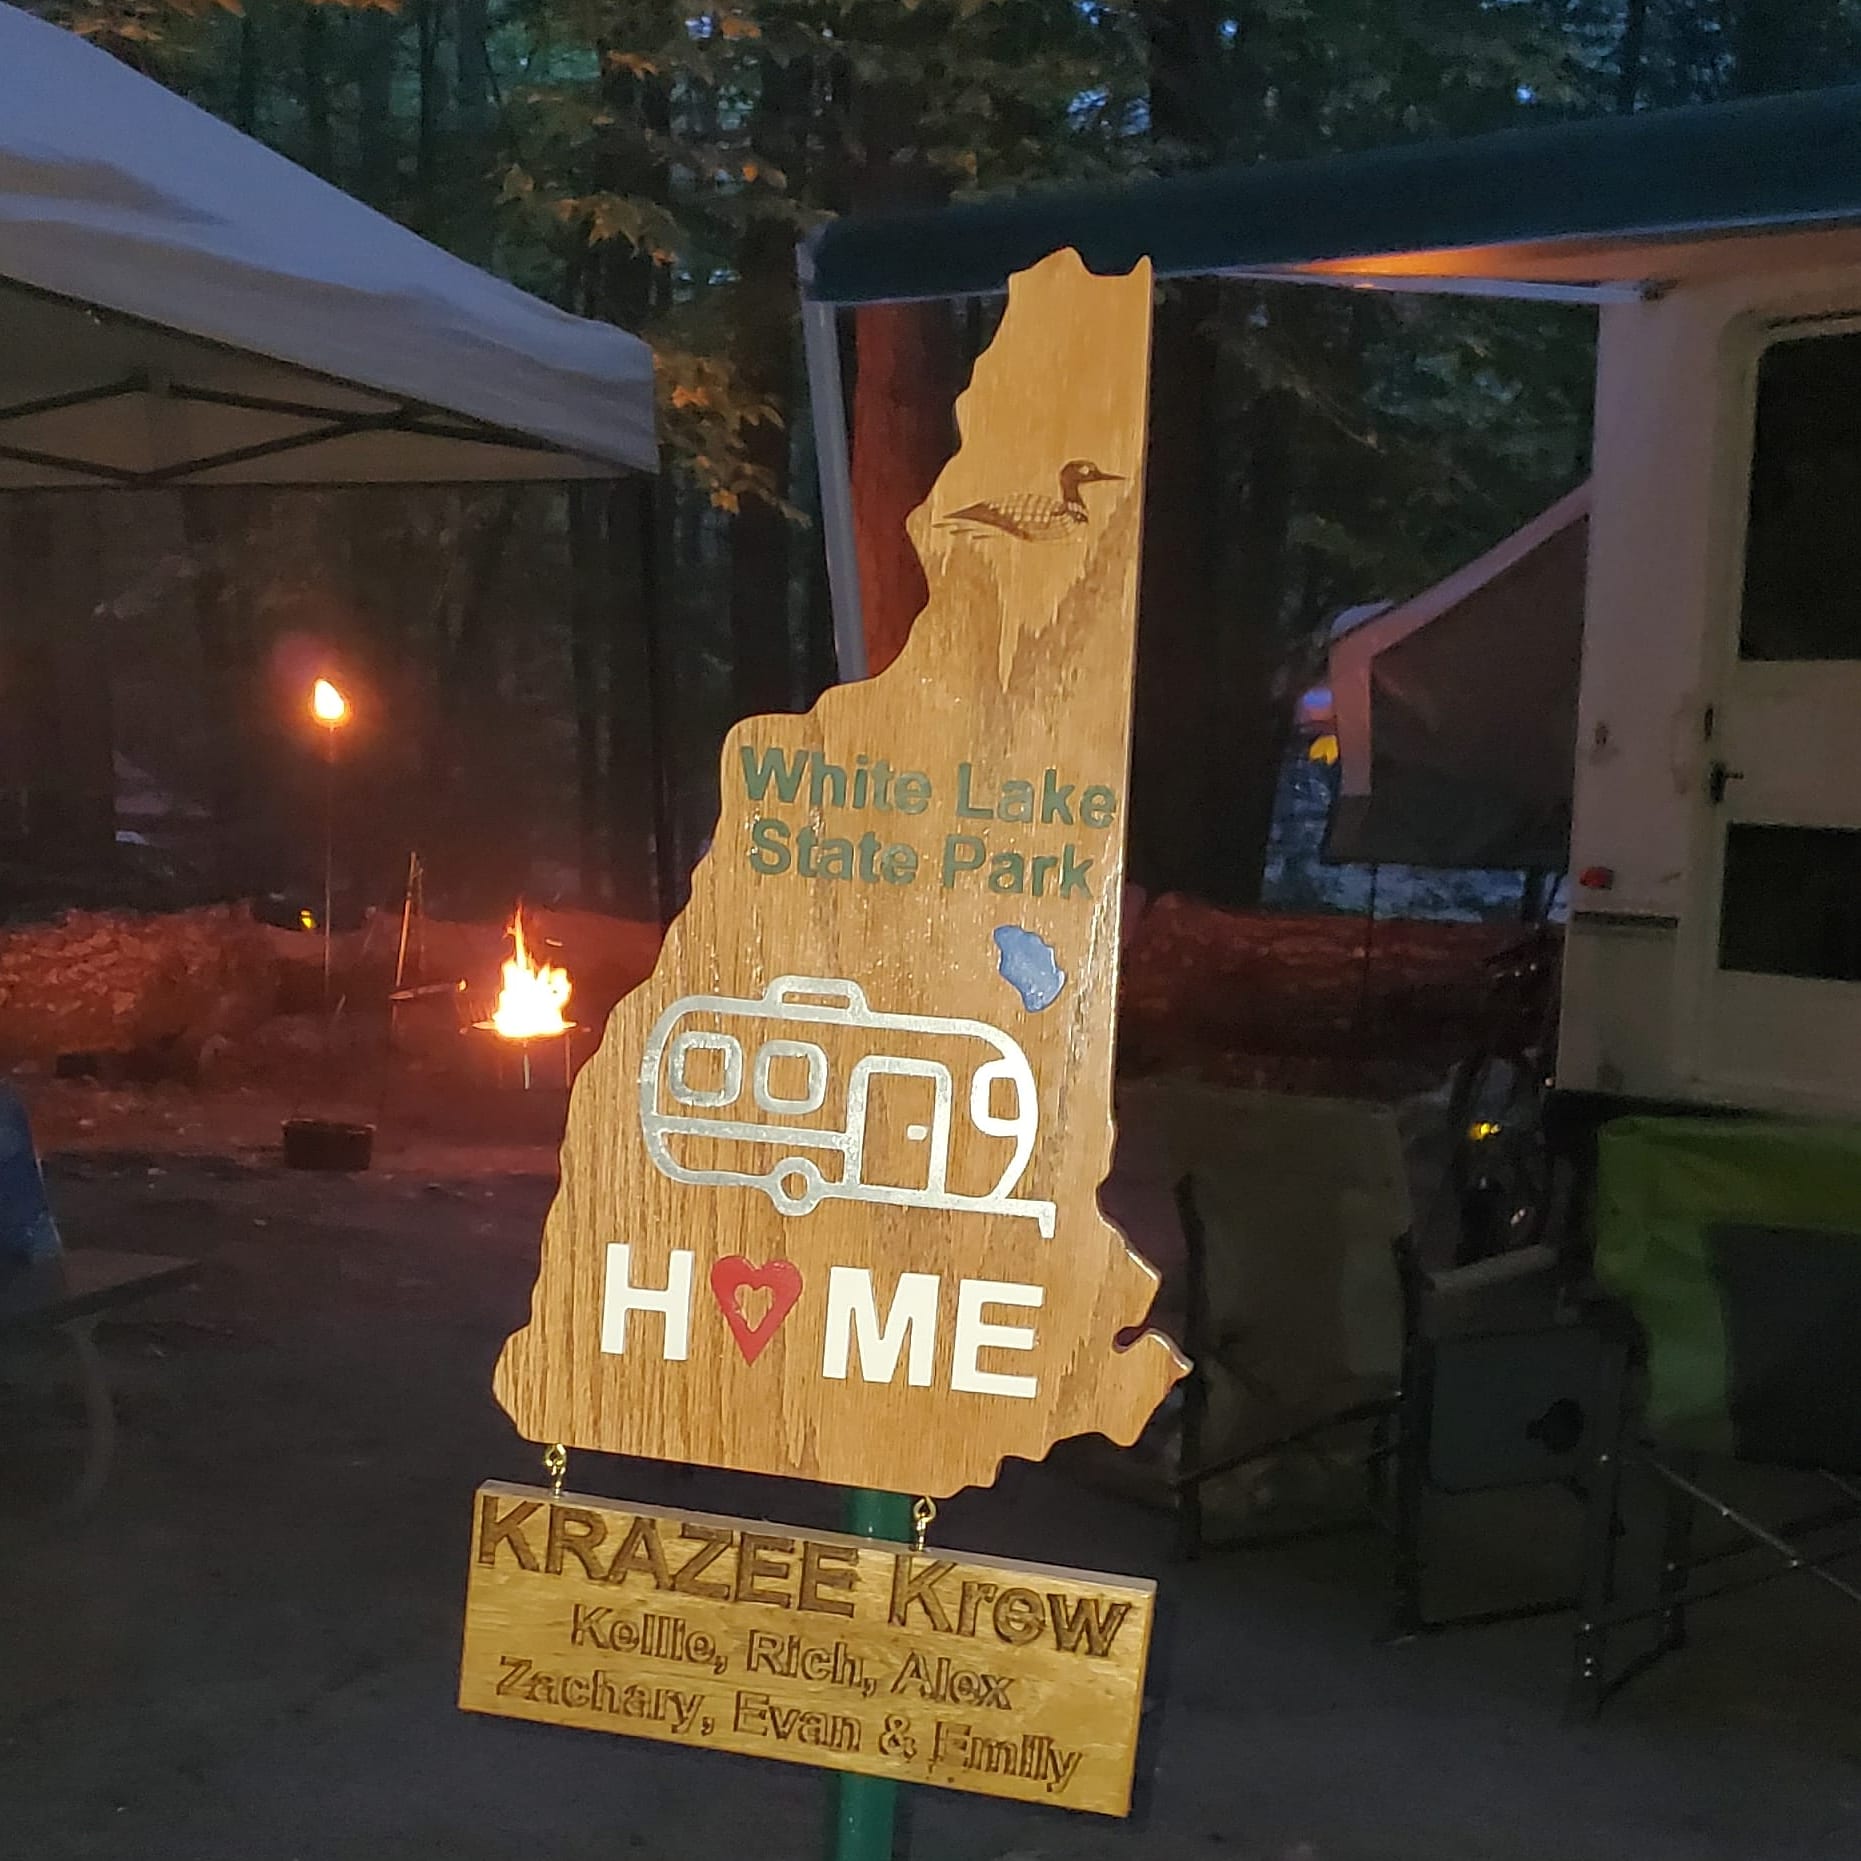
Carved out all the bits .25 Inch thick, painted them, then inlayed them .1 inch in the pockets I carved them out, carved a loon with a 15 degree vcarve bit. Cut the sign out, then glued it all up. Sprayed with exterior high gloss urethane.
16 Likes
Incredible work! Very inspiring!
1 Like
Island Park Idaho scout camp coasters.
Shapeoko Pro XXL
I planned on these being useful display pieces. I.E. Mini Sign 
Designed in Adobe Illustrator
Using Carbide Create for toolpaths
1/8 EM
60 degree V
Cut out of Vinyl flooring tile.
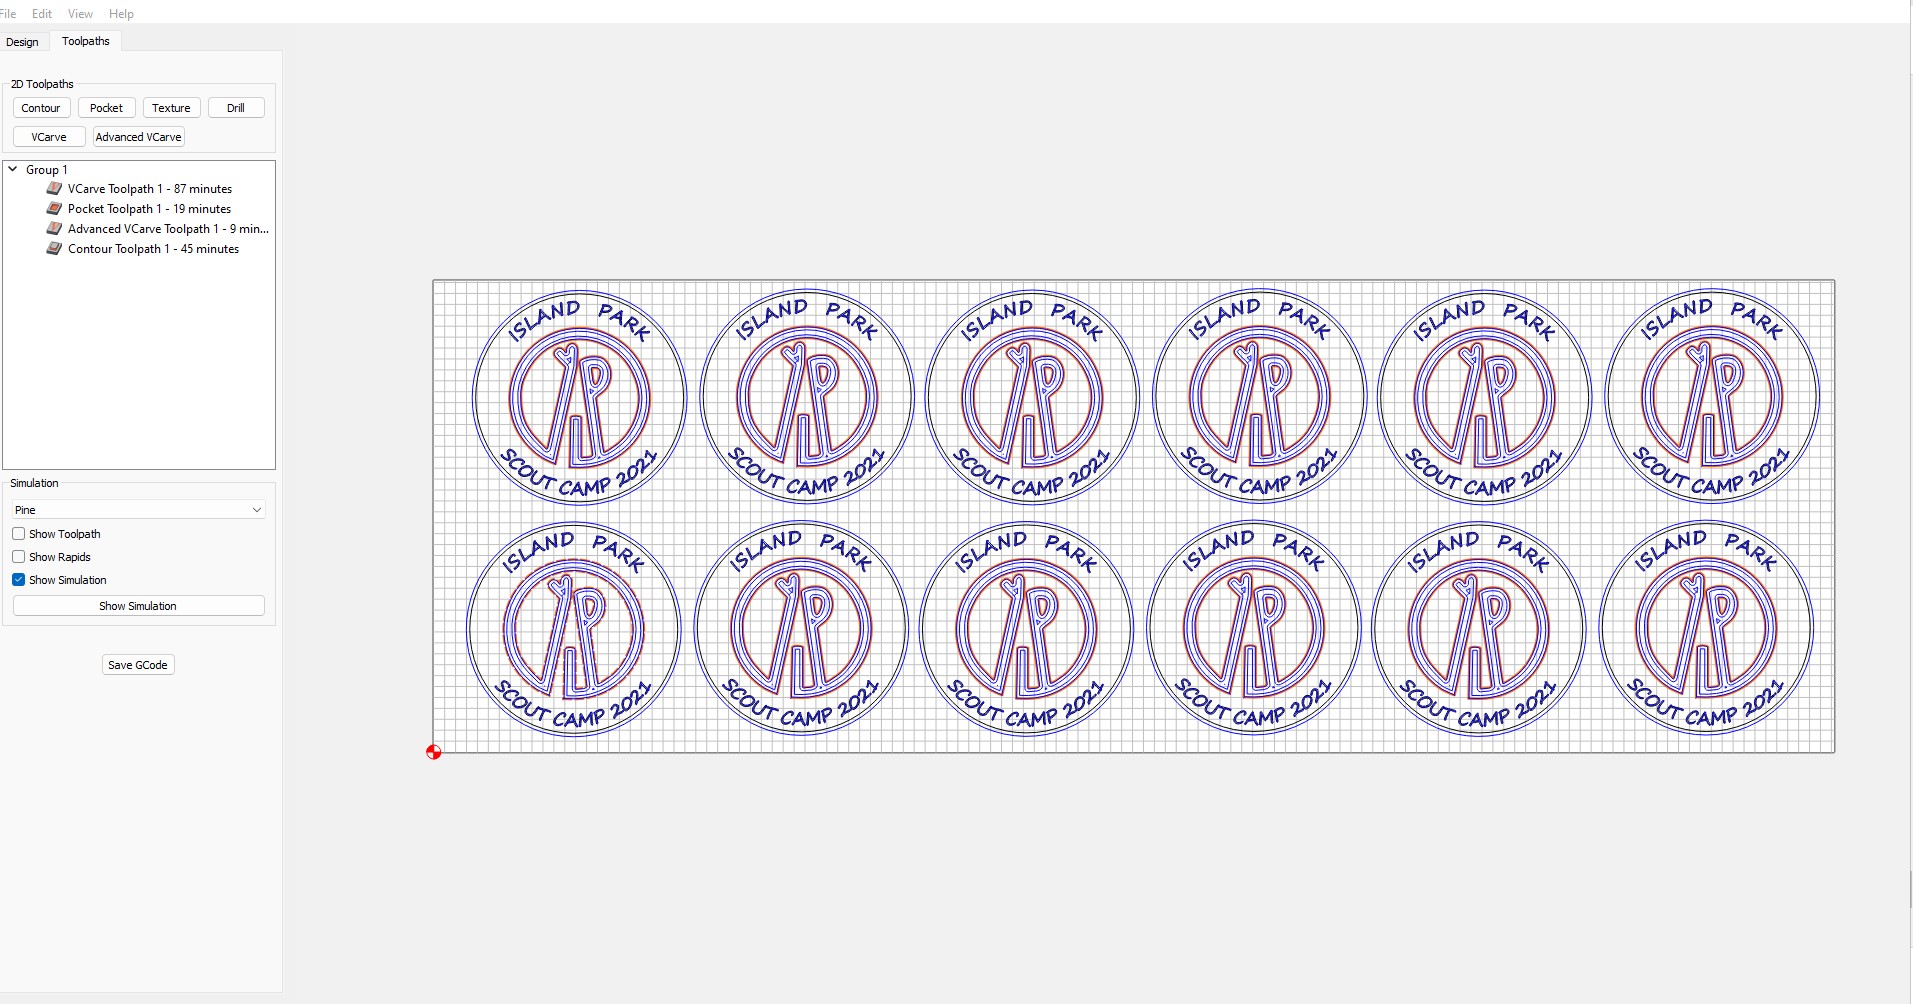
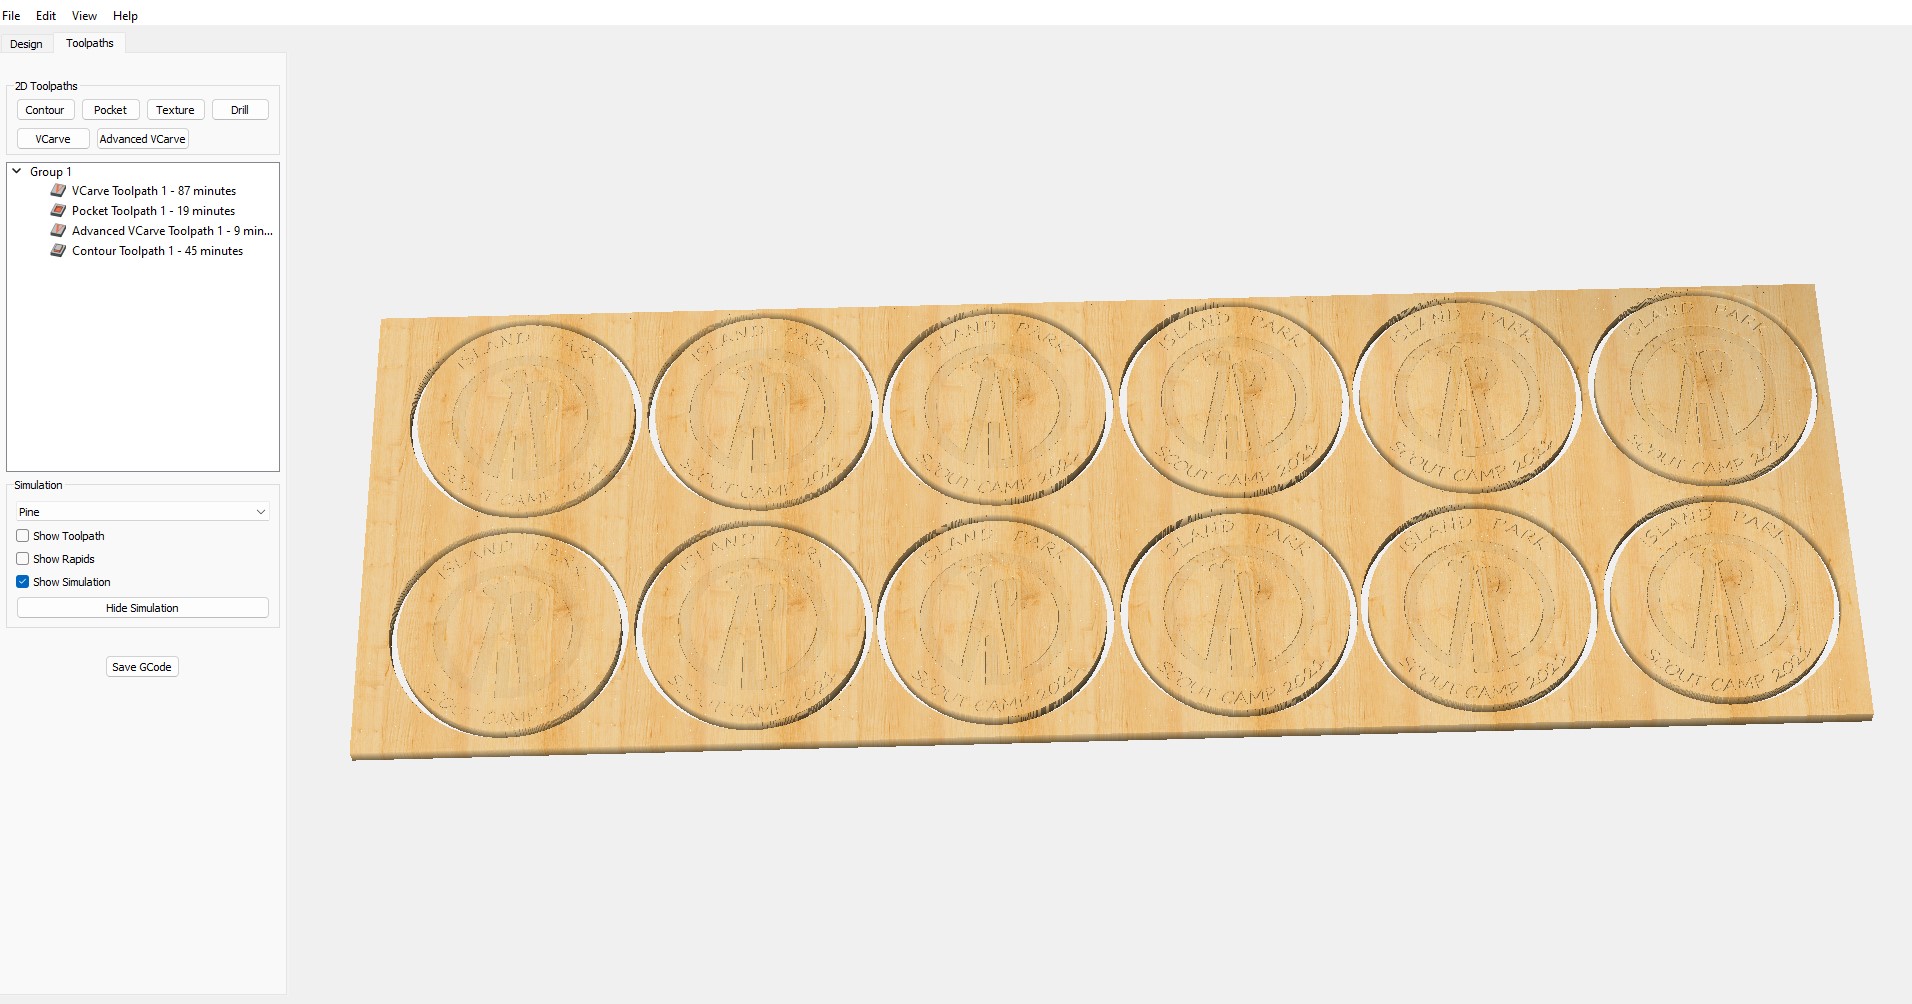
No cleanup required except for dusting the tops off.
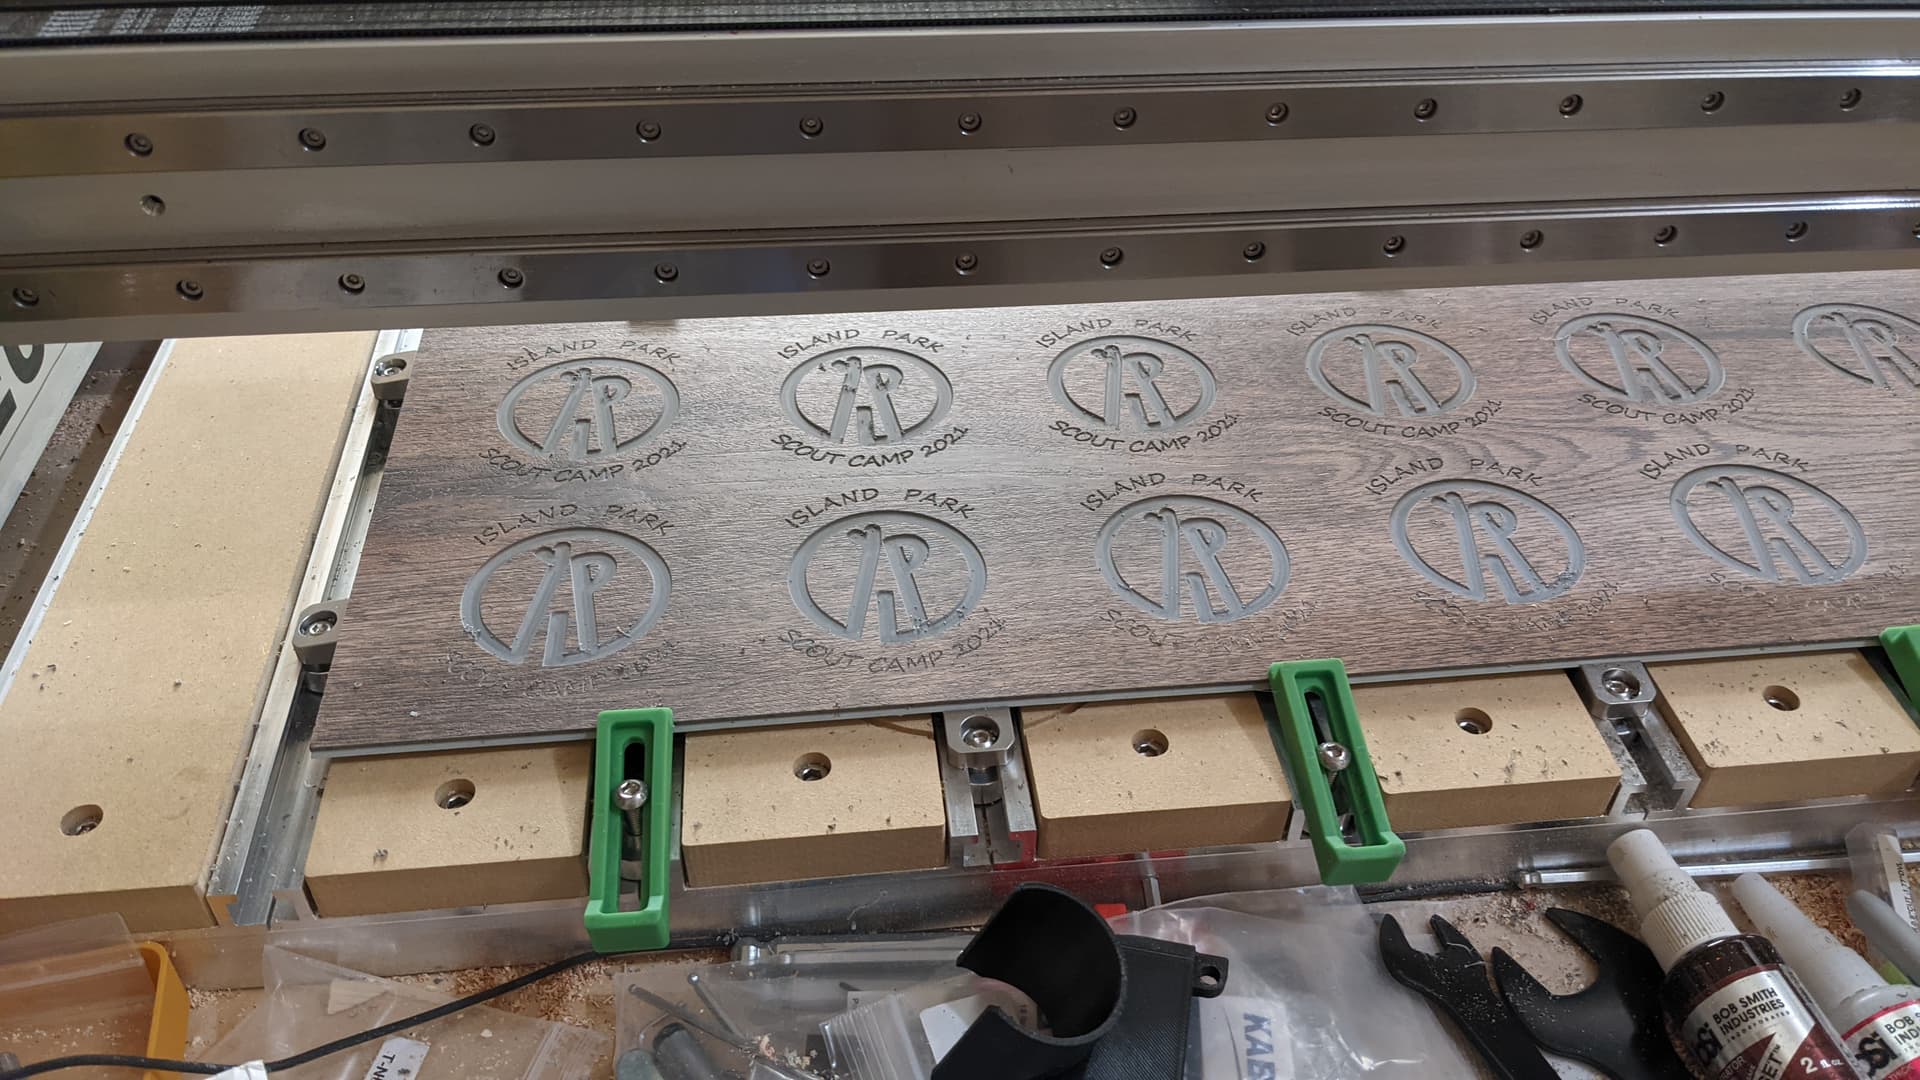
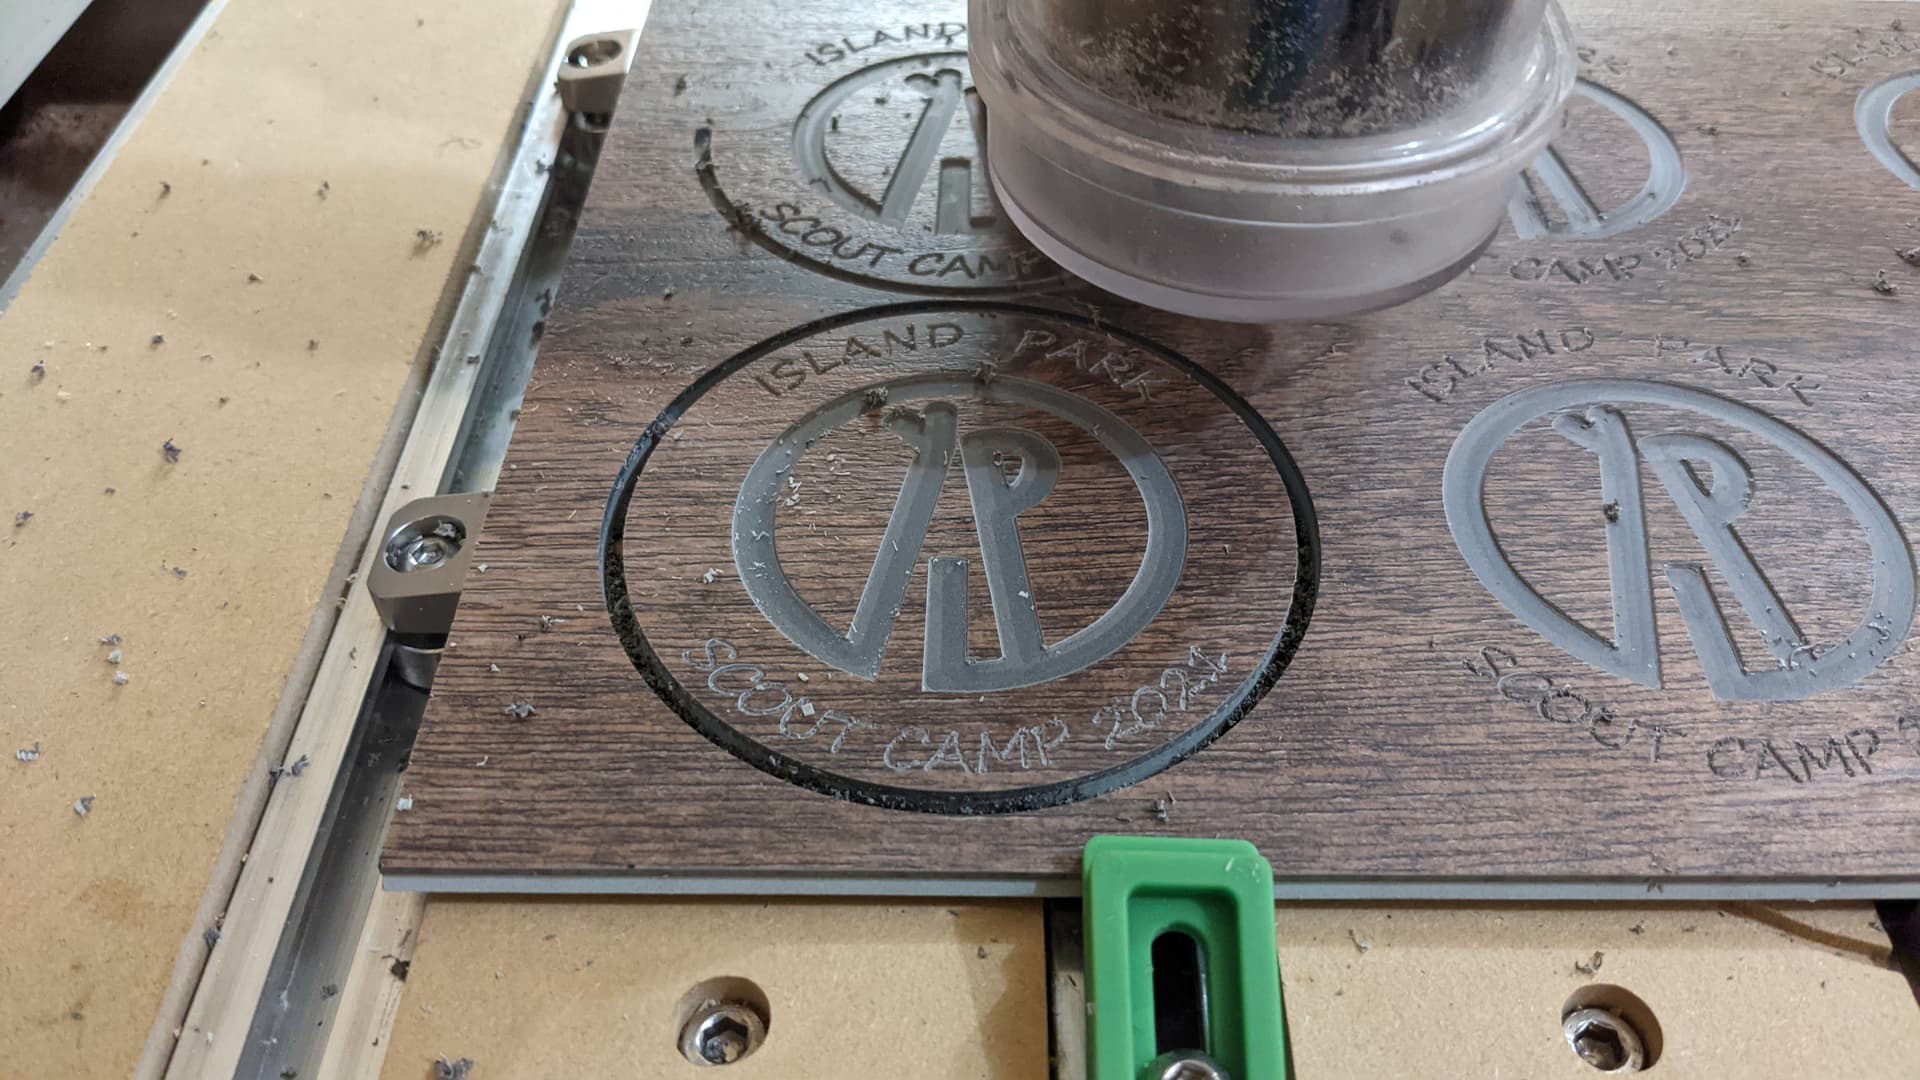

Used a brown stain for darkening the letters

These are donation pieces for the new scout leaders as a memento for participating in events at the scout camp

15 Likes

New to CNC
I built my Shapeoko 3XXL Pro in March 2021. Since then I have been doing reading and watching a lot to gain information. I wanted to make a sign for my archery shop (my other hobby!) After many hours of deciding and designing, I finally made the choice to give it a try. I must say, I was very pleased with how it turned out. Both sides turned out great. I still have a lot to learn, but this sign did alot for my confidence. I have been making some other signs but this is the biggest at 30" x 24". Very happy with my Shapeoko and having fun.
19 Likes

Sheriff deputy swat team leader I made this for his family on my shokepo3d
2 Likes
I’ve had my XXL for 2-1/2 years. During that time I’ve done small things, learning how it works and how to use the software. For almost a year it was disassembled while we moved into a new house and I set up my new shop.
The new house is on a river and my wife has named the place Riverwatch. She said she wanted a welcome sign to hang out front. Yes! I knew right away what I wanted to do.
I made a sketch to show her my idea and got project approval:

Next step was CAD layout. I recently got BricsCAD so this was the first real test. So far I do everything in 2D. I ended up with 5 programs:
- 1/4" endmill for material removal at 2 different depths .150 & .300
- 1/16 endmill for details at .150
- 1/16 endmill for details at .300
- 20 deg vee bit
- 1/4 endmill for final cut out with tabs
Here all all 5 2D layouts together:
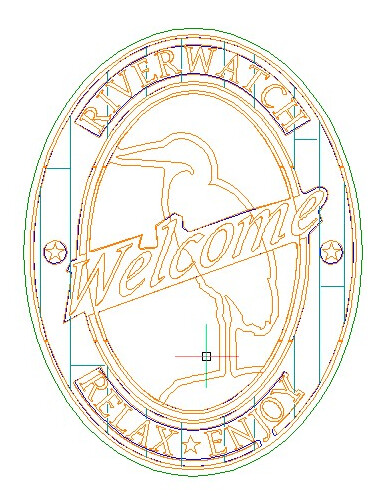
One of the reasons I chose BricsCAD was how well it handled raster images. The outline of the heron is traced off a photo that I took from our house:
Having everything set, I went to Carbide Create V5 to make the programs only to find that it was a little more complicated than the software could handle. I ended having to split the first 1/16" detail program in to 3 sections so the software would recognize all the letters and pocket around them.
It took just under 6 hours to run all 5 programs. On the first run of the 1/16" detail program I was a little off on the Z setting so I made a quick fix program to take another .020 off. That fixed it. I was pleased with the results:

Then came several hours of sanding. Working around all the letters. Cleaning out the grooves that the 20 deg vee bit made. I left the outside area where the boards are rough and tried to get the inside as smooth as I could.
Next after reading a post about primer and since I wanted parts of it to be gray (and had a can of it), I applied 2 coats of Rustoleum gray primer:

Now came the hard part. I haven’t painted since I was in college (40 some years ago) but I knew what i wanted so I went out and bought acrylic paints and brushes and started. After about 16 hours of painting (and re-painting):

Then as an afterthought I ordered a keyhole router bit so I could hang it.
Finally after a test of how well it worked on MDF, I gave it 5 coats of Rustoleum Painters Touch 2X Clear Matte. It’s hanging on a covered porch, I think it will be OK.
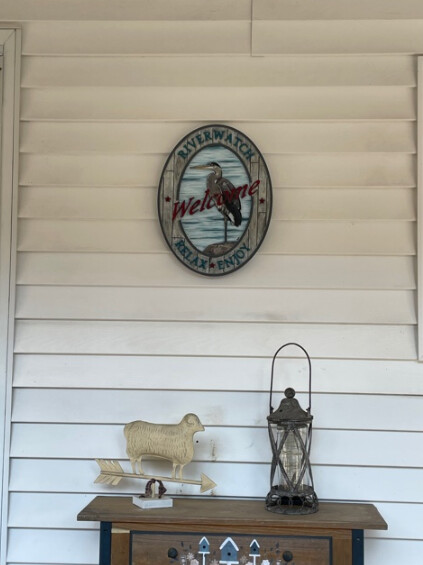
My wife is happy and I got to do what I wanted so life is good.
39 Likes
Thanks for this info! Didn’t know Inkscape had that function. I’ve spent many hours re-creating paths in fusion to be able to work with bought SVGs from makeCNC
1 Like
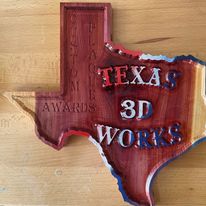
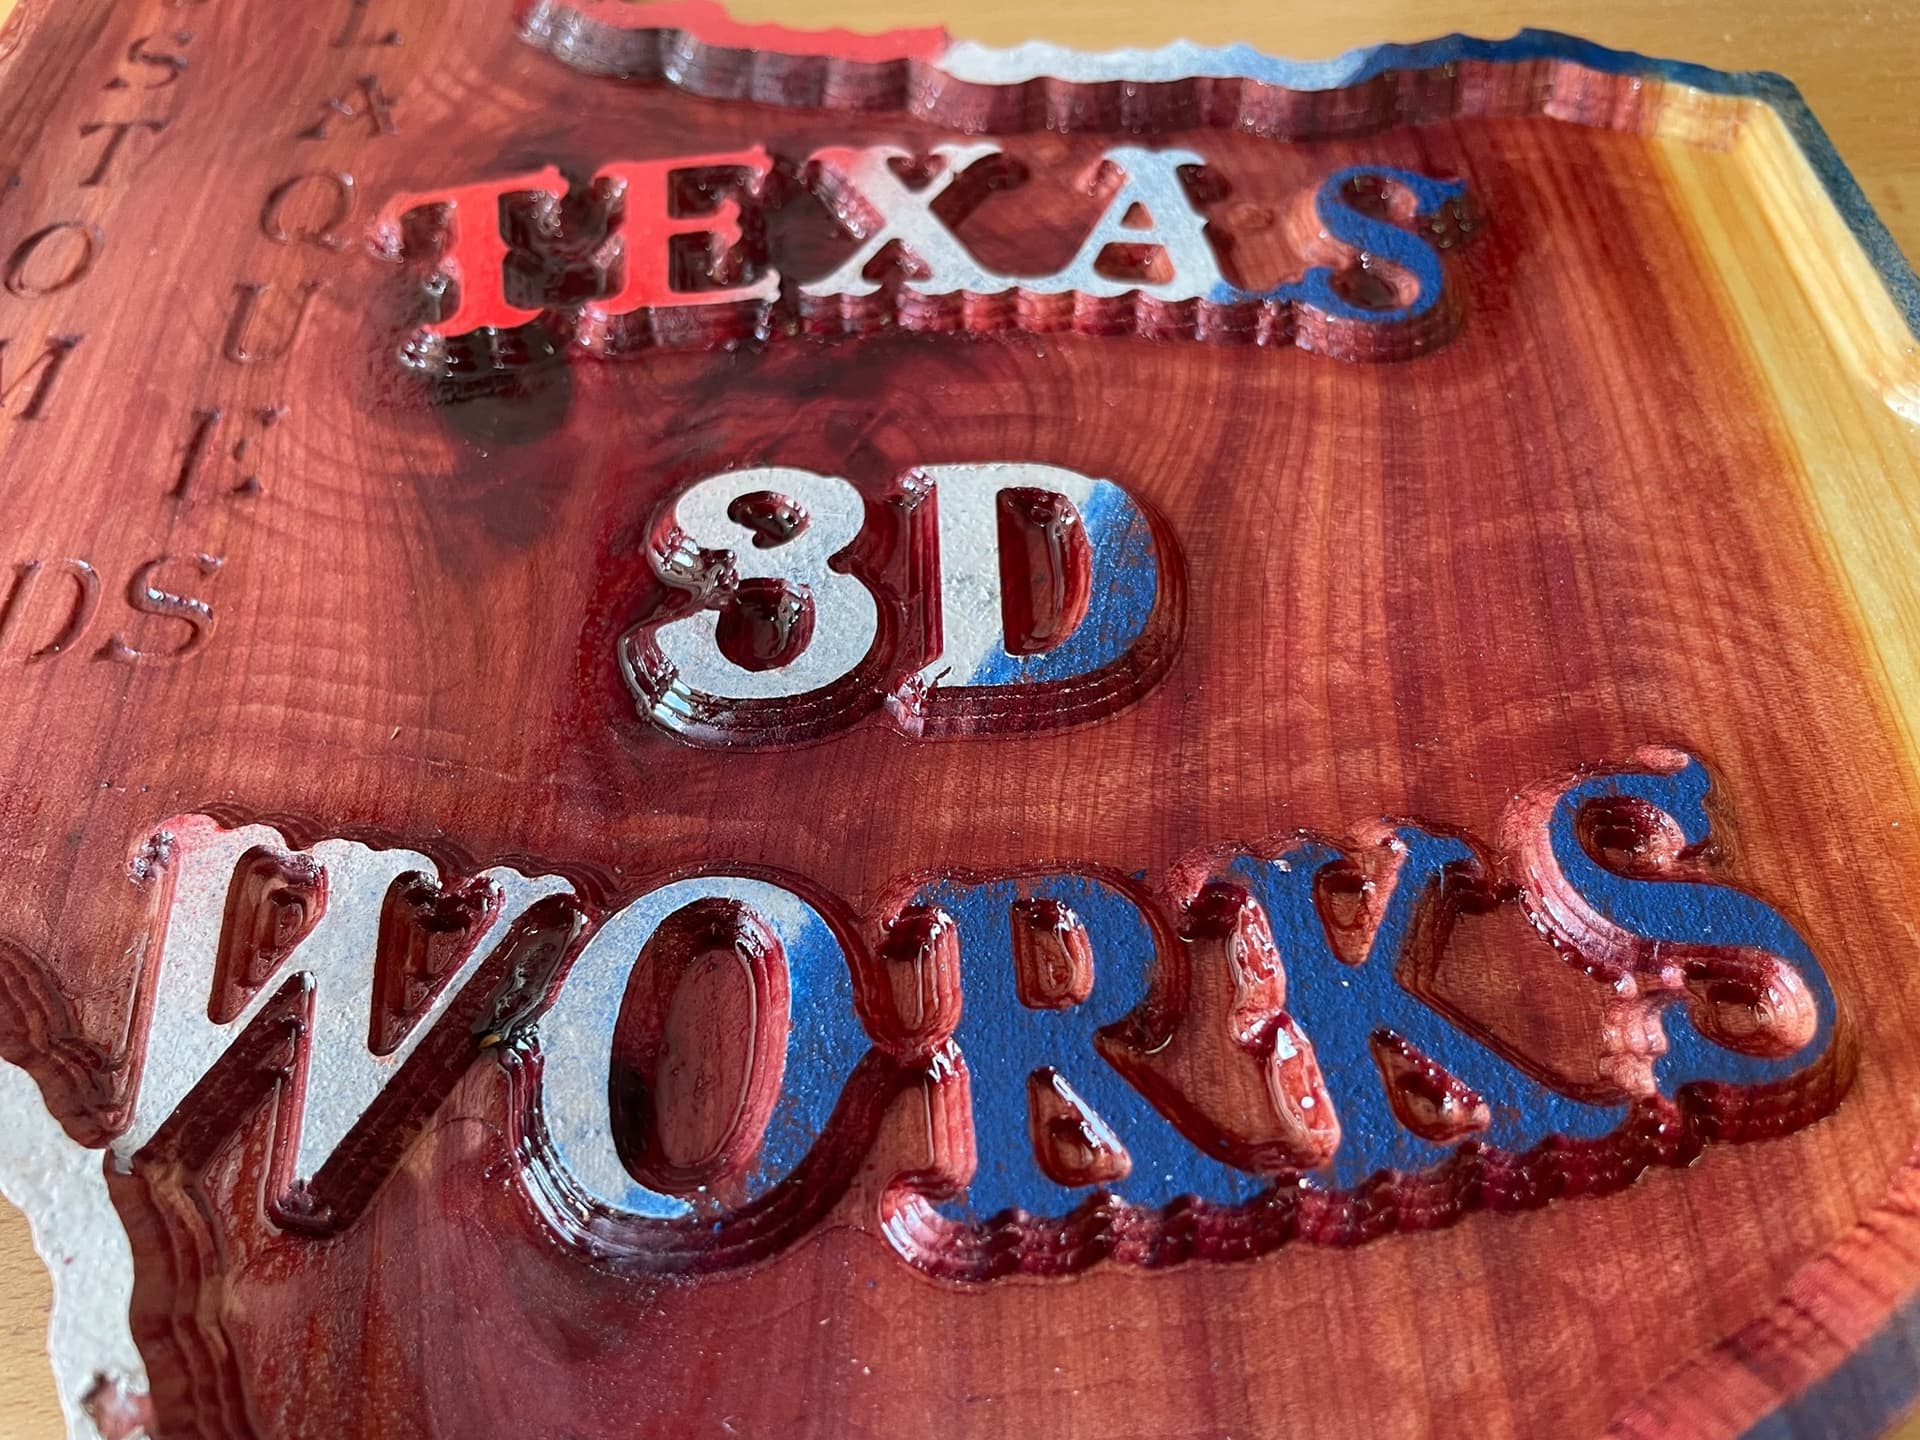
I have been searching far and wide for ideas on the logo for my business. One day I decided to make a shape of Texas. This is where I landed:

15 Likes
This is a sign I made for the in-law’s new basement bar. Substrate is solid maple and the tool paths were all made in Carbide Create. It’s an advanced V-Carve with then a textured tool path behind.
I stained the board first, then added 2 coats of spray shellac, applied Frisco Craft blue vinyl mask, and carved through it. Once off of the machine, I added some satin black spray paint, removed the masking and finished it off with 3 coats of Sherwin Williams T77F58 dull-rubbed pre-cat lacquer. This was a last-minute project, so I didn’t snag any in-process photos.

17 Likes
Wow, that’s the actual sign? It looks so clean I thought it was a render  . Great work!
2 Likes
I just scrolled through this and as a newbie got super motivated and discouraged all at the same time. No way I will win this contest but excited to learn and get some inspiration.
The most complex project doesn’t always win, but you should throw your hat into the ring anyways! The contests are always great to see new people enter, and this one is certainly a newbie friendly one!
7 Likes
I will definitely give it a go! There is no downside so why not.
3 Likes
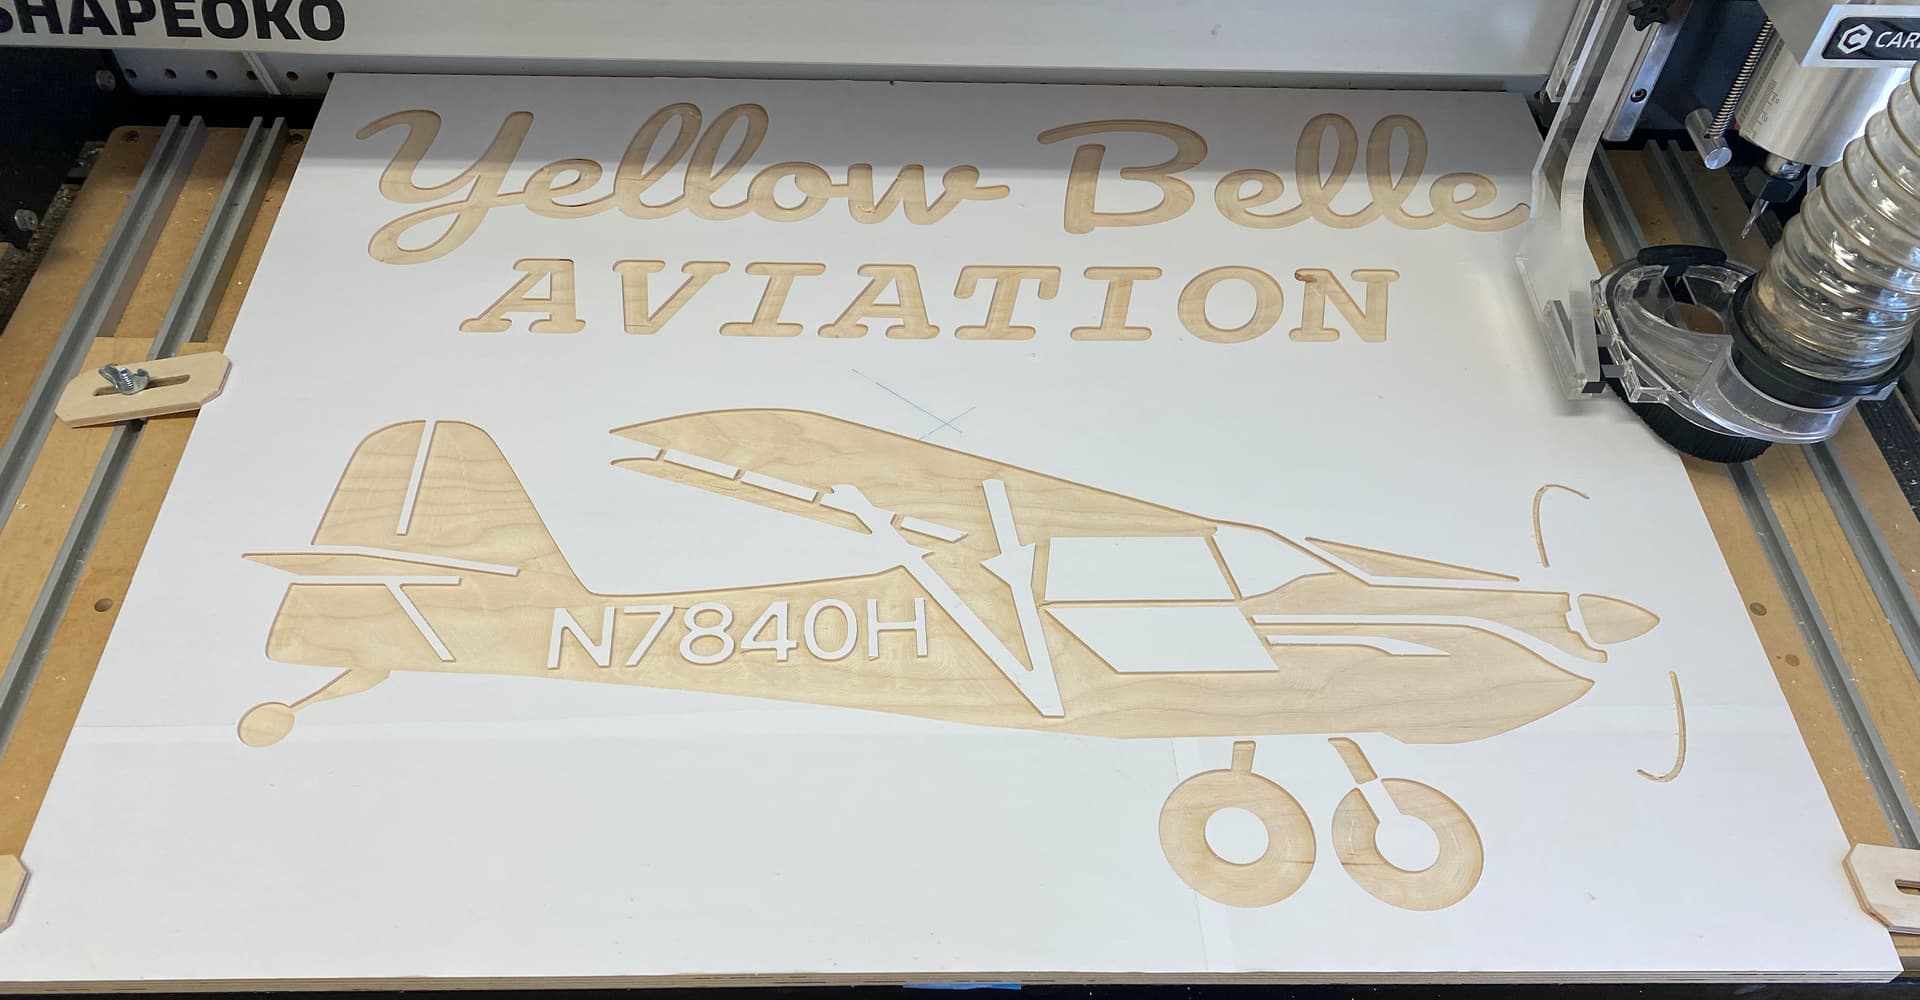
YELLOW BELLE AVIATION
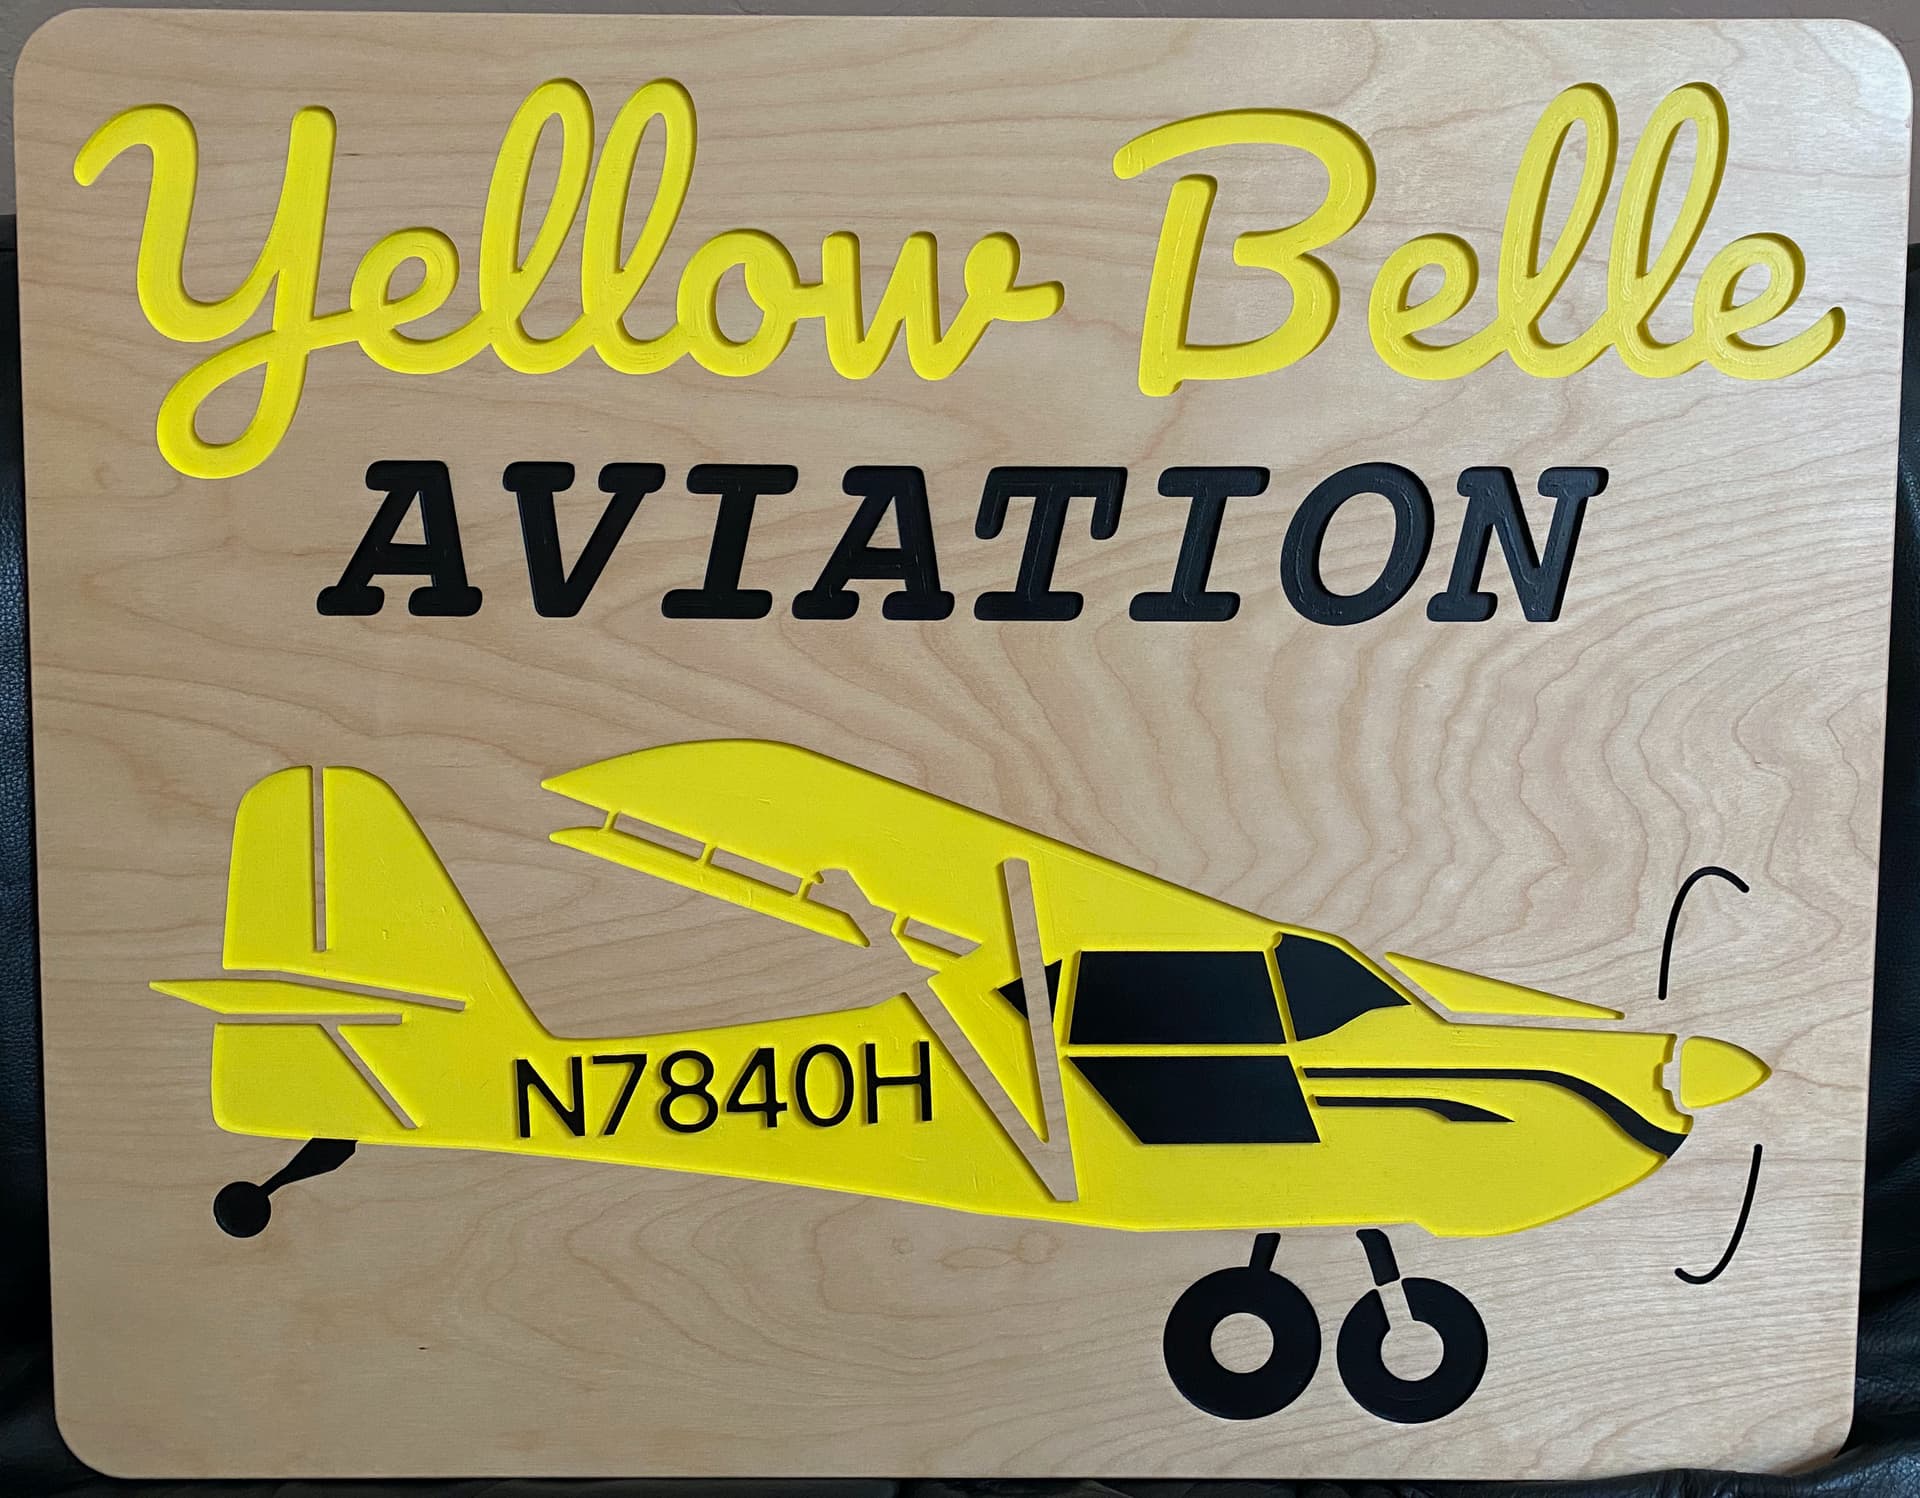
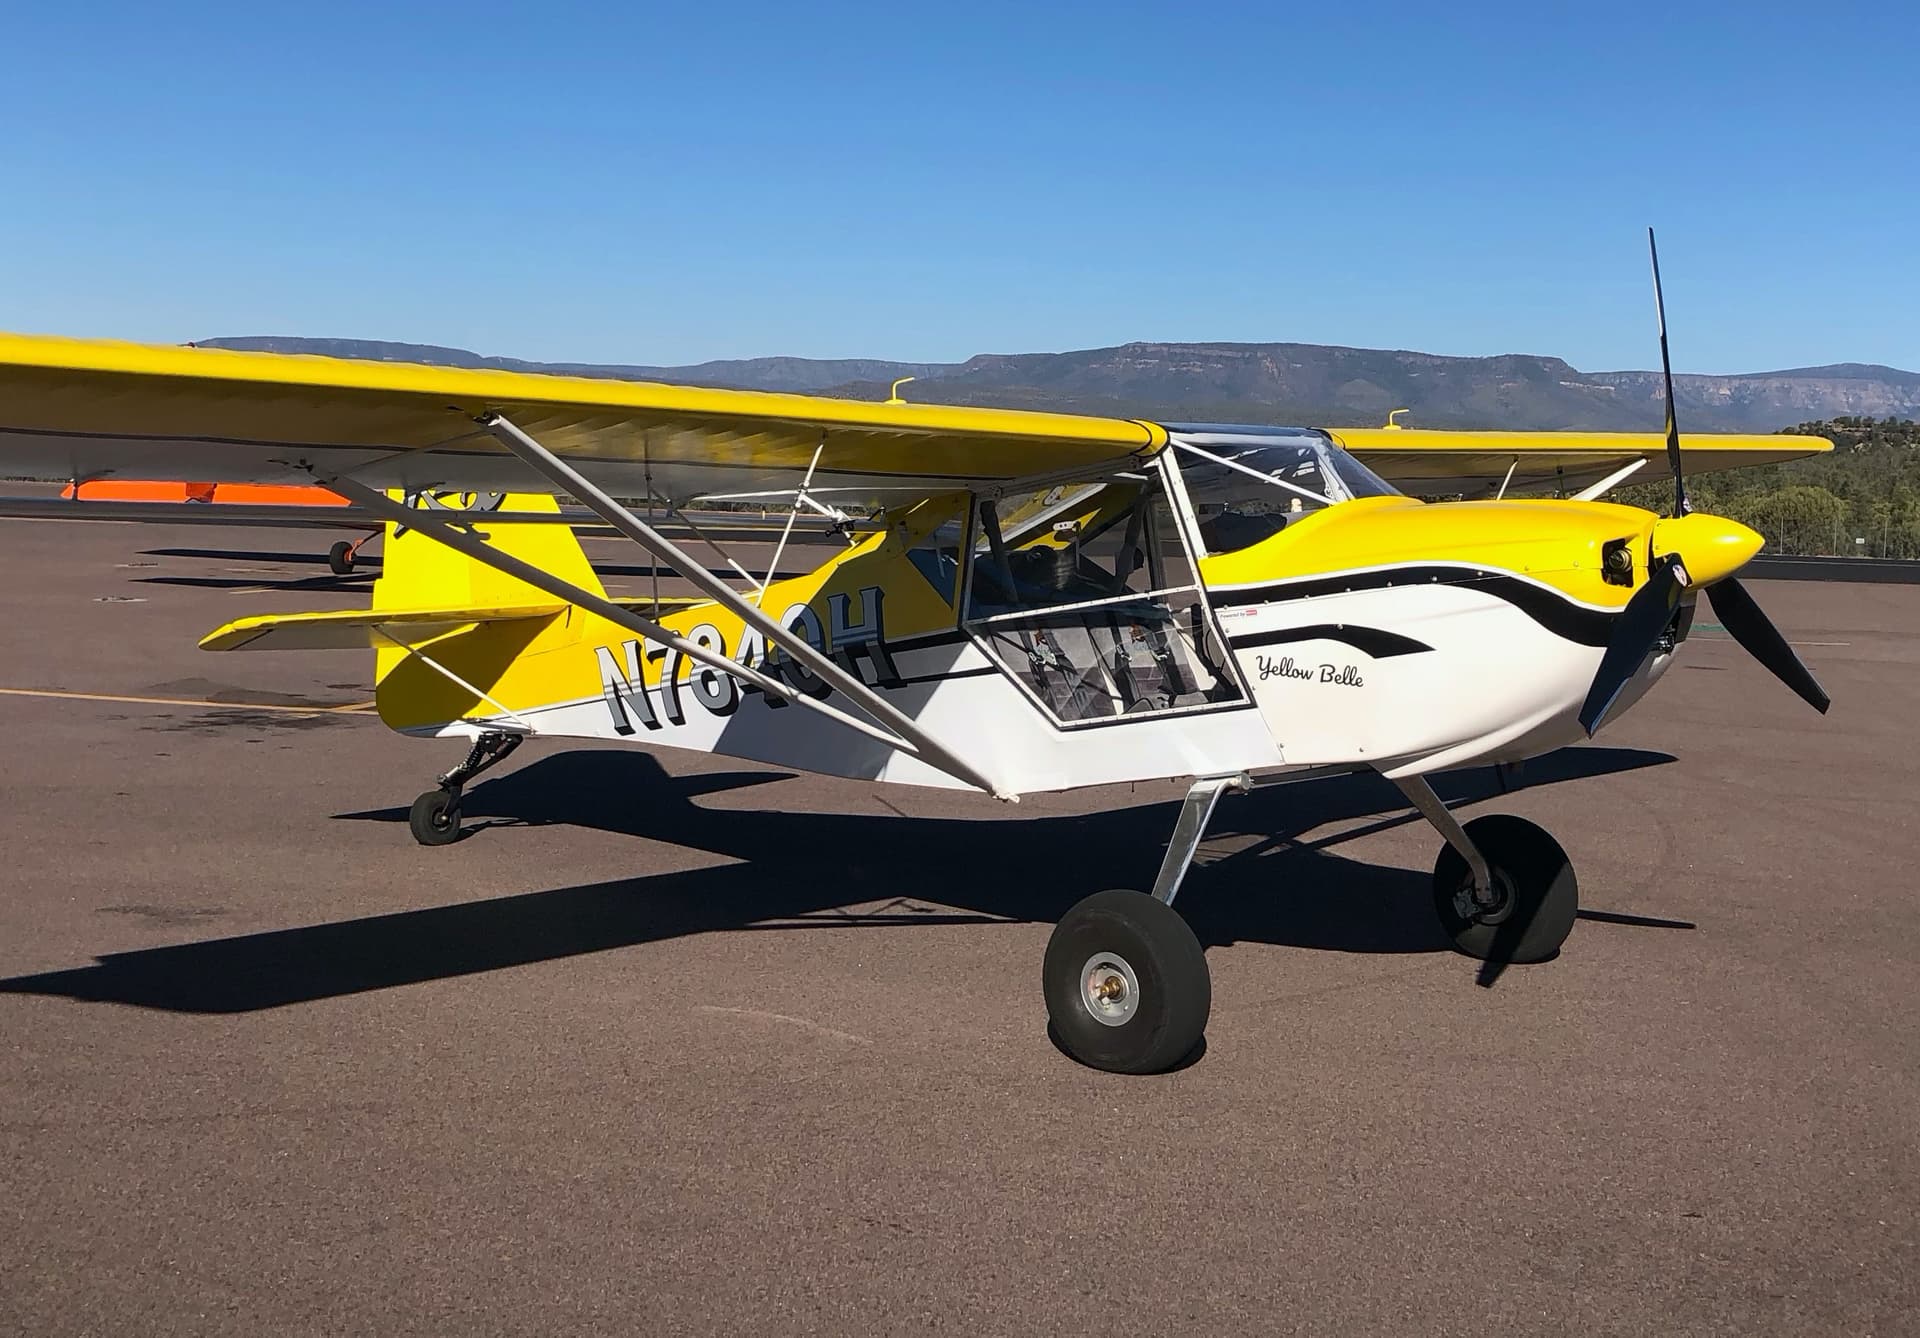
My buddy from college is a pilot who owns a Kitfox Series 6 airplane, so-named for its color (Yellow) and in memory of his mother (Belle), hence “Yellow Belle”. Ironically, Belle hated the idea of flying in small airplanes.
Late last month, we flew the Yellow Belle 15 hours (1400 miles) from Phoenix, Arizona to Oshkosh, Wisconsin for the annual Oshkosh airshow. We were plane-camping at the airshow when this contest was announced. Seeing the silhouetted plane in the early morning, an idea for a sign was born. I had plenty of time to think about it during the long flight home. I made two signs – one for my buddy’s hangar and one for his workshop/man cave.
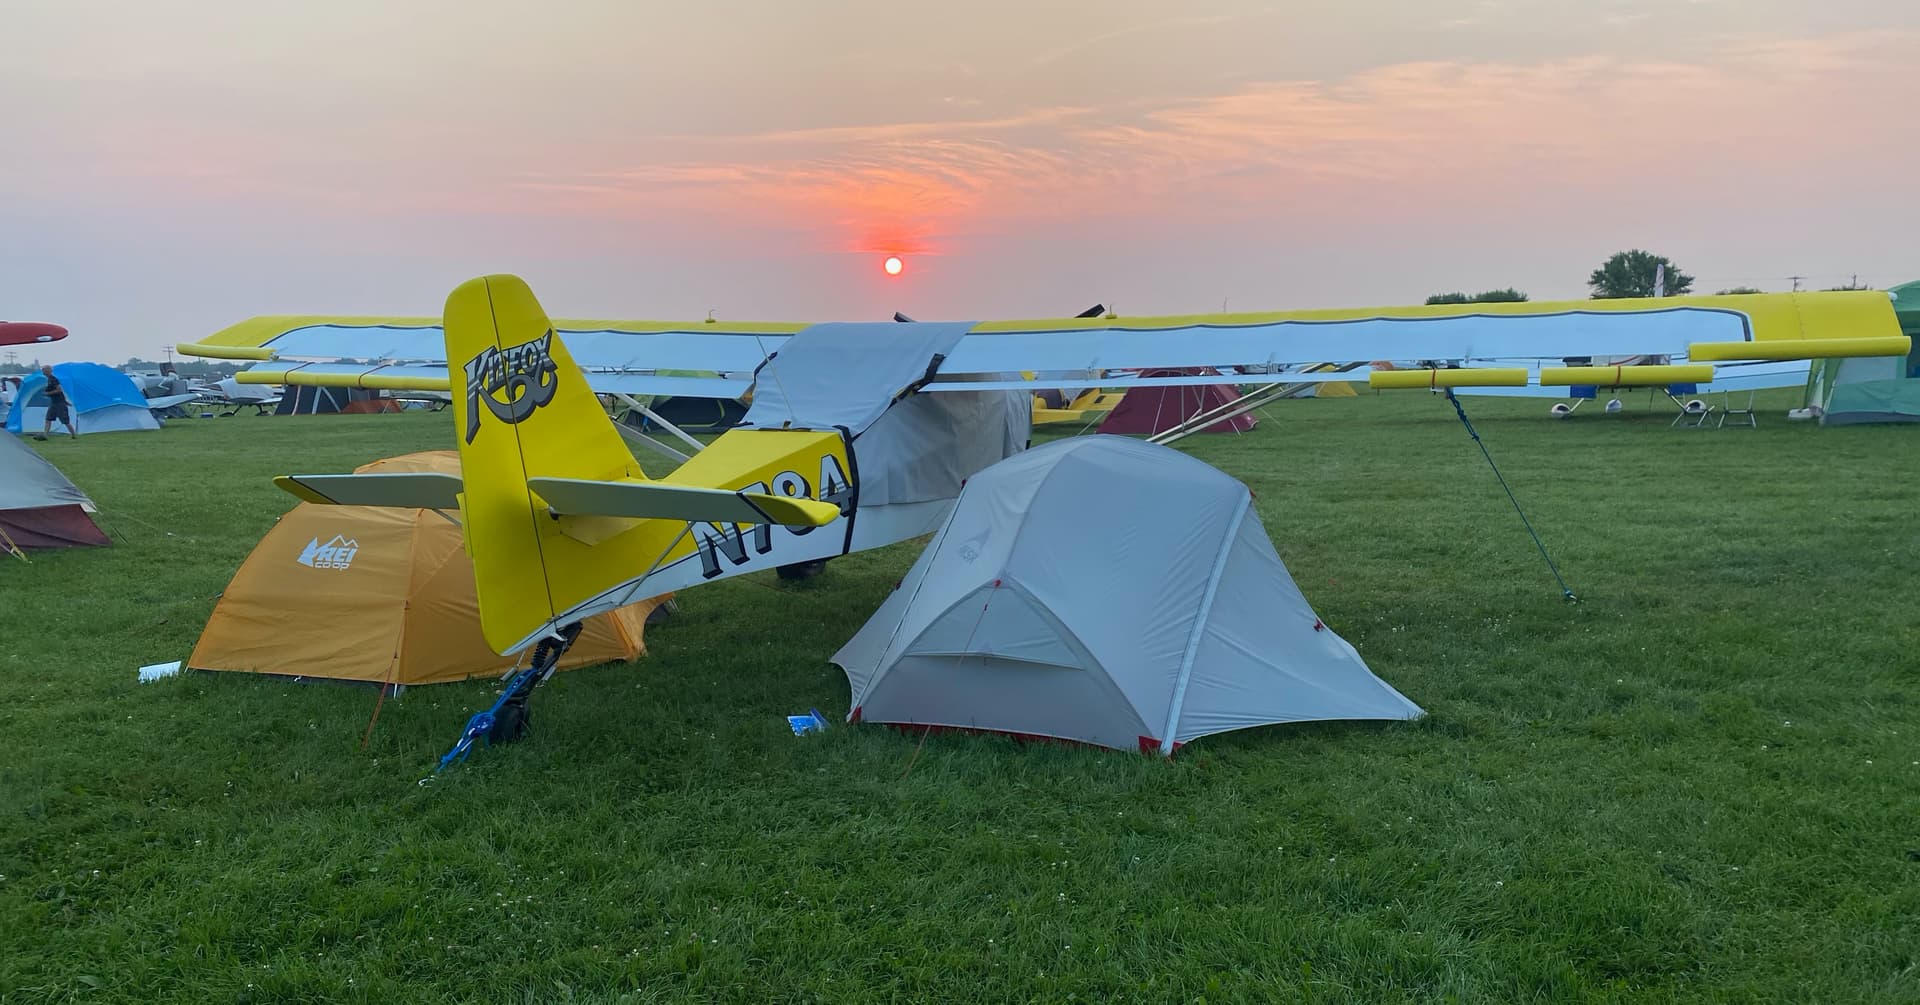
Landing in Oshkosh

DESIGN NOTES
I imported a photo of the plane as a background and carefully traced it with the polyline and curve tools, tweaking the design until it was a good likeness of the real thing. This was by far the hardest part of the project.
The name on the plane uses the “Pacifico” font, so I used the same font for “Yellow Belle” on the sign. I used Courier Bold Oblique for “AVIATION” because it leans to the right and seems to convey a sense of forward motion.
CONSTRUCTION NOTES
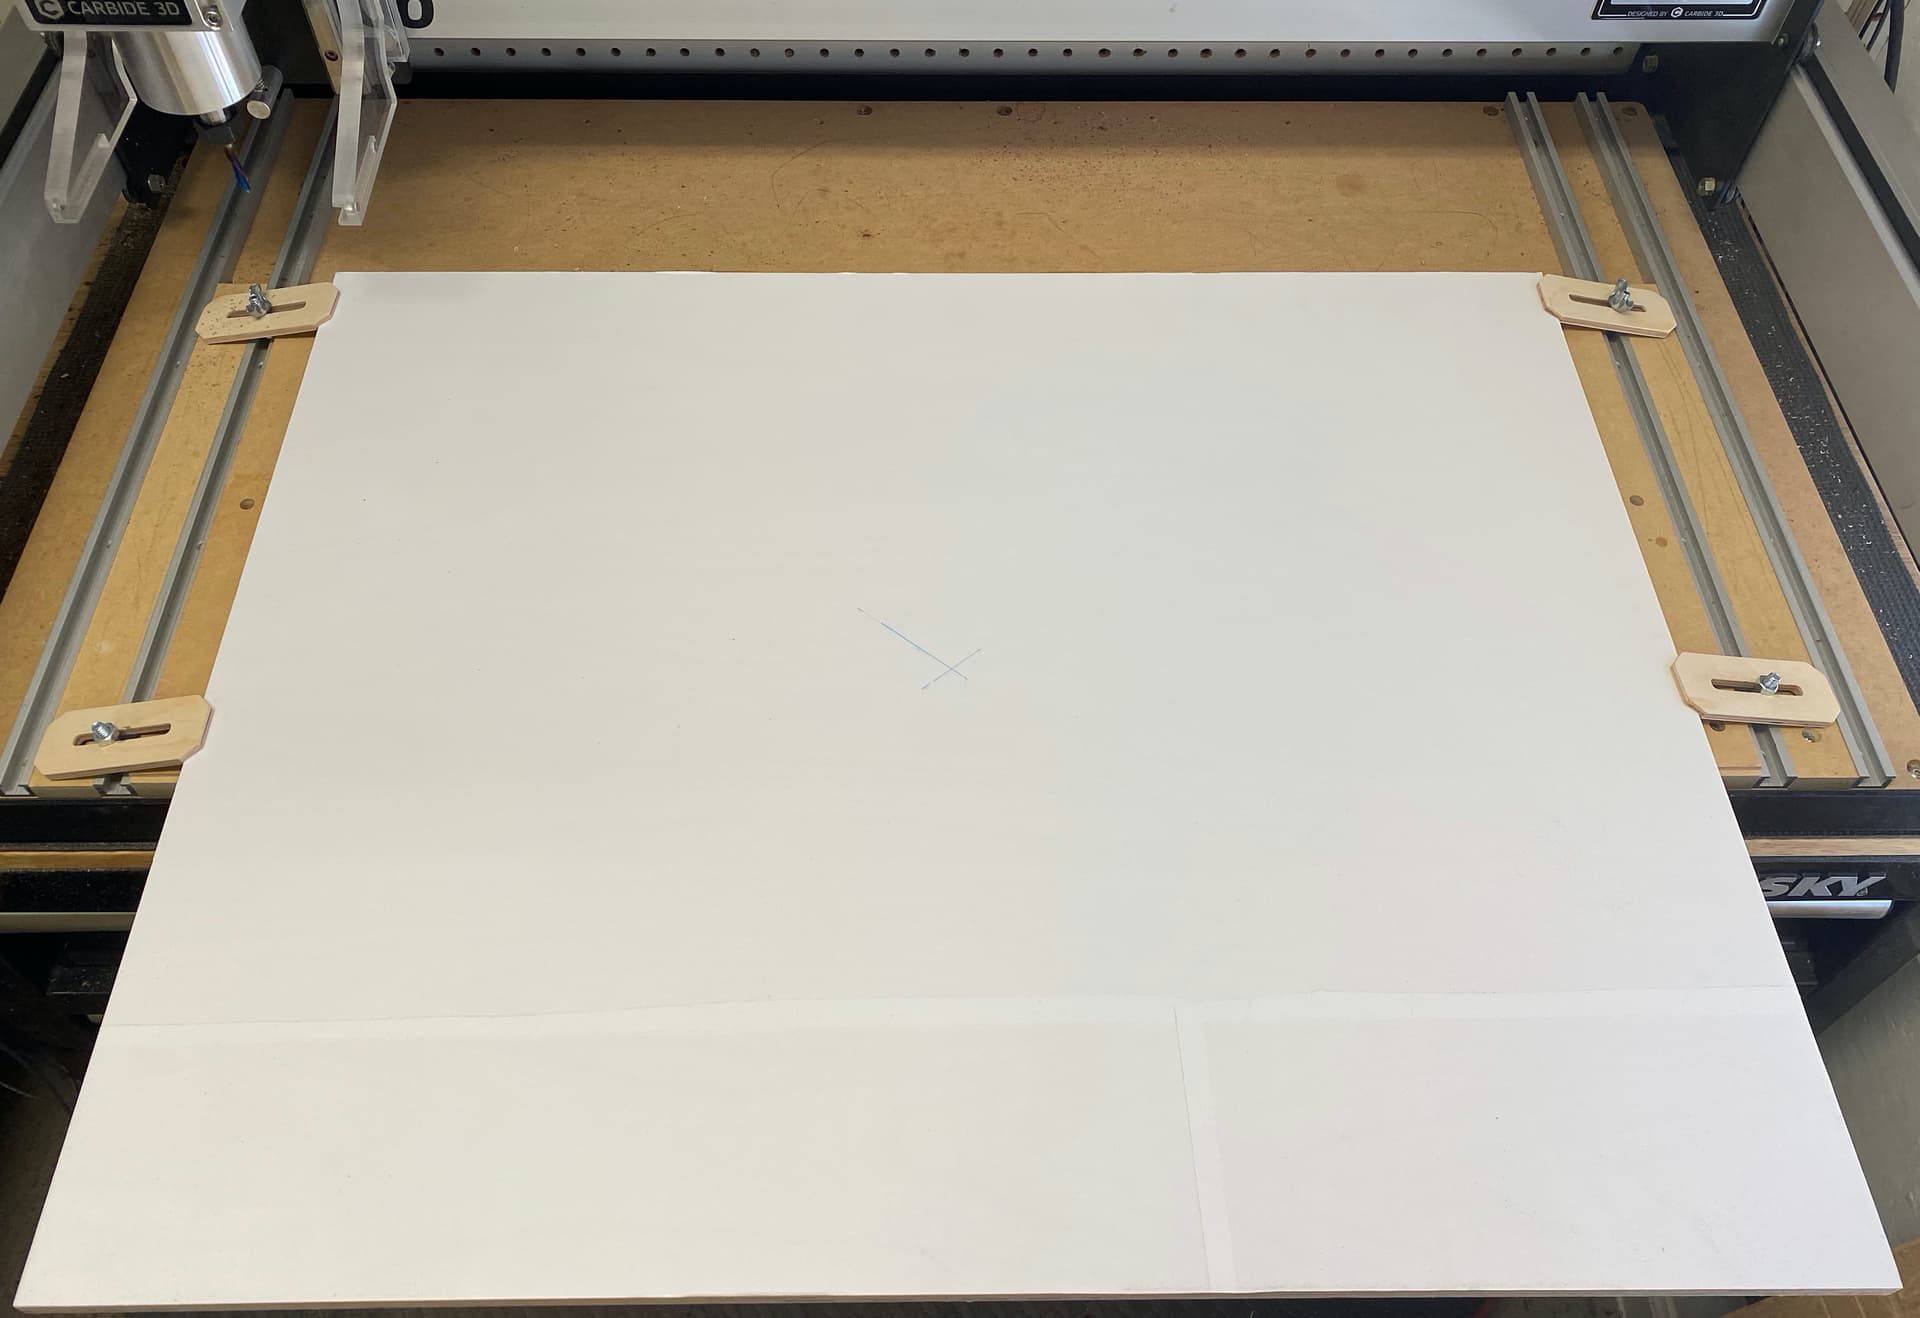
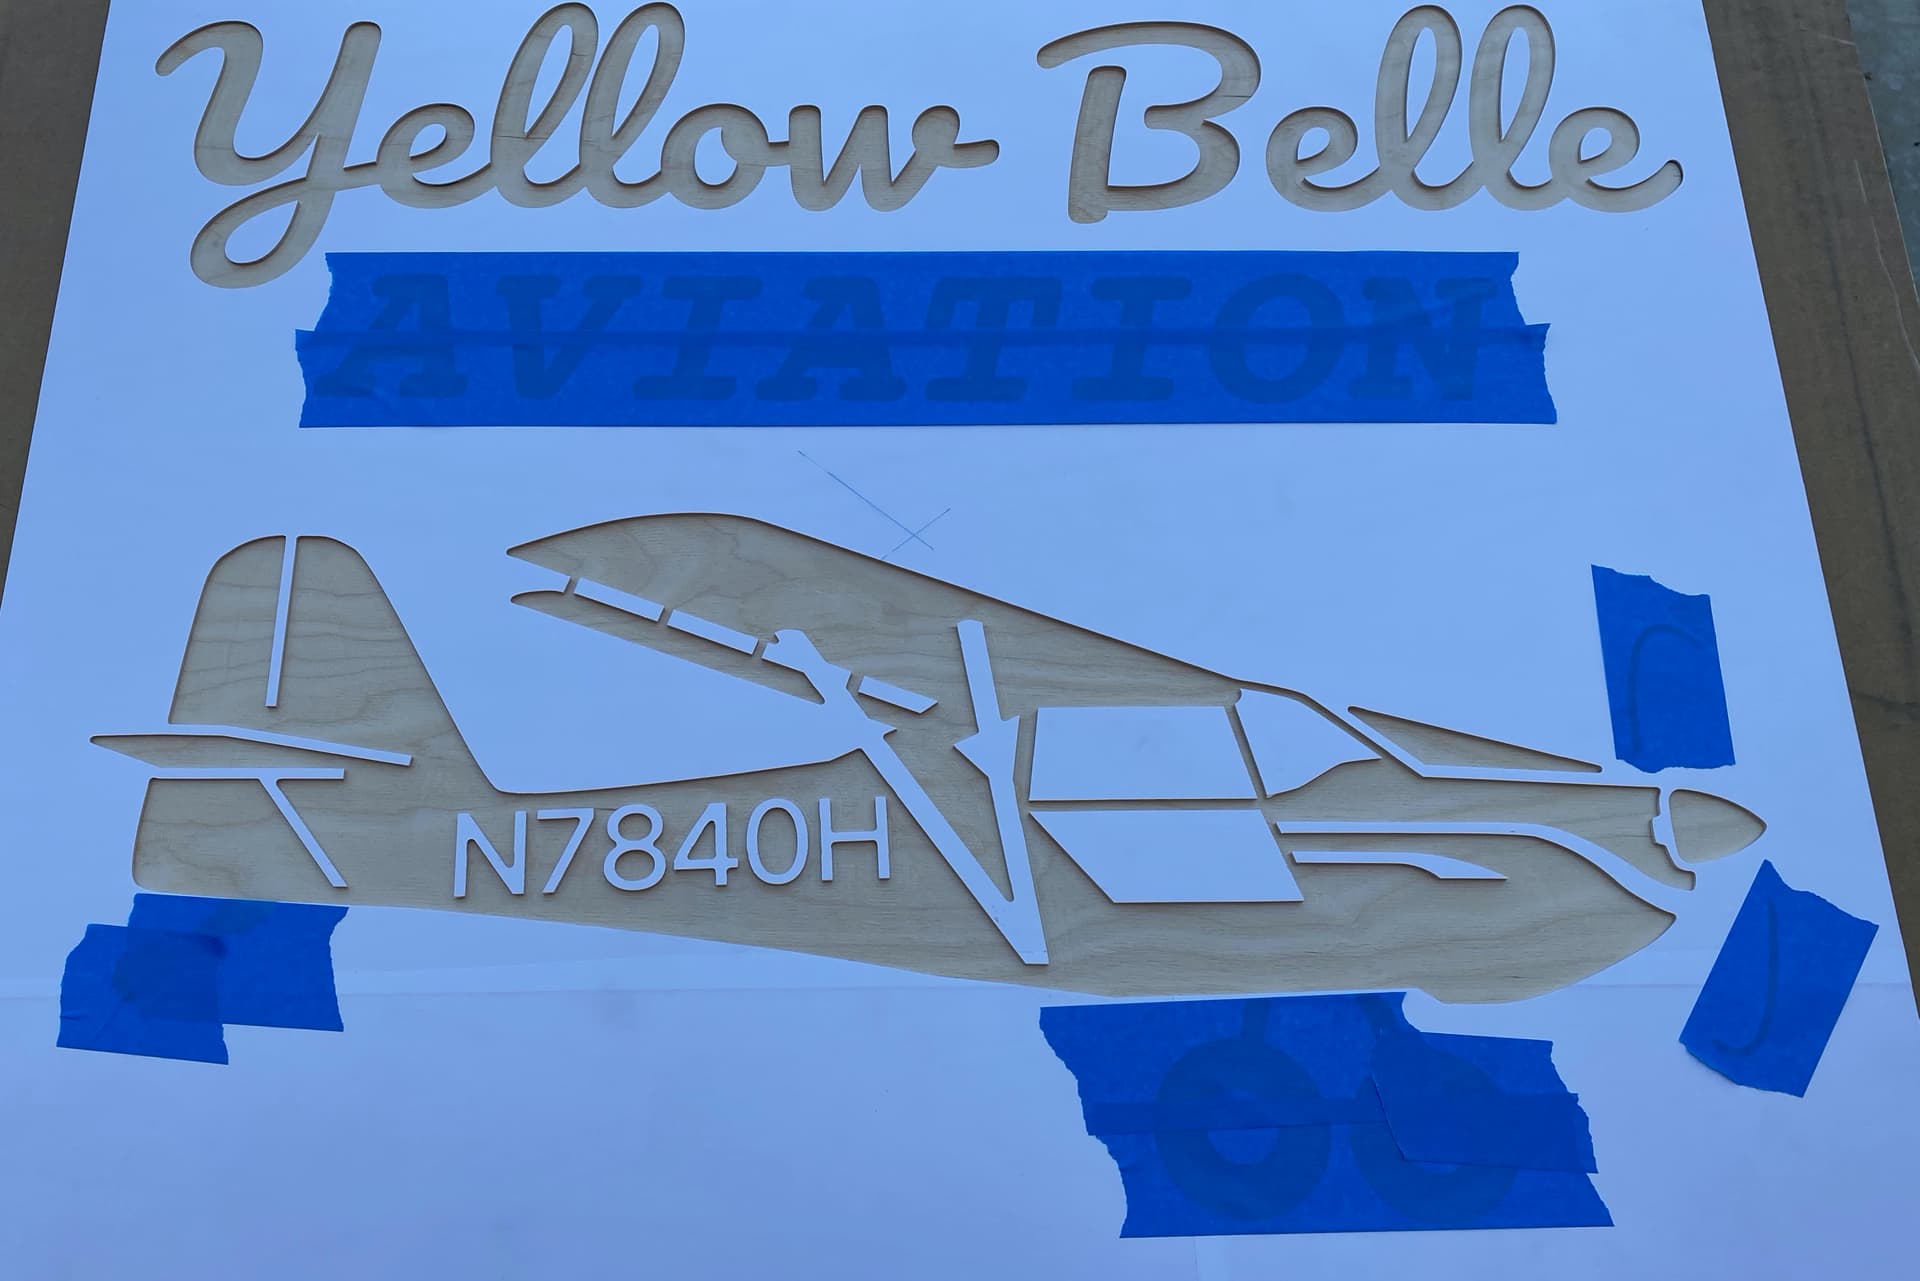
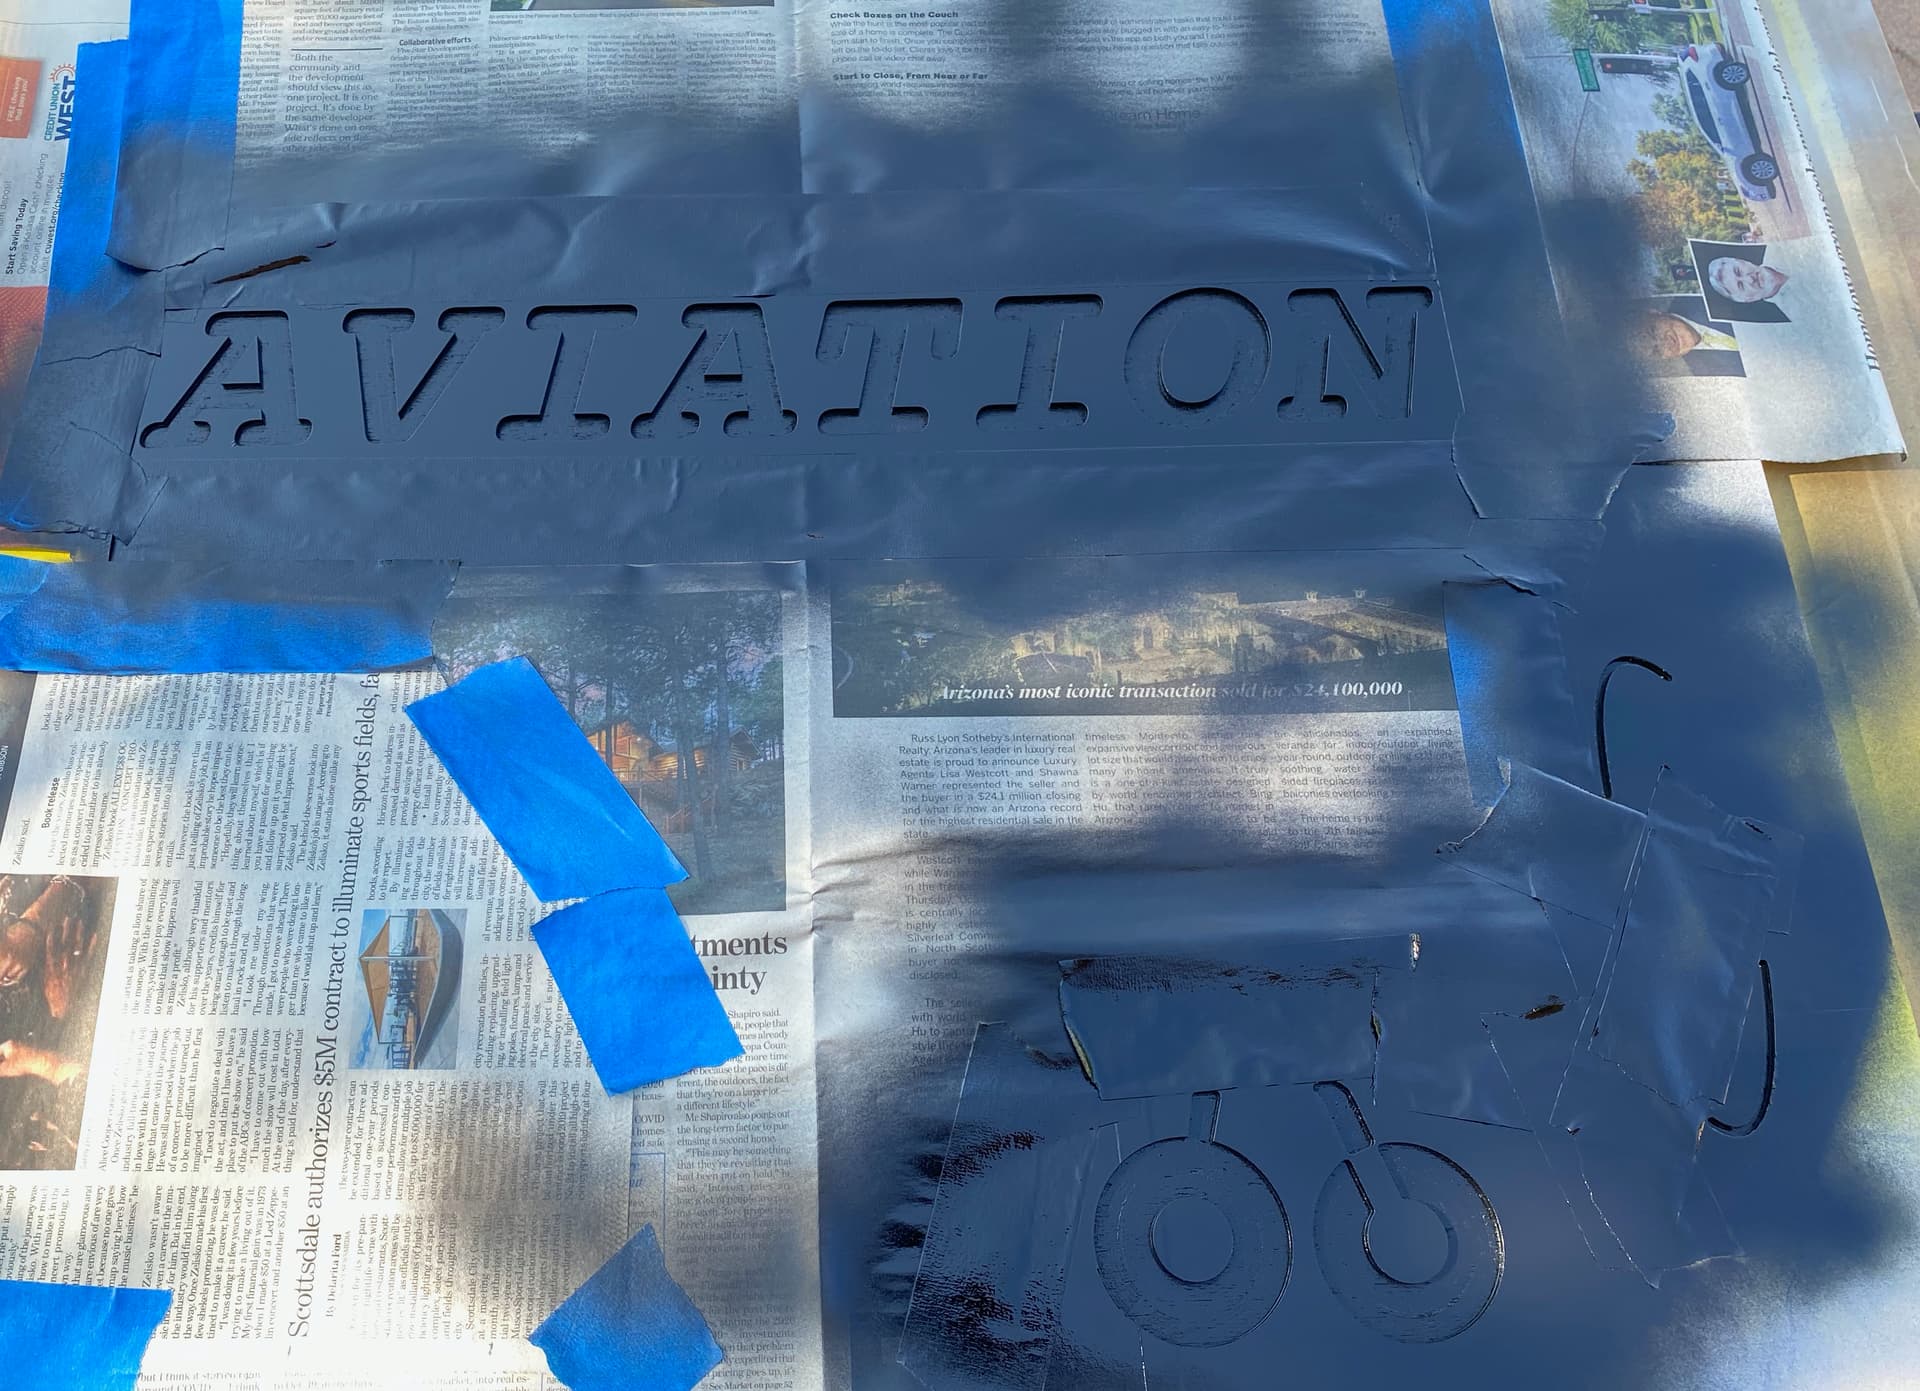
The signs are made from ½” Baltic Birch Plywood, 30”x24”. After sanding, I sprayed the blanks with a coat of shellac for two reasons: 1) it seals the wood and prevents paint from bleeding under the mask and 2) it allows the mask to be removed without peeling up wood fibers.
The boards were then masked with (cheap) Duck brand adhesive shelf paper and squeegeed down tight with a roller.
Spray the blank with Shellac…

Mask with Duck brand shelf paper…
Zero on the center and cut “Yellow Belle Aviation”…

Move the board (too tall for my XL to cut in one pass), re-zero and cut the plane…
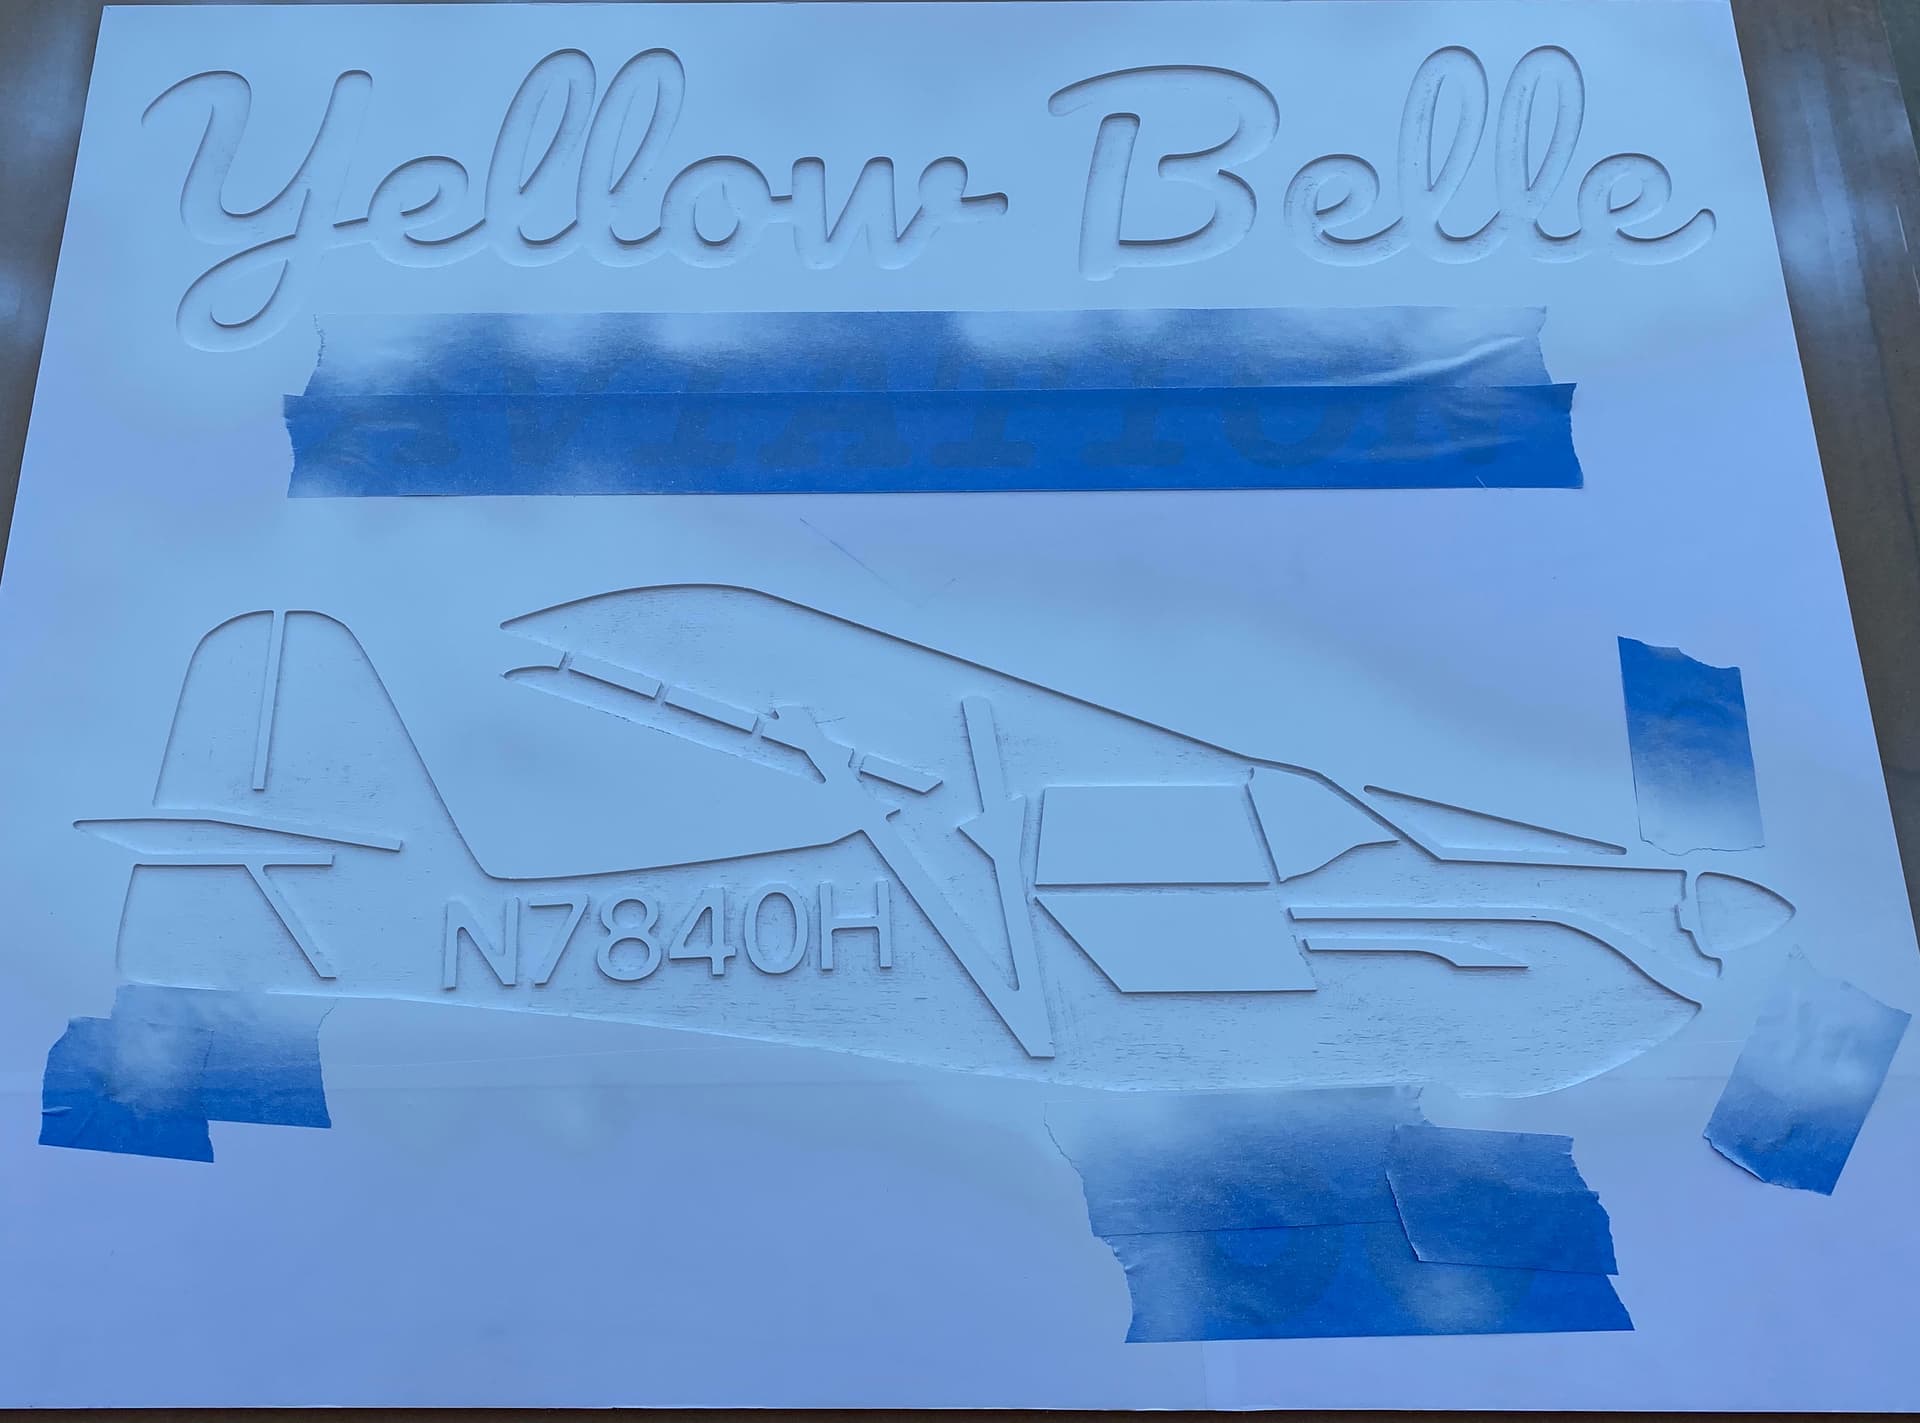
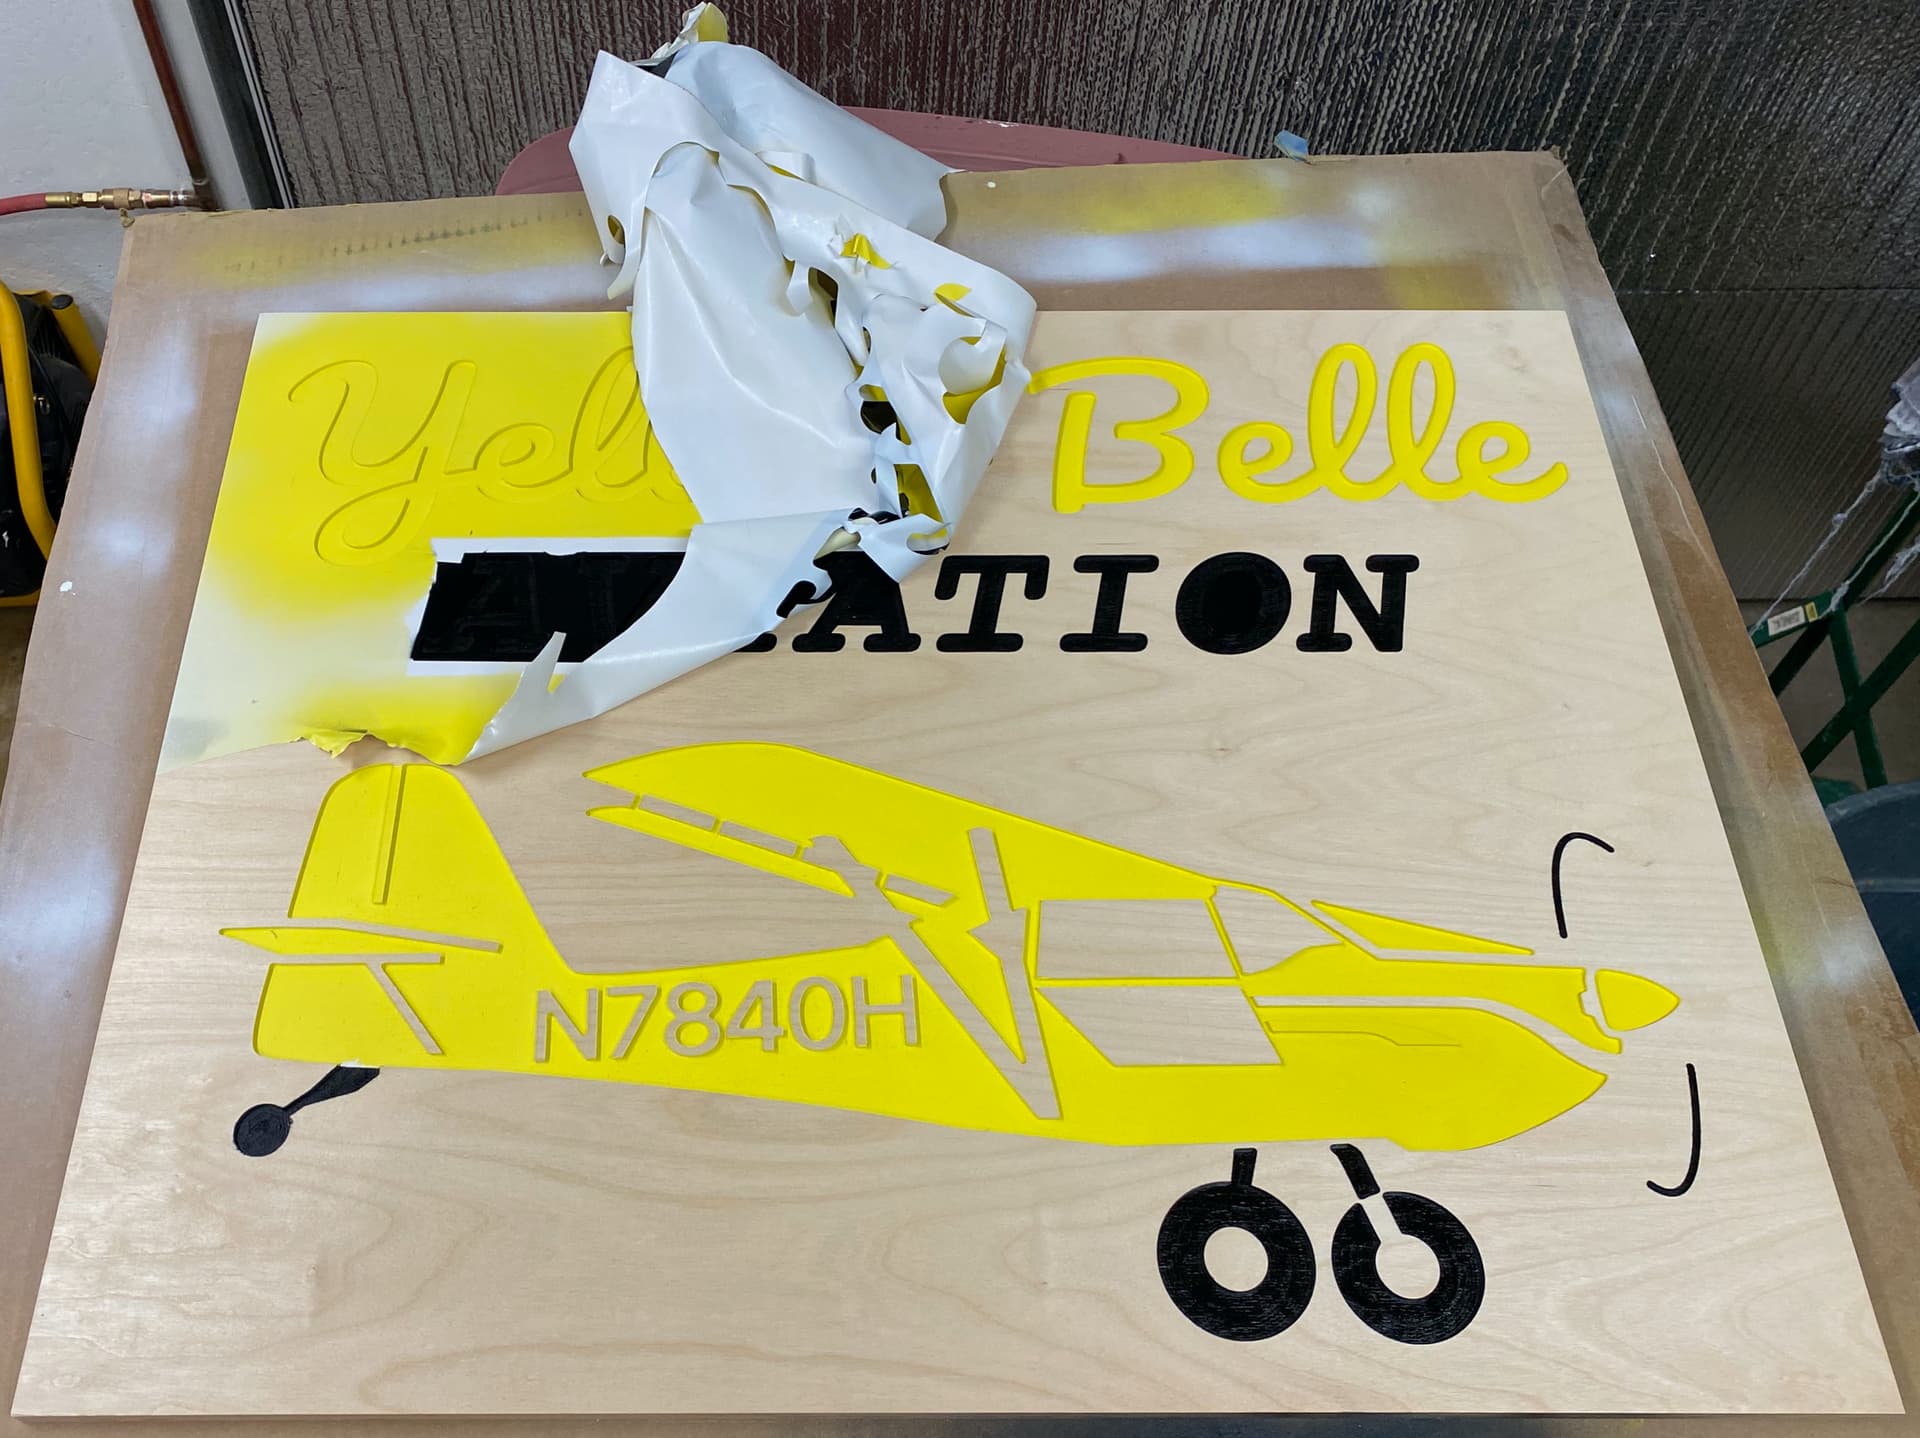
Mask the black parts…
Spray a base coat of white (helps the yellow paint cover better)…
Spray the yellow…
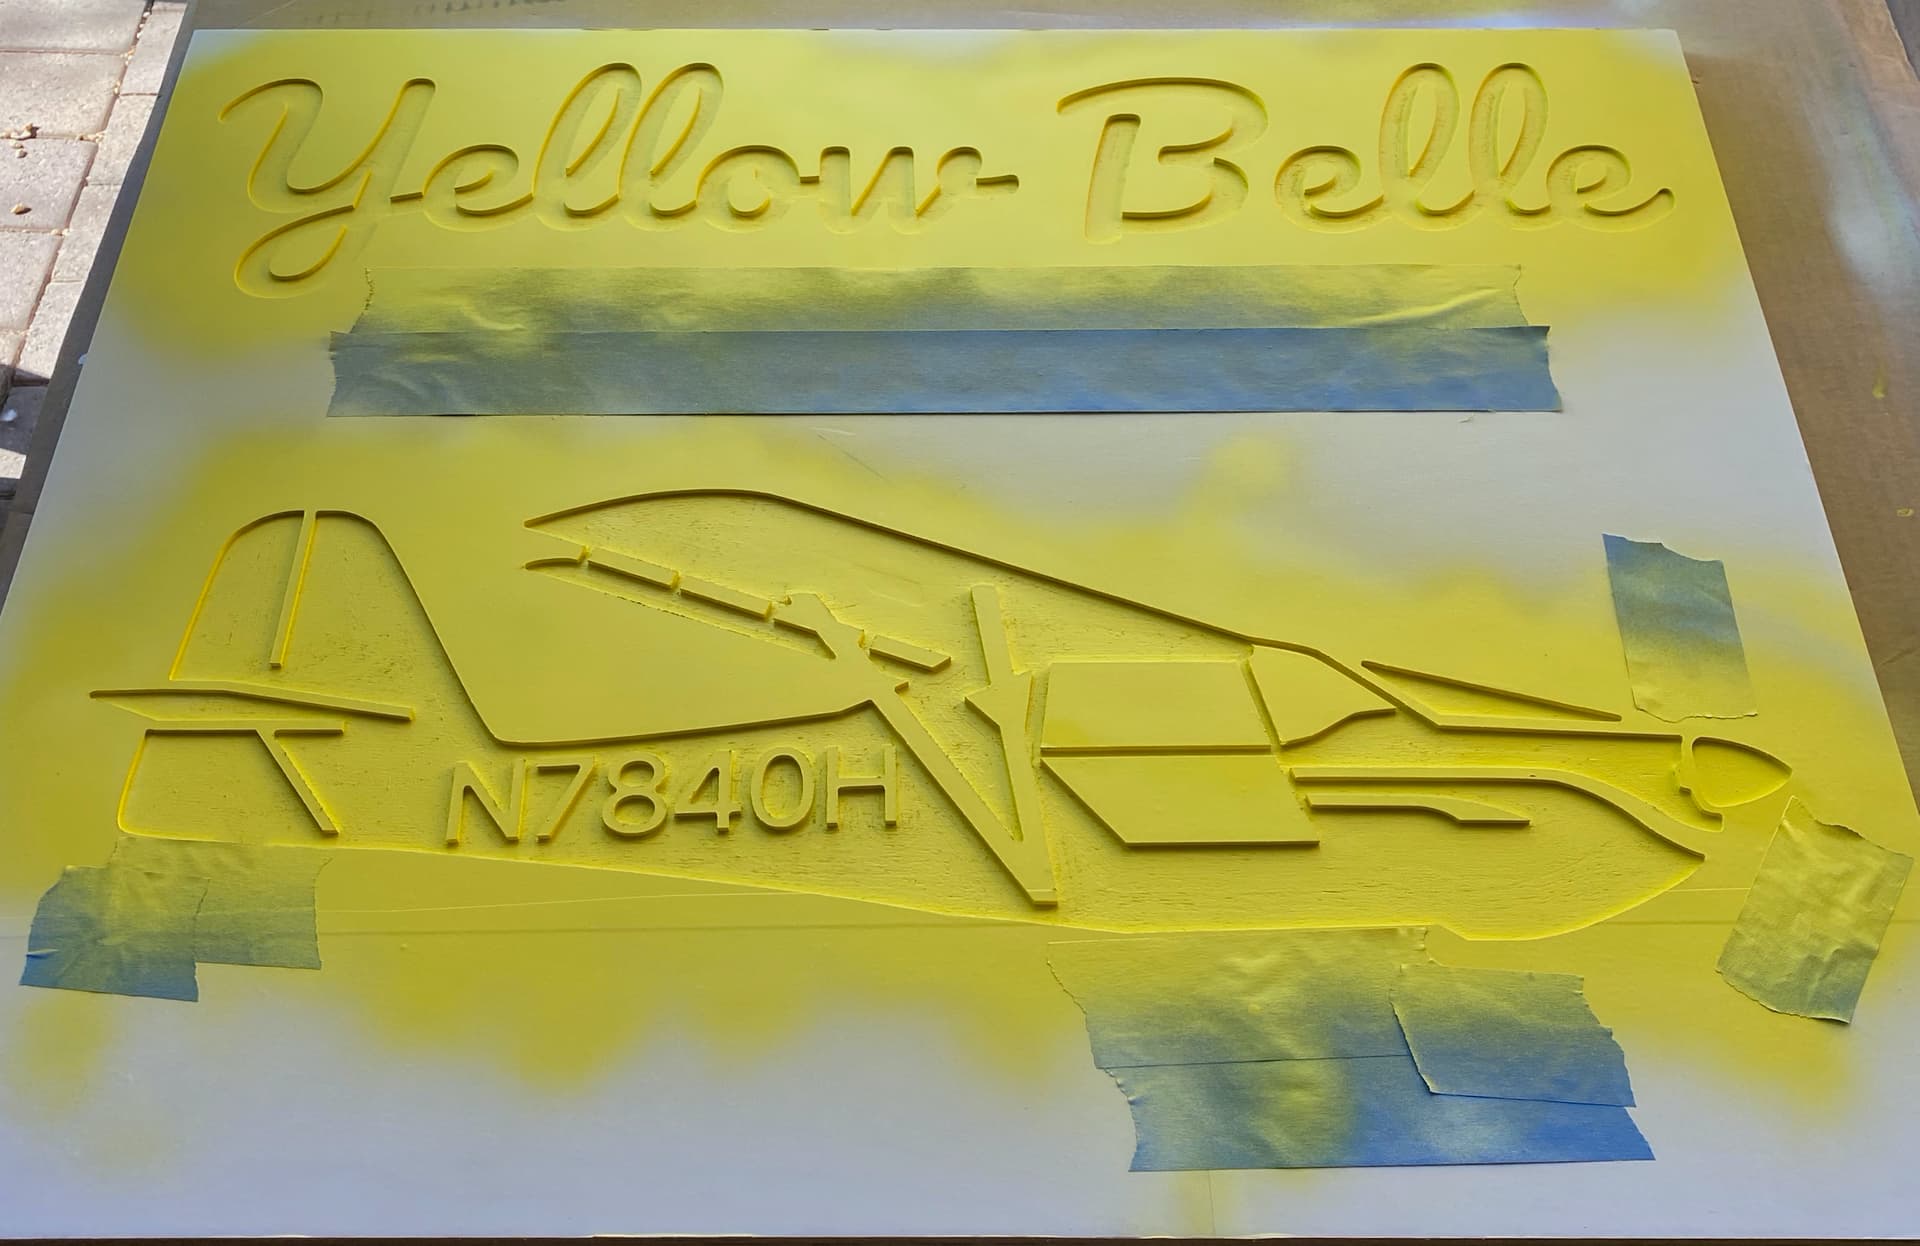
Mask the yellow and spray the black…
Peel off the mask. This is the fun part!
Sign #1. Pinstripes, windows and “N” number are hand-painted.
Sign #2 (no paint on the windows for a different look)
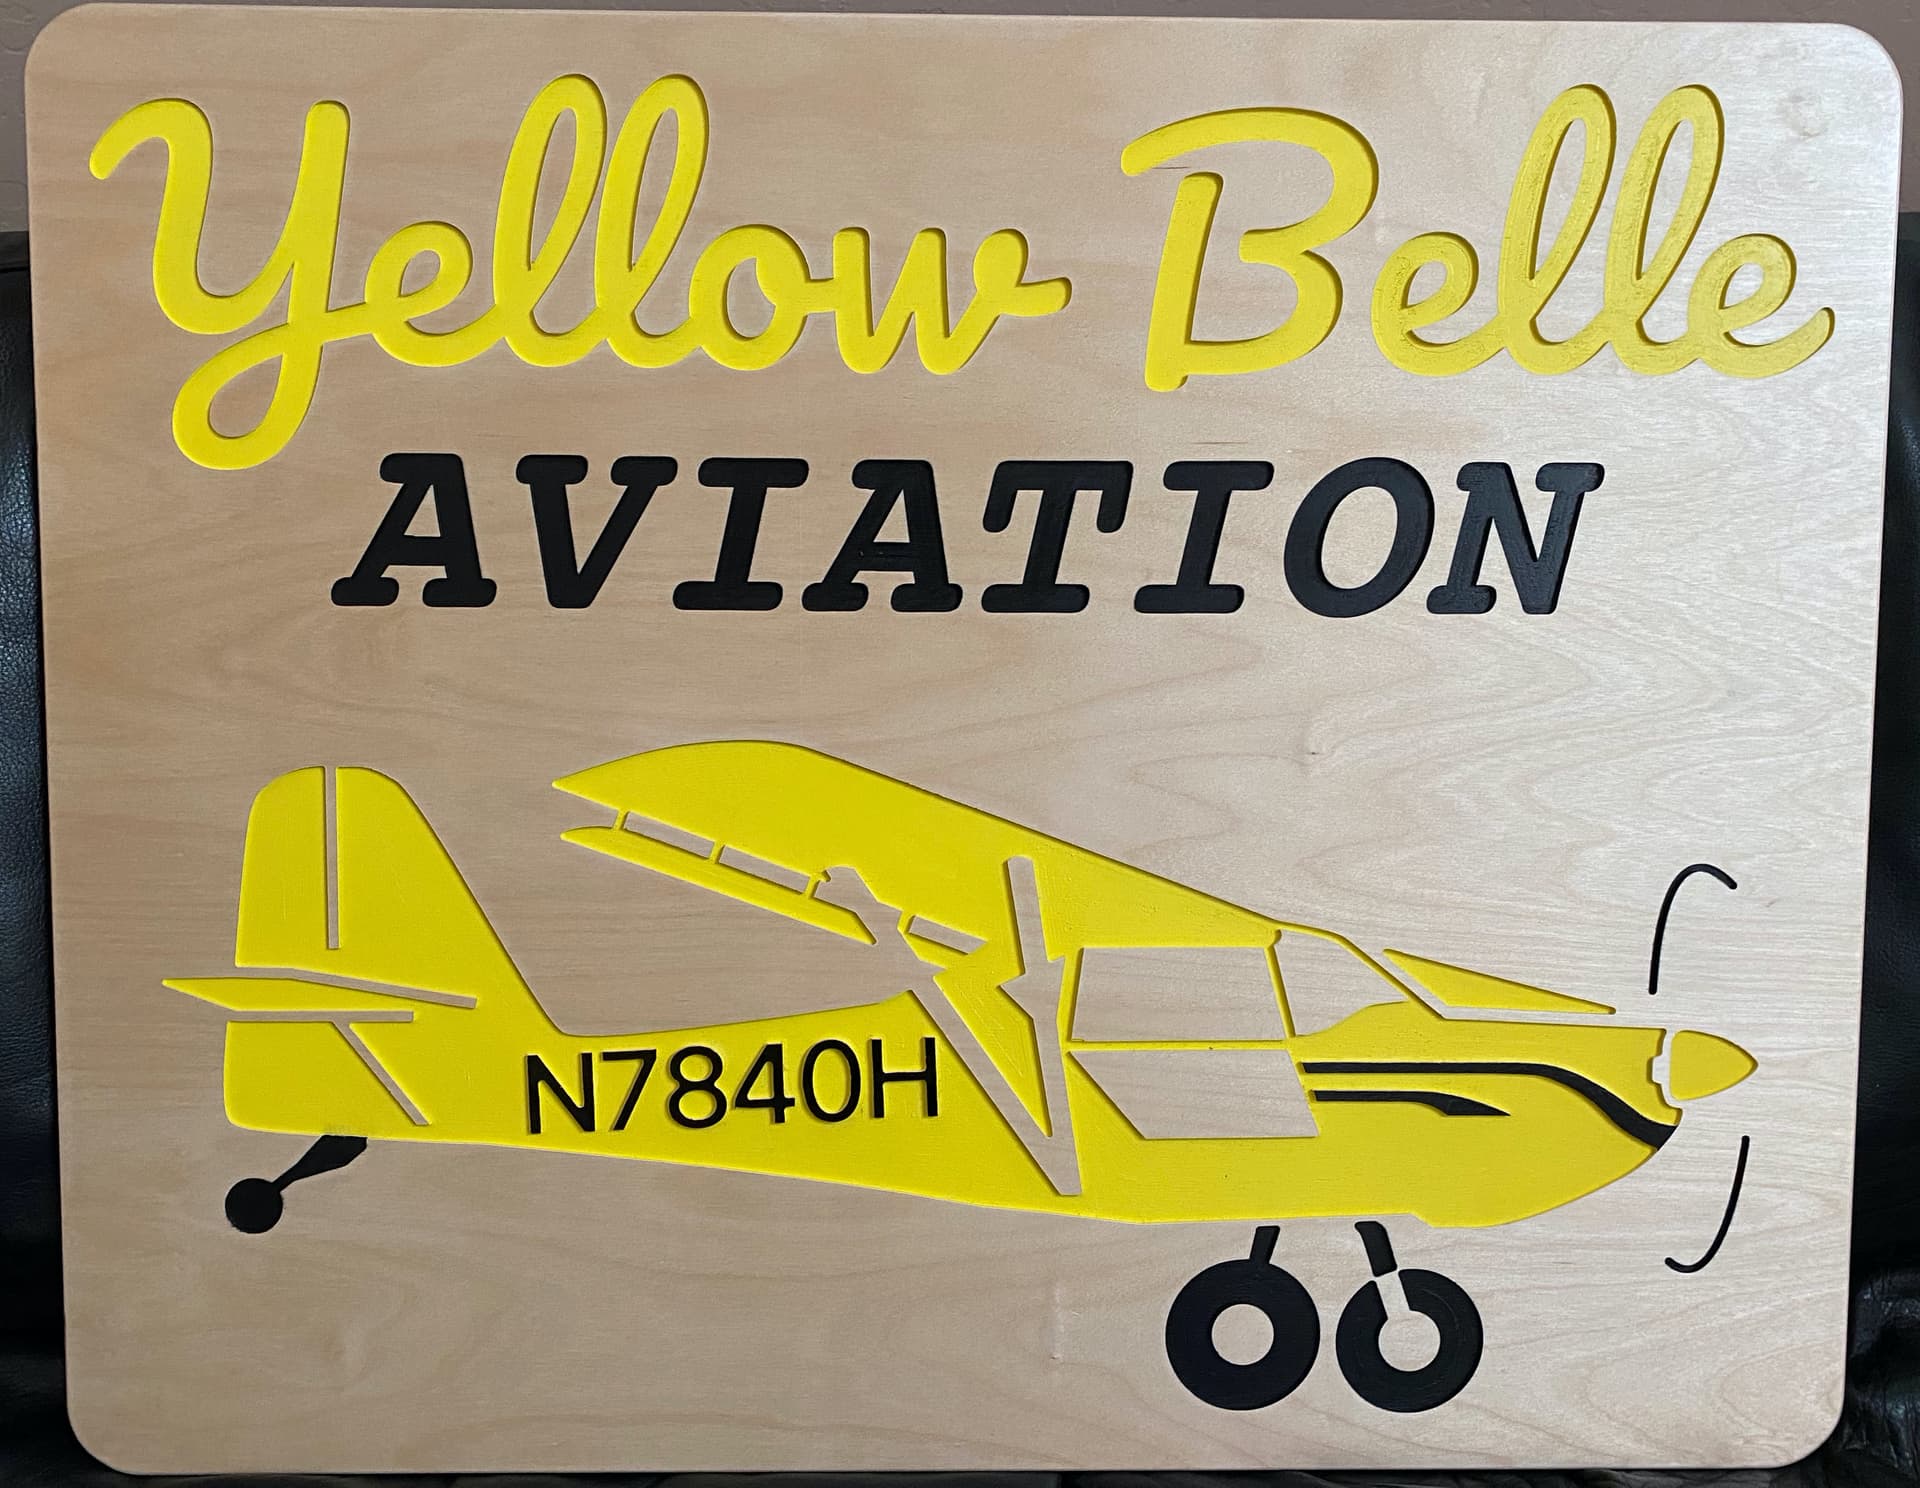
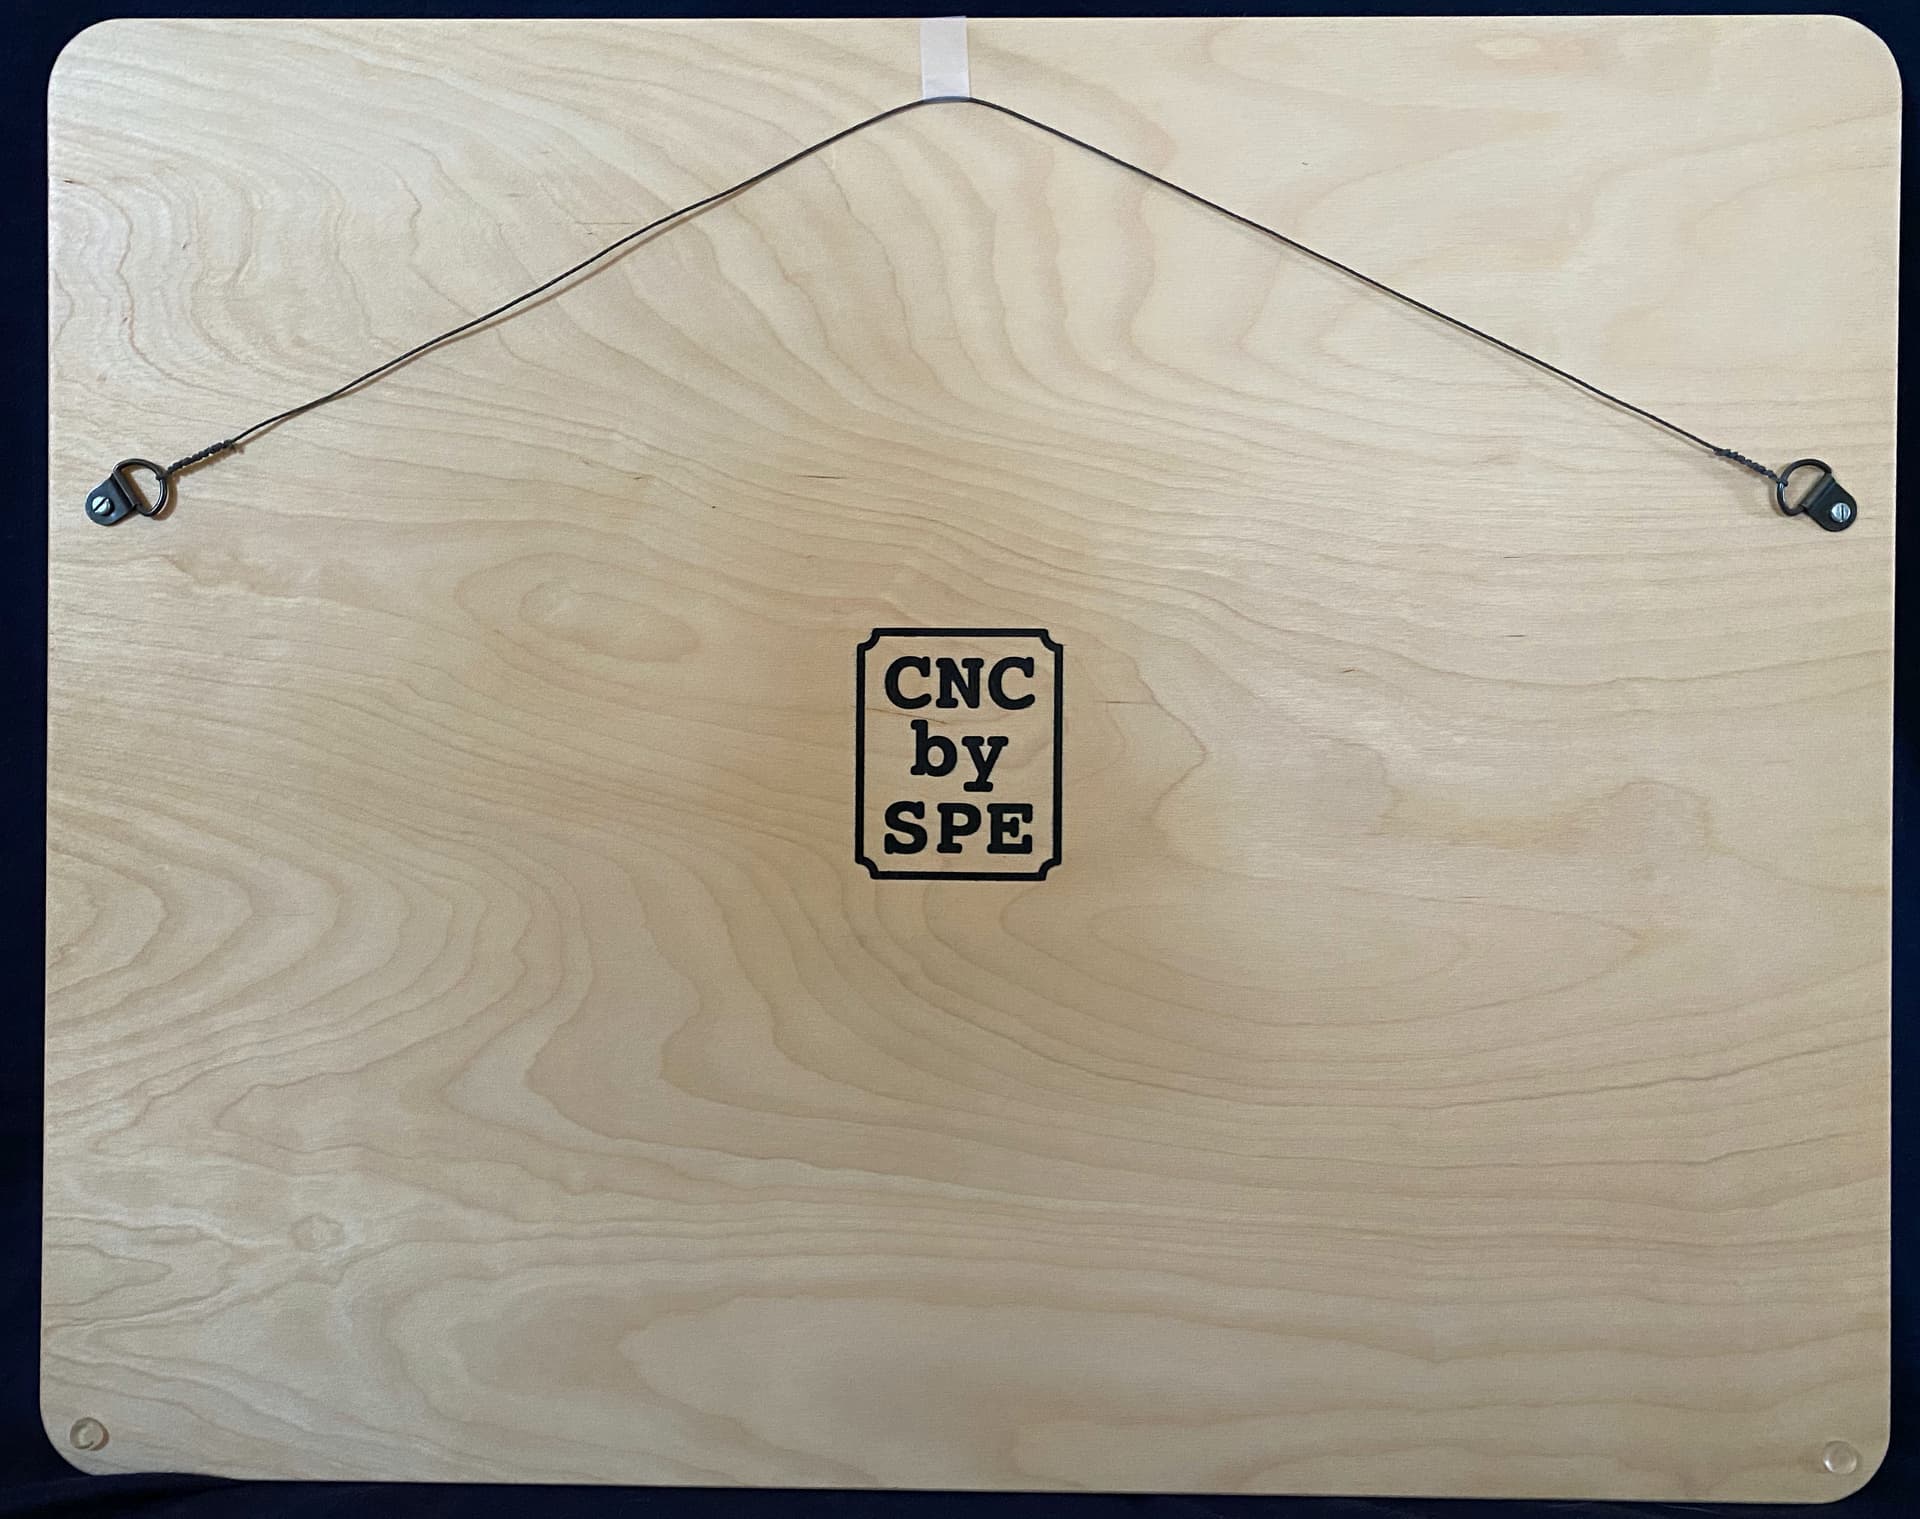
The corners were rounded with a disc sander. 2 coats of Polycrylic spray on both sides. Personalize the back and add hardware…
Yellow Belle Aviation.c2d (2.1 MB)
24 Likes
Is the $500 gizmo the HDZ Pro or a new product?
I’m pretty sure that if it were the HDZ or a variant of same, it would have been described as such, so presumably, it’s something new — after all, @Luke has to do something to earn his keep.
4 Likes