Community challenge #9: Sign/Plaque (closed)

Howdy!

While voting for challenge #8 continues, let’s kick-off the next one.
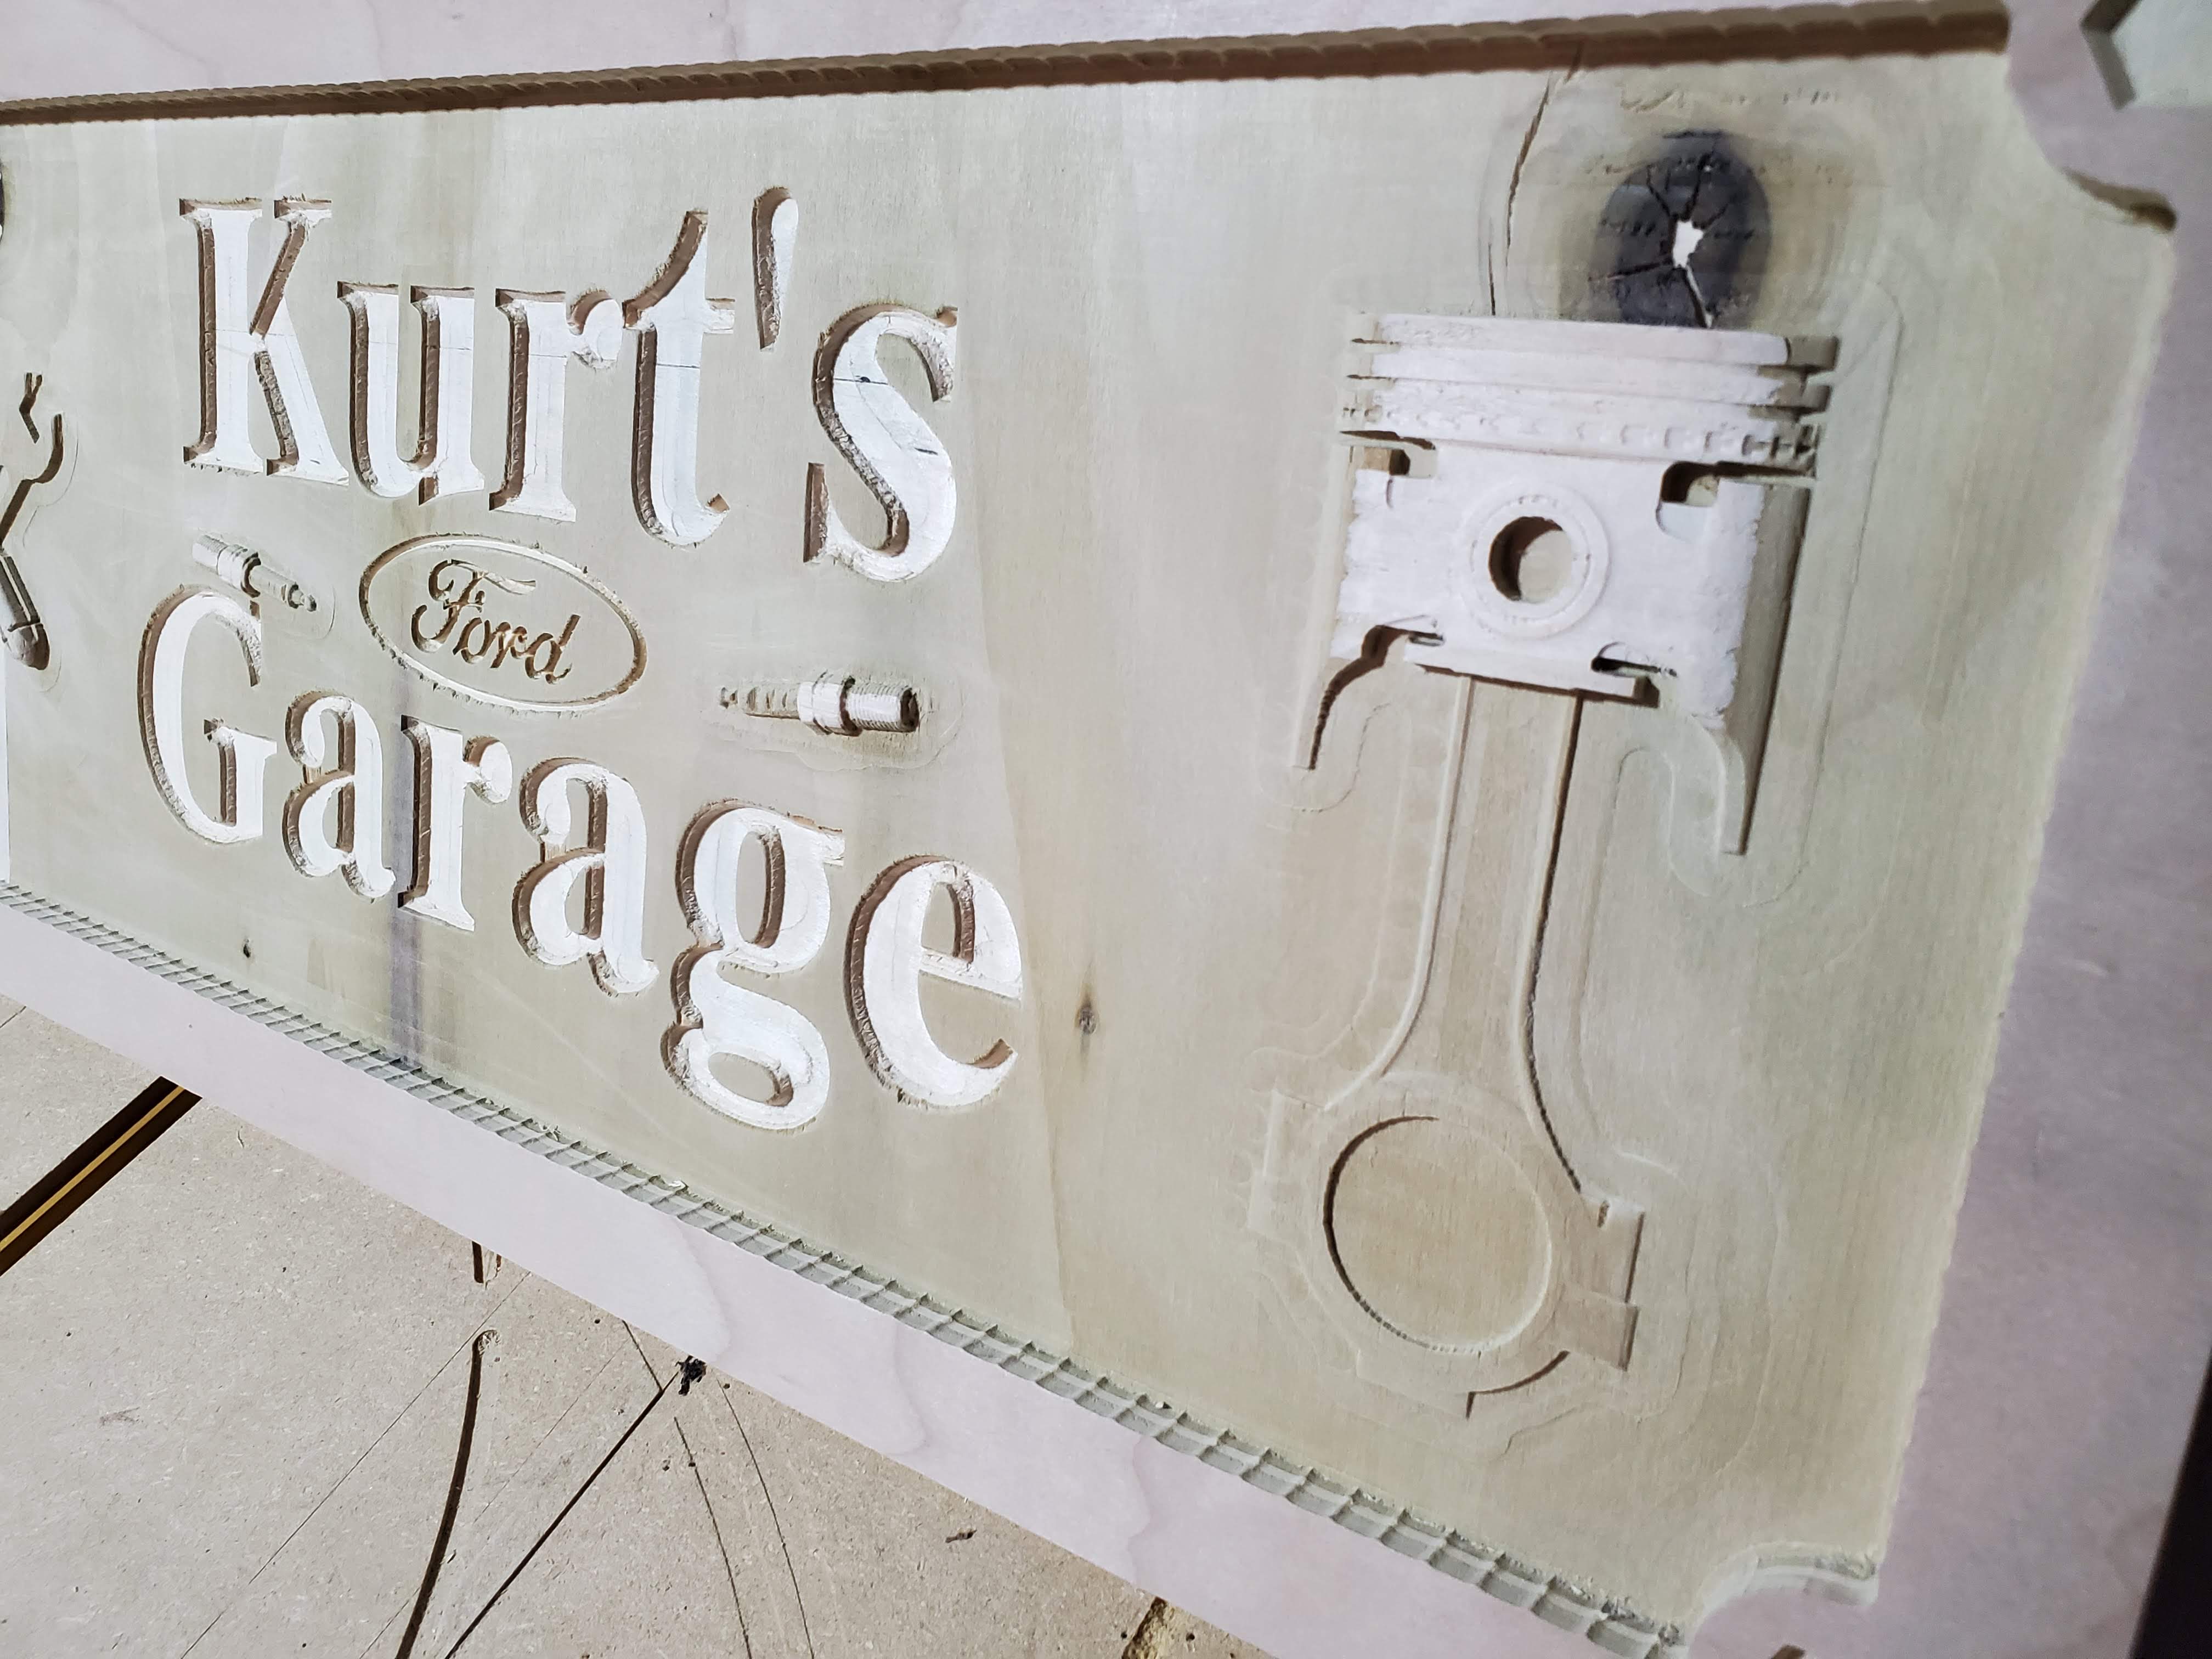
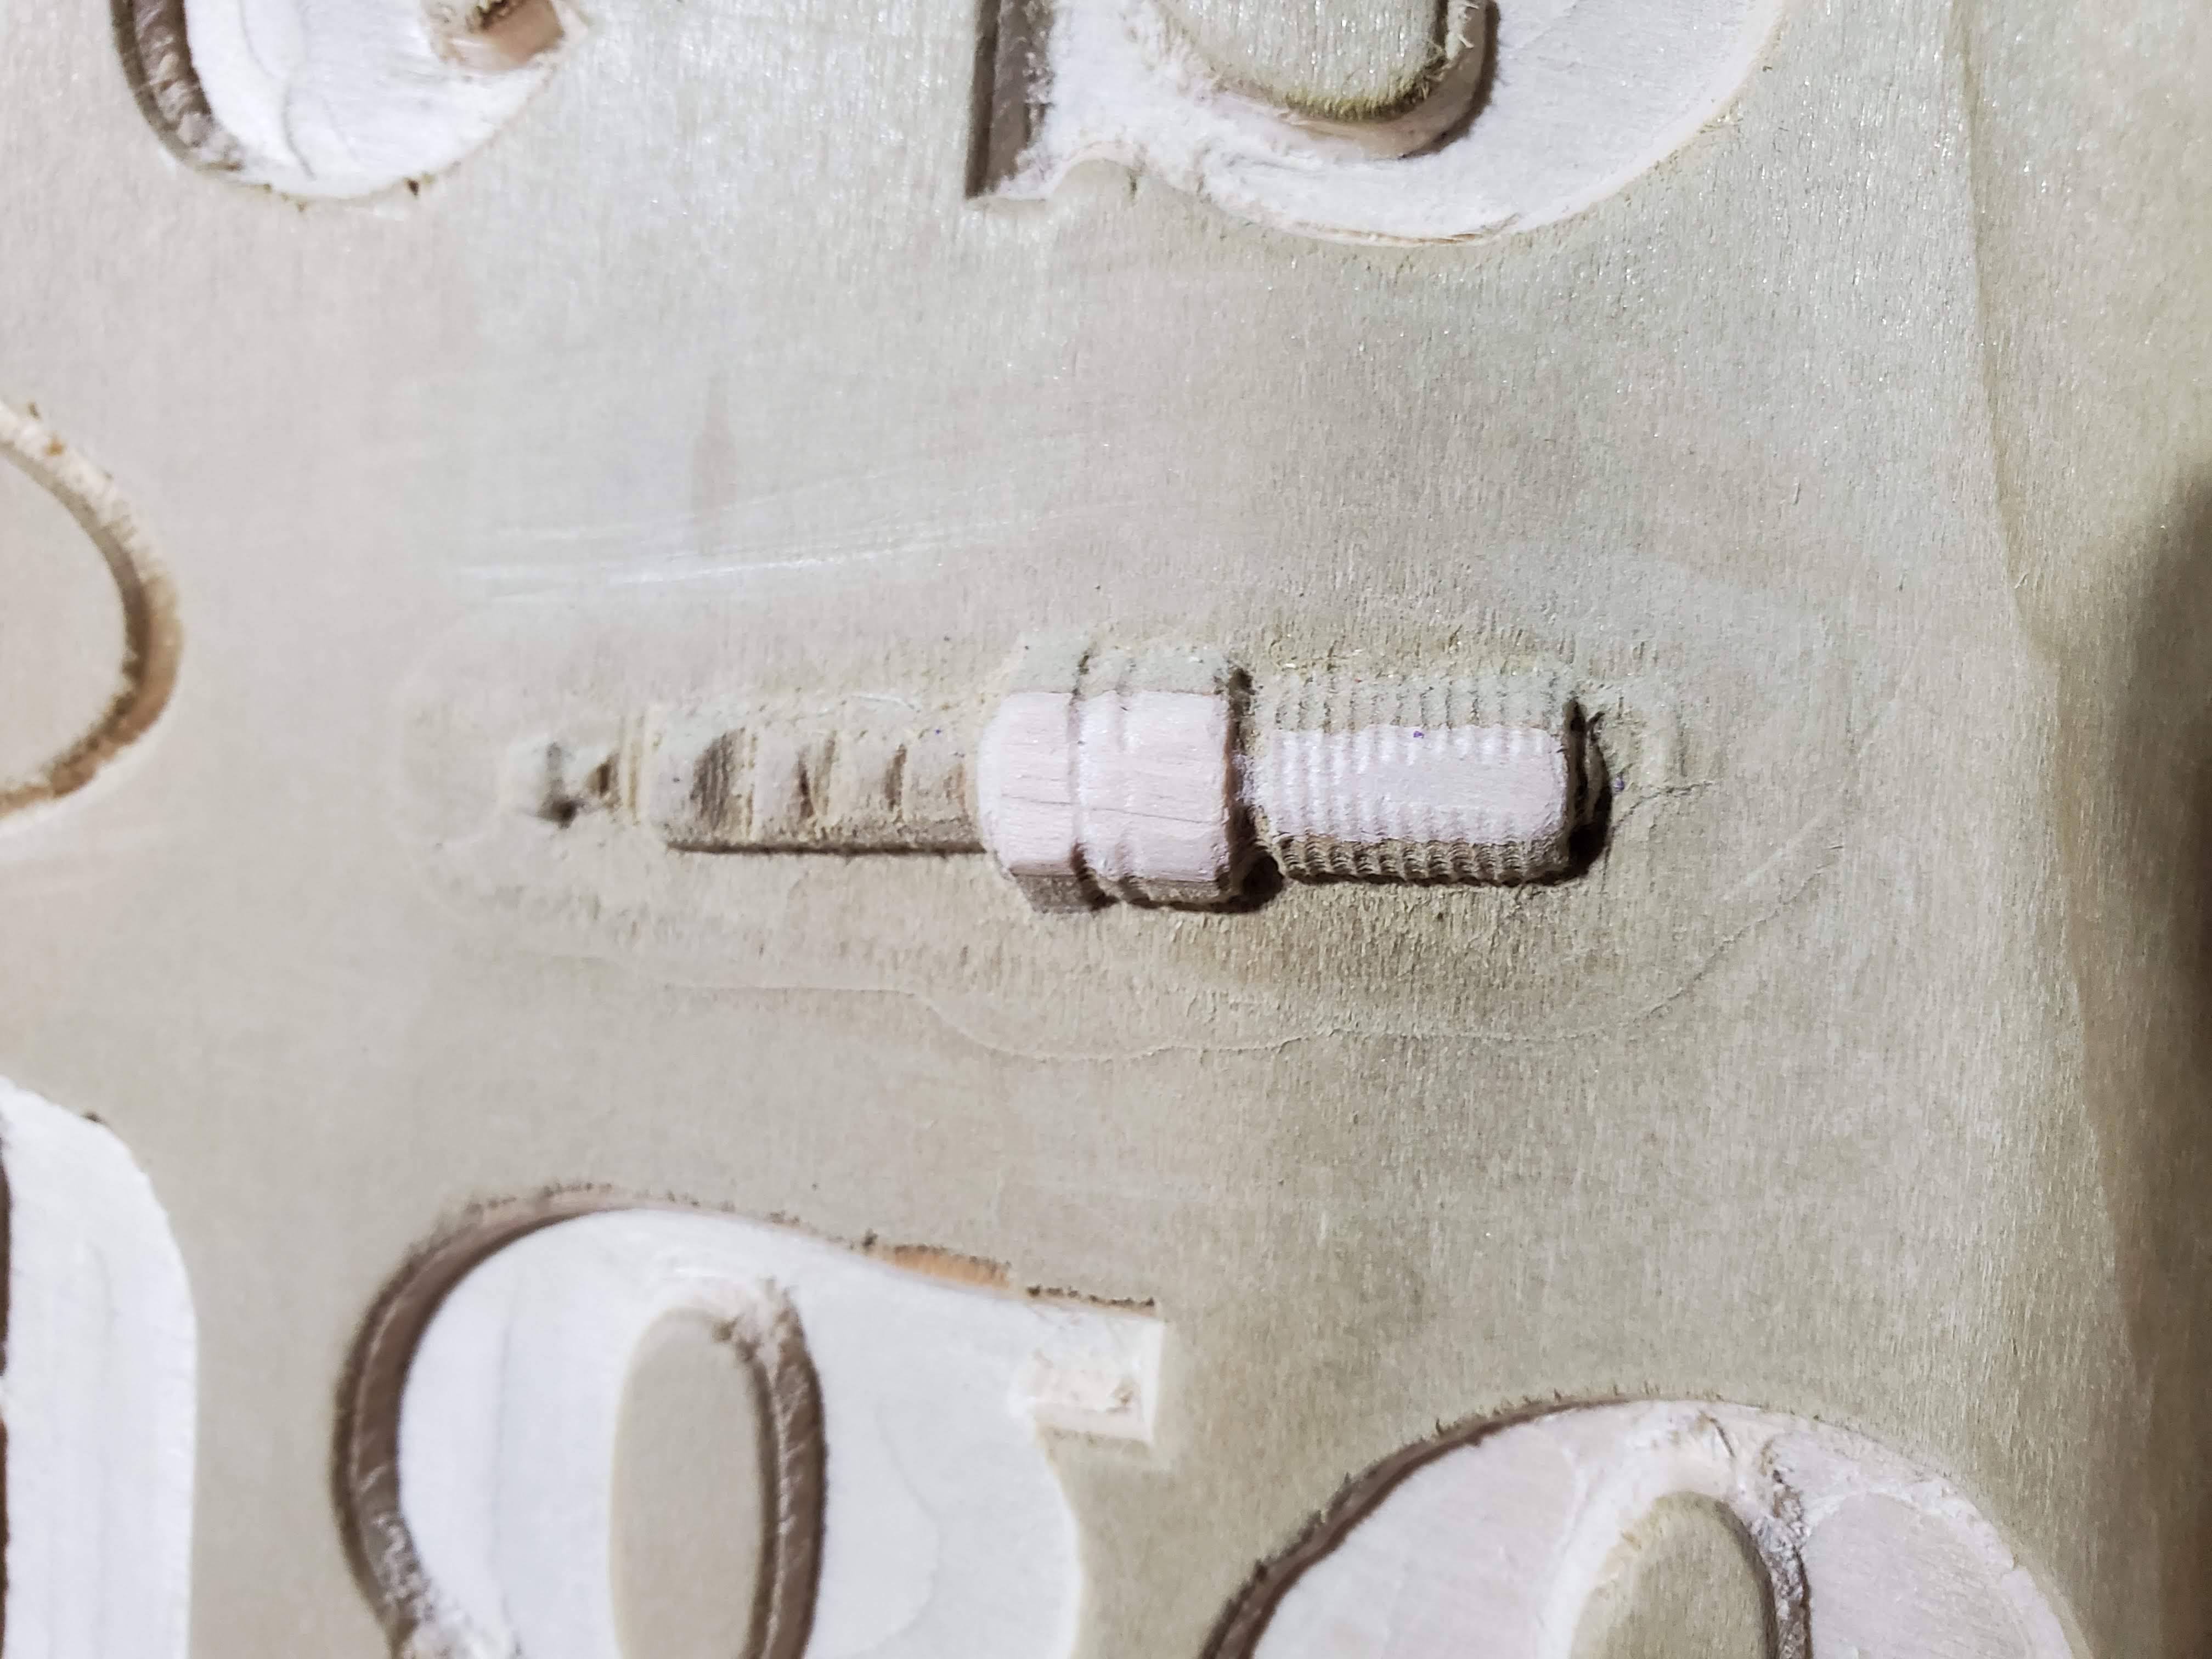
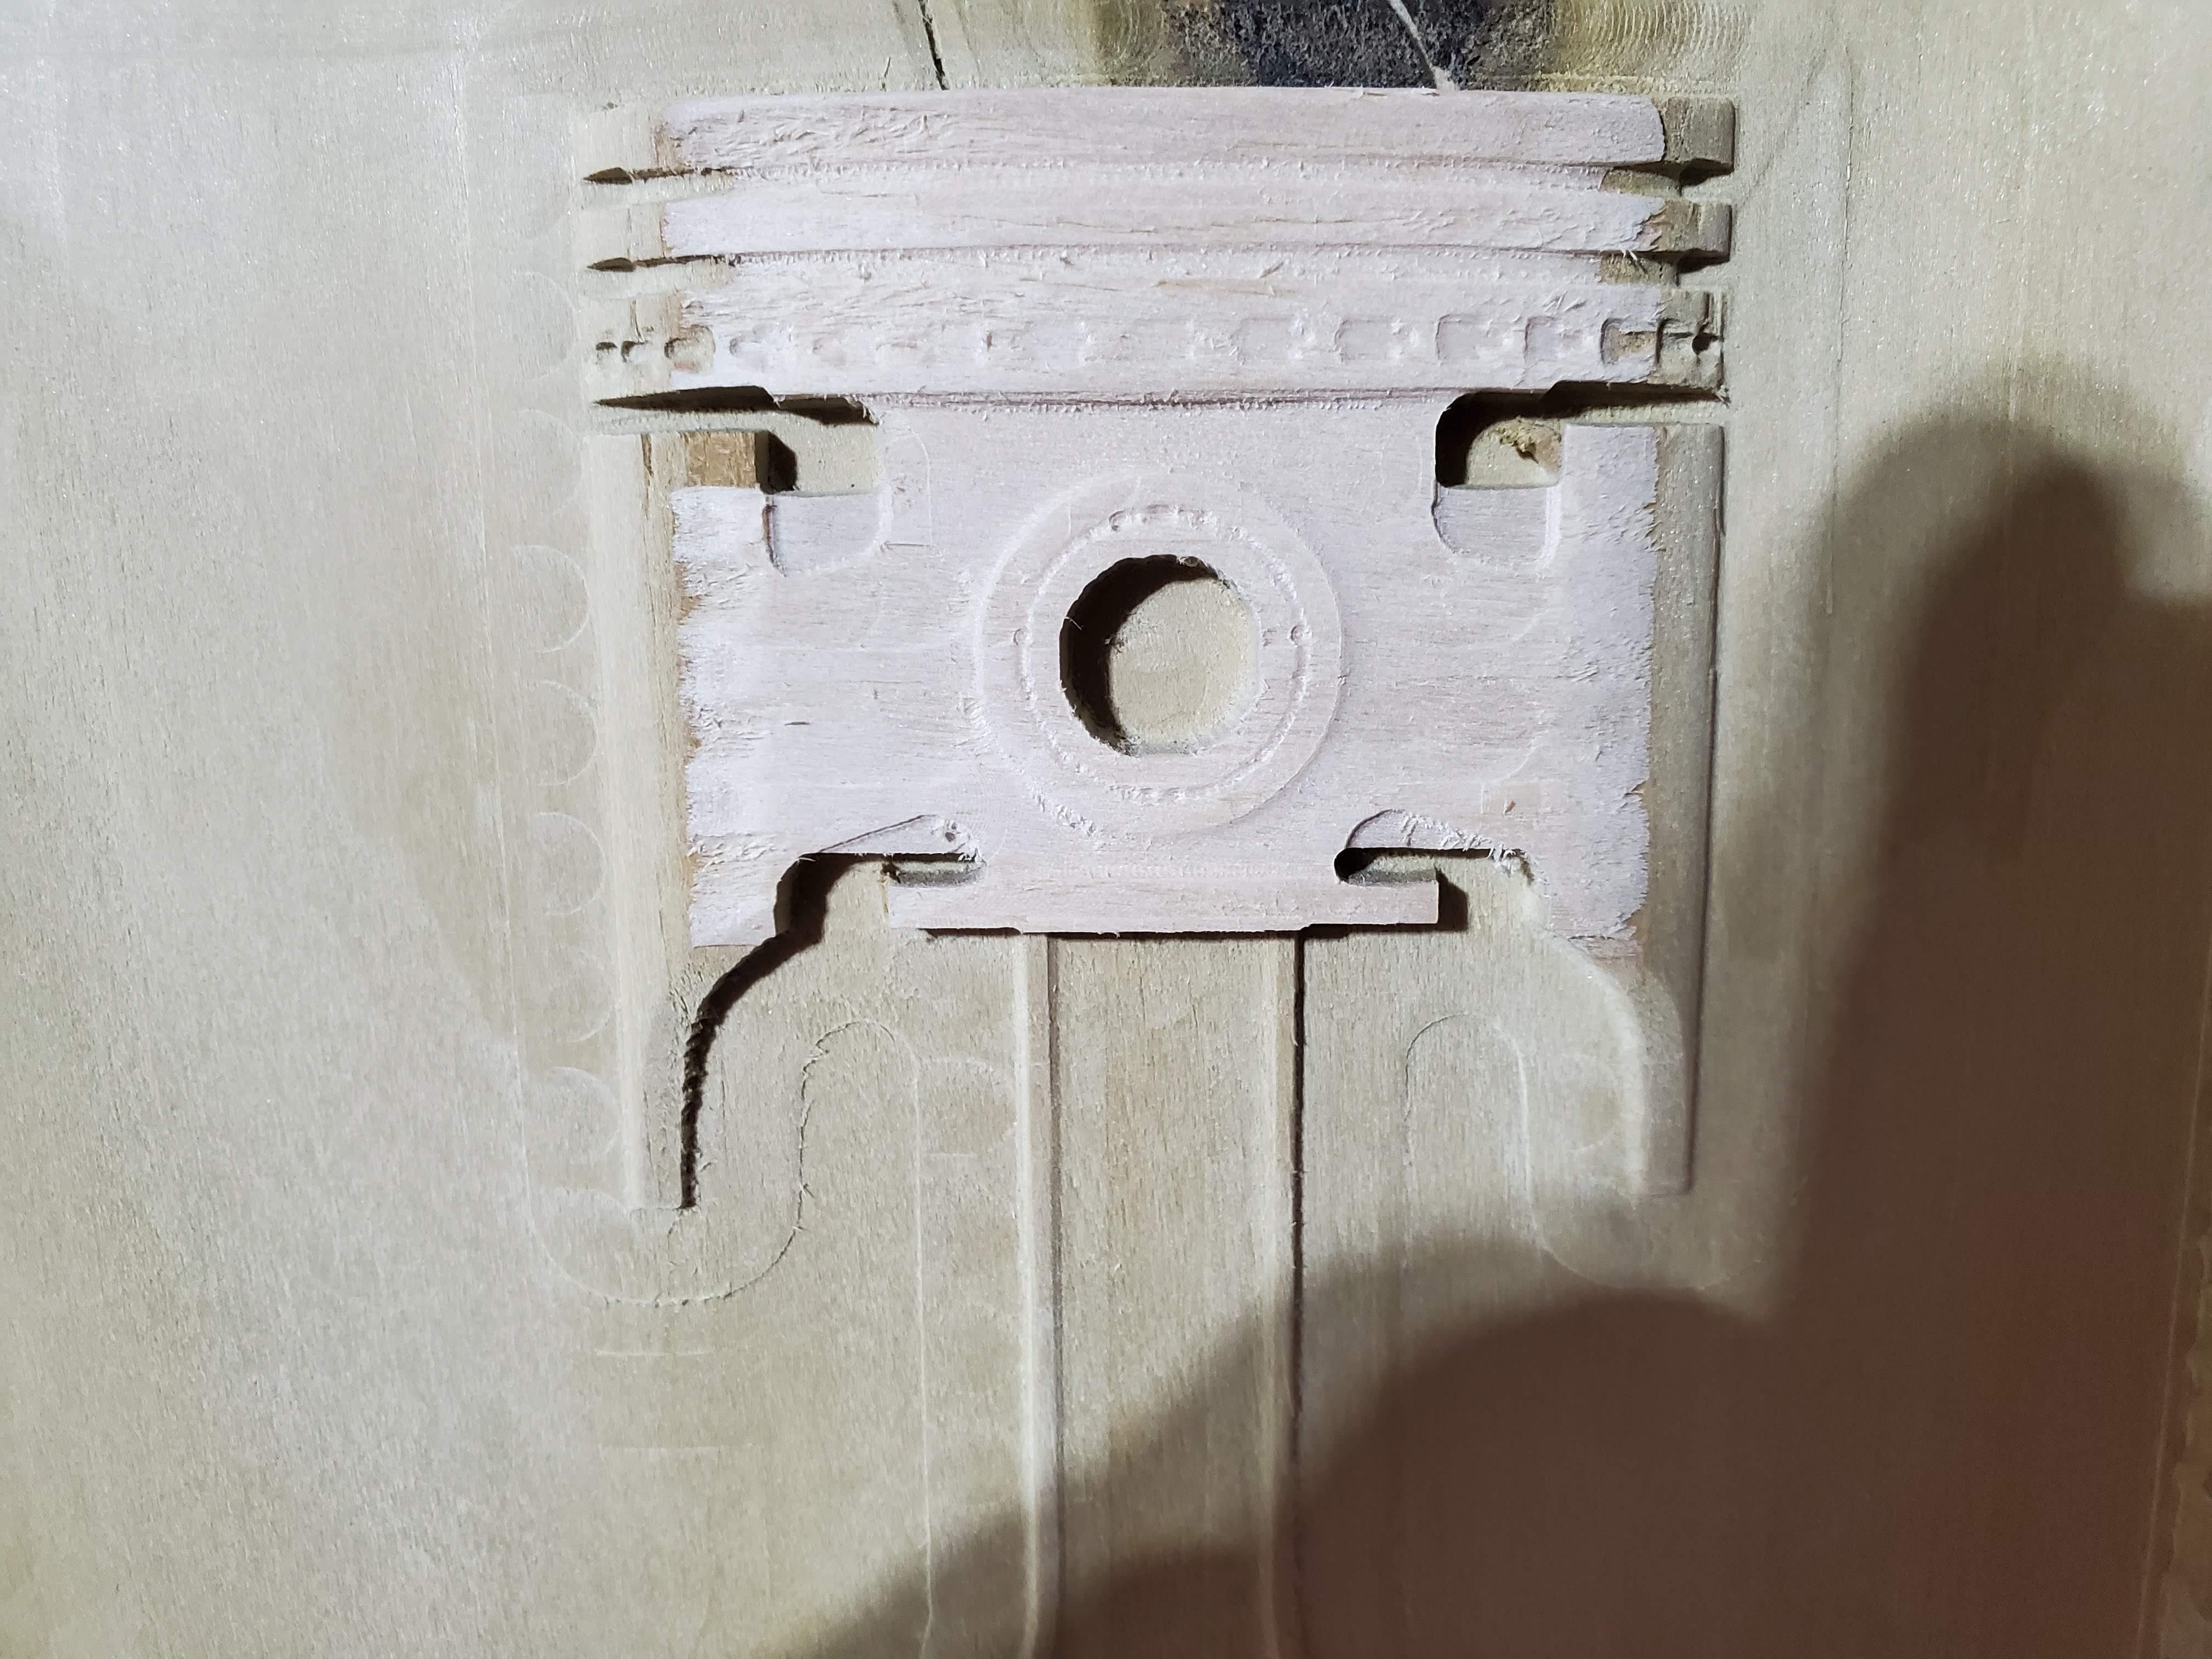
Challenge #9 is: “Make a sign/plaque

Making signs is one of the popular reasons for people to get a CNC, they are cool to have in the shop (“don’t put your fingers where you wouldn’t put your [beeeep]”), and they make for great gifts (or items to sell). But what I really like about them is how accessible they are and how they reflect one’s journey on the CNC learning path.

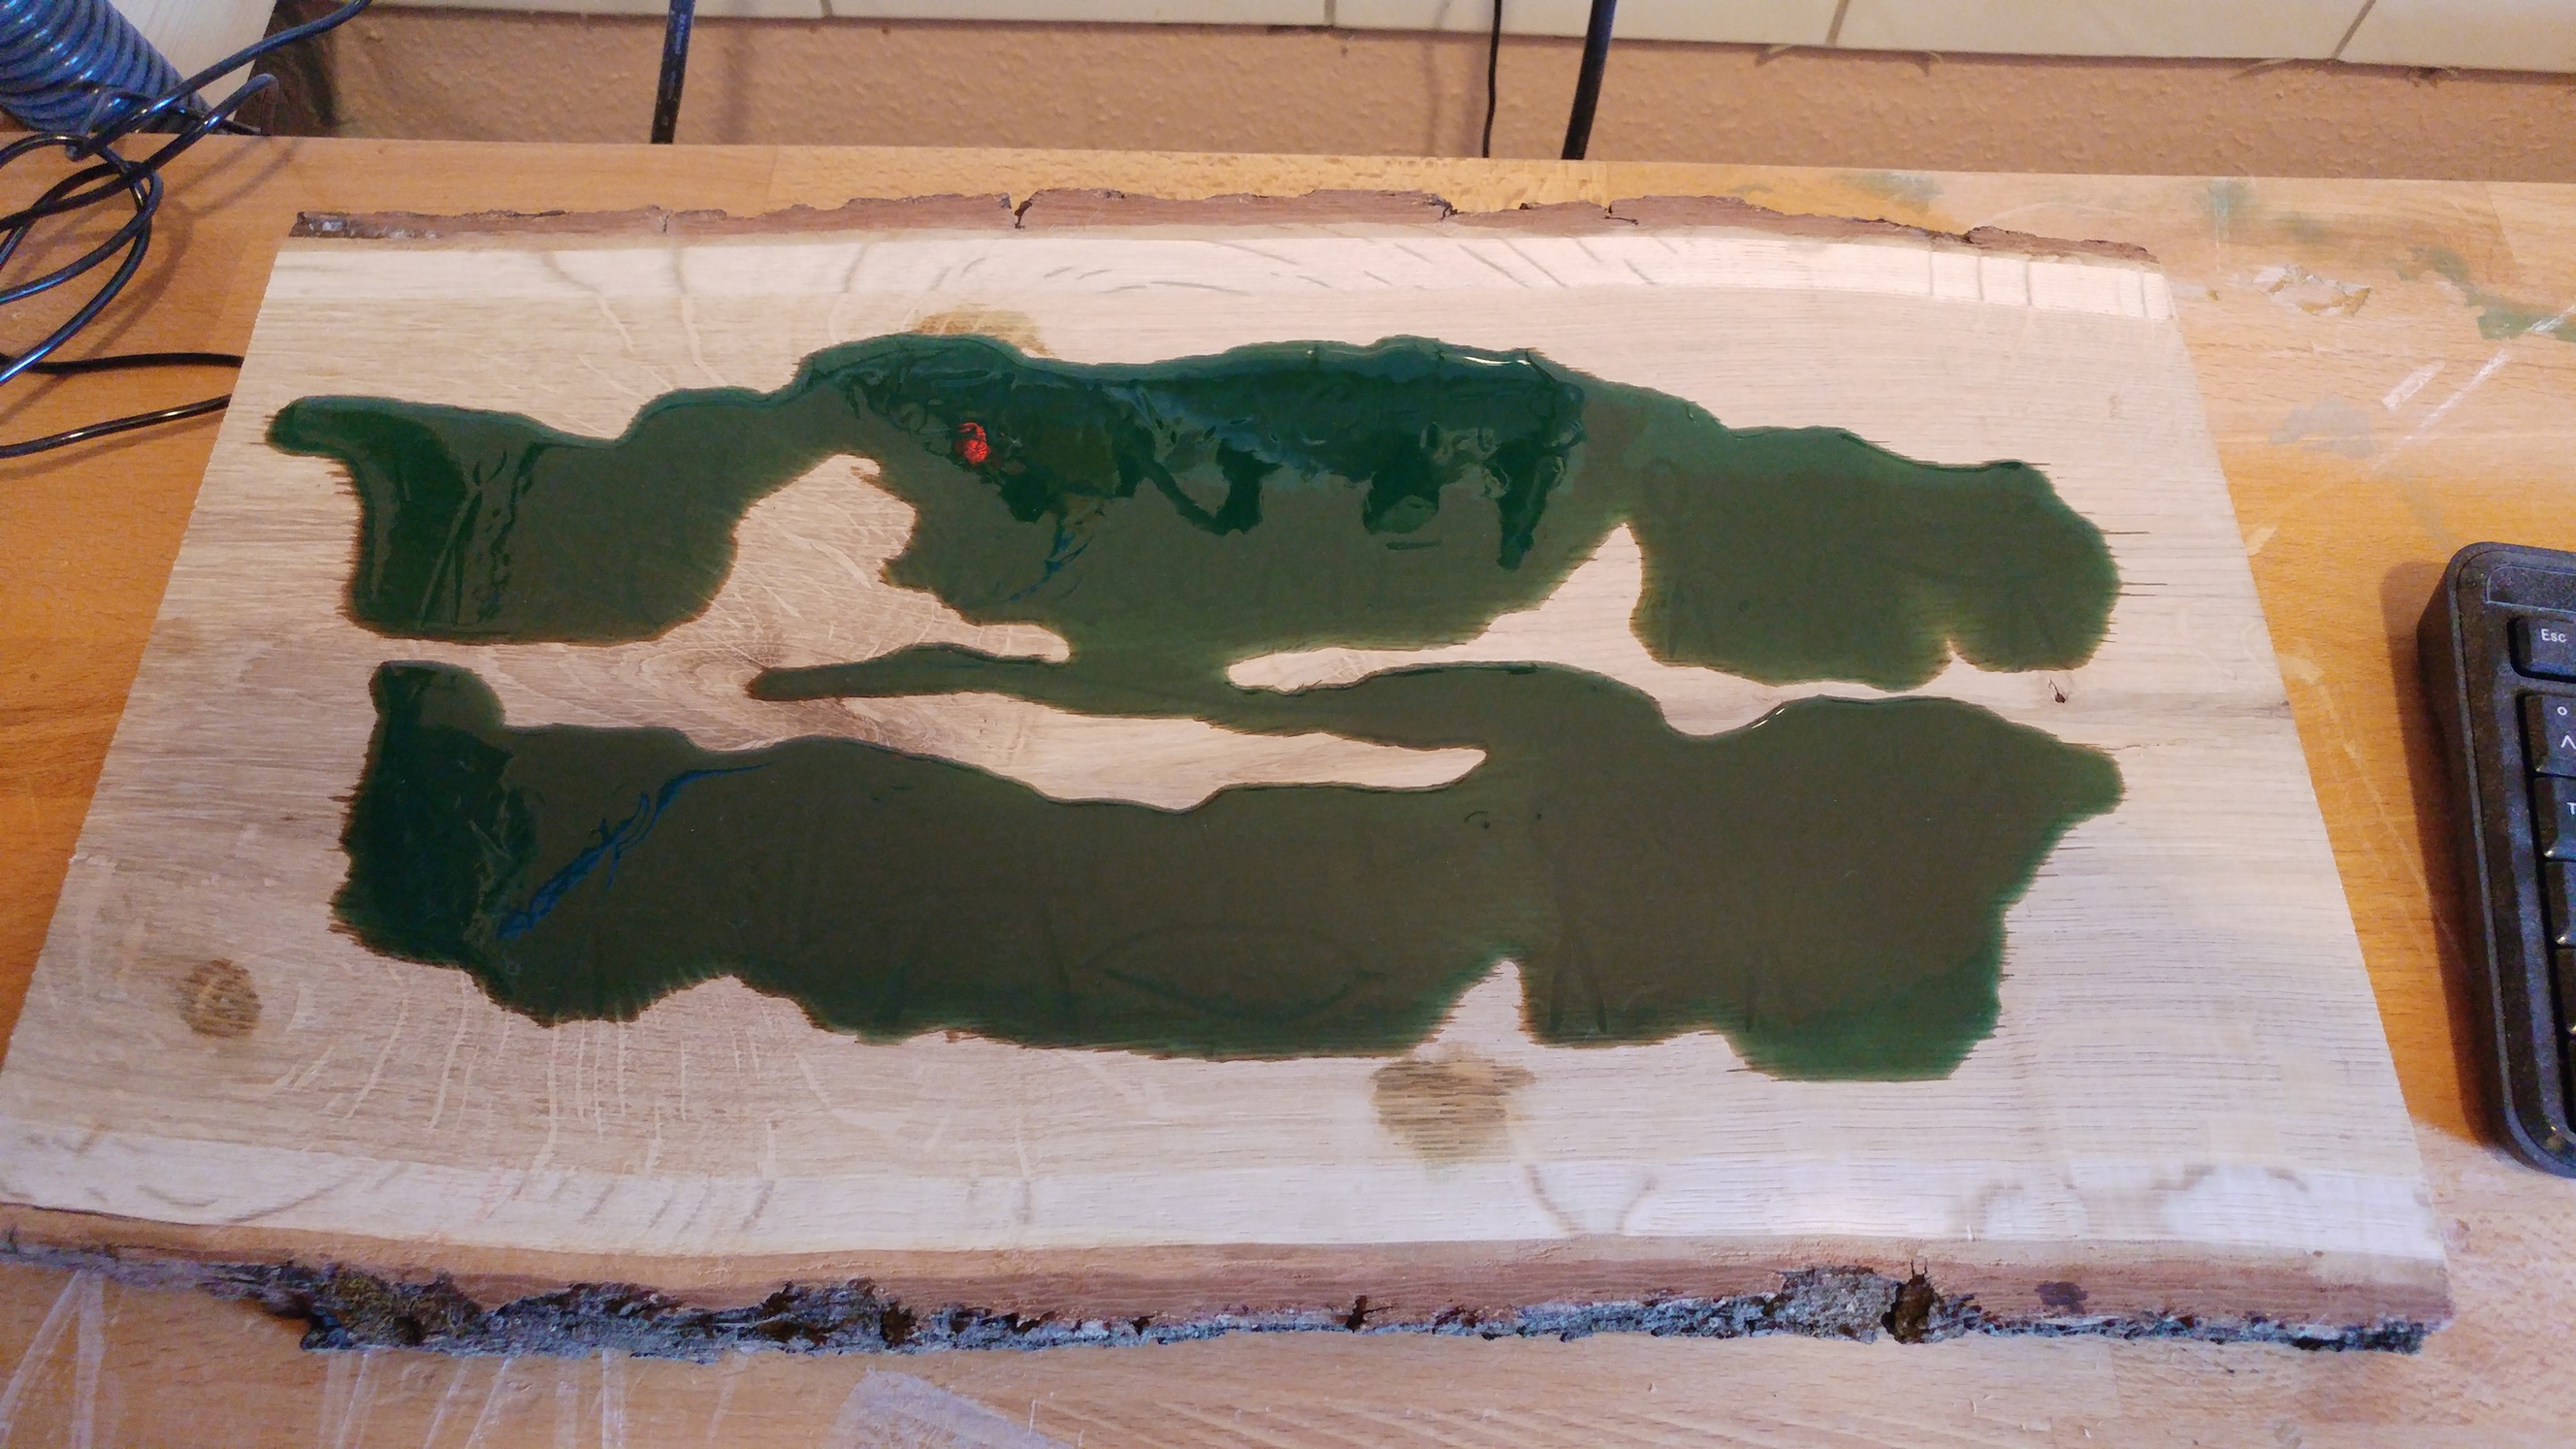
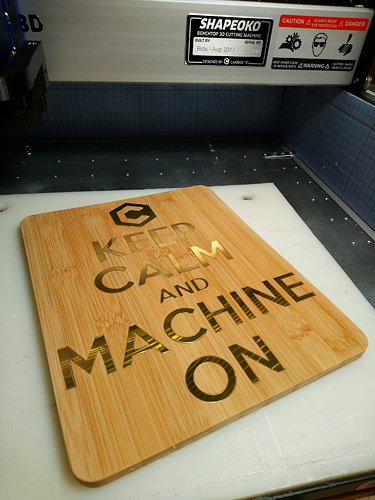
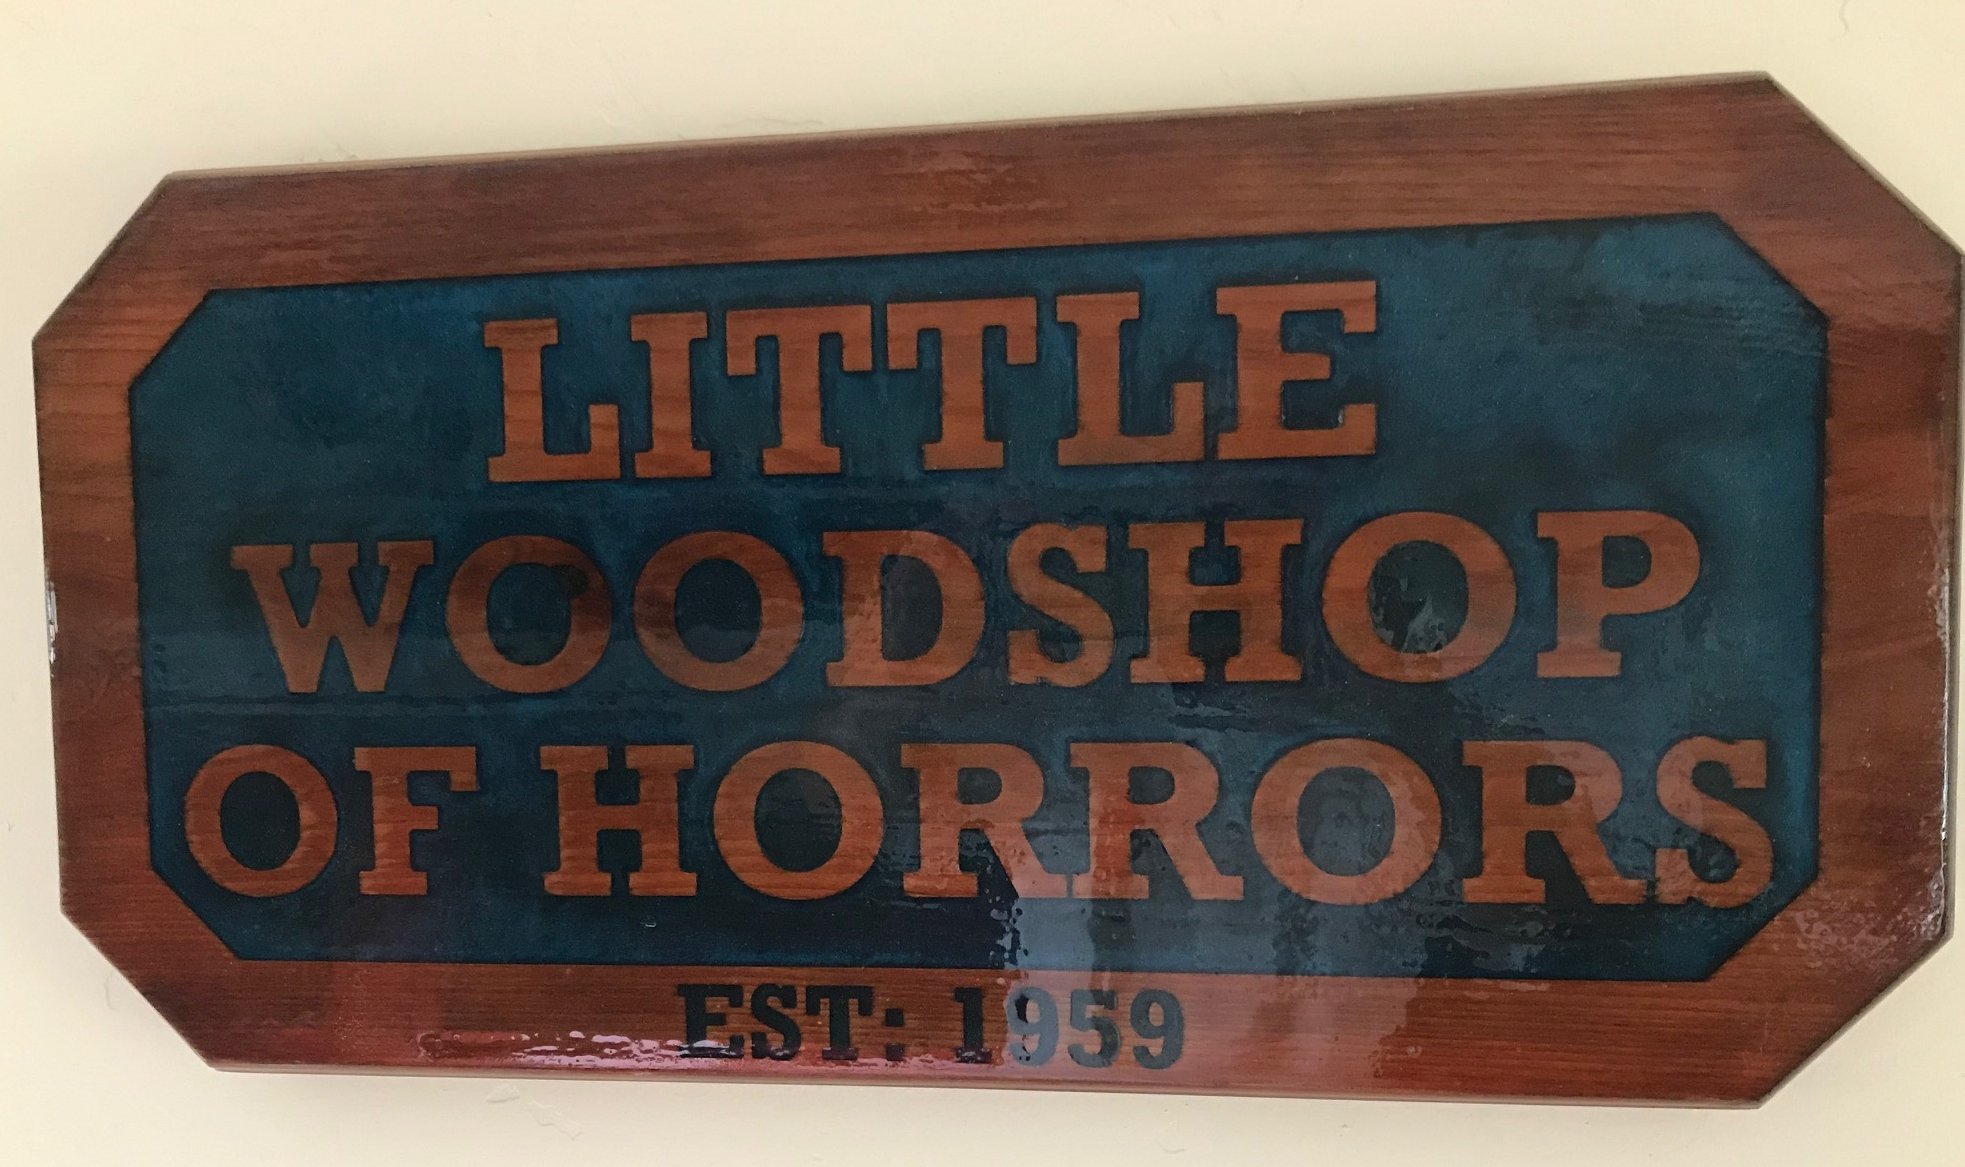
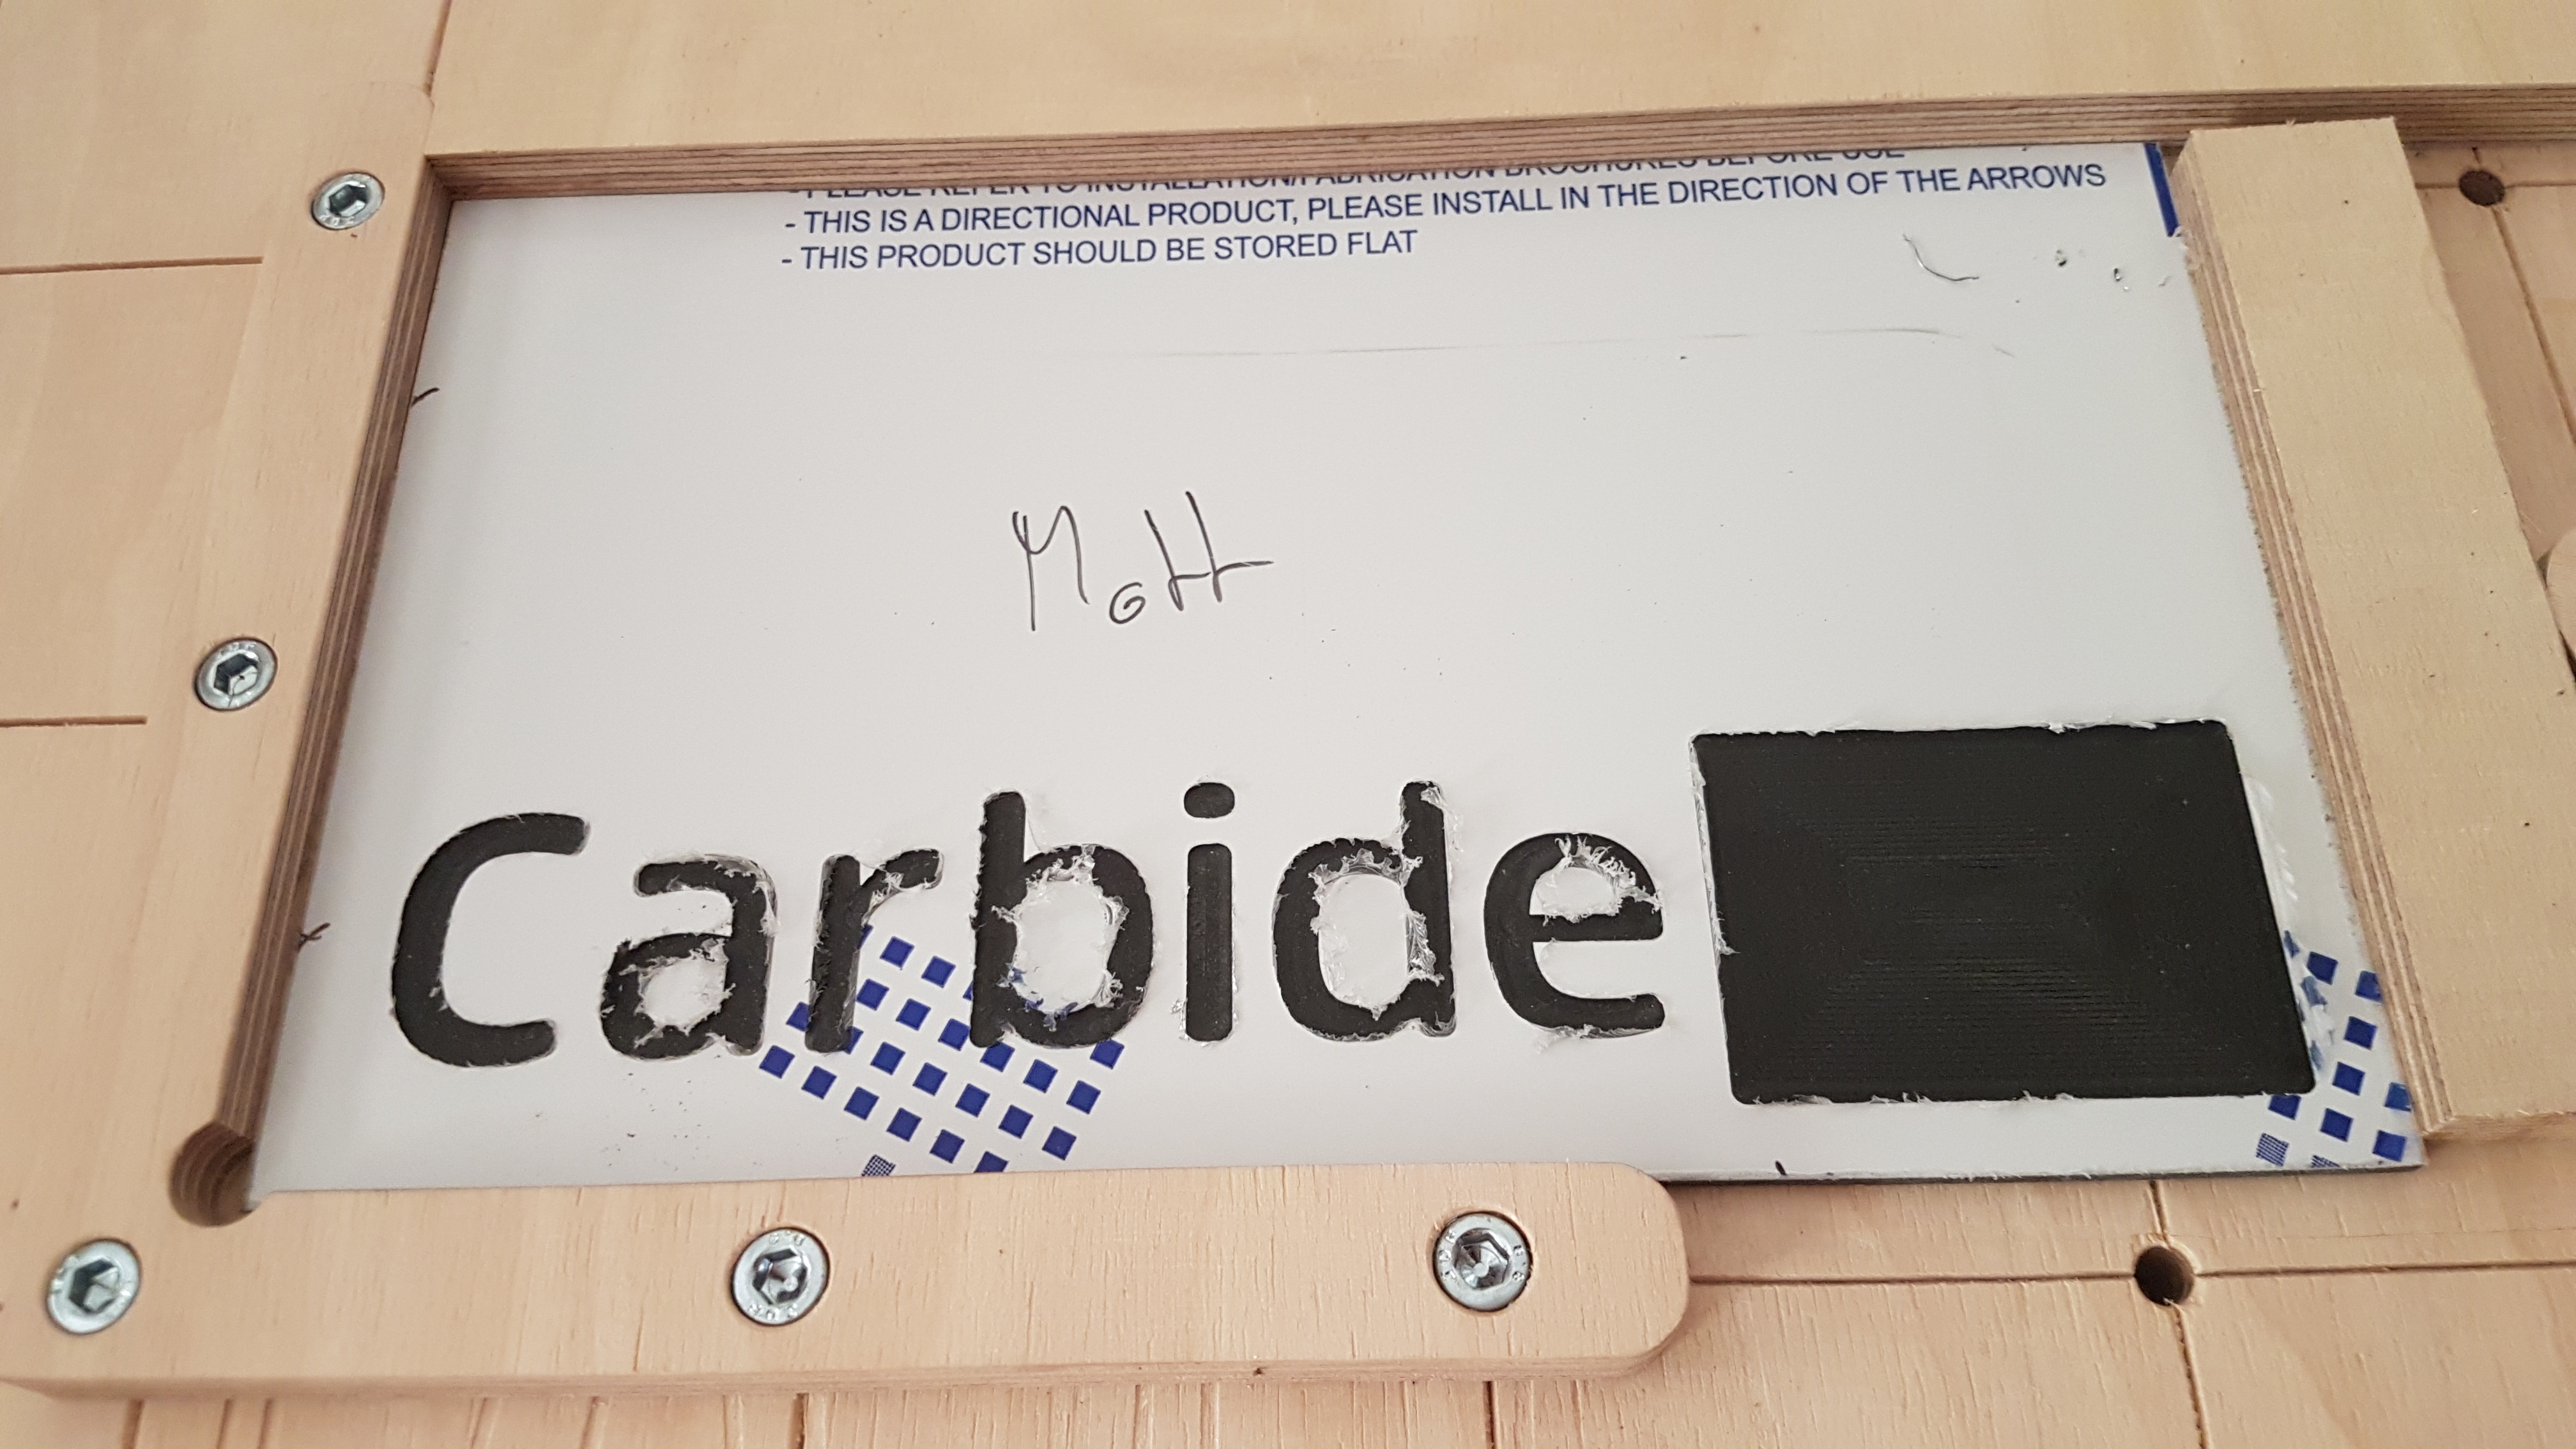
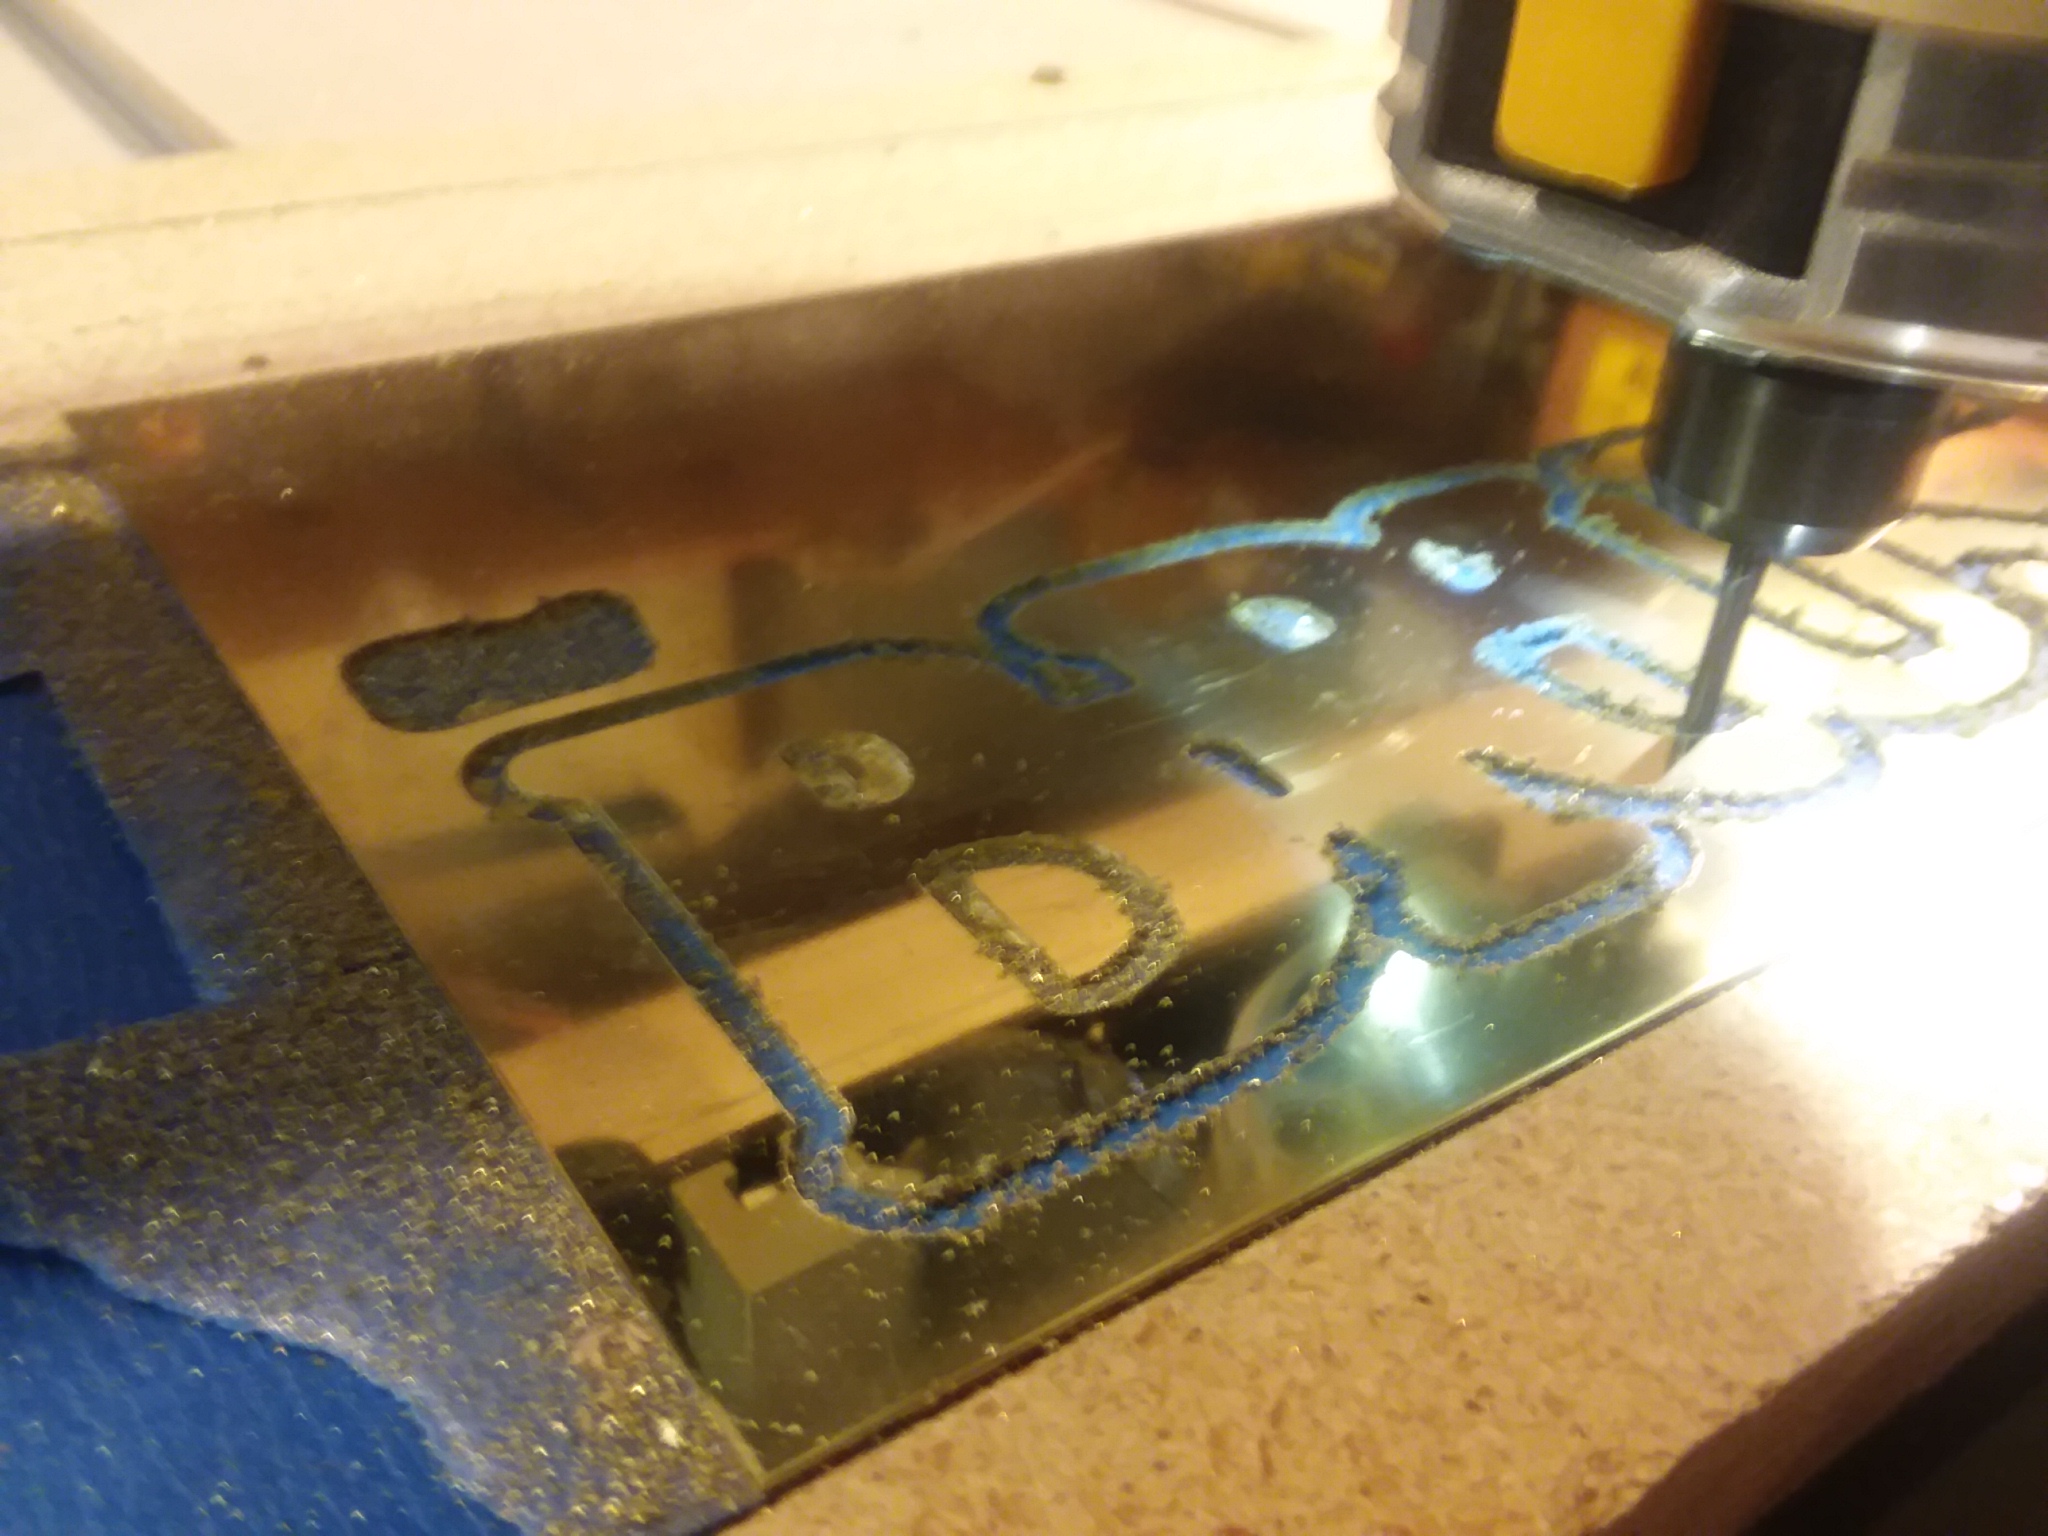
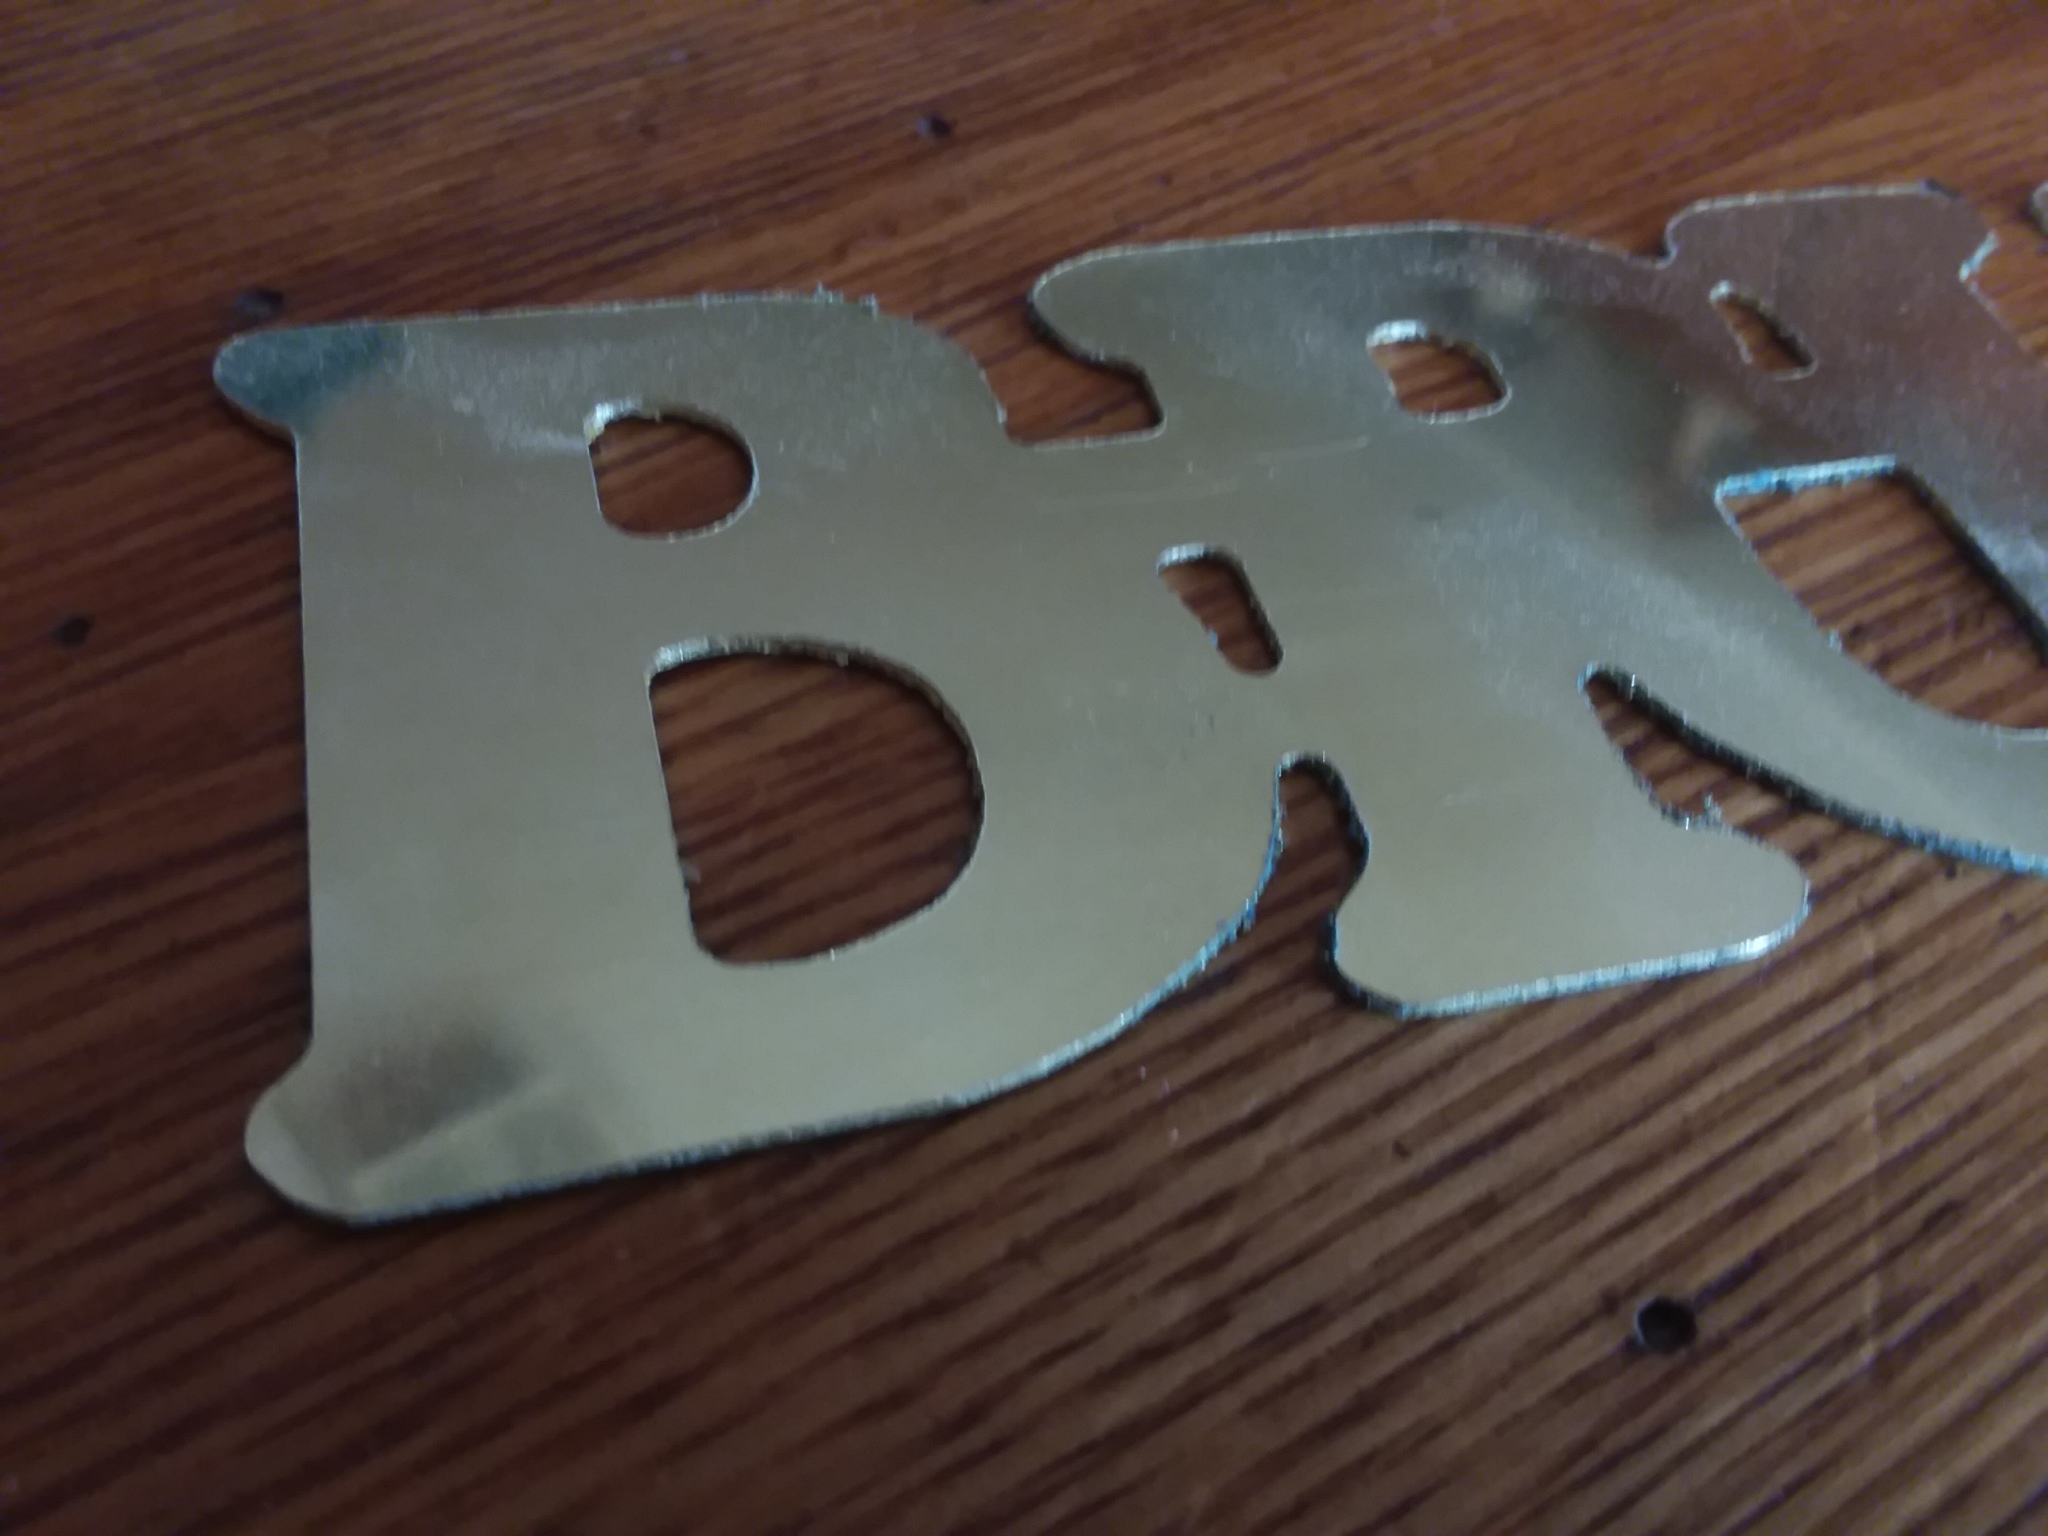
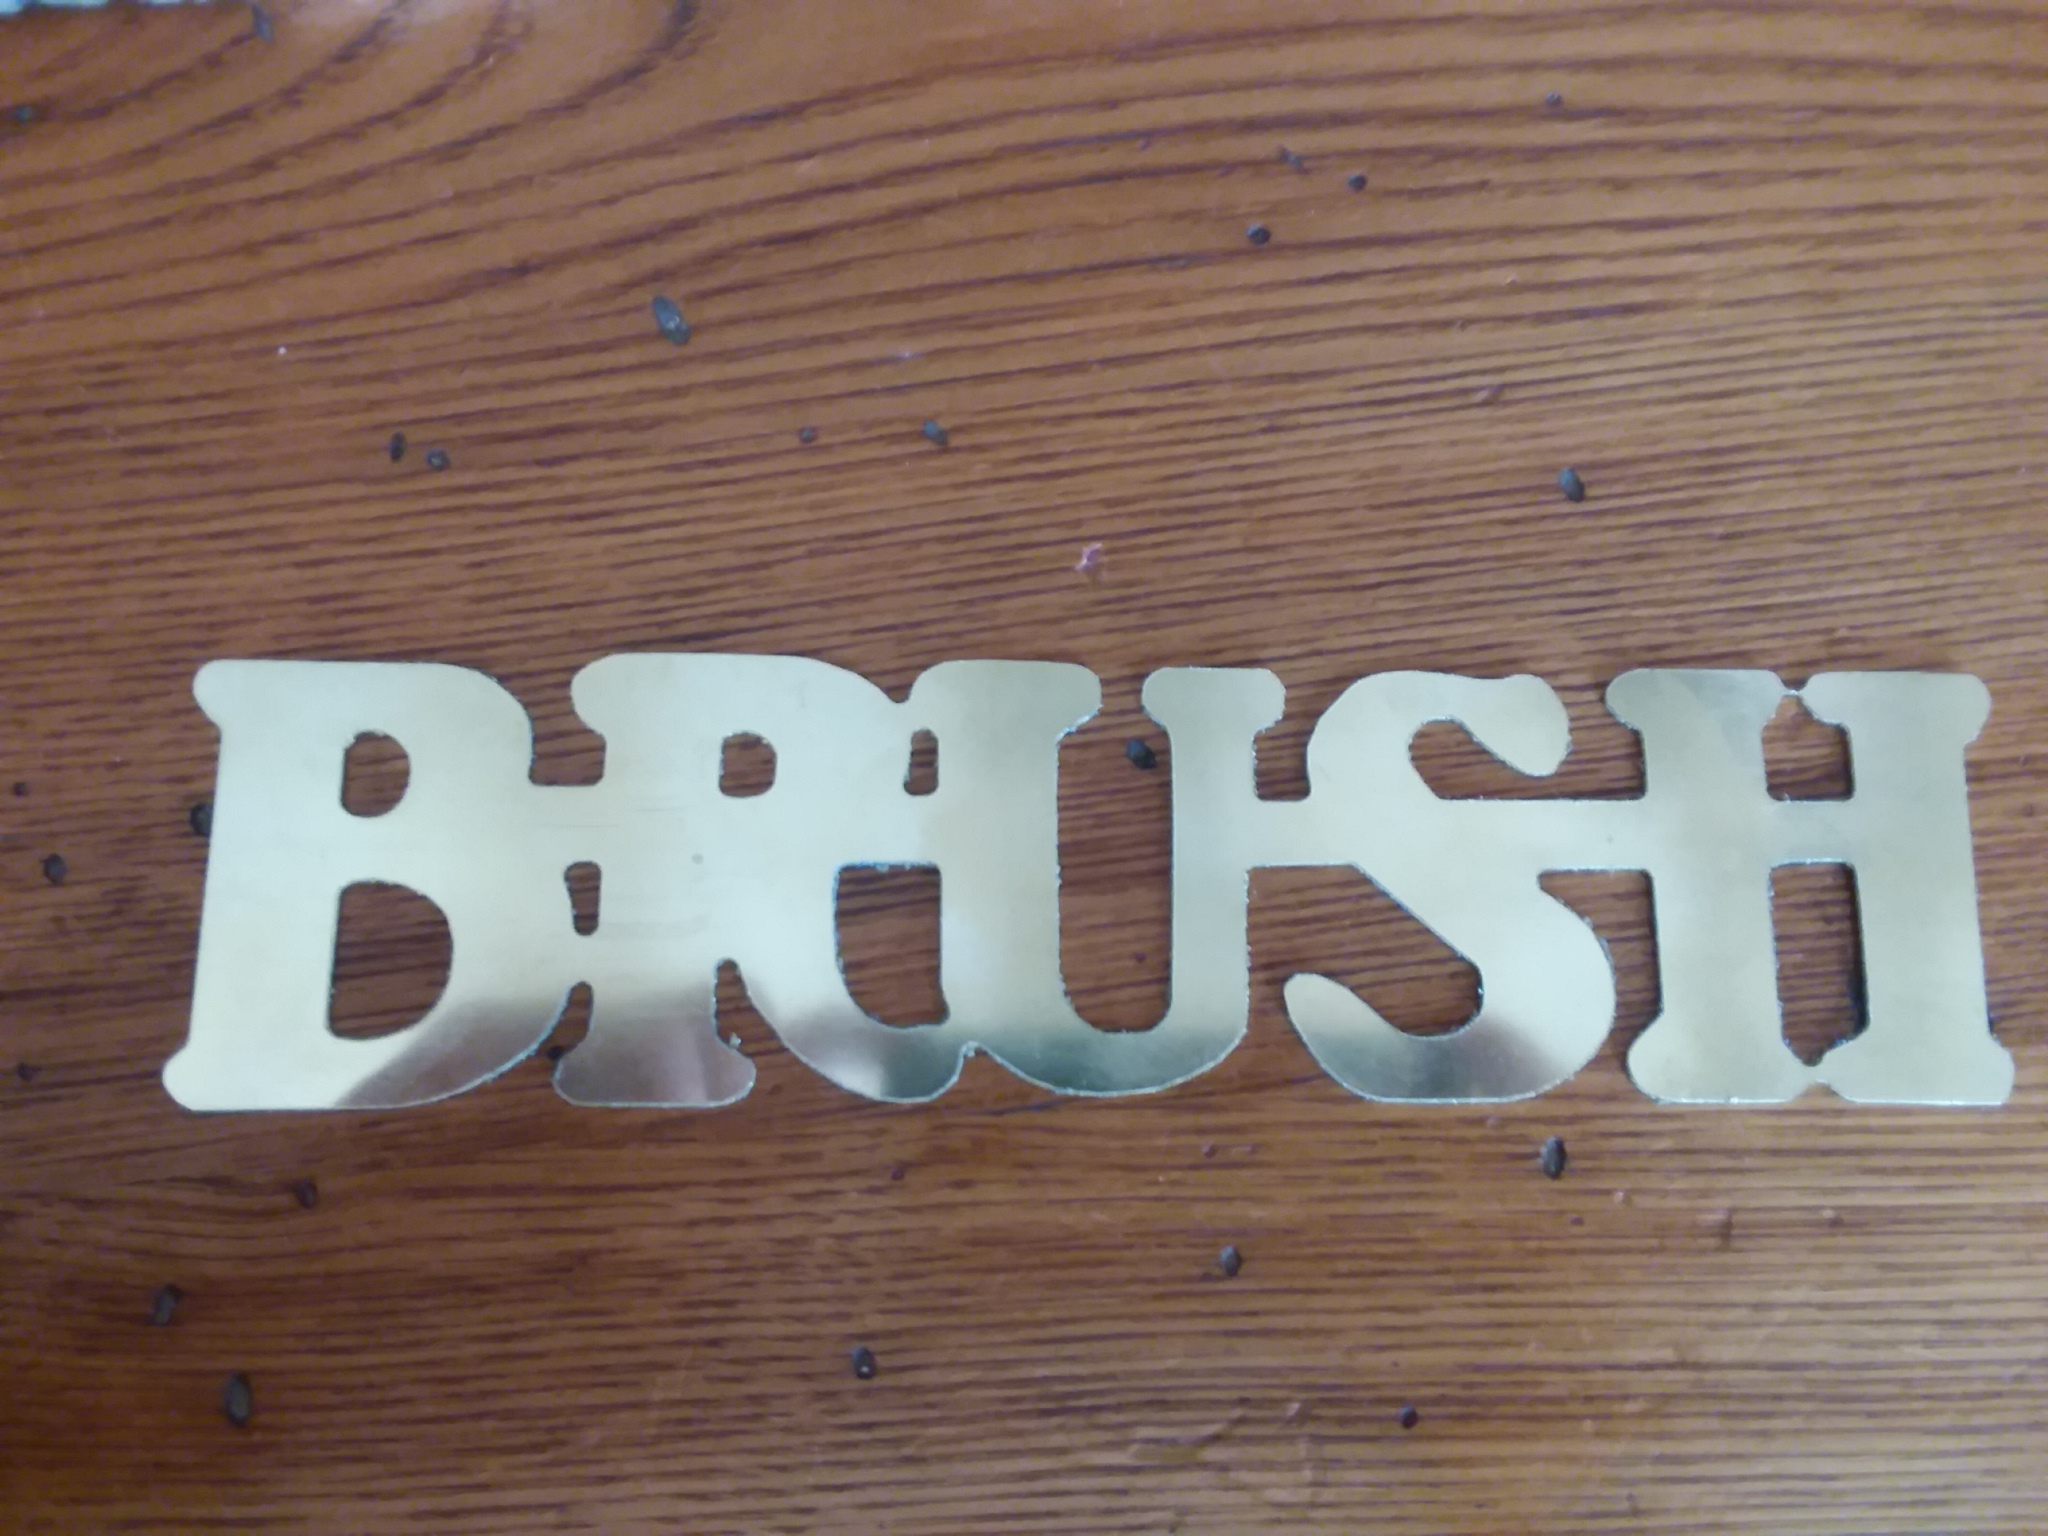
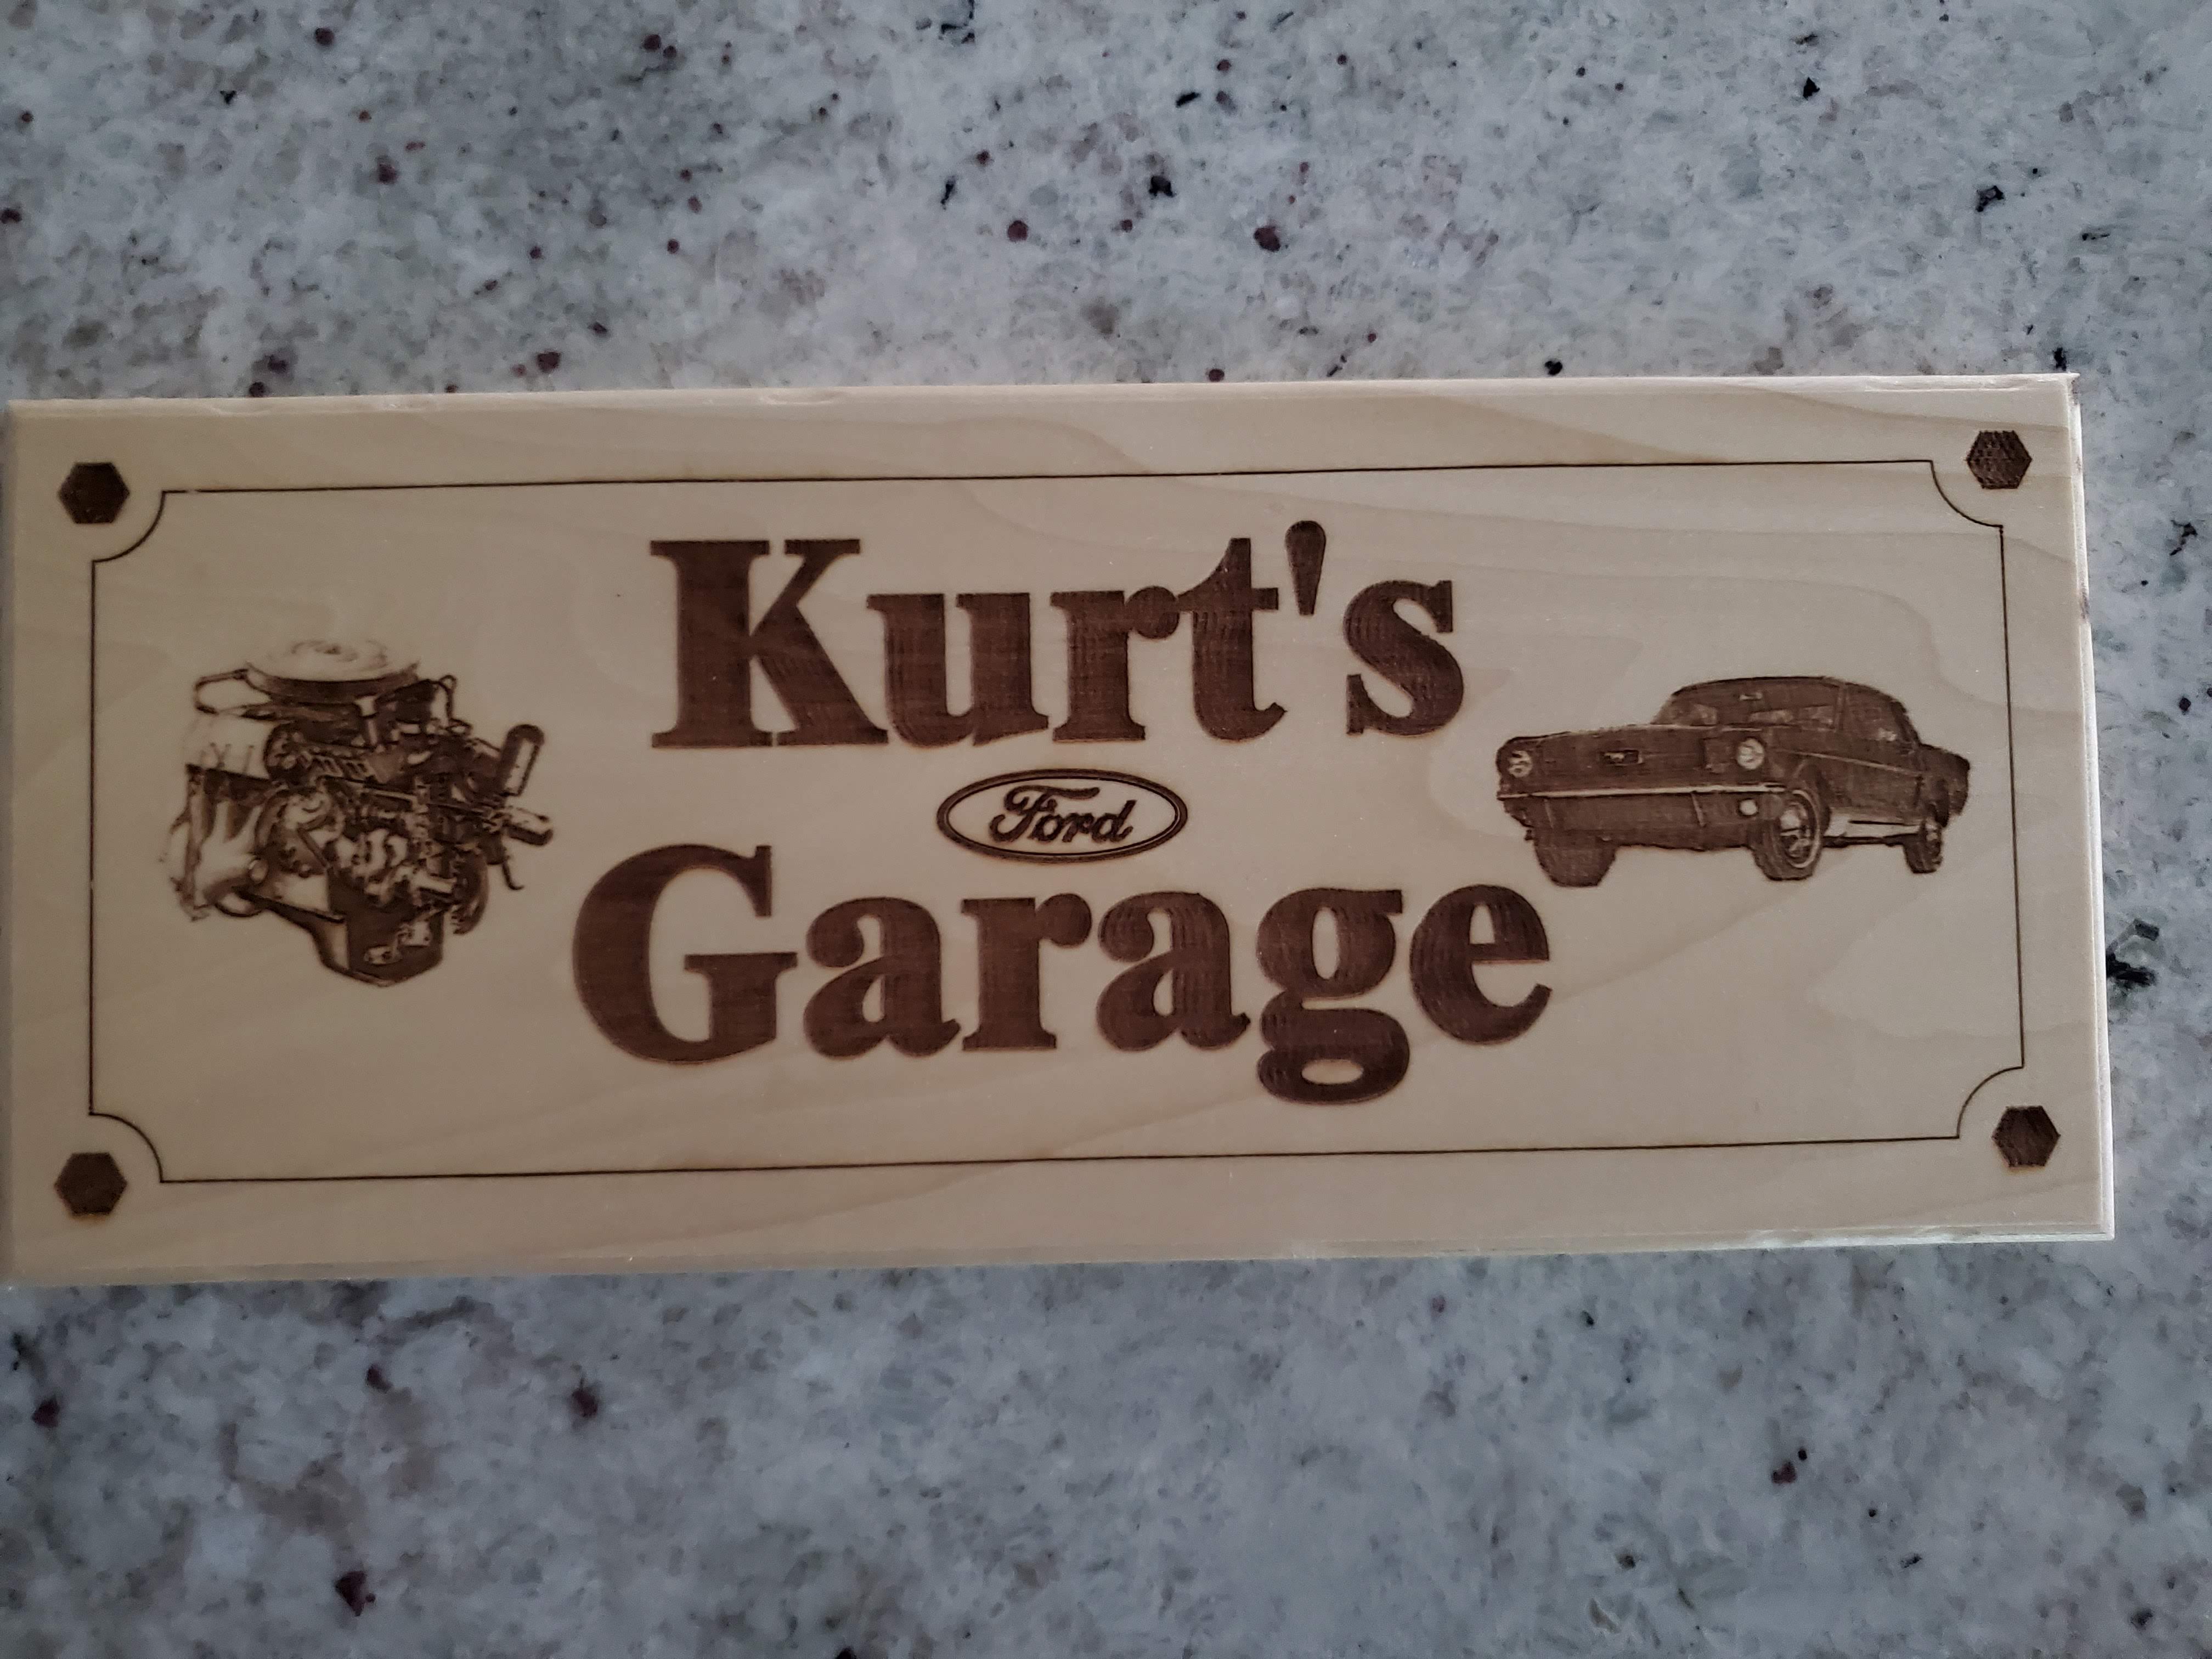
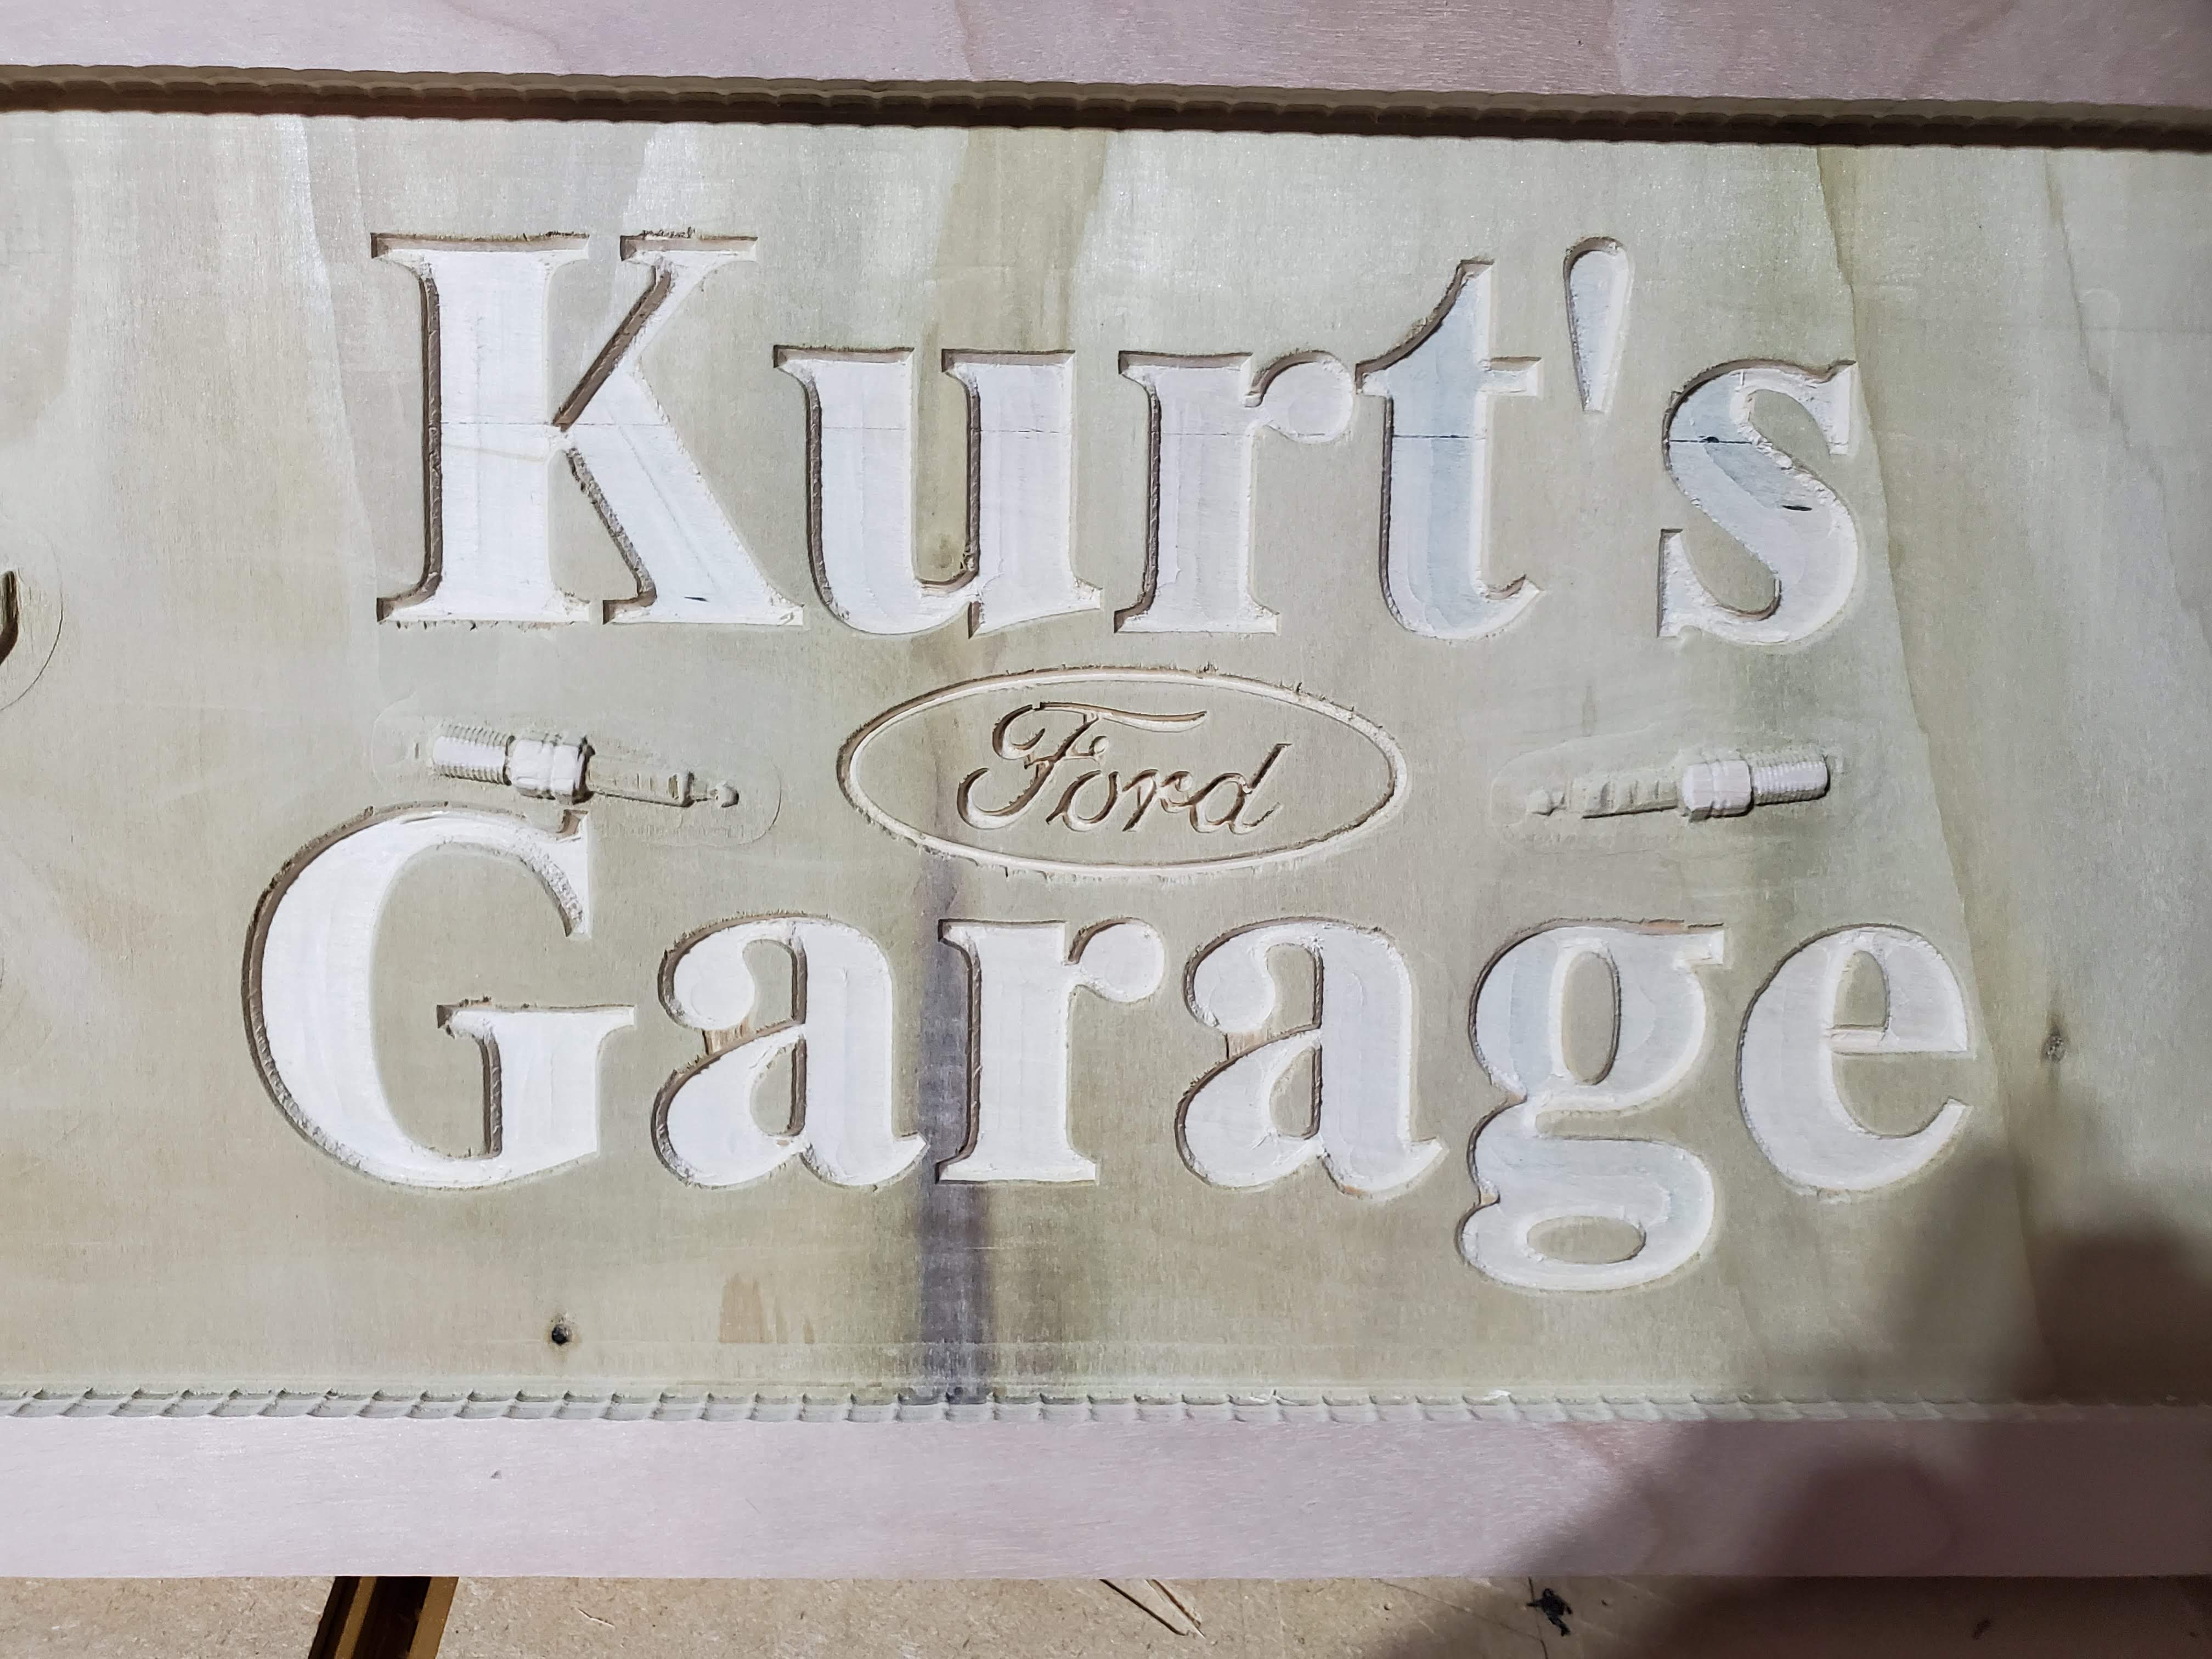
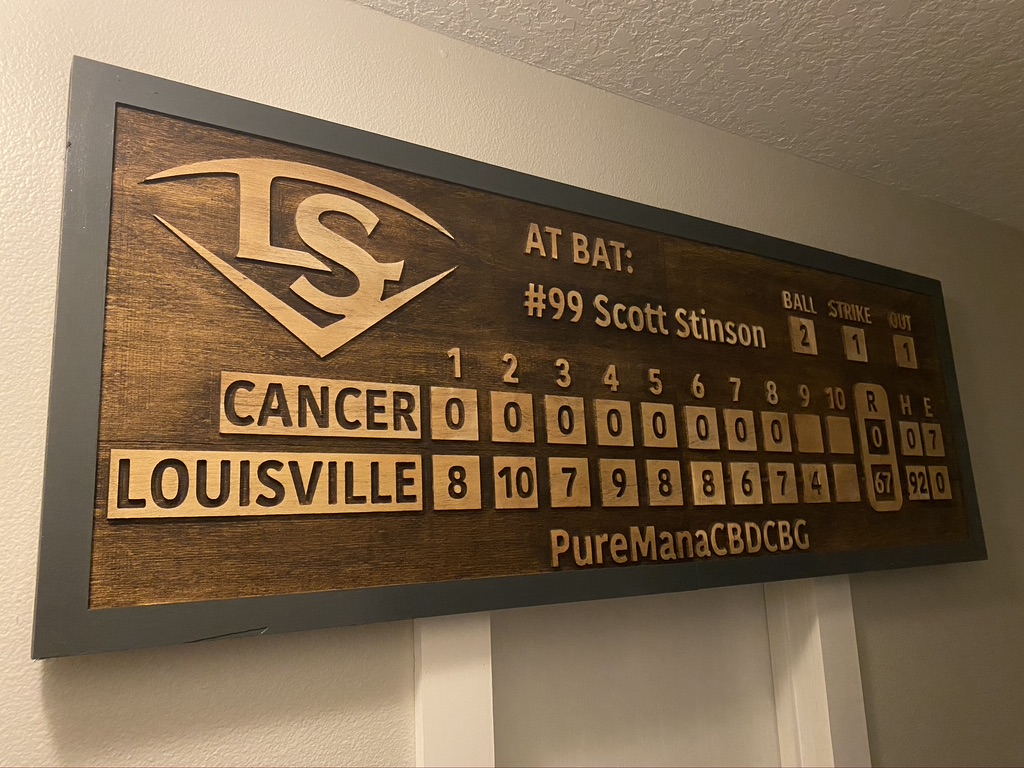
I have no shame, so I’ll share the first sign I made on the Shapeoko:

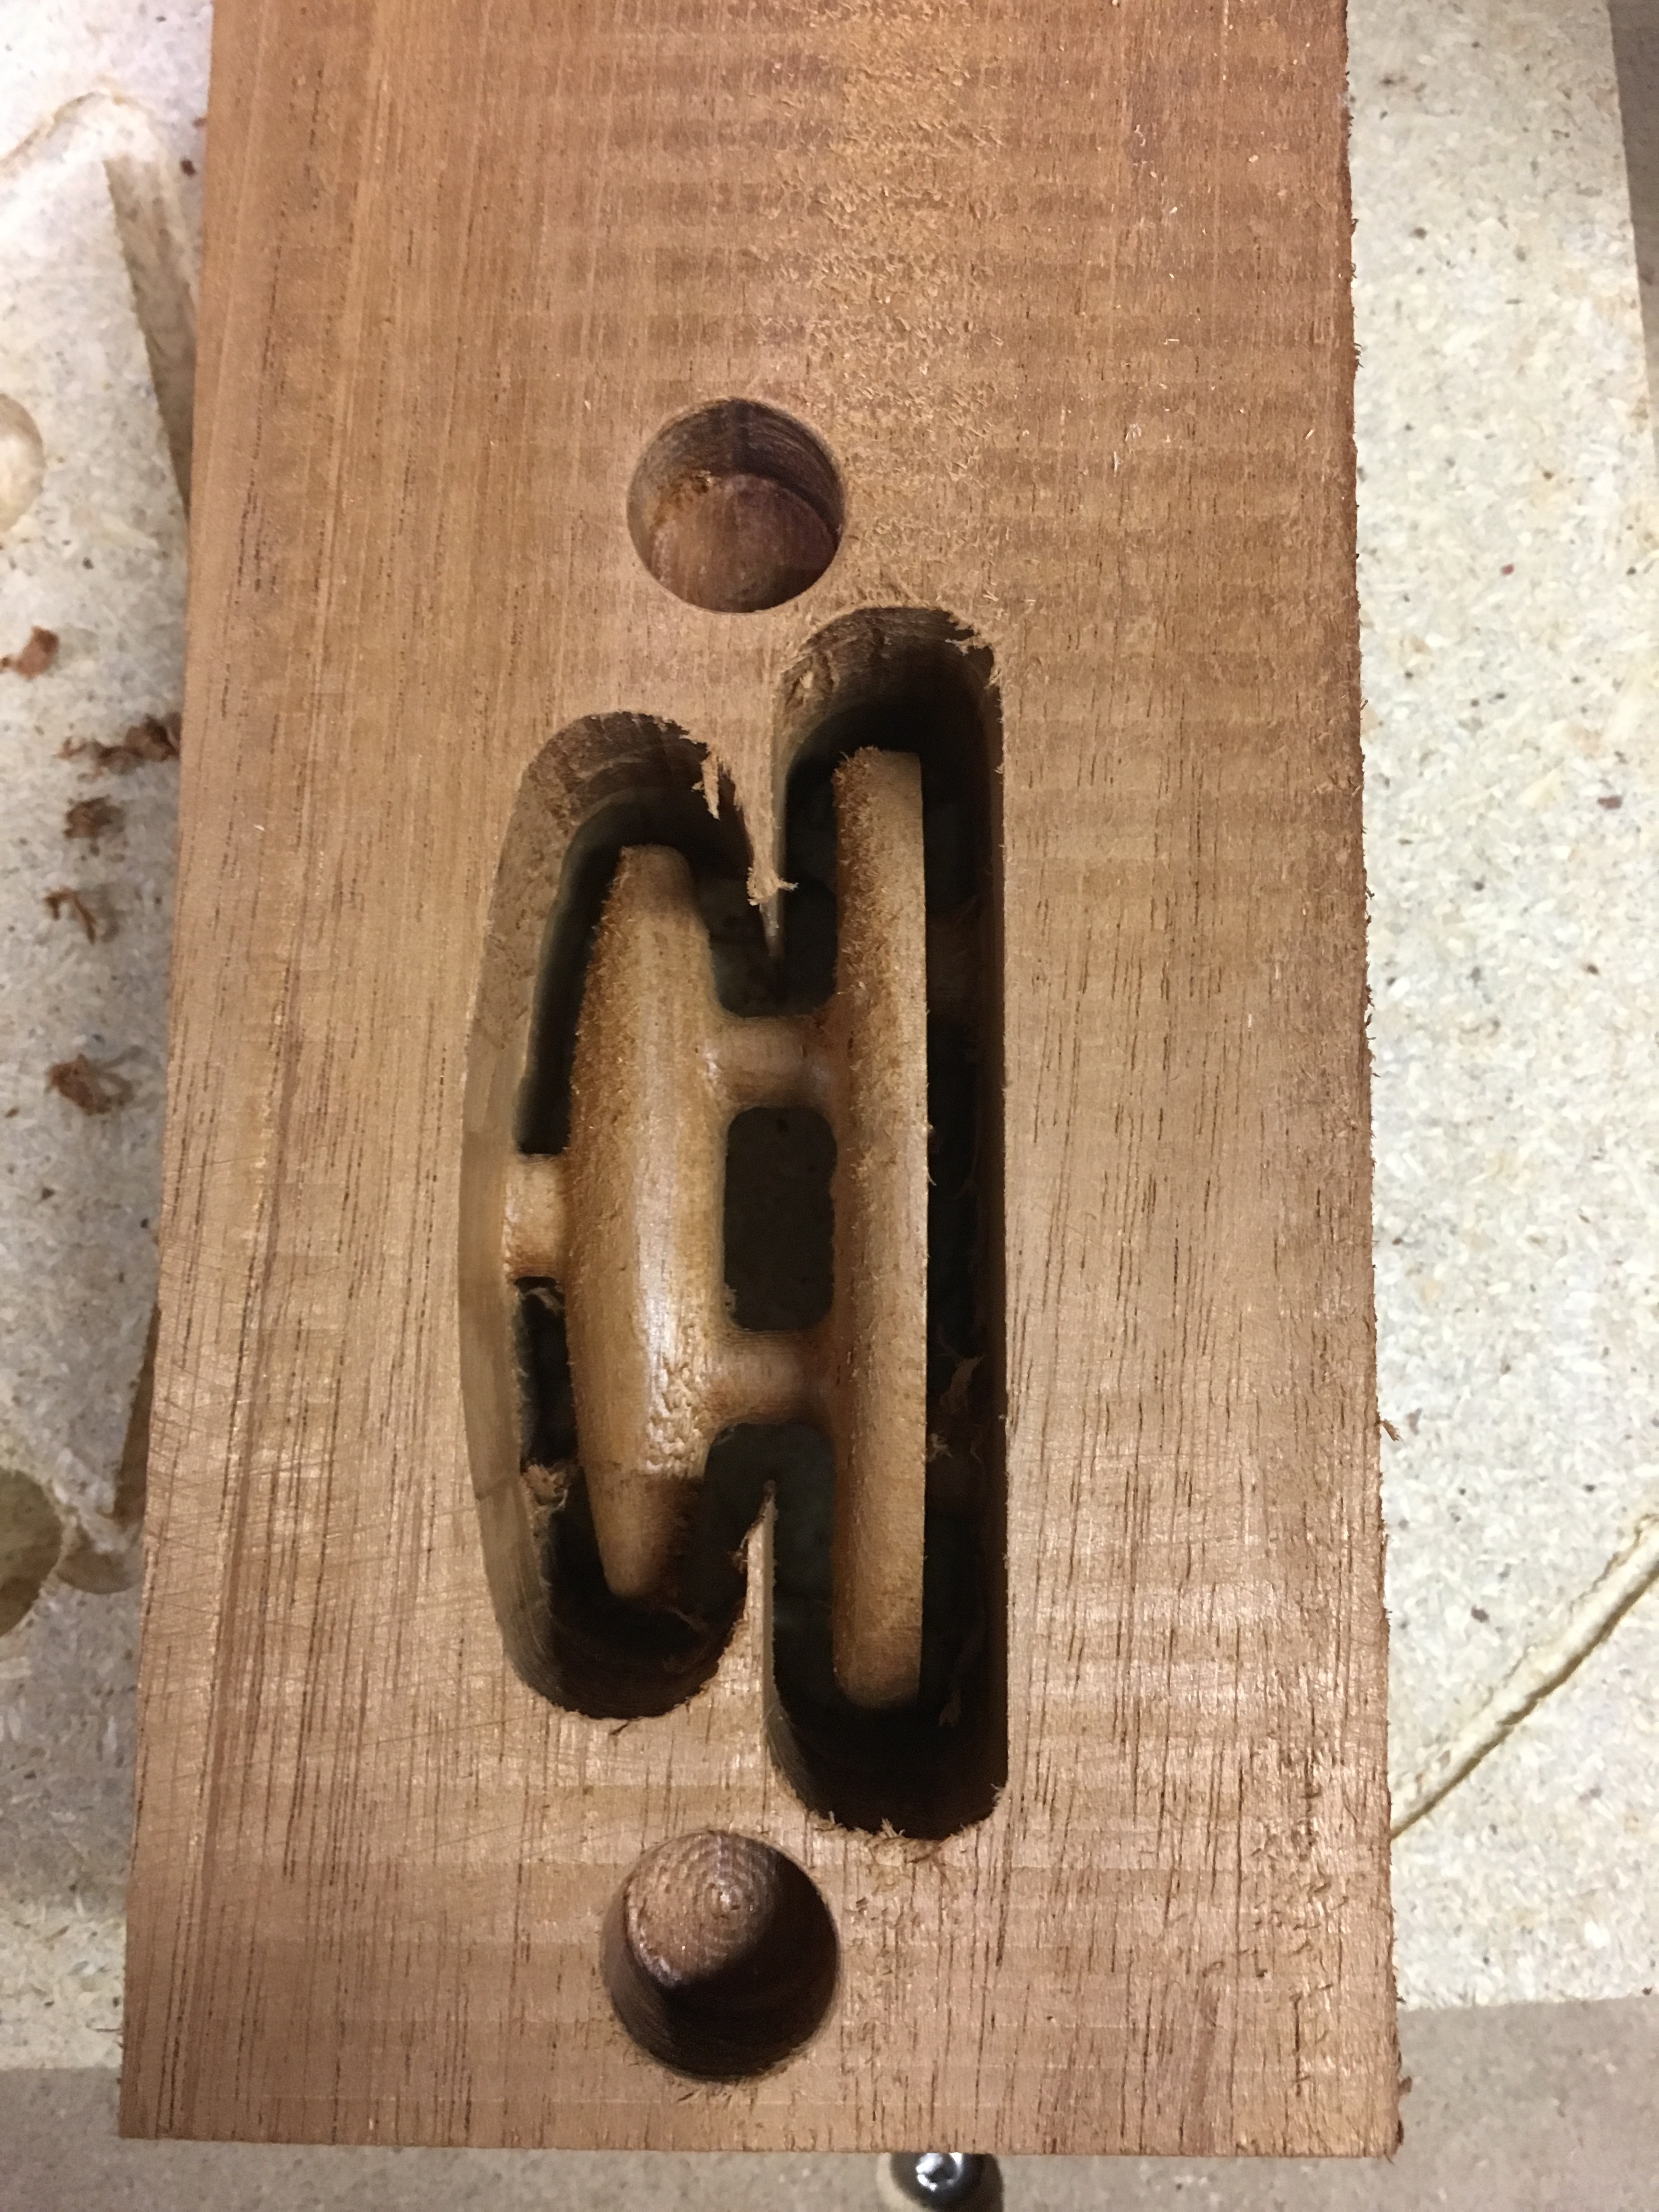
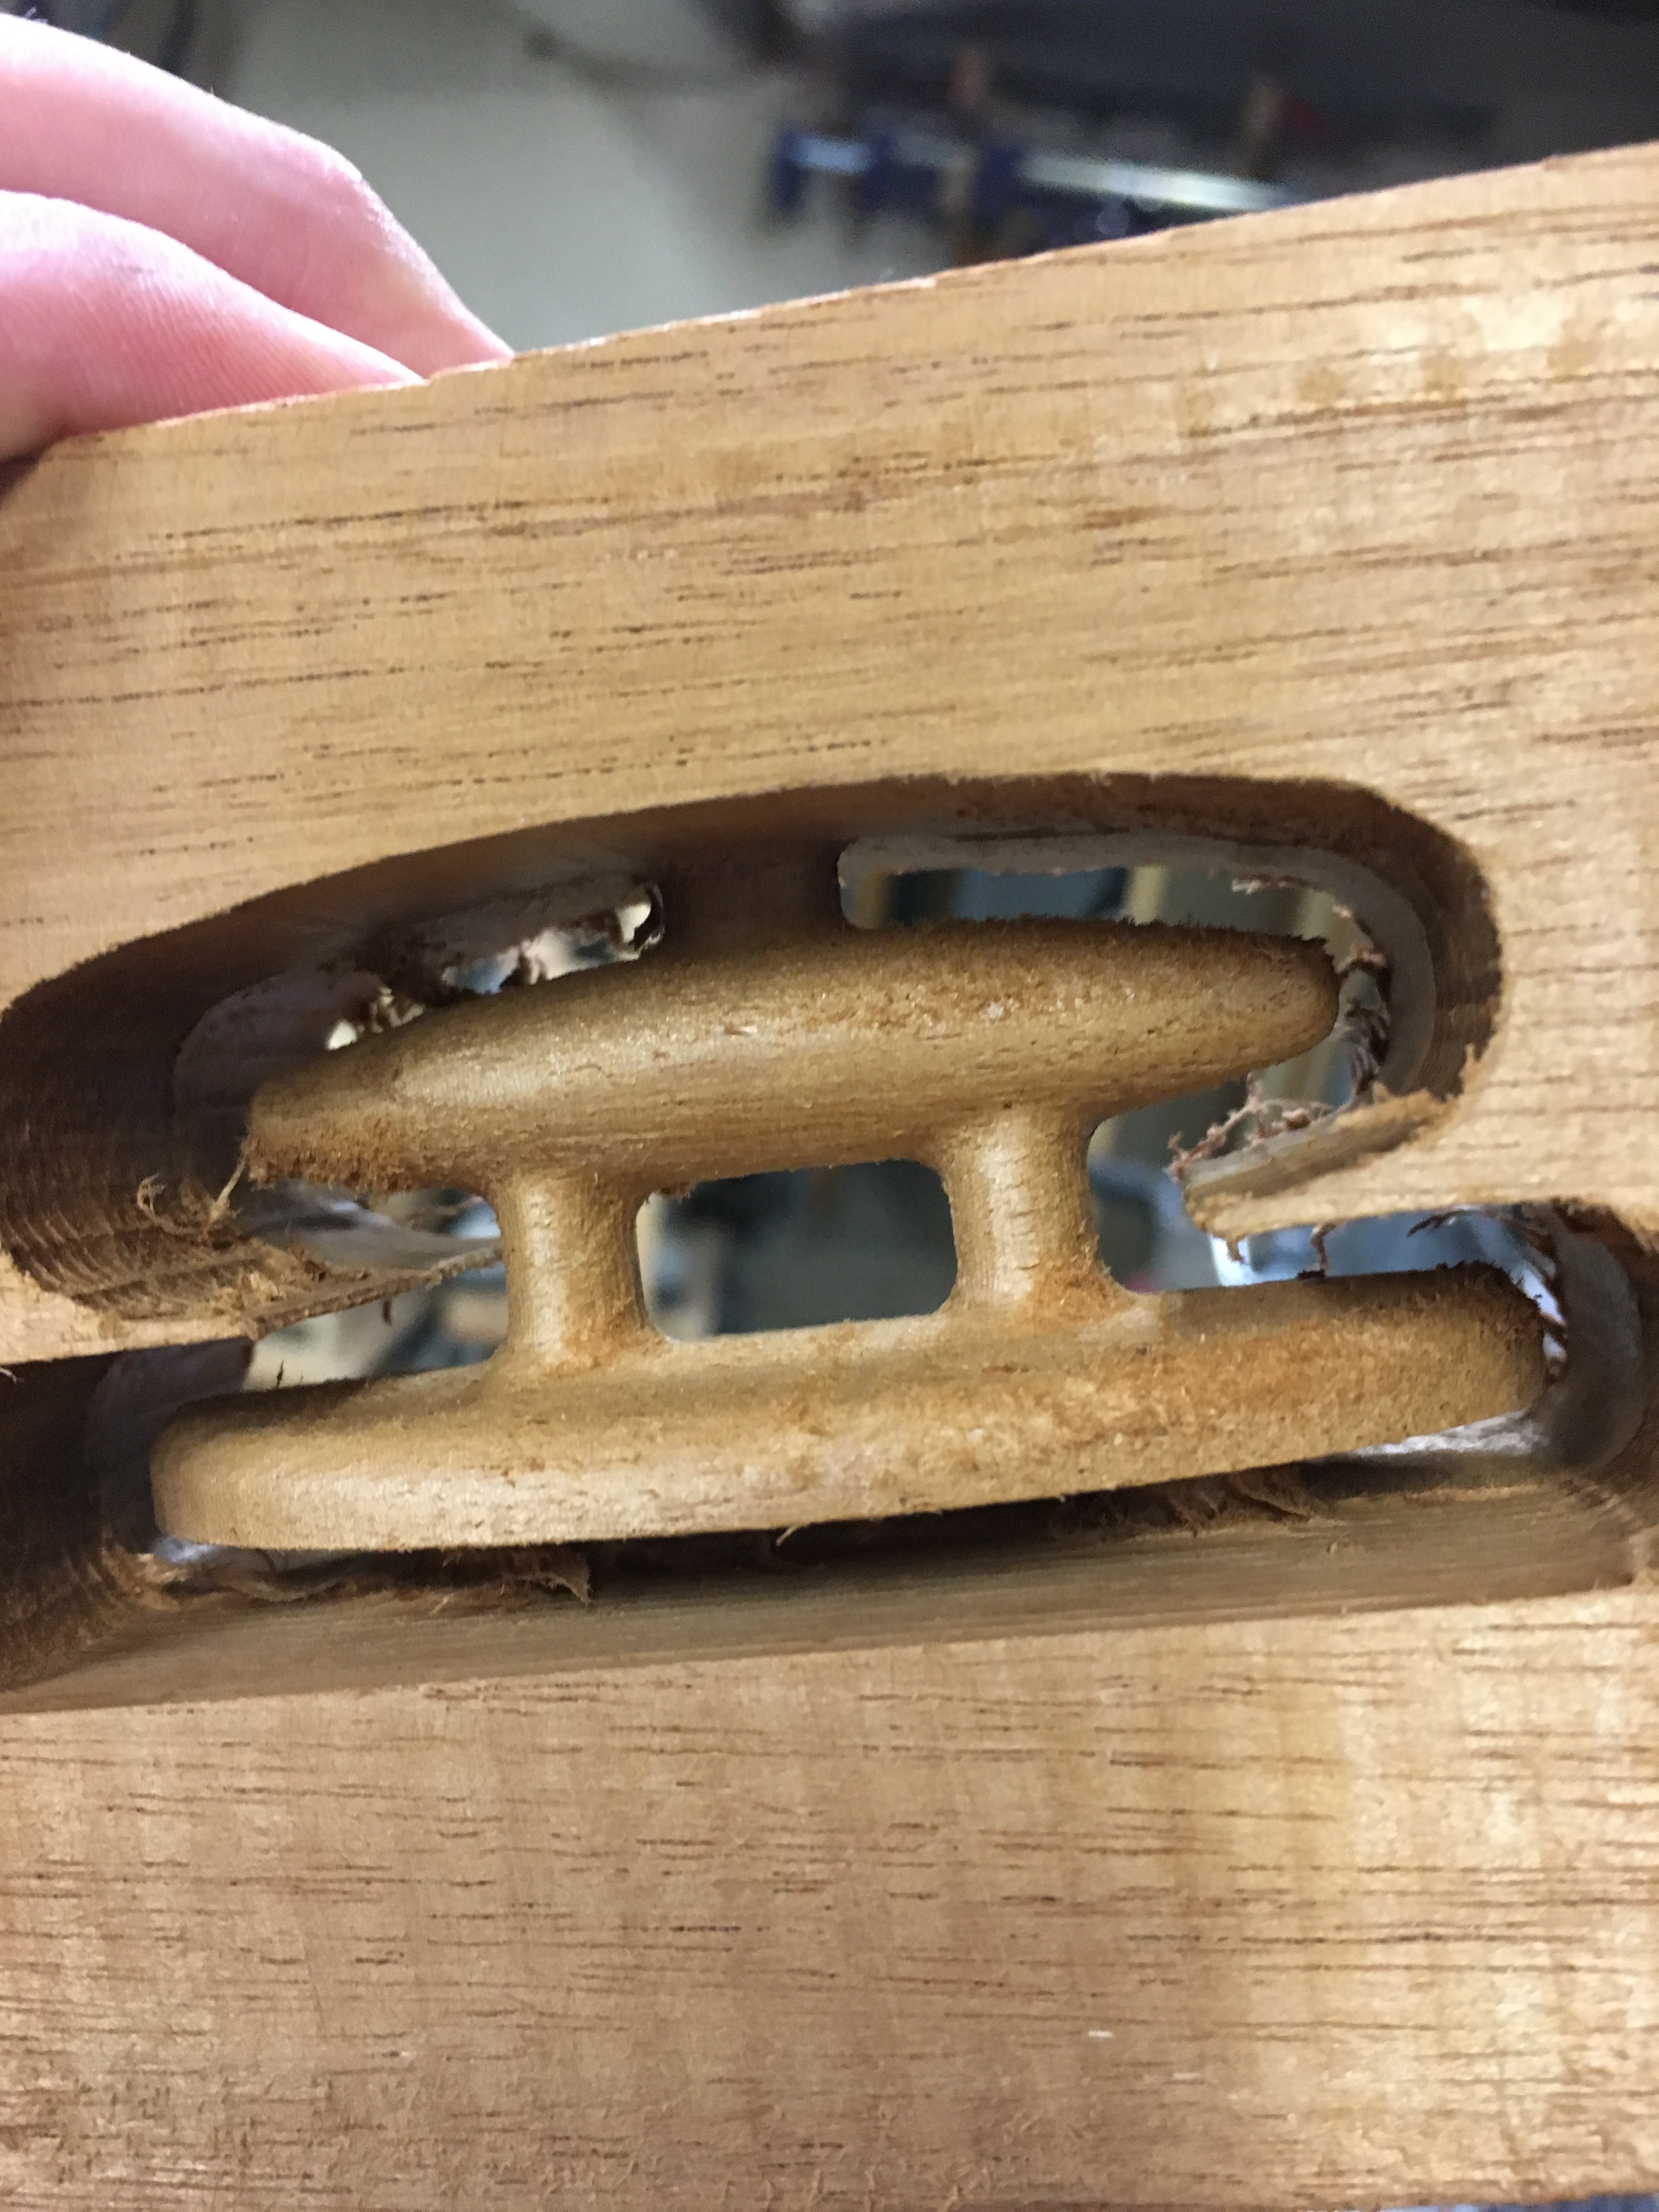
(oh boy, I had no idea about proper feeds and speeds, I was using a poor quality Vbit, had not surfaced my wasteboard nor trammed my router yet, and I was obviously bad at properly setting Z0 and tensioning the Z-belt correctly…fun times!)

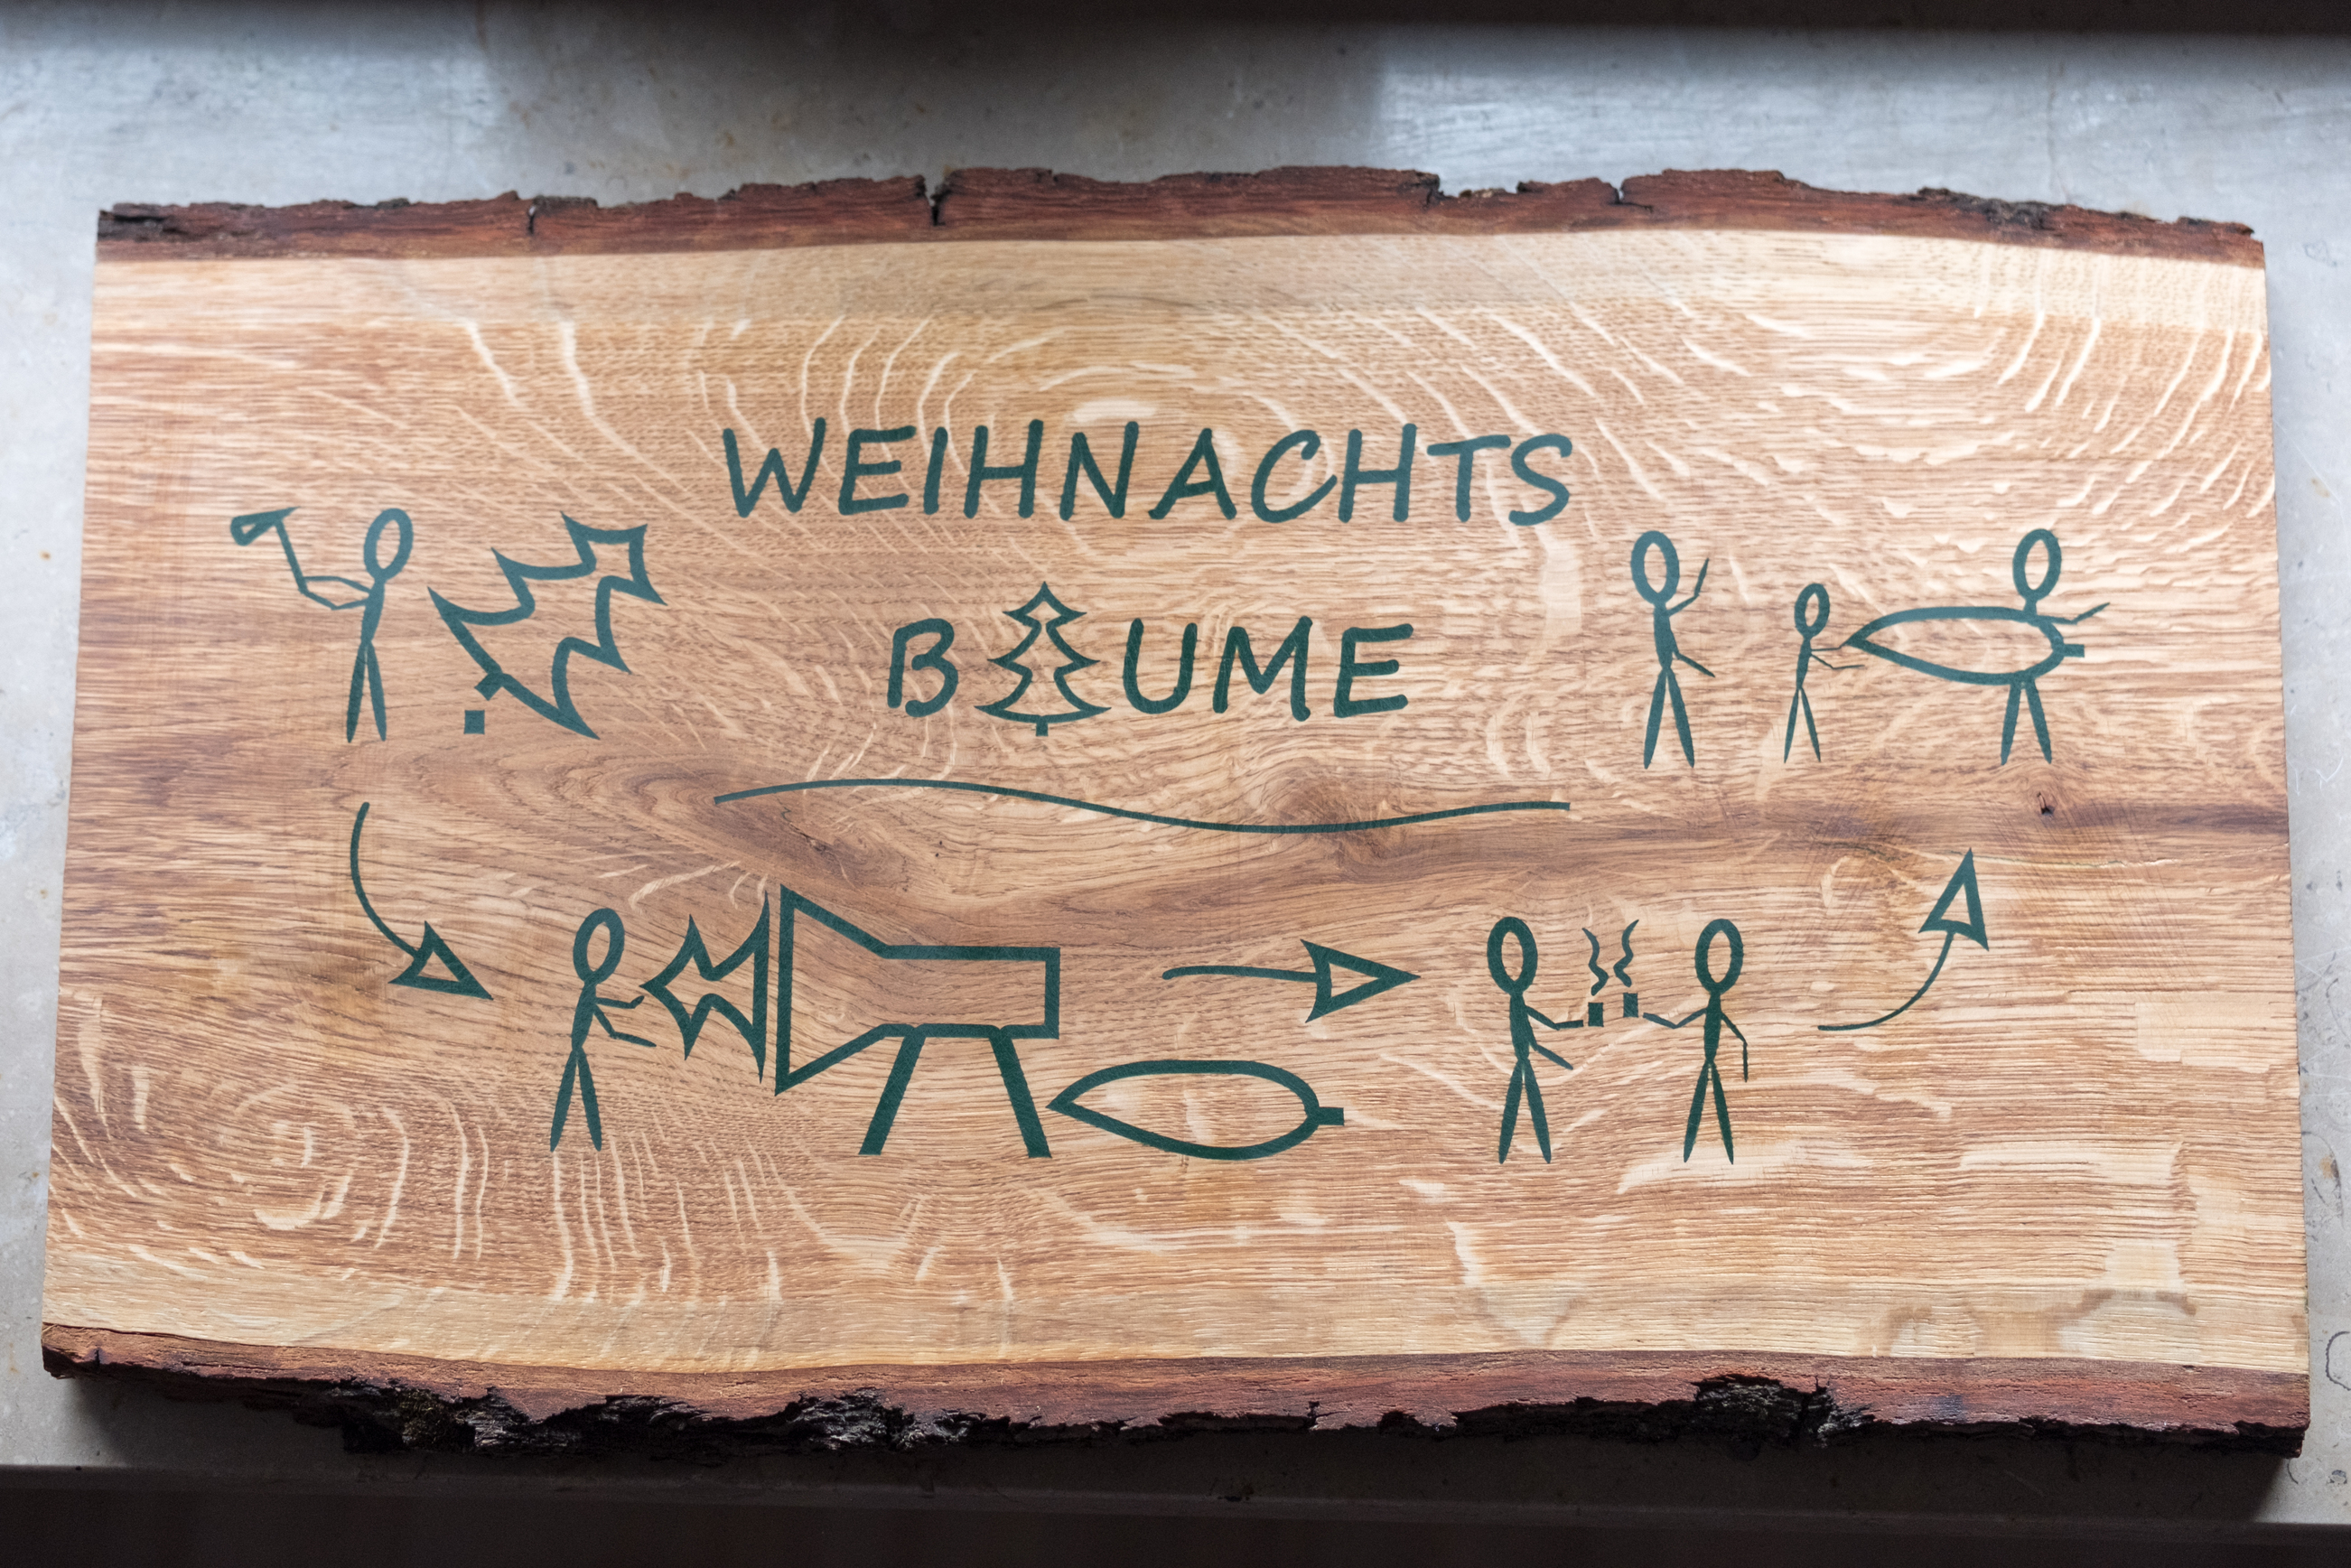
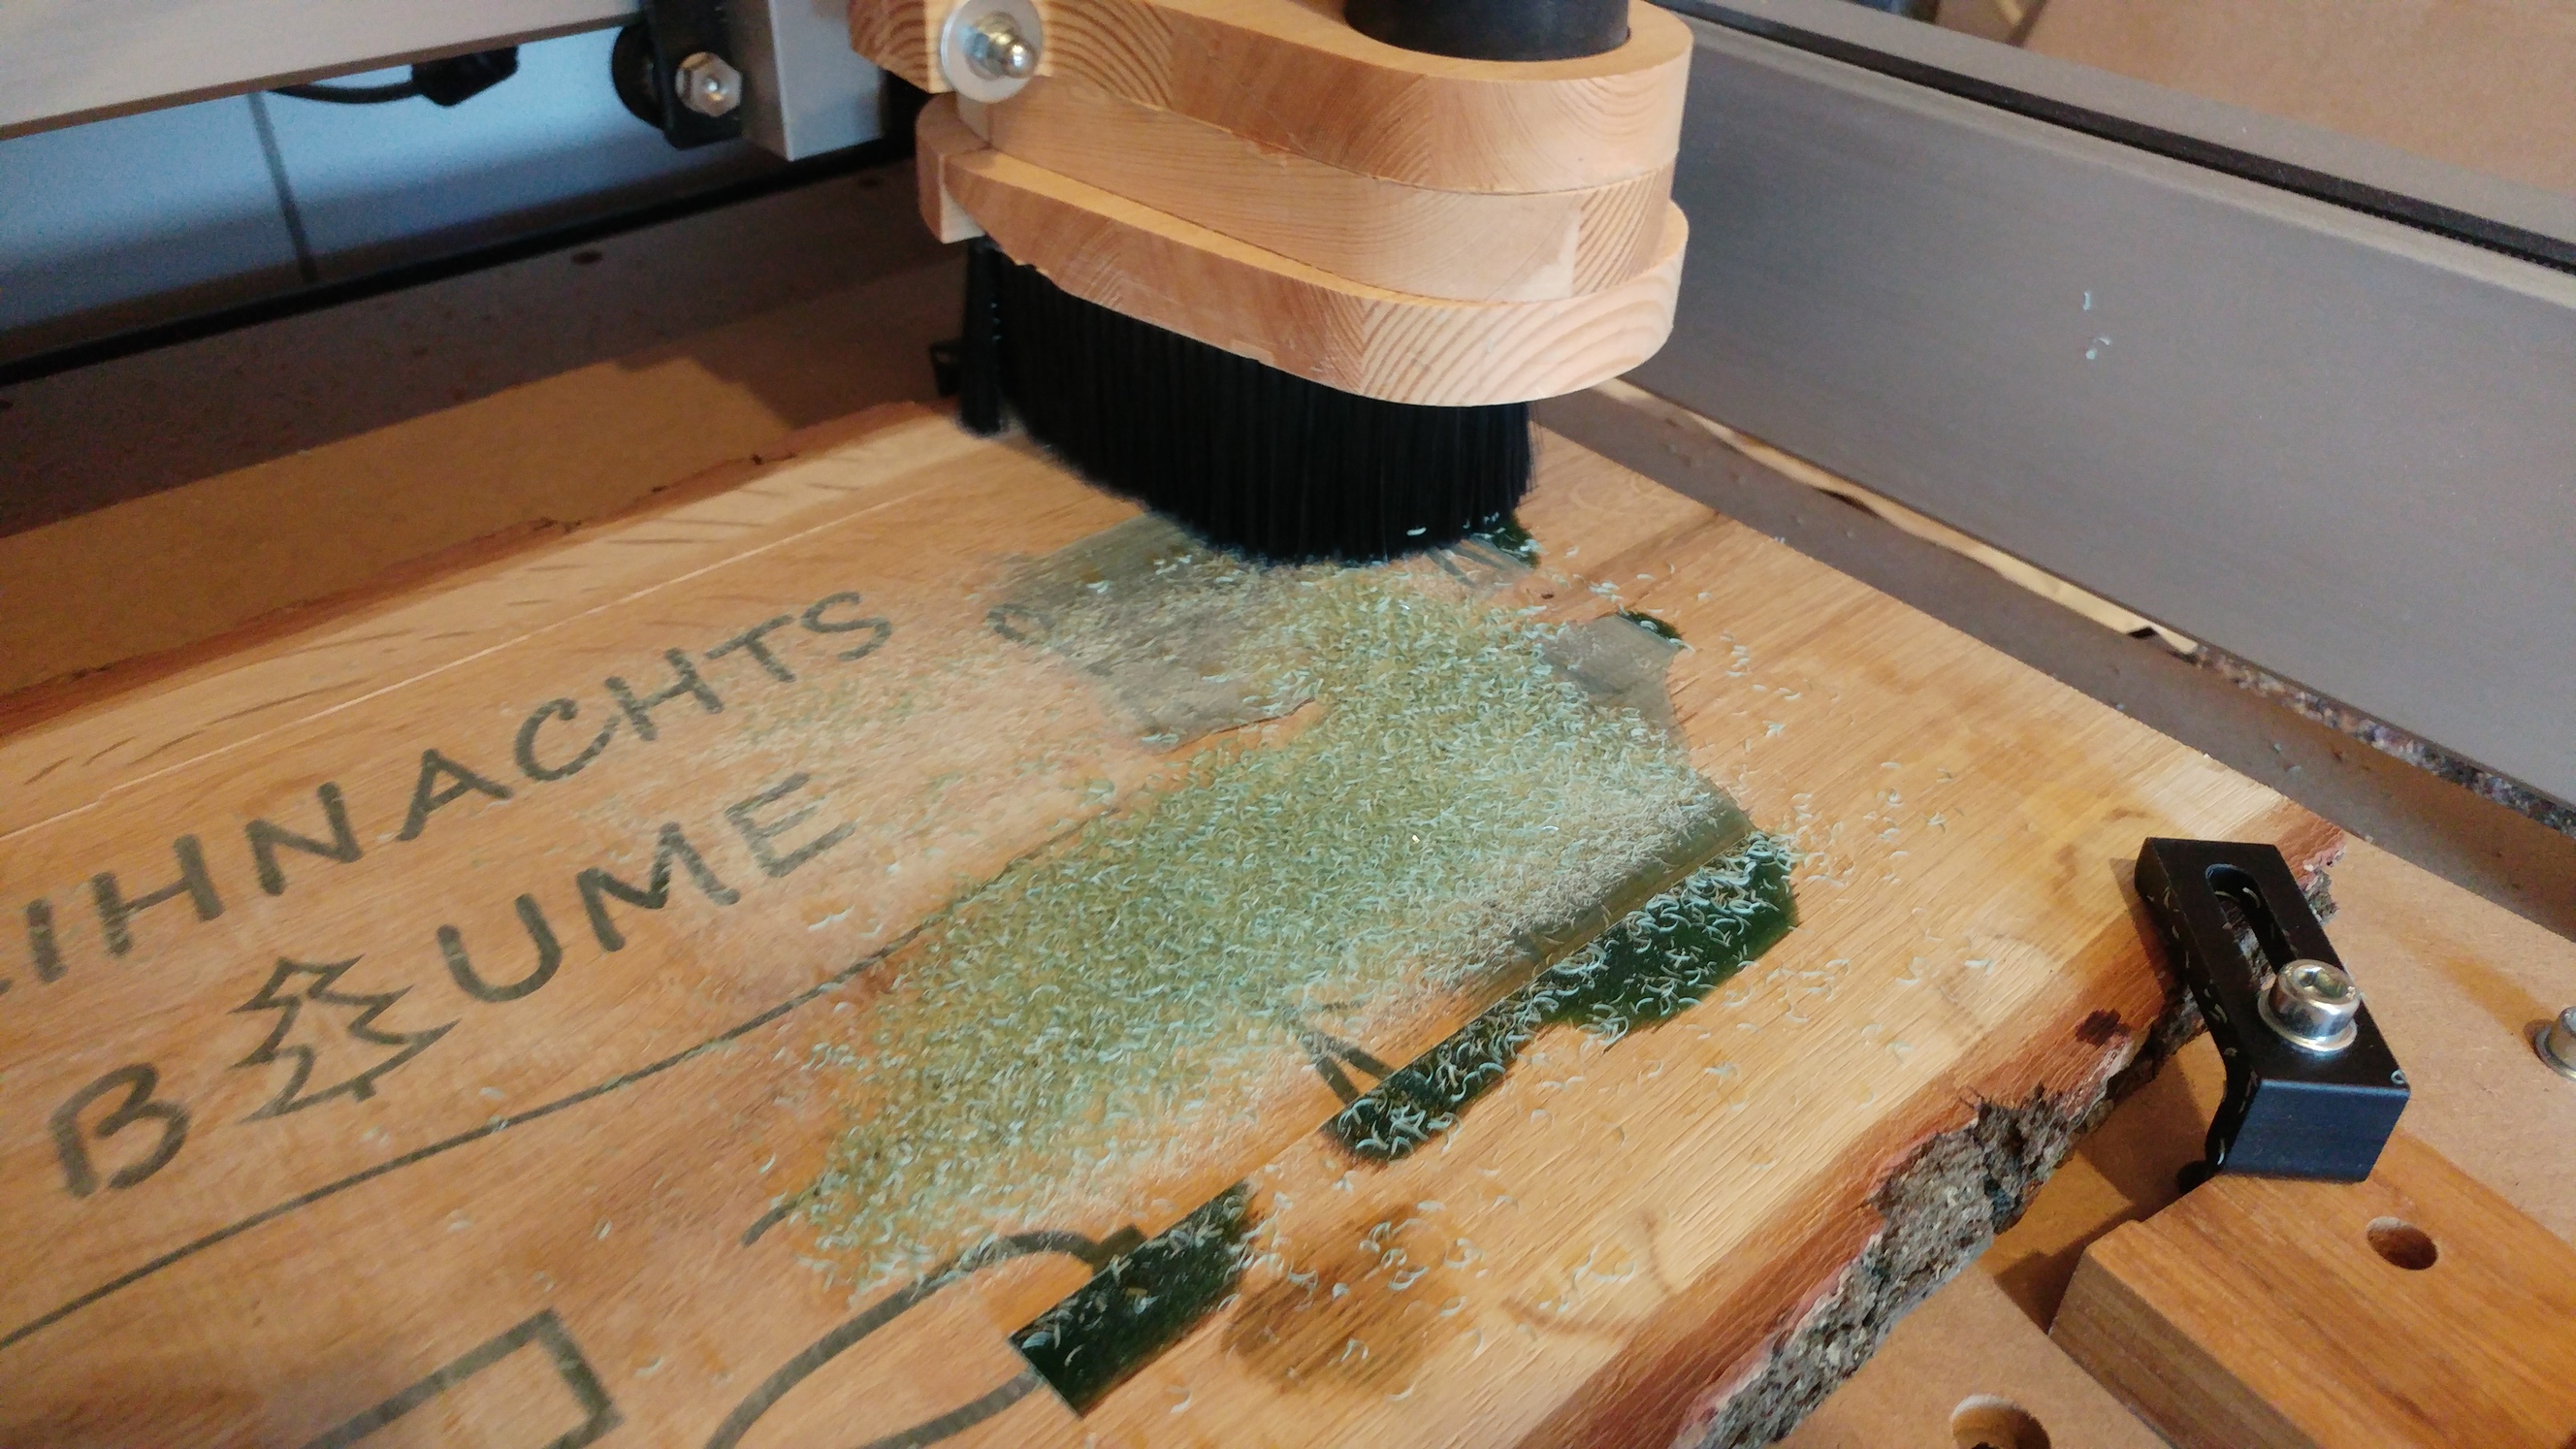
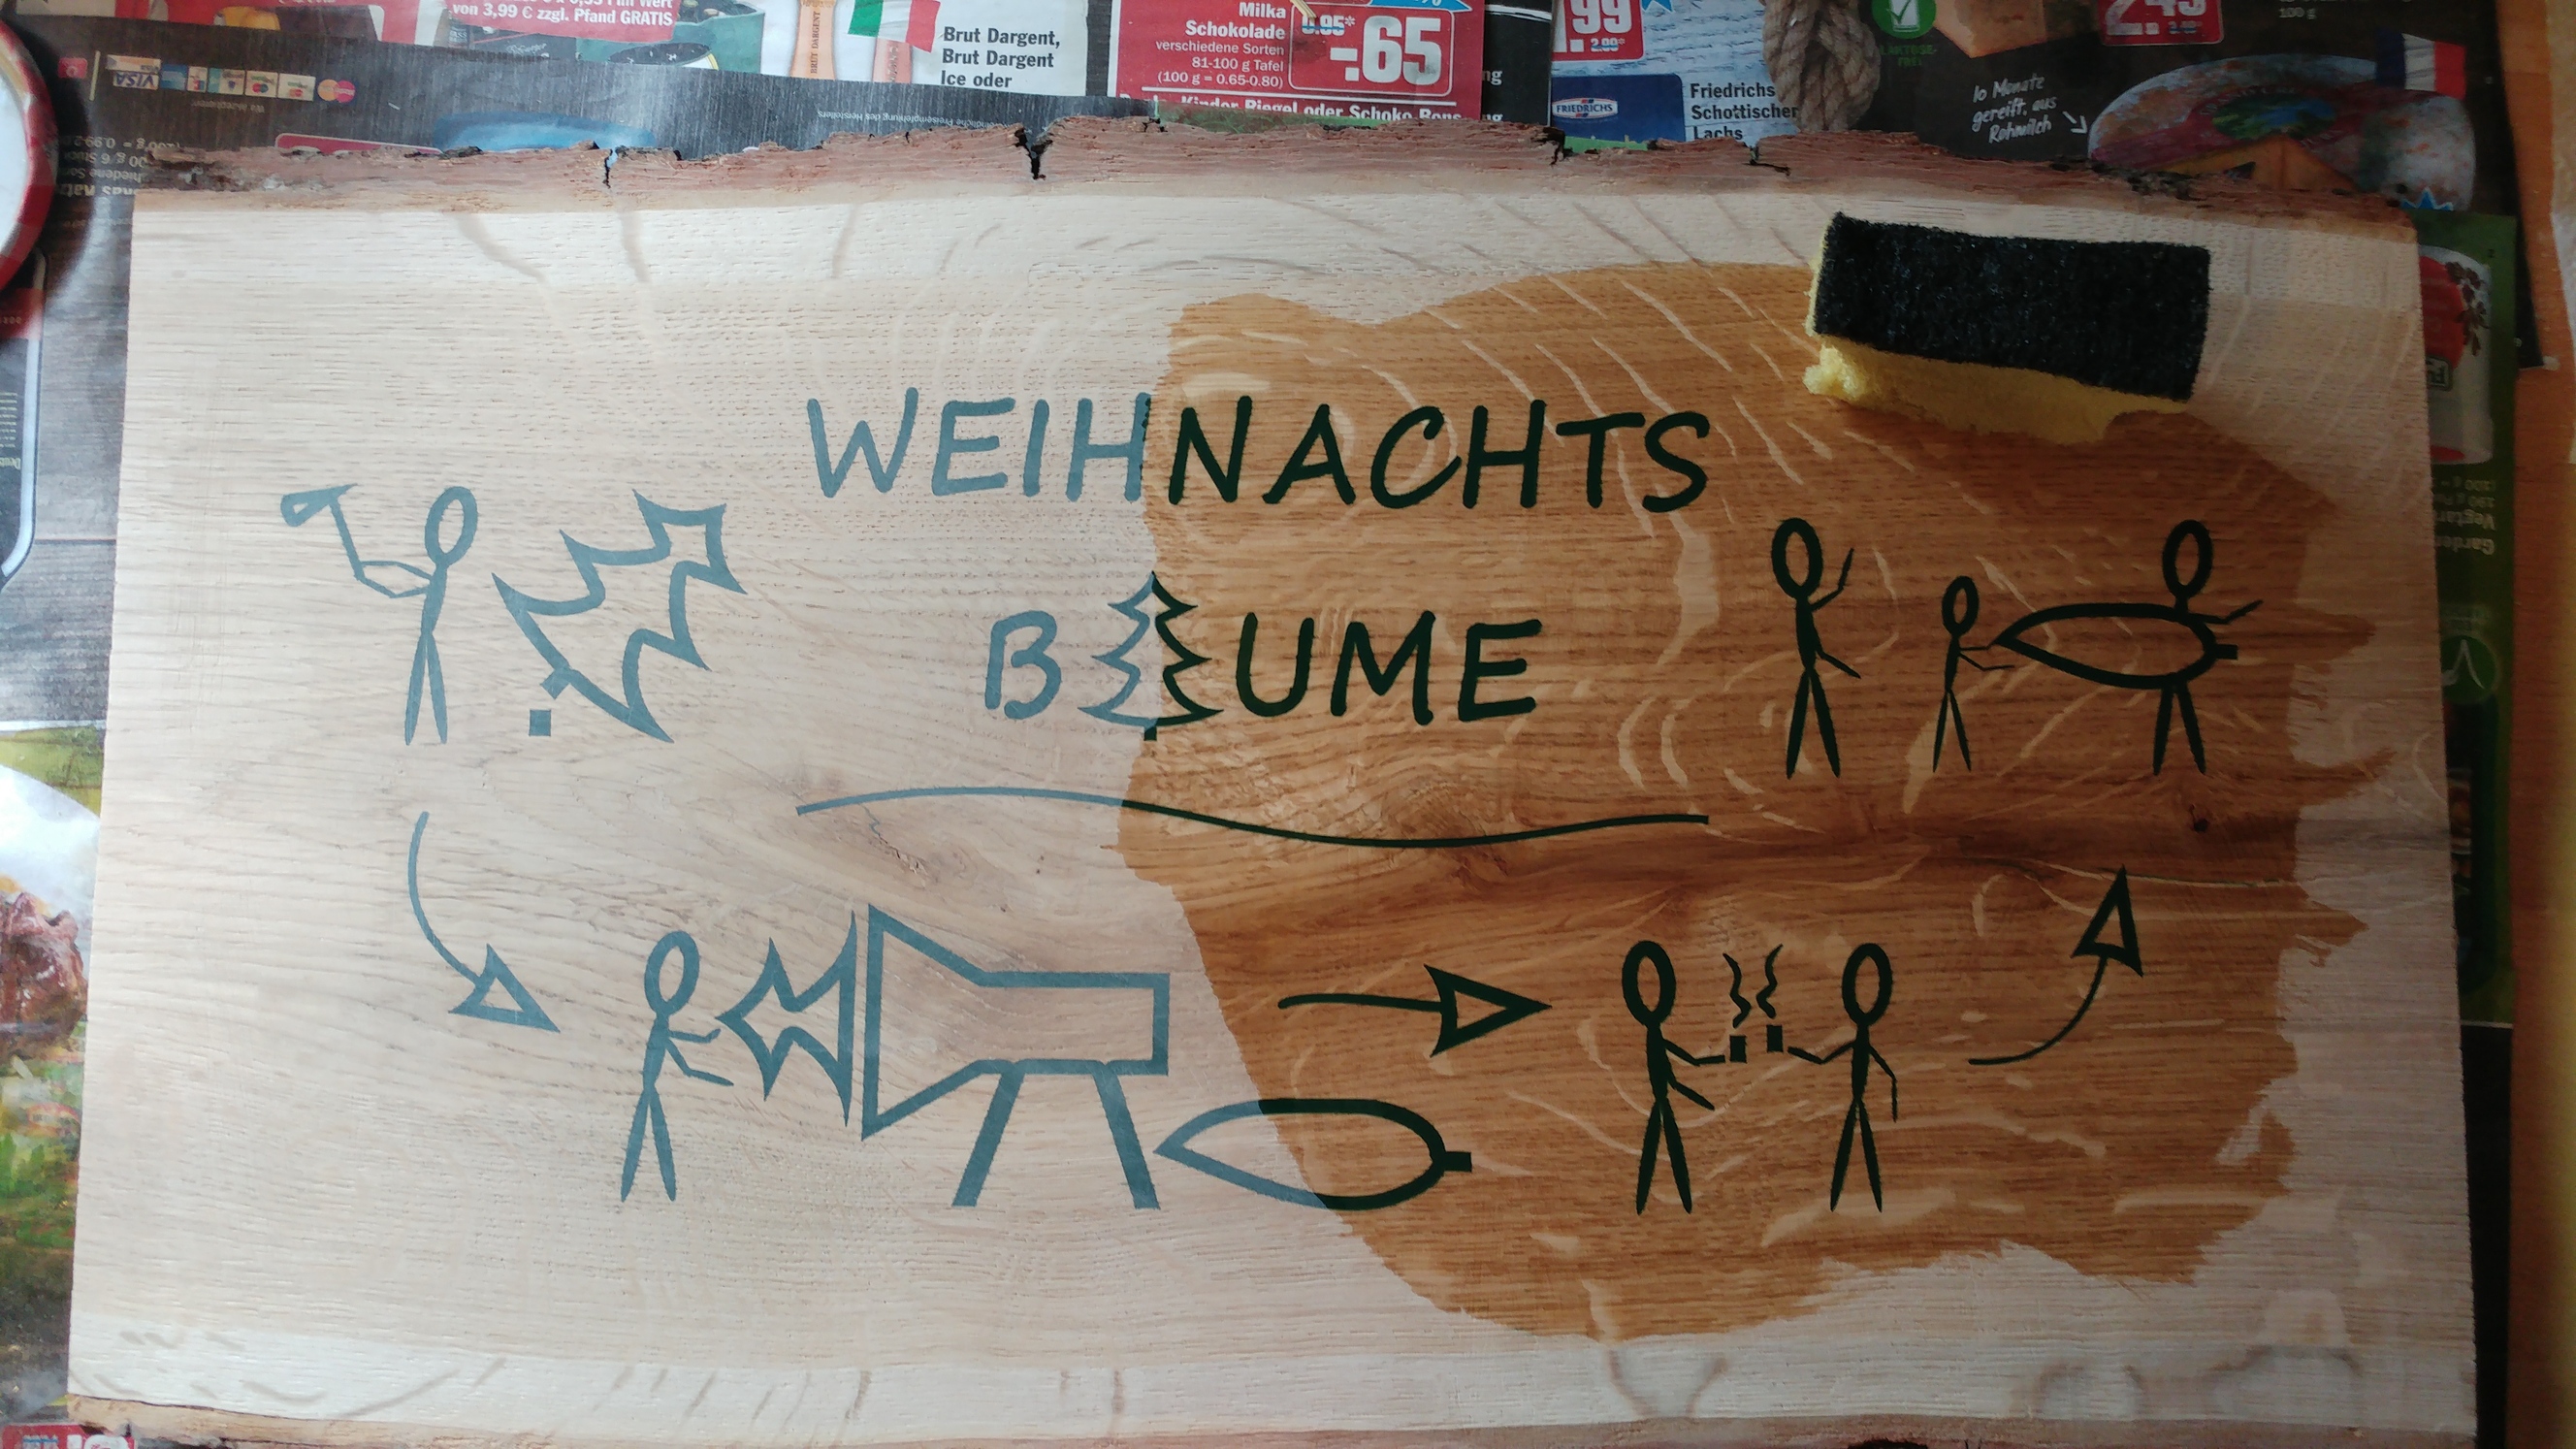
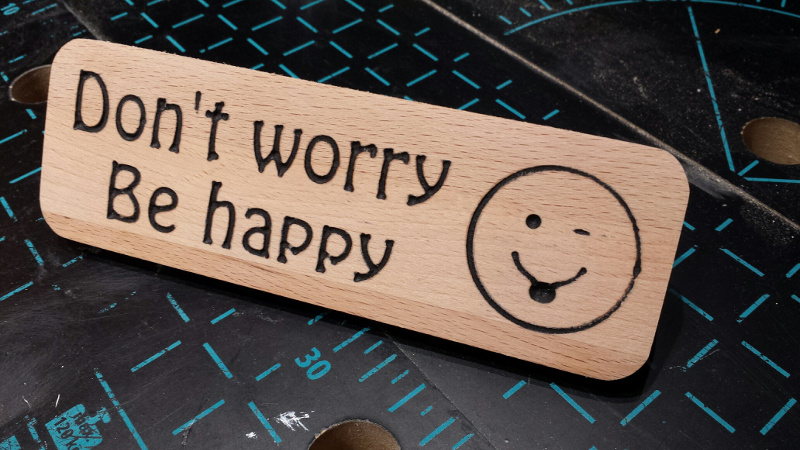
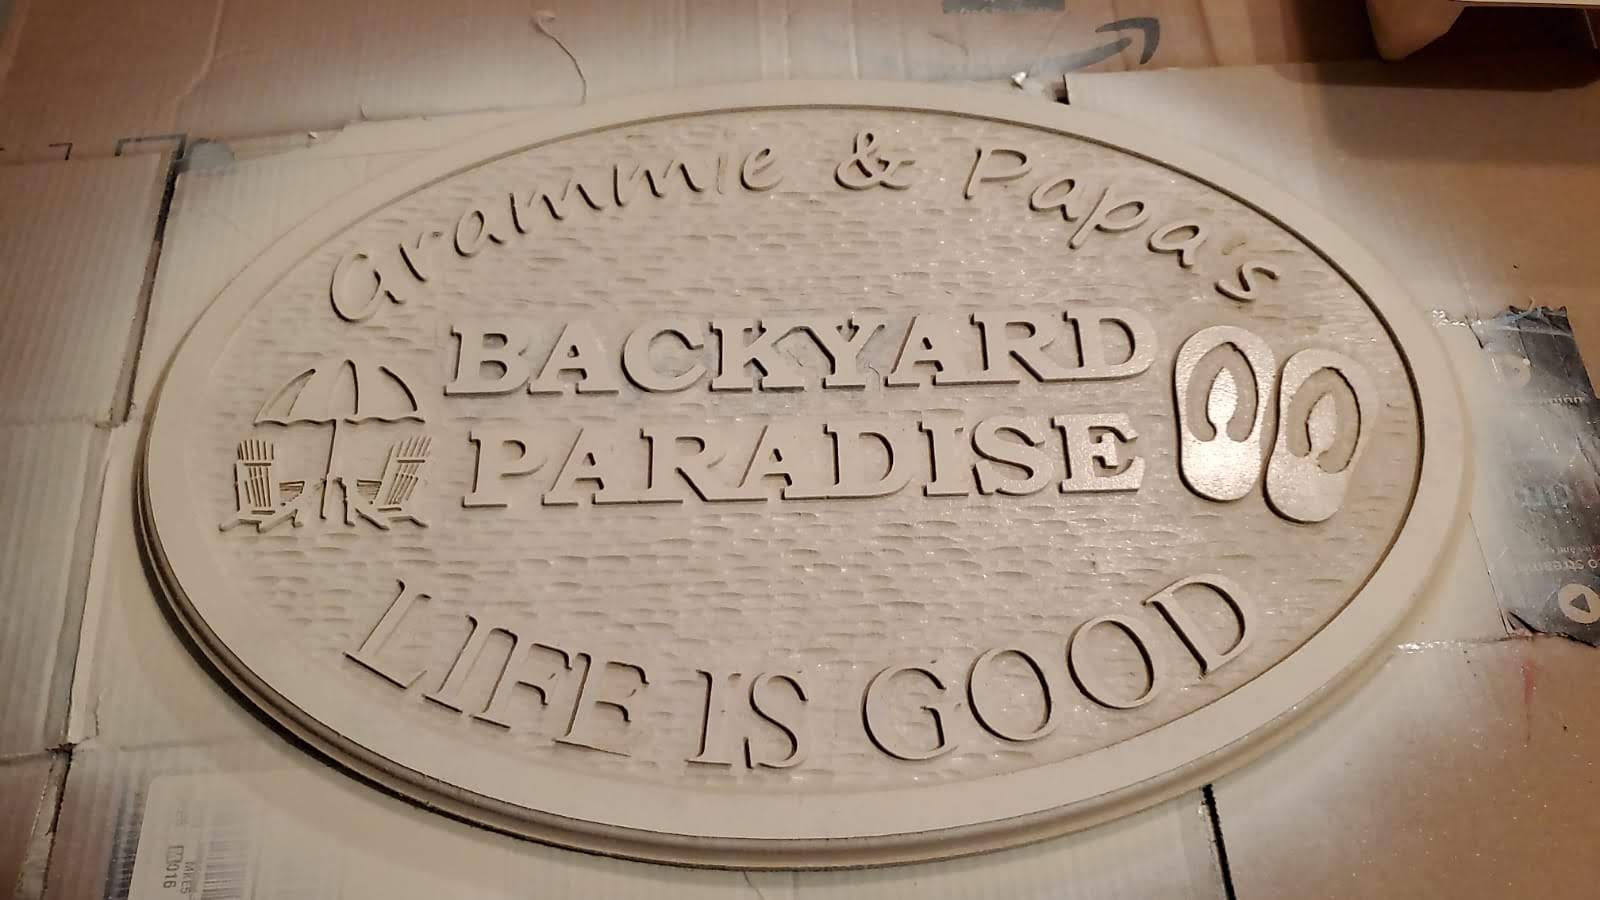
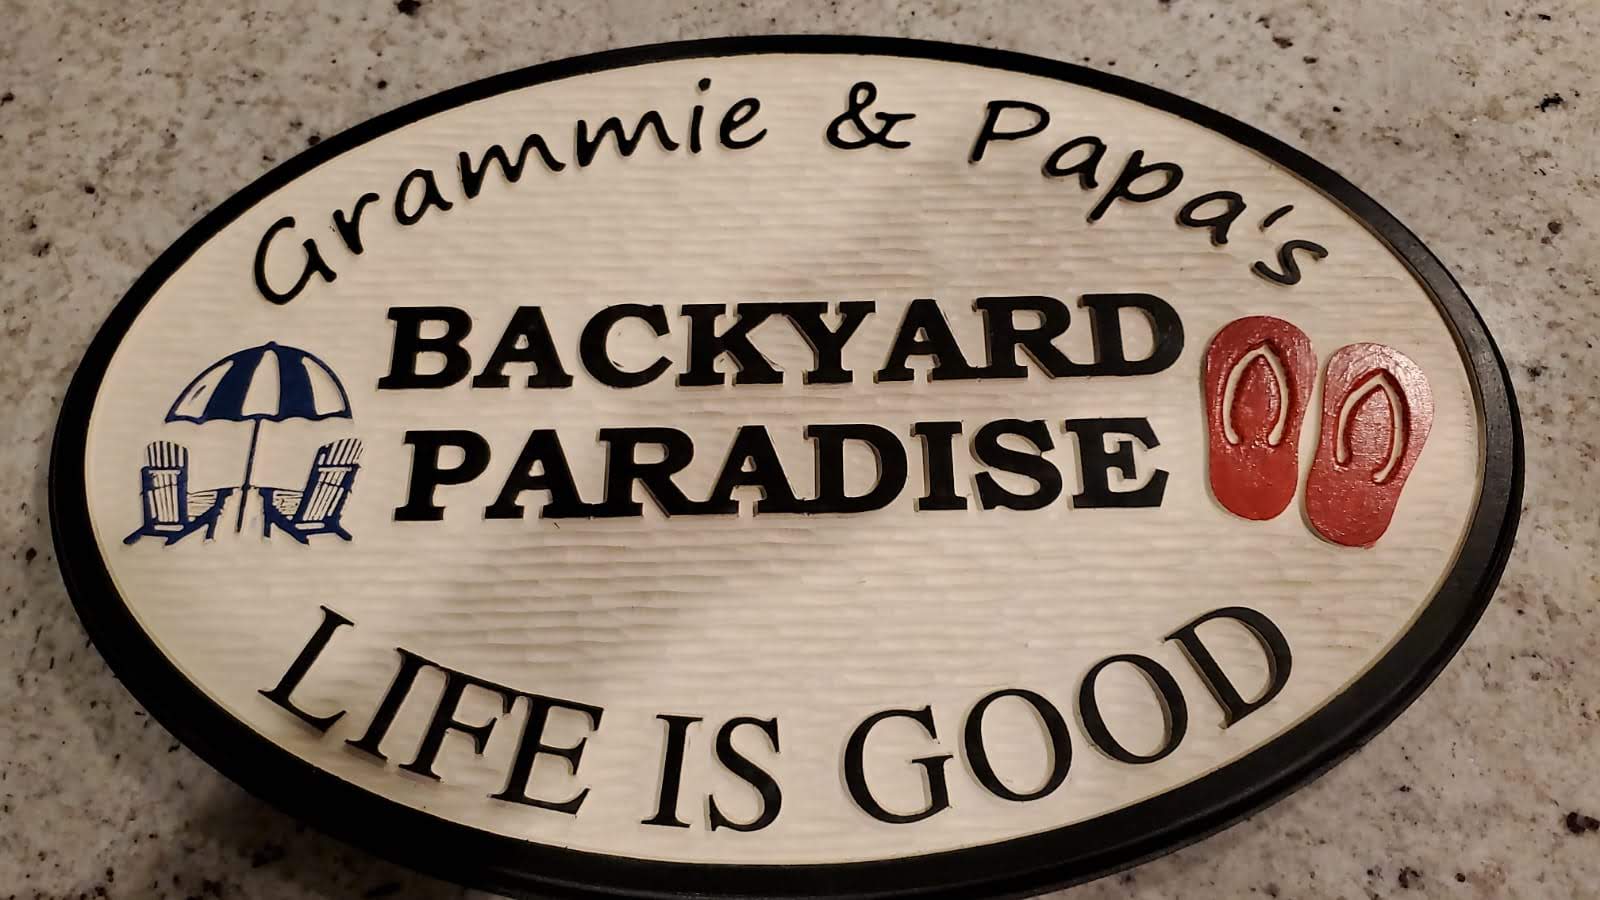
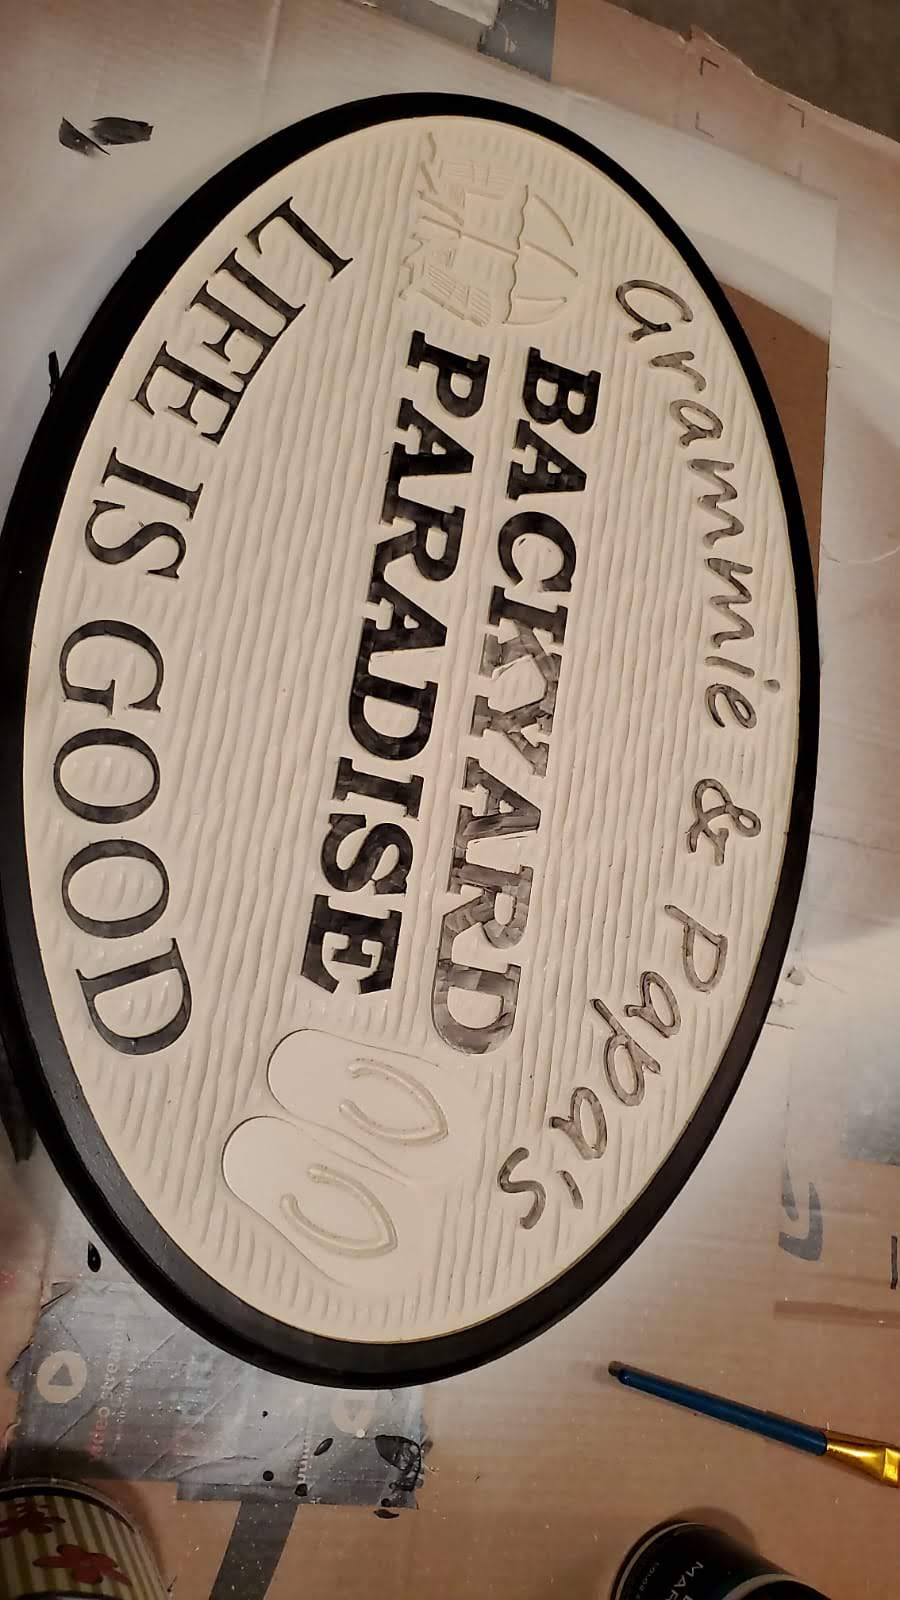
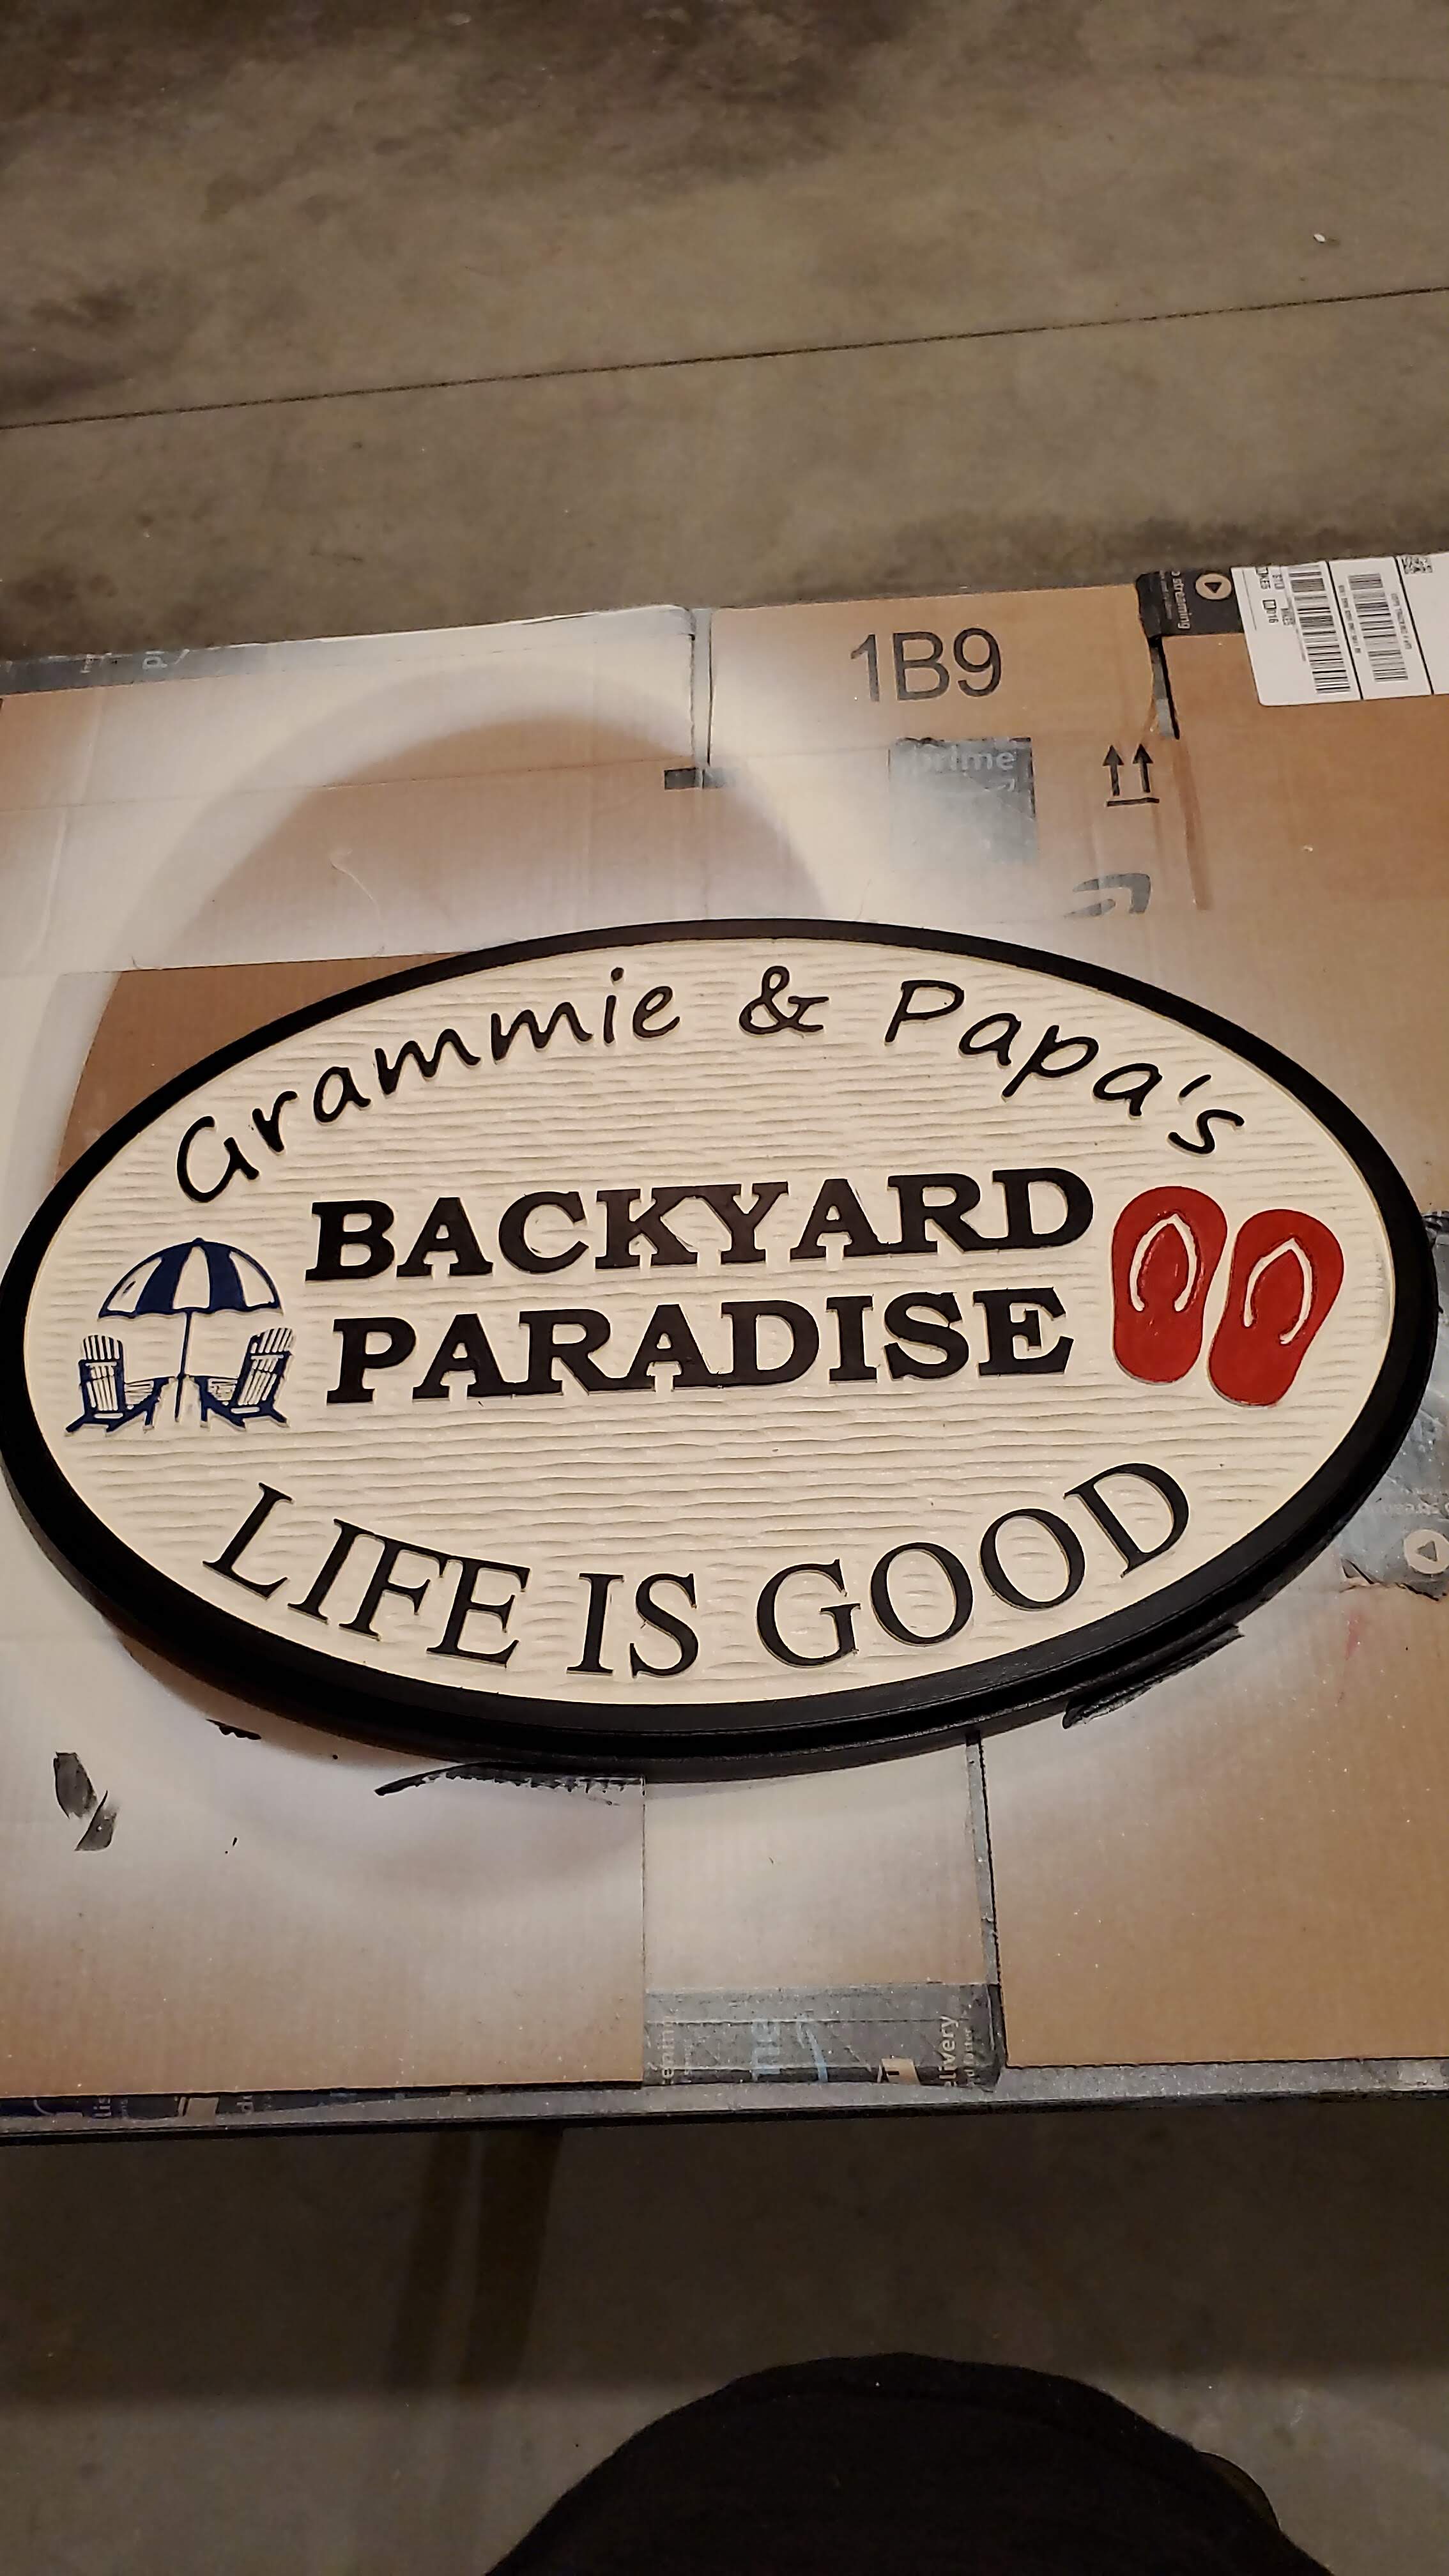
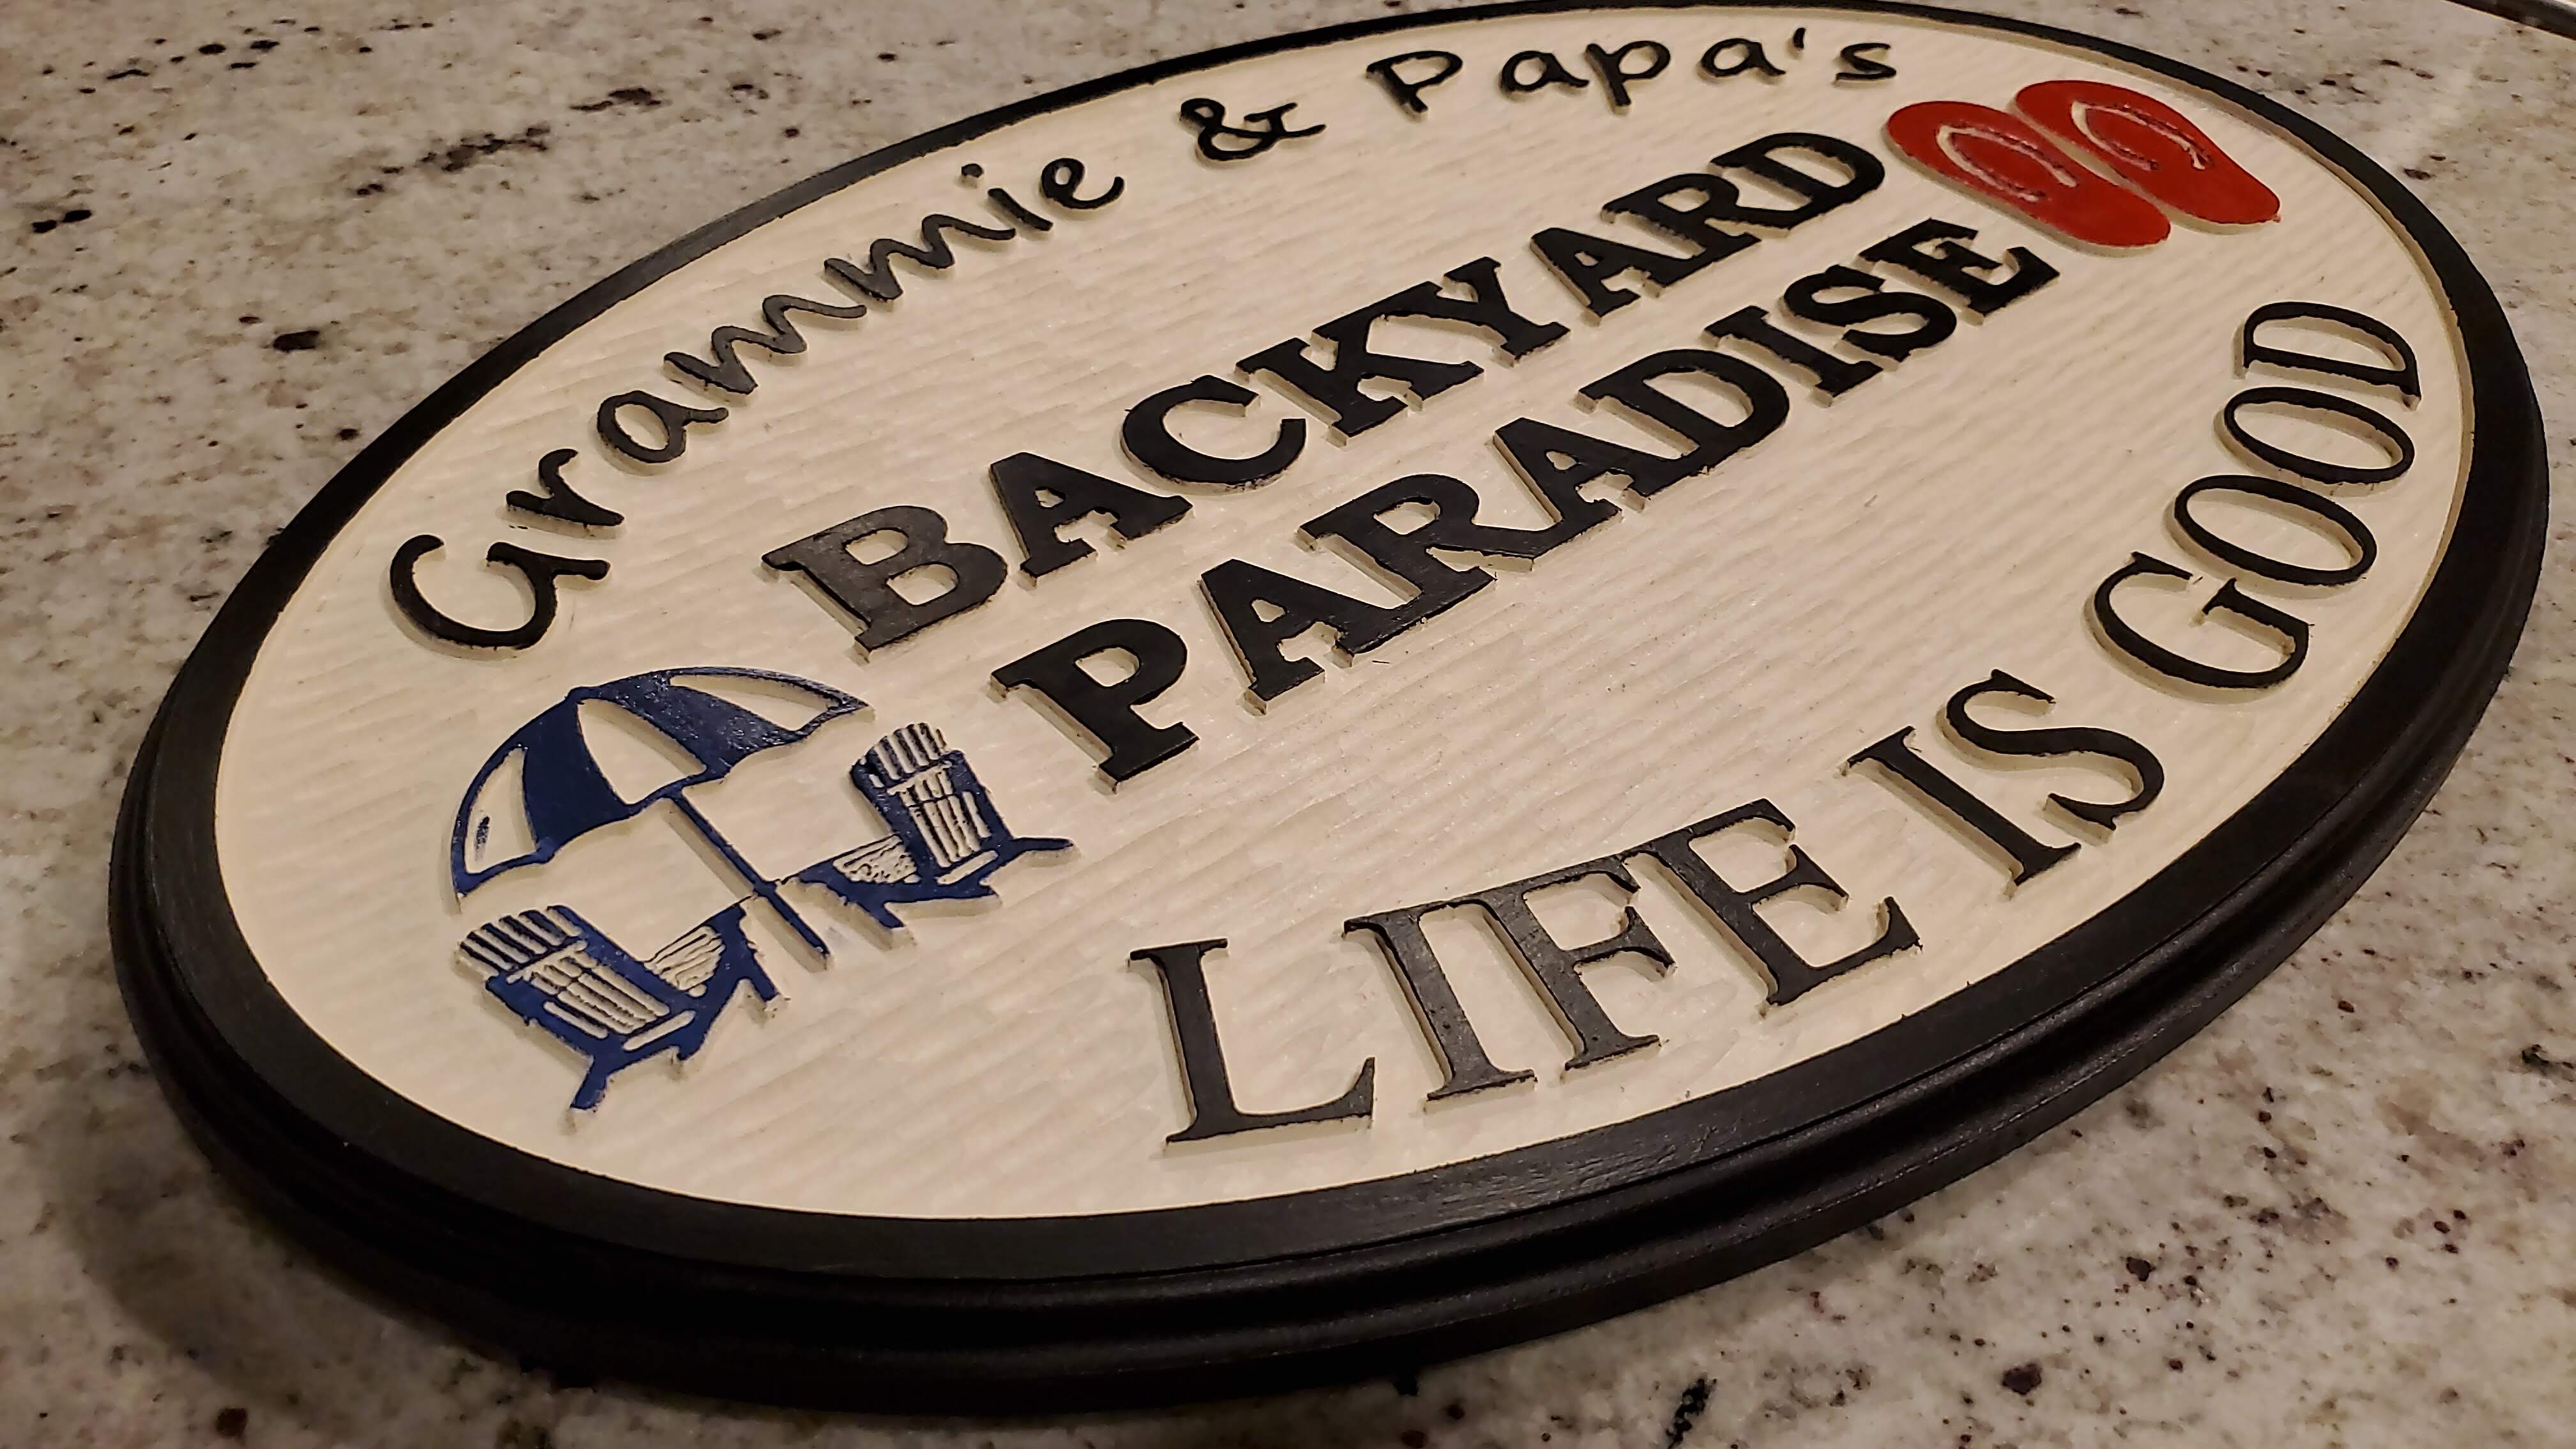
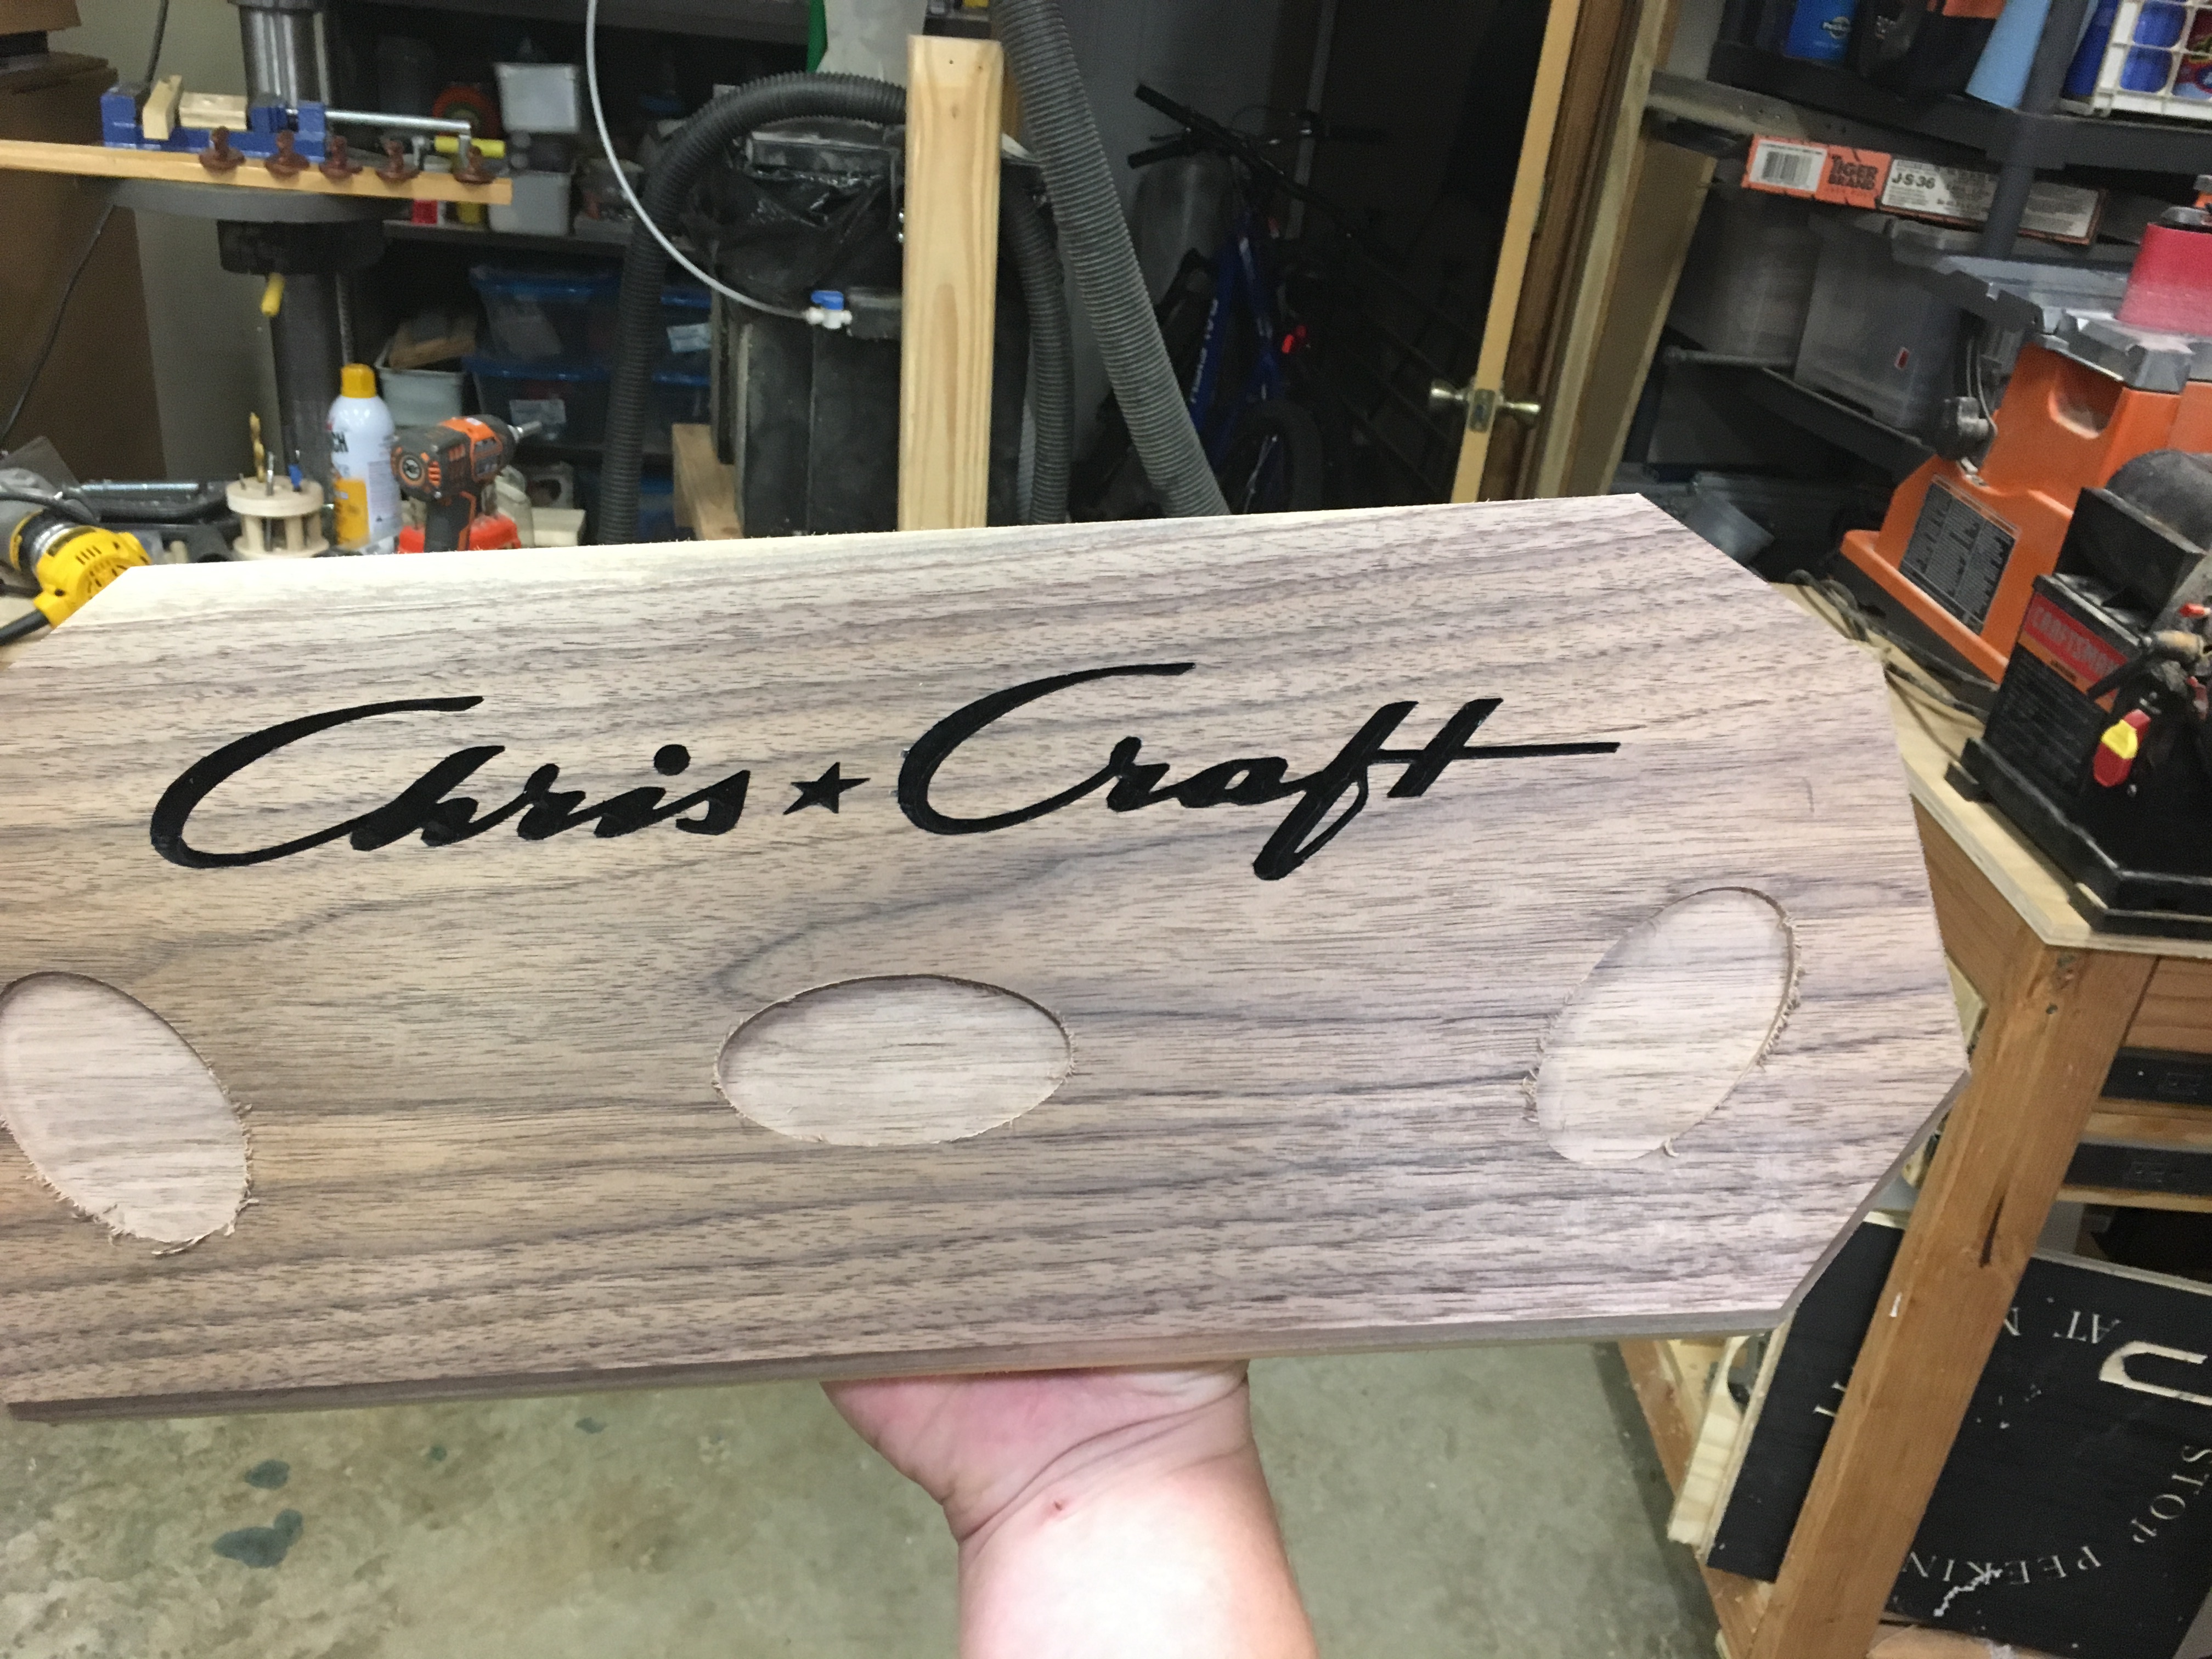
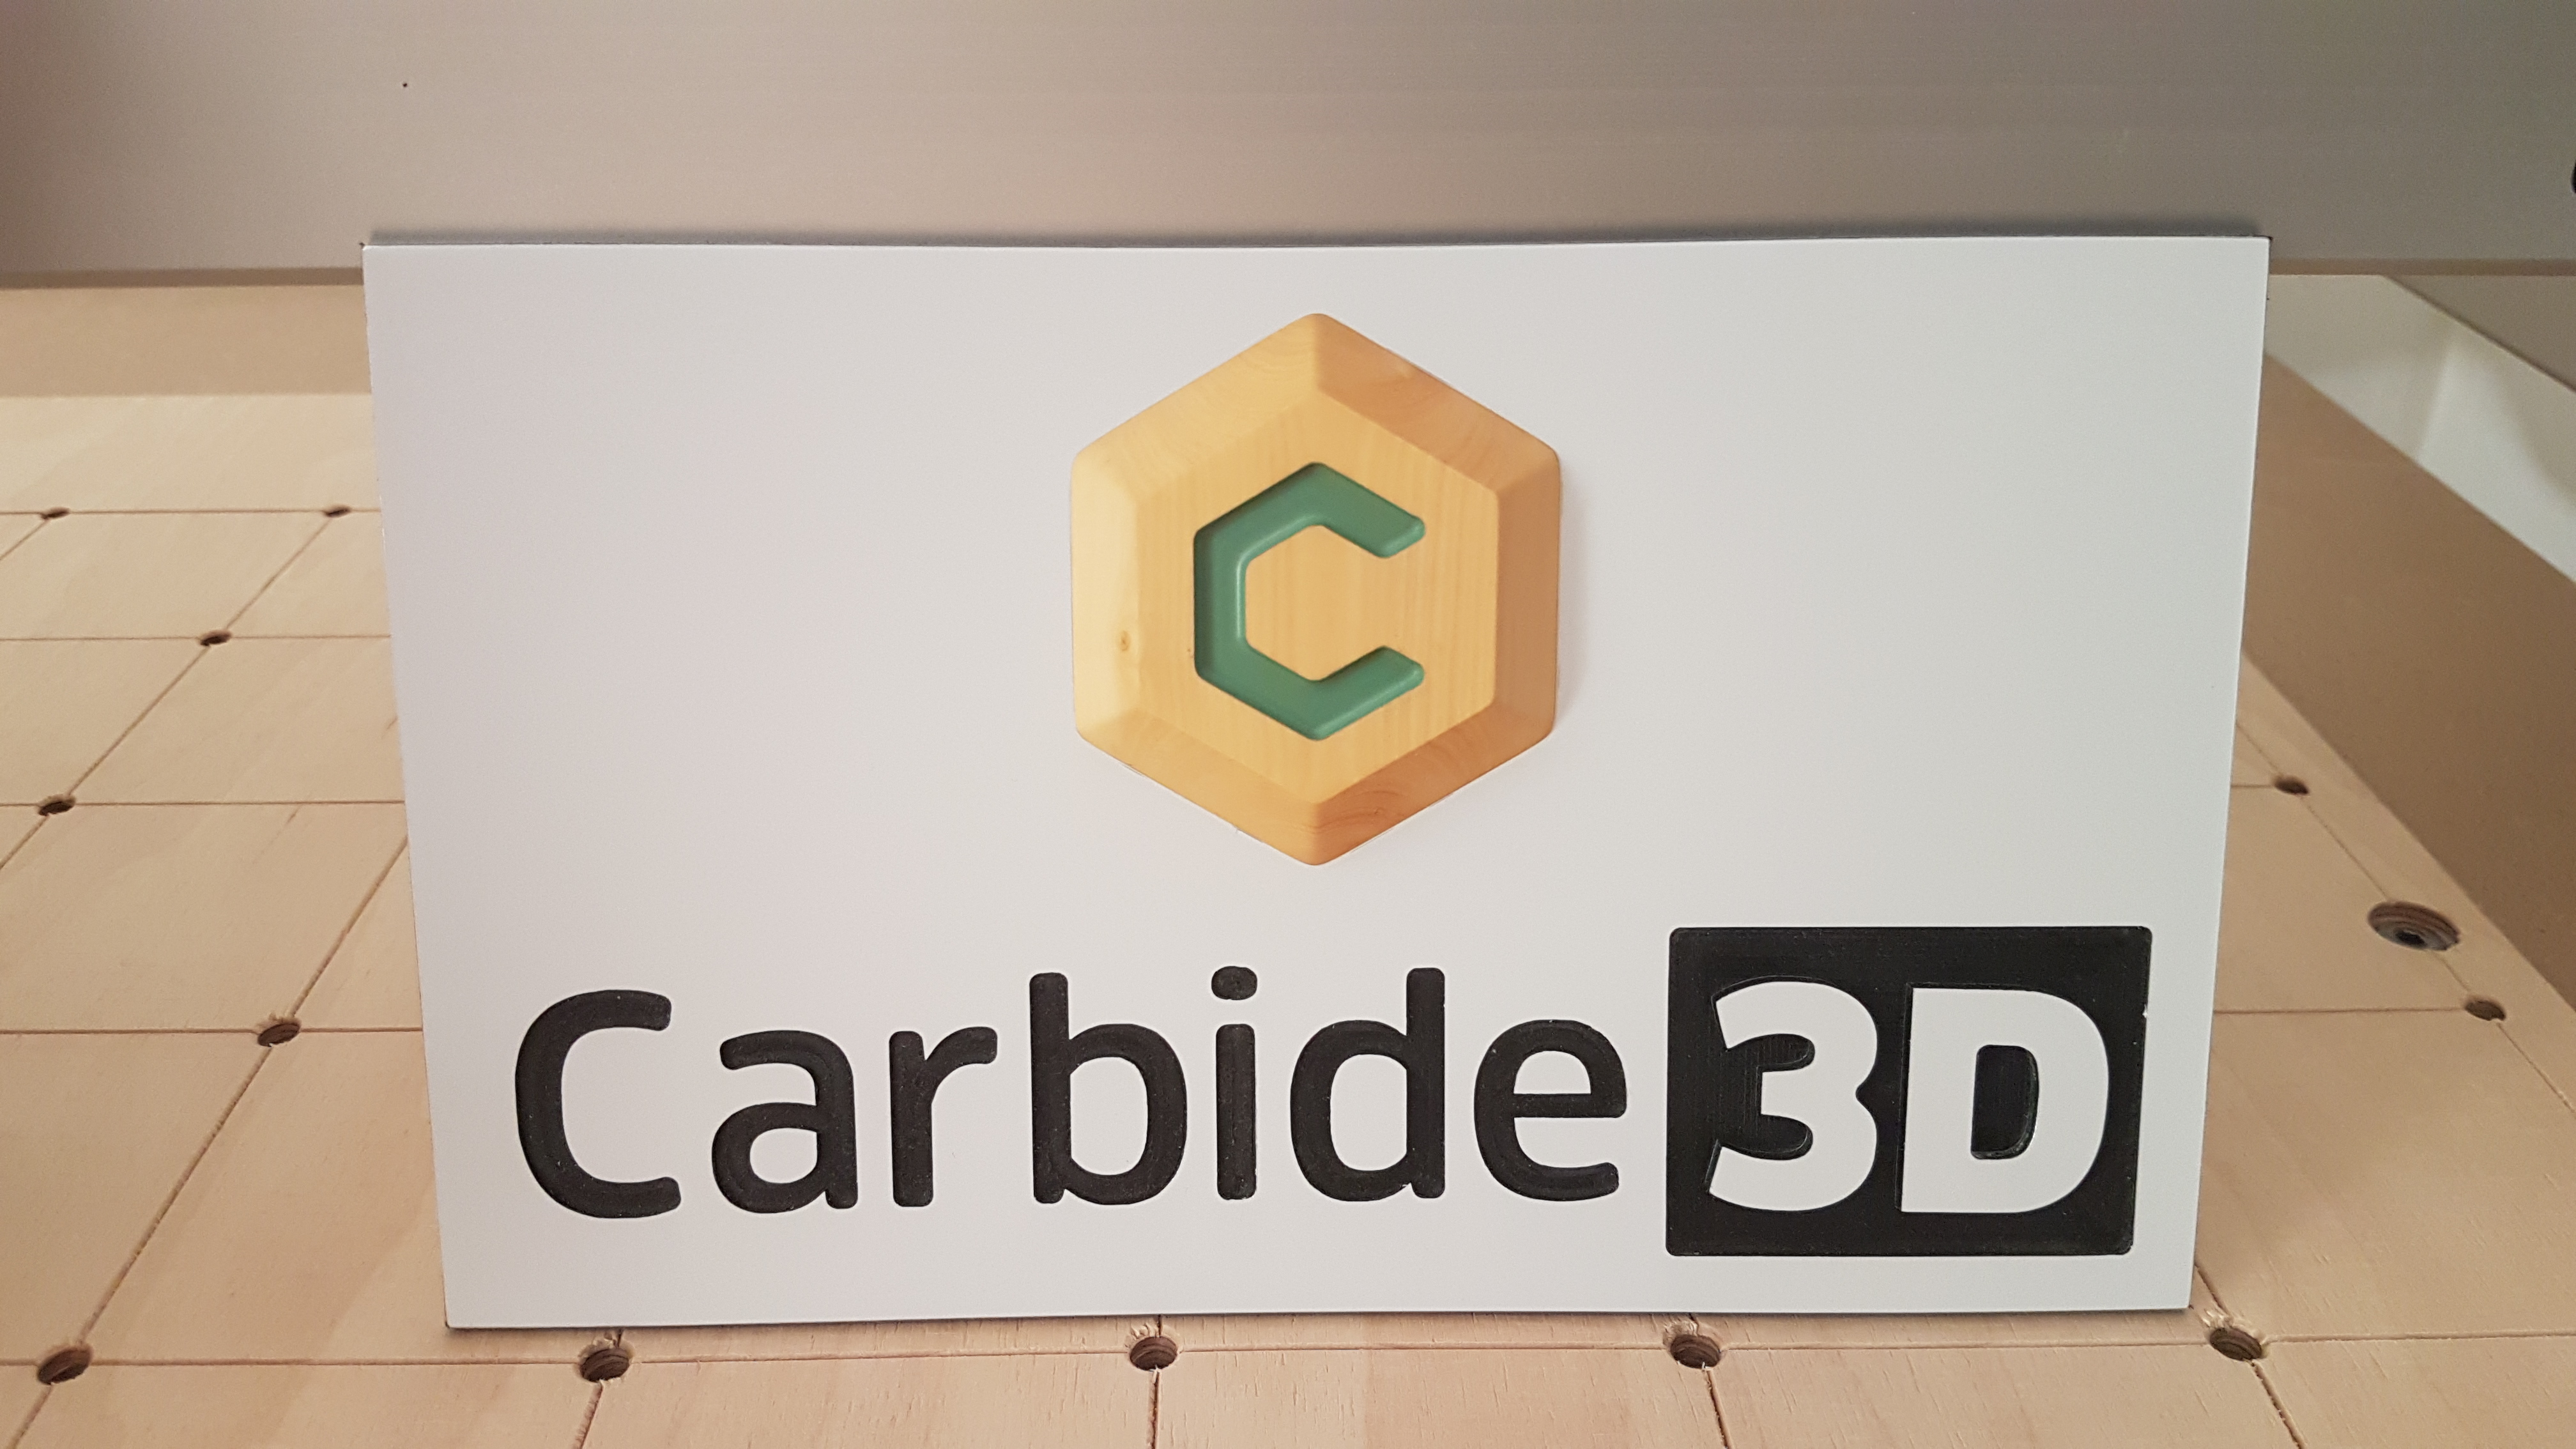
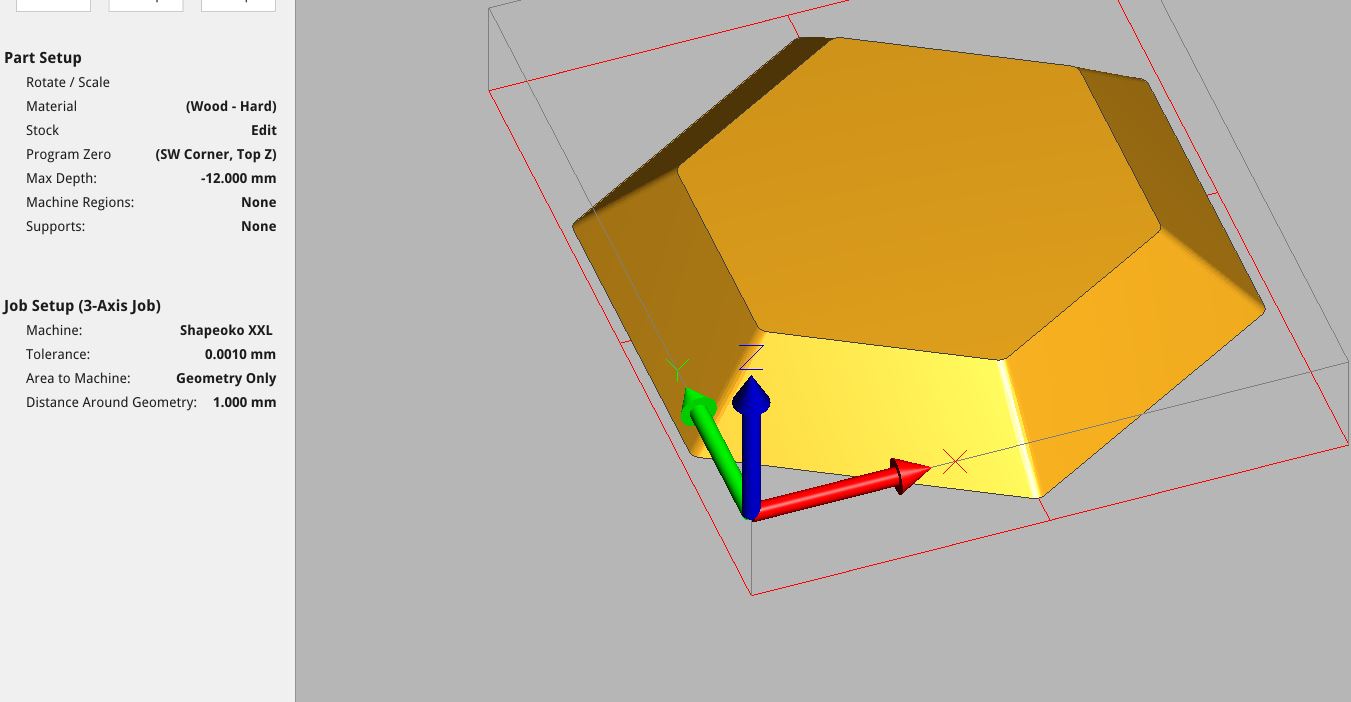
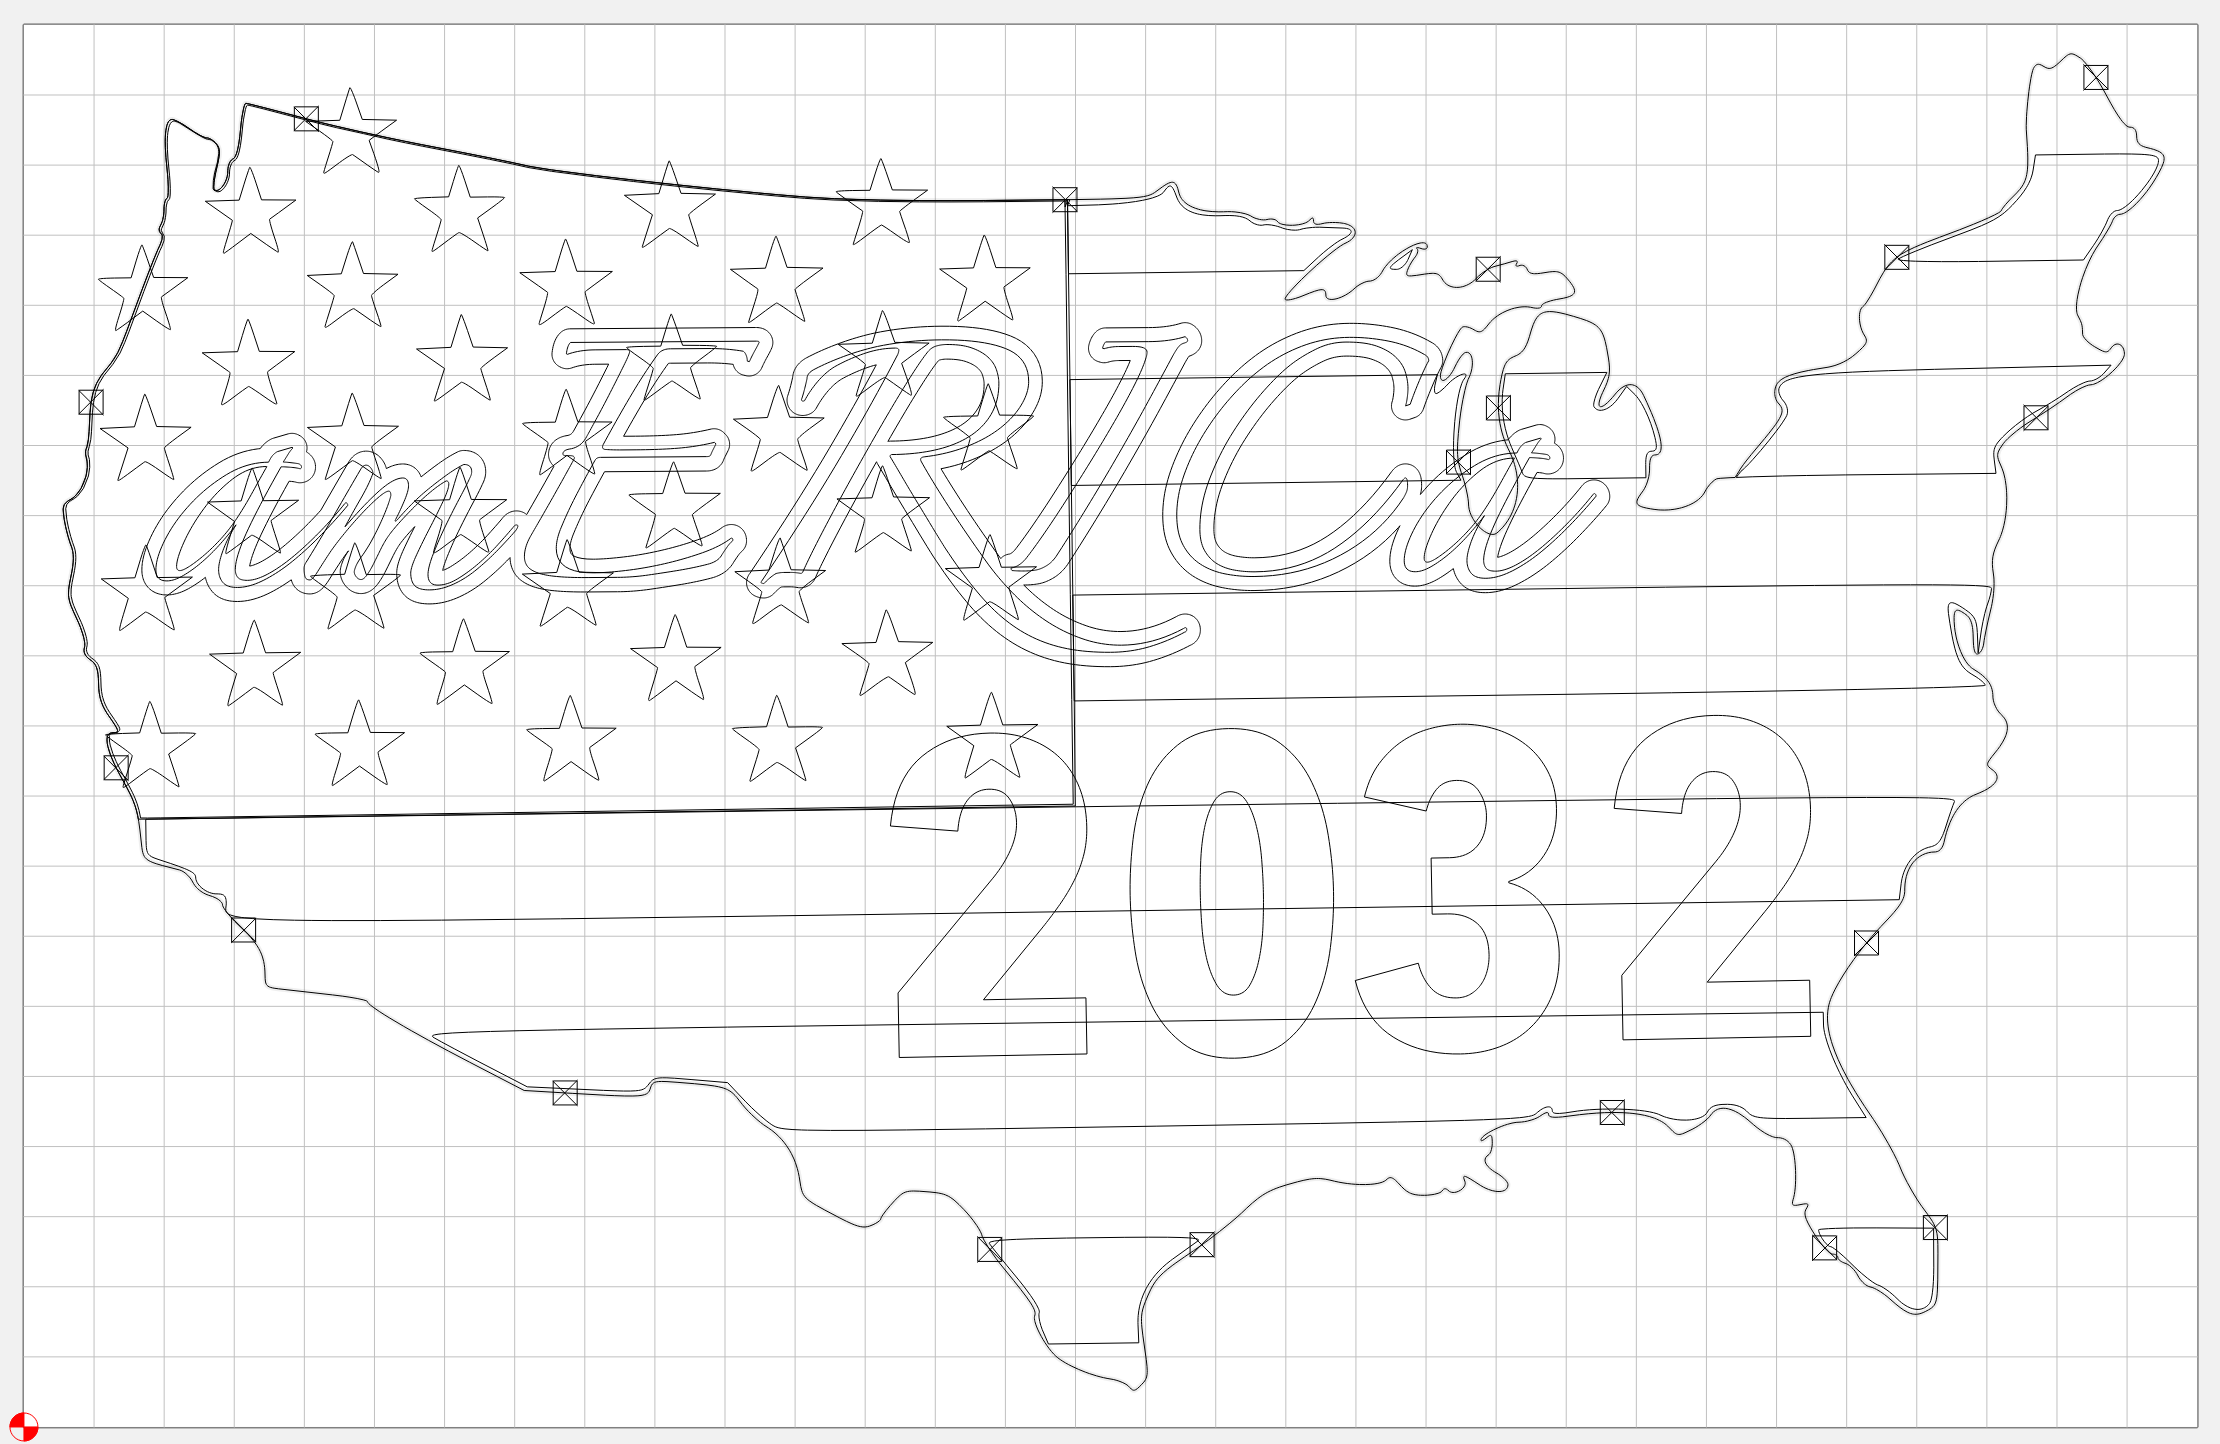
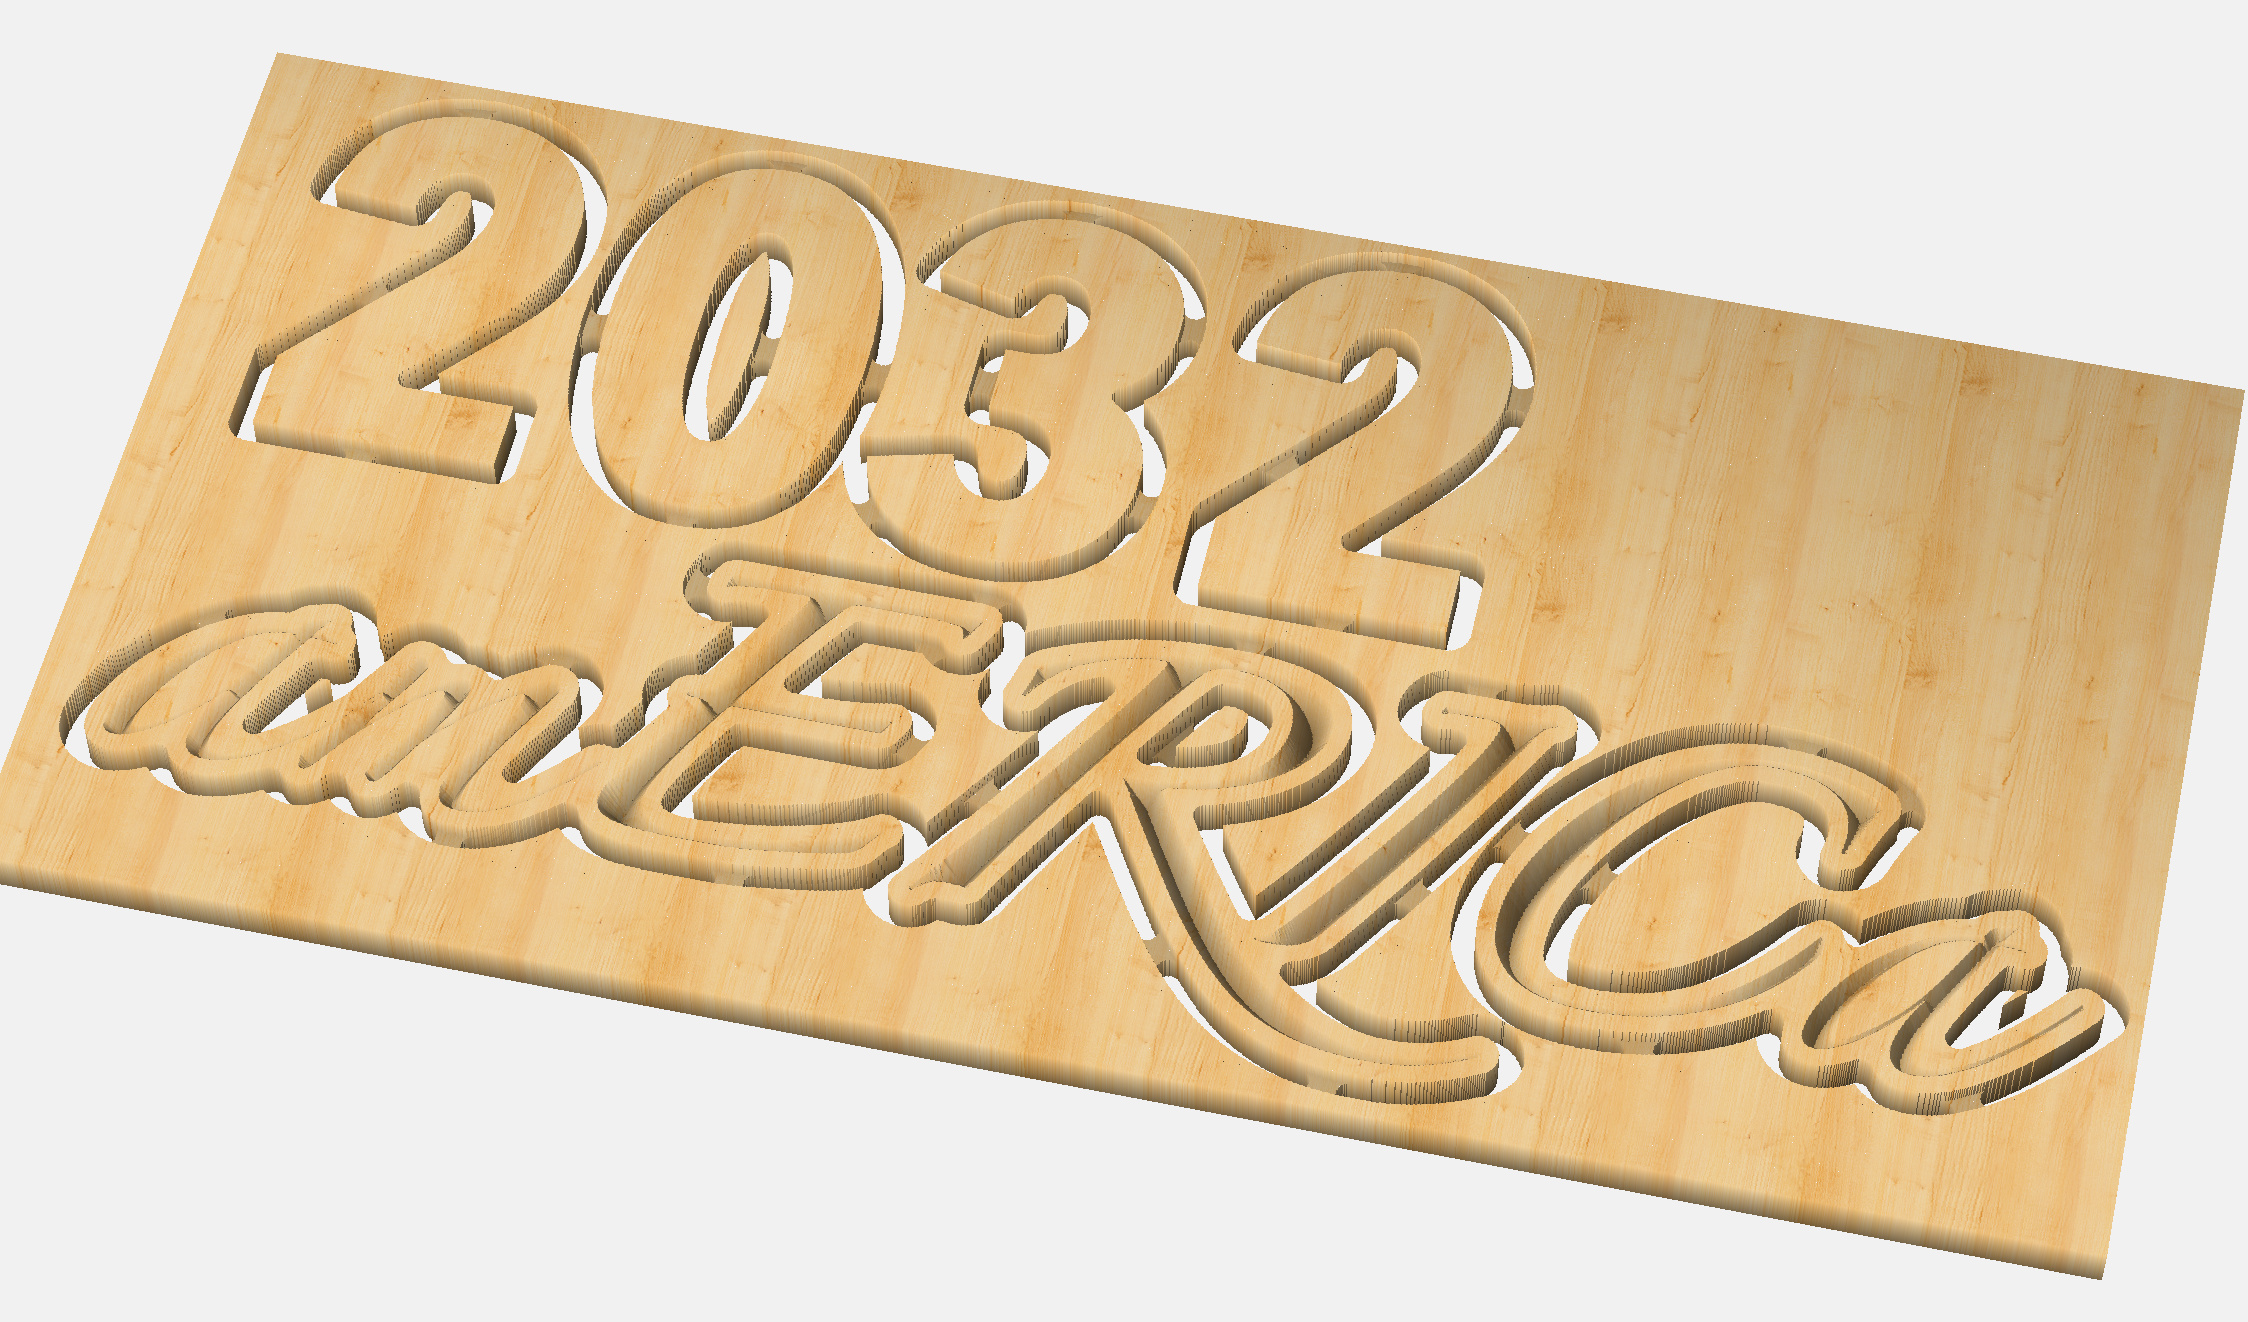
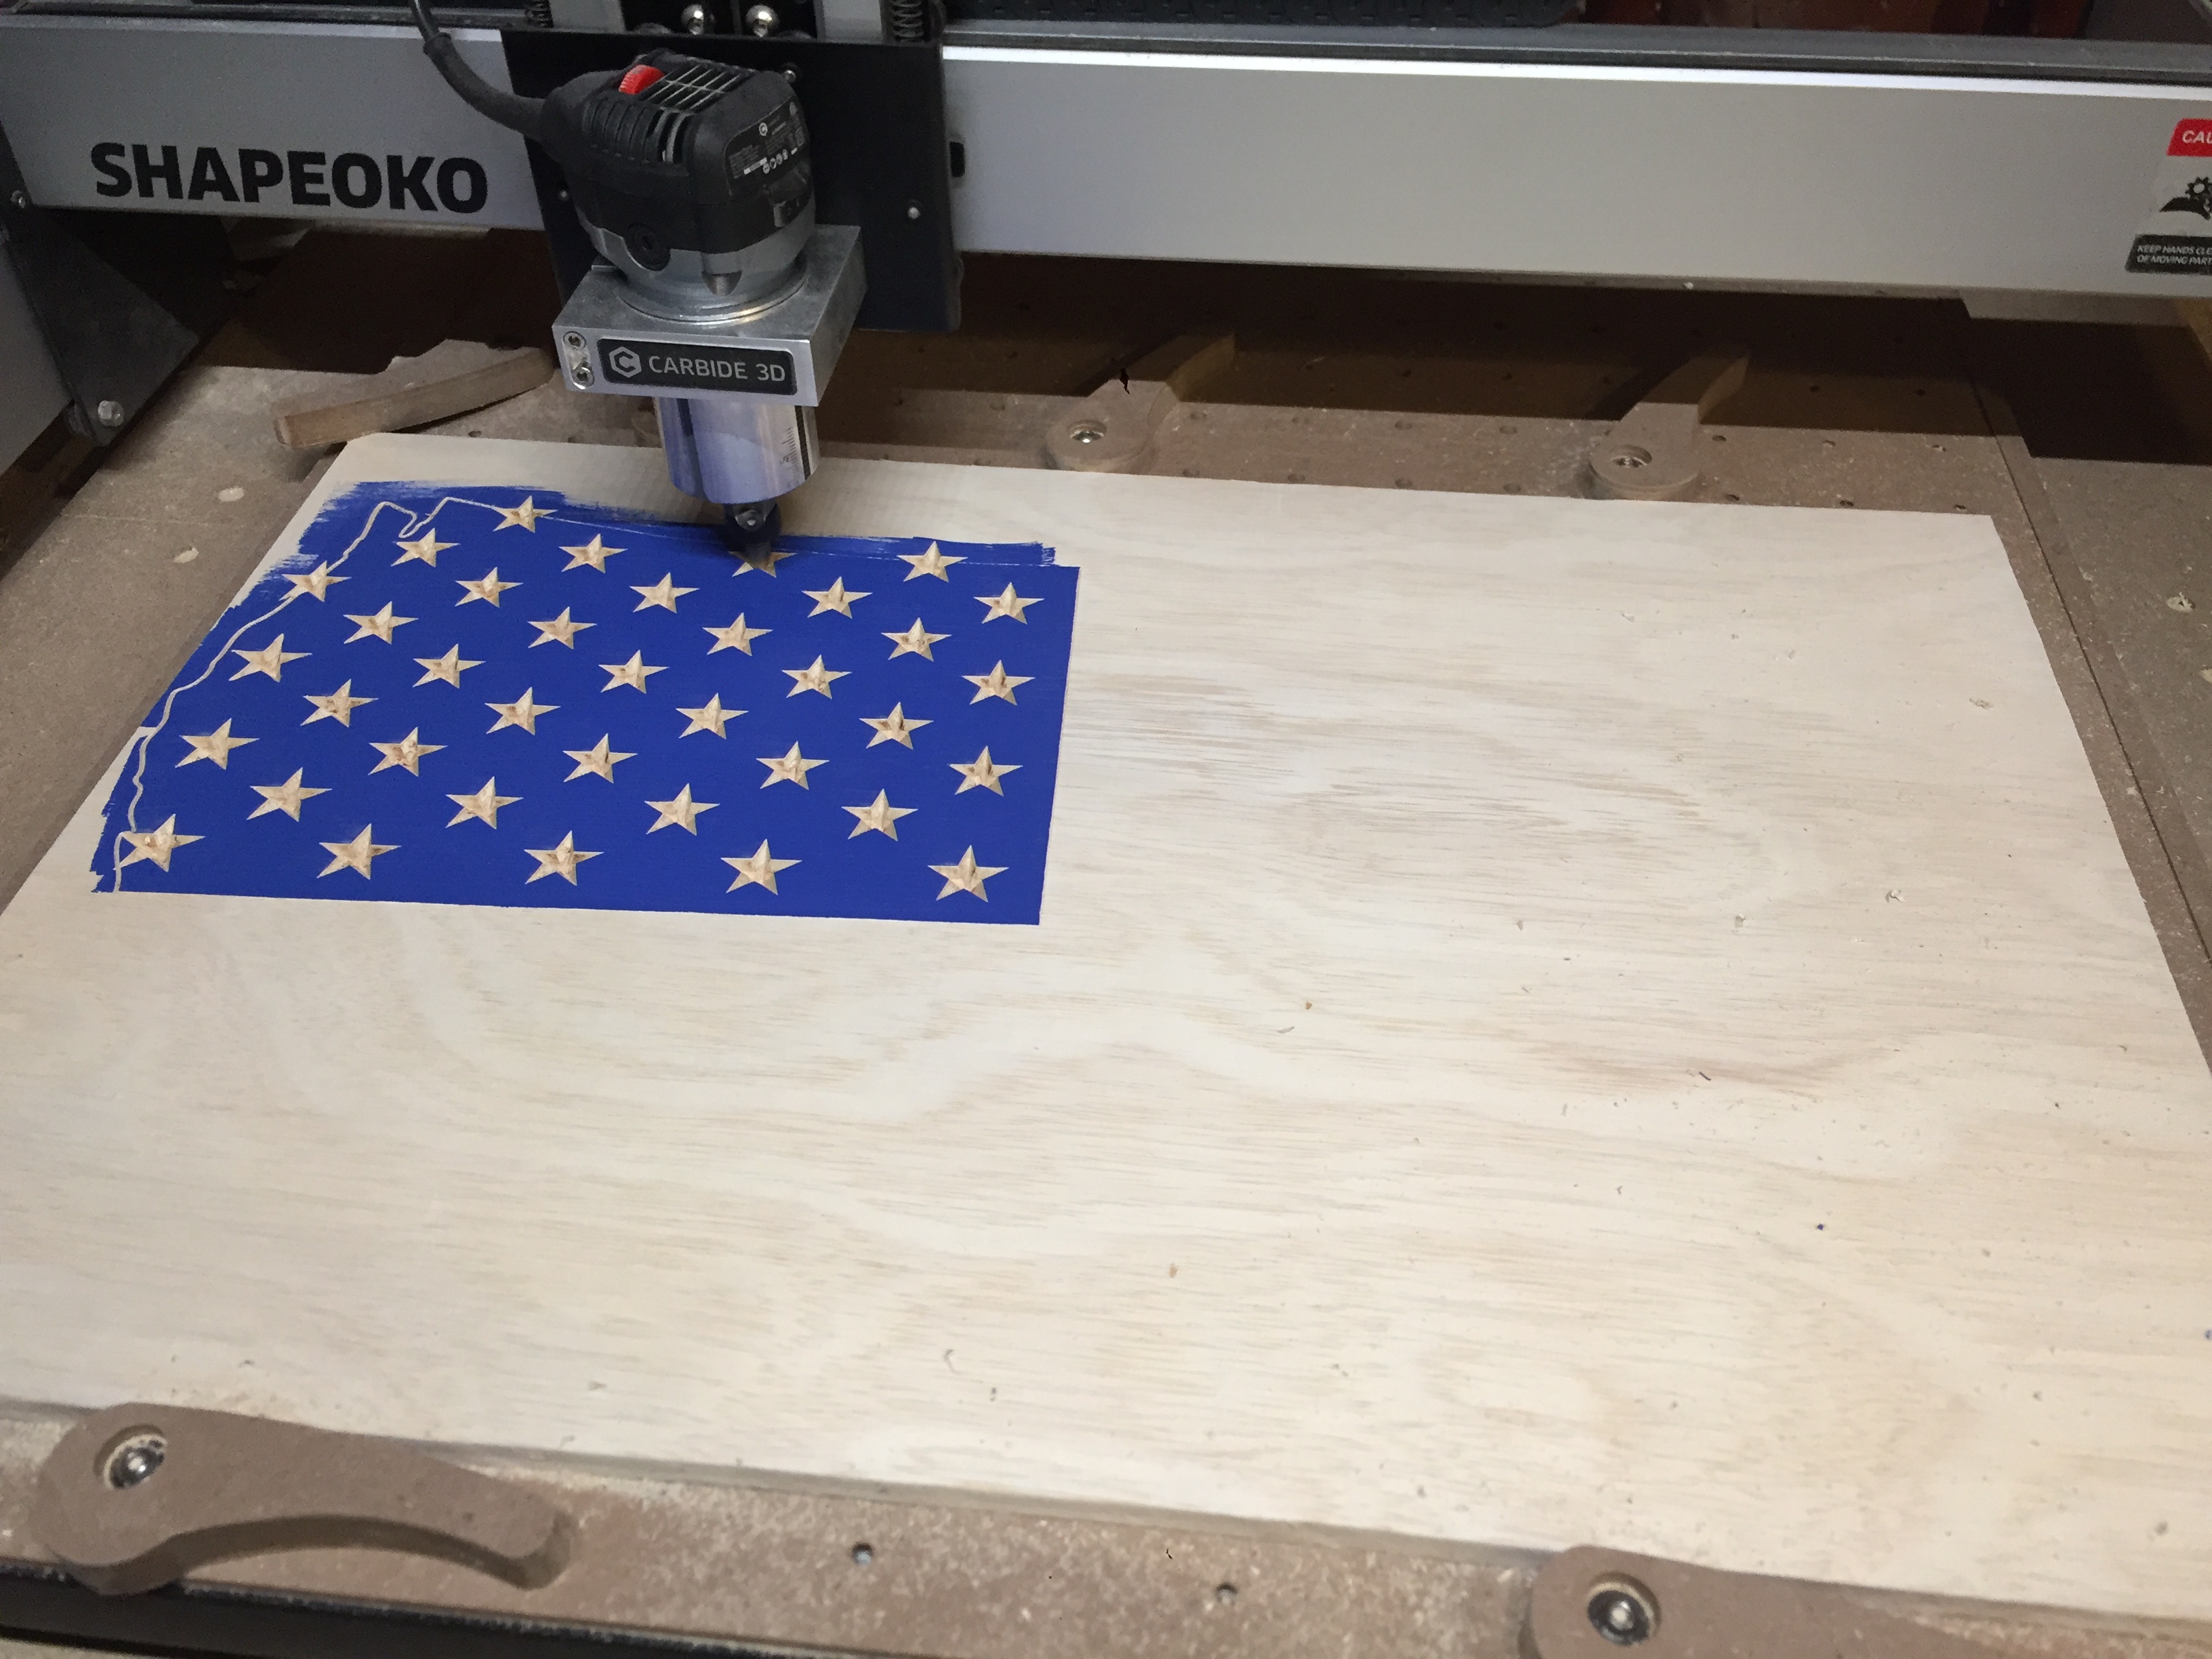
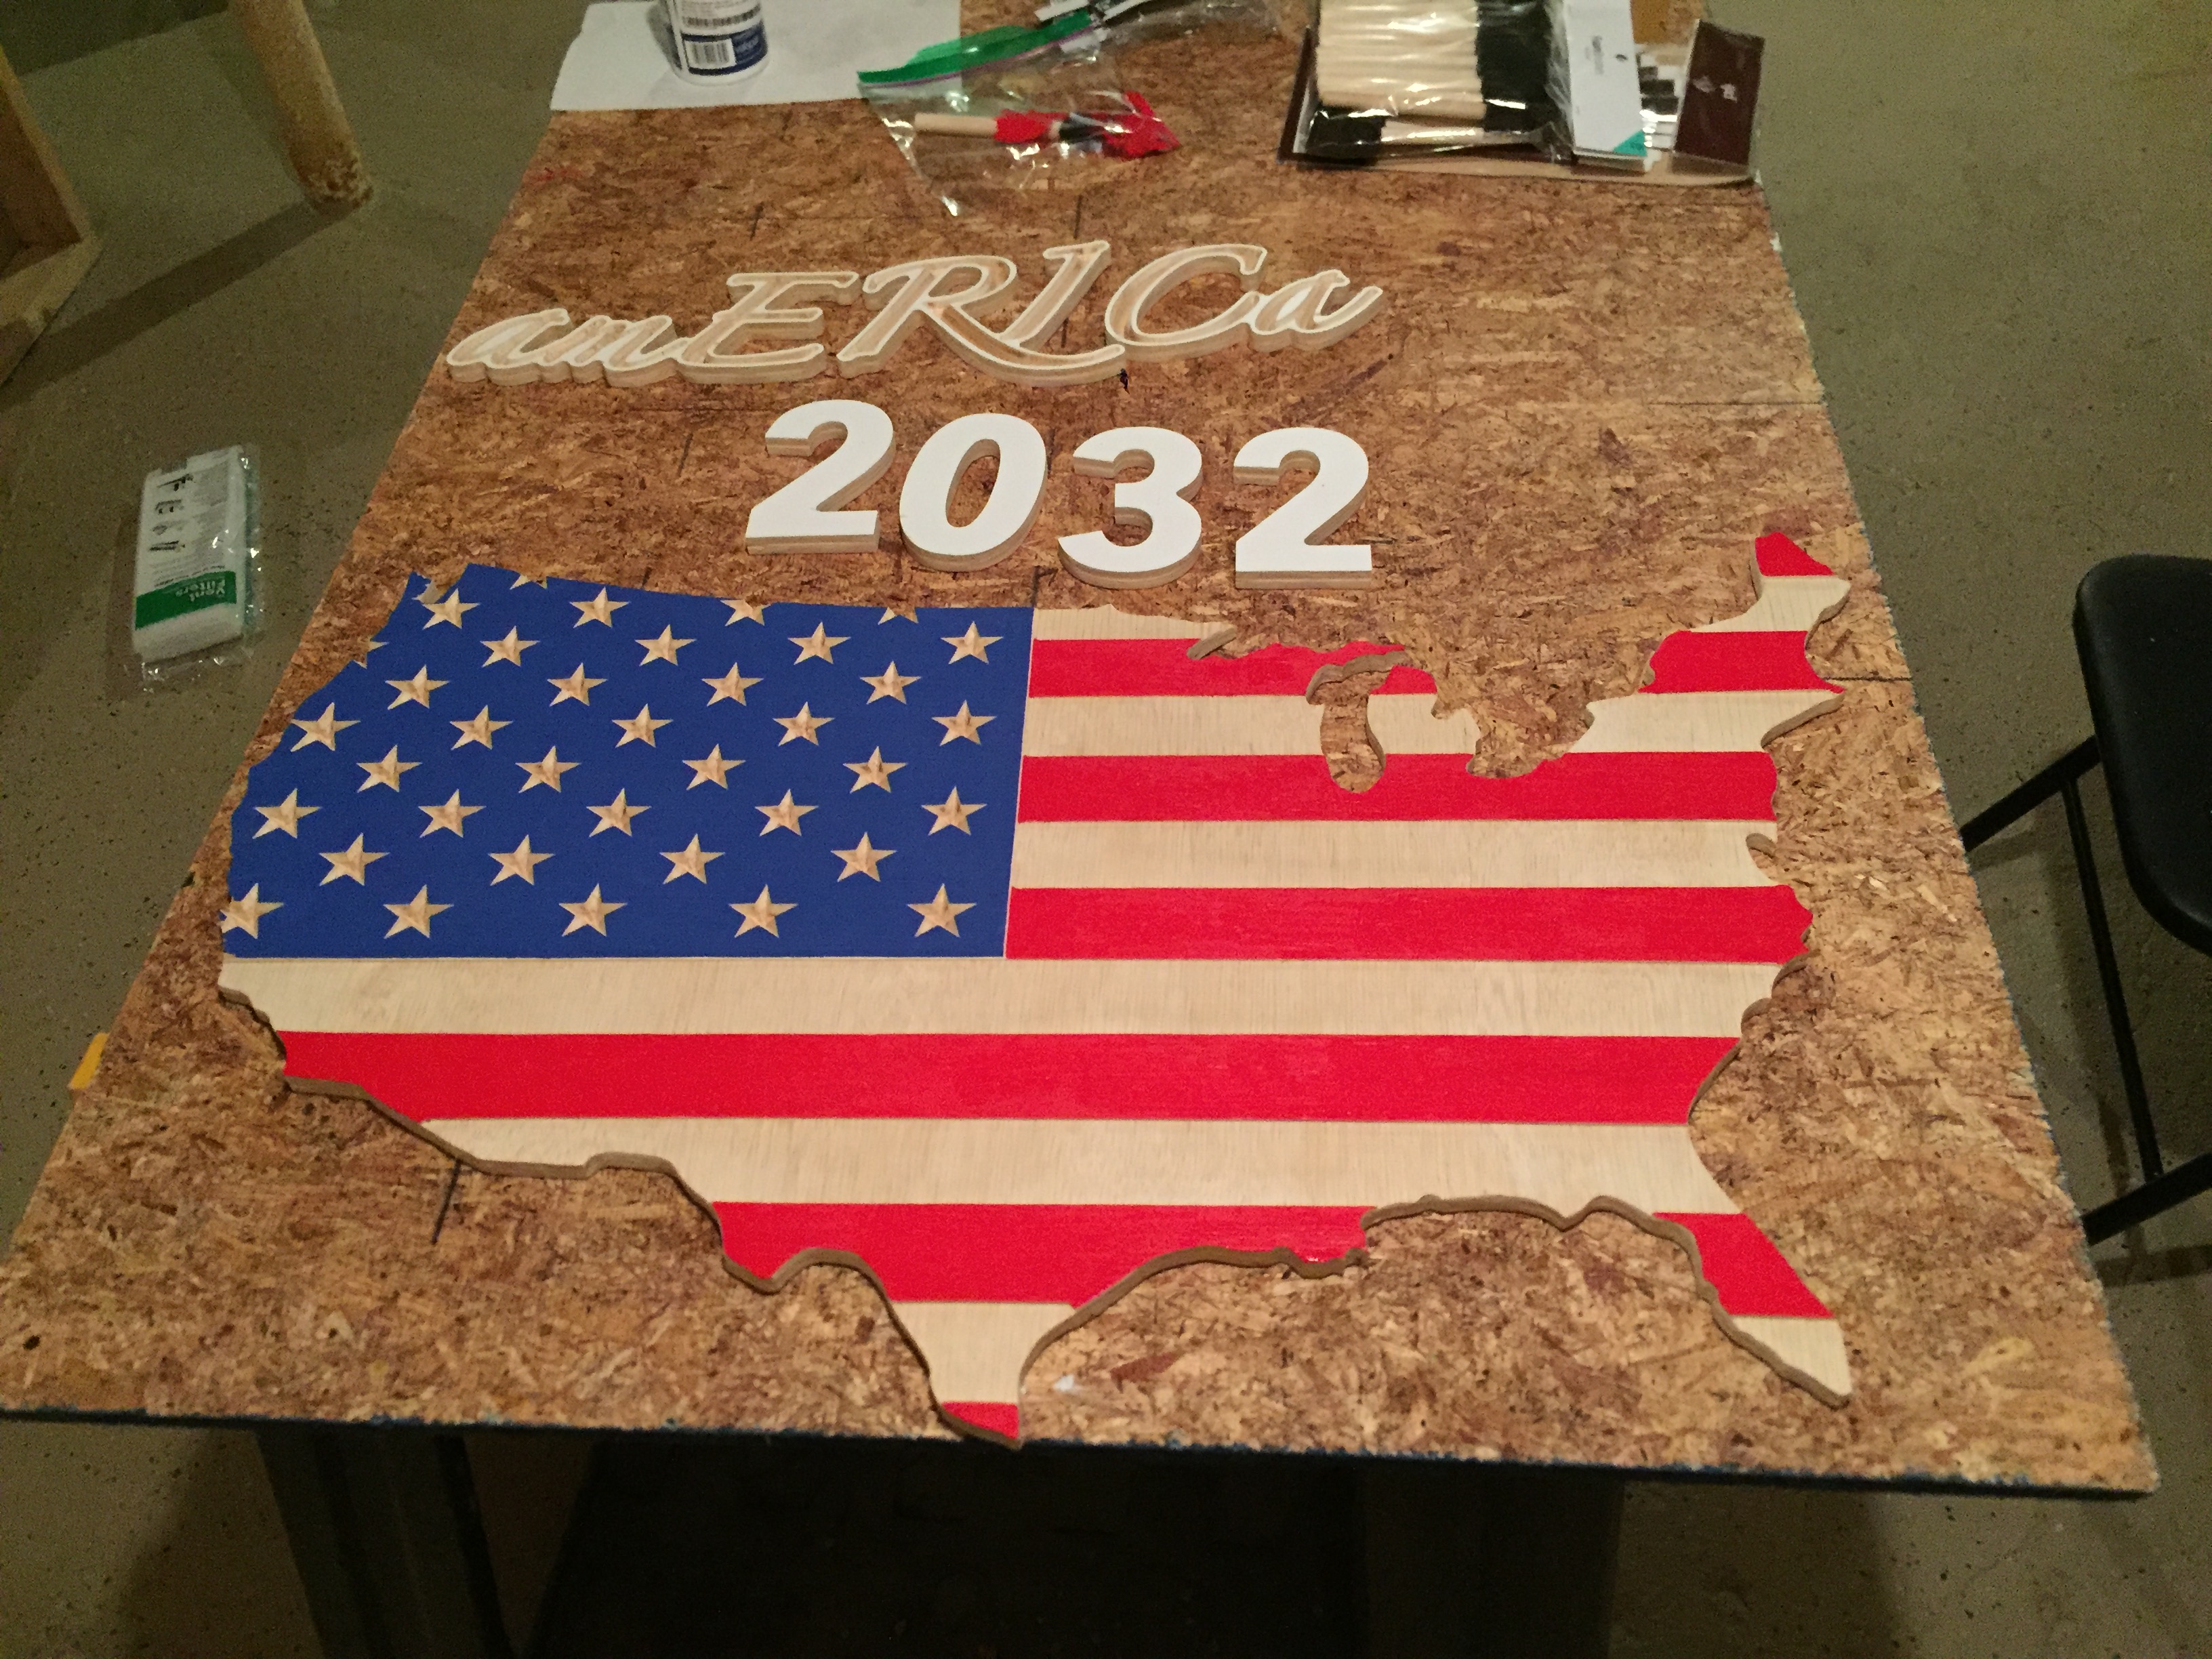
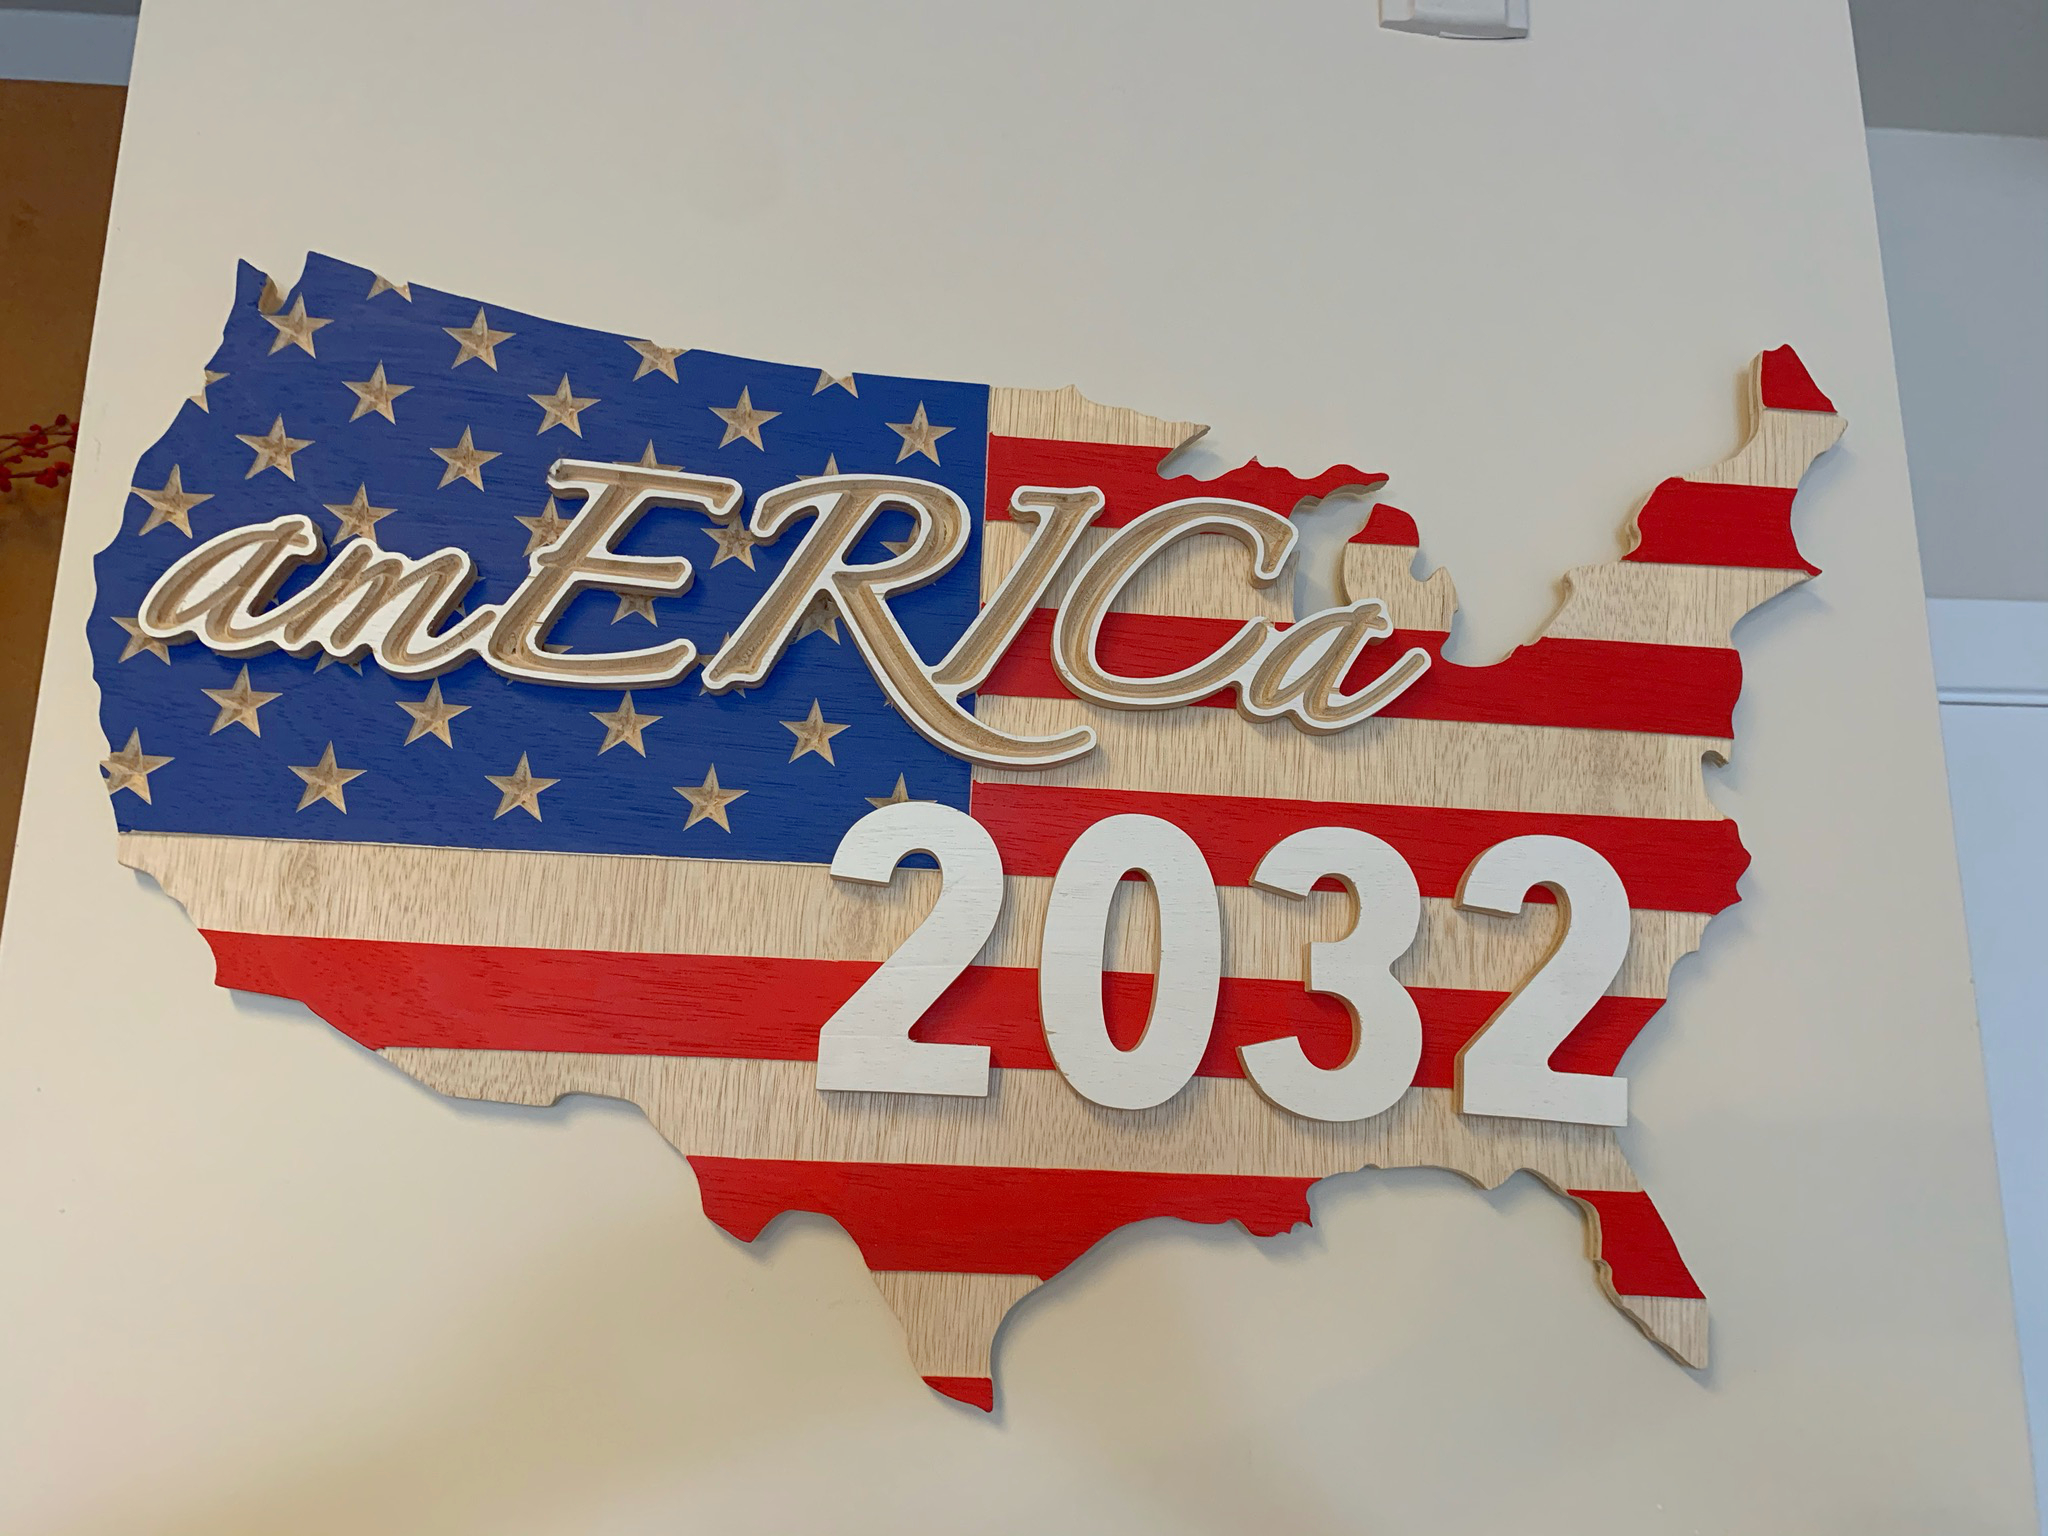
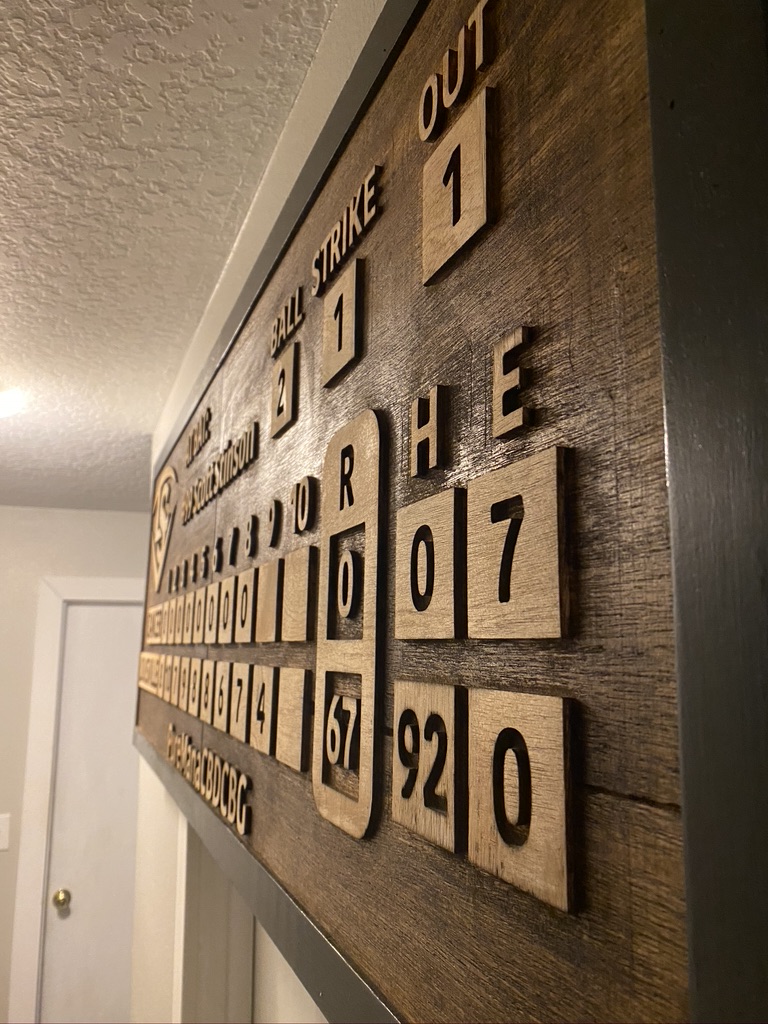
I recently did that one for myself, which reminded me that plaques are fun to make:

keepcalmcarryon

Anyhow, the rules for this 9th challenge are:

  • submit your entry in this thread:
    • the sign/plaque must have been made (at least mainly) on a Shapeoko or Nomad.
    • you must include pics of the finished piece.
    • you must include the design file (so watch out for any licensed vectors you might use, that might not be shareable)
    • tell us about your mistakes, tips and tricks, etc…

And I’m adding a :warning:NEW RULE :warning:: I will add +2 to how many votes you get, if you also upload your design file and a few pics on CutRocket. Since we see a lot of great projets in these challenges, we might as well make them accessible there.

  • you can post multiple entries if you want.
  • timeline:
    • deadline is set to June 14th, midnight PST
    • there will then be 7 days for voting.
      • voting will be open to legit community members only, and the jury reserves the right to remove votes from “outsiders”, and will also break any tie.

Here are the prizes for this challenge:
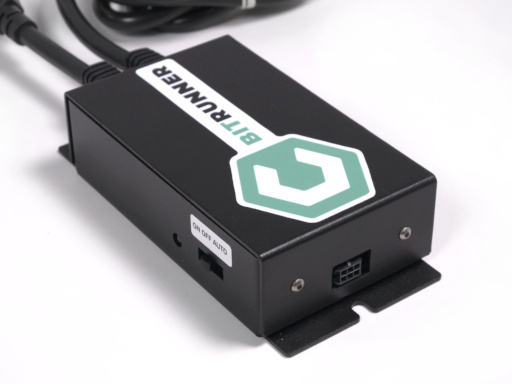
image

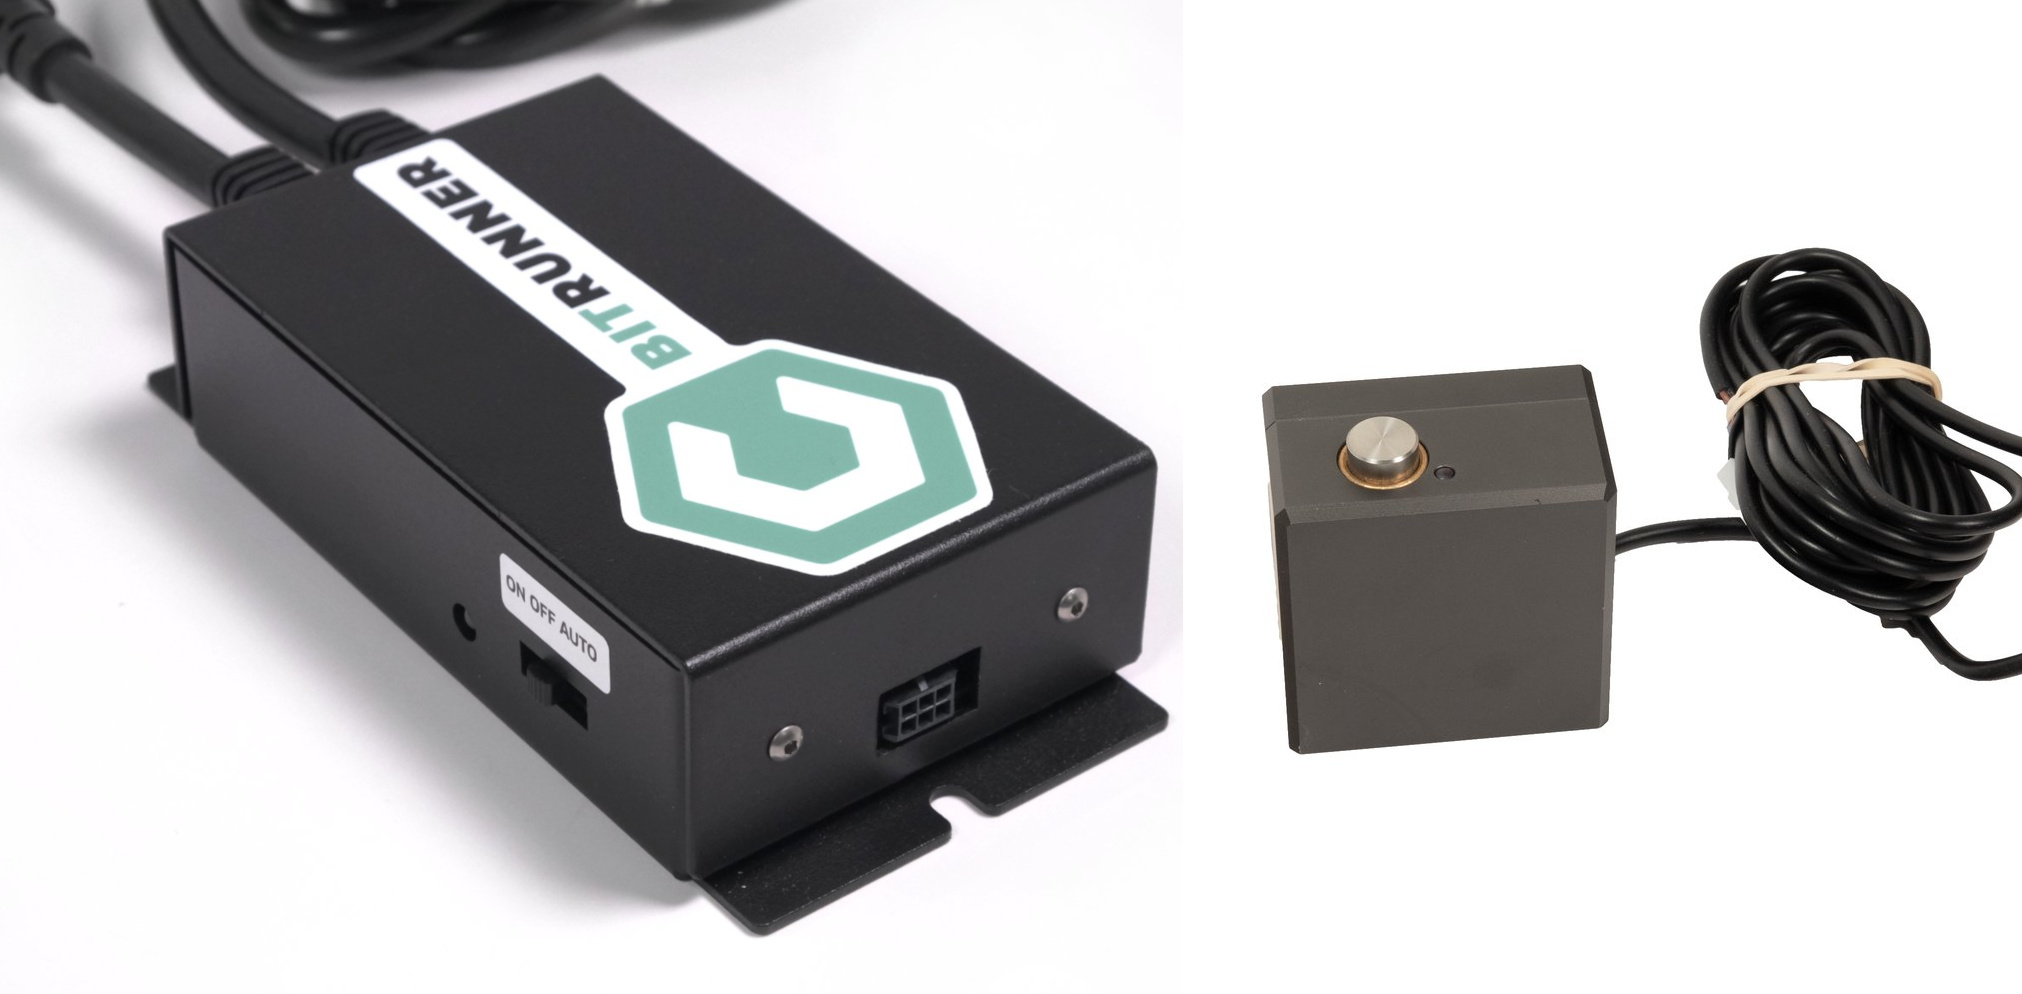
  • Jury’s prize: one BitRunner

image

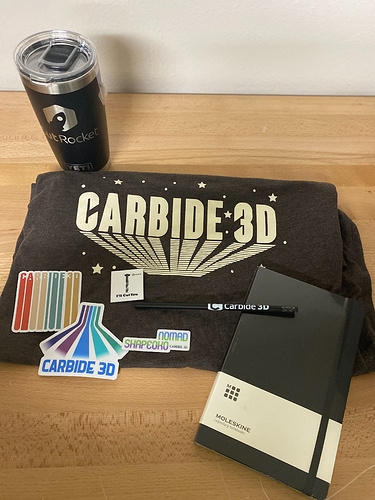
And Carbide3D swag as the cherry on top:

image

Let’s see those signs/plaques!

14 Likes

@Julien they are practical ikea cutting boards :rofl: :rofl:

4 Likes

I’m going to shamelessly follow Julien’s example and post one of the first sign projects that I created. This hangs proudly in my shop, near the tablesaw, and is a reminder to me to use caution! Yes, I still have all my digits :slight_smile:


I had a piece of redwood for many years in the back corner of the garage knowing someday I wanted to make a sign with it. And then I found Carbide 3D and the Shapeoko and the rest is as they say, history.

This was a rough sawn piece of RW and had a pretty good twist in it 24" (60.96 cm) length. So I just mounted it on the machine bed with shims taping it down really well around all the edges. Also used clamps butted up around the perimeter which made for a very solid work holding. After leveling the first side I just flipped the piece and ran the same process to get a nice flat work piece at 1.375" (3.4925 cm) thick.

I knew from some previous epoxy work that the cuts wouldn’t need to be very deep to get the translucent look that I was after. So in this case, the cut depth was set to 0.200" (0.508 cm). You can see in the font chosen that smaller bits needed to be used to cut the edge detail. Simply creating a contour tool path to cut around the letters with a 0.125 bit after the rough cut got most of the edges. This still wasn’t enough to get the detail between the Rs and the tips of the Ss, but creating a toolpath in these areas took care of that using a 0.0625" bit. Not sure why the toolpaths are off using the new version of CC, so watch out for that if you use the attached file.

The epoxy was one of the many available, I didn’t know very much about it at the time (still don’t) and wasn’t to picky. The coloring was a combination of Craftsmart Sapphire metallic and Folkart Ultra Dye 5606 Blue Bayou. It’s doesn’t take much color, 5-6 drops of each to get that rich color look but to remain translucent.

Lessons:

  1. Don’t worry about the rough lumber being warped, we all have these really nifty planners!

  2. Seal the wood before applying the colored epoxy! Doing so prevents the edge bleeding AND the formation of hundreds of bubbles as the epoxy makes it’s way into the super dry wood! Can’t emphasize this enough as I watched in horror (pun intended) as the bubbles just kept forming. I’ve recently been using shellac as it absorbs nicely, allows multiple coats in a short amount of time and doesn’t discolor the wood, at least not much. Here’s an example of that bleeding:
    bleed

  3. Make a final cut on the epoxy and then spray with polyurethane. Wish I would have thought about this before, but I suppose it’s not too late to go ahead and make that final pass to fix this one. I’ve discovered in subsequent projects that this method works really well for me without the hassle of dripping epoxy around the edges and makes a nice flat no bubble finish. You can select the gloss level desired with the poly, gloss, satin, flat etc.

  4. It’s possible, but probably much easier, to do all of this machining without a BitSetter as I still do not have one.

  5. Use brass for the inlay, it doesn’t bleed as much :slight_smile:
    LittleShopHorrors.c2d (416.1 KB)

And don’t forget the CutRocket link!

11 Likes

Perfect timing for this since I just finished making this belated Mothers day gift for my Mother in laws backyard pool.

First attempt was in MDF, I thought maybe I could seal it up well enough but after talking with many people on forums, I wanted to make sure this would not be hurt by weather, so I went to Home Depot and picked up a sheet of 3/4" PVC. I gotta say, this stuff cuts like butter and I love it.

Tool 1 was a 1/4 2 Flute Carbide end mill (standard upcut). 150IPM feed rate 50IPM Plunge rate, .125 depth of cut, .1875 stepover.

Tool 2 was a 1/8 2 Flute Carbide end mill (standard upcut). 200IPM feed rate 50IPM Plunge rate, ."125 depth of cut, .09375 stepover.

Tool 3 was a 30 degree engraving bit 100IPM feed rate 50IPM Plunge rate, .".0625 depth of cut, cut on the profile of the chairs to get the fine details.

Tool 4 was a 1/4" Carbide Ball End Mill 400IPM feed rate 100IPM Plunge rate, .25" MAX depth of cut, texture tool path.

Tool 5 was a 60 degree Vcarve bit 200IPM feed rate 50IPM Plunge rate, .".0625 depth of cut, cut on the profile of the flip flop insides to get the fine details.

Tool 6 was a 1/4 Compression bit (only because it was the tool i have with 1" cut length) 100IPM feed rate 30IPM Plunge rate, .".125 depth of cut per pass, .77" total depth cut on the profile outside to cut free.

Once cut free, I hit the outside with the router table to give it some more rounded look.

After cutting, I Spray painted with a plastic primer spray paint (Krylon Fusion) and hand painted the rest.

This was all pretty quick thanks to my Bit Setter :slight_smile:

Link to Cutrocket! –https://cutrocket.com/p/5ed2e15026432/

BACKYARD PARADISE FLIP FLOPS BACKYARD PARADISE FLIP FLOPS.dxf (3.8 MB)

16 Likes

Here is my sign (Clock), We needed a clock for our Sunday School room and i thought this would be perfect. Made from some oak that was given to me, programed in Vcare Pro,
image

10 Likes

@MikeG: this made me smile:

But I’ll note that it can induce bleeding…on finger tips, if one is not careful when filing off those sharp edges after a cut. I wouldn’t know about that, but " a friend told me it can happen" :slight_smile:

@Sbedow7885: isn’t it fun and satisfying to cut at those high feedrates ? :sunglasses:

@BoWesson1: thanks, don’t forget to edit your post to join the design file if you want to validate your entry

4 Likes

It is Julien, I started with the HDZ so I am sure I’m spoiled… i have the 7w Jtech laser and I just did some black anodized cards for first responders, and I had it going 400ipm… just fun to watch!

3 Likes

Note to everyone: when you upload a project on CutRocket, it may take a day or two to be listed / show up in the public page, just wait and it should be there after a while.

4 Likes

Start with a father in law who has everything but you need a birthday present. So you come up with a plan to make a sign with boat cleats but find that the size and shape you want are weirdly expensive. If you only had a CNC. I sketched the boat cleats in fusion, pulled it together in V-Carve including recessing the boat cleats about 1/8” to hopefully make them secure if something is hung on it. Boat cleats are out of mahogany found at a yard sale and the walnut is from a tree milled at my in laws property.


Link to Vectric Files

22 Likes

Nothing fancy but a surprise gift for some friends

10 Likes

Hi, I was thinking of making a sign for a shop in the city of Aigues Mortes, but it might be just for the challenge…

So I made the one for Carbide 3D. I had a material to test for another project, (aluminium/polyester panel, 3mm) and I also wanted to get an idea of the machining on boxwood (buis in french).


panneau logo carbide 3d.c2d (444.0 KB) decoupe 3D.c2d (133.4 KB) ![Capture|690x351](upload://vDrjZmSUOYhY2ivmzhQgehkRhexagone 3d.mcf (106.4 KB) SN8.jpeg)

11 Likes

This the first desk plaque I made after setting up the Shapeoko and making my spoil board and clamps.

The plaque is made out of walnut with 8 x 2 x .5. A .25 in pocket carved around the letters filled with Alumalite Resin.

My brother in-law has a Brush car from the early 1900’s. He did not have the brass name plate that was originally in the front of the radiator. So working from a picture I traced the imagine he had and made a brass sign as shown. First time I tried any metal in my machine.(XL) It seems I could have had a faster speed. The first thing I did was made sure the waste broad was level. To fasten the brass down I used two layers of masking tape and super glue. Just used paper to find the top of the surface and started it. Had a little clean up with some sandpaper because the bit was just cutting into the blue tape and brought some of it up to the brass. But it did not clog anything up like I was afraid it might.


Original imagine from the front of a car


Imagine copied


Doing the cutting. Used an 1/8 inch bit.

Finished
BrushSign25High.c2d (591.6 KB)

13 Likes

A family member recently graduated from law school and decided to enter public service. As a gift, I wanted to make a multi-layered sign that contained depth utilizing red, white, and blue colors. We joke that 2032 is an important election year because it is the first Presidential election cycle where he will be old enough to run. I gained inspiration online, and I worked in Carbide Create to design the concept through trial and error. I followed tutorials online to practice using Carbide Create’s boolean functions to combine a flag with the shape of the USA, for use as the sign background.

I used 1/2 inch Sande plywood from the local big box store and learned that using this type of plywood in combination with an upcut and v-carve bit requires a lot of post-sanding afterward. Very fuzzy material. However, it was a blast to make.

Lessons:
Since I’m new to CNC, I played cautiously on my feeds and speeds. I began with the default settings in Carbide Create and slowed it down from there before exporting the G-Code. I did everything in Carbide Create and used my Shapeoko XXL to cut the pieces out.

To prevent setting the feed rate too high and damaging the bit or workpiece, I start slow and use the increase/decrease the speed feature in Carbide Motion for fine-tuning. To minimize tool changes, I chose to use #302 and #201 bits.

I found out the hard way that you’re not supposed to zero the Z-axis (only) with a C3D touch probe hanging off the corner of the workpiece, in the same manner, you zero X, Y, and Z simultaneously. The cutter plunged deeper than expected and blew the tabs off rather quickly on one of the numbers, removing it. After stopping the machine, and re-reading the touch probe instructions, I realized that to zero the Z-axis only, you need to use the probe sitting entirely on top of the work surface.

Overall, this sign was fun, and now my wife wants one!


I used one file to make sure I like the size of all pieces.


I exported the letters and numbers to a second file to cut on a small piece.


Cutting the stars.


Cutting the stripes and profile cut at the same time.


V-Carve for the inside of the amERICa lettering.


Pre-assembly


Photo of the final product!

USA_Flag_Rev7.c2d (1.7 MB) amERICa_Rev8.c2d (2.2 MB)

CutRocket Link!

16 Likes

Got another one ,while done on a ShapeOko 3 XL, this was done with the Jtech 7W Laser attachment.

1/2" x 5.5" x 12" Poplar board
80IPM x 80% Power , .004" Stepover
Photo of Car & Engine were processed with a Laser Prep Script from Infinitelaser.us (the script i use is the one for GIMP ).
Each Photo was set to 600DPI with the script.
Shellack finished


9 Likes

aaaaaaaaaaaaand another… Aparently my wife thought the laser engraved sign didnt look very good… so after a wave of “here look at this from pinterest and Etsy” for inspiration… I decide to do some 3d reliefs on a sign. This one was fun… lots of learning on my part. It has a engine piston, two spark plugs (you can actually see the threads on them!) a wrench and a screw driver…

I carved this into 3/4 baltic birch from Home Depot… and after seeing the voids and crap under the top surface I now know why everyone says to get ply from a lumber yard if you want better quality.

Tool 1 was a 1/4 4 flute end mill - used to rough the 3d and pocket in.
Tool 2 was Yonico 37310-SC 1/32 tapered ball nose used for the fine detail 3d work
Tool 3 V-Bit (60 deg 0.5") for engraving the Text and Ford oval (not the ford text)
Tool 4 Engrave (30’ 0.003937" used to carve the Ford text

I tried to profile the inside of the pocket to clean up the beaver teeth marks left from 3d roughing, but i rushed and didn’t clean it up fully… now, i call it intentional texturing :slight_smile:

the person this is going to wants to paint it themselves so no pictures of it finished yet.

KURTS GARAGE SIGN.dxf (625.5 KB) KURTS GARAGE SIGN.stl (2.0 MB)

11 Likes

Looks good. Do this in foam or PVC sheet next time. You will be more amazed at the results. (There are many types of foam and PVC.)

5 Likes

Yes I agree, the backyard sign up above was PVC and it was a better result.

So I dont know if im posting this right or not lol this is my first time enbetering a contest on here. I have a Shapeoko xxl. I have had it for about 8 months now and I love it. Super user friendly, I learned very quickly from everyone on facewbook groupd and the cutrocket site. I mainly bought the xxl to do larger products and was not very educated when I bought the Shapeoko xxl as I thought it would do larger projects all at once. Was I wrong lol so I tought myslef to I guess people call it tileing? Im not sure, I use carbide create and carbide motion so I kow my design options are limited.

Quick back story on the project, a friend of mine who is sponsored by Louisville Slugger’s softball team was diagnosed with throat cancer. He has been going through radiation treatments and always saw my work I posted on fqcebook. He asked if I could design him a sign and to be creative, so this is what I cam up with. Before anyone says anything, yes I know I have the score in the 9th inning wrong (if you know you know lol) but I designed this sign 60" x 30" he wanted something big and I had never done anything over 30" but I wanted this to be special.

Im not expert and im sure I could have done this an easier way but im new lol So I used a piece of birch cut it 30x30 and did a pocket path with a 1/8 bit I bought on amazon (totally a chinese brand but all i can afford right now lol) I designed the who9le sign in carbide create and split it in half at what I thought was a good non noticable place and did a pocket path 0.180 and it was off. Took about an hour and a haldf per piece, then I just used pocket screws and some glue.

Used dark walnut stain on the pocket path and just a clear coat on the rest. Then sprayed with shellac to seal.

He loved it and brought him to tears. It took me a whole day to do but its because I am still new top bits and selecting the right ones for the job. Also, staining and sealing is a pain in the butt.

Scott cut.c2d (1.2 MB)

18 Likes

Hi all,

I was working on this sign with “caveman style” pictograms, depicting the process of selling a christmas tree :sweat_smile:.

I’ll give it to my cousin as a gift. He sells christmas trees as a hobby during december. The text in the center is German for “christmas trees”, where the umlaut Ä is replaced by the tree shape.

It should be self-explanatory, but from left to right:

  1. The tree ist cut.
  2. The tree is wrapped, using a funnel to put it in a net.
  3. The customers get some mulled wine or some other sort of drink that heats from the inside.
  4. Happy customers walk away with their tree.

The piece is about 2.5 cm thick oak and 40 cm wide with bark and the pictograms are made from epoxy resin inlays.

So after doing the carving, colored resin was put on the piece…

… to be later milled off.

Didn’t work out too well, though. I don’t know if the stock material was bent or if my Shapeoko is. Anyway, I think an error in the Z depth should’ve showed in the carving as well, but it did not.
Maybe the stock bent after applying the resin, because it heats up during hardening?

So I sanded the remaining parts off by hand. Went outside for that (epoxy resin dust bad).

Finishing was done with linseed oil. Putting on the oil is always my favourit part!

Most important lesson learned was probably how important zeroing is for both, the V carve and the later removal of the protruding resin. I thought like, “who would notice a quarter millimeter?”. But this results in half a millimeter wider or thinner contours, and where the contours are already quite thin, that makes some large visible difference!

Here goes the pretty simple desing file: Weihnachtsbaeume_piktogramme.c2d (2.4 MB)

11 Likes