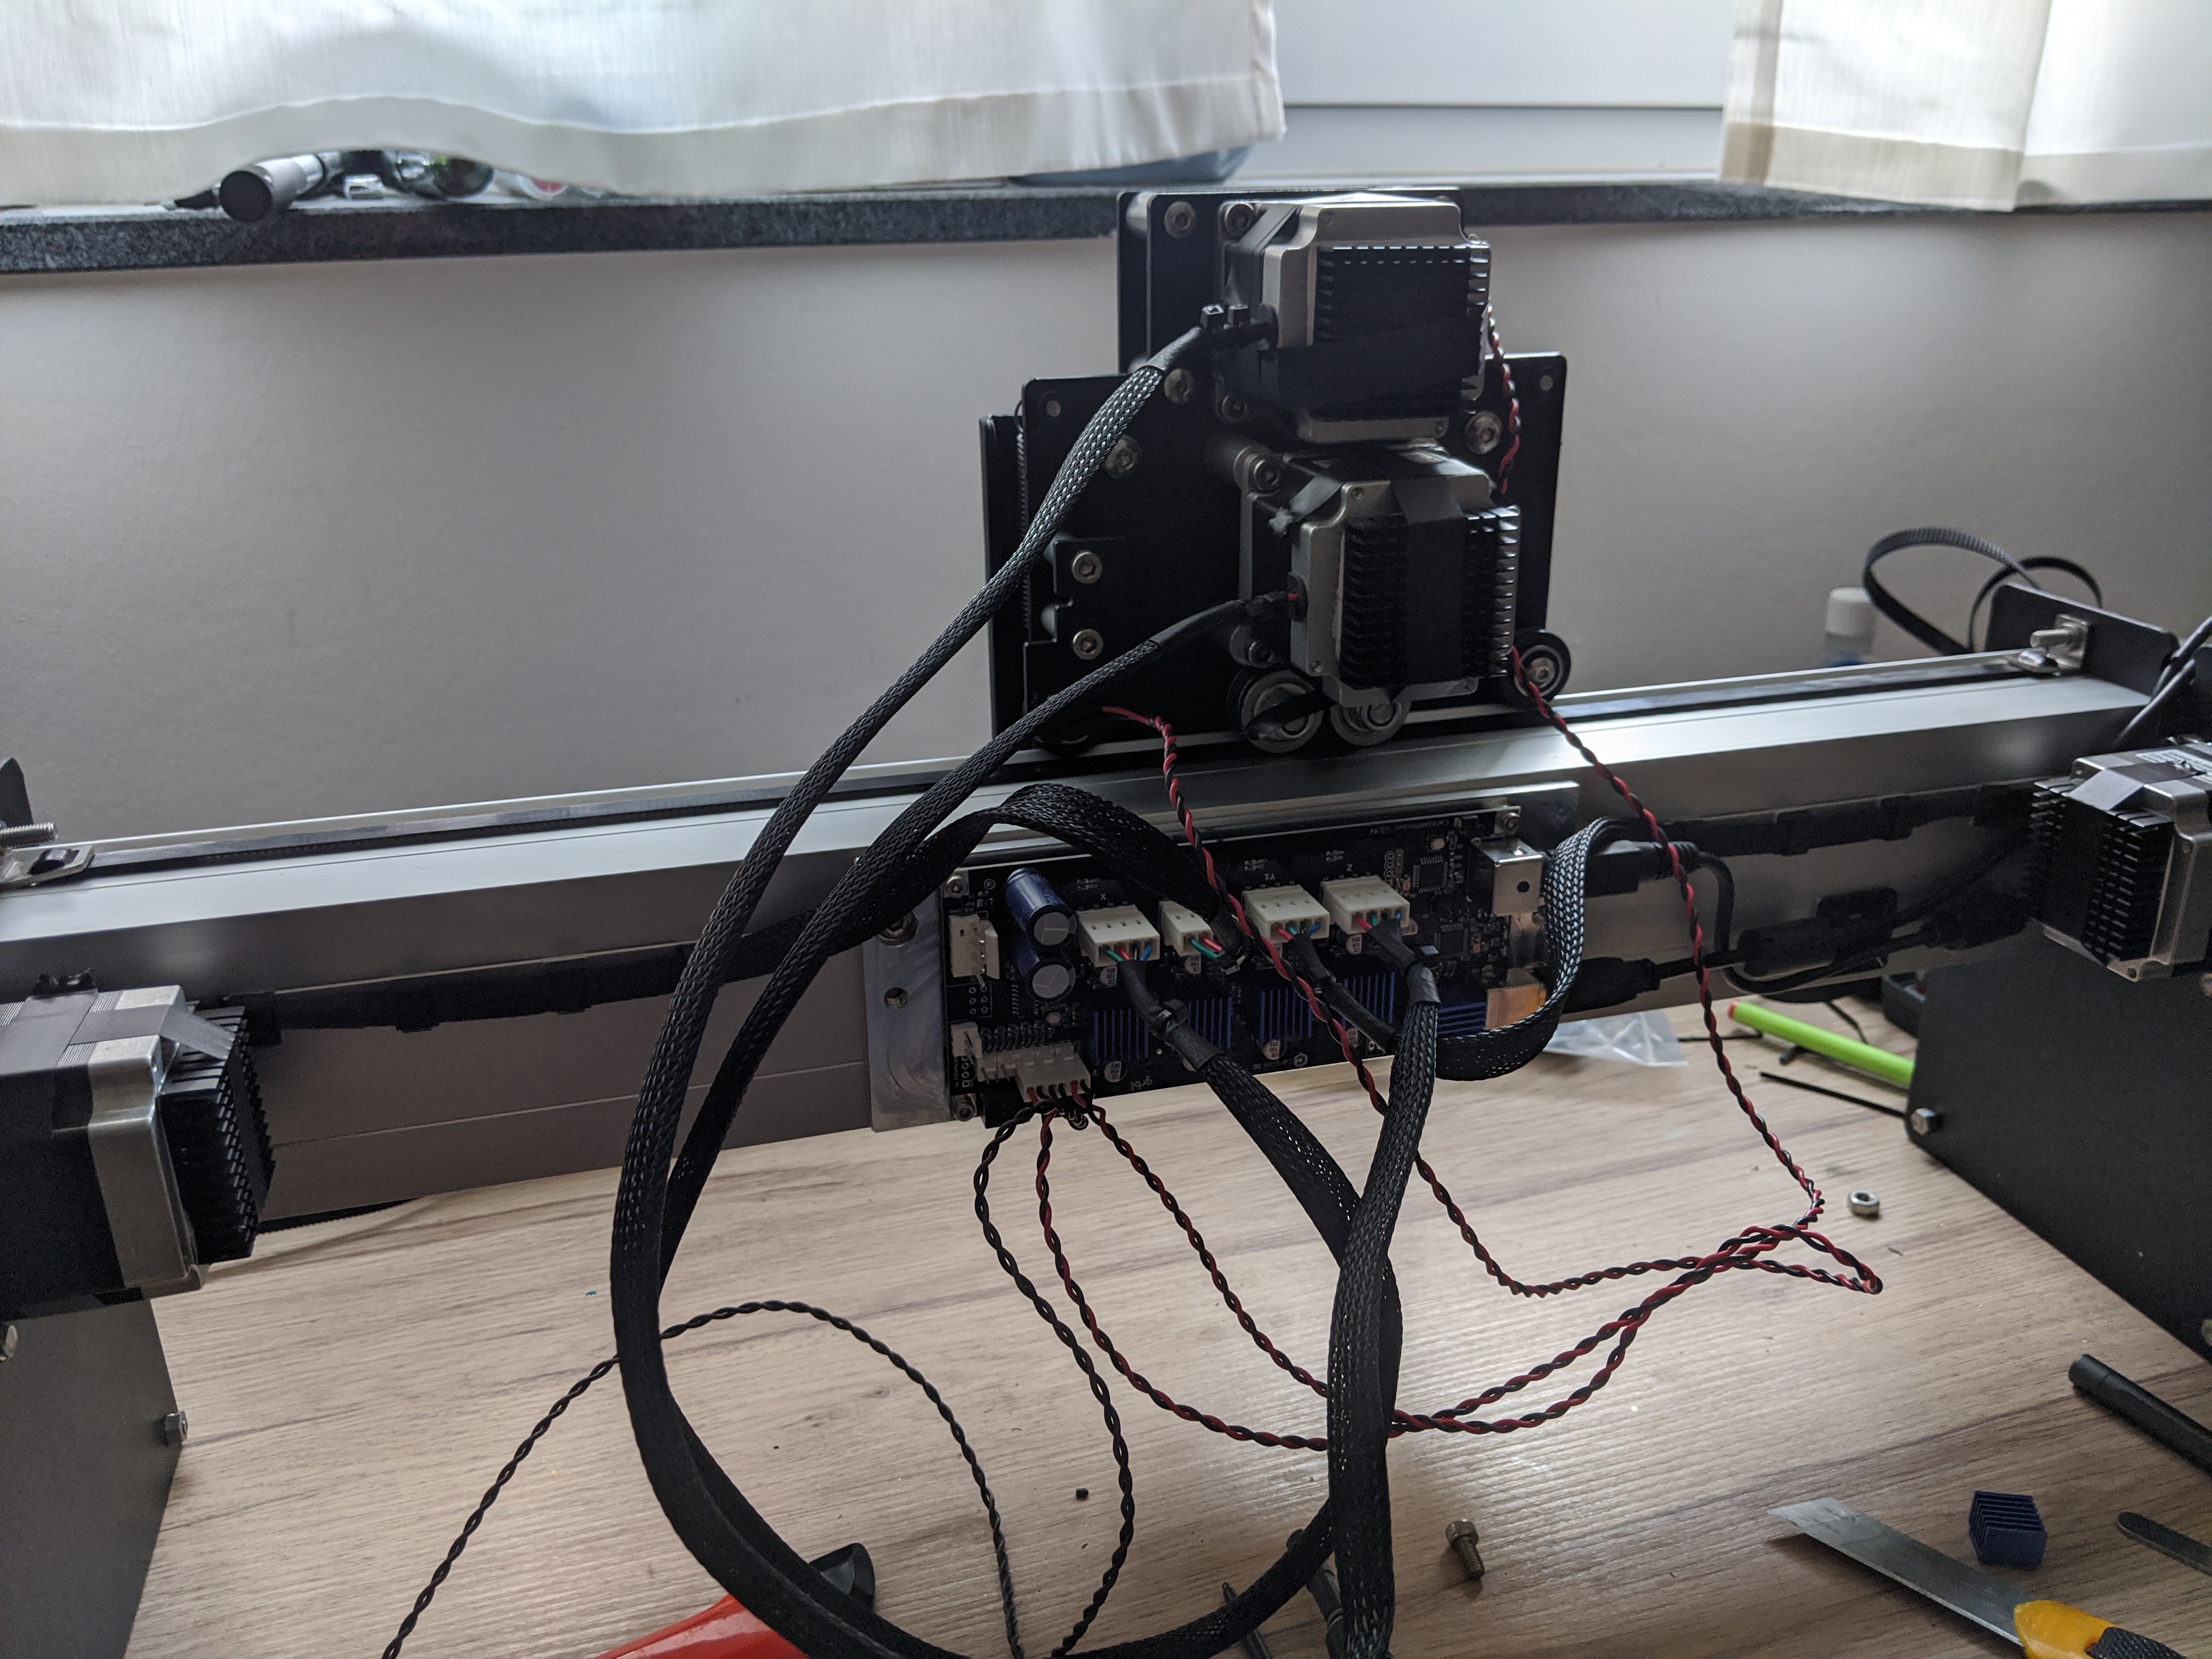
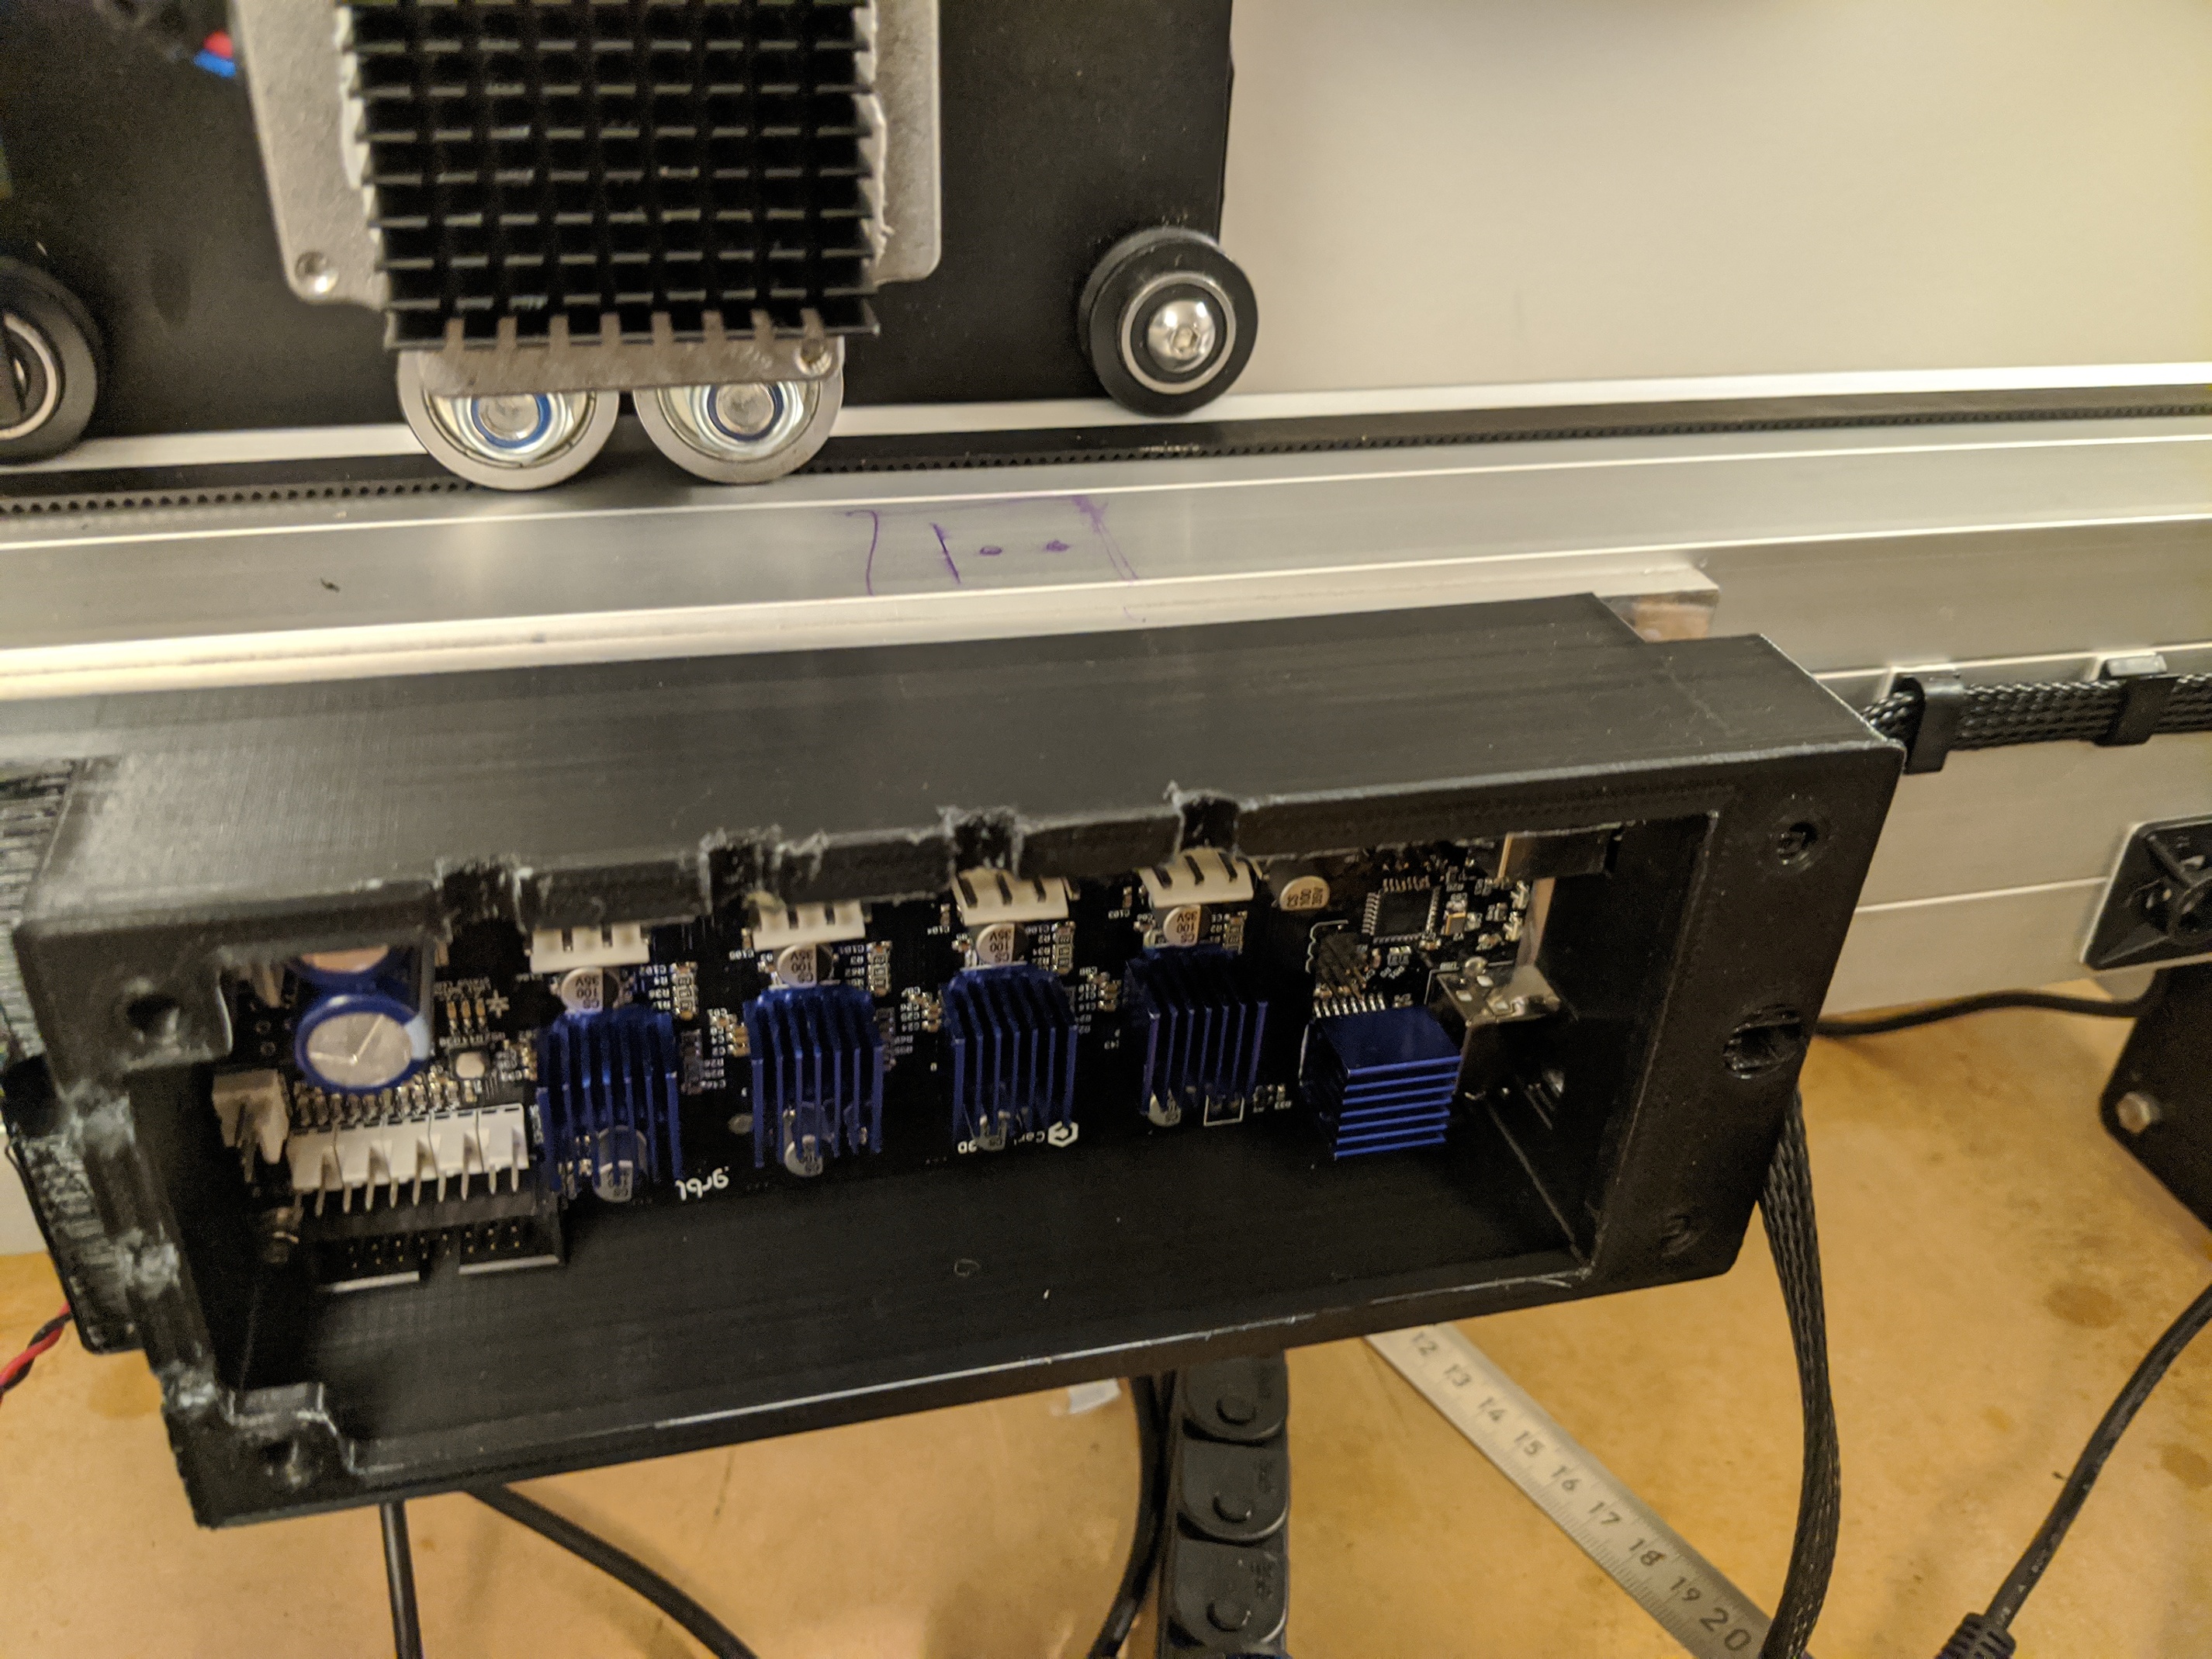
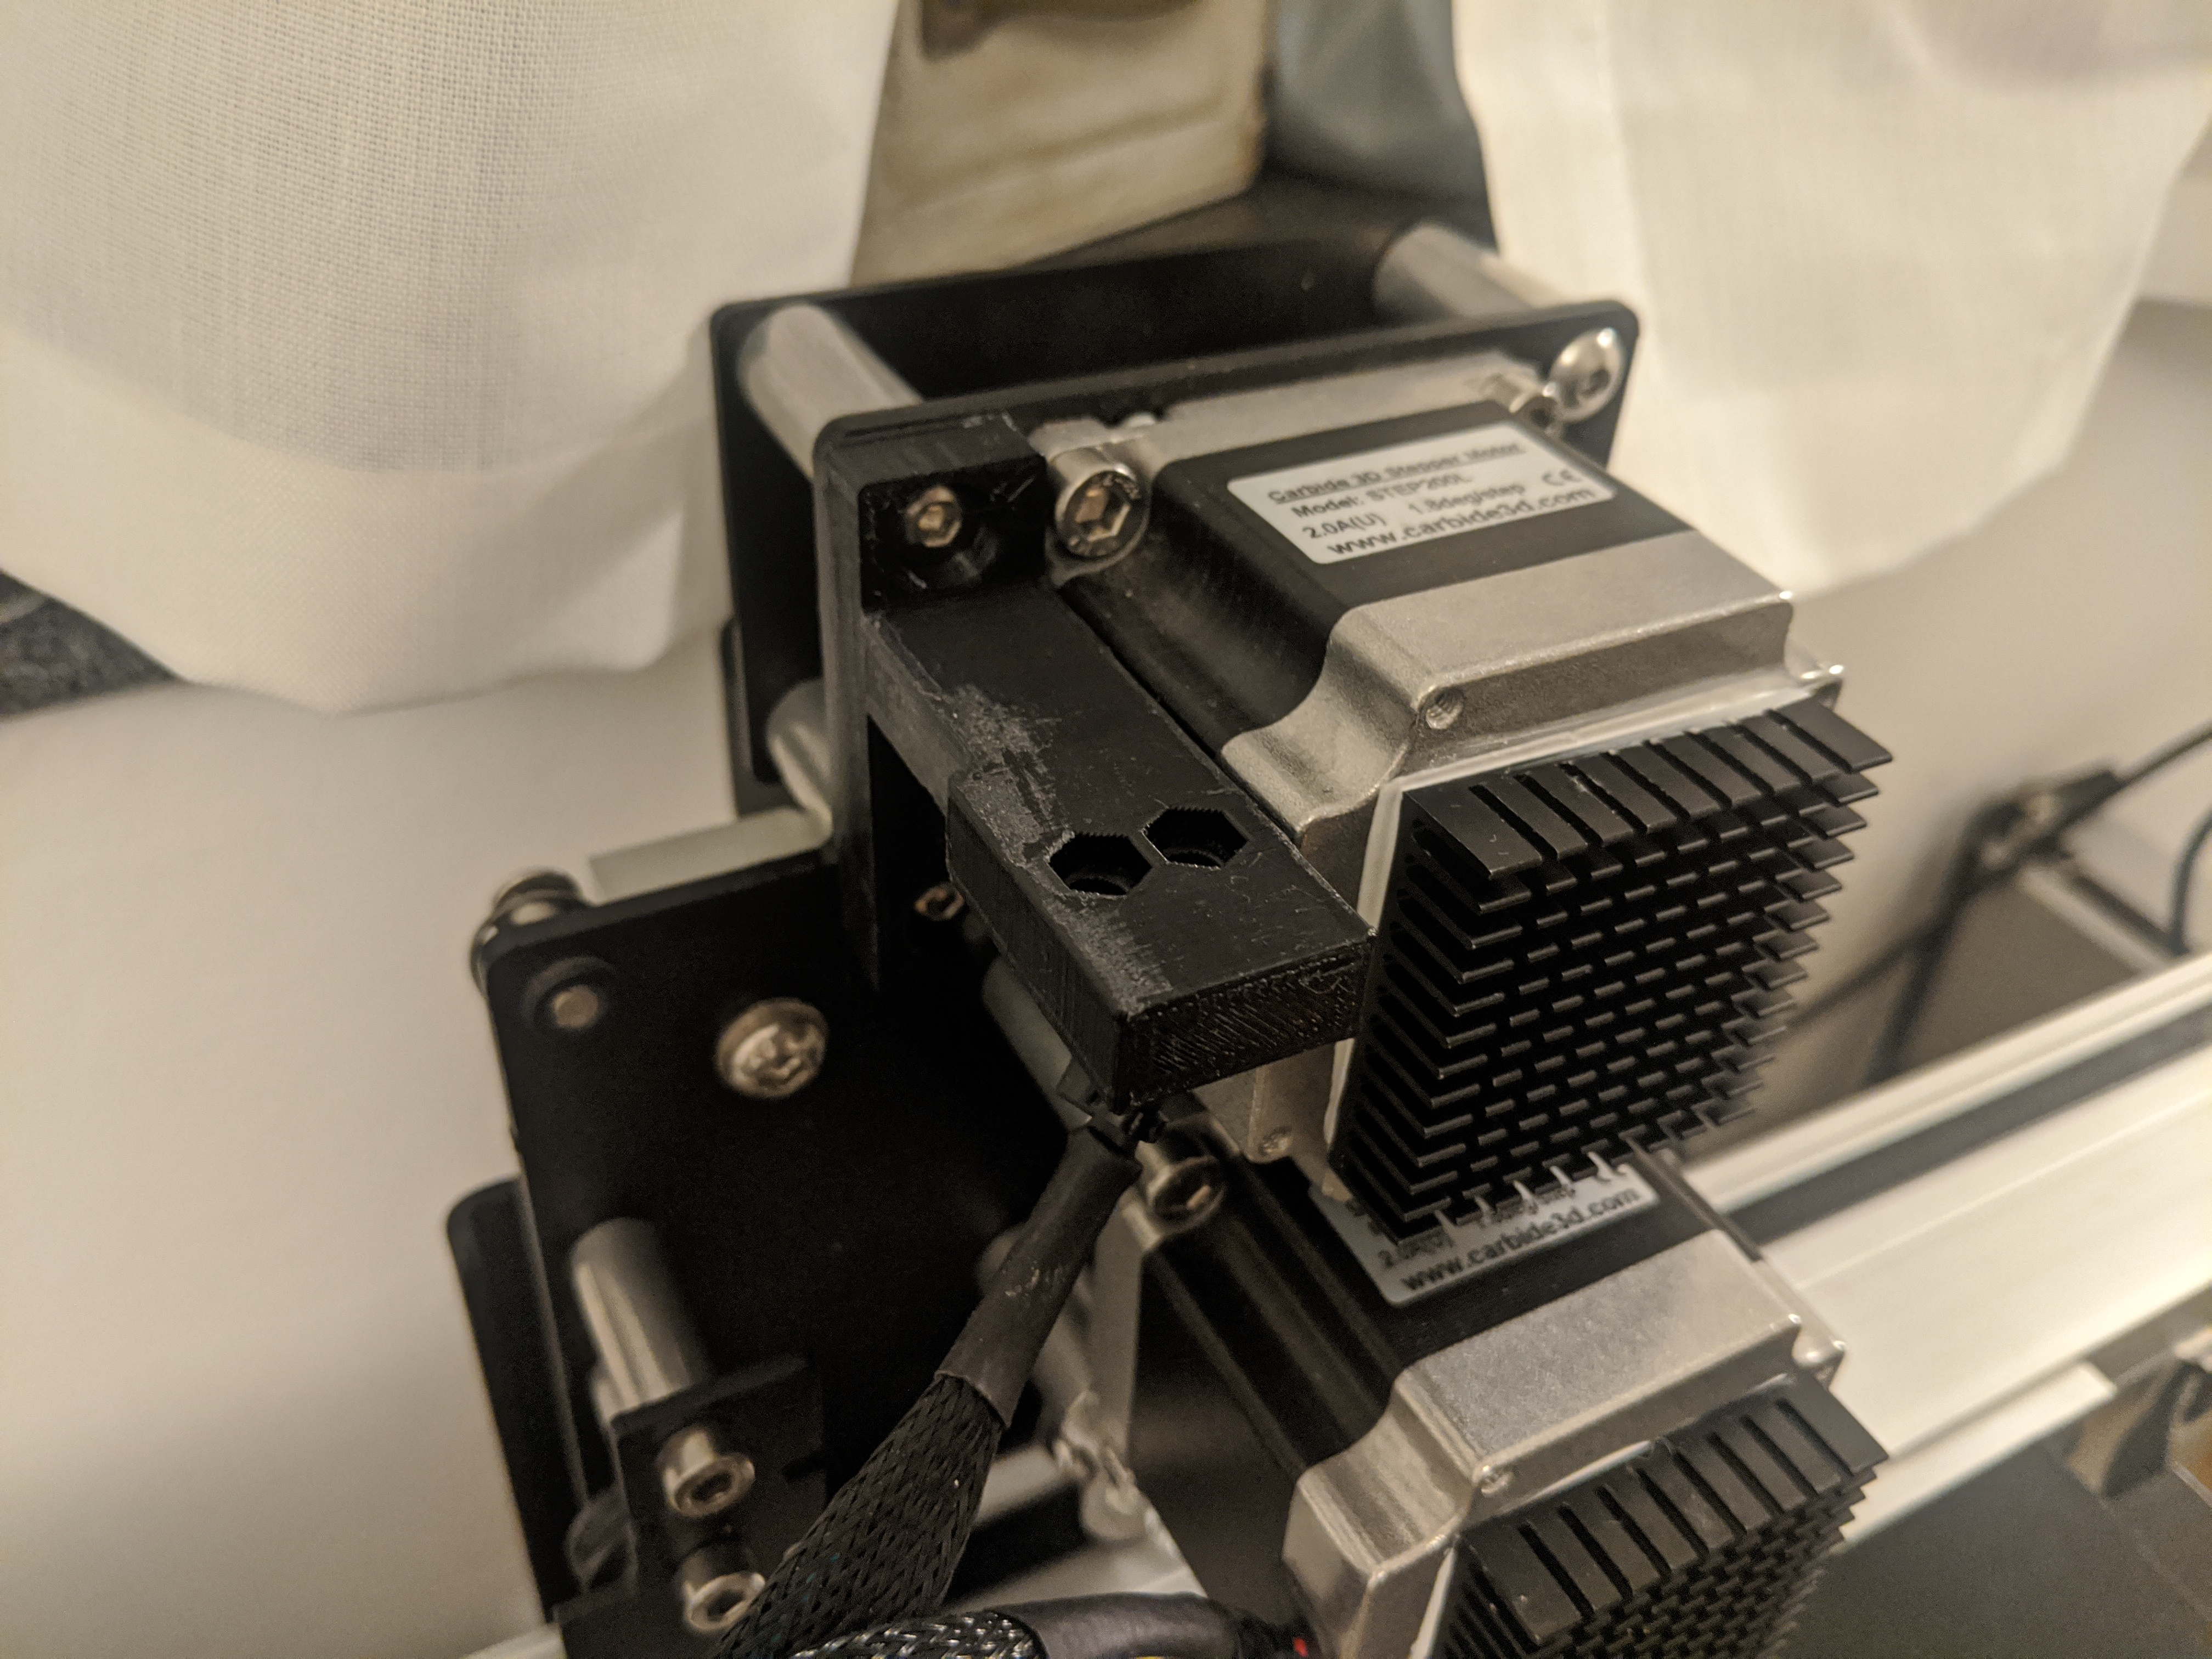
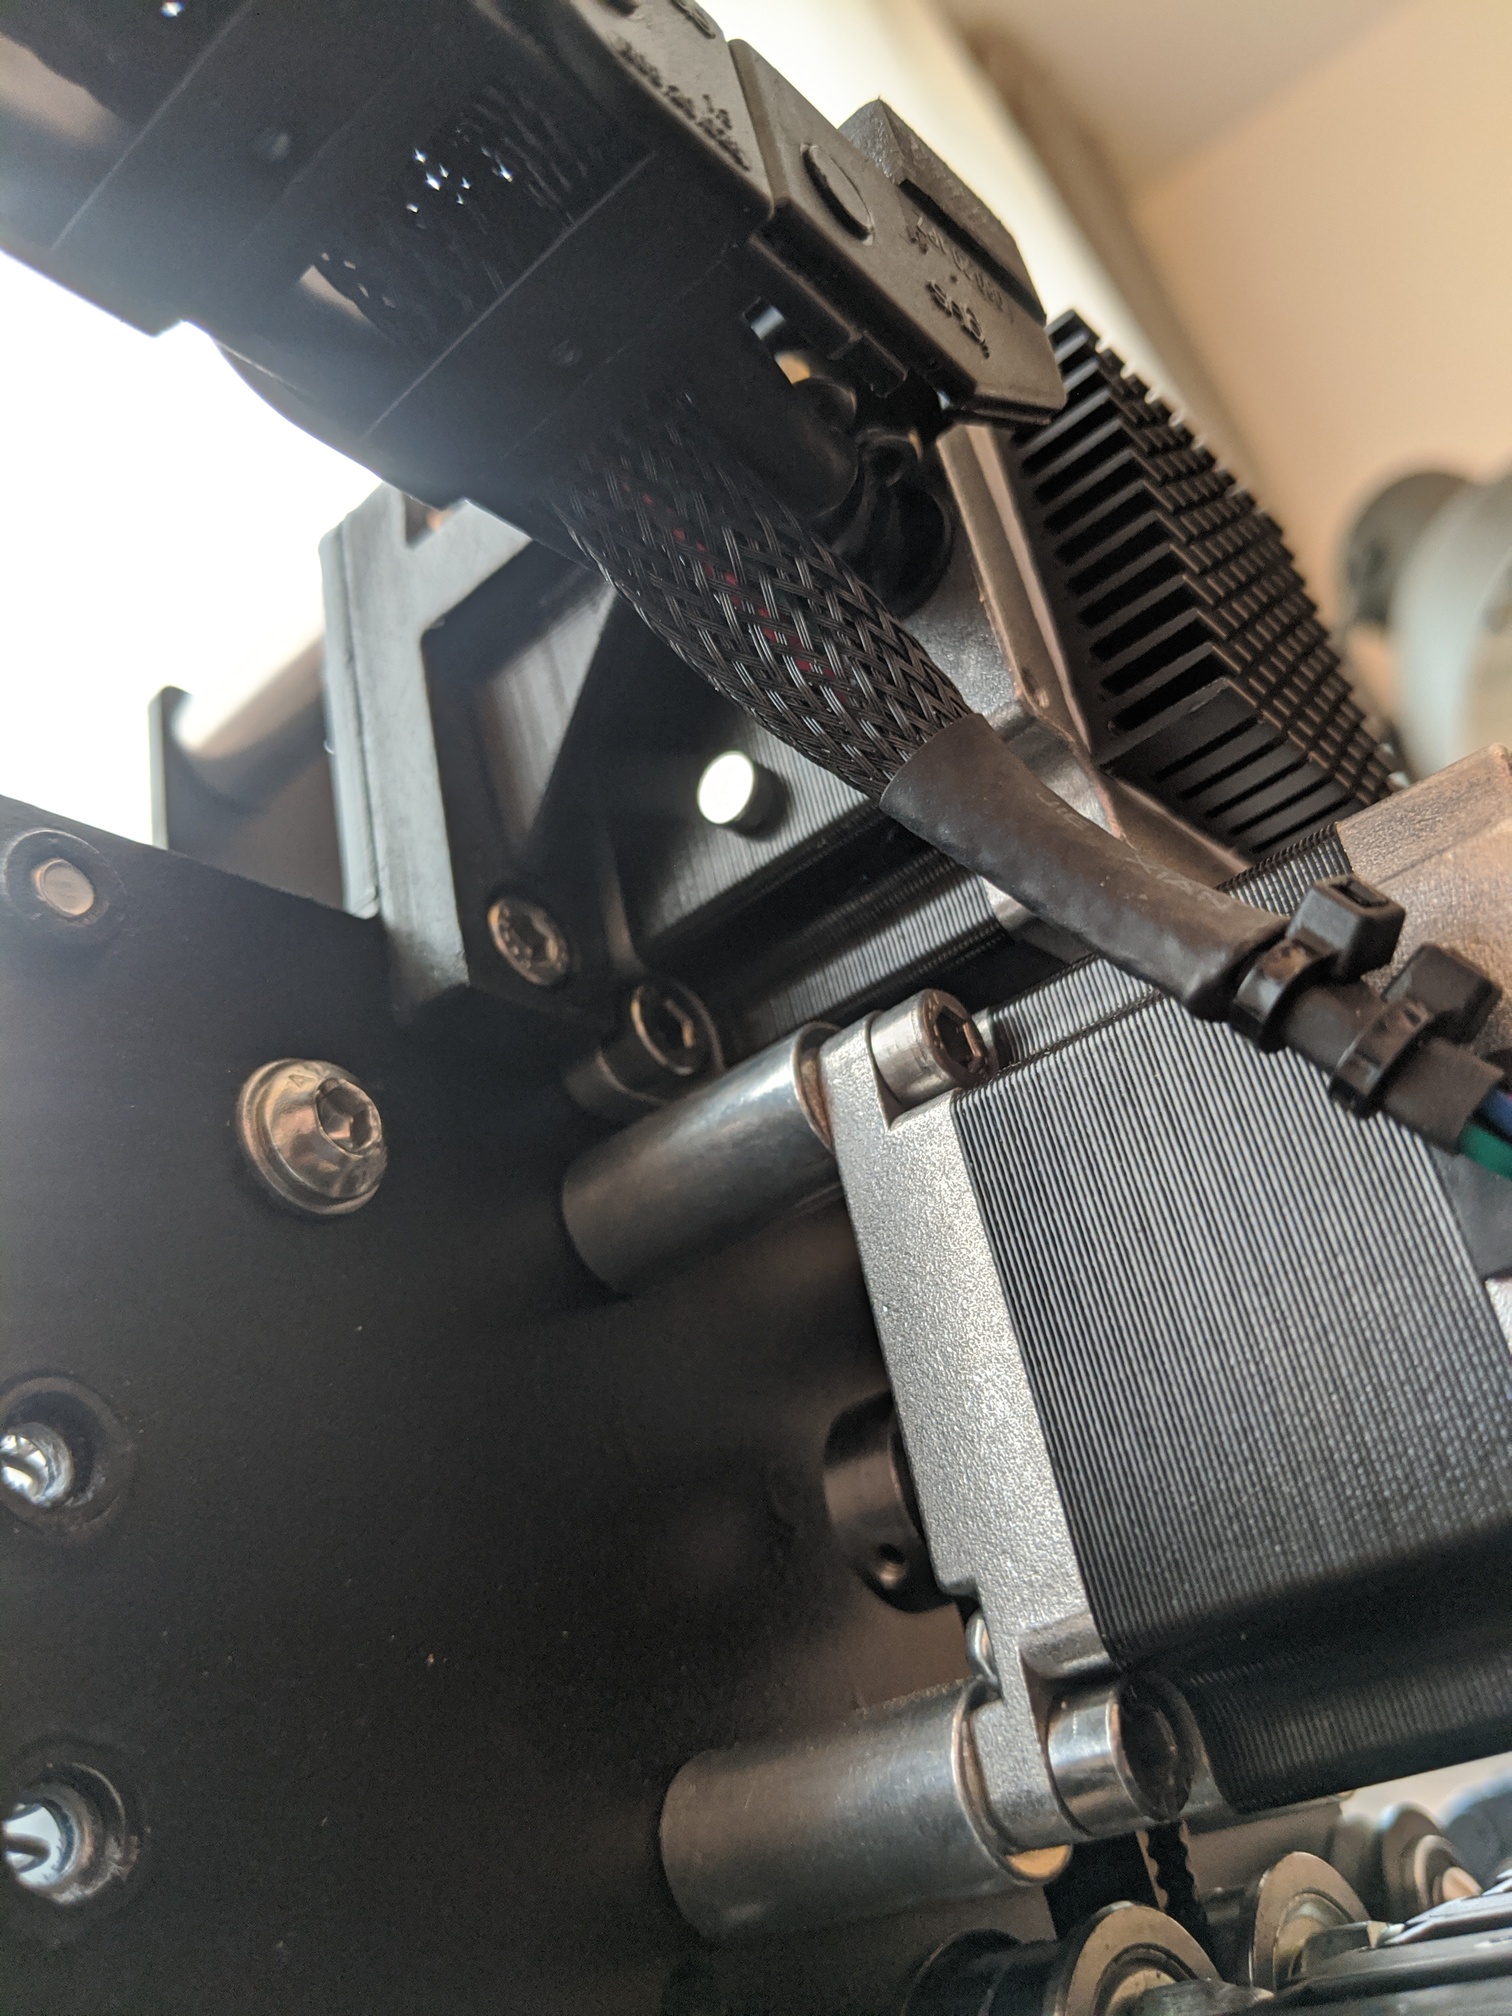
Waiting for the cable chains and homing switches. rest of the wiring is good so far. added additional cooling bodies to the nemas and stepper driver (glue still hardeining) as well to the usb driver. just for sanity 
1 Like
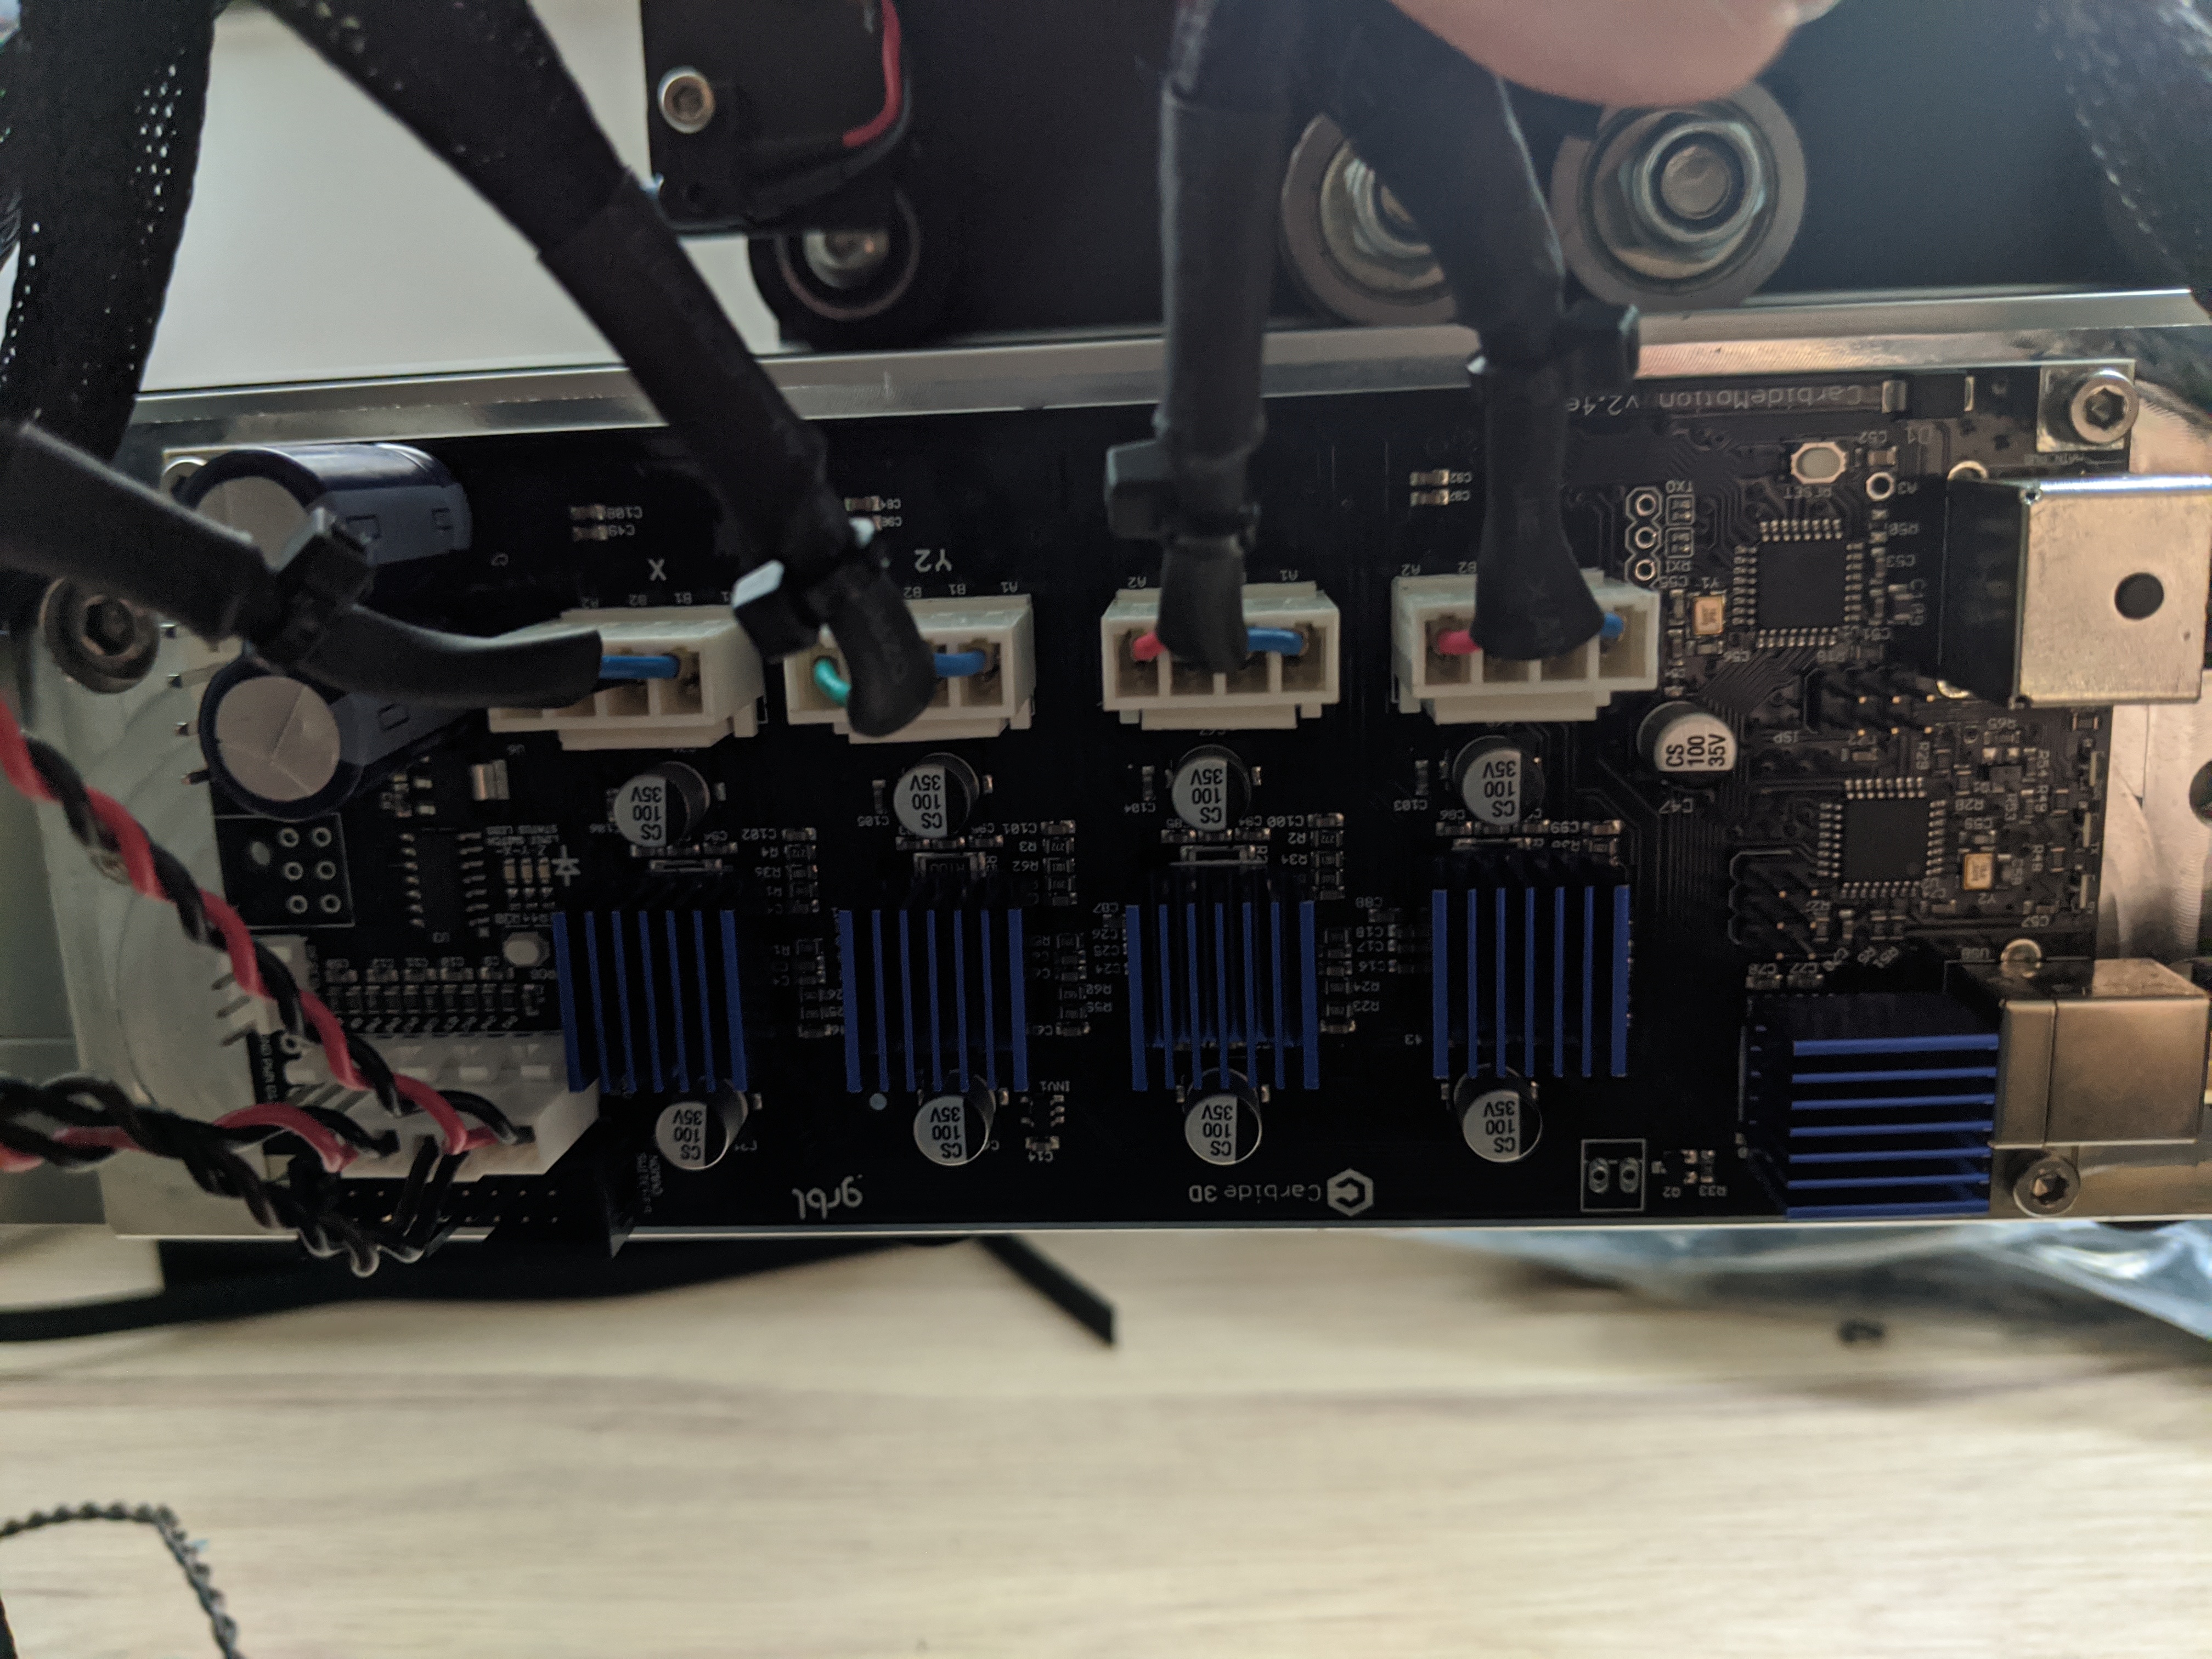
Wow mind sharing a link to the heat sinks?
Very cool mod!
sure.
bought these one for my 3d printer and orderer more then i initially needed… china shipping you know 
come with self adhering back and they worked quite nice on my printer.
1 Like
They seem a little far away from me haha I will check local great idea!
Aluminium bed is ordered and on its way, unfortunately i couldnt take the stock one because freight and taxes would be the ultra bummer.
My bed will now be 20mm of 7075 aluminum with custom hole pattern.
if somebody has the same problem as me or is just curious please find attached the fusion model.
The cad file is so designed that you can change the hole pattern and start point with paramters attached as well the mounting holes due to variation of manufacturing.

https://a360.co/2KRnRjN
PW: #sharingiscaring
7 Likes
Another day another update.
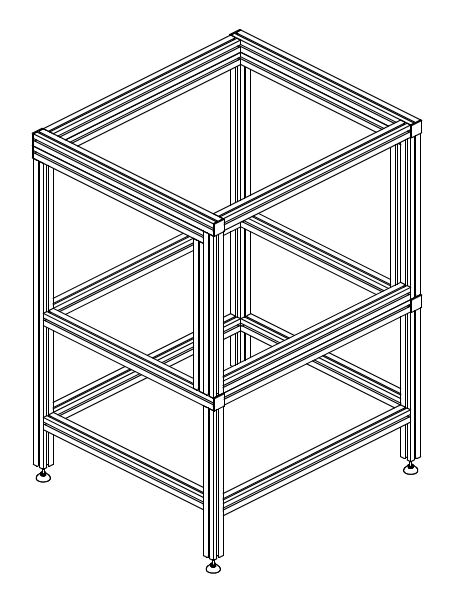
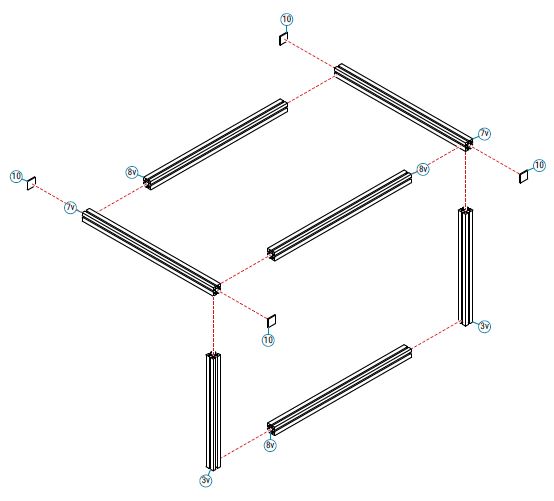
Designed my enclosure today, specially for an S3 with HDZ if you are interested find attached the drawings and BOM. i have to testfit the enclosure inside my hobby workshop so small changes can apply but thats just for my workshop. it is all designed with 40/40 aluminum extrusion to fit insulation material inside and close it up from outside with ply or acrylic sheets. Sound dampening is crucial for me living in a apartment with shared basement spaces.
The lower shelf later on will host my Spindel and Compressed air system as well as some tools and stock

2 Likes
Another Quick Update:
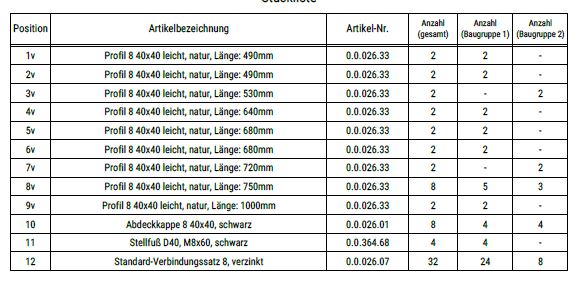
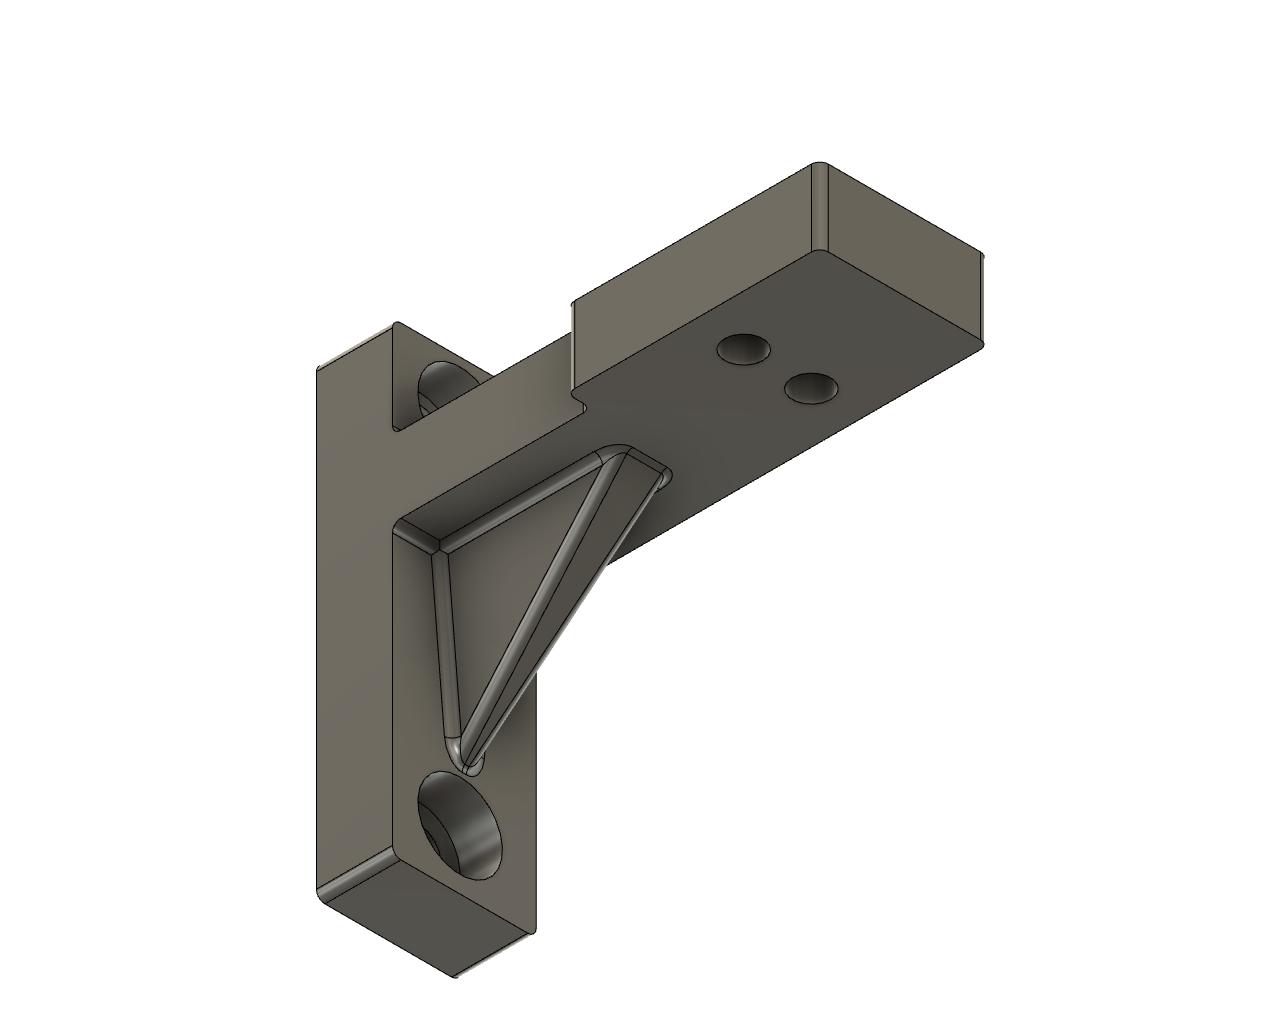
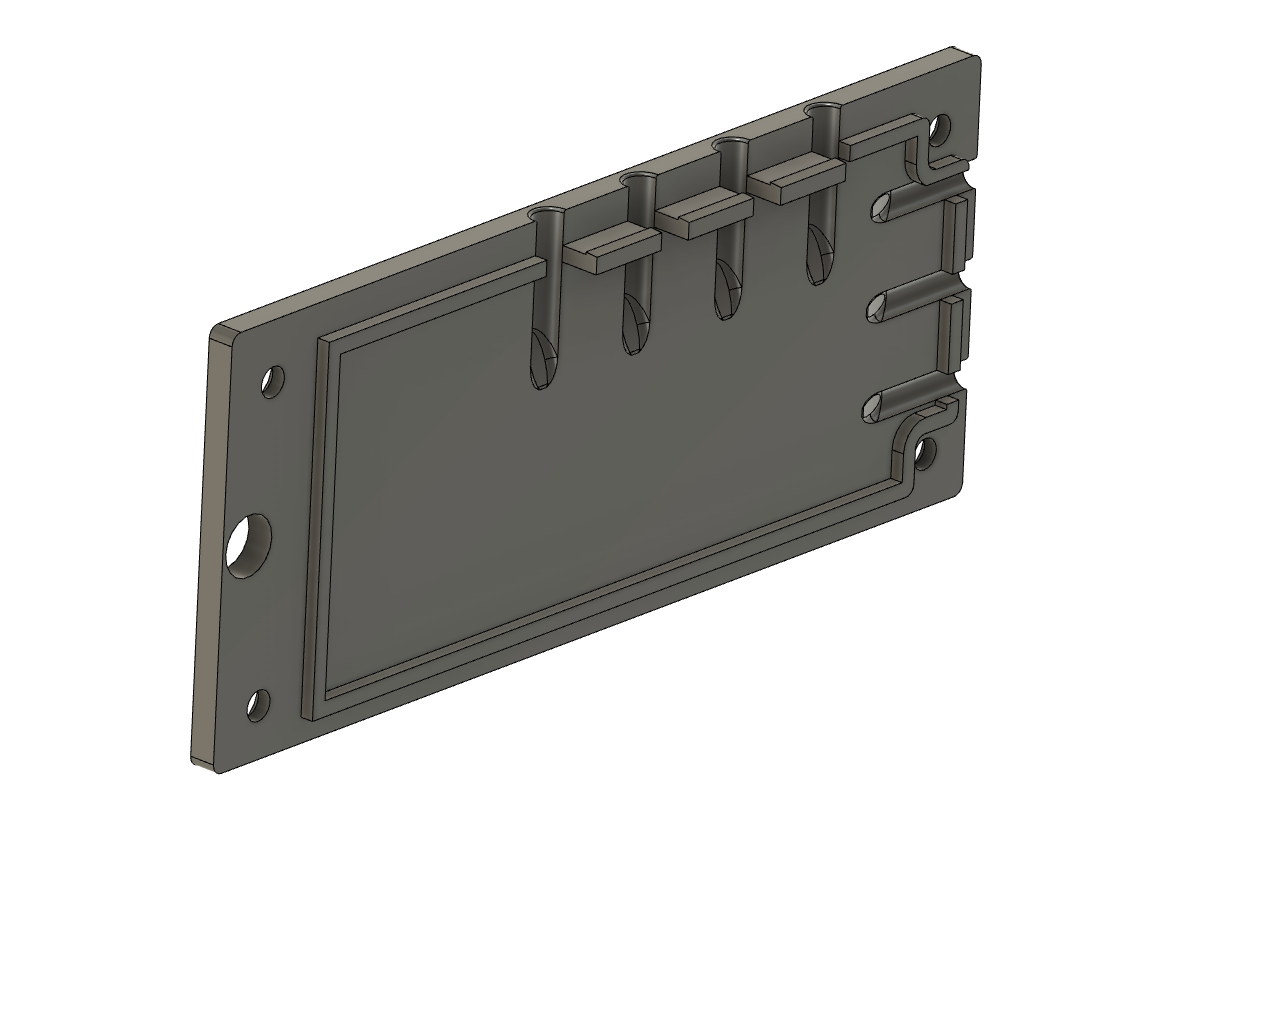
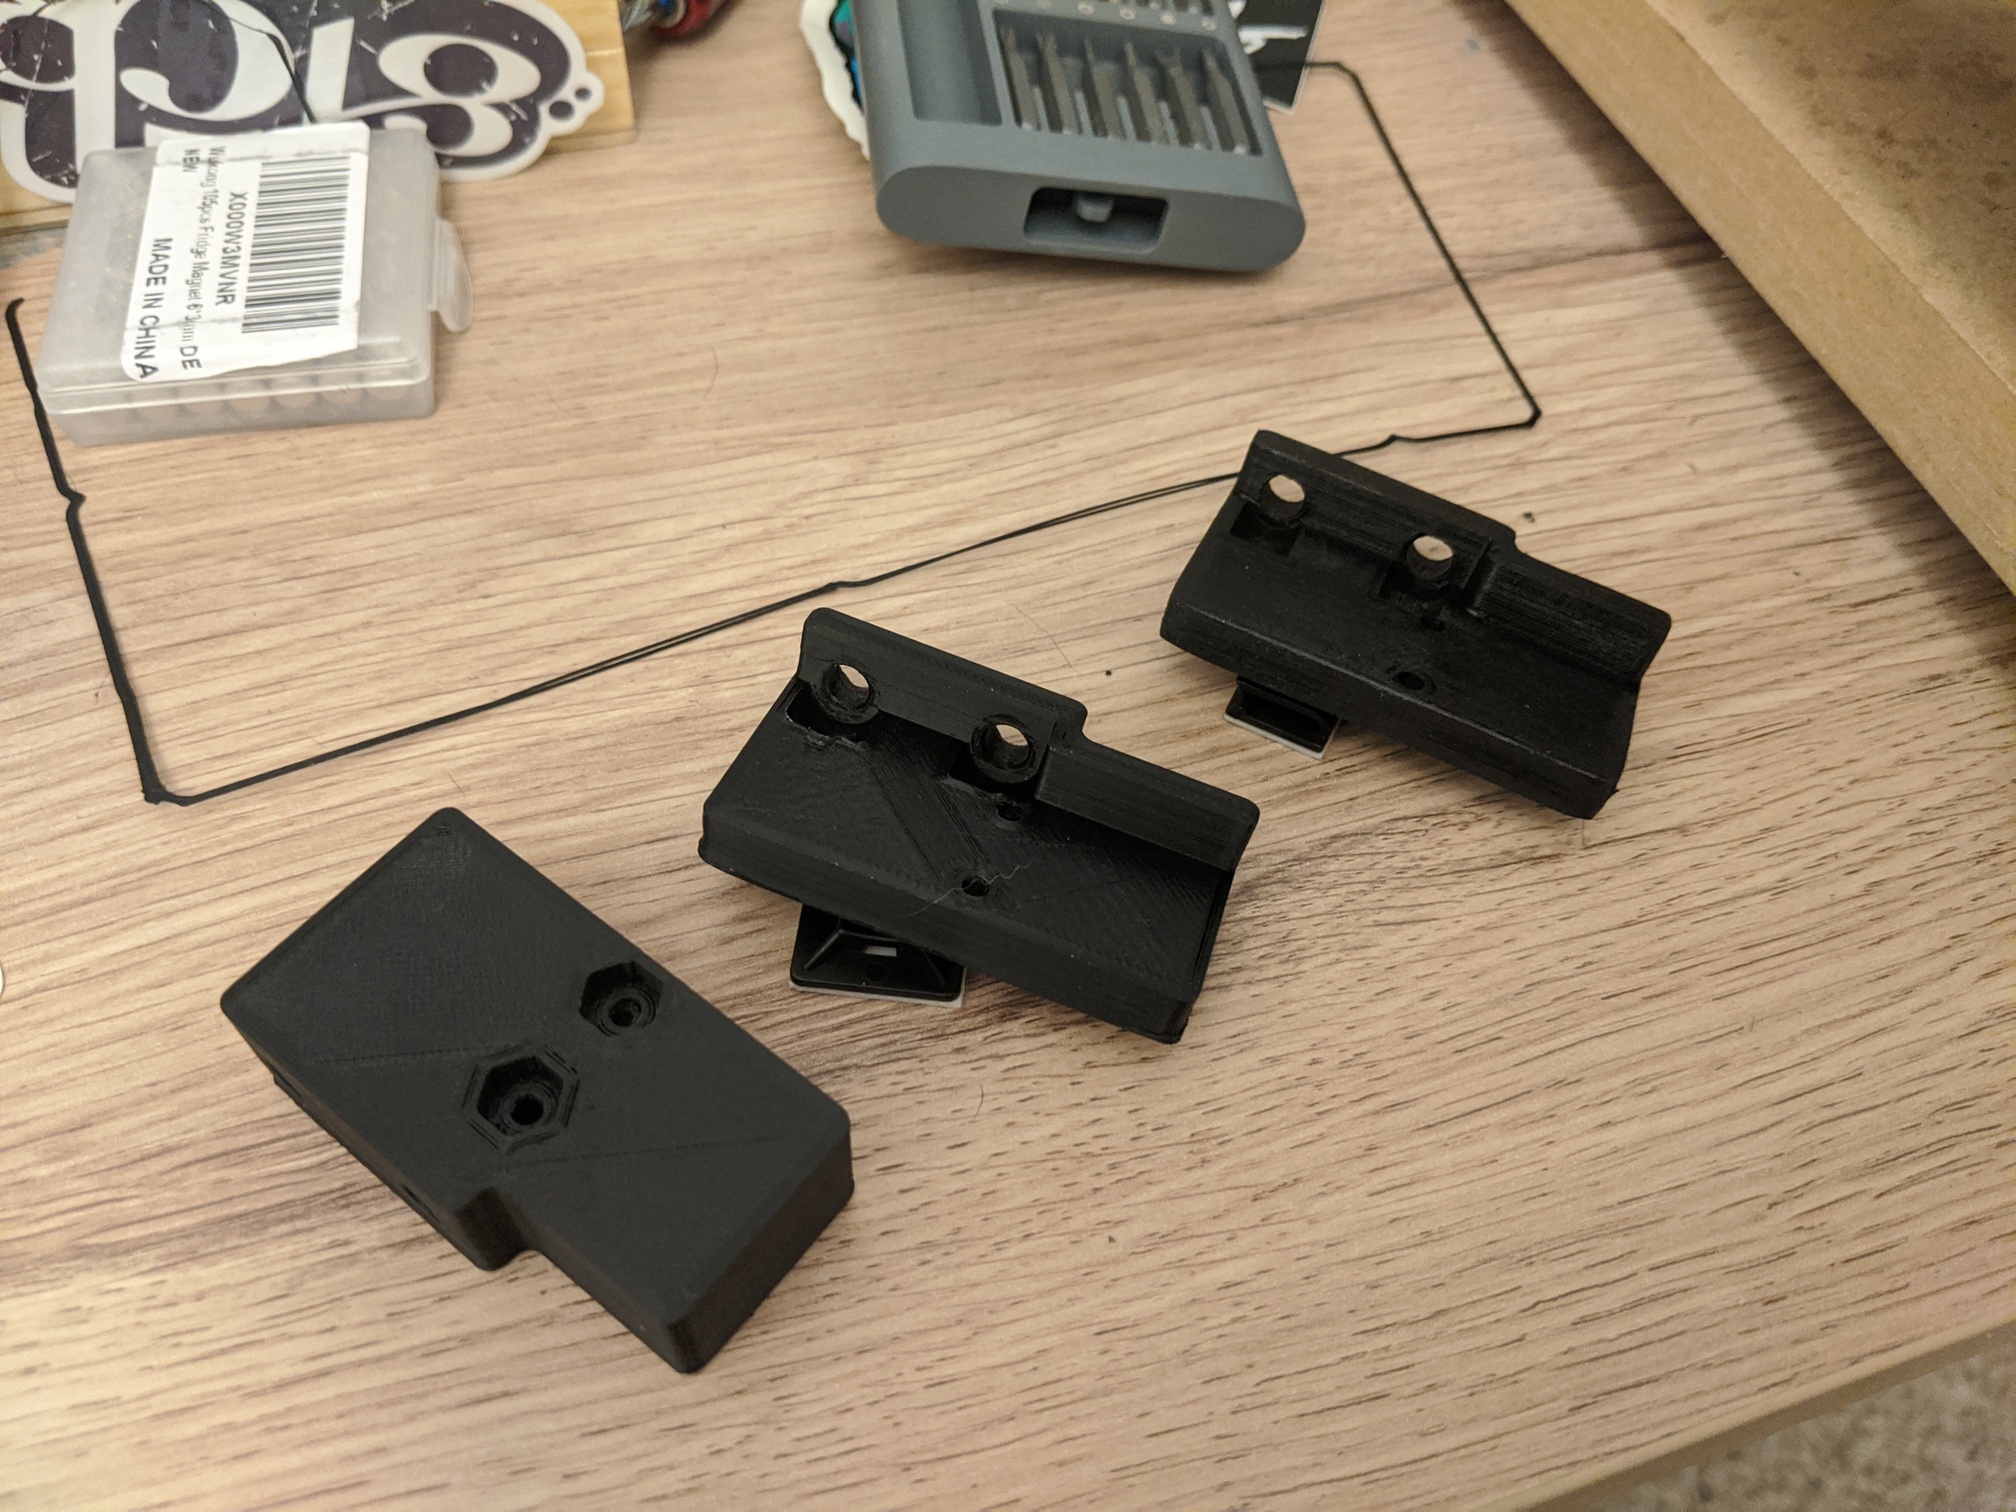
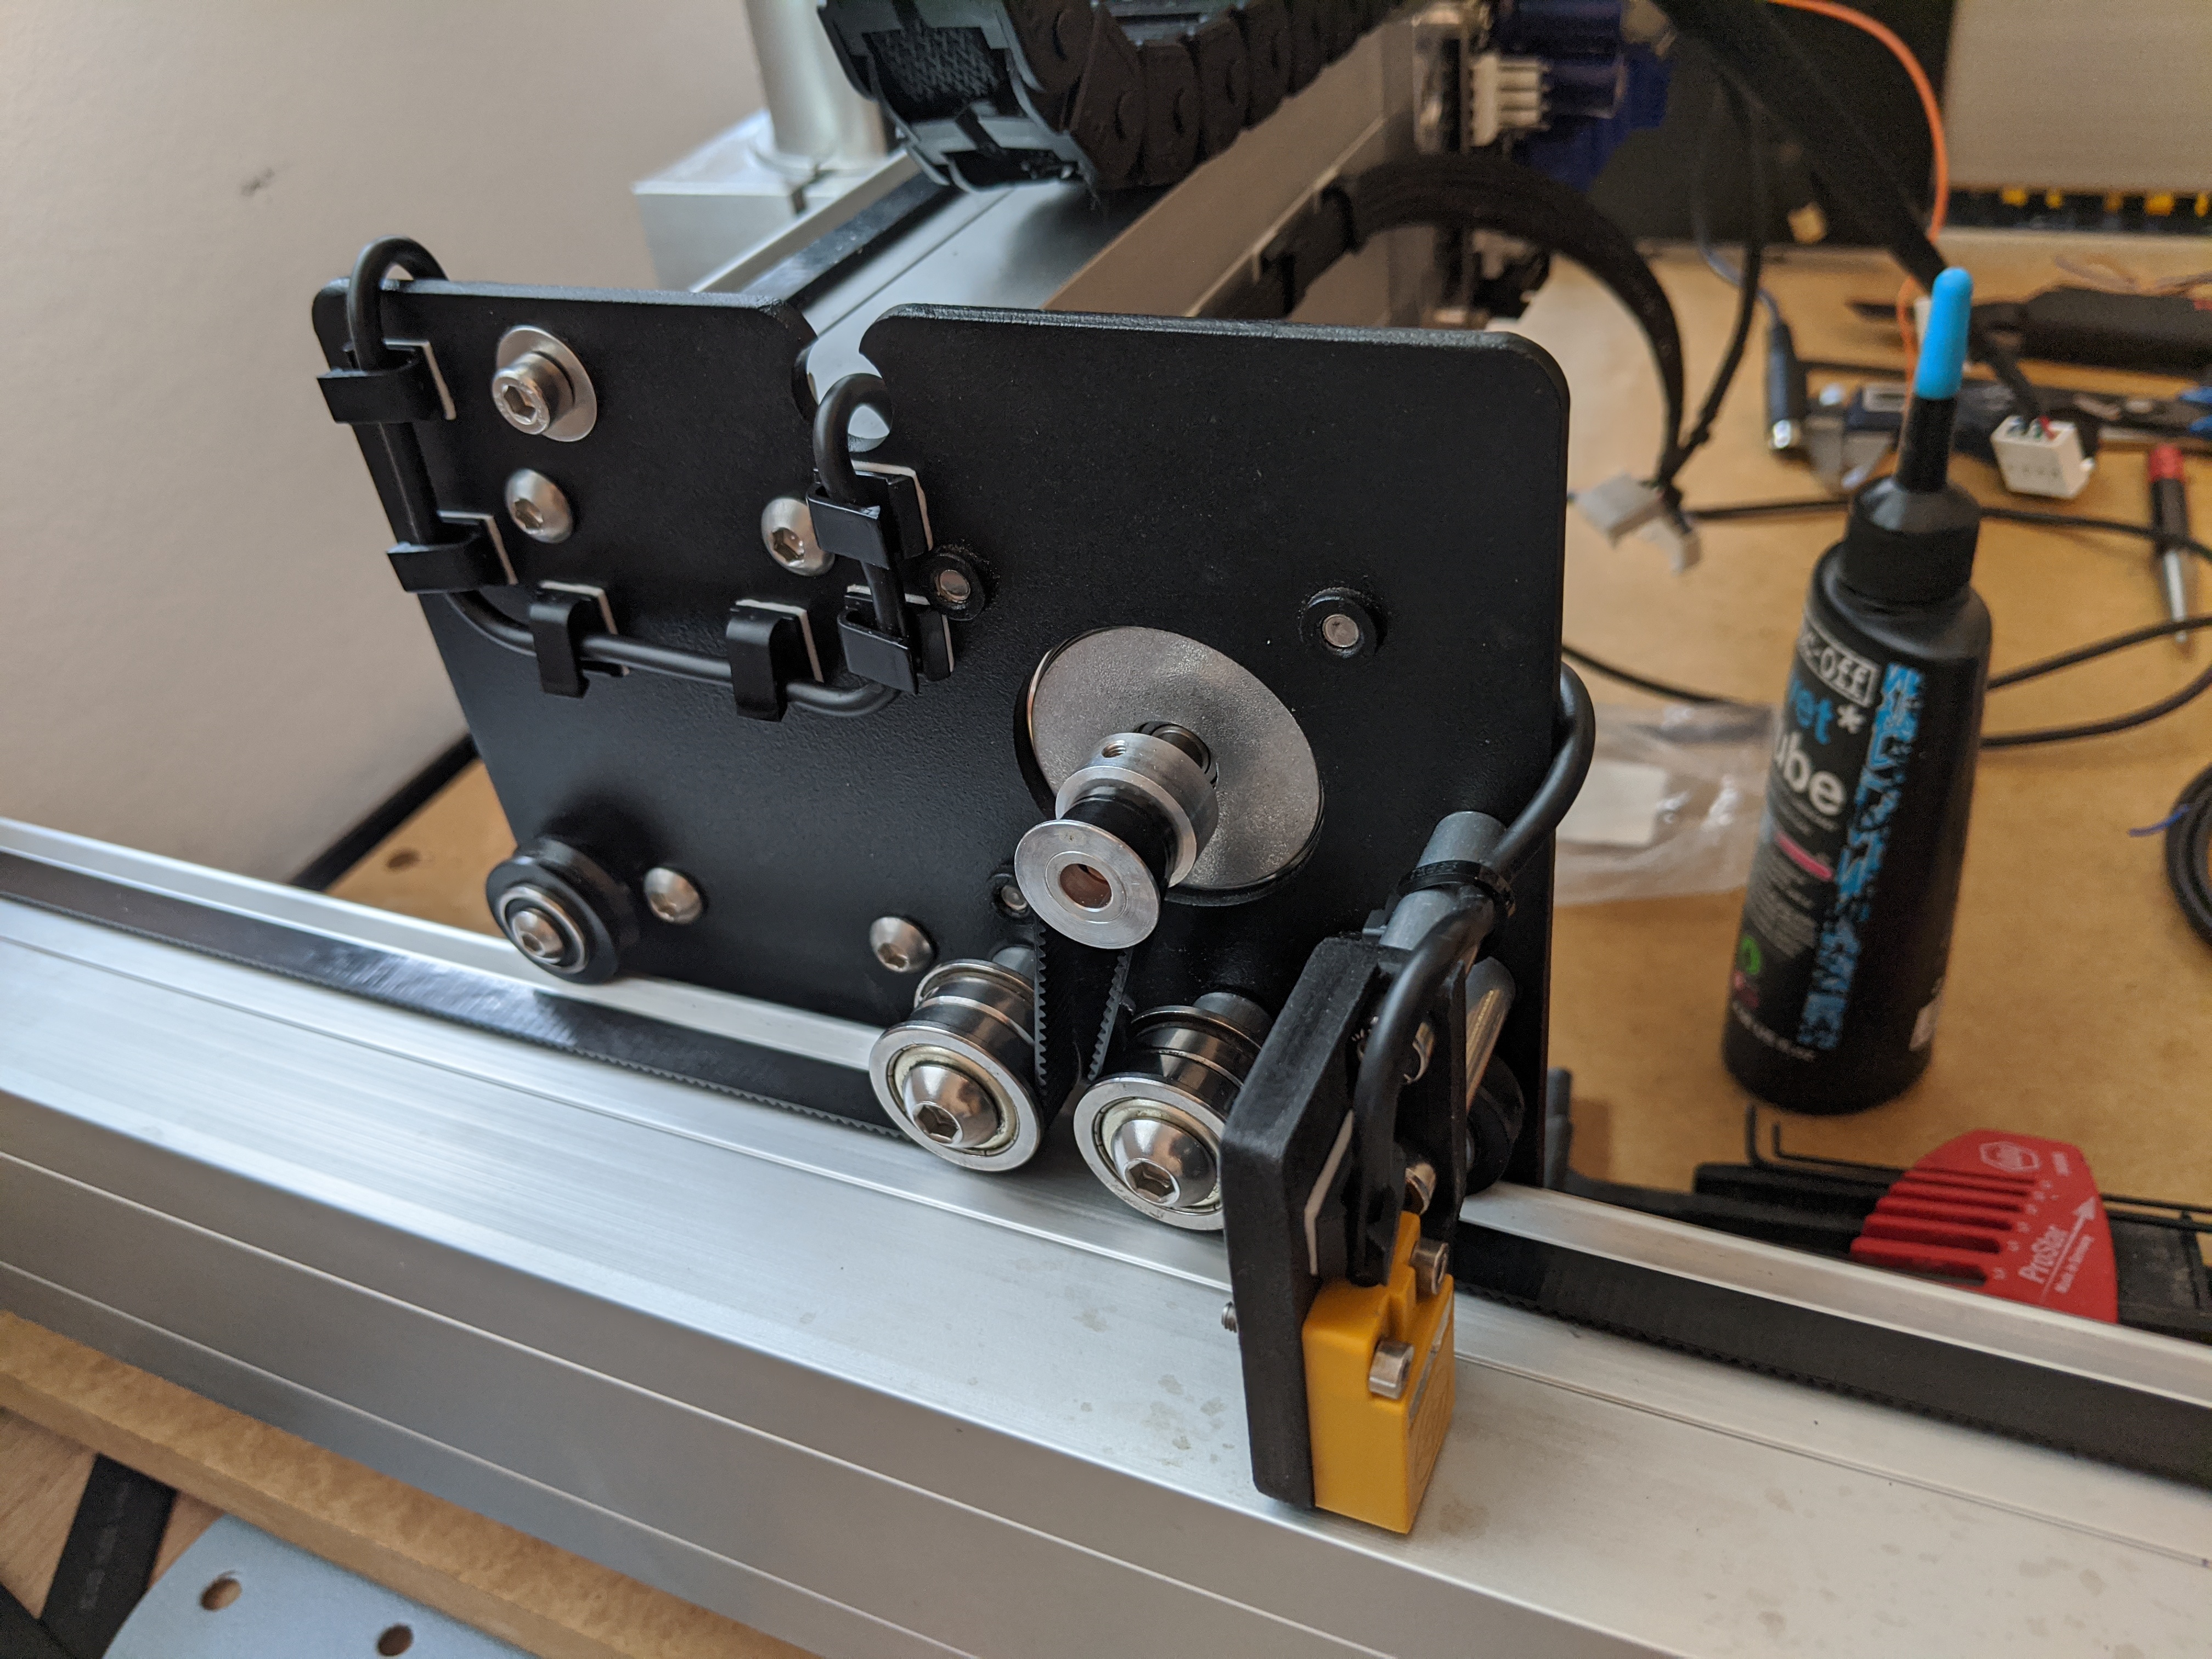
Designed some Brakets for my drag chain and a new electronic enlclosure because im not really happy with the open metal case.
The electronic cover is made out of 3 parts to ensure maximum sealant and easy access.
they are now on the 3d printer and should be ready in 22 hours

6 Likes
Nice!
Share links to the files or put them up on Thingiverse?
Sure. Want to print them out and mount everything successful after hopefully just one revision I’m going to share it with you guys.
1 Like
The holder and enclosure fitting nice and snug have to tweek my printer settings a bit to get better PETG results and made one mistake orienting the power plug on the wrong side in the model so the plug doesnt fit… everything else works fine
print it out again hopefully this weekend and if everything fits then files are on thingiverse.
4 Likes
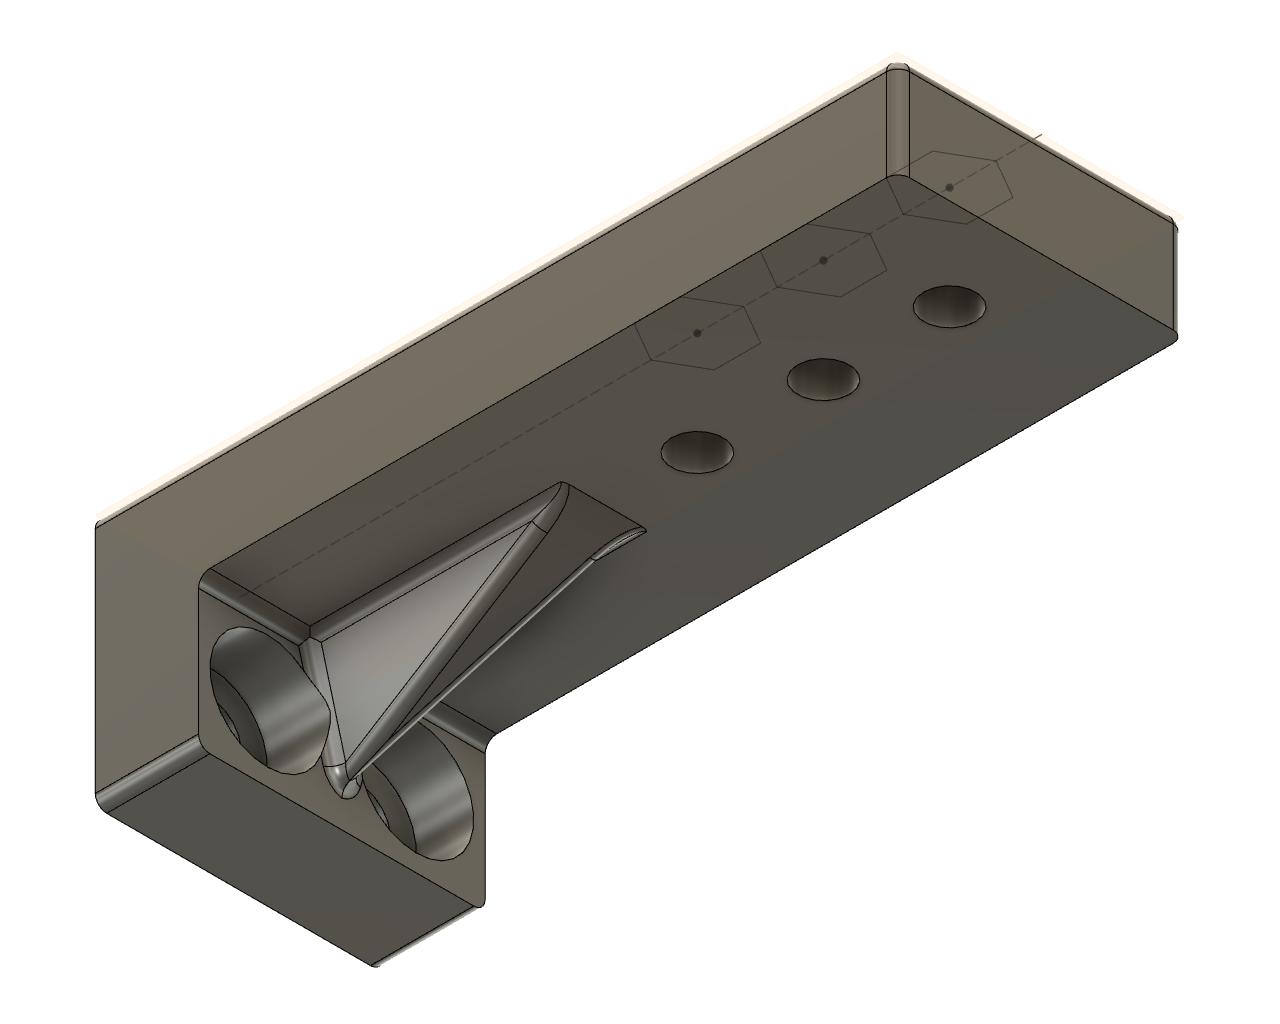
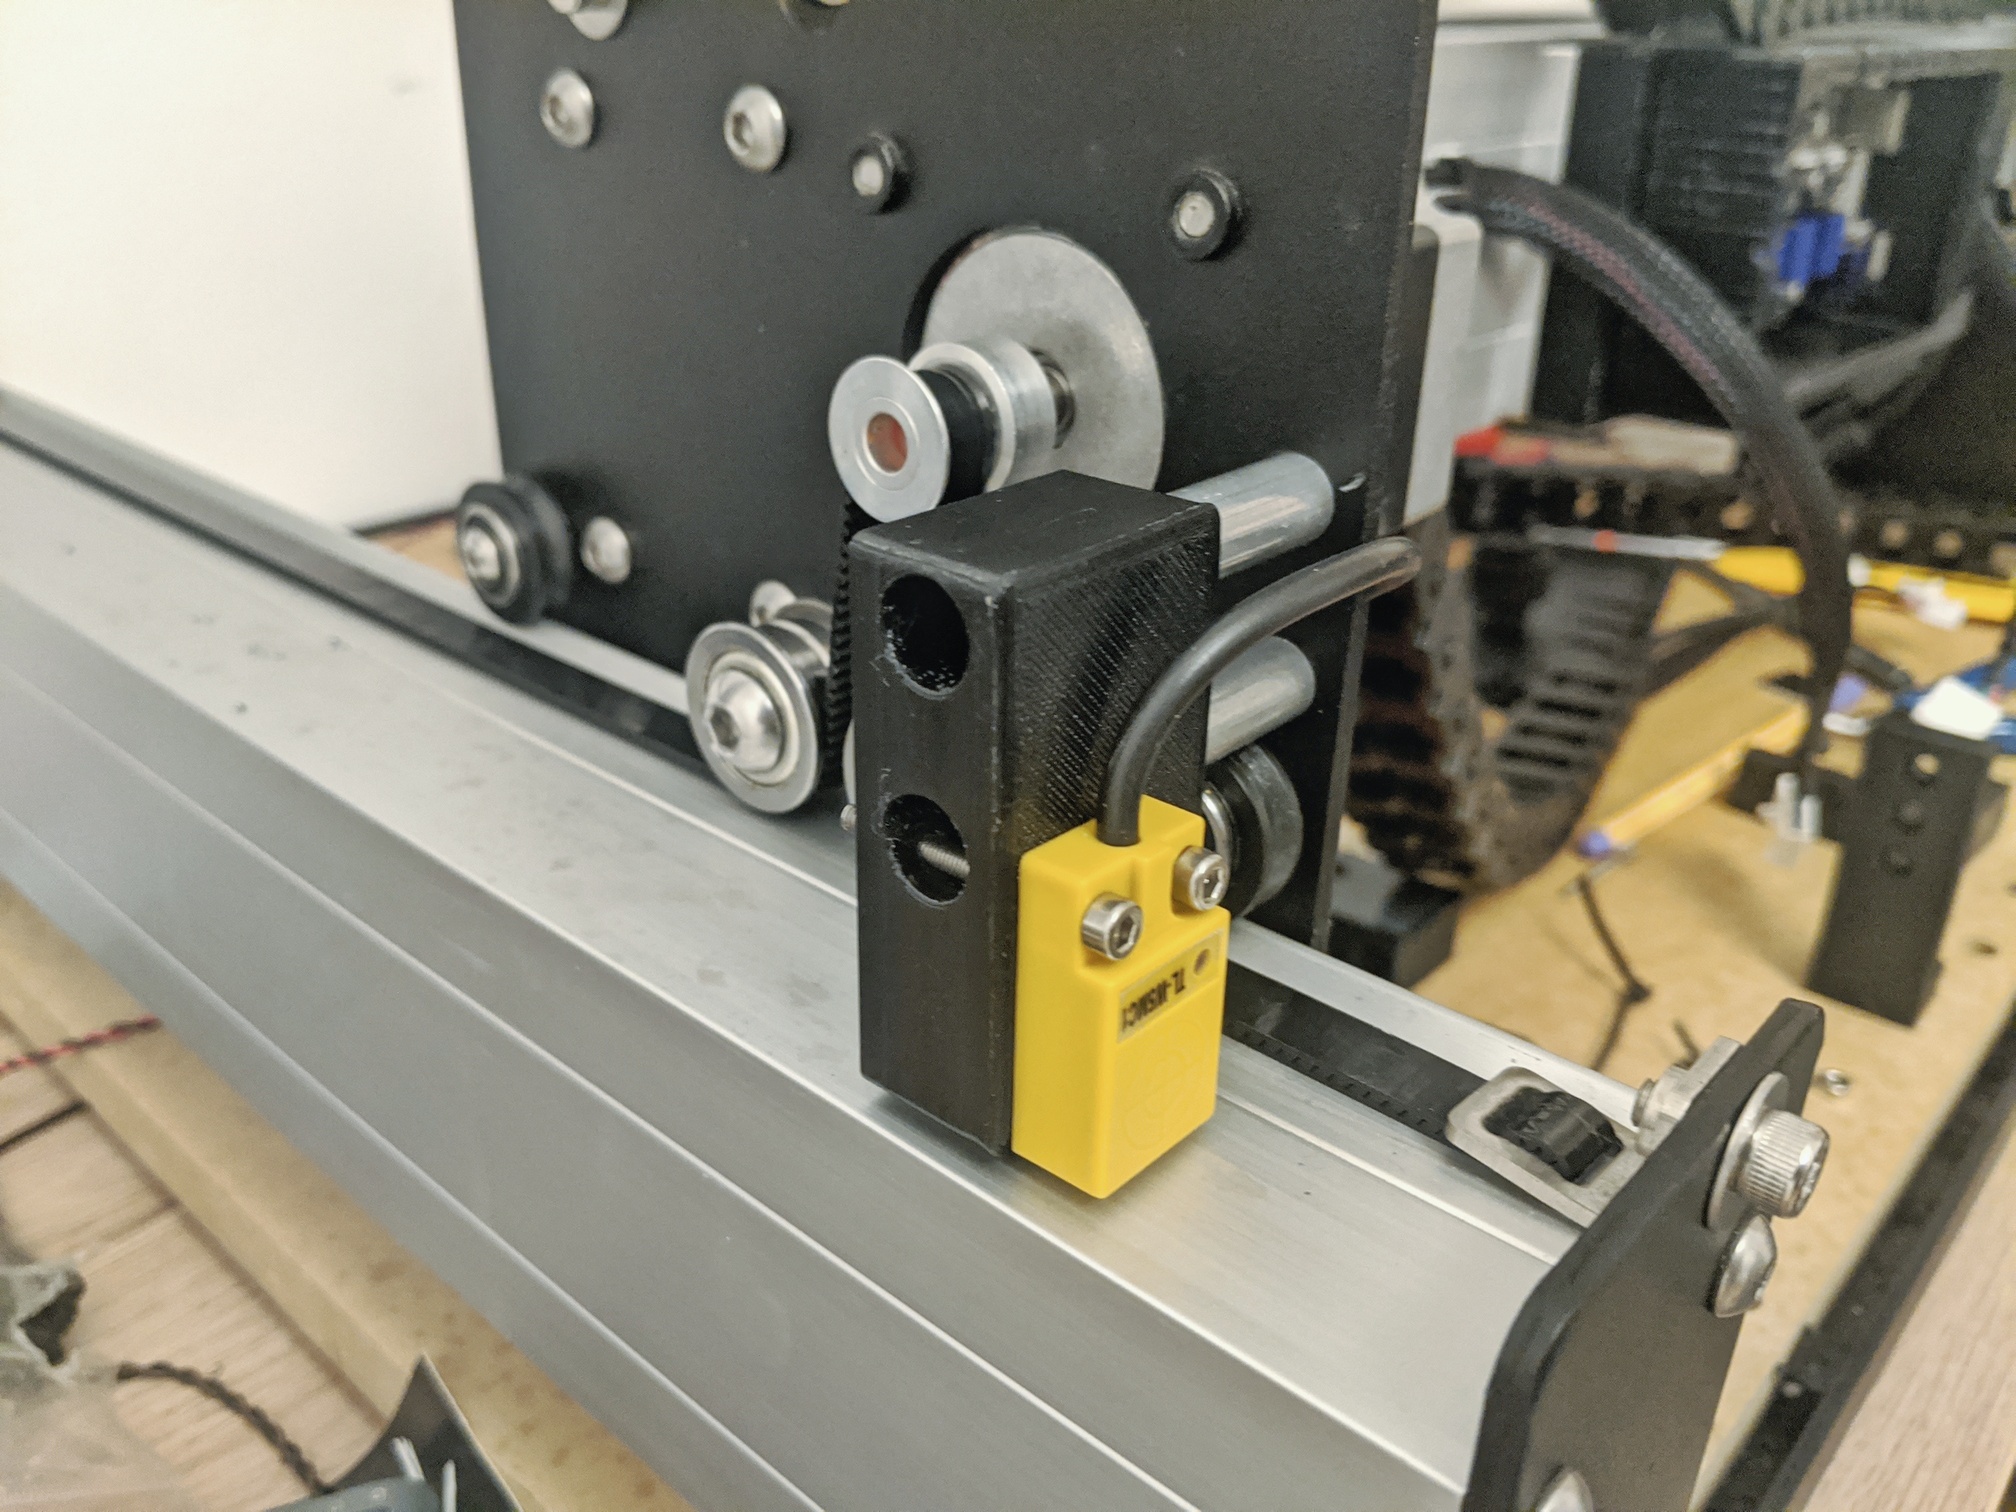
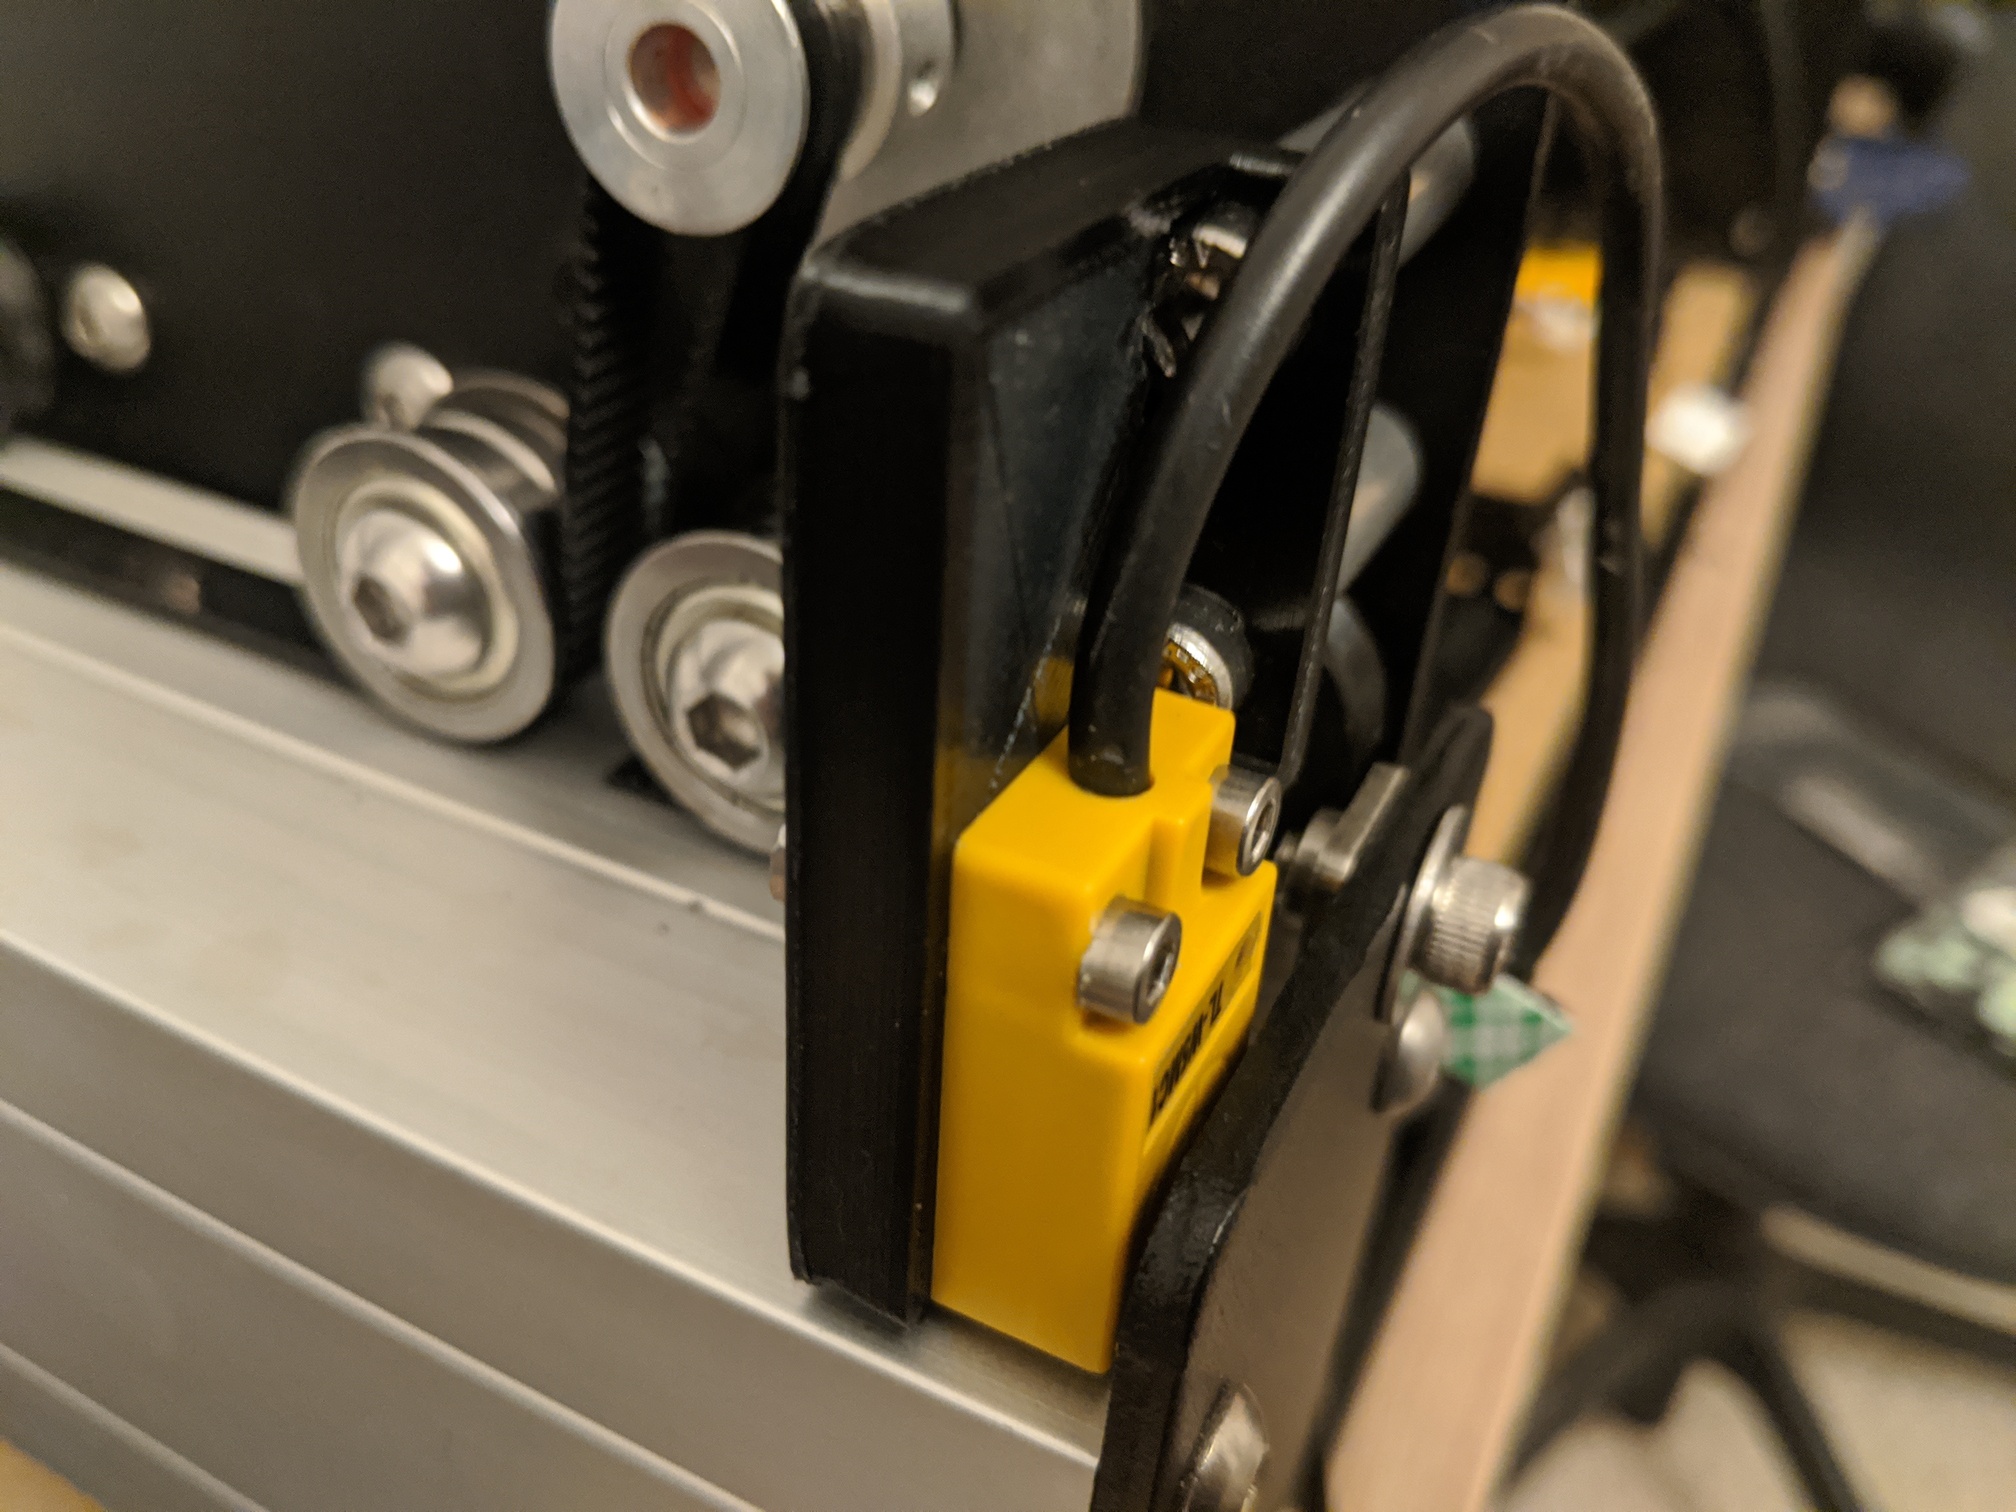
Got the idea from touch less homing switches from @Luke and @Vince.Fab but I didn’t liked the mounts by just glueing them on so I designed a new Y axis holder where you intersect the M5 holes with M3 to use the standard mounting holes of the switches.
(I publish all files on the weekend. Dry fitted most of them now and had one or two revision or tweaks because OCD you know)
5 Likes
That looks great and makes it pretty much a drop in As well
1 Like
Nice! Have you thought about offsetting it back a tad so no matter what happens, the side plates will hit the rear mount before any contact to the proximity?
Might make the mount a little more complicated but could be worth the “bulletproofness”.
2 Likes
Good point! That will also increase the working area of the machine. Home switch should be triggered as close as possible to mechanical endstop.
@Sinned
I’m looking forward to print some of these great solutions you are making up! Keep up the good work!
the side plates will hit the rear mount before any contact to the proximity?
fair point my intial thought was that before i dang my machine on solid parts
i loose an proximty switch. but designed an offset version as well with set back switch. the major problem with the setback is that the mounting holes intersect if you want to keep stock mounting holes.
made V 1.1 with set back switch because the loosing of working area isnt that nice you are right on that. should be printed out when im back home and im testing if i can it assemble that way i think.
keep you updated
2 Likes
Took your addition in account V1.1. 1.3 is on the printer right now. Redefining small things and then should be final.

6 Likes
1.1.3 is Final fits like a glove. rest of the files will be published on sat/sun
Endstop_Y_1.3.stl (125.3 KB)
4 Likes
Gotta love 3D printing!
If you wouldn’t mind posting the Fusion files too, that would be appreciated.
3 Likes
A brief update. Everything coming together.
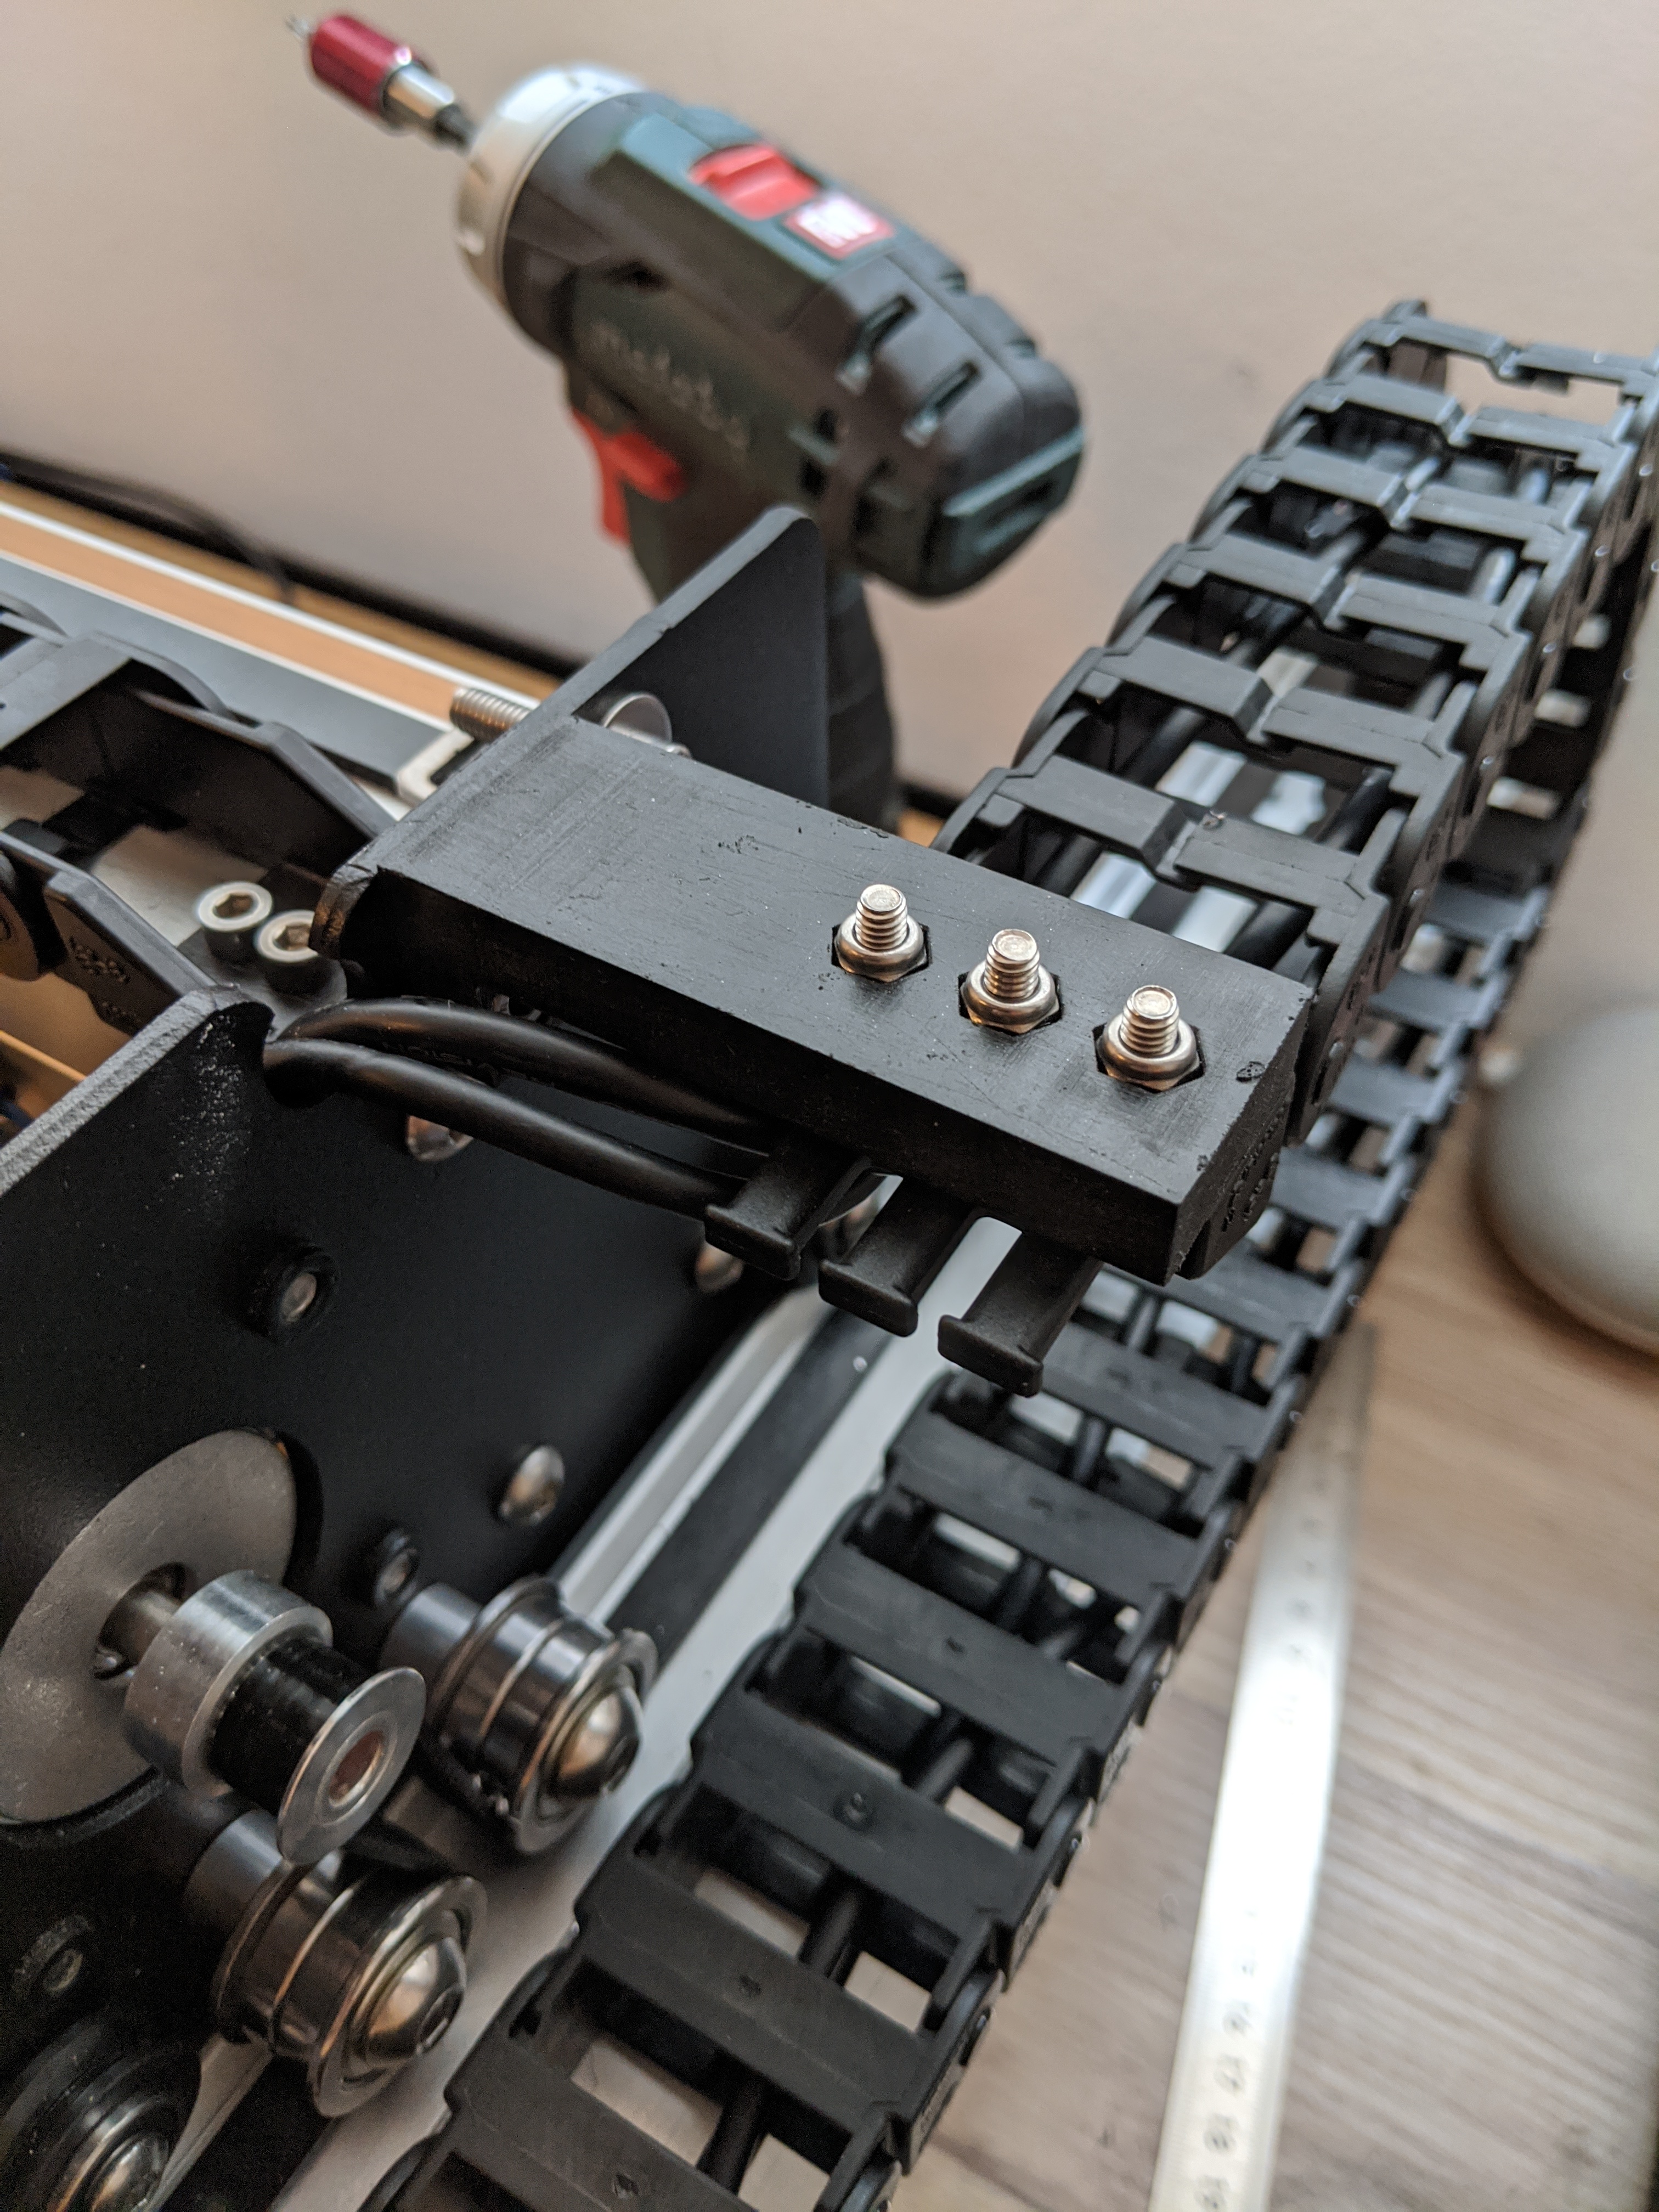
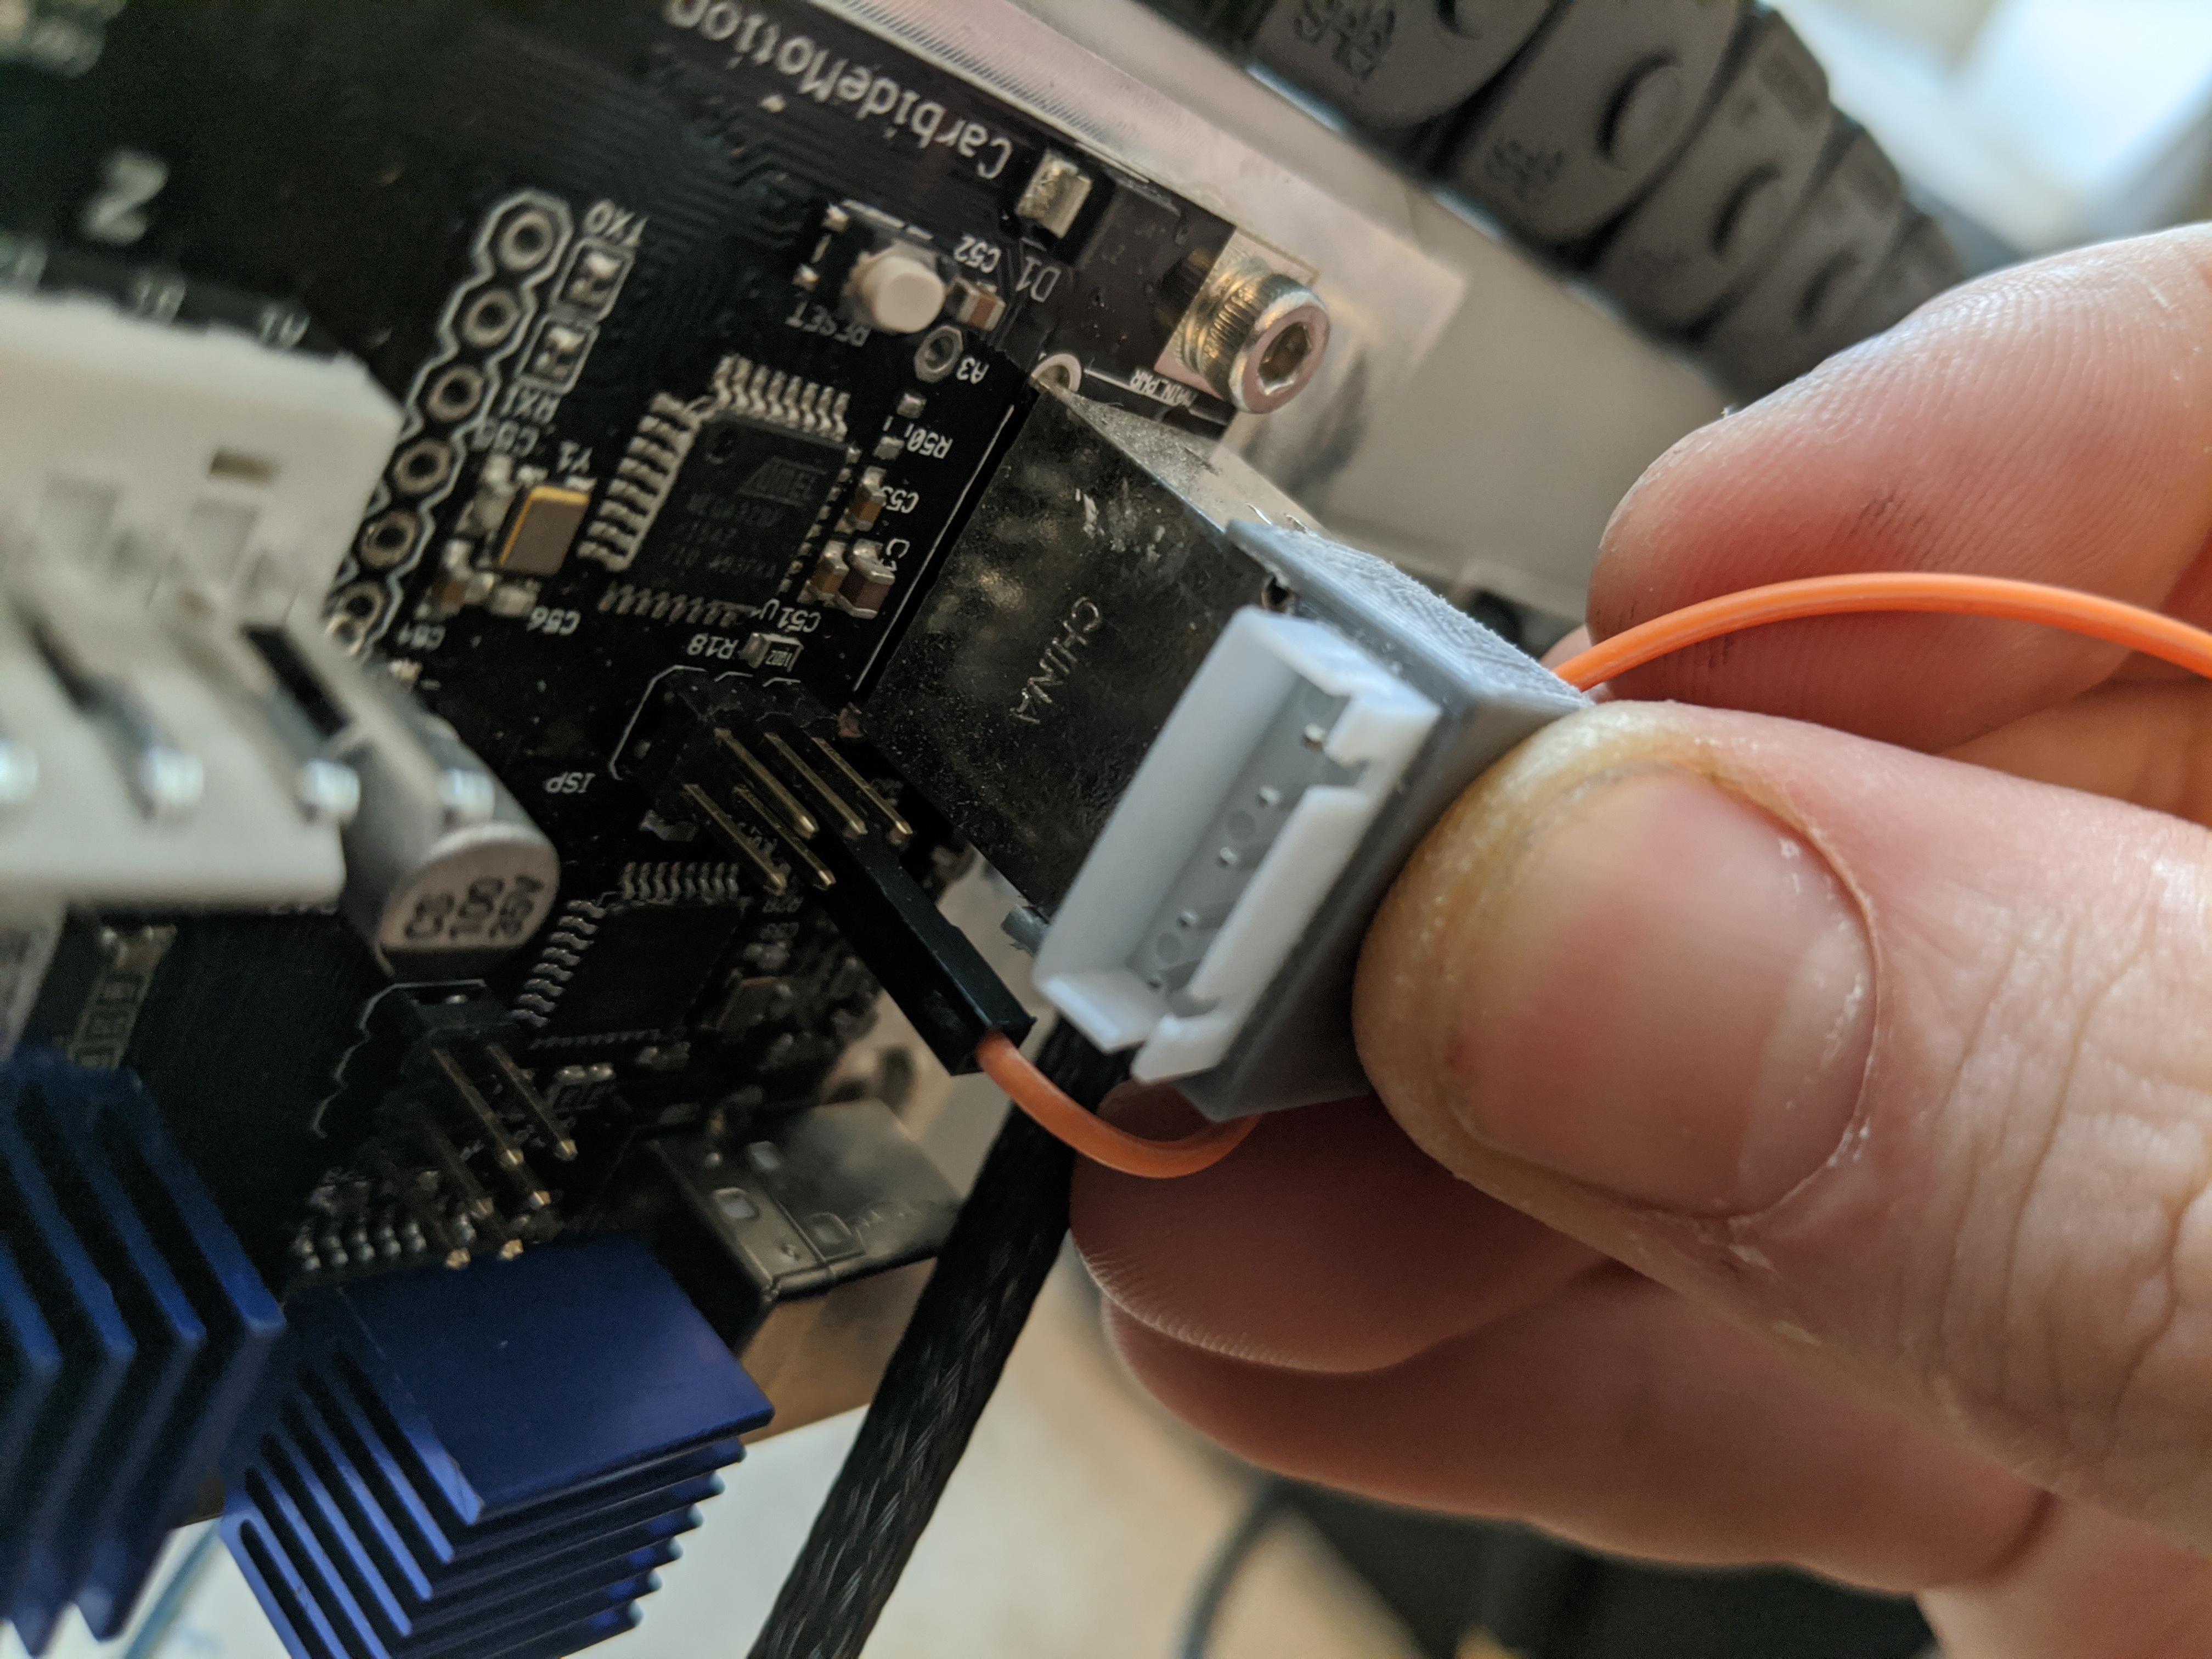
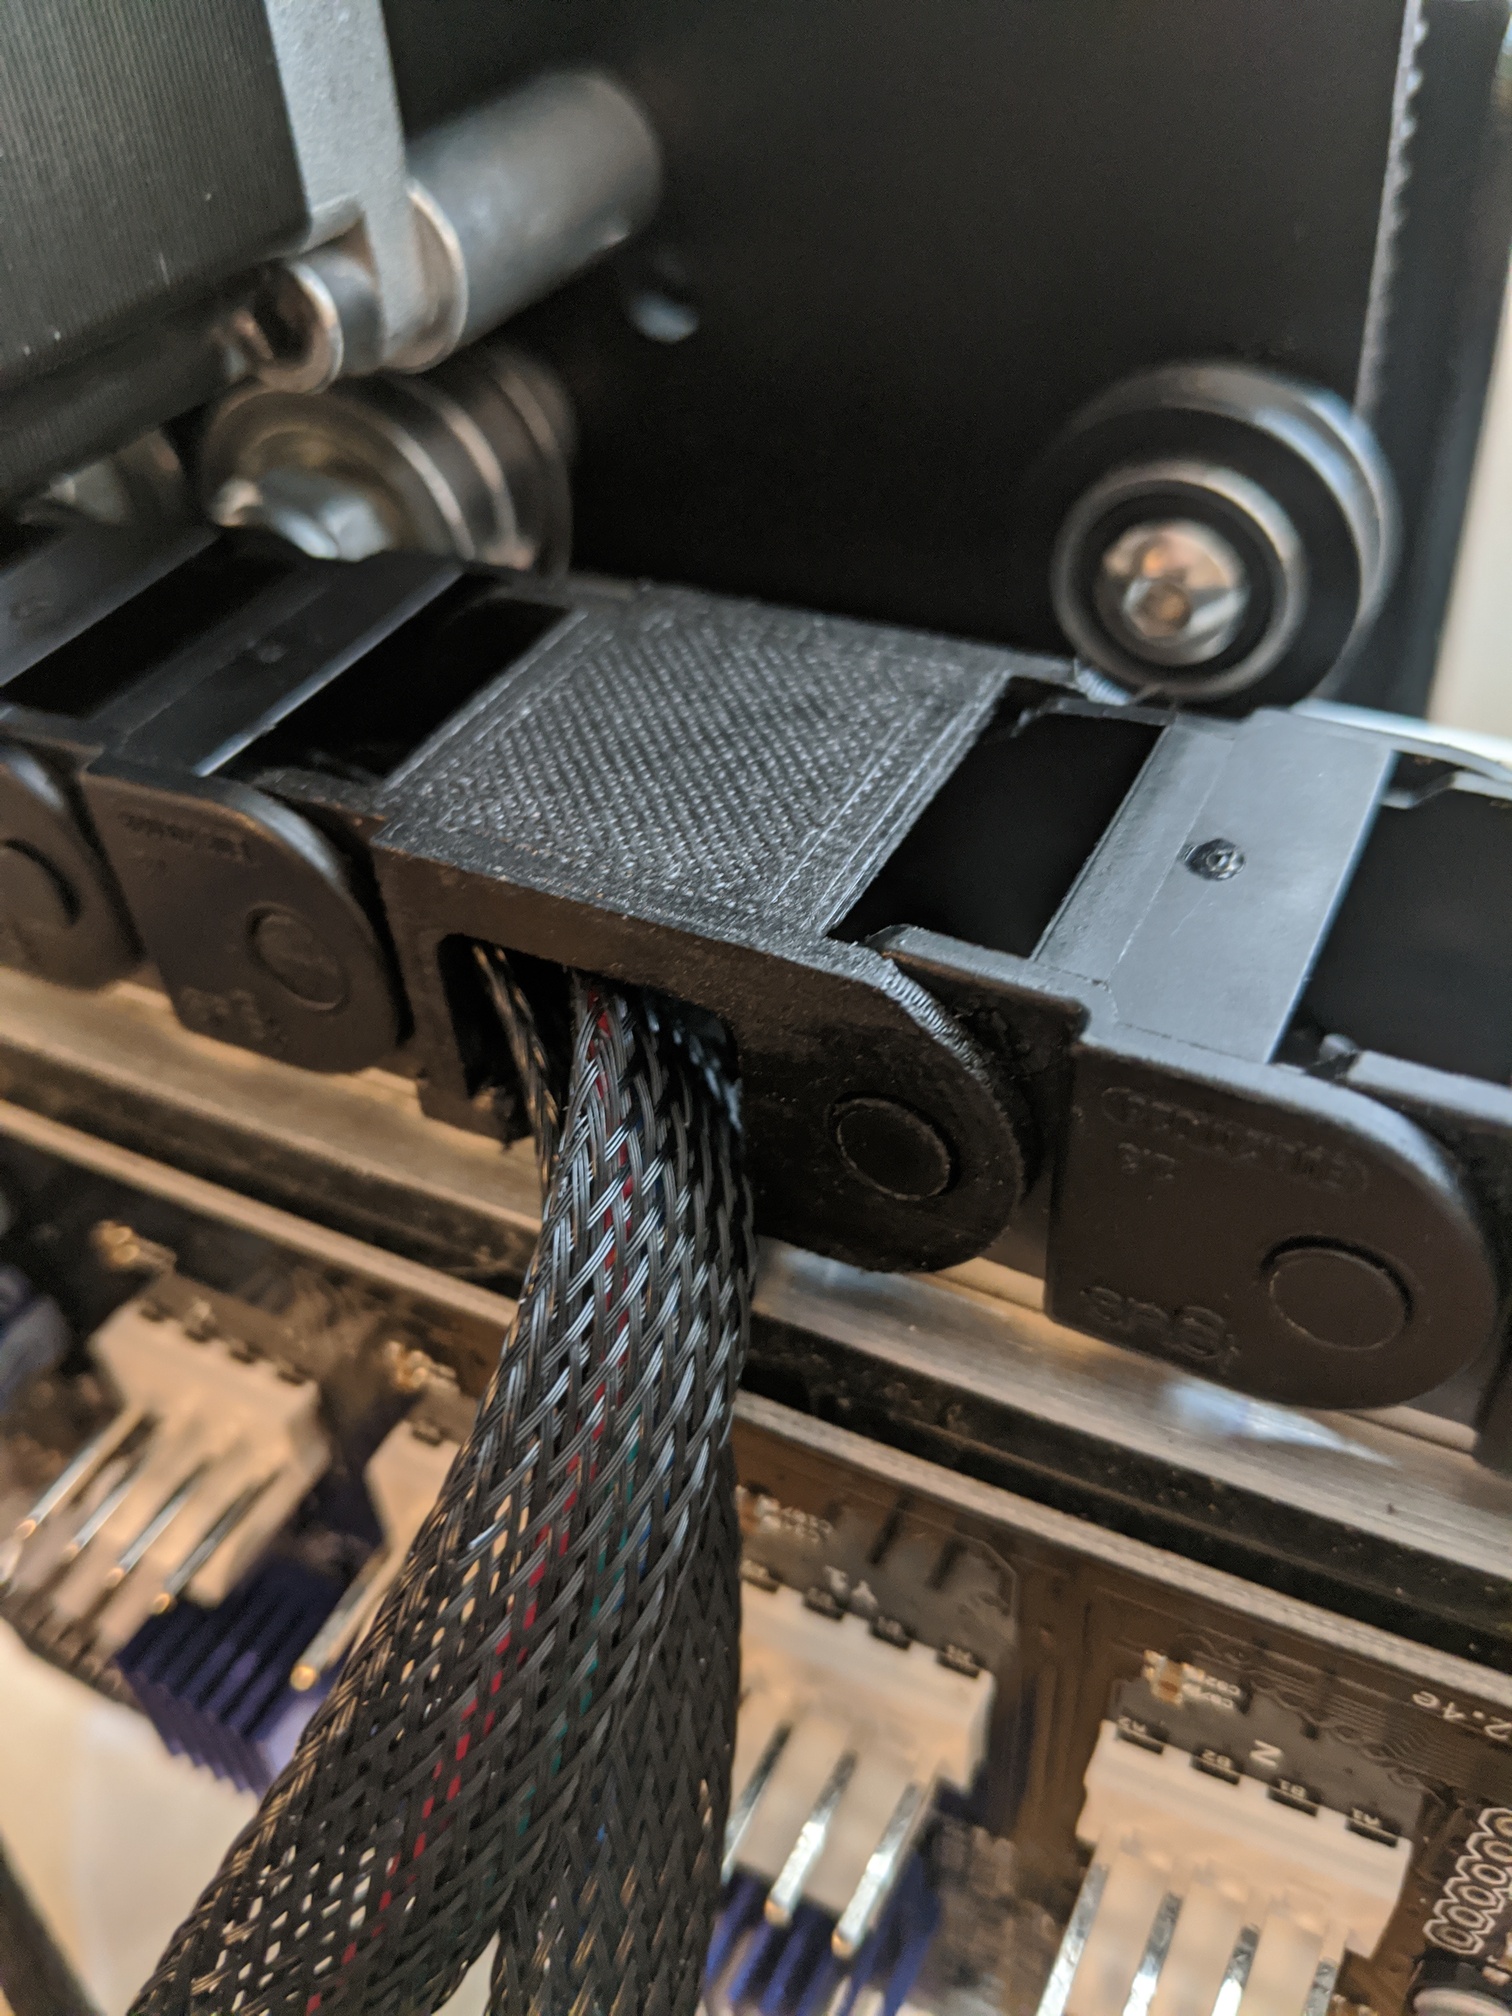
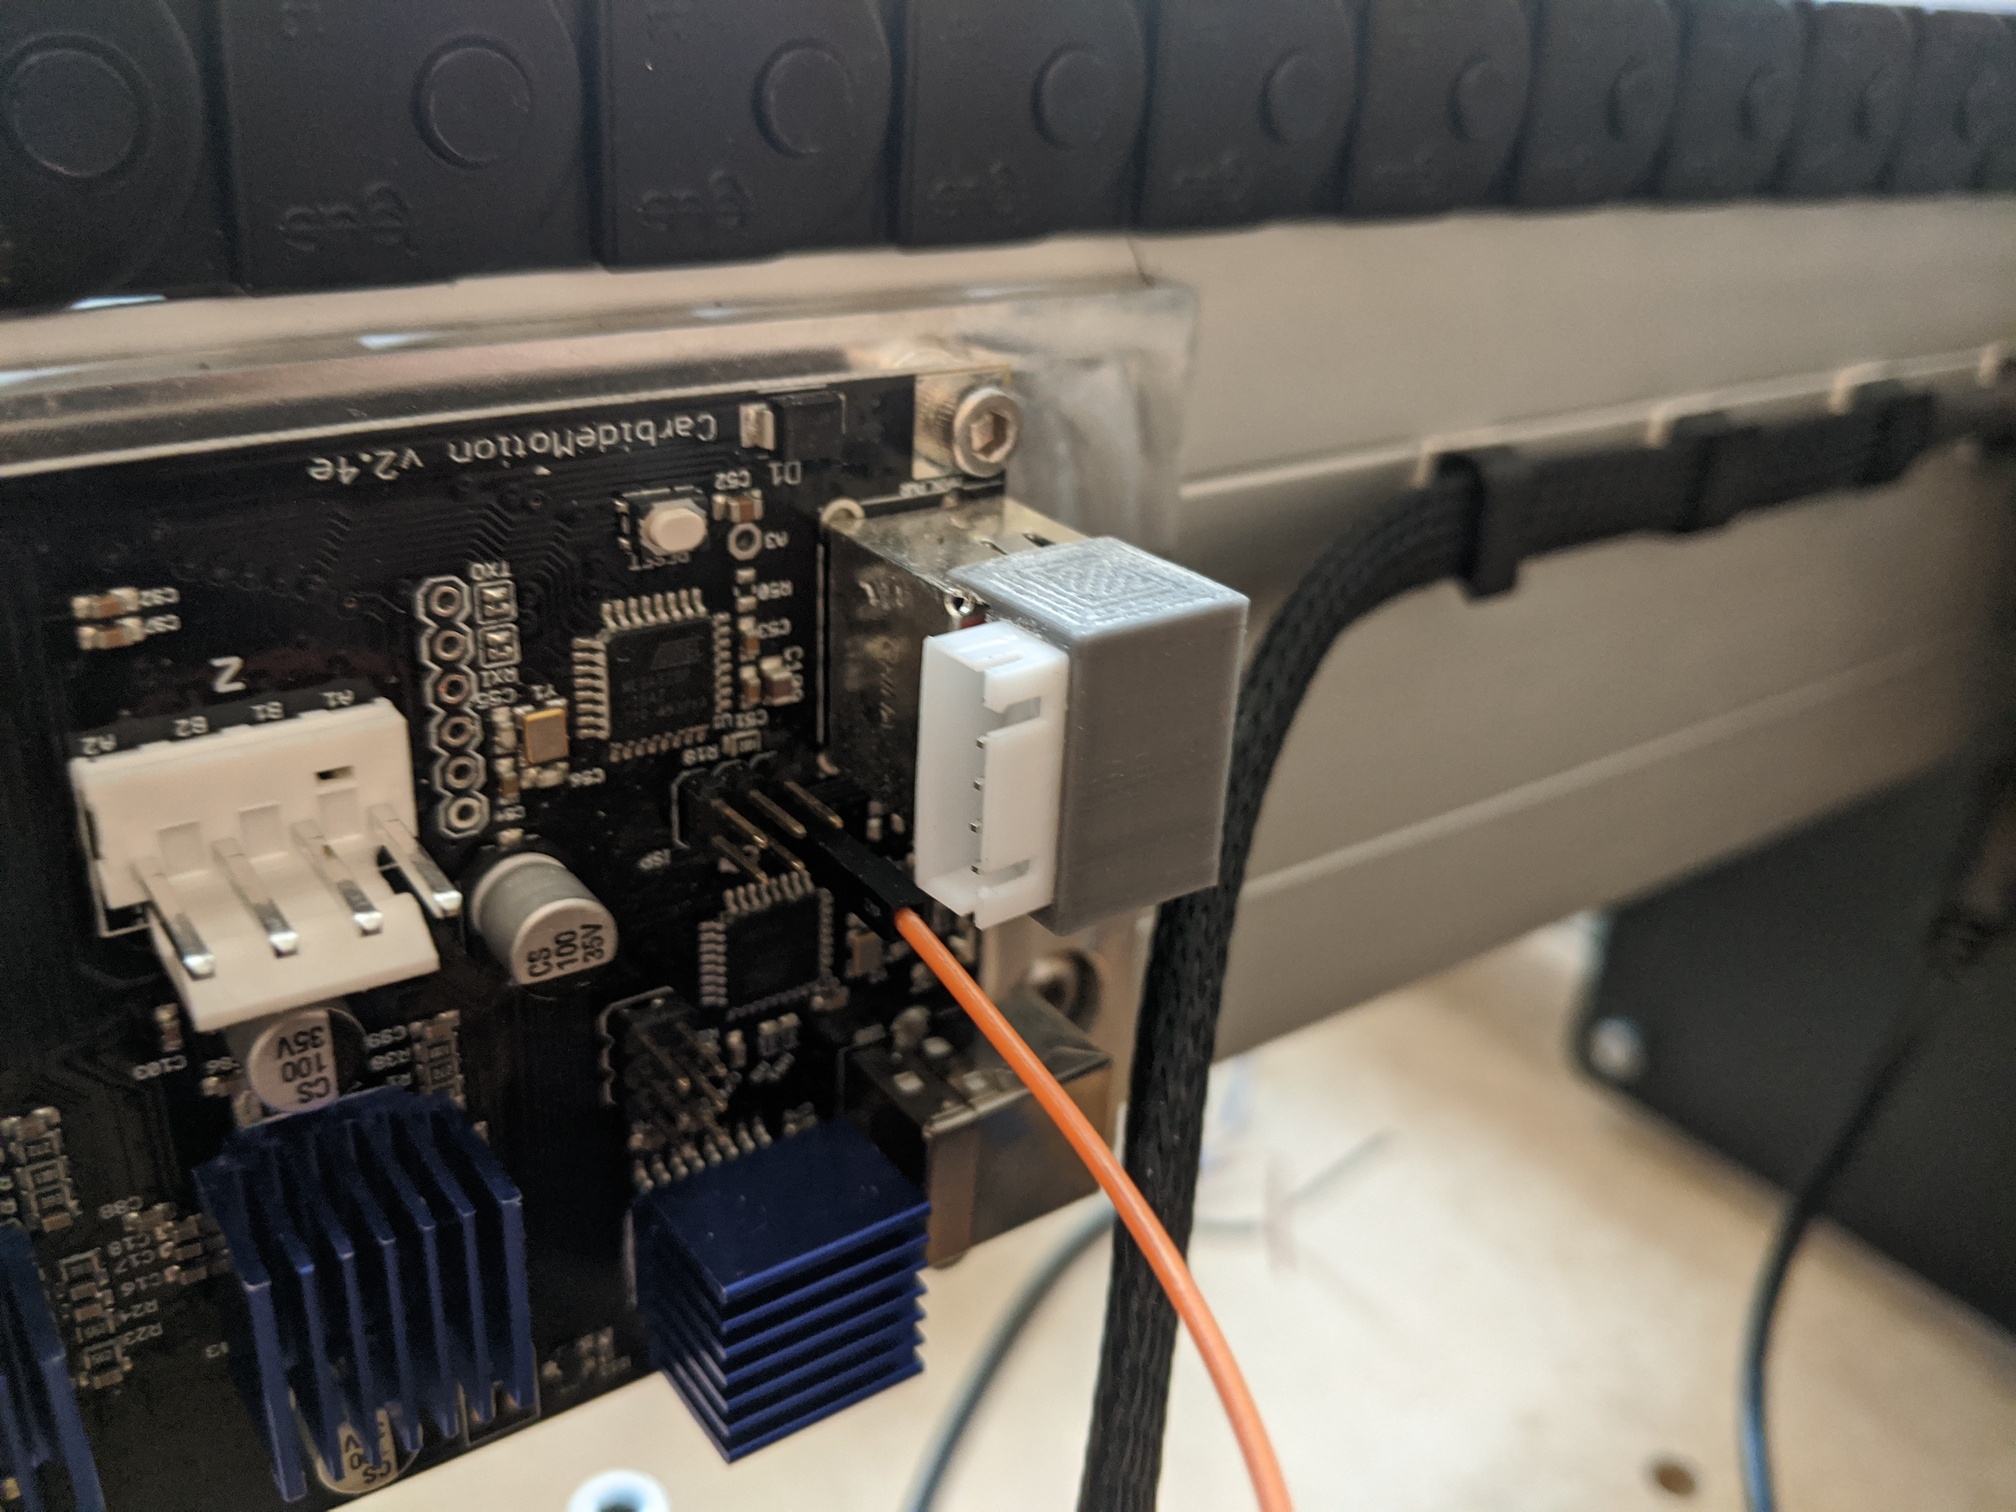
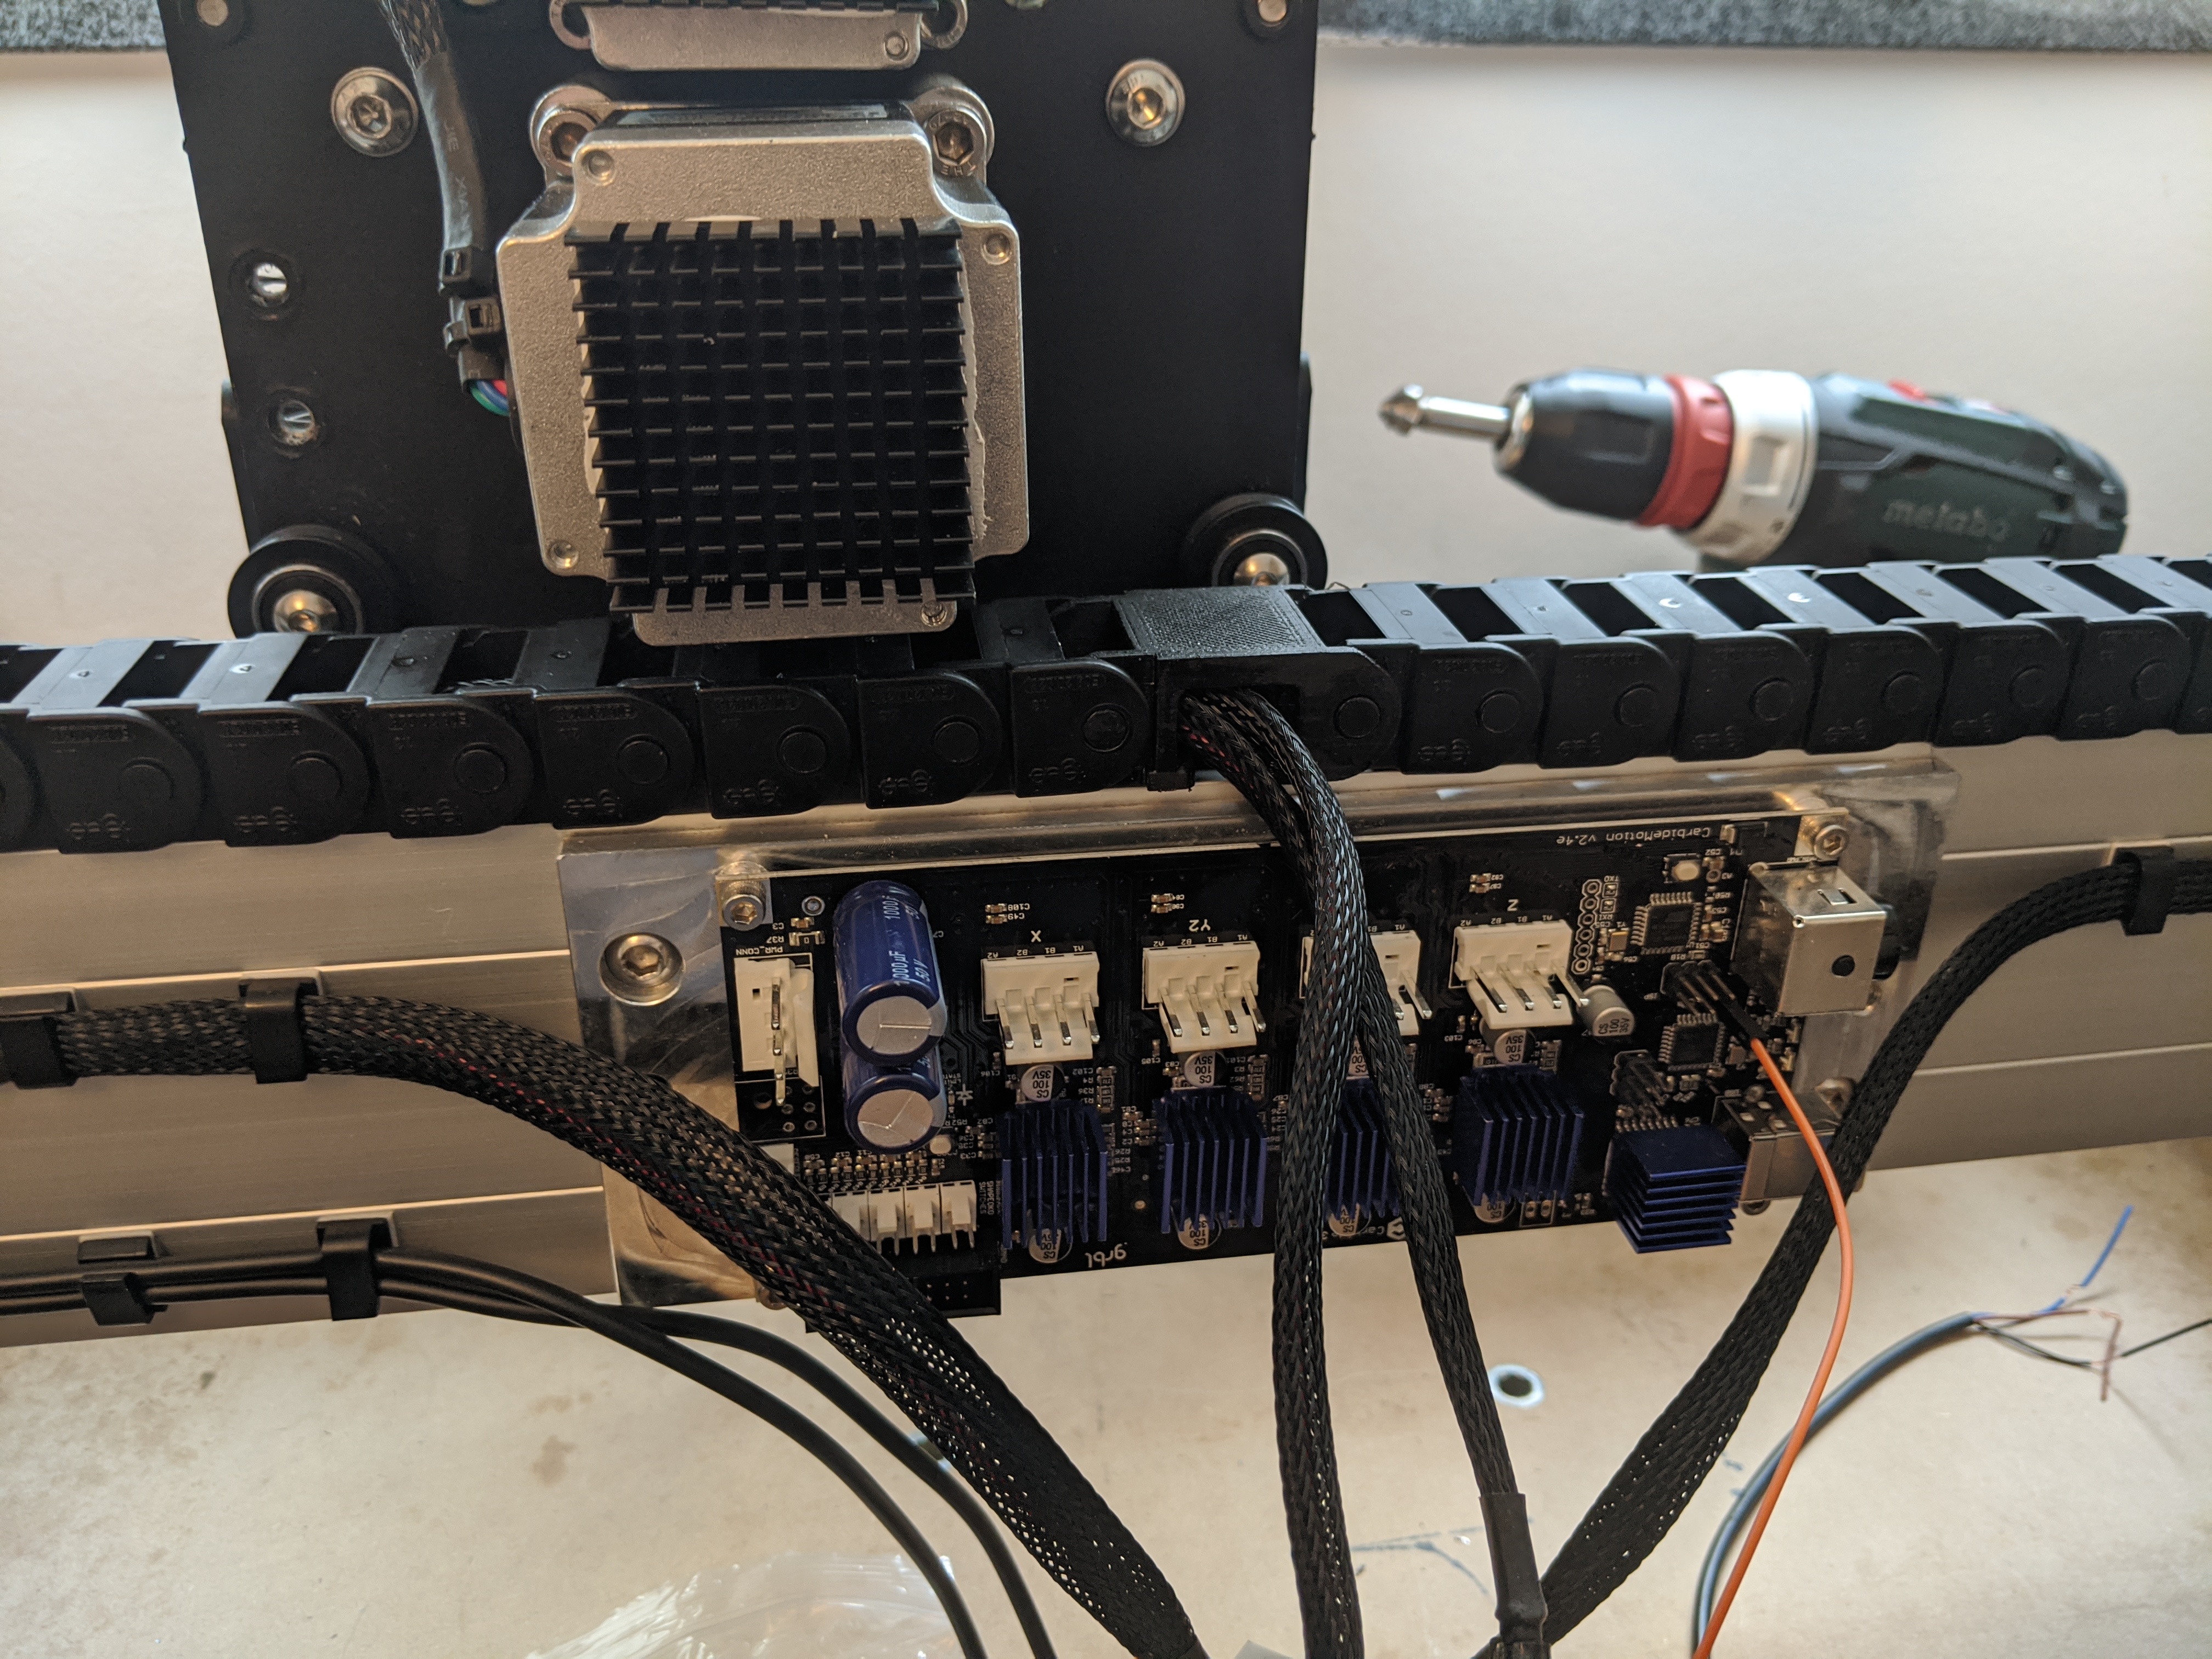
Really proud of the drag chain. I bought a igus chain and they provide all their chains as 3d files. I have to rout the motor cables out on the control box and took one file of their page enlarged it and put a throughout in it so I could take the rest and rout it out of the machine without changing it to a different drag chain or cable Channel what so ever


6 Likes